 Настройка переменных среды Windows может помочь сократить время, необходимое для набора команд в командной строке или, если вы часто пишете скрипты для собственных задач, сделать их более читаемыми. В большинстве случаев обычные пользователи добавляют записи в системную переменную среды PATH, хотя бывают и другие задачи.
В этой пошаговой инструкции базовая информация о том, как открыть переменные среды Windows 11 и Windows 10, создать или отредактировать их.
Что такое переменные среды
Переменные среды в Windows — записи о расположении системных папок, свойствах системы и другие, которые доступны для любой программы или скрипта.
Одна из наиболее часто используемых переменных среды — PATH, указывающая на папки, в которых выполняется поиск файлов, вызываемых в командной строке, терминале Windows, файле bat или из других источников. В качестве примера её назначения:
- Если вы откроете командную строку (или диалоговое окно «Выполнить»), введёте regedit и нажмете Enter — вы сможете запустить редактор реестра, не указывая полный путь к файлу regedit.exe, поскольку путь C:\Windows добавлен в переменную среды Path.
- Если же тем же образом в командной строке написать имя программы, путь к которой не добавлен в Path (chrome.exe, adb.exe, pip и другие), вы получите сообщение «Не является внутренней или внешней командой, исполняемой программой или пакетным файлом».
Если предположить, что вы часто используете команды adb.exe (например, для установки приложений Android в Windows 11), pip install (для установки пакетов Python) или любые другие то для того, чтобы не писать каждый раз полный путь к этим файлам, имеет смысл добавить эти пути в переменные среды.
Также вы можете добавлять и иные переменные среды (не обязательно содержащие пути), а в дальнейшем получать и использовать их значения в сценариях BAT (командной строки) или PowerShell. Пример получения и отображения значения системной переменной PATH для обоих случаев:
echo %PATH%
echo $Env:PATH
Получить список всех переменных среды в командной строке и PowerShell соответственно можно следующими командами:
set
ls env:
Редактирование переменных среды Windows 11/10
Прежде чем приступать, учтите: изменение системных переменных среды по умолчанию может привести к проблемам в работе системы, не удаляйте уже имеющиеся переменные среды. Возможно, имеет смысл создать точку восстановления системы, если вы не уверены в своих действиях.
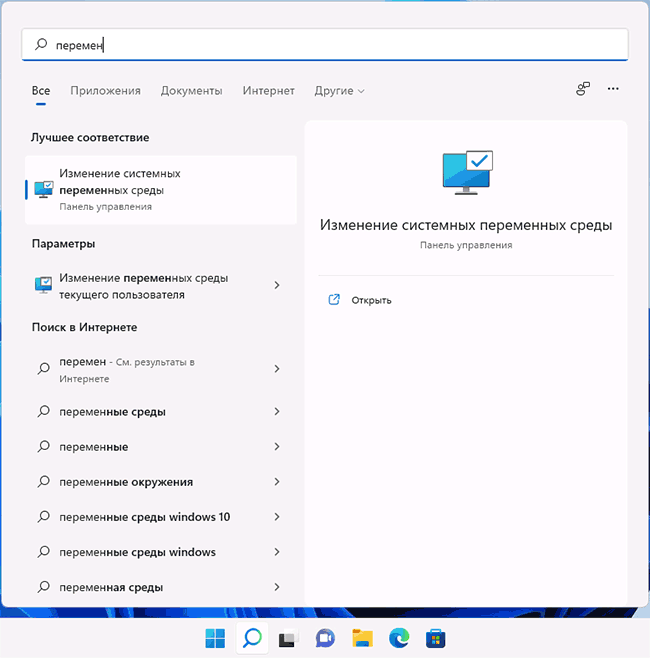
- Чтобы открыть переменные среды Windows вы можете использовать поиск в панели задач (начните вводить «Переменных» и откройте пункт «Изменение системных переменных среды») или нажать клавиши Win+R на клавиатуре, ввести sysdm.cpl и нажать Enter.

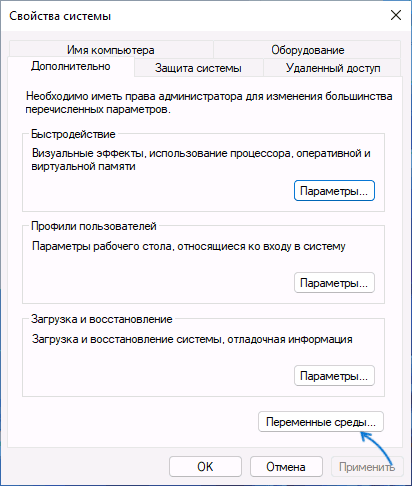
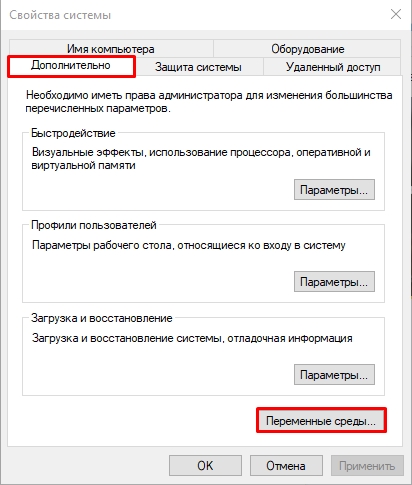
- На вкладке «Дополнительно» нажмите кнопку «Переменные среды…»

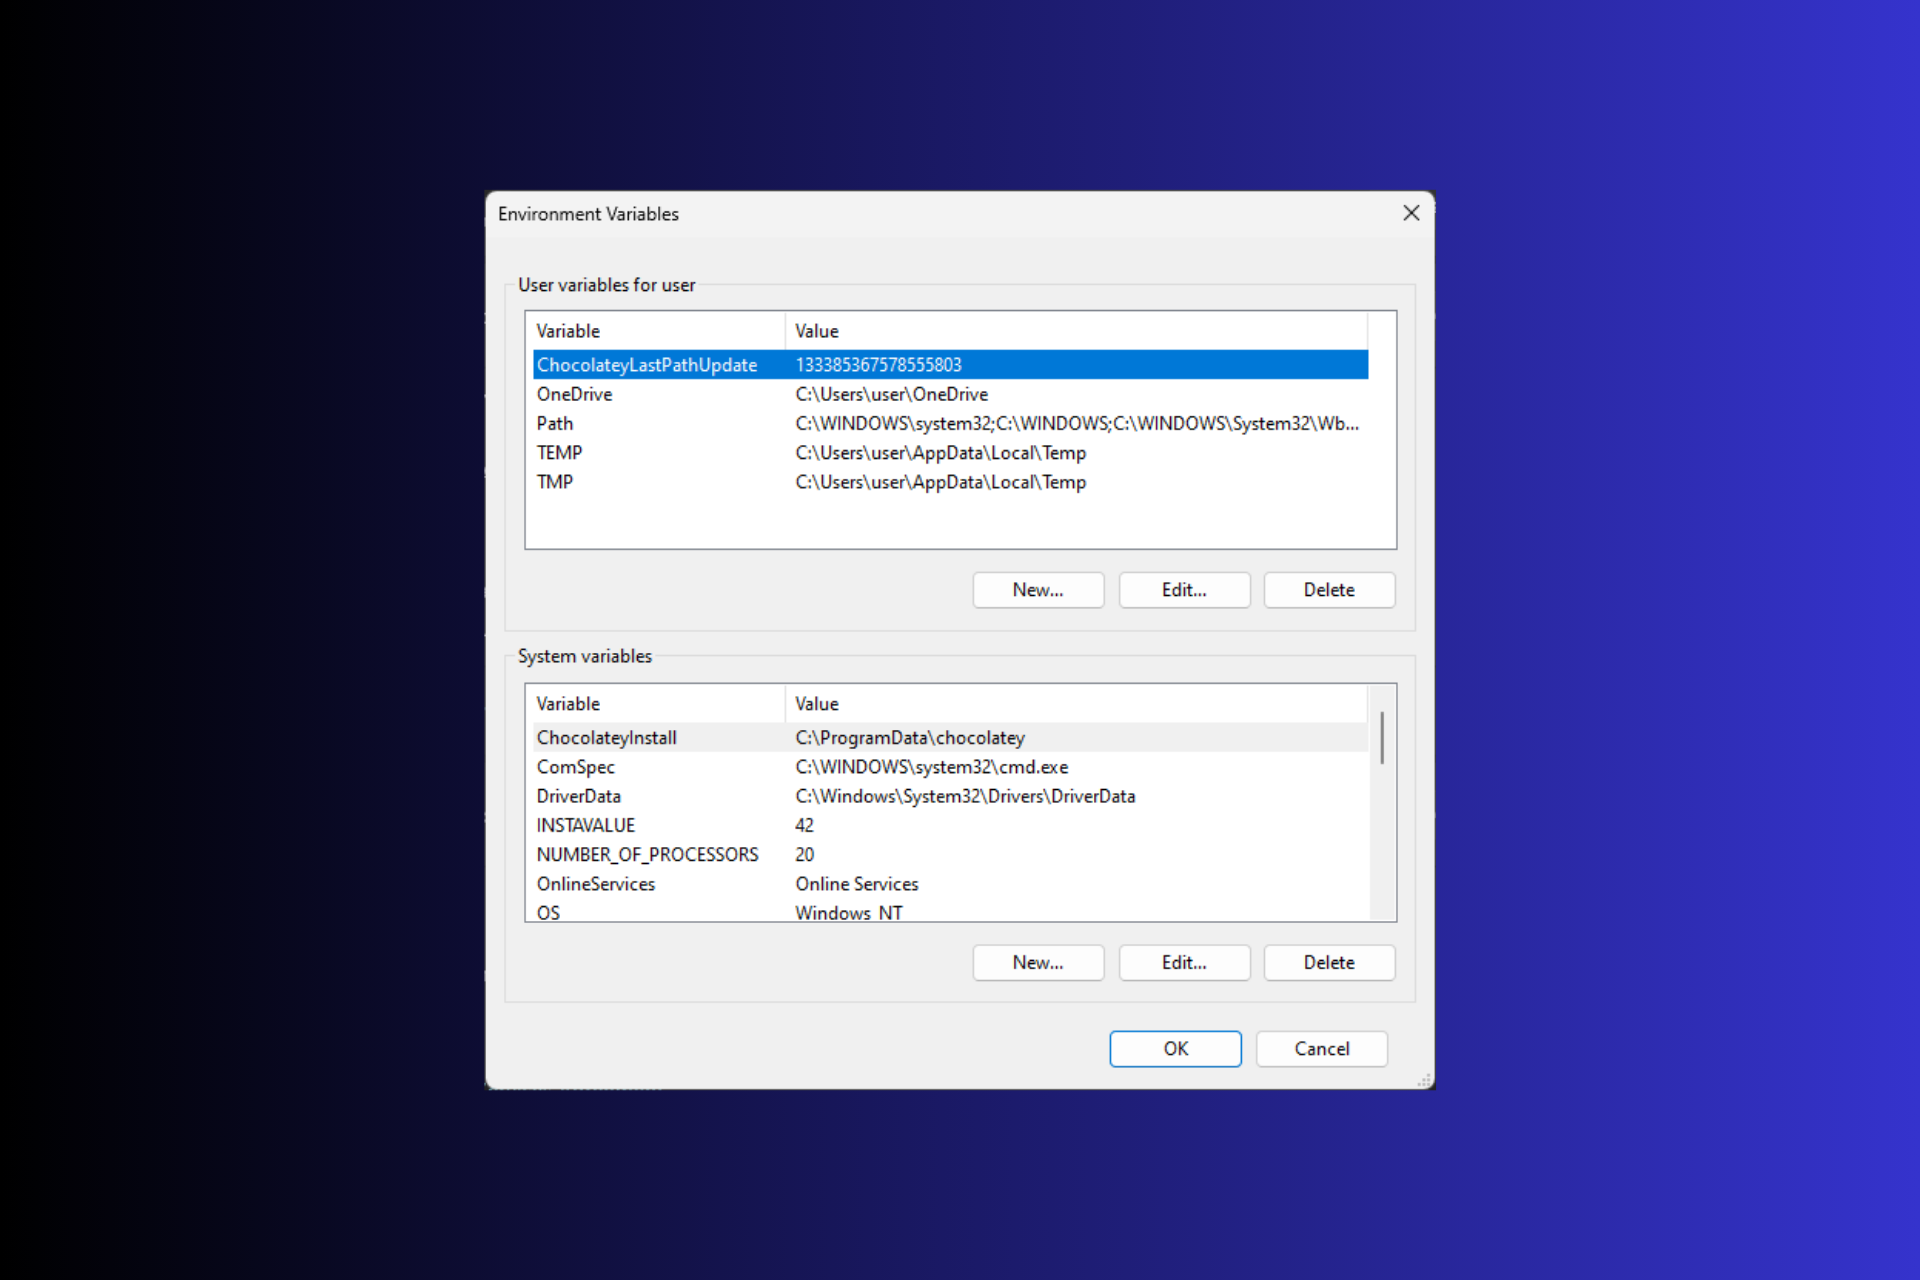
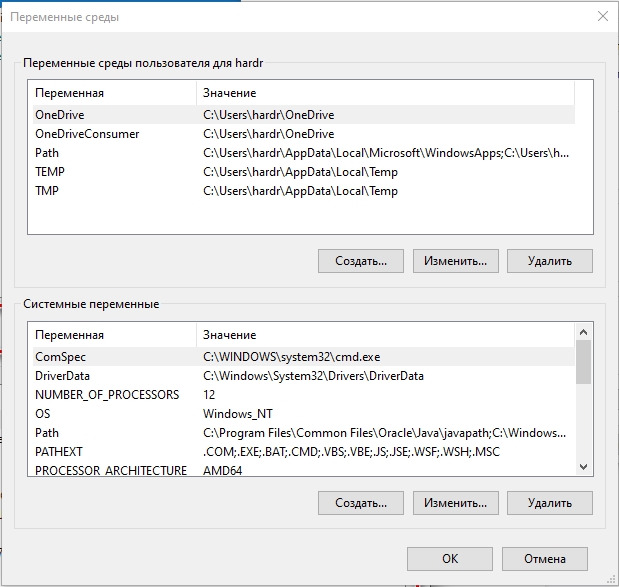
- В разделе «Переменные среды пользователя» (если требуется изменение только для текущего пользователя) или «Системные переменные» выберите переменную, которую нужно изменить и нажмите «Изменить» (обычно требуется именно это), либо, если необходимо создать новую переменную — нажмите кнопку «Создать». В моем примере — добавляем свои пути в системную переменную Path (выбираем эту переменную и нажимаем «Изменить»).

- Для добавления нового значения (пути) в системную переменную в следующем окне можно нажать кнопку «Создать», либо просто дважды кликнуть по первой пустой строке, затем — ввести нужный путь к папке, содержащей нужные нам исполняемые файлы.

- Также вы можете использовать кнопку «Изменить текст», в этом случае окно изменения системной переменной откроется в ином виде: имя переменной, а ниже — её значение. В случае указания путей значение будет представлять собой все пути, хранящиеся в переменной, разделенные знаком «точка с запятой».

- При создании новой переменной среды окно будет тем же, что и в 5-м шаге: необходимо будет указать имя системной переменной в верхнем поле, а её значение — в нижнем.


После создания или изменения переменной среды и сохранения сделанных настроек, переменная или обновленные значения сразу становятся доступны для текущего пользователя или в системе в целом в зависимости от того, какие именно переменные редактировались или создавались. Также есть методы добавления переменных среды в командной строке или PowerShell, подробнее в статье: Как добавить путь в переменную среды PATH
It’s easier than you think & more powerful than you know!
by Srishti Sisodia
Srishti Sisodia is an electronics engineer and writer with a passion for technology. She has extensive experience exploring the latest technological advancements and sharing her insights through informative… read more
Updated on
Reviewed by
Alex Serban

After moving away from the corporate work-style, Alex has found rewards in a lifestyle of constant analysis, team coordination and pestering his colleagues. Holding an MCSA Windows Server… read more
- Environment variables play a crucial role in the proper functioning of your operating system and installed apps.
- They store information like system paths, temporary file locations, and other user-specific settings.
- You can use Advanced system settings, Command Prompt, or Windows PowerShell to set it.
- Continue reading to know the detailed steps for each method.
Setting environment variables on Windows 11 can help you customize your system, run scripts, and configure applications.
In this guide, we will discuss three ways with step-by-step instructions to do that so you can configure your system according to your preferences.
There are three types of Environment Variables
- System Environment Variables – The global variables are at the lowest priority, can be accessed by all users & apps on a Windows, and are usually used to define system-wide settings.
- User Environment Variables – With a higher priority, these only apply to the current user & processes running under that account & are set by the user or apps that run under that account.
- Process Environment Variables – With the highest priority, they are temporary and apply to the current process & its child processes, providing runtime information or customization for a program.
How do I set & use Environment Variables on Windows 11?
1. Using the Settings app
- Press Windows + I to open Settings.
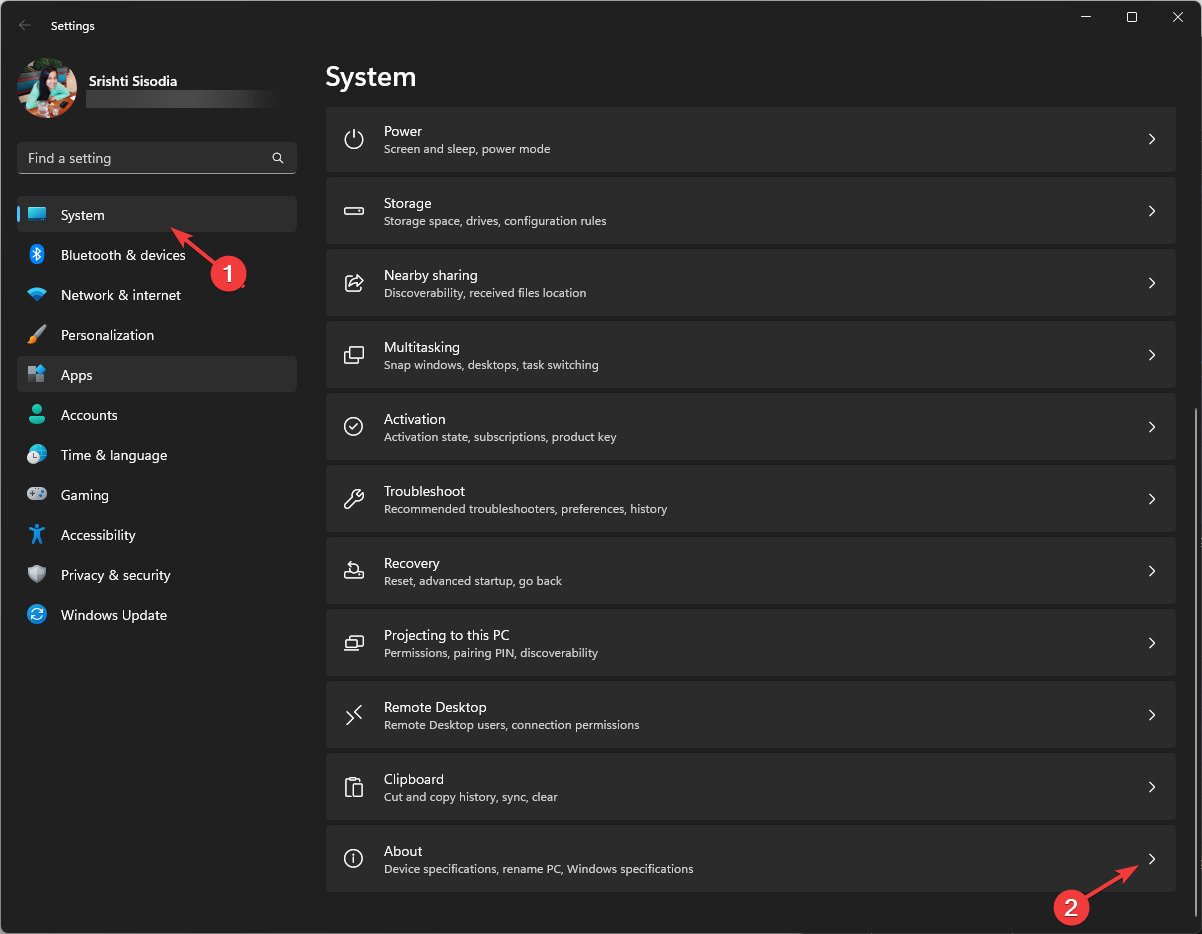
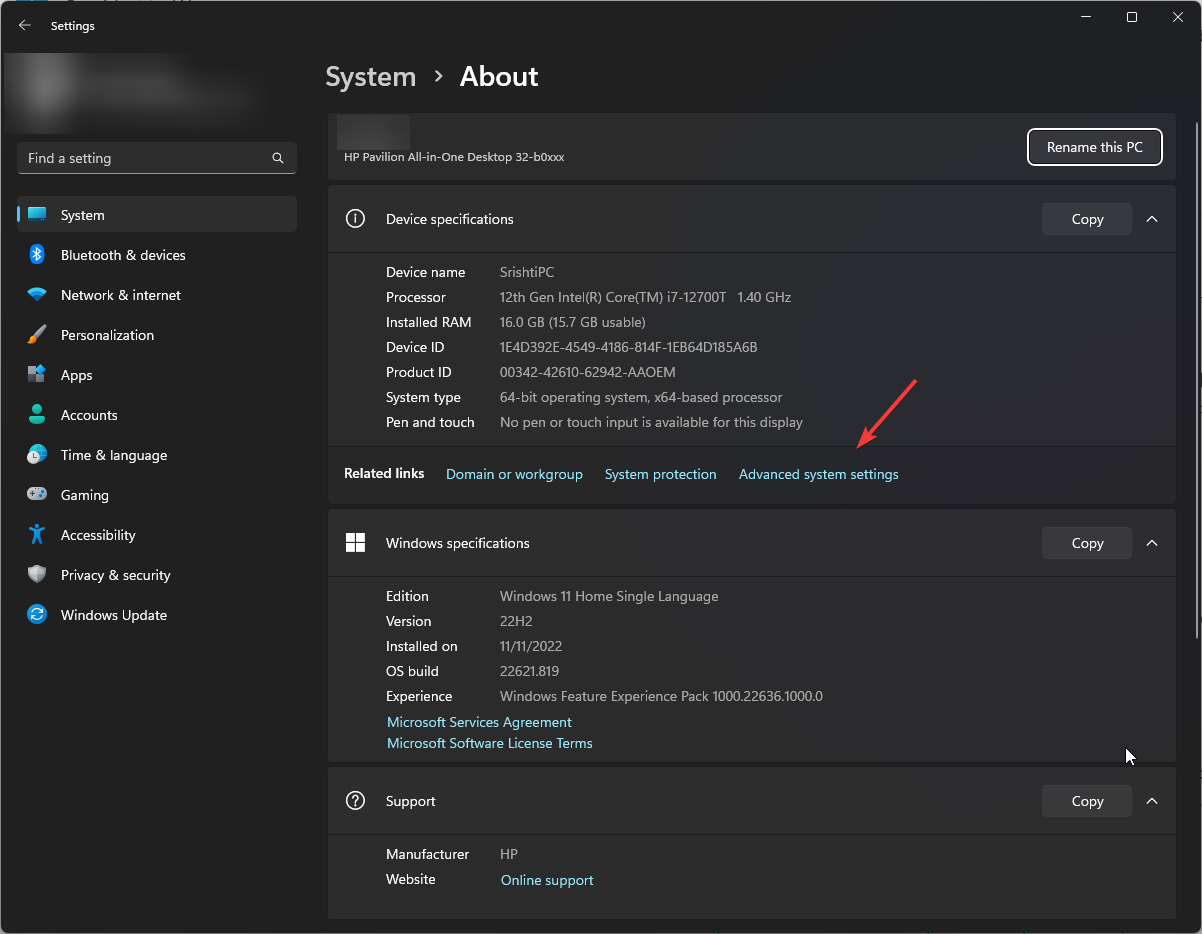
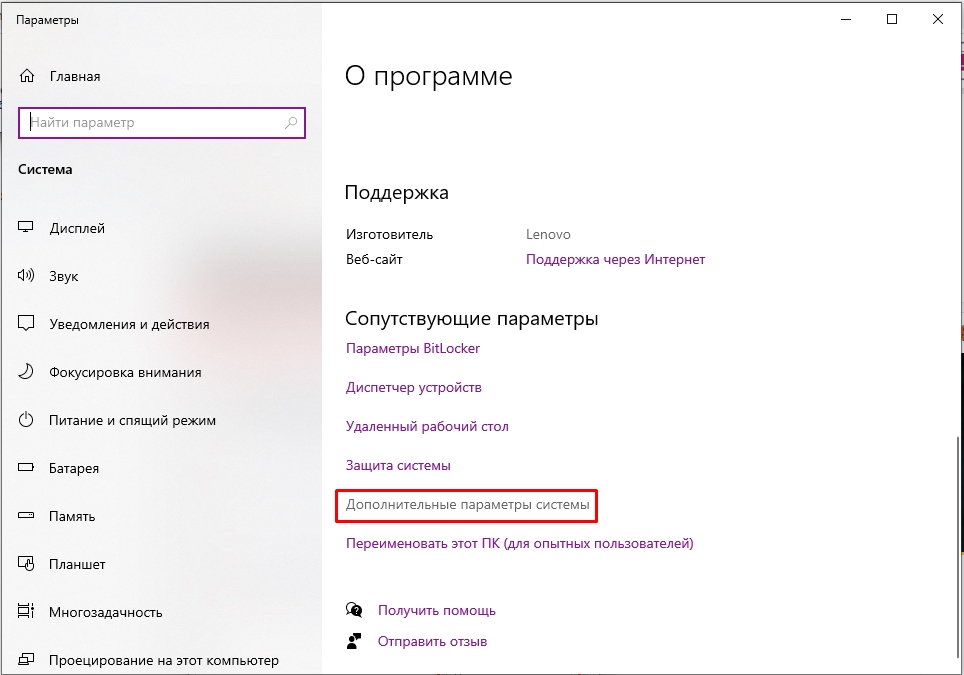
- Go to System, then click About.

- Click the Advanced system settings link.
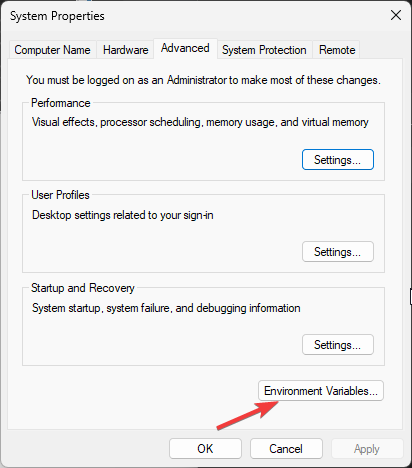
- On the System Properties window, click Environment Variables.

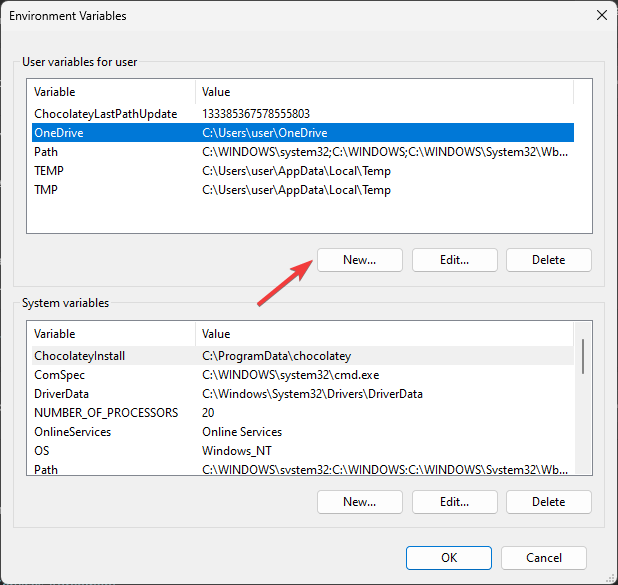
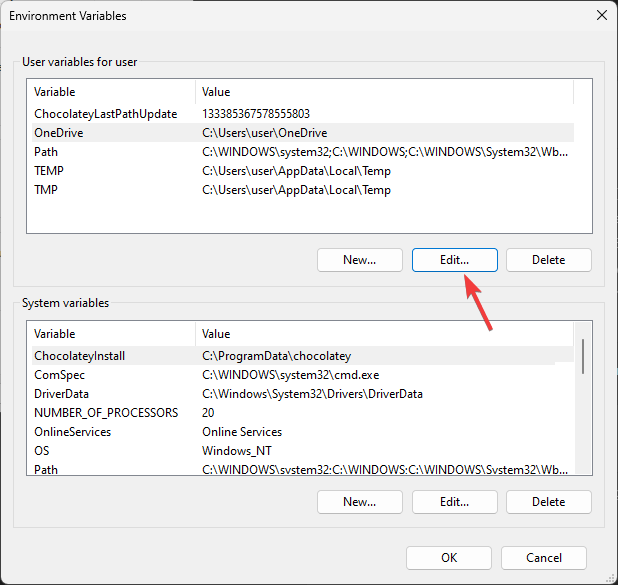
- Next, on the Environment Variables window, you will see two types of variables. Choose an option from either User variables for user or System variables and click New.

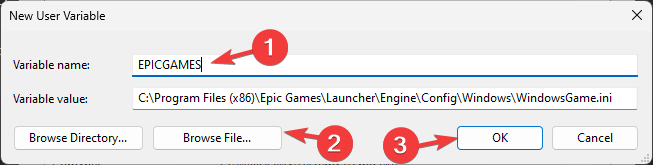
- On the following window, type in the Variable name without any spaces, and for Variable Value, click the Browse Directory or Browse File button.
- Select the path and click OK.
2. Using the Command Prompt
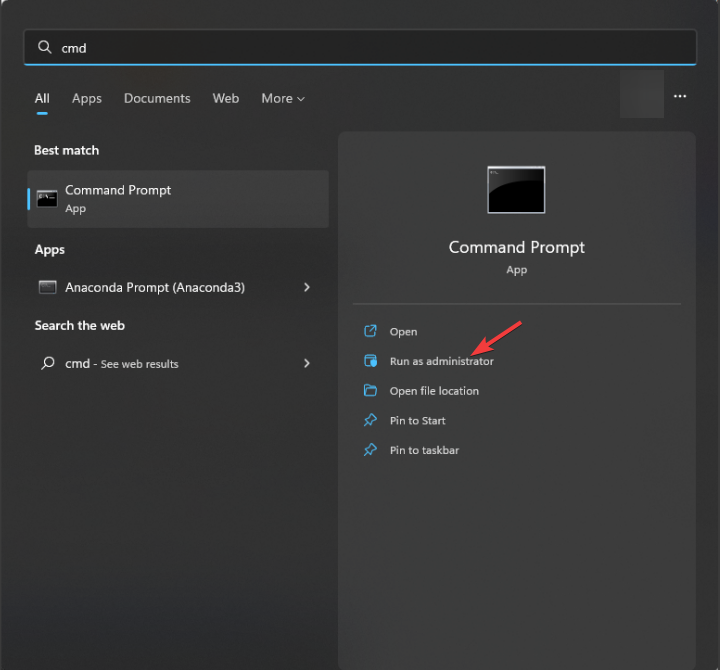
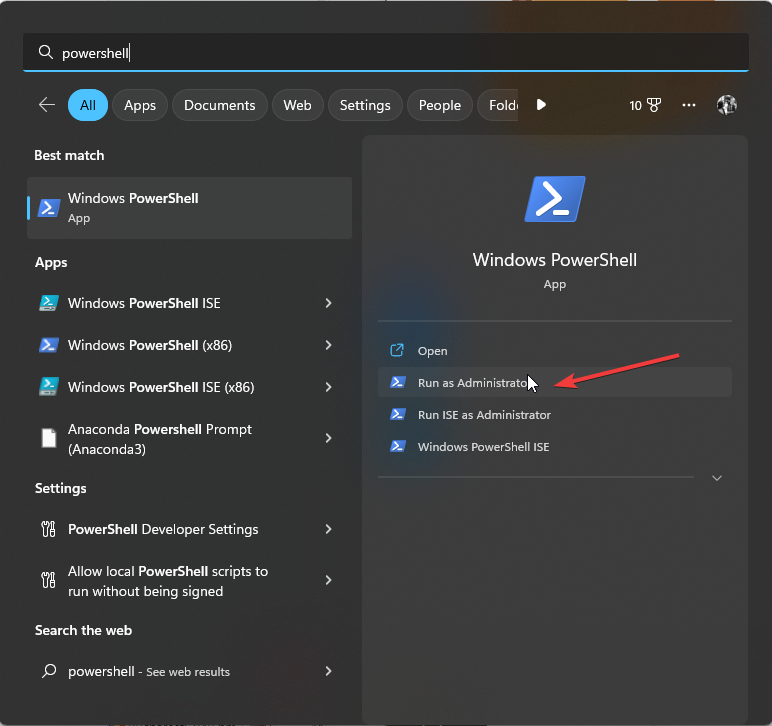
- Press the Windows key, type cmd in the search bar, and click Run as administrator.

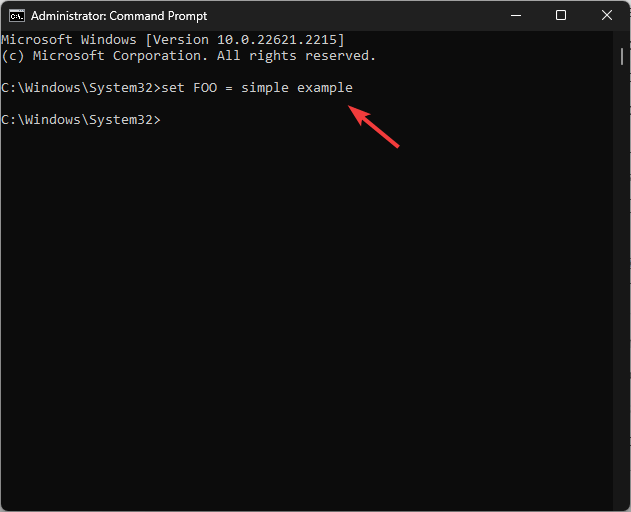
- To add a temporary variable to your system, use this command after replacing VariableName & Variablevalue with the one you want and hit Enter:
set VariableName = Variablevalue
- The set command is used to define an environment variable within the process for which it is defined and will be deleted once the window is closed.
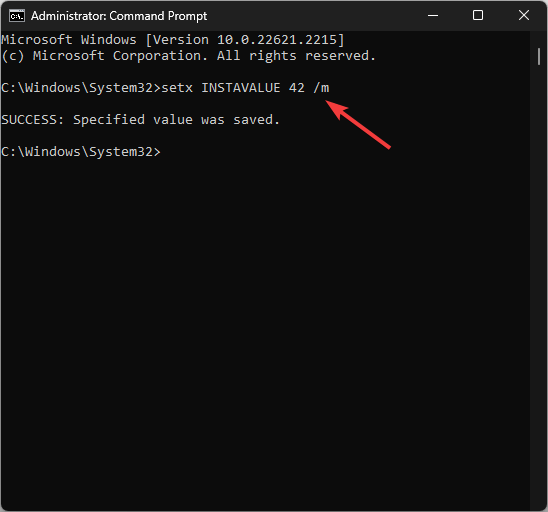
- To set environment variables permanently, type the following command after replacing the Variablename with the name of the variable & Value with the value you want to set and press Enter:
setx Variablename Value /m
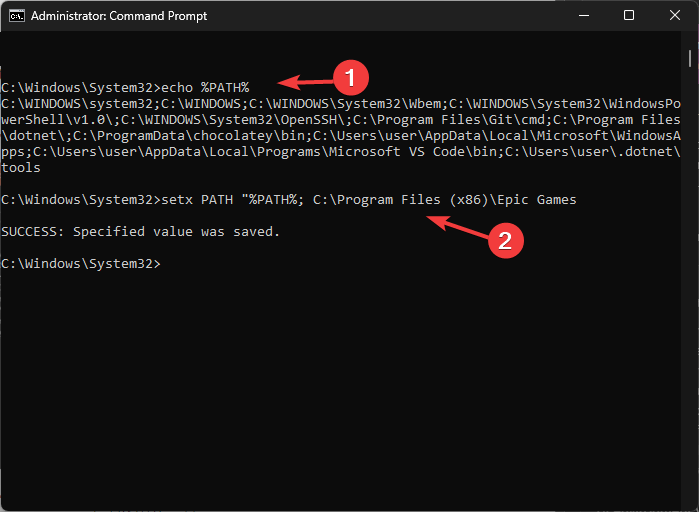
- Now for the path variables, type the following command to list all of them and hit Enter:
echo %PATH% - Copy & paste the following command to add another variable to the path directory; replace the PATH value with the path you want to add and press Enter:
setx PATH "%PATH%; PATH Value
- Refresh the Environment variable window to see the newly added path.
3. Using the Windows PowerShell
- Press the Windows key, type powershell, and click Run as administrator.

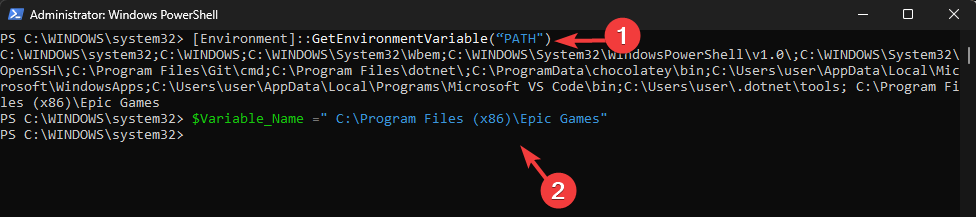
- Type the following command to list of path variables and press Enter: [Environment]::GetEnvironmentVariable(“PATH”)
- Copy & paste the following command to declare a path variable after replacing PATH with the path you want to add and hit Enter:
$Variable_Name = "PATH"
- To add the variable to the Path Variable list, use this command after replacing Folder PATH with the path you declared and press Enter: [Environment]::SetEnvironmentVariable(“Folder PATH”, “$PATH;$Variable_Name”)
- Restart your computer to let the changes take effect.
You can use any of the methods to add a new or missing environment variable to prevent issues like the system could not find the environment option that was entered
How we test, review and rate?
We have worked for the past 6 months on building a new review system on how we produce content. Using it, we have subsequently redone most of our articles to provide actual hands-on expertise on the guides we made.
For more details you can read how we test, review, and rate at WindowsReport.
- How to Type Accents on Windows 11
- How to Disable the Insert Your Security Key Into the USB Port popup
How do I edit Environment Variables on Windows 11?
1. Using the Settings app
- Press Windows + I to open Settings, then go to System > About >Advanced system settings.
- Click Environment Variables, then select the variable you want to edit and click Edit.
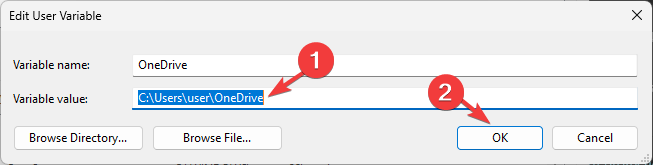
- Make the changes and click OK on all three windows to save the changes.
- Restart the Environment Variable window to see the changes.
2. Using the Registry Editor
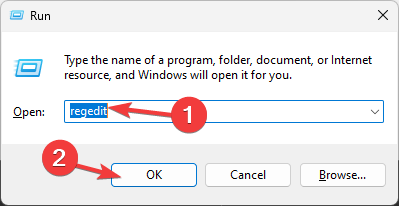
- Press Windows + R to open the Run dialog box.

- Type regedit and click OK to open Registry Editor.
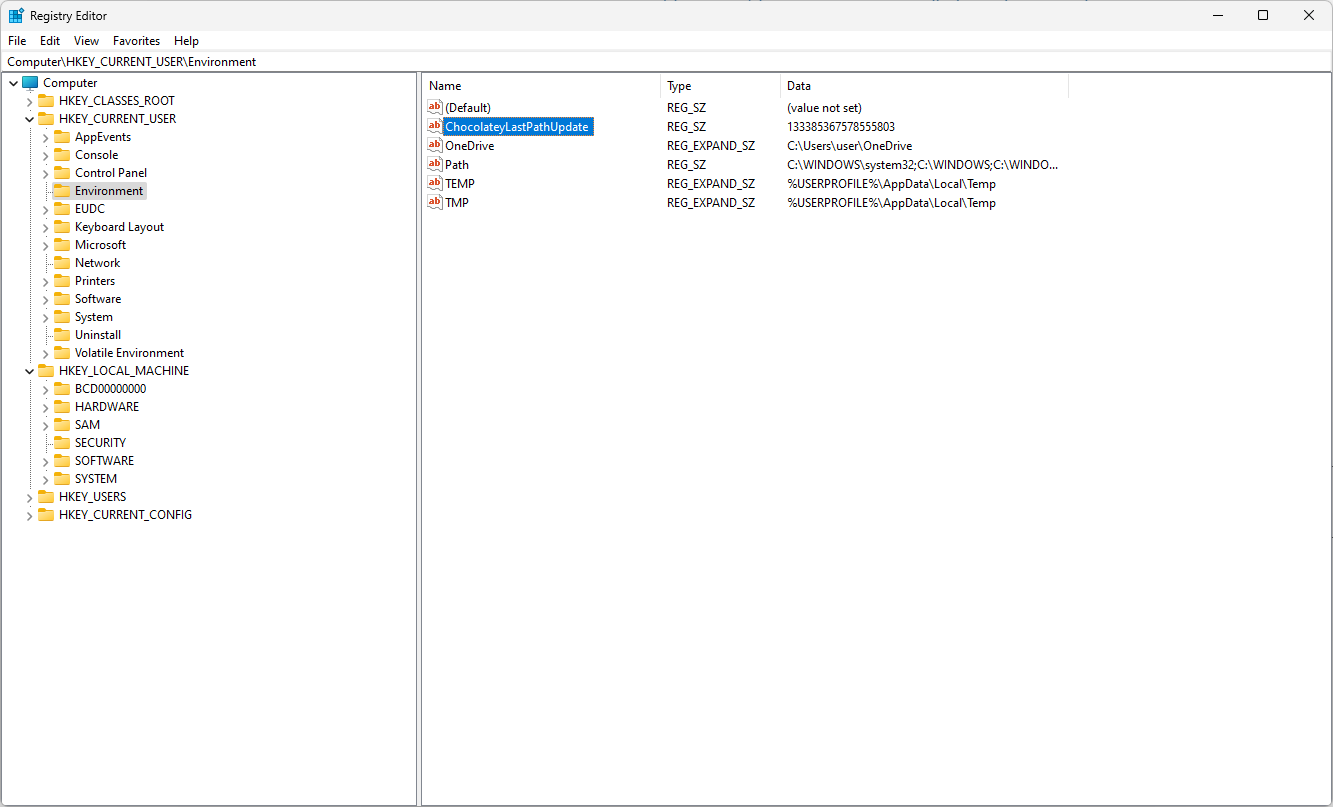
- Navigate to this path if you are making changes to User Variables:
Computer\HKEY_CURRENT_USER\Environment
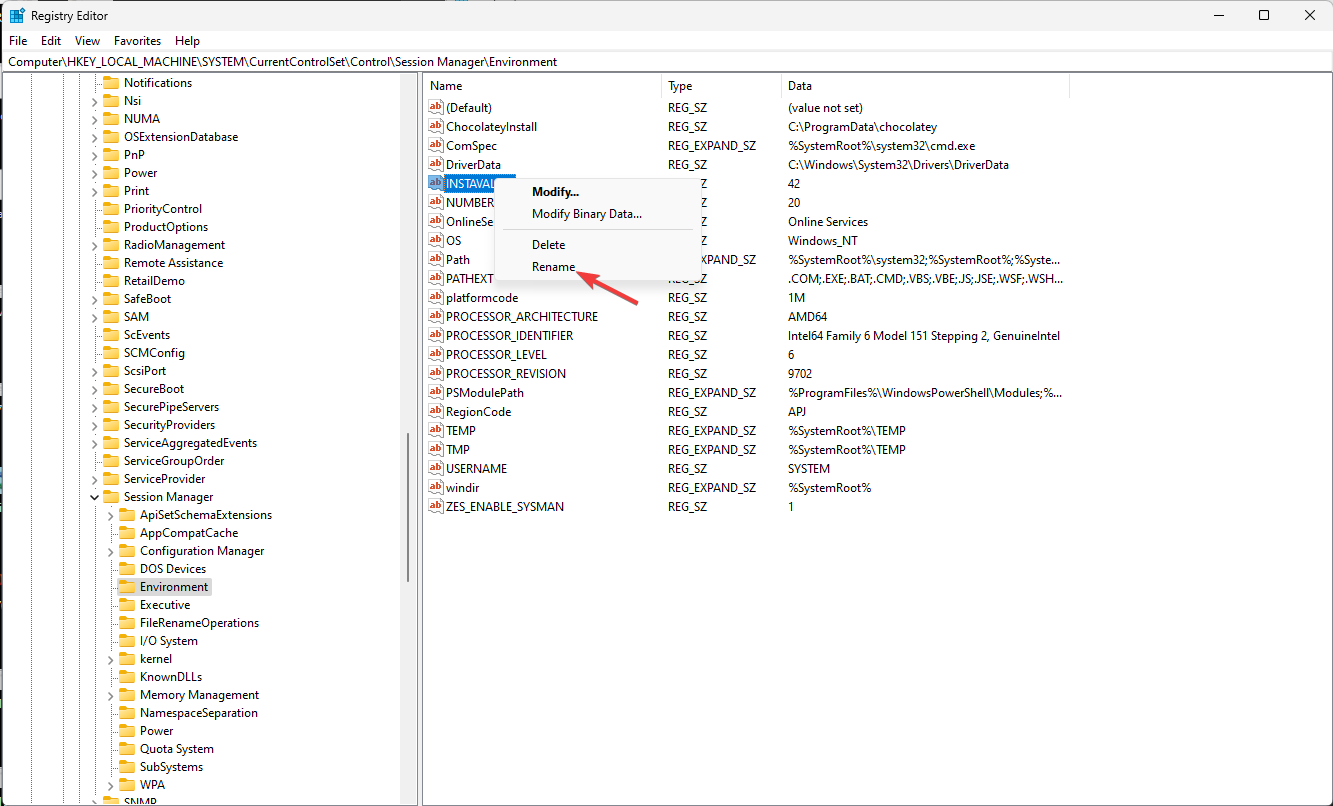
- For System Variables, go to this path:
Computer\HKEY_LOCAL_MACHINE\SYSTEM\CurrentControlSet\Control\Session Manager\Environment
- Once you have located either of the variables, you can change the name by right-clicking and selecting Rename.
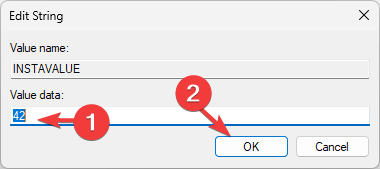
- To edit the value, double-click the variable, change the Value data, and click OK.

- Restart your computer to save the changes.
3. Using the Windows PowerShell
- Open Windows PowerShell with administrator privileges using the same steps mentioned above.
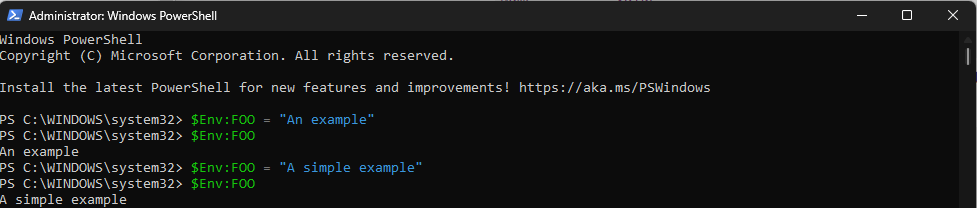
- Type the following command to get the current value of the variable after replacing VARIABLENAME with the variable name and press Enter:
$Env: VARIABLENAME
- Next, to update or edit the value, copy & paste the following command after replacing the VARIABLEANME with the name of the variable & NEWVALUE with the value that you want to add, then hit Enter:
$Env: VARIABLENAME = "NEWVALUE" - Reboot your PC to save the changes.
How do I get a list of Environment Variables in Windows?
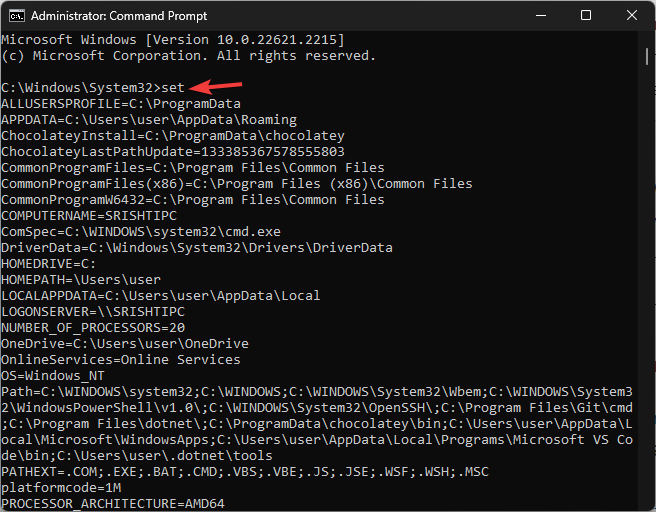
To get a list of environment variables in Windows 11, you can open Command Prompt with administrator rights and type set, and hit Enter.
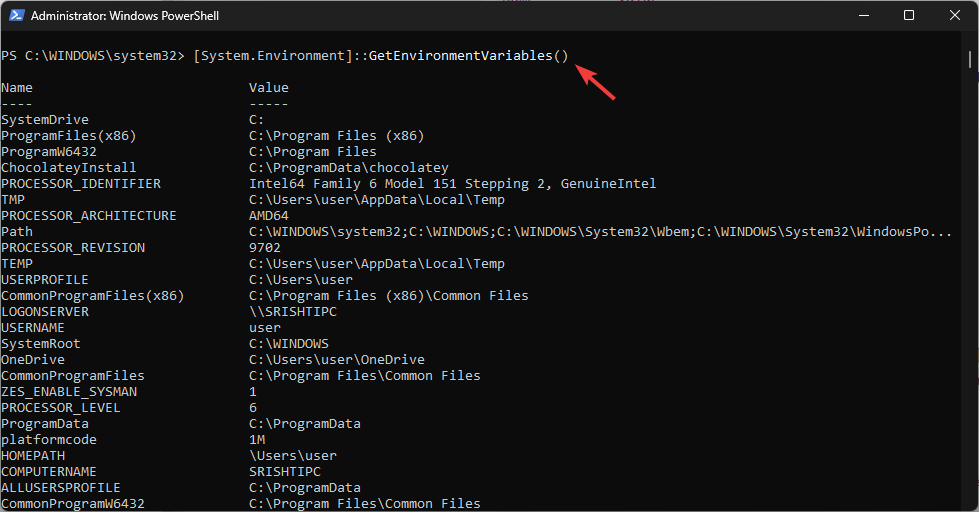
In Powershell, with admin privileges to get a list of environment variables, copy & paste the following command and hit Enter: [System.Environment]::GetEnvironmentVariables()
If you want to print the environment variables list you got on PowerShell to apply the same settings on another computer, read this guide.
Where are Windows environment variables stored?
You can find the environment variables in Registry Editor. The system variables are found in Computer\HKEY_LOCAL_MACHINE\SYSTEM\CurrentControlSet\Control\Session Manager\Environment, wherein the user variables are located at Computer\HKEY_CURRENT_USER\Environment
Setting environment variables on Windows 11 can help you customize your system settings; however, you must always exercise caution when making changes to system variables.
Remember to double-check the variable name & value, and always create a backup of your registry editor before making changes.
Stuck somewhere? Don’t hesitate to mention your queries in the comments section below. We will be happy to assist you.
![]()
In Windows 11, the environment variables (env) can be easily set via the graphical user interface. The ENV on Windows or other operating-system needed by it to let it know exactly where the most important files are stored. And that can be a little different on every computer. For most Windows users, the system is located in the C:\Windows\ folder and programs in the C:\Program Files\folder. But it is not always the case.
And this is the reason why the paths are important locations, they are not permanently programmed, but are stored in so-called environment variables.
There are also environment variables that do not lead to any folders. These are variables like Dirverdata, PATHEXT, and more…
Environment variables are an important element of every operating system, including Windows 11. But how do you actually get them?
Add or Display system variables Path in Windows 11
1. Open Edit system environment variables
For this, you simply use the Windows 11 search and search for “Edit system environment variables“. Then simply select the result and the following window with the system properties will open.

2. System Properties
You will see the “System Properties” there click on the “Environment Variables …” button, which is already focused on in the given screenshot.

3. Add System Variables or User Variable on Windows 11
On the Environment Variable windows you will have two choices:
- User variables for your account; the folder path added under it will only be accessible by that particular user
- System variables for the entire operating system, hence any user account will be able to access the executables or folder declared under it.
Added System variables are visible to all user accounts. If it is the case that only you use the PC, it is sufficient to set user variables. However, here we are going for “System Variables“. You can choose between as per your choice.
Select the Path and hit the Edit button.

4. Create a New Variable and add the path in Windows 11
As you click the Edit button in the above step, the corresponding window will open. After that add the path of the folder or executable that you want to add.


Alternatively, we can also browse the same.
For example, to integrate the Oracle VirtualBox, simply edit the “Path” variable under the system or user variables. So follow the below steps…
• Select the Path variable, click on Edit … and click on Browse
• A file explorer tree will open, go to the folder that you want to add, and hit the OK button.


Then confirm all windows with OK and restart the command line (Windows Terminal/PowerShell/Command Prompt) and start accessing your executable directly in it once. The old variables are still saved in the open instance.
In this way, we can add any path to our system on Windows 11 using the graphical user interface. the user can also remove any of the added paths in a similar way.
This post shows students and new users steps to add or edit Windows PATH environment variables in Windows 11. Most programs will default add their custom shortcuts to Windows PATH environment variables.
Some programs will not automatically add to the System Path variables but let users edit or add to the path so that the program can function correctly.
The System PATH variable is one of the most used variables in Windows. It allows users to run any executables located inside the paths without giving the full path to the executables or directories to locate.
Users must search for and locate each executable without environment variables or provide full paths and directories of important program files. Environment variables create shortcuts to executables within those paths specified.
Below is how one can add or edit Windows PATH environment variables so they can run executables from their custom directories.
How to set path and environment variables in Windows 11
As mentioned, PATH and environment variables create shortcuts to executables and directories. It allows custom programs to be launched and used efficiently in Windows.
Administrator privileges are required to modify the path and environment variables. Below is how to add or edit Windows PATH and environment variables in Windows 11.
First, go to Windows Settings app. To get to the Settings app, you can use the Windows key + I shortcut or click on Start ==> Settings, as shown in the image below:

Alternatively, you can use the search box on the taskbar and search for Settings. Then select to open it.
Windows Settings pane should look similar to the image below. In Windows Settings, click System, and select the About tile on the right pane of your screen shown in the image below.

On the About screen, click the Advanced system settings link, as highlighted below.

In the System Properties window, click the Advanced tab, then click the Environment Variables button near the bottom of that tab.

You’ll typically want to add to the System variables so everyone on the System can use it. If you use the User variable, only a user who adds it may use it.
Highlight the Path variable in the System variables section and click the Edit button.

Next, add or modify the path lines with the paths you want the computer to access. Each directory path is separated with a semicolon, as shown below.

You can click the New button to add new paths or edit to modify the existing path. Delete will delete a path.
If you know the path, simply type it in or copy and paste it. You can also click Browse and navigate to the desired path you want to include in the System path variables.
Each directory path is separated with a semicolon, as shown below.
C:\Program Files;C:\Winnt;C:\Winnt\System32
That should do it.
Conclusion:
This post showed you how to add or edit PATH environment variables in Windows 11. Please use the comment form below if you find any errors above or have something to add.
Всем привет! Переменные среды (Environment Variables) в Windows 10 и Windows 11 – это специальные переменные, которые можно свободно использовать в командной строке, скриптах или в некоторых командах во встроенных приложениях (как например, в окне «Выполнить»). Очень полезная вещь для тех людей, которые постоянно пользуются консолью или скриптами. Например, вам необязательно постоянно вручную указывать полный путь к папке, которая находится глубоко на диске – достаточно просто прописать переменную.
Сегодня в статье я расскажу, где находятся системные переменные среды (Environment Variables) Windows, как с ними работать и создавать. Если возникнут какие-то дополнительные вопросы – пишите в комментариях.
Содержание
- Где хранятся существующие переменные
- PATH и PATHEXT
- Создание переменной
- Задать вопрос автору статьи
Где хранятся существующие переменные

Для начала давайте посмотрим, где хранятся переменные окружения в Windows 10 или 11. Уже потом познакомимся с ними поближе и на примере поймем, как они работают в системе.
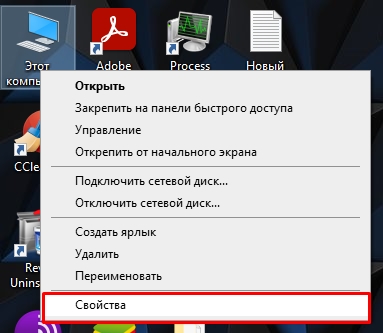
- Кликните правой кнопкой по вашему компьютеру и зайдите в «Свойства».
- Если у вас обычная Home-версия – слева выбираем ссылку «Дополнительные параметры системы». Если у вас последняя Pro-версия, тогда в разделе «О программе» в правом блоке листаем в самый низ и находим ссылку с таким же названием.
- Перейдите во вкладку «Дополнительно» и нажмите по кнопке «Переменные среды…».
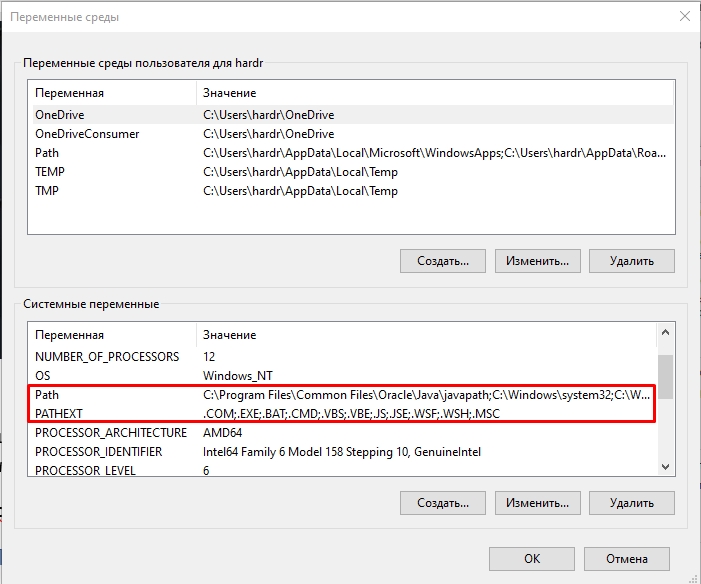
Далее вы увидите две таблички. В первом столбце указаны «Переменные», которые вы можете использовать. А во втором столбце – это их значения, которые уже используются программами или скриптами. Верхний блок – это переменные локального пользователя, под которым вы сидите. Они могут быть созданы установленными программами или вами. Внизу строгие системные переменные.
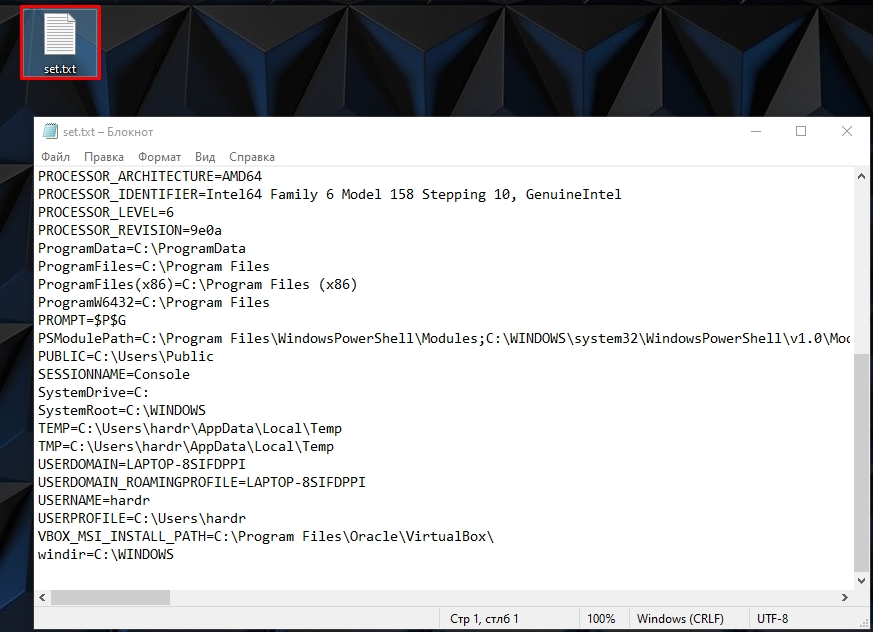
Также можно посмотреть весь перечень в консоли – открываем командную строку. Далее вводим команду:
set > %homepath%\desktop\set.txt

Команда выполняется очень быстро. После этого смотрим на рабочий стол и открываем текстовый файл
set.txt
В нем хранятся все уже существующие переменные, которые вы можете использовать. Все эти переменные мы используем в любом месте, в скриптах или командной строке. Например, в прошлой команде мы уже использовали переменную %homepath% – которая заменяет данные о положении папки:
C:\Users\Имя
И еще один важный момент – все переменные обрамляются знаком процента (%) с двух сторон. Размер написанных букв переменных не важен:
%homepath% = %HOMEPATH% = %Homepath%
PATH и PATHEXT
Вы могли заметить две интересные переменные PATH и PATHEXT, которые содержат в себе сразу целый массив значений. Как же с ними работать? – давайте разберем на конкретном примере.
Представим себе, что мы запускаем какую-то программу:
program.exe
С допиской переменной PATH. Если посмотреть в значения PATH, можно заметить, что это пути к определенным папкам на любом диске системы. Если вы будете использовать переменную PATH, в скрипте или консольной команде, то система пройдет по всему массиву – то есть по всем выделенным папкам и попробует найти program.exe и запустит его, если найдет. Давайте добавим свою директорию:
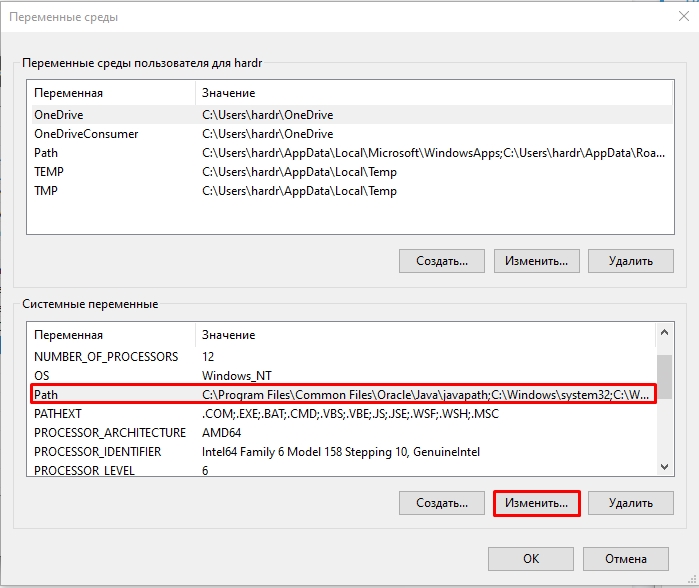
- Выделите PATH, нажав ЛКМ.
- Кликаем по кнопке «Изменить».
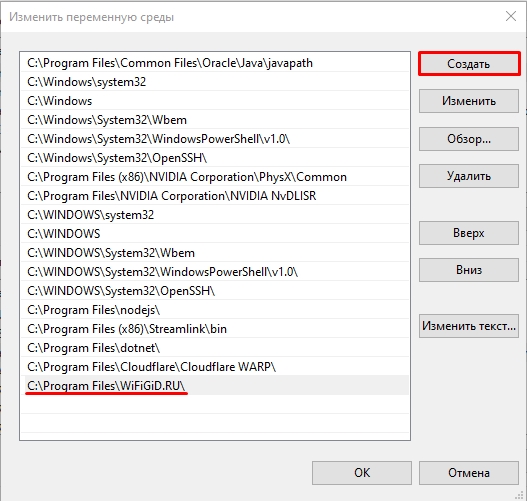
- Жмем «Создать».
- Далее вводим новую директорию. Желательно, чтобы эта директория была верной, и папка такая существовала. В конце жмем «ОК».
И еще один важный момент – после того как вы добавили новые переменные, надо чтобы они появились в системе. Для этого – или перезагружаем компьютер, или «Проводник». Только после этого переменными можно будет пользоваться. Для перезагрузки проводника, откройте консоль и введите две команды:
taskkill /F /IM explorer.exe
После этого вводим:
explorer.exe
Если вы будете работать с переменными среды в командной строке Windows 10 или Windows 11, то вам нужно также её перезапустить – закрываем и снова открываем приложение.
Ах, да…мы чуть не забыли про переменную PATHEXT, в которой хранятся различные расширения. Работает переменная примерно также. Вы можете не указывать расширение программы или объекта для запуска в скрипте или командной строке. Система автоматически будет брать расширения из массива PATHEXT и перебирать все варианты. Поэтому вместо:
program.exe
Можно просто указать:
program
Создание переменной
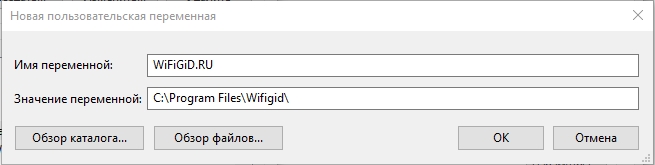
Давайте посмотрим, как создать переменную среды в Windows. Делается все очень просто. Выбираем верхний или нижний блок и жмем по кнопке «Создать». Еще раз повторюсь, что верхний блок предназначен для запуска команд под данным локальным пользователем.
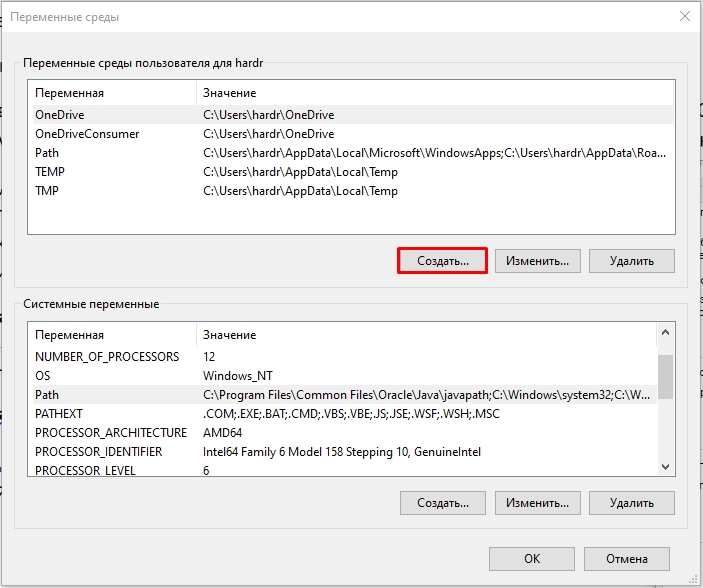
Вводим «Имя переменной» и значение – куда можно указать путь к папке, файлу или запускаемой программе. Напомню, что здесь вы также можете использовать системные переменные, которые находятся в нижнем блоке. Жмем «ОК».
Напомню – чтобы переменная заработала, нужно будет перезагрузить «Проводник» (Explorer.exe). Про то как это сделать я уже писал в прошлой главе. Если остались вопросы и вы хотите получить помощь от портала WiFiGiD.RU – опишите свою проблему в комментариях. Также вы можете писать дополнения и предложения там же.