🔊
In Short.
To disable McAfee on Windows 11, open the app and turn off real-time scanning, scheduled scans, firewall, and tracker remover. To uninstall, go to Settings > Apps & features > McAfee > Uninstall or use the McAfee Product Removal Tool.
When you purchase a new Windows device from a manufacturer other than Microsoft, it may come with McAfee antivirus already installed. While it’s always a good idea to have antivirus software on your computer, you may prefer a different program to McAfee. In this case, it’s important to know how to uninstall McAfee.
On the other hand, you may be happy with McAfee but need to temporarily disable it to install an app from an unknown publisher or test your own apps in development. Or, you may want to try out other antivirus software options.
If you need to disable or uninstall McAfee, don’t worry – we’ve got you covered with this step-by-step guide. We’ll first walk you through how to disable the antivirus program, and then we’ll cover the uninstallation process. Whether you’re a newbie or a more experienced user, this guide will help you complete the process quickly and easily. Let’s get started!
How to Temporarily Disable McAfee Antivirus Protection on your PC
Disabling McAfee antivirus is actually quite simple. All you need to do is turn off the protection temporarily, and you can even set it to automatically enable itself after a certain amount of time.
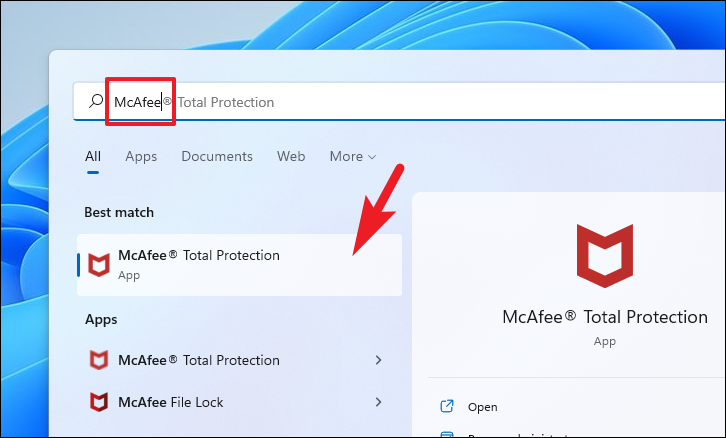
To disable MacAfee, either right-click on the McAfee Antivirus icon from the tray icon section and click on the ‘Open McAfee’ option from the context menu to open the app, or search for the app from the Start Menu.
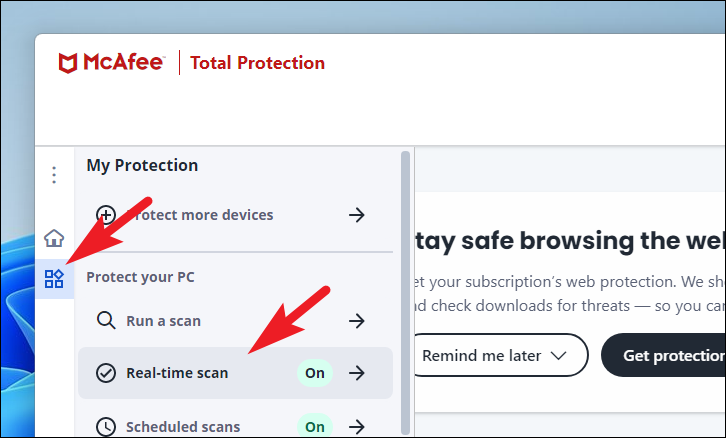
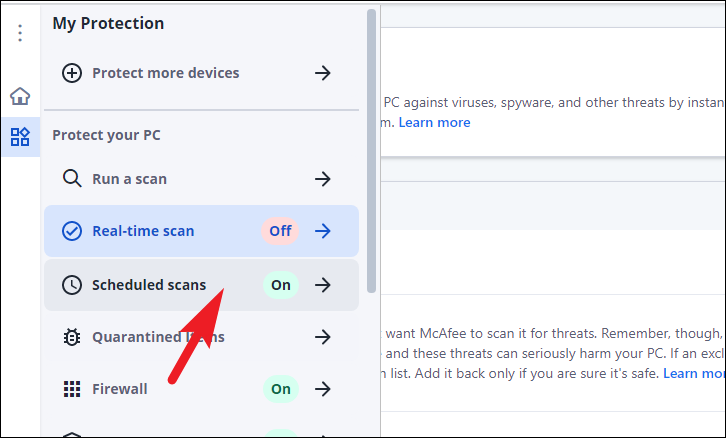
Next, on the ‘McAfee’ window, click on the ‘My Protection’ tab to reveal the sidebar. Then, locate and click on the ‘Real-Time Scanning’ option present on the left-sidebar to continue.
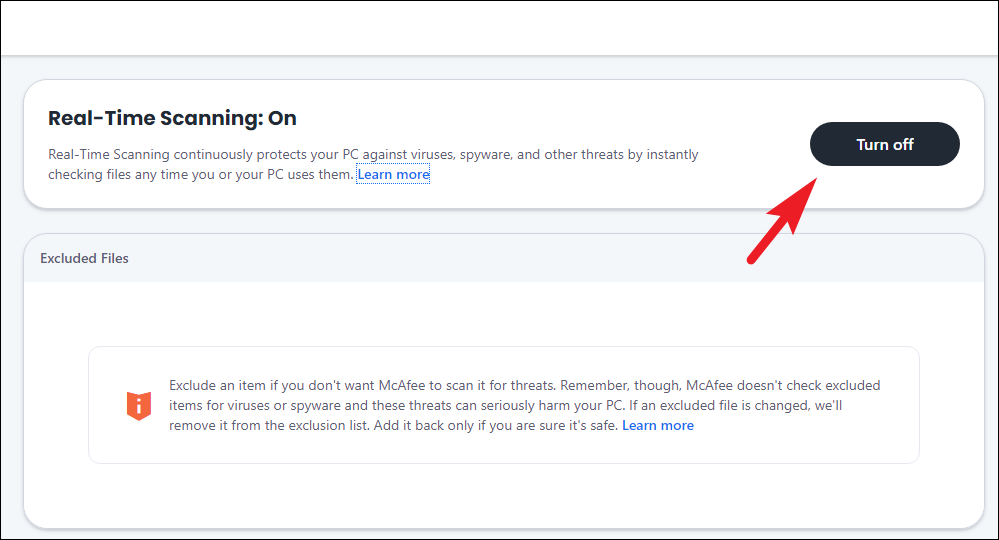
Then, from the ‘Real-Time Scanning’ screen, click on the ‘Turn Off’ button. This will bring a separate overlay window on your screen.
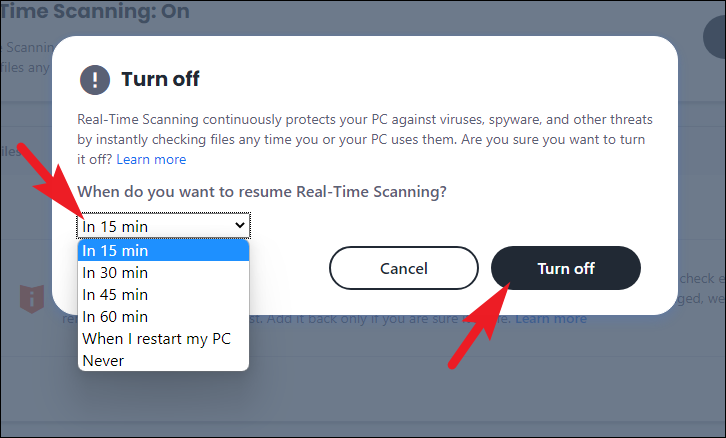
Now, click on the drop-down menu and select a preferred time duration if you wish to enable the protection automatically. If you wish to enable the protection manually, select the ‘Never’ option. Then, click on the ‘Turn Off’ button from the bottom right corner of the pane to disable the real-time scanning of McAfee.
After you have disabled real-time scanning, click on the ‘Scheduled scans’ option located on the left sidebar right below the ‘Real-Time Scanning’ option. This will open a separate window on your screen.
Now, click on the ‘Turn off’ button present on the ‘Scheduled Scan’ screen to disable the scheduled scan services completely.

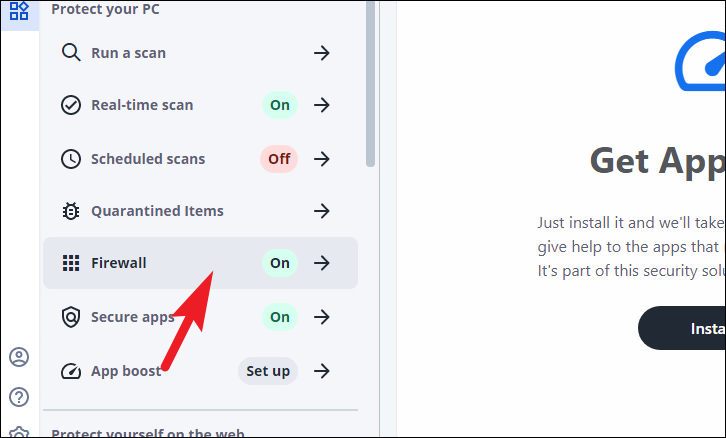
After that, similar to previous steps click on the ‘Firewall’ tab situated on the left sidebar. This will take you to the ‘Firewall’ settings screen.
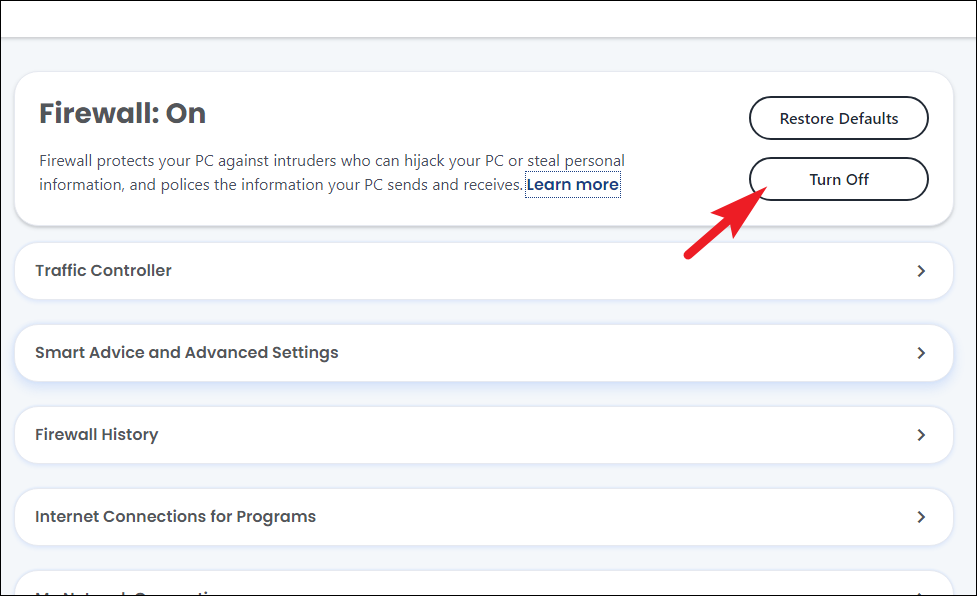
Now, click on the ‘Turn Off’ button from the ‘Firewall settings’ screen to continue. This will open a separate overlay window on your screen.
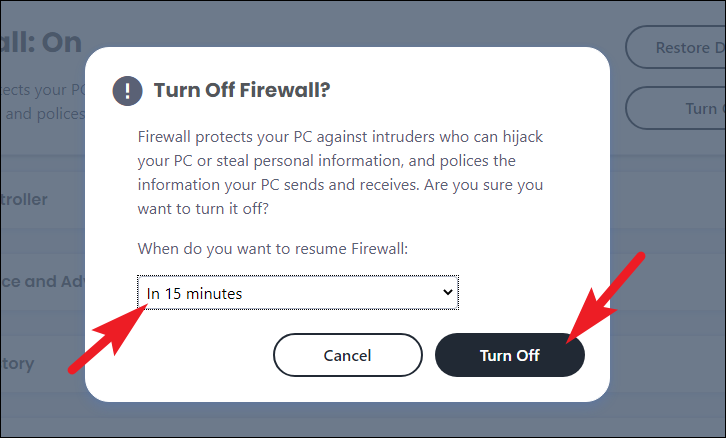
Next, click on the drop-down menu present in the ‘Turn of Firewall’ overlay pane and select the duration after which you wish to reactivate the protection. If you wish to reactivate it manually, click to select the ‘Never’ option and then click on the ‘Turn off’ button present on the pane to disable the firewall.
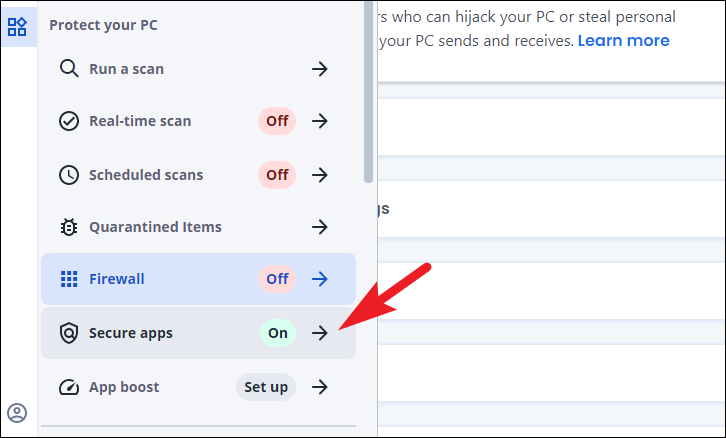
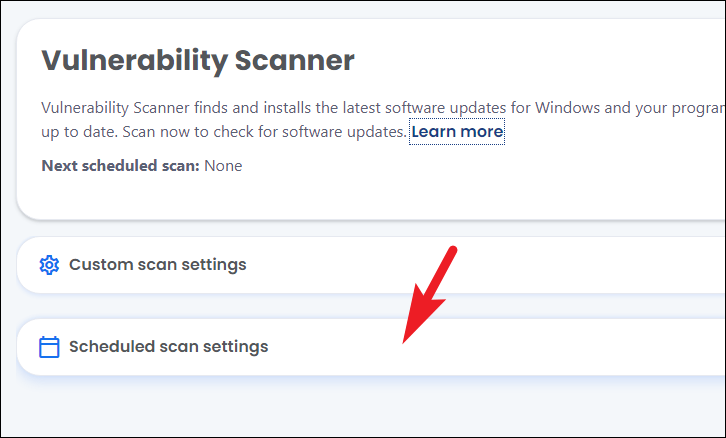
After that, click on the ‘Secure apps’ option from the sidebar to continue. This will take you to the ‘Vulnerability scanner’ settings page.
Then, on the ‘Vulnerability Scanner’ settings page, click on the ‘Scheduled scan settings’ tile to reveal the options.
After that, scroll down the revealed options till you locate the ‘Don’t set a scan schedule’ and click on the radio button preceding the option. Then, click on the ‘Apply’ button to save the changes.

Next, scroll down the revealed sidebar till you locate the ‘Protect yourself on the web’ section, then, click on the ‘Tracker remover’ tile.

Then, click on the ‘Schedule’ tile to reveal the scheduling settings of the feature.

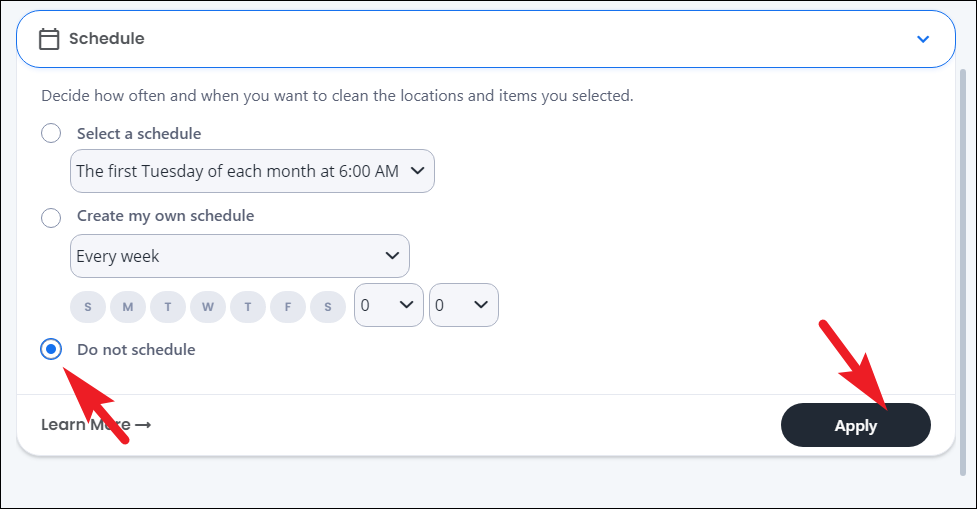
Now, scroll down to locate the ‘Do not schdeule’ option and click on the radio button preceding the option to select. Then, click on the ‘Apply’ button to save the changes.
And that’s it, you have disabled all the McAfee services on your system. In case you are here to uninstall the app altogether from your system, head on to the next section.
How to Remove McAfee from your Windows 11 PC
Uninstalling an app is never a cumbersome process, and the statement holds true in this case as well. Interestingly, there is more than one way to uninstall the McAfee antivirus from your Windows 11 PC.
Uninstall McAfee from the Settings App
The most convenient way to uninstall the McAfee antivirus from your system is from the Settings app. It is fast, simple, and easy. Thus, being the first method on the list.
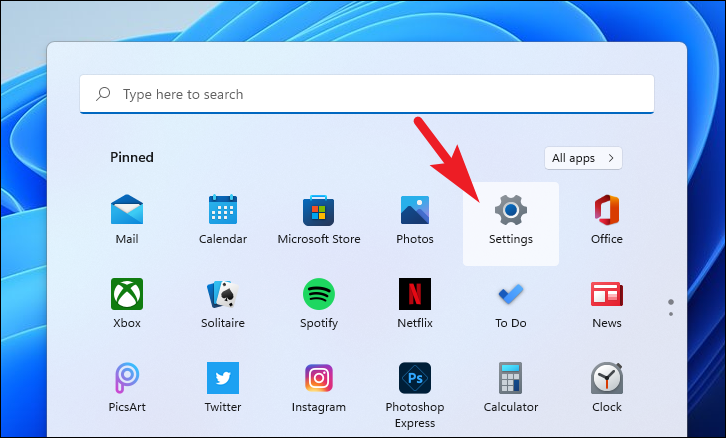
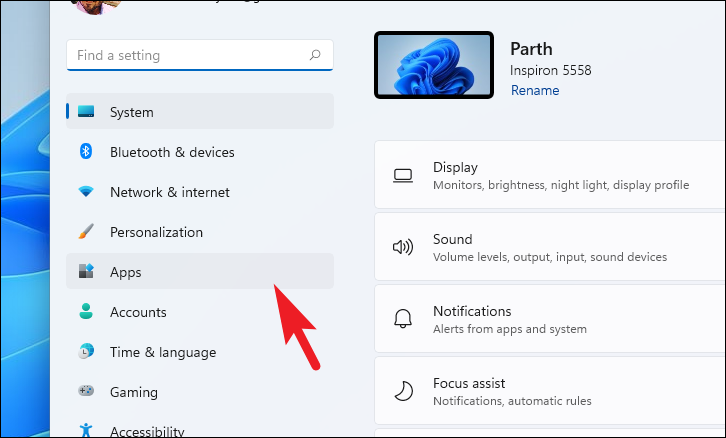
To uninstall McAfee using this method, open the Settings app either from the pinned apps on the Start Menu or by searching for it. Alternatively, you can also open the Settings app by pressing the Windows+I keys together on your keyboard.
Next, click on the ‘Apps’ tab present on the left sidebar of the Settings window.
After that, click on the ‘Apps & features’ tile present on the right section of the window.
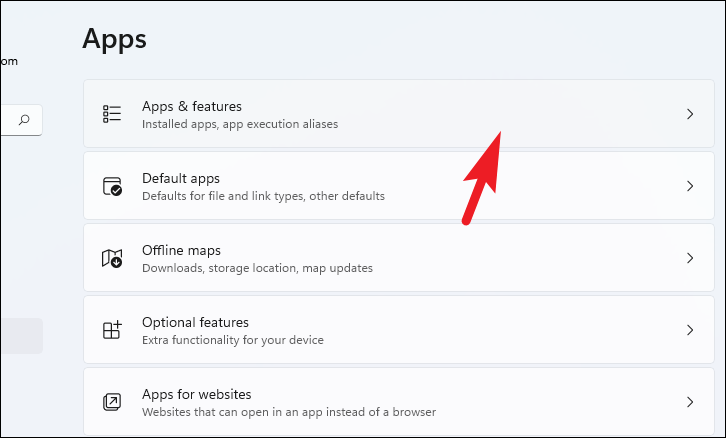
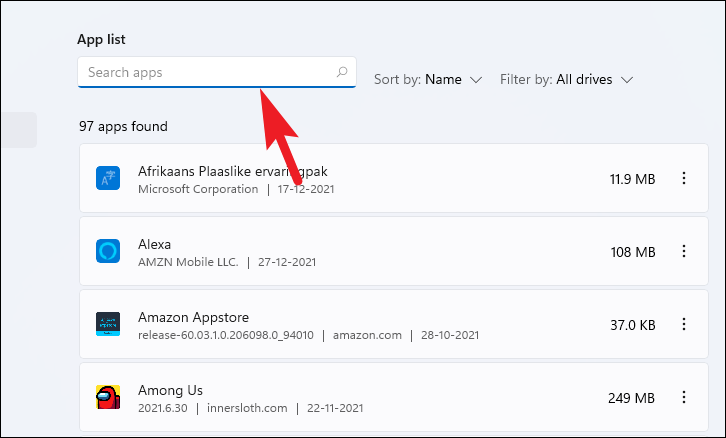
Then, under the ‘App list’ section locate the ‘McAfee’ either by scrolling manually or by searching it using the ‘search’ bar present.
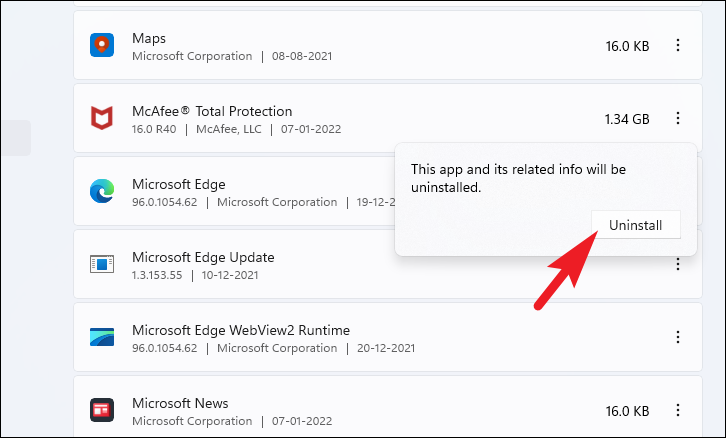
Once located, click on the kebab menu present on the far right edge of each tile and click on the ‘Uninstall’ button from the context menu to initiate the McAfee uninstaller in a separate window.
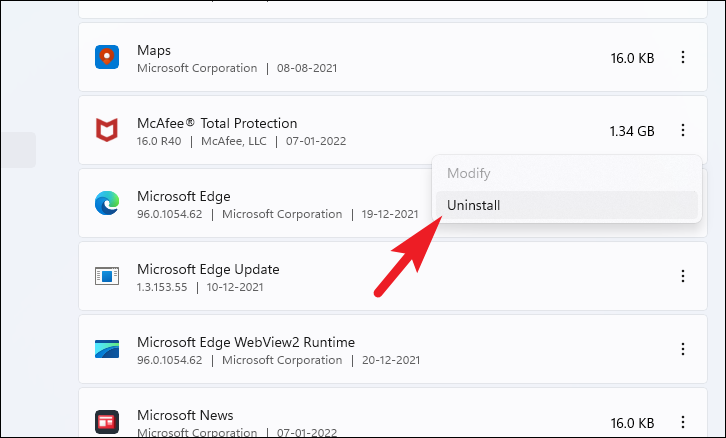
Then, again click on the ‘Uninstall’ button to commence the uninstallation process.
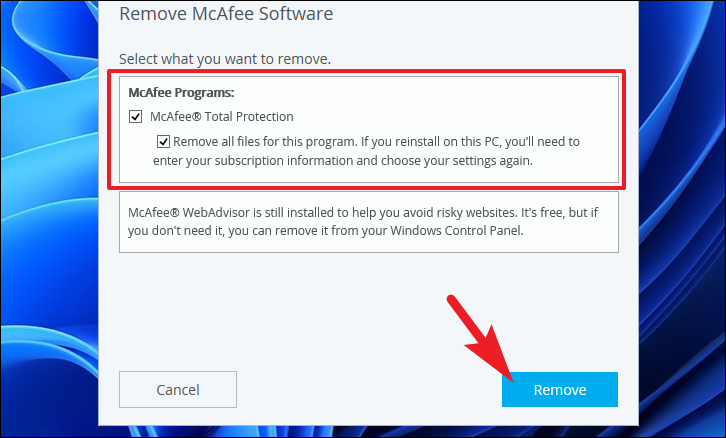
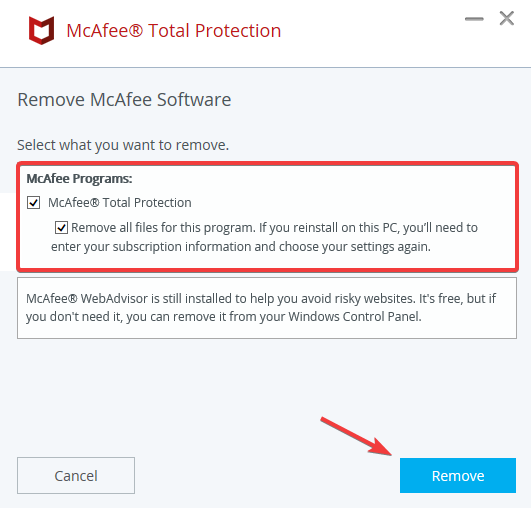
Once the uninstaller presents itself on the screen, click on the checkbox preceding each option under the ‘Select what you want to remove’ section to select all McAfee products installed on your system. Then, click on the ‘Remove’ button to proceed.
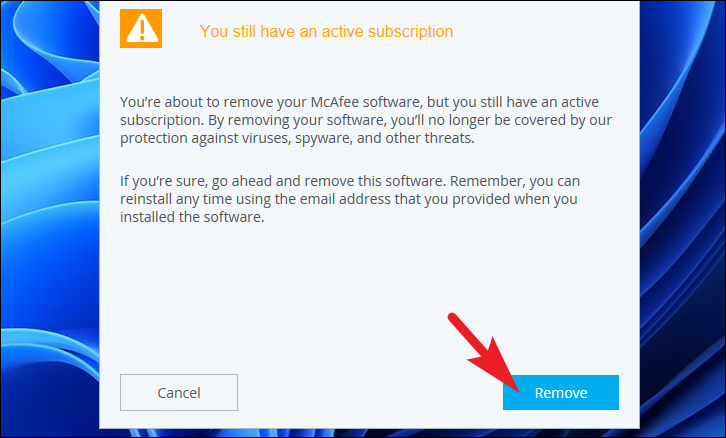
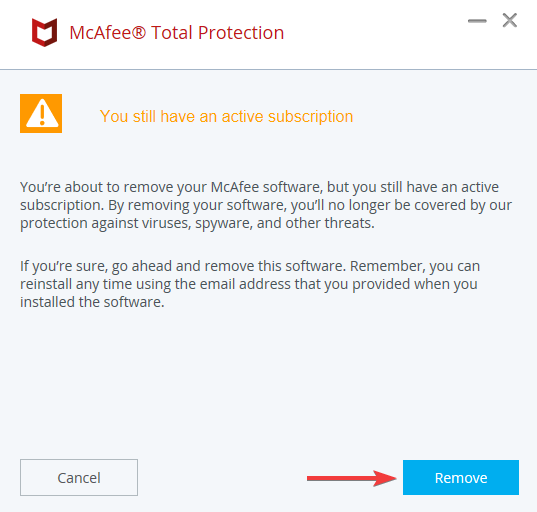
After that, on the next screen, if you have an active subscription on your account, McAfee will notify you of the same. Read the information carefully and click on the ‘Remove’ button.
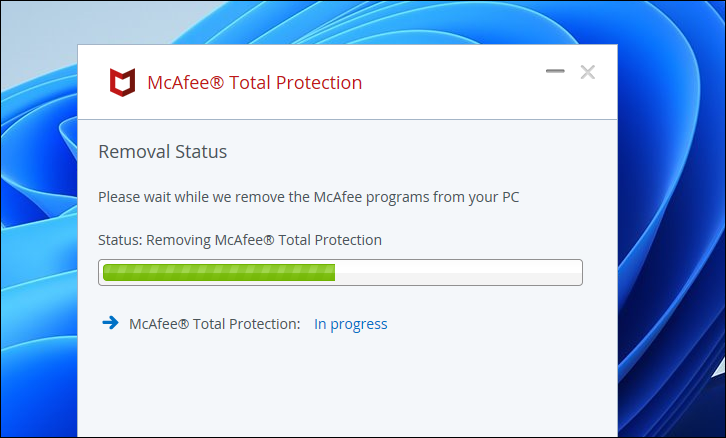
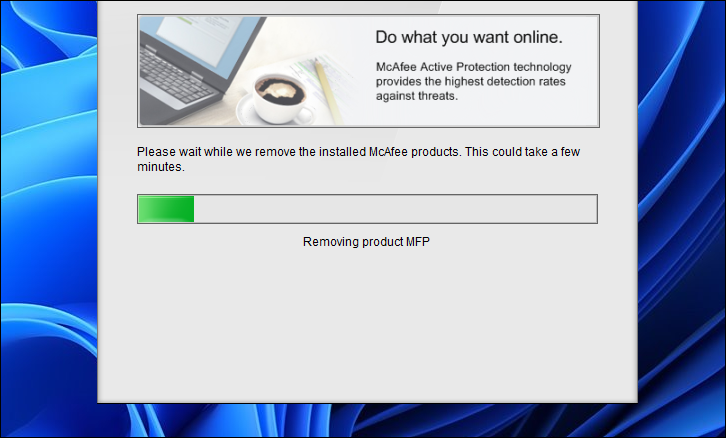
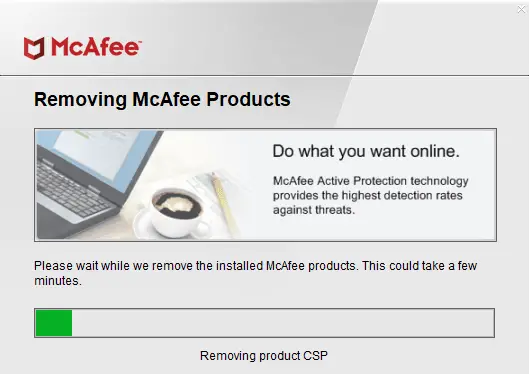
Now, McAfee will uninstall the chosen products, wait patiently while the process runs in the background.
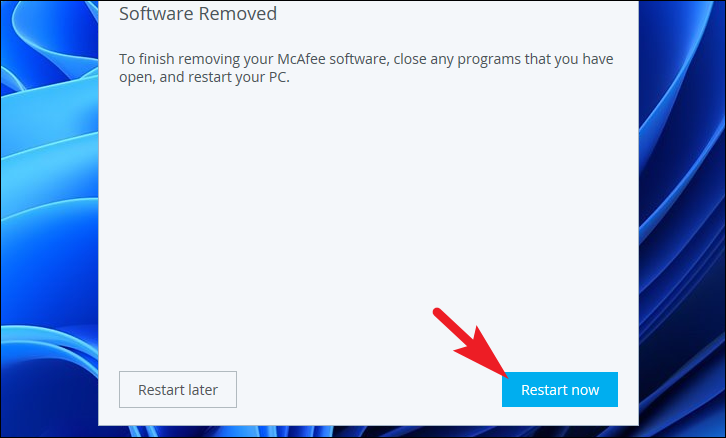
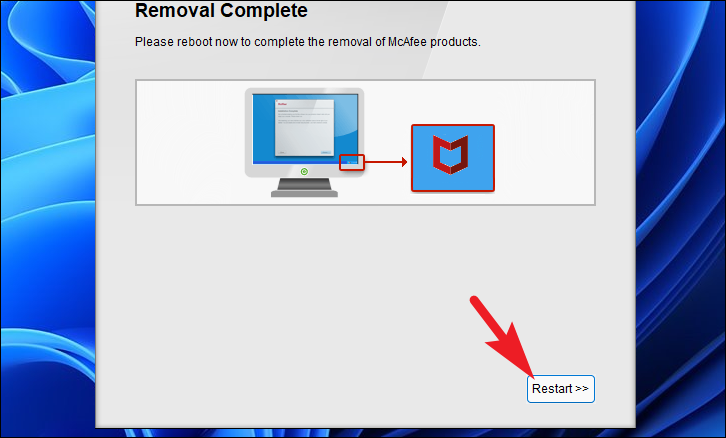
Once the products have been completely removed, you will be notified of the same on the uninstall window. To complete the uninstall, you will have to restart your Windows PC, click on the ‘Restart Now’ button to restart your PC, and complete the installation.
Uninstall McAfee using McAfee Product Removal Tool
If diving into the settings is too much work for you to remove the app or the normal uninstall isn’t working on your system for some reason, you can use the removal tool from McAfee itself to remove all traces of the software from your system.
First, download the McAfee Product Removal Tool (MCPR) on your Windows 11 PC. Once downloaded, head to your defaults downloads directory and double-click on the .EXE file you just downloaded to run the tool.

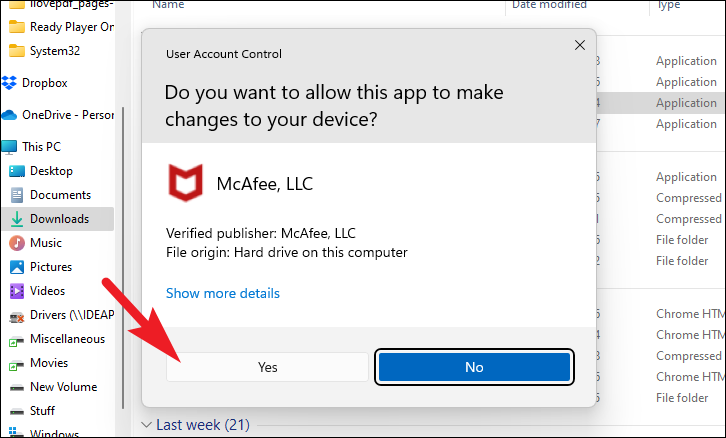
After that, a UAC screen might appear on your screen. If you are not logged in with an admin account, enter the credentials for one. Otherwise, click on the ‘Yes’ button to proceed.
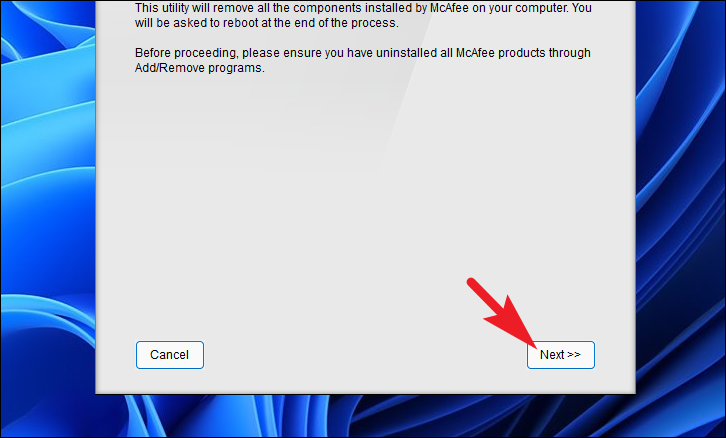
Now, from the MCPR screen, click on the ‘Next’ button to proceed with the uninstallation process.
On the next screen, click on the radio button preceding the ‘Agree’ option and then click on the ‘Next’ button to continue.

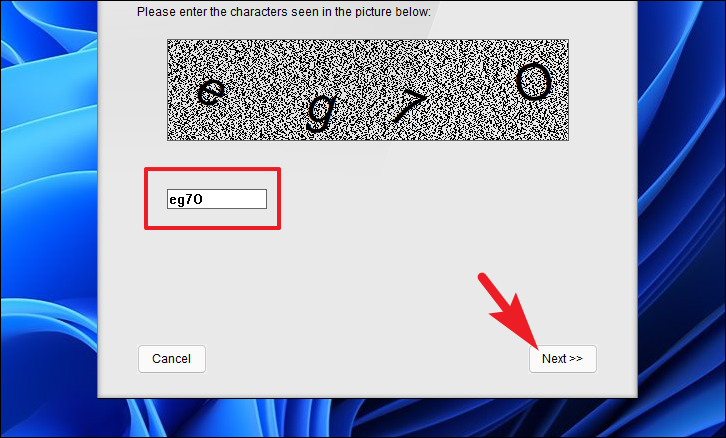
After that, enter the CAPTCHA text in the text box present from the image displayed on the window and click on the ‘Next’ button to validate it and move forward.
Now, on the next screen, McAfee Product Removal Tool will detect all the installed products on your system and remove them completely from your system.
Once the process has been compelled, MCPR will notify of the same on the window. Now, click on the ‘Restart’ button situated on the bottom right corner of the window to restart your PC and complete the process.
Conclusion
Whether you want to temporarily disable McAfee or completely remove it from your Windows 11 PC, there are multiple ways to do so. Disabling the antivirus temporarily involves turning off real-time scanning, scheduled scans, firewall, and vulnerability scanner. On the other hand, the most convenient way to uninstall McAfee is through the Settings app by locating the antivirus in the ‘Apps & features’ section and clicking on ‘Uninstall’. If this method doesn’t work for you, then you can use the McAfee Product Removal Tool to remove all traces of the software from your system.
With these simple steps, you can easily disable or uninstall McAfee and opt for another antivirus software that better suits your needs.
These days, most PC manufacturers prefer using McAfee antivirus. As a result, this comes bundled with the default Windows operating system. Though you can always clean install Windows, we suggest logging into your Microsoft account so that your product key is stored in Microsoft’s database. Proceeding this way, you may easily activate your Windows OS by using the digital license. Let’s see how one can disable or uninstall McAfee on Windows 11 PC.
When you uninstall McAfee, the default security app i.e. Windows Defender will activate automatically. So, you need not worry about viruses attacks or malware infections on your computer.
Why should one uninstall McAfee?
Though McAfee is a good security application to start with, this is not as good as it proclaims when you use its free version. The evolution of Windows Security is another prime reason why Windows users don’t want to use McAfee anymore. A few other reasons are well-elaborated below –
- McAfee consumes huge system resources.
- You were on a better antivirus program before.
However, when you try to remove or uninstall this antivirus program, you may end up with it being not uninstalled. In this post, we will look up to the reasons that might have stopped uninstalling McAfee and explore ways that can do it quite easily.
If you no longer wish to continue with McAfee antivirus, follow either of the seven methods to uninstall it from your Windows 11 PC.
1] Using Windows Settings
The simplest way to remove any application on Windows 11 is by using the Settings app. This applies to McAfee software as well. Here’s what you need to do disable or uninstall it on your computer –
- Press “Windows Key + I” to access the Settings window.
- Launch “Apps” from the list of options displayed on the left pane, and select “Apps and features“.
- Scroll down for a bit until you get the “McAfee total protection” program.
- Click the three dots available to this program’s right end, and select Uninstall.

- When a popup window comes up, click “Uninstall” again.
- McAfee antivirus soon starts uninstalling. As soon as the uninstallation completes, the system will prompt you to restart it. Well, do it as this way your device will get rid of any leftover or residual files.
2] Use MCPR Removal tool
McAfee removal tool for end-consumer is abbreviated as MCPR. This utility can also be used in conjunction with other methods to get rid of McAfee’s residual files and recovery installers from your computer. However, this application will not assist you in removing McAfee extensions or McAfee products that have been installed.
Note: Go for this method only when McAfee is not uninstalling for some unknown reason.
Follow these steps to use MCPR –
- Download MCPR from its official website. Do not use the old MCPR tool if you had downloaded it previously.
- Install the MCPR tool. Before you go ahead, make sure to close all running programs.
- Run the MCPR tool’s executable file that you just downloaded.
- On the emerging Window as a result of the previous step, launch “Next.“
- Next, pick the radio button on the Agree box, which appears at the end of the End-user license agreement. After that, press “Next.“
- The security validation page displays, prompting you to enter the caption shown. Fill the caption and click “Next” again.
- This utility will now begin removing all installation files, residual files, and other files associated with McAfee software from your computer.
- When this process is finished, you’ll be led to the “Removal complete page,” which will prompt you to restart your computer.
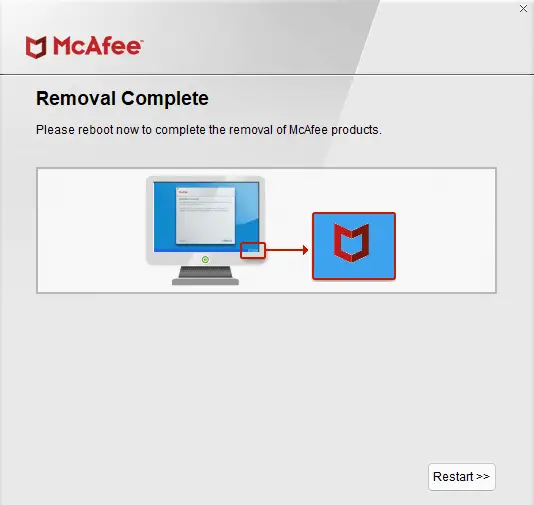
- Your PC will reboot automatically, thus you won’t have any residual McAfee software installation files.
3] Uninstall McAfee using command prompt
If for any reason, you are still unable to remove McAfee from your computer, try CMD way. Here’s what you need to do –
- Click over the Windows icon and start typing “CMD”.
- Right-click on the top result and select the option – Run as Administrator.
- When Command Prompt launches, type the following, and press Enter –
wmic
- Execute the below code next –
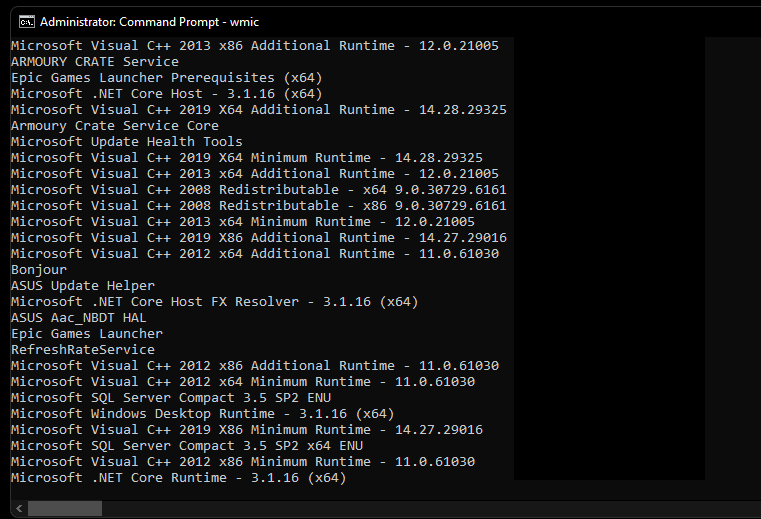
product get name
- You will get a list of programs installed on your computer.
- Make a note of the McAfee software from the list.
- Now, copy/paste the below command and press Enter –
product where name="PROGRAM_NAME" call uninstalls
- Make sure to replace “PROGRAM_NAME” with the actual name that you have noted down.
- Do so for all the files that you’ve written or noted down.
- Doing so will definitely delete all McAfee-related files from your computer.
4] Use Windows PowerShell to remove McAfee
Just like CMD, you may use Windows PowerShell as well to get rid of McAfee from your computer. To do so, follow the below instructions –
- Press Win + X, and choose Windows Terminal (Admin).
- The terminal will default land into Windows PowerShell.
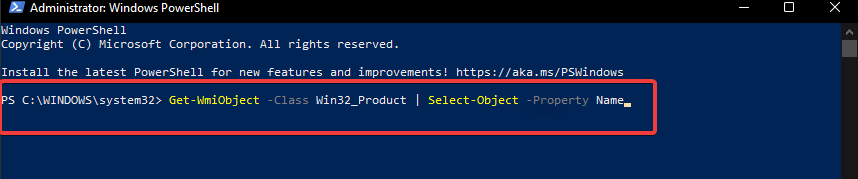
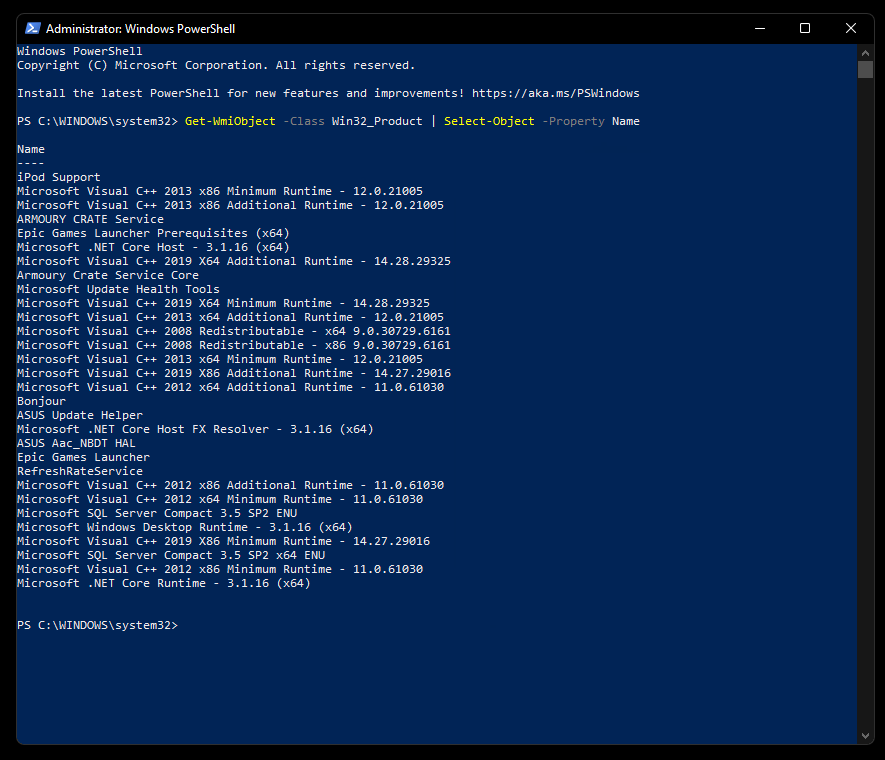
- Now, run the below cmdlet to see all programs installed on your PC.
Get-WmiObject -Class Win32_Product | Select-Object -Property Name
- Make a list of all the files related to McAfee. Now, run this command on the terminal –
$app = Get-WmiObject-Class Win32_Product -Filter "Name = 'PRODUCT_NAME'"
- Replace PRODUCT_NAME with the actual file name that you have noted down. Make sure not to remove any quotations from the command.
- Repeat this process for all the files that you have noted down.
- In the end, you will have your device cleaned of the McAfee application.
5] Disable McAfee Antivirus
On PCs that came bundled with McAfee, you may find it difficult to uninstall this bloatware. Well, you can always disable this security software by following the steps provided below.
- Press “Win + I” to launch the Settings App.
- Click Apps followed by Default apps.
- As a result, a list of all built-in apps will appear on the right pane.
- Look for McAfee and change its default extension to Microsoft Windows Defender.
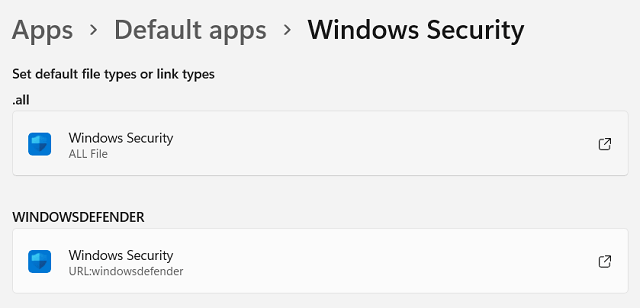
- Restart your computer after you’ve performed the preceding steps.
- Try again to uninstall McAfee. Hopefully, McAfee uninstalls now.
3] Try the EPR Removal tool
The abbreviation EPR stands for Endpoint Removal. McAfee provides this tool, which one may use on all business editions, organizations, and businesses. The grant number is used by this tool (grant number is a unique code that the company issued at the time of purchase of the software). If none of the above solutions work, you may use EPR to delete all files related to McAfee.
Get the EPR Tool
Before you may try out this tool, you need to first download and install it on your computer. Visit EPR’s official site and log in using your “email-id” and “grant number”. Proceeding this way, you may access your business account.
After entering into your account, use the filters to find “utilities and connectors“. Download and install the most recent version of the EPR utility program. Once the download completes, here’s how you may use this tool –
Uninstall McAfee using the EPR tool
Follow these steps to uninstall McAfee files using the EPR tool –
- Sign in to your computer and allow administrative permission for the EPR tool.
- Run EPR locally. Some users often run EPR from the network share. Well, we don’t recommend doing so.
- If you’re using EPO to deploy the EPR tool, make sure you provide the required command-line parameters when you construct your deployment task.
- To remove McAfee and related products, utilize appropriately managed product parameters. (We don’t suggest using the syntax “–ALL”).
Note: EPR tool must be used within its expiry date specified.
7] Check Account Privileges and contact the administrator
If you are using a system provided by an institution, such as an educational institution, an IT or non-IT company, or another organization, you may not be able to uninstall this software. In such cases, you must contact your administrator to complete this process on your behalf. If the administrator accepts and provides the grant number (a unique code supplied by the company at the time of software purchase), you may complete the uninstallation. Use the EPR tool as guided above to uninstall McAfee on Windows 11.
8] Seek technical assistance from McAfree
If none of the preceding approaches worked for you, it must be due to some technical complexities. Visit the official site or phone number, or look for technical support to get this problem resolved.
What are the left behind files after uninstalling McAfee?
When you uninstall McAfee software, this prompts you to restart your PC. In case you don’t do this, there may remain some files that must be erased manually. Here’s how to get rid of such files –
- Press “Windows key + E” to open Windows Explorer.
- Go to the path that has been specified below –
C:\Program Files
- Look for McAfee-related files and directories inside “C: Program Files“.
- Delete any files or directories that you detect here.
- Next, go to the paths provided below, search for McAfee files, and delete them.
"C:\Program Files\Common Files"
"C:\Program Files (x86)"
"C:\Program Files (x86)\CommonFiles"
"C:\ProgramData"
"C:\ProgramData"
"C:\Users\USERNAME\AppData\Local"
"C:\Users\USERNAME\AppData\Roaming"
Note: make sure to replace USERNAME with your actual user name.
- This will result in the deletion of all leftover files of McAfee software.
What exactly is McAfee?
McAfee is an anti-virus program that protects your computer from malicious software. You can download the free trial version and use it for a few days to ensure that your system is fully protected. There are several other features that this antivirus provides. A few of them are as follows – Password Management, Identity Protection, and Online Protection. In short, it does provide comprehensive security to your computer.
That’s it, I hope this article helps to uninstall McAfee software from your computer.
Антивирусная программа McAfee, как и другие антивирусы, играет важную роль в обеспечении безопасности компьютера. Однако иногда может возникнуть необходимость временно отключить антивирус, например, при установке определенного программного обеспечения или выполнении определенных действий. В этой статье мы подробно рассмотрим, как отключить антивирус McAfee на операционной системе Windows 11.
Шаг 1: Запуск McAfee. Чтобы начать процесс отключения антивируса McAfee, необходимо открыть программу. Для этого найдите иконку McAfee на рабочем столе или в меню «Пуск» и щелкните по ней.
Шаг 2: Отключение защиты в режиме реального времени. После запуска программы McAfee вам необходимо найти раздел «Настройки» или «Настройки защиты» и щелкнуть по нему. В открывшемся меню найдите пункт «Защита в режиме реального времени» или что-то похожее и щелкните по нему. В появившемся окне выберите опцию «Отключить» или «Выключить».
Шаг 3: Подтверждение отключения антивируса. После выбора опции отключения защиты в режиме реального времени, McAfee может попросить вас подтвердить свои действия. Убедитесь, что вы понимаете последствия отключения антивирусной защиты и щелкните «Продолжить» или «Да», чтобы подтвердить.
Шаг 4: Подтверждение временного отключения антивируса. McAfee также может запросить у вас подтверждение временного отключения антивируса на определенный период. Если вам необходимо отключить антивирус только на ограниченное время, выберите соответствующую опцию и укажите нужные значения. Если же вы хотите отключить антивирус навсегда, выберите опцию «Отключить полностью» или что-то подобное.
Шаг 5: Проверка отключения антивируса. После подтверждения временного отключения антивируса или его полного отключения, убедитесь, что антивирус McAfee действительно отключен. Для этого попробуйте запустить программу или выполнить действия, которые требовали время отключения антивируса. Если все прошло успешно, вы сможете продолжить свои дела без помех со стороны антивируса McAfee.
Важно: Помните, что отключение антивируса McAfee на Windows 11 может вносить угрозу для безопасности вашего компьютера и личных данных. Всегда будьте осторожны при отключении антивируса и убедитесь, что вы делаете это только в случае реальной необходимости.
Следуя этой пошаговой инструкции, вы сможете успешно отключить антивирус McAfee на Windows 11 и выполнить нужные вам задачи без помех со стороны антивирусной программы.
Содержание
- Как отключить антивирус McAfee на Windows 11
- Подготовка к отключению антивируса
- Отключение антивируса McAfee
- Проверка отключения антивируса
Как отключить антивирус McAfee на Windows 11
Отключение антивируса McAfee может быть полезным в нескольких ситуациях. Например, если вы устанавливаете программу, которая приостанавливает свою работу из-за конфликтов с антивирусом или если вы хотите проверить, не является ли антивирус причиной проблем с производительностью компьютера.
Чтобы отключить антивирус McAfee на Windows 11, выполните следующие шаги:
- Щелкните правой кнопкой мыши на иконке McAfee в правом нижнем углу панели задач.
- Выберите «Защита от вирусов и угроз».
- В открывшемся окне выберите «Настройки антивируса и антиспама».
- Нажмите на переключатель рядом с функцией «Антивирус McAfee» для ее отключения. Появится всплывающее окно с предупреждением о безопасности, в котором необходимо подтвердить отключение.
- Выберите, сколько долго вы хотите отключить антивирус — на 15 минут, 1 час, 5 часов или до следующей перезагрузки компьютера.
- Нажмите на кнопку «Готово».
После выполнения этих шагов антивирус McAfee будет временно отключен, и вы сможете продолжить работу на компьютере без его вмешательства. Важно помнить, что отключение антивируса на длительное время может повысить риск заражения компьютера вредоносными программами, поэтому рекомендуется включать антивирусную защиту как можно быстрее после завершения необходимых операций.
Подготовка к отключению антивируса
Перед тем как приступить к отключению антивируса McAfee на Windows 11, важно выполнить несколько предварительных шагов:
- Убедитесь, что у вас есть права администратора на компьютере. Без них вы не сможете выполнить необходимые действия.
- Создайте резервную копию важных файлов и данных на вашем компьютере. Хотя отключение антивируса не должно вызывать проблемы, лучше быть на всякий случай готовым.
- Сделайте список программ и процессов, которые вы используете и которые могут быть заблокированы антивирусом. Это поможет вам восстановить правильную работу системы после отключения антивируса.
- Проверьте, нет ли других антивирусных программ на вашем компьютере. Использование нескольких антивирусов одновременно может вызывать конфликты и проблемы.
После выполнения этих предварительных шагов вы будете готовы приступить к отключению антивируса McAfee и продолжить с основной частью инструкции.
Отключение антивируса McAfee
Антивирус McAfee может быть полезным инструментом для защиты вашего компьютера, но иногда вы можете захотеть временно отключить его. Вот пошаговая инструкция о том, как отключить антивирус McAfee на Windows 11:
- Щелкните правой кнопкой мыши на иконке McAfee, которая находится в системном трее в правом нижнем углу экрана.
- Выберите пункт «Защита в реальном времени» в контекстном меню, которое появится.
- В дополнительном всплывающем меню нажмите на переключатель, чтобы отключить защиту в реальном времени.
- Появится окно подтверждения — нажмите «Да», чтобы подтвердить отключение антивируса McAfee.
- Теперь антивирус McAfee будет отключен на вашем компьютере.
Помните, что отключение антивируса McAfee на компьютере увеличит его уязвимость перед потенциальными угрозами. Поэтому рекомендуется включить антивирусную защиту как можно скорее после завершения нужных действий.
Проверка отключения антивируса
Для убедительности необходимо проверить, был ли антивирус McAfee действительно отключен на вашей операционной системе Windows 11. Вы можете выполнить следующие шаги, чтобы это узнать:
- Нажмите правой кнопкой мыши на иконку McAfee в системном трее, расположенной в правом нижнем углу экрана.
- В открывшемся контекстном меню выберите «Открыть McAfee».
- Далее, в главном окне программы, найдите и нажмите на вкладку «Настройки».
- В открывшемся меню выберите пункт «Real-Time Scanning» или «Реальный анализ».
- Если антивирус McAfee успешно отключен, вы должны увидеть опцию «Отключено» или «Выкл.» рядом с функцией «Real-Time Scanning» или «Реальный анализ».
Если вы видите такую опцию, это означает, что антивирус McAfee отключен и не будет сканировать ваши файлы в режиме реального времени. Вы можете выполнить нужные вам задачи, не волнуясь о вмешательстве антивирусной программы.
Однако, если вы не видите опцию «Отключено» или «Выкл.» рядом с функцией «Real-Time Scanning» или «Реальный анализ», это означает, что антивирус McAfee все еще активен и может вмешиваться в работу вашей системы. В этом случае, рекомендуется повторить шаги, описанные в предыдущем разделе, чтобы убедиться, что процесс отключения правильно выполнен.
Take a closer look at these quick procedures now
by Farhad Pashaei
As a technophile, Farhad has spent the last decade getting hands-on experience with a variety of electronic devices, including smartphones, laptops, accessories, wearables, printers, and so on. When… read more
Updated on
Reviewed by
Alex Serban

After moving away from the corporate work-style, Alex has found rewards in a lifestyle of constant analysis, team coordination and pestering his colleagues. Holding an MCSA Windows Server… read more
- It is safe to remove antiviruses from the system as long as the official integrated antivirus program is functional.
- Windows won’t let users remove some of the applications which is why users cant can’t uninstall McAfee from Windows 11.
- Using the Command Prompt to remove the application may be the easiest way of getting rid of the antivirus program.

McAfee is an excellent antivirus program that can totally secure your computer, but it appears that users can’t uninstall McAfee from Windows 11 or any other operating system.
The standard methods of removing an application from Windows will not work on this antivirus since it is recognized as an official and required application for the system to function.
However, users should be informed that there are methods for deleting this app from the PC that functions on any operating system.
Should I uninstall McAfee from Windows 11?
It is not suggested to use Windows without any anti-virus software; however, it should be noted that, in addition to McAfee, Microsoft has built additional antivirus within Windows.
If McAfee is causing you trouble, you can safely uninstall it because Windows Defender protects your computer from viruses and malware.
How we test, review and rate?
We have worked for the past 6 months on building a new review system on how we produce content. Using it, we have subsequently redone most of our articles to provide actual hands-on expertise on the guides we made.
For more details you can read how we test, review, and rate at WindowsReport.
Despite the popular notion that purchased antiviruses are superior to free antiviruses, McAfee and Windows Defender provide the same level of protection for the system.
Although McAfee has more features than Windows Defender, it is not necessarily better.
Why can’t I remove McAfee from my computer?
The Windows uninstall utility will not completely remove McAfee Security Center from your computer.
Although some McAfee products can be removed this way, the security center service remains; attempting to stop it manually results in an Access Denied error.
How do I uninstall McAfee from Windows 11 completely?
1. Use the Settings app
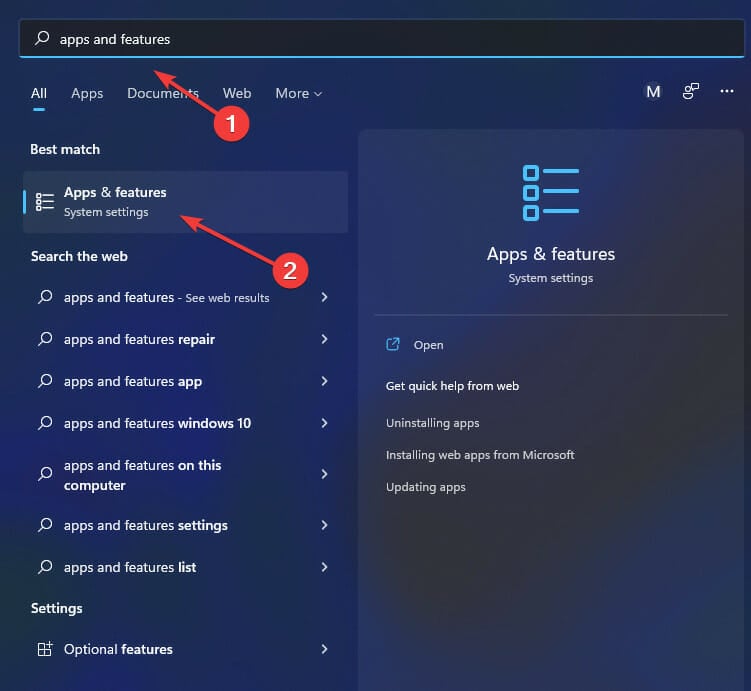
- Search Apps and Features in the taskbar and choose the first option.

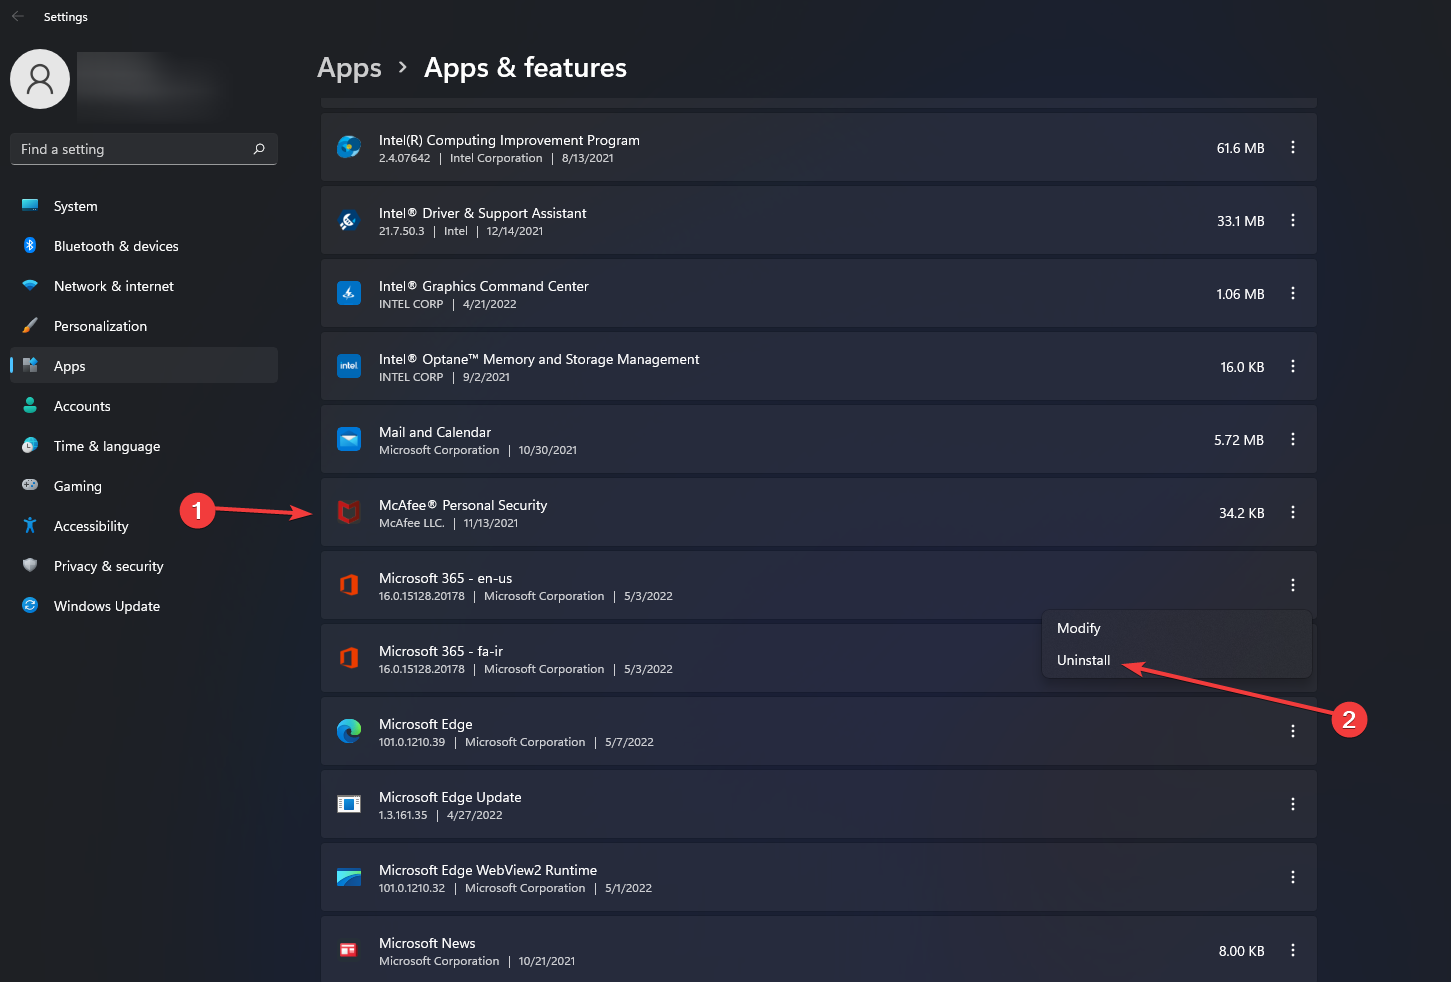
- Scroll down to find the McAfee product you’re trying to uninstall and click the three-dot menu next to the mentioned size.

- The uninstaller should now appear. Select all of the McAfee products that are currently installed from this list and then click Remove.

- Click on Remove again.

2. Use a reliable removal tool
- First, download the CCleaner tool.
- Run the application.
- Launch the CCleaner app on your PC.
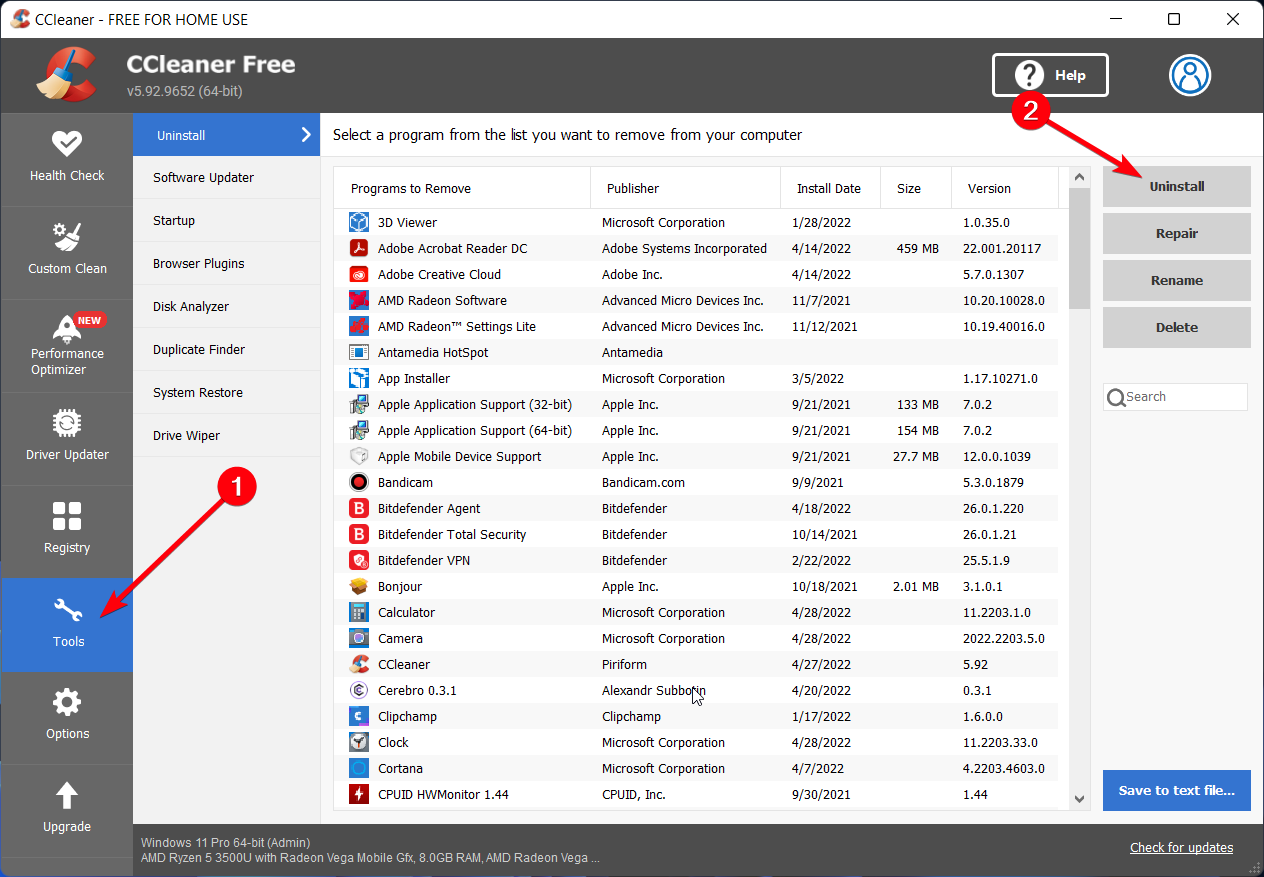
- Go to Tools.

- Search the McAfee antivirus in the list and press Uninstall.
You can as well use the Custom Clean function to analyze your computer and erase junk files or registry entries left behind from uninstalled apps.
This way, your system will get rid of useless software files and increase the overall speed and performance while performing more complex tasks.
3. Use CMD
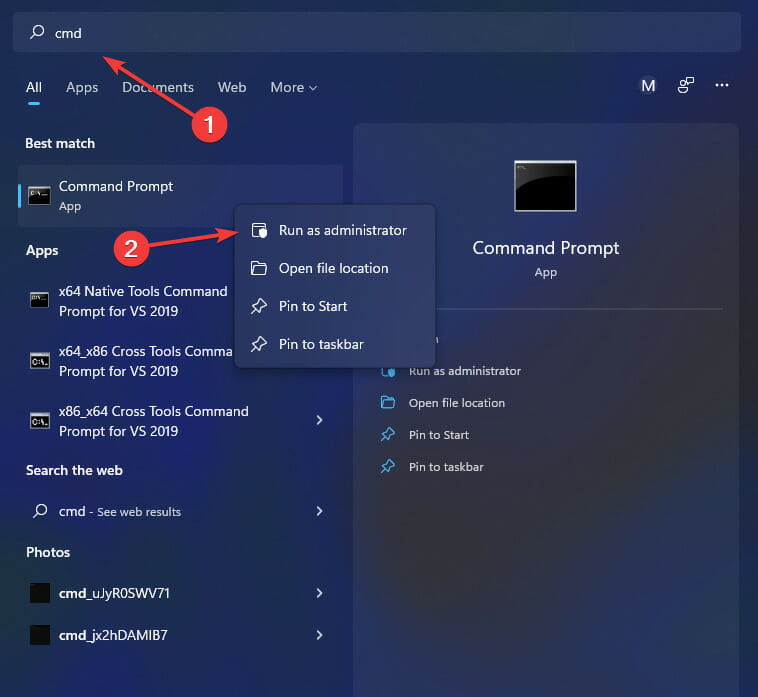
- In the taskbar search for CMD. Right-click on it and select Run as administrator once the Command Prompt app shows up in your search results.

- Now enter the following command and press Enter on your keyboard.
wmic
- Following that, type this command to get a list of all installed programs.
product get name - Look for McAfee products in the list on your screen and note down their names.

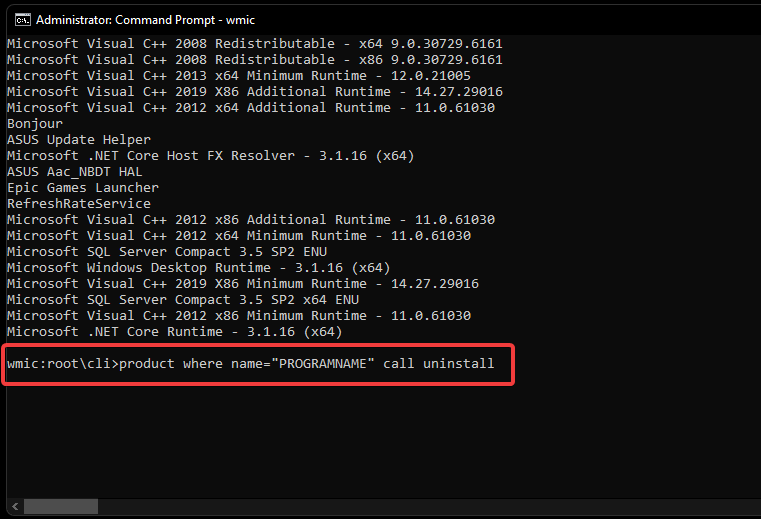
- Once done, enter the following command, and press Enter on your keyboard to execute it. Replace PROGRAMNAME with the name you noted down earlier.
product where name="PROGRAMNAME" call uninstall

4. Use PowerShell
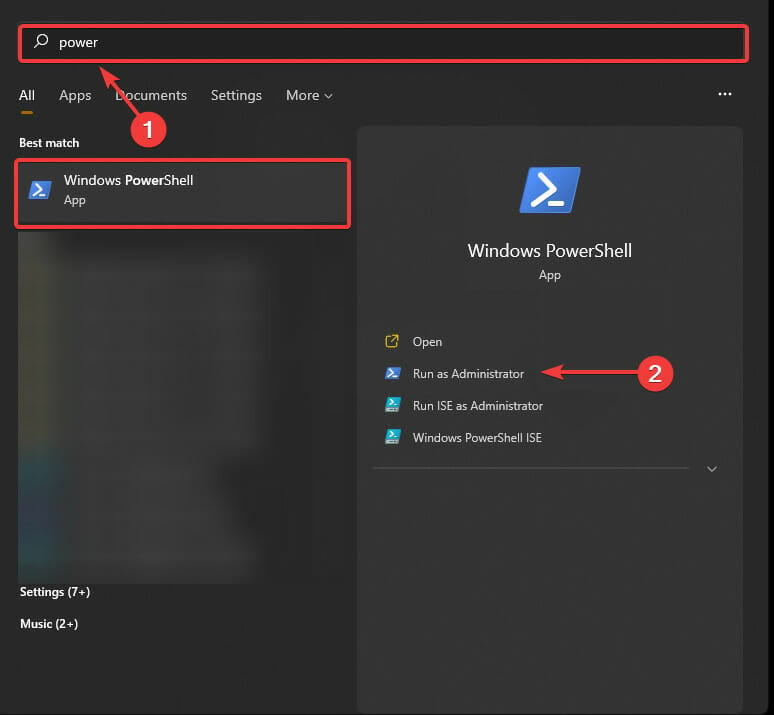
- To begin, open the taskbar and type in PowerShell. Click on Run as administrator once the app shows up in your search results.

- Run this command:
Get-WmiObject -Class Win32_Product | Select-Object -Property Name.
- Note down the product name for the concerned McAfee app.

- Now to uninstall the app run the following command but replace the PRODUCTNAME with the name of the concerned McAfee product:
$app = Get-WmiObject -Class Win32_Product `
-Filter "Name="PRODUCTNAME"".
The official Microsoft virus detection program hasn’t bothered many users, but McAfee users have complained.
Read this article if you encounter a communication error with the Event Log in McAfee.
Overall, removing McAfee can save users headaches as well as some system energy and CPU consumption. It can also help with Uihost.exe application error. Users can get rid of this anti-virus by following the techniques above. Do not hesitate to apply them if you can’t uninstall McAfee from Windows 10.
If you could successfully uninstall McAfee on your Windows PC, please let us know in the comments section below.
![]()
McAfee is by no means a bad antivirus. But users should get the choice of using it or migrating to a new antivirus.
Many users report that the installation process of McAfee is really easy, but when it comes to uninstalling it, they get a little lost.
Do not worry; we can uninstall McAfee through simple windows settings or removal tools. But, Uninstalling the program may not be enough. We always need to check residual files, settings, and services activated by the antivirus.
Check out the steps below and remove McAfee from your PC.
Table of Contents
Check out the steps serially to remove the program efficiently. We have compiled solutions covering windows settings, third-party apps, and some final checks to get the residual files, services, or tasks sorted.
Uninstall it from Window Settings
Windows has its own way of uninstalling programs. We can do it via Apps > App & features of windows settings. Follow the steps below to uninstall McAfee via windows settings.
- Press Windows Key and search/select Add or Remove Programs. This action will take you to Apps > Apps & Features.
- On the Apps list section, search McAfee.
- You should see a listing named McAfee or something like McAfee @Total Protection. Click on the three-dotted button on the right-hand side.
- Select the Uninstall option. Selecting this option should trigger the Uninstaller

- You will see a “Select What you want to Remove “section in the Uninstaller. Make sure you select all the checkboxes.
- Click on Remove.

- We will see a confirmation message about ending the subscription, go ahead, and click on Continue.

- Let the process complete and select Restart Now at the end.


Now, this method should be enough for most users. But if the program isn’t uninstalled, we recommend the next alternative.
Additional Tip: We also recommend checking for McAfee’s Webadvisor and uninstalling that too.
Use Removal Tool
McAfee has its own removal tool that users can download and use. The official title given to this tool is “McAfee Consumer Product Removal Tool (MCPR).”
There are a couple of things that the McAfee company emphasizes. Make sure you follow the suggestions below:
- We should always download a fresh copy of the tool before each use. This action ensures that we are using the latest removal tool version.
- The removal tool is primarily focused on removing components required for the reinstallation of the program. It is not made to get rid of 100% of the components.
- You will have to compulsorily restart the PC after using the program.
- It is also recommended to save unsaved files and close unnecessary programs before running the removal tool.
Follow the steps below to understand how to use the tool.
- Download the MCPR tool for the official McAfee website.
- Run the program.
- We will get a confirmation message asking us if we want to allow this app to make changes to our device. Make sure you select Yes.
- Once the tool runs, click on Next.
- Check the Agree box on End User Agreement License and select next.

- You will be asked to do a security validation CAPTCHA, complete it and select next.

- Let the uninstallation process complete.
- Click on Restart.


There are also plenty of third-party Uninstallers that can get rid of McAfee. E.g., IObit Uninstaller, Revo Uninstallers, Geek Uninstaller, Z Soft Uninstaller, etc. However, we only recommend trying these uninstallers if the McAfee company’s Uninstaller doesn’t work.
If you are using the enterprise version of McAfee software, there is a separate tool called EPR Removal Tool which can also be downloaded from the official McAfee website.
Check & Clean Any Residual files & Settings
Once the above options are done, we recommend checking the following elements to ensure no residual files exist on the PC.
Check Files Manually
Check McAfee listing on the following file paths in the drive that houses the operating system. If you do not find any listing in one of these paths, move on to the next. Do this till all of these paths are checked.
- C:\Program Files
- C:\Program Files\Common Files
- C:\Program Files (x86)
- C:\Program Files (x86)\Common Files
- C:\ProgramData
- C:\Users\USERNAME
- C:\Users\USERNAME\AppData\Local
- C:\Users\USERNAME\AppData\Roaming
Clean Registry
Please backup your registry before doing this step just to be safe. Mistakes in the registry can be fatal to the operating system.
- Press Windows Key + R and run regedit

- You will see 5 HKEY listings, click on each one & press Ctrl + F, to search McAfee
.
- If any listing pops up, right-click on it and select Delete.


Check Task Scheduler
Check and disable any leftover tasks in the windows task scheduler with listings titled McAfee or McAfee Updater.
- Press Windows Key and search/ select Task Scheduler
- Check the list of tasks and Delete McAfee listings.


Check Windows Services
Check and disable any windows services with the McAfee listing if found.
- Press Windows Key + R and run services.msc

- Search any listing with the name McAfee. Right-click on it to select Properties.
- Click on Stop.
- Under startup type, select Disabled and select apply.
- Press Windows Key and search CMD.
- Right-click on it and select Run as administrator.

- Run the following command by replacing the service name with the actual name of the service with McAfee included on it.
sc delete service name


McAfee still doesn’t Go Away?
Suppose none of these options work for you. We recommend contacting the technical support of McAfee. You can contact them via their official website.
What to Do After Removing McAfee from Windows 11?
Congratulations, you have successfully removed the antivirus program from the PC. But if you leave it as it is, your PC is vulnerable to attacks. You should consider either of the following options:
- Use Windows Defender (built into Windows 11)
- Use an alternative antivirus program
There are plenty of antivirus brands in the market like Norton, Kaspersky, AVG, Avast, Bitdefender, and more. Make sure you read the features of each antivirus before choosing the best one that suits your needs.
This process is essential because each antivirus program has its own specialty.
Some of the important factors to consider are:
- VPN functions
- Password Manager
- Resource usage during deep scans
- Customer Support
- Dark Web monitoring
- Cloud backups
- Ransomware/ Malware / Online threat protection
- Price points
We highly recommend checking out google reviews and threads on Reddit/Quora to see past customer experiences before choosing a new antivirus program.
An alternative to third-party antivirus programs is using the Windows defender. The defender will automatically disable itself when the antivirus is turned on.
Once an antivirus program is uninstalled, it should turn itself back on. However, sometimes it does require a reboot before it activates.
We can also run third-party antivirus and defender simultaneously.
If it’s still not working, you may have to do a bit of troubleshooting. We have a specific article dedicated to this issue. We recommend checking it out to solve the issue of Windows defender not working.