Если вам понадобится программа HyperTerminal в Windows 7, то смею вас огорчить: ее там больше нет. По какой-то причине разработчики компании Microsoft перестали включать эту замечательную утилиту в состав своих ОС (Vista, Server 2008/R2, Windows 7). Вероятно, одной из причин такого решения являться тот факт, что COM порты на современных компьютерах практически отсутствуют, а если и есть, то покрыты толстым слоем пыли…
Напомним, что HyperTerminal – это приложение, позволяющее эмулировать работу терминала при взаимодействии с удалёнными устройствами по последовательной шине (RS-232), dial-up-у или протоколу TCP/IP (последнее скорее редкость, предпочтительнее использовать telnet). Через консольный COM порт обычно настраивают различное сетевое оборудование, такое как маршрутизаторы, модемы, свитчи, АТС и т.д.
Так как же работать с COM-портами и устройствами на них в Windows 7 , когда нужен функционал старого доброго гипертерминала?
Используем стандартный HyperTerminal из Windows XP
Чтобы вернуть HyperTerminal в Windows 7 достаточно просто скопировать файлы данной программы из Windows XP. Нам понадобятся следующие файлы:
- C:\Program Files\Windows NT\hypertrm.exe
- C:\WINODWS\system32\hypertrm.dll
- C:\WINODWS\Help\hypertrm.chm
- C:\Windows\Help\hyperterm.hlp
Скопируйте их в отдельный каталог в Windows 7, после чего можно запустить гипертерминал в Windows 7, открыв файл hypertrm.exe с явными правами админа (Run as administrator по правой кнопочке мыши).

Для тех счастливчиков, которые уже полностью мигрировали на Windows 7 и в чьем ведении не осталось Xp-шек, в архиве публикую все необходимые файлы.
Скачать hyperterminal для windows 7: HyperTerminal_for_win7.zip (215 Кб)
Putty как аналог гипертерминала
Если вы хотите радикально избавиться от устаревшего гипертерминала, придется искать его аналоги для Windows 7.
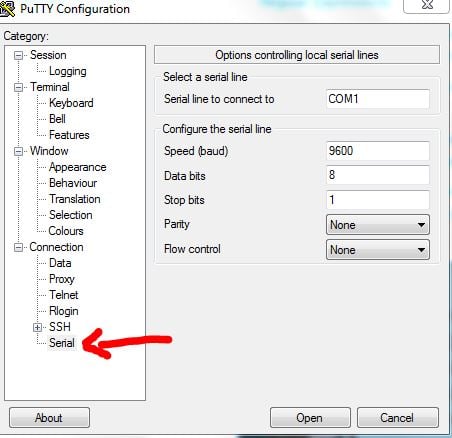
Из наиболее удобных вариантов аналога мне видится утилита Putty (тем более она входит в арсенал практически любого администратора). Все, что необходимо сделать для работы Putty с локальным COM-портом, выполнить следующую настройку:
 В Windows 7 по умолчанию нет этой замечательной программы. Выход из положения есть, точнее 3 выхода:
1. Использовать PuTTy
2. Скопировать файлы Hyperterminal из папки Windows в рабочей системе XP. Копируем :
C:\Program Files\Windows NT\HYPERTRM.EXE
С:\Windows\Help\HYPERTRM.CHM
C:\Windows\Help\HYPERTRM.HLP
C:\Windows\System32\hypertrm.dll
В отдельную папку и оттуда запускаем.
3. Используем установочный диск с Windows XP (или iso образ).
На диске находим папку I386. Оттуда копируем файлы HYPERTERM. с расширениями .CH_, .DL_, .EX_ и .HL_ куда-нибудь в локальную папку, например C:\Temp. Заходим из командной строки в эту папку и выполняем команду:
С:\Temp>expand -R hyper*.* с:\temp
Если все сделано правильно — файлы распакуются, а командная строка покажет вам успешное выполнение команды.
Теперь у вас есть hyperterminal на Windows 7. Не забывайте запускть его от имени администратора.
Everything you need to use HyperTerminal on your PC
by Tashreef Shareef
Tashreef Shareef is a software developer turned tech writer. He discovered his interest in technology after reading a tech magazine accidentally. Now he writes about everything tech from… read more
Updated on
Reviewed by
Alex Serban

After moving away from the corporate work-style, Alex has found rewards in a lifestyle of constant analysis, team coordination and pestering his colleagues. Holding an MCSA Windows Server… read more
- If you need to use HyperTerminal on Windows 7, you can move it over from Windows XP.
- You can also download the private edition of HyperTerminal from the official website.
The original HyperTerminal was a popular terminal emulation software for Windows. It helps to connect one computer to another remote system. To use the HyperTerminal, the user requires a modem, Ethernet connection, or a null-modem cable.
Microsoft HyperTerminal is no longer available for Windows 7/8/10. However, you can still install it using a workaround. That said, there are many excellent and modern alternatives to the software that you can use.
If you are new to HyperTerminal, this is the article you need. In this article, we show you how to install HyperTerminal on a Windows 7 PC. This article also covers a popular HyperTerminal alternative and the setup process.
How we test, review and rate?
We have worked for the past 6 months on building a new review system on how we produce content. Using it, we have subsequently redone most of our articles to provide actual hands-on expertise on the guides we made.
For more details you can read how we test, review, and rate at WindowsReport.
How do I install HyperTerminal on Windows 7?
1. Move HyperTerminal from XP
- On your XP computer, navigate to the following location:
C:/Program Files/Windows NT - Copy the hypertrm.exe file to a flash drive.
- Next, navigate to the following location:
C:/Windows/System32 - Copy the hypertrm.dll file to your flash drive.
- Move both files to any directory on your PC, and you should be able to run HyperTerminal.
- Are Windows 11 Product Keys Backward Compatible?
- Windows 7 Disk Management: How to Access & Use it
- Windows 7 Simulator: How to Run & Test the OS Online
- Does PC Health Check Work on Windows 7?
2. Install HyperTerminal Private Edition
2.1 Download and install HyperTerminal
- Download the HyperTerminal Private Edition installer from the official website.
- Double-click on the installer to initialize the installation.
- If you are using Windows 7 or Vista, click Yes when the User Account Control prompts you to take action.
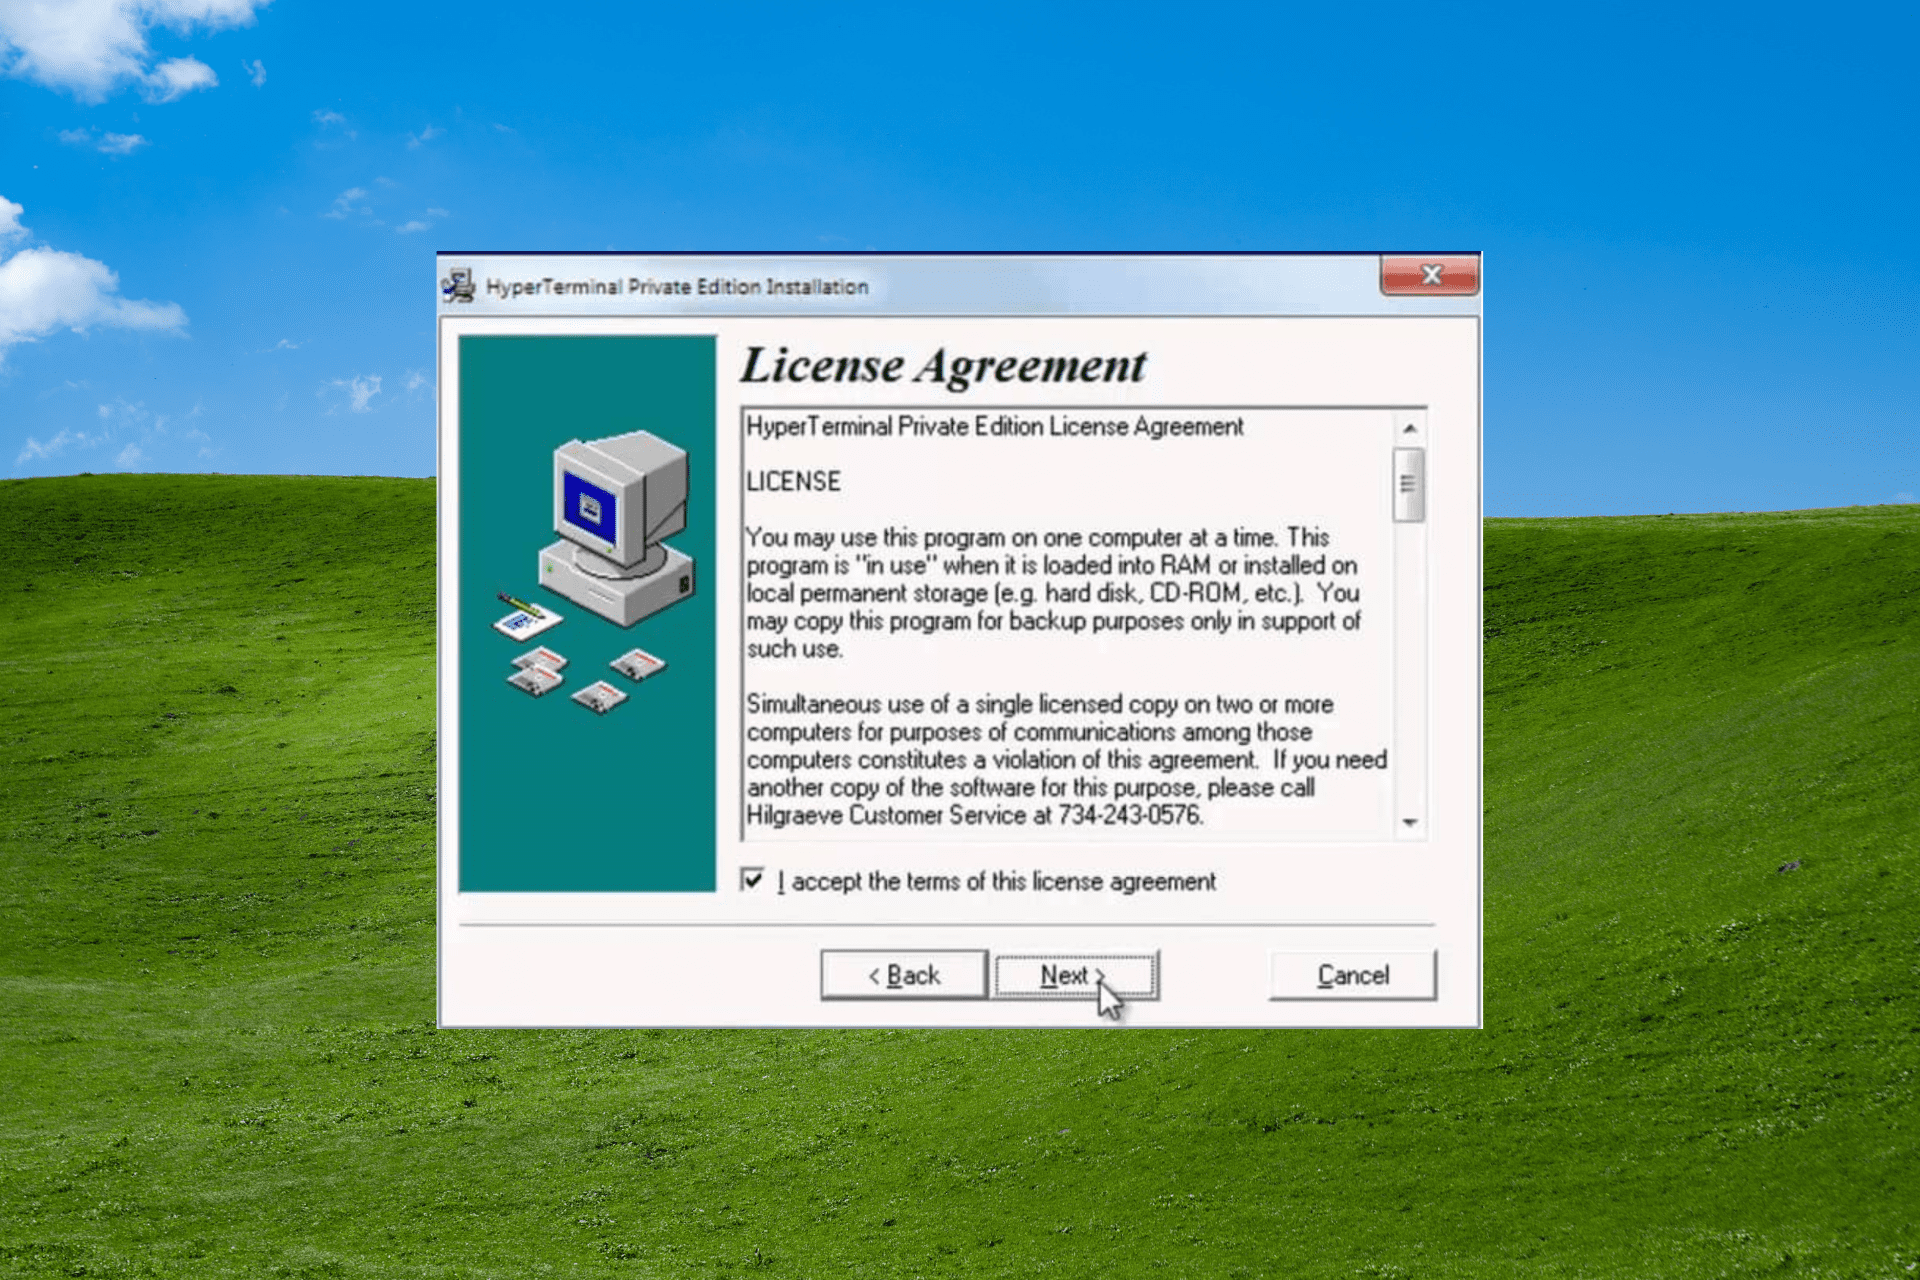
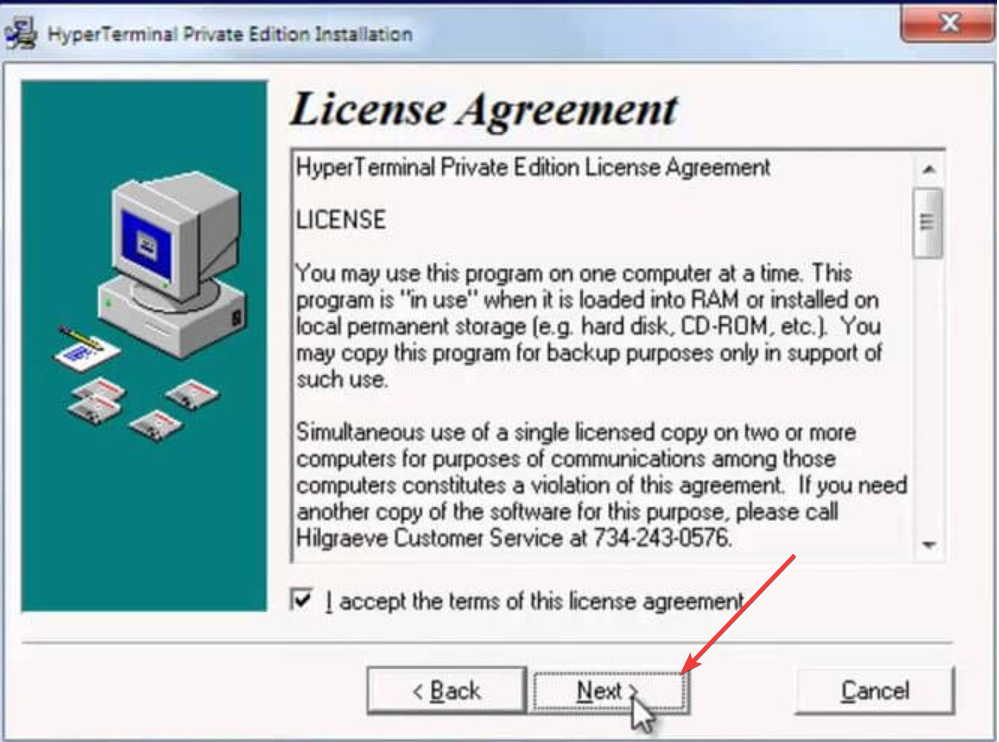
- Click Next to proceed.
- You may have to agree to the terms of the license agreement.
- Click Next to proceed.

- Next, if you want to change the default installation folder, you can specify the location.
- Click Next to proceed with the installation.
- When successfully installed, click on Finish.
2.2 Register HyperTerminal Private Edition copy
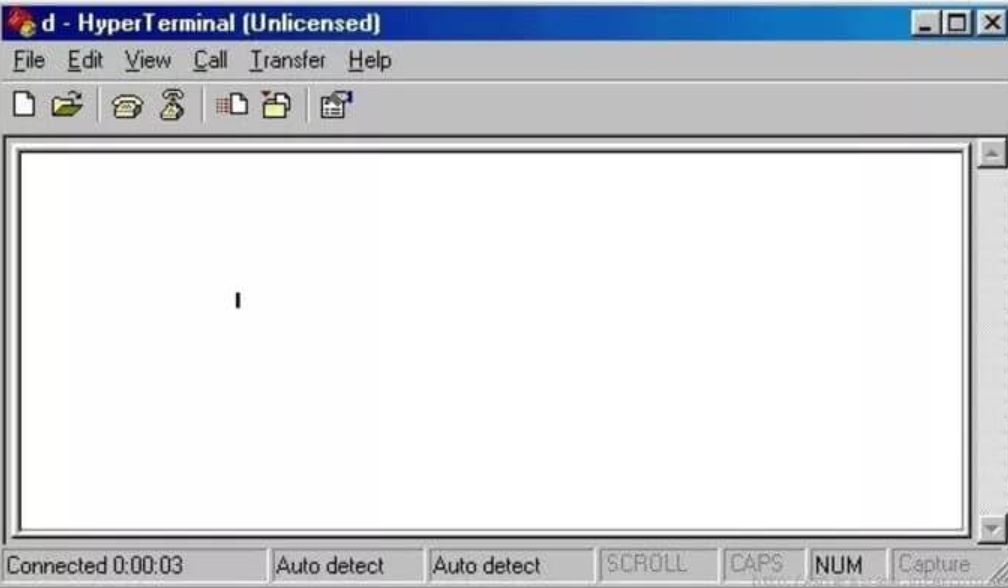
- Launch HyperTerminal client.

- Click Yes when the trial box dialog appears.
- If you haven’t purchased the license yet, you can do it now.
- You will receive the serial number in the email. Enter the license in the registration box and click OK.
If you get an Unable to write to file error during the registration, make sure you run the program with administrator rights. To do this, right-click on the HyperTerminal program and select Run as Administrator.
The HyperTerminal client comes with a free trial that you can use. However, for prolonged use, you must purchase the license.
2.3 Setup a modem connection
- Once registered, select your country and enter your area code.
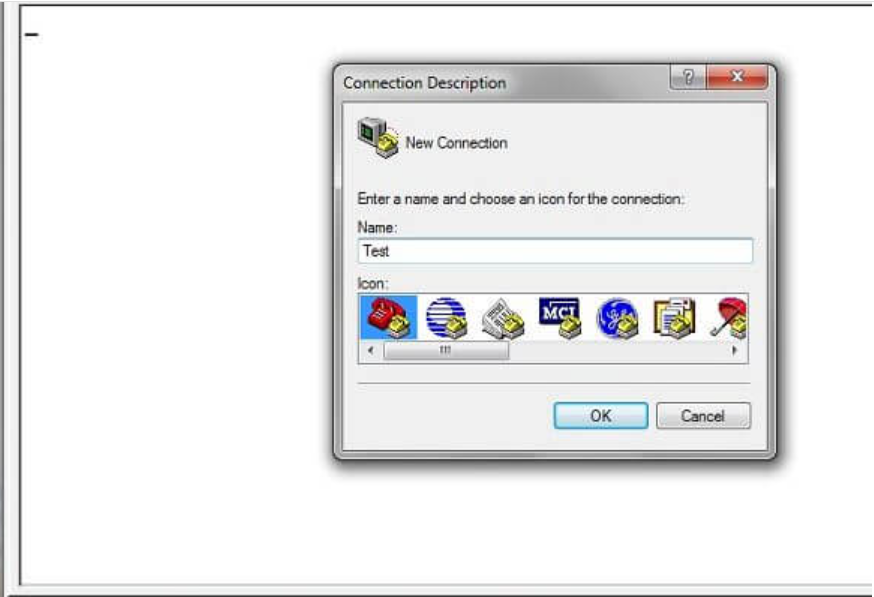
- Enter a unique name for your connection and click OK.

- Next, enter the area code and phone of the system you are connecting to, and click OK.
- If you want to manually configure the setup, click on Modify and then click on Configure for connection configuration or settings for the emulator setting.
- Click the Dial button to connect.
- To save the connection profile, click on File and select Save.
2.4 Troubleshoot modem connection
After setting up the connection, you may encounter some issues. Here are the most common connection issues and how to resolve them:
- No answer
- Check the dialing properties and make sure the phone number is correct. If not, try lowering port speeds and dialing other settings.
- No dial tone
- Make sure the modem is plugged in and receiving power.
- Asking for Host Address instead of phone number
- This error occurs if the computer fails to recognize the modem or dial-up connection. Try restarting the computer and checking if that resolves the issue.
- Data appearing in the wrong section
- Make sure you are using the correct terminal emulator for the system you are connecting.
- You can check the setting by going to File >Properties > Settings.
Installing HyperTerminal in Windows 7 is a straightforward process. By following the steps in this article, you can learn how to install the software as well as set it up for the first time.
Similarly, if you are facing issues on HyperTerminal, we have a guide to help you fix the common problems users encounter.
If you know of another simple way of installing HyperTerminal on Windows 7, leave us a message in the comments section below.
![]()
Гипертерминал — это удобное приложение, позволяющее пользователям Windows 7 осуществлять удаленное управление и отладку устройств через последовательные порты. Оно имеет простой и интуитивно понятный интерфейс, позволяющий быстро настроить соединение и провести необходимые действия. В данной статье мы расскажем, как включить гипертерминал на компьютере с операционной системой Windows 7.
Для начала откройте меню «Пуск» и выберите «Панель управления». Затем найдите ссылку «Программы» и кликните на нее. В открывшемся окне найдите раздел «Включение или отключение компонентов Windows» и кликните на нем.
Далее вам необходимо найти раздел «Гипертерминал» и поставить галочку в чекбоксе напротив этого названия. После этого нажмите кнопку «OK» и подождите, пока Windows установит гипертерминал на ваш компьютер.
Теперь, чтобы запустить гипертерминал, откройте меню «Пуск», выберите «Все программы» и найдите папку «Стандартные». В ней вы должны увидеть значок с названием «Гипертерминал». Кликните на этот значок, и гипертерминал запустится.
Гипертерминал — это отличный инструмент для работы с удаленными устройствами через последовательные порты. Он позволяет эффективно настраивать и отлаживать оборудование, а также проводить диагностику и выполнять другие необходимые операции. Включение гипертерминала в Windows 7 — простая задача, которую можно выполнить всего в несколько кликов.
Содержание
- Переход в «Панель управления»
- Поиск и выбор «Включение или отключение компонентов Windows»
- Установка галочки напротив «Гипертерминал»
- Запуск гипертерминала и его настройка
Переход в «Панель управления»
Чтобы включить гипертерминал в Windows 7, вам необходимо сначала перейти в «Панель управления». Это можно сделать несколькими способами:
1. Нажать кнопку «Пуск» в левом нижнем углу экрана. В открывшемся меню выбрать пункт «Панель управления».
2. Открыть проводник (нажать на значок папки на панели задач или нажать клавишу «Win + E»). В адресной строке проводника ввести «Control Panel» и нажать клавишу «Enter».
3. Кликнуть правой кнопкой мыши на значок «Пуск» и выбрать пункт «Панель управления» из контекстного меню.
После выполнения одного из этих действий вы попадете в «Панель управления» и сможете перейти к следующему шагу по включению гипертерминала.
Поиск и выбор «Включение или отключение компонентов Windows»
Чтобы включить гипертерминал в Windows 7, вам необходимо воспользоваться функцией «Включение или отключение компонентов Windows». Эта функция позволяет выбрать, какие компоненты Windows вы хотите установить или удалить.
Для начала откройте меню «Пуск» и введите в поисковой строке «Включение или отключение компонентов Windows». Затем выберите эту опцию из списка результатов поиска.
После открытия окна «Включение или отключение компонентов Windows» вам может потребоваться подтверждение администратора. Если это необходимо, введите пароль администратора или подтвердите действие.
В открывшемся окне вам будет представлен список компонентов Windows. Прокрутите список вниз до тех пор, пока не найдете «Гипертерминал» в списке.
Чтобы включить гипертерминал, отметьте флажок рядом с ним. Если вы хотите удалить гипертерминал, снимите флажок.
После того, как вы сделали свой выбор, нажмите кнопку «OK» для сохранения изменений.
Если вам будет предложено установить недостающие компоненты, следуйте инструкциям на экране.
После завершения процесса установки гипертерминал будет включен и готов к использованию.
Установка галочки напротив «Гипертерминал»
Чтобы включить гипертерминал в Windows 7, выполните следующие действия:
1. Нажмите на кнопку «Пуск» в левом нижнем углу экрана.
2. В открывшемся меню найдите пункт «Панель управления» и щелкните по нему.
3. В окне «Панель управления» найдите раздел «Программы» и щелкните по нему.
4. В разделе «Программы» найдите иконку «Включение или отключение компонентов Windows» и щелкните по ней.
5. Появится окно «Компоненты Windows» с отмеченными и неотмеченными галочками.
6. Прокрутите список компонентов до тех пор, пока не найдете «Гипертерминал».
7. Установите галочку напротив «Гипертермил» и нажмите на кнопку «OK».
8. Система начнет процесс установки гипертерминала.
После завершения установки можно будет использовать гипертерминал на компьютере под управлением Windows 7.
Запуск гипертерминала и его настройка
Включение гипертерминала в Windows 7 довольно просто:
Шаг 1: Нажмите кнопку «Пуск».
Шаг 2: В поисковой строке введите «гипертерминал» и нажмите Ввод.
Шаг 3: В поисковых результатах найдите программу «Гипертерминал» и кликните по ней правой кнопкой мыши.
Шаг 4: В контекстном меню выберите «Запустить от имени администратора».
После запуска гипертерминала можно настроить его для работы с нужным устройством:
Шаг 1: В открывшемся окне «Соединение с последовательным портом» выберите нужные настройки порта: скорость передачи данных, биты данных, контроль четности и т.д.
Шаг 2: Нажмите кнопку «ОК» для сохранения настроек.
Шаг 3: В основном окне гипертерминала введите команды для взаимодействия с устройством.
Примечание: Обязательно запомните порт, к которому подключено устройство, чтобы успешно установить соединение.
Вот и все! Теперь вы знаете, как включить гипертерминал в Windows 7 и настроить его для работы с устройствами через последовательный порт.
Unfortunately, Hyperterminal is not included with Windows 7; however, you can still control your serial devices using alternate methods. In this guide, I will discuss several alternatives. By the end, you will know how to set one up and which one to use. The reason for its exclusion from Windows 7 is a question for Microsoft, and they provide an answer HERE.
Alternative #1: PuTTY.
PuTTY is an awesome, free, and open-source emulator that has been around for 16 years. You can download PuTTY from https://www.chiark.greenend.org.uk/~sgtatham/putty/latest.html.
How to use Putty as a Hyperterminal.
You will need to have a COM port on your machine, whether a laptop or desktop, in order to connect your console cable first. If you do not have one, then a USB port is essentially available on almost all computers, so you would need a DB9 to USB converter. Assuming you now have the converter/port, you will connect one end to your device and the other end to the DB9, which goes into the USB port on your computer. Alternatively, if you have a COM port, then connect directly.
You now need to have the COM port number, which you can obtain from the Device Manager -> Ports (COM & LPT).
Once you have it, you will then begin to configure PuTTY with your console settings.
Open PuTTY and click ‘Serial’ from the left pane, which is the last option. This is where you will configure your terminal settings. For example, for a Cisco router, the settings will appear like this:
Now, click the ‘Session’ button in the left pane, select the first option, and choose ‘Open.’
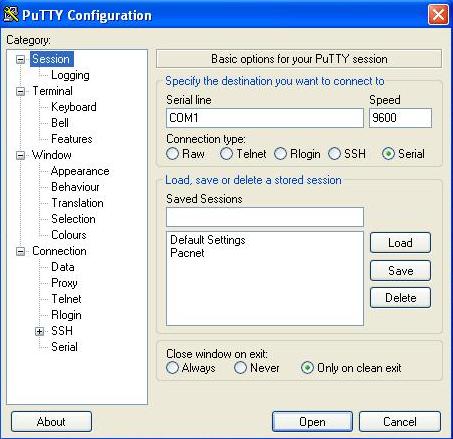
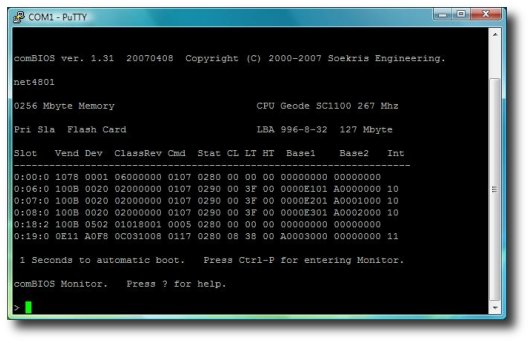
This will connect you to your device, and you will be using PuTTY as your Hyperterminal.
Installing HyperTerminal on Windows 7.
Now, if you still do not want to use PuTTY and prefer to have Hyperterminal back, here is what you will need to do.
In order to do this, you will need to have access to a Windows XP computer from which you can copy the three files we need.
C:\Program Files\Windows NT\hypertrm.exe
C:\WINDOWS\system32\hypertrm.dll
C:\WINDOWS\Help\hypertrm.chm
Once you have copied the files mentioned above, create the following folders on your Windows 7 and copy the three files into them.
For a 32-bit Windows 7 create a folder
C:\Program Files\HyperTerminal
For a 64-bit Windows 7 create a folder
C:\Program Files (x86)\HyperTerminal
Now, from the folders, you can create a shortcut for hypertrm.exe and run it to get HyperTerminal back, or if you wish to have HyperTerminal on the Start Menu, put the hypertrm.exe file in C:\ProgramData\Microsoft\Windows\Start Menu\Programs.

Kevin Arrows
Kevin Arrows is a highly experienced and knowledgeable technology specialist with over a decade of industry experience. He holds a Microsoft Certified Technology Specialist (MCTS) certification and has a deep passion for staying up-to-date on the latest tech developments. Kevin has written extensively on a wide range of tech-related topics, showcasing his expertise and knowledge in areas such as software development, cybersecurity, and cloud computing. His contributions to the tech field have been widely recognized and respected by his peers, and he is highly regarded for his ability to explain complex technical concepts in a clear and concise manner.