Устанавливать будем на VirtualBoxopen in new window, скачиваем iso образ Windows Server 2016 с сайта Microsoftopen in new window или раздачуopen in new window с уже интегрированными обновлениями.
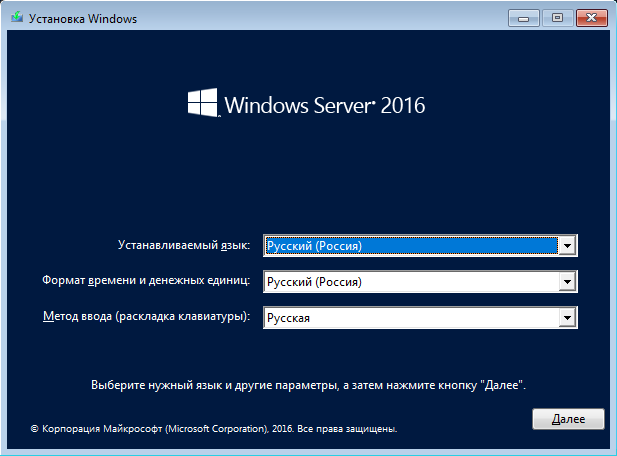
Добавляем и запускаем новую ВМ, начинается процесс установки:
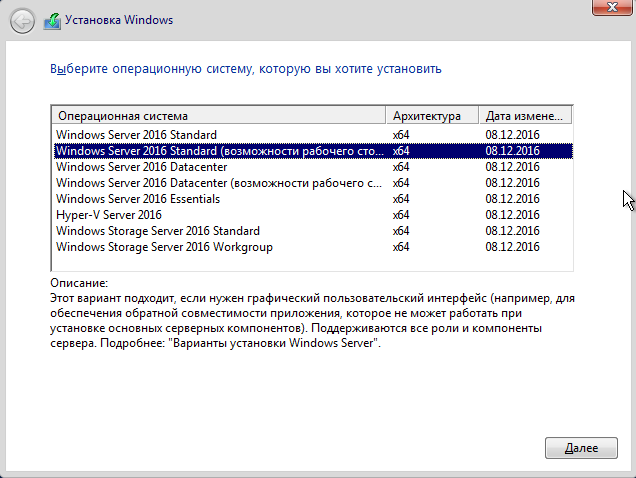
Выбираем версию с рабочим столом.
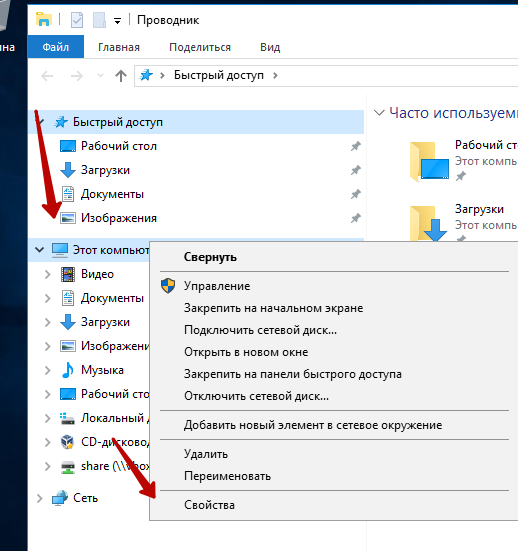
Настройка удаленного подключения
Открываем окно настроек системы
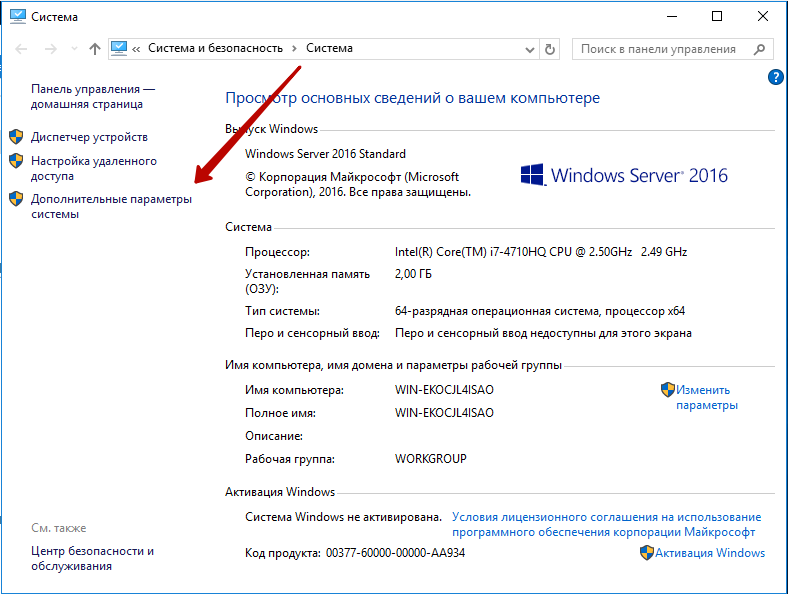
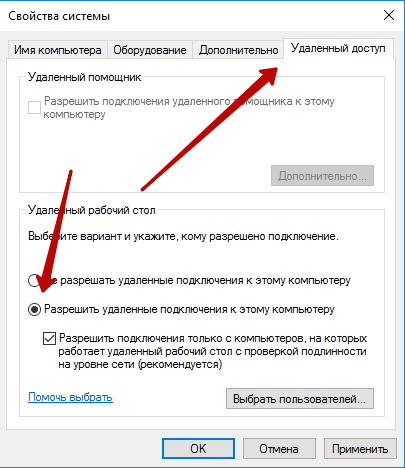
Включаем удаленный доступ
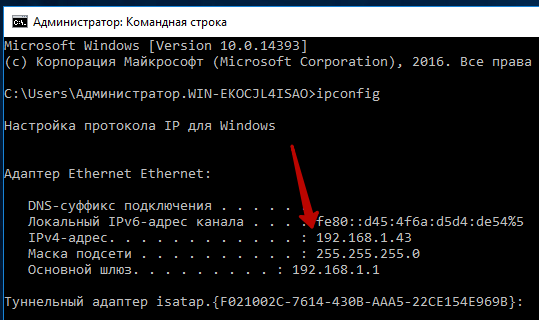
Теперь запишем IP гостевой системы
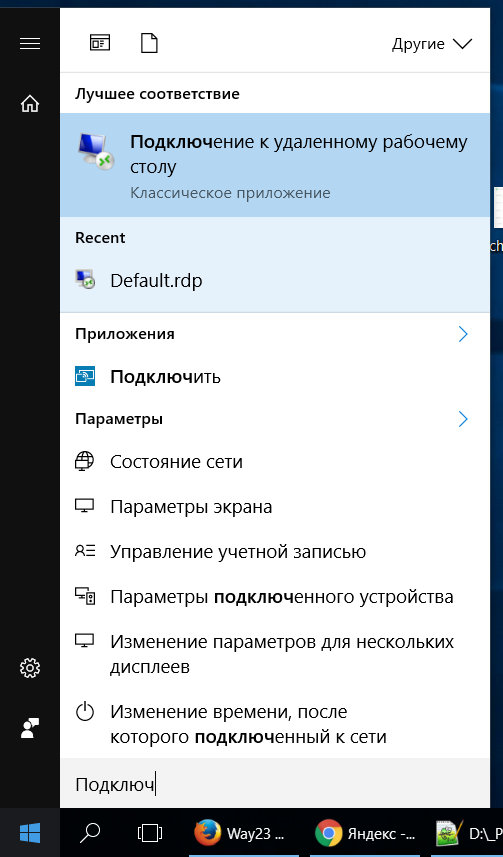
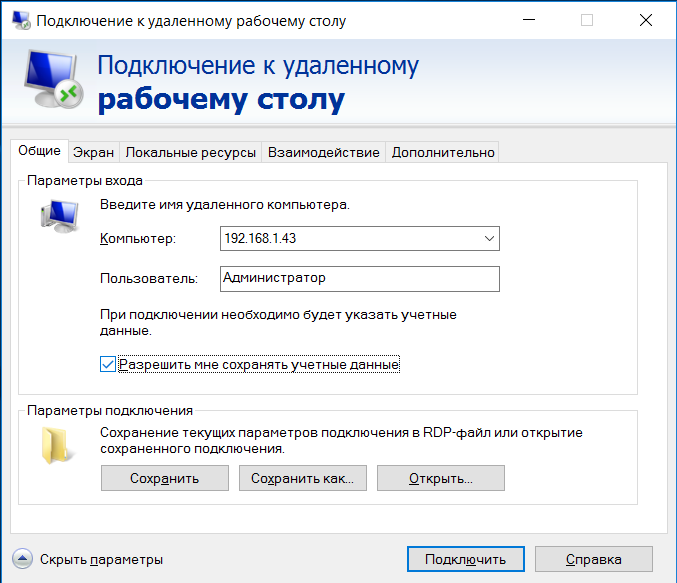
Переходим в хостовую систему, настраиваем и сохраняем новое подключение
Updated by
Daisy on Jul 20, 2023
Are you trying to install Windows Server 2016 on a virtual machine? Here in the below-offered tips, we’ll offer you secure, effective and detail tutorial steps to guide you prepare VMware workstation and install Windows Server 2016 on Virtual Machine without any obstacles. Feel free to follow below-offered steps to install Windows Server 2016 on your VMware workstation now:
- Part 1. Create and customize the virtual machine
- Part 2. Extend VM system partition for installing Windows Server 2016
- Part 3. Install Windows Server 2016 on a virtual machine
Tip: If you have any important business or personal files on your VMware machine, please backup or move those files into an external storage device in advance.
So now you may follow to prepare VMware and install Windows Server 2016 on your virtual machine with ease.
Part 1. Create and customize the virtual machine
- Open VMware > Click Create a New Virtual Machine;
If you don’t have VMware installed on your computer, you may need to download and install one in your PC first.
- Select Custom (Advanced) to specify the VMware settings and click on Next;
- Leave Virtual Machine Hardware Compatibility settings by default > Click Next;
- Add an installer image to the virtual machine and select Installer disk image file (ISO) > click Browse > select Windows Server 2016 ISO file and click Next;
- Select Windows Server 2016 version from the Microsoft windows > Next;
- Enter a name for the virtual machine and browse a location where you want to store the installation files by clicking Browse > Next;
- Choose how many processors your server should use on Processor Configuration > Next > Specify the amount of memory for the VMware (MB) and click Next;
- Select Use Network Address Translation (NAT) or Use bridged networking to connect and use the internet, as a network type > Next;
- Select I/O Controller Types as default > Next;
- Select disk type SCSI > Next > Create a new virtual disk by clicking create a new virtual disk for the virtual machine;
- Specify the disk amount and click Next > check the settings that you’ve customized and click Finish.
Now you’ve finished the whole process of creating and customizing a new virtual machine on your PC. You can move on to prepare and install Windows Server 2016 on your newly created VMware workstation now.
Part 2. Extend VM system partition for installing Windows Server 2016
Normally, a VM machine requires a minimum of 32GB and 2GB for Server with Desktop Experience installation option. Please do ensure that enough space is left in the system partition and system reserved partition on your VMware Workstation. Here below you may try EaseUS Partition Master Server — a professional Windows Server partition manager software to extend system/system reserved partition within 3 simple steps:
EaseUS Partition Master Enterprise
Your trustworthy Windows Server disk manager.
- Extend System drive, combine/split partitions.
- Clone disk, migrate OS to HDD/SSD.
- Convert MBR to GPT, GPT to MBR, no data loss.
- 1-click adjust disk layout, create volumes at one time.
24/7 Tech Chat
Free Inquiry
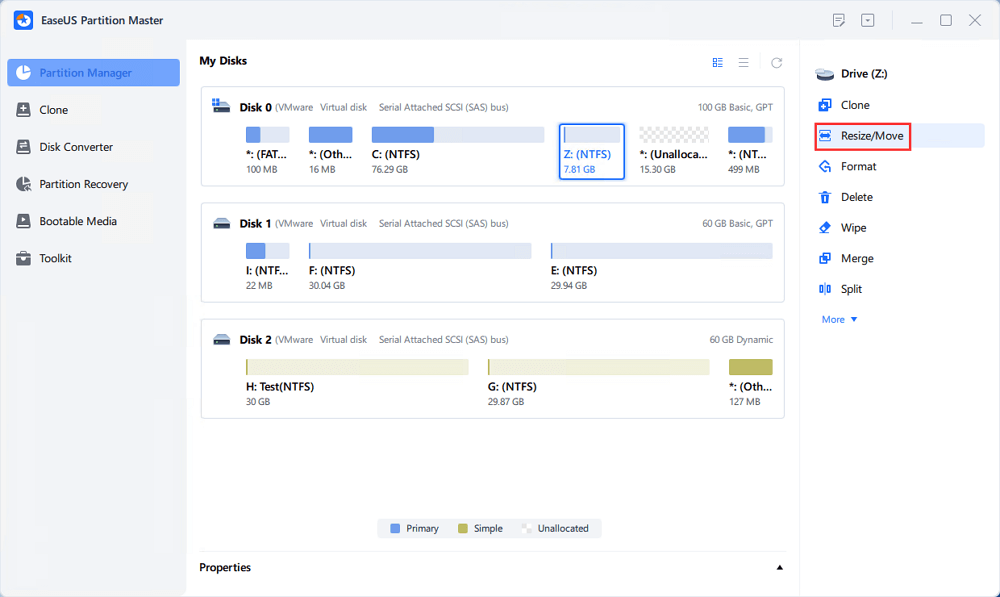
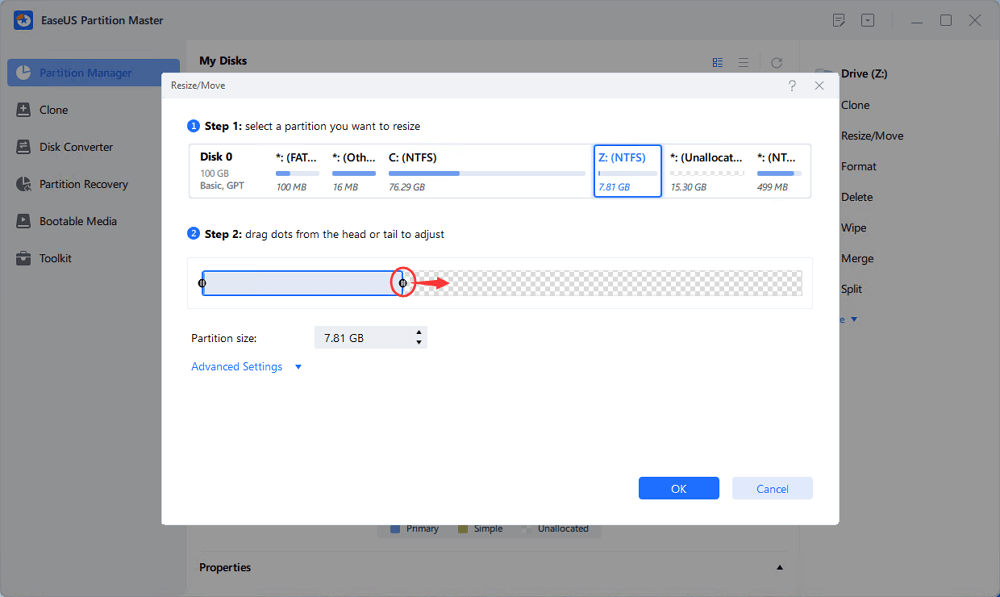
Step 1. Locate the Target Partition.
Go to Partition Manager, locate the target partition and select «Resize/Move».
Step 2. Extend the Target Partition.
Drag the partition panel rightward or leftward to add the unallocated space into your current partition and click «OK» to confirm.
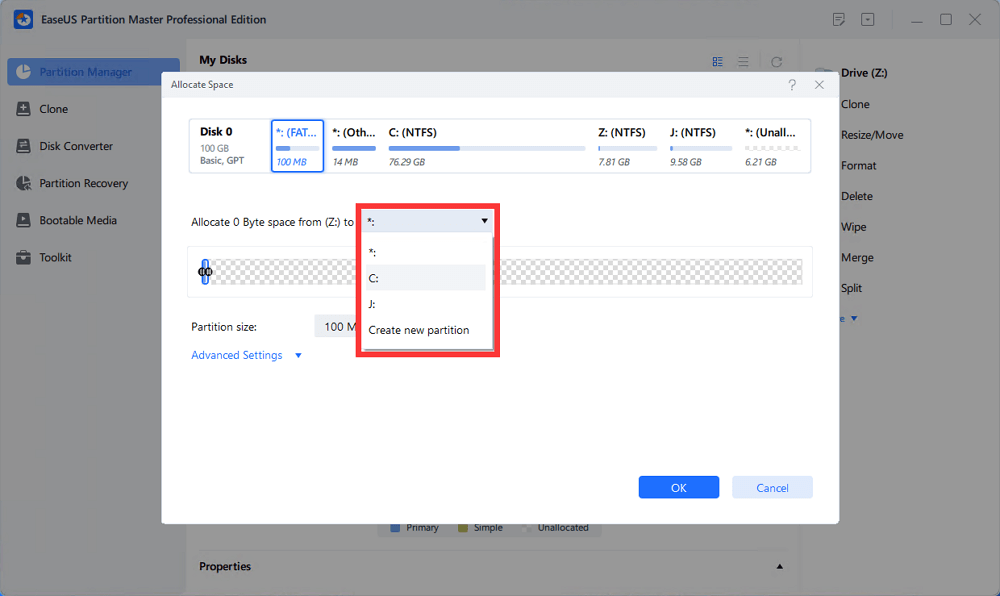
Extra Option: Get Space from Another Drive
If there is not enough unallocated space on your disk, right-click on a big partition with enough free space, select «Allocate space».
Then select the target partition that you want to extend at the allocate space to column.
Step 3. Execute Operations to Extend Partition.
Drag the dots of the target partition into the unallocated space and click «OK».
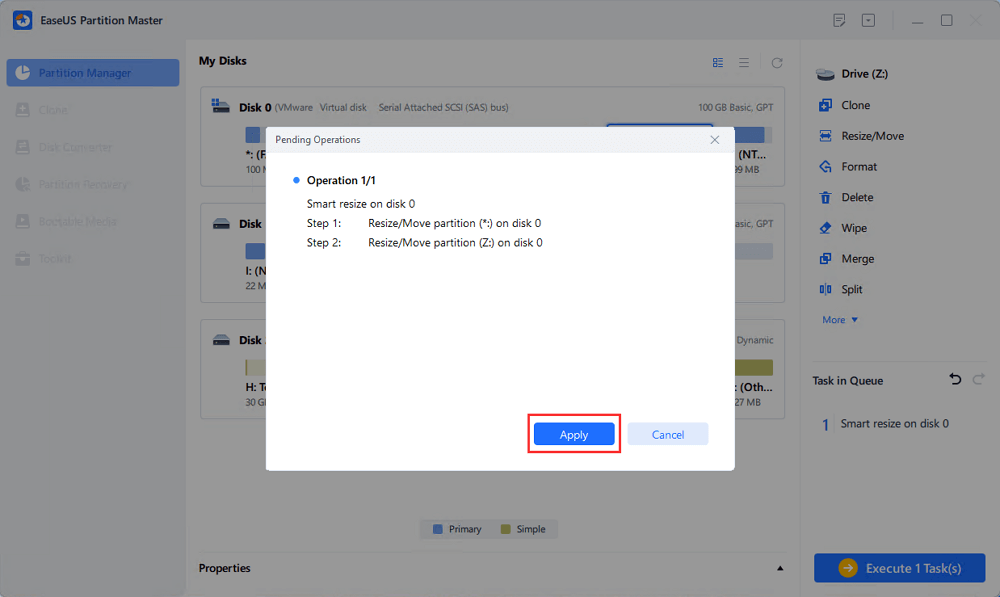
Then Click the «Execute Task» button and click «Apply» to keep all the changes.
Besides extending VM system partition, you can also apply EaseUS Partition Master to adjust the disk layout of your VM or Windows Server disk with simple clicks.
24/7 Tech Chat
Free Inquiry
Now you can follow the below steps to install Windows Server 2016 on your virtual machine without any obstacles:
1. Open VMware Workstation on your host computer > click on Power on this virtual machine;
2. Specify Language, Time Zone, and Keyboard when the virtual machine powers on > click Next;
3. Tab Install now to install Windows Server 2016 on virtual machine > Select the right operating system of Windows Server editions you need and click Next;
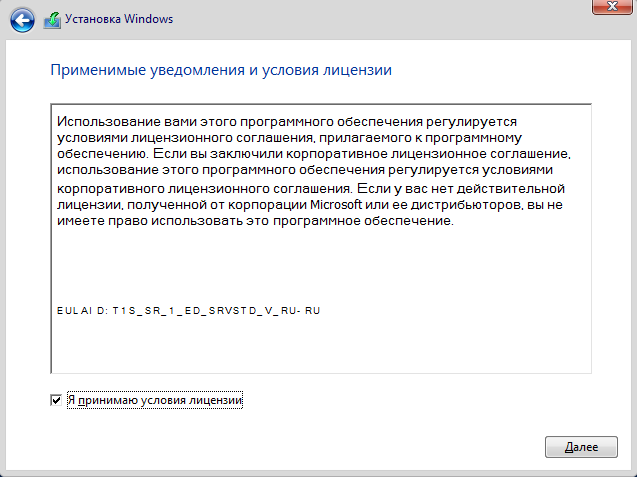
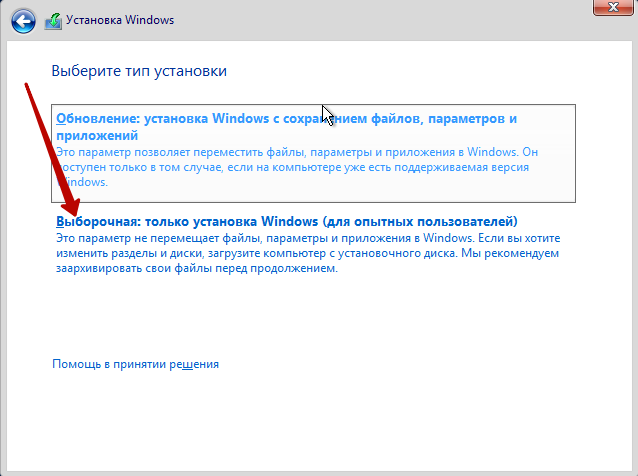
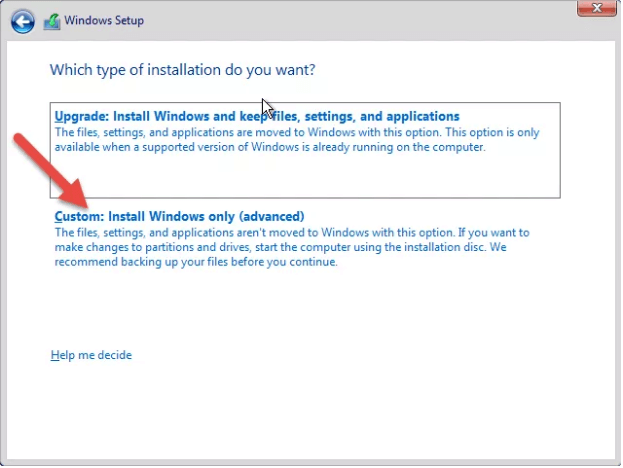
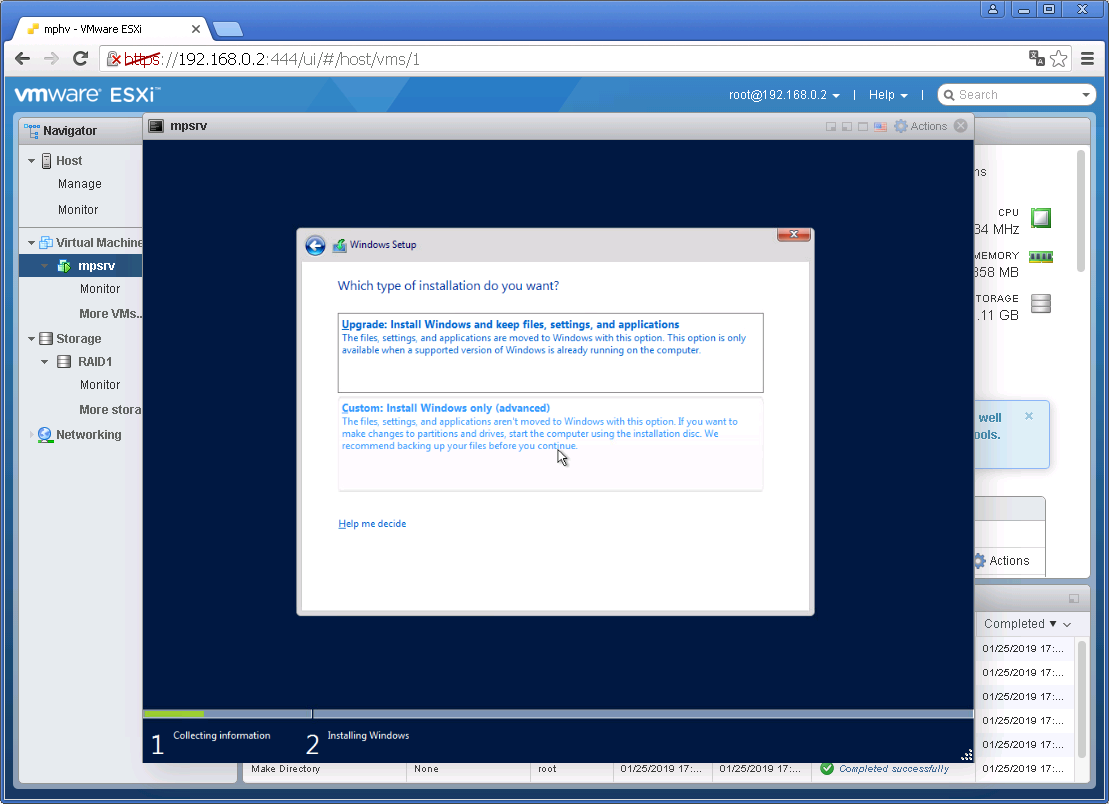
4.Tab I accept the license terms > Next > Click Custom: Install Windows only (Advanced) for installing the server custom;
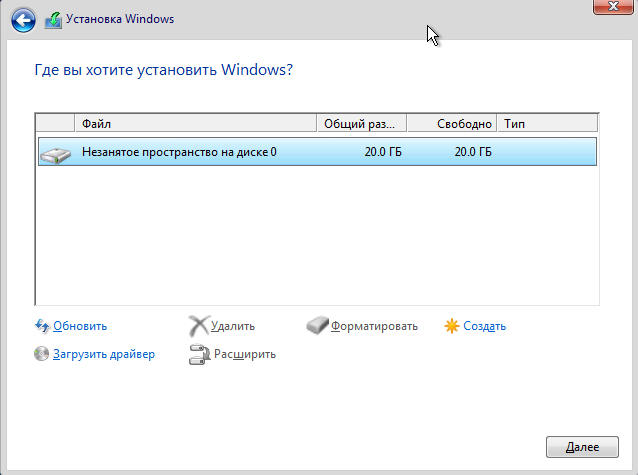
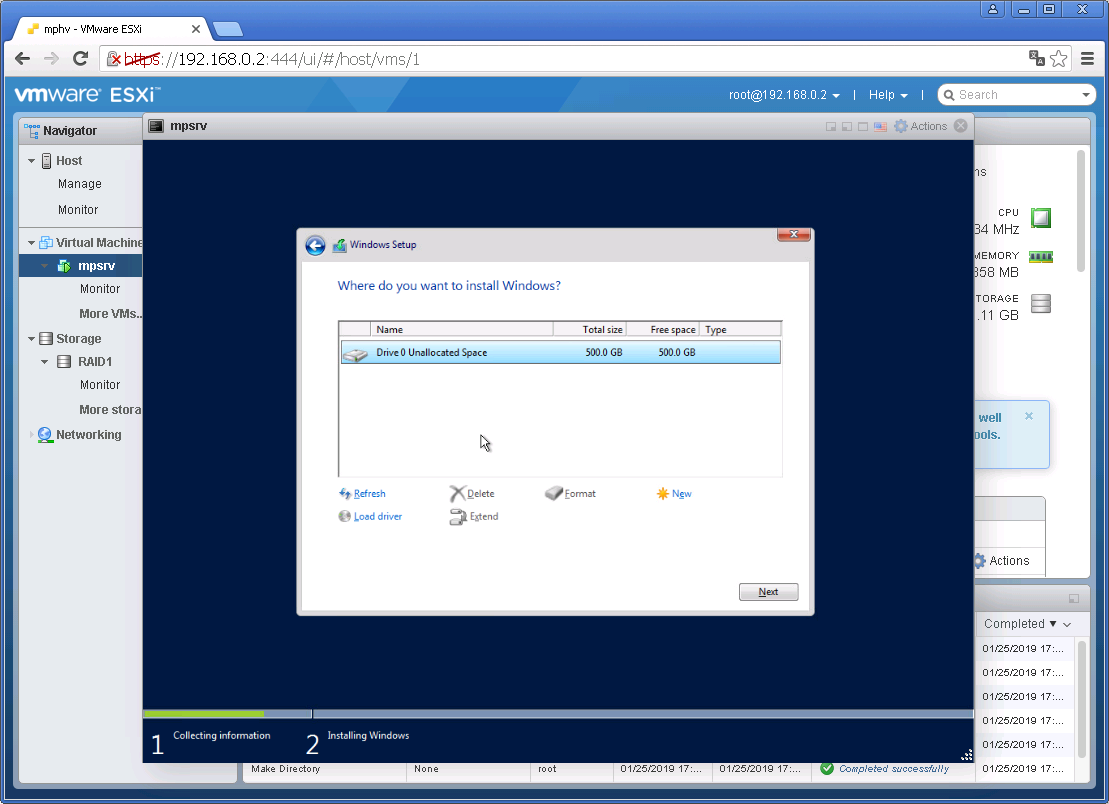
5. Select the disk to install Windows server on and click New > Specify the amount (MB) and click Apply > Next;
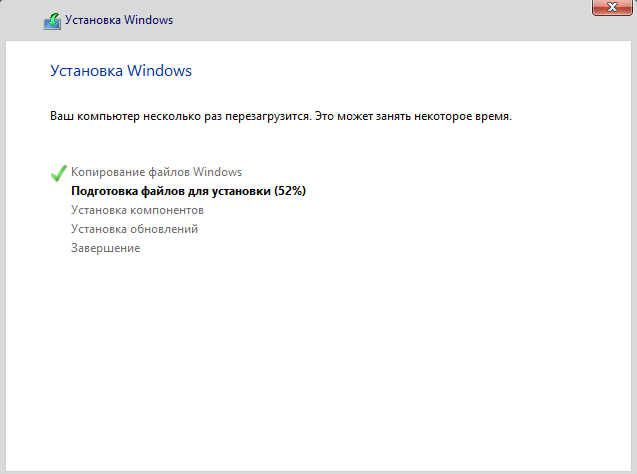
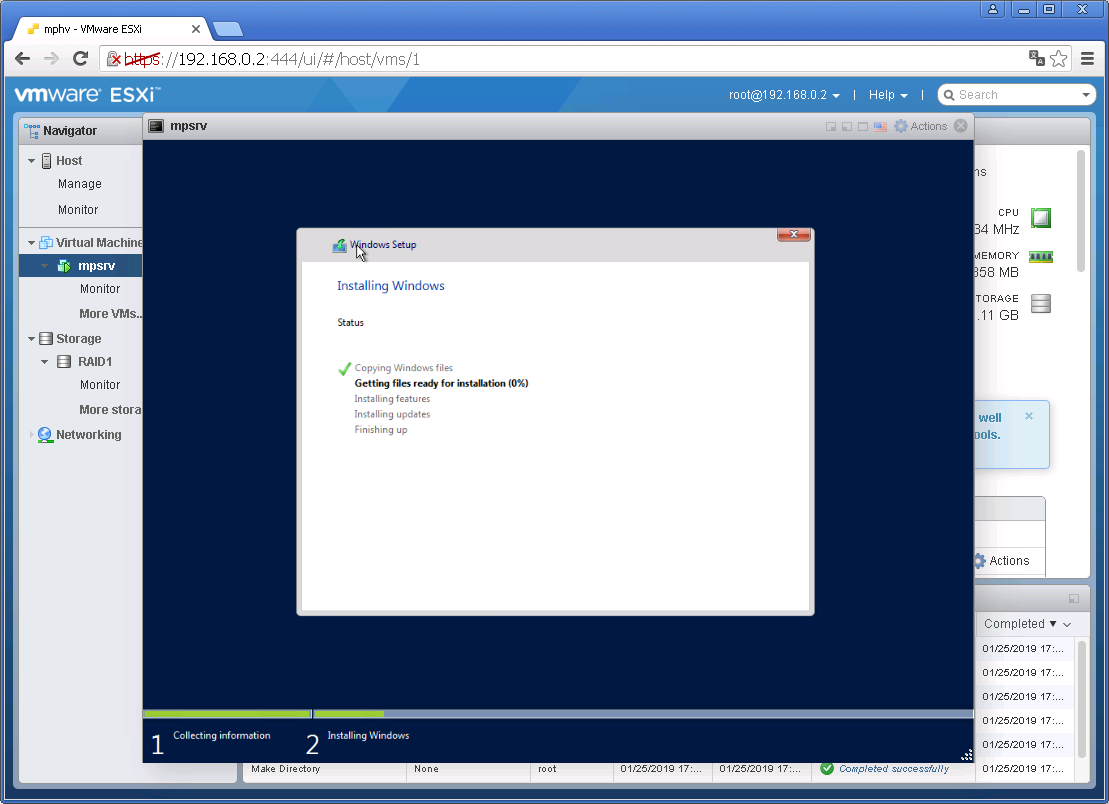
6. The server will copy all files to the disk, mount the files from the windows image, install features, updates and then it will take time to finish and reboot;
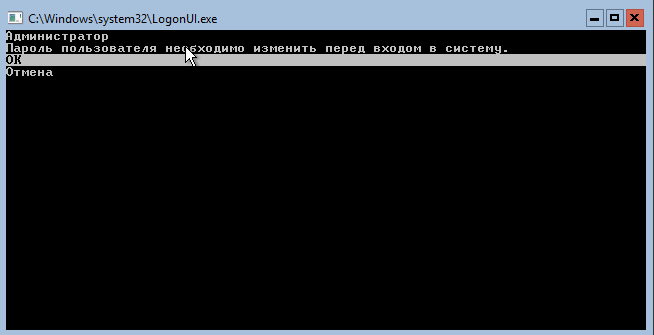
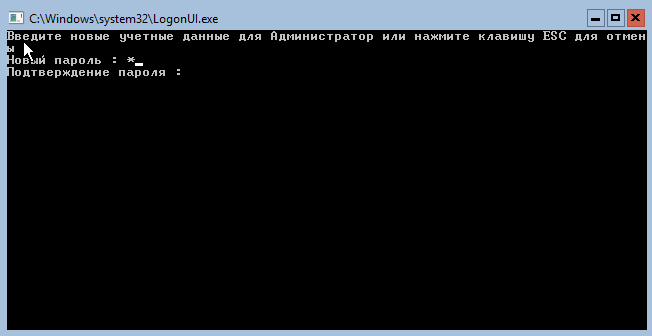
7. After reboot, set a complex password with uppercase, lowercase, symbols, and numbers and click on Finish;

8. When the customization process is finished, click on the button: ctrl + alt + del and sign in to Windows Server;
Now your Windows Server 2016 installation is completed and you can start using and manage it on your VMware workstation.

![]()
Инструкция в картинках по установке операционной системы Windows Server 2016 на виртуальную машину, которая находится на гипервизоре ESXi 6.7.
Для начала создадим саму виртуальную машину, если её у нас ещё нет:
ESXi 6.7 — создаём виртуальную машину
В UI гипервизора ESXi 6.7 кликаем на нашу виртуалку. Edit:
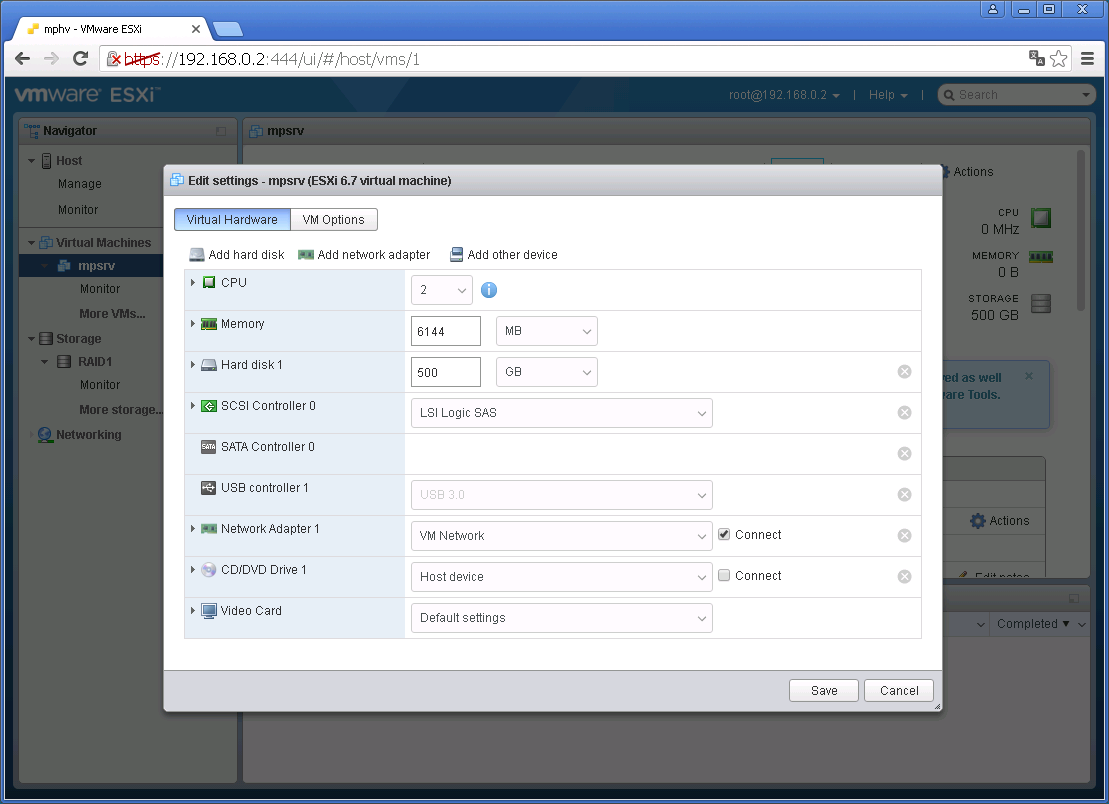
Наша задача, воткнуть ISO образ инсталлятора Windows в дисковод. В CD/DVD Drive 1 выбираем Datastore ISO file, откроется Datastore browser:
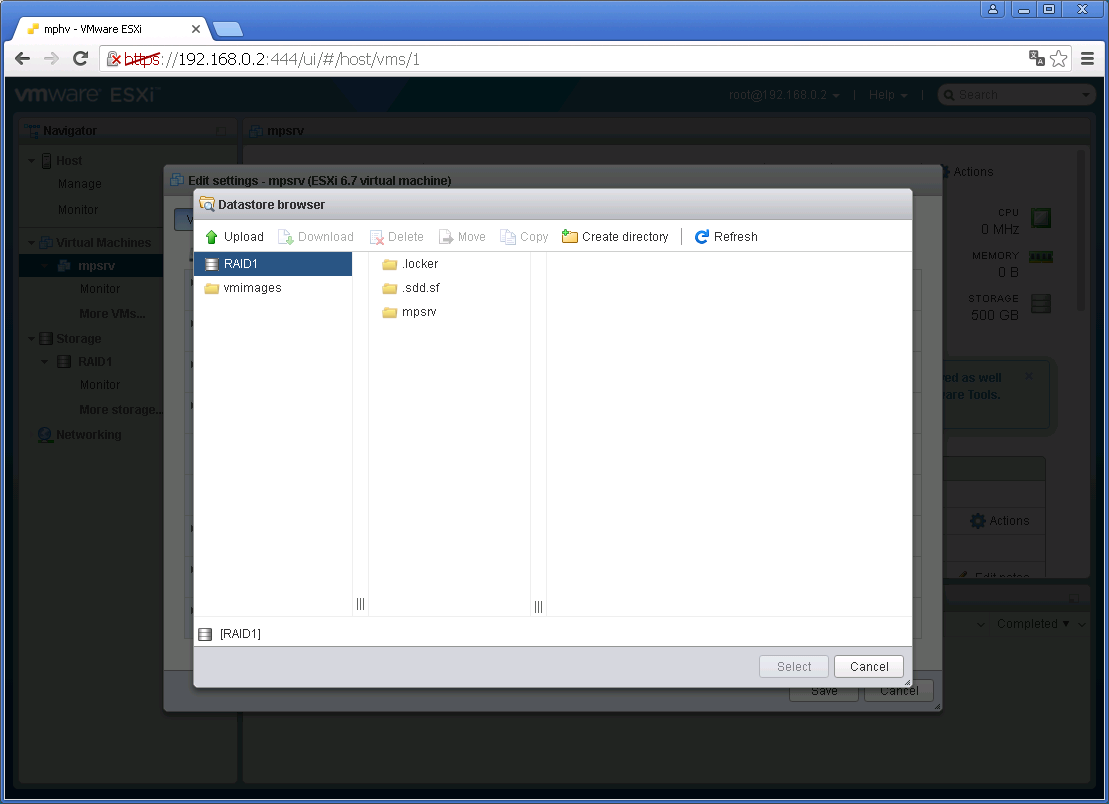
Образ у меня не загружен в хранилище, создам папочку для ISO файлов. Create directory:
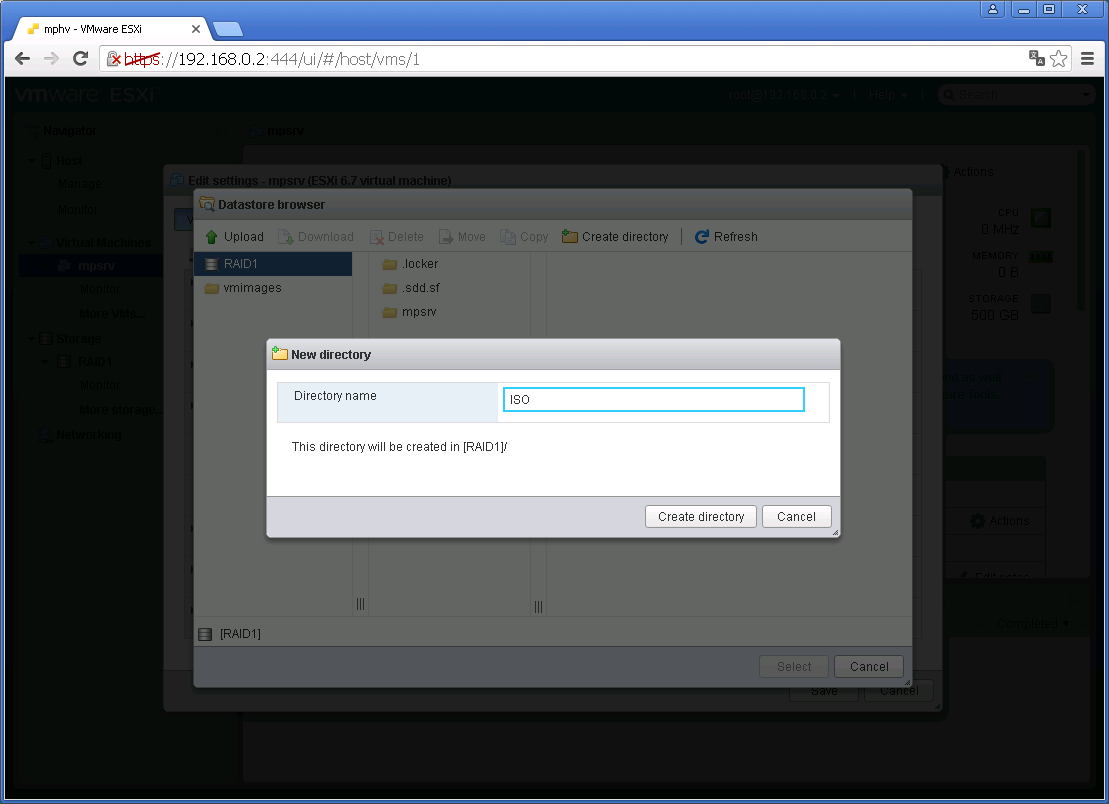
Указываем название директории, у меня будет ISO, Create directory:
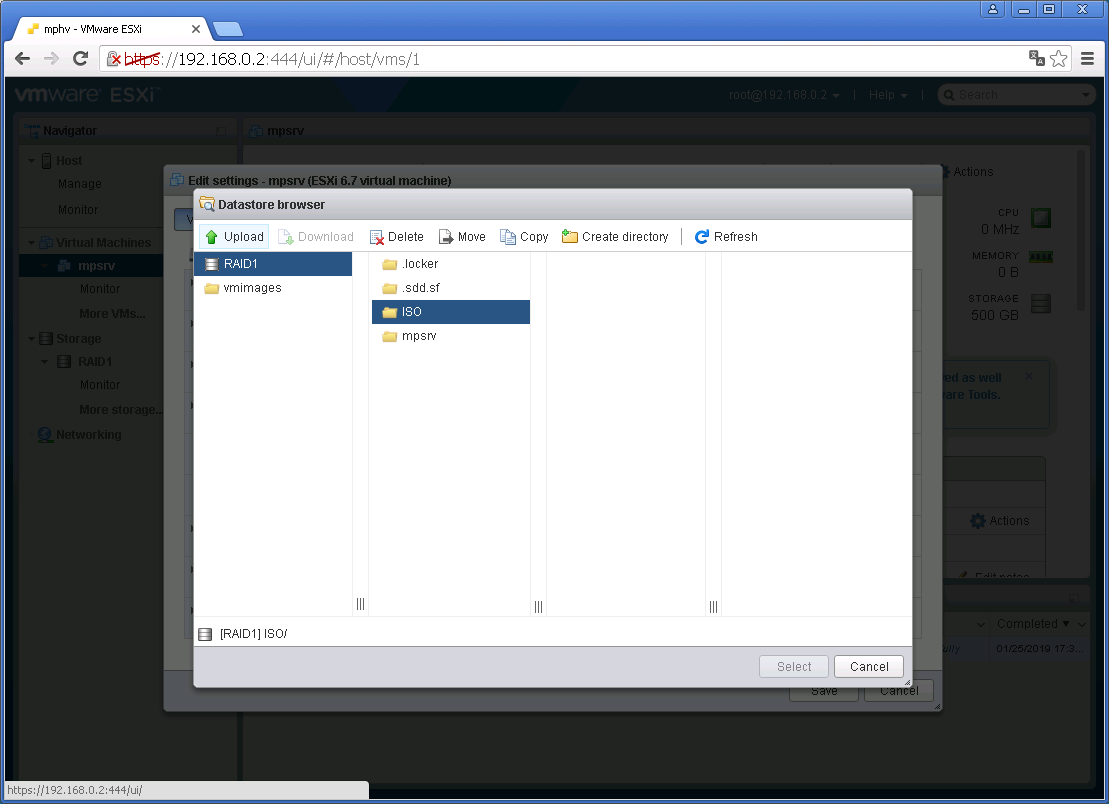
Папочка создалась. Кликаем на неё, потом Upload, выбираем ISO образ инсталлятора Windows Server 2016:
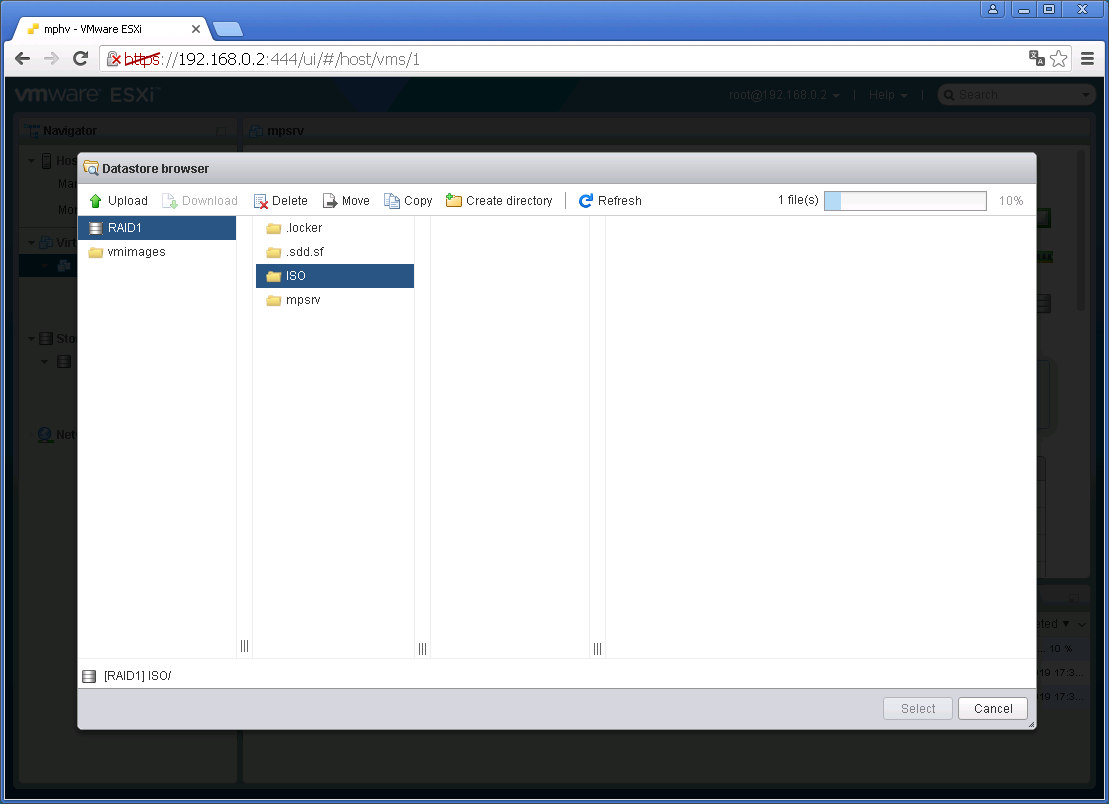
В правом верхнем углу показывается прогрусс загрузки файла. Итак, файл загрузился в хранилище, кликаем на него, потом Select:
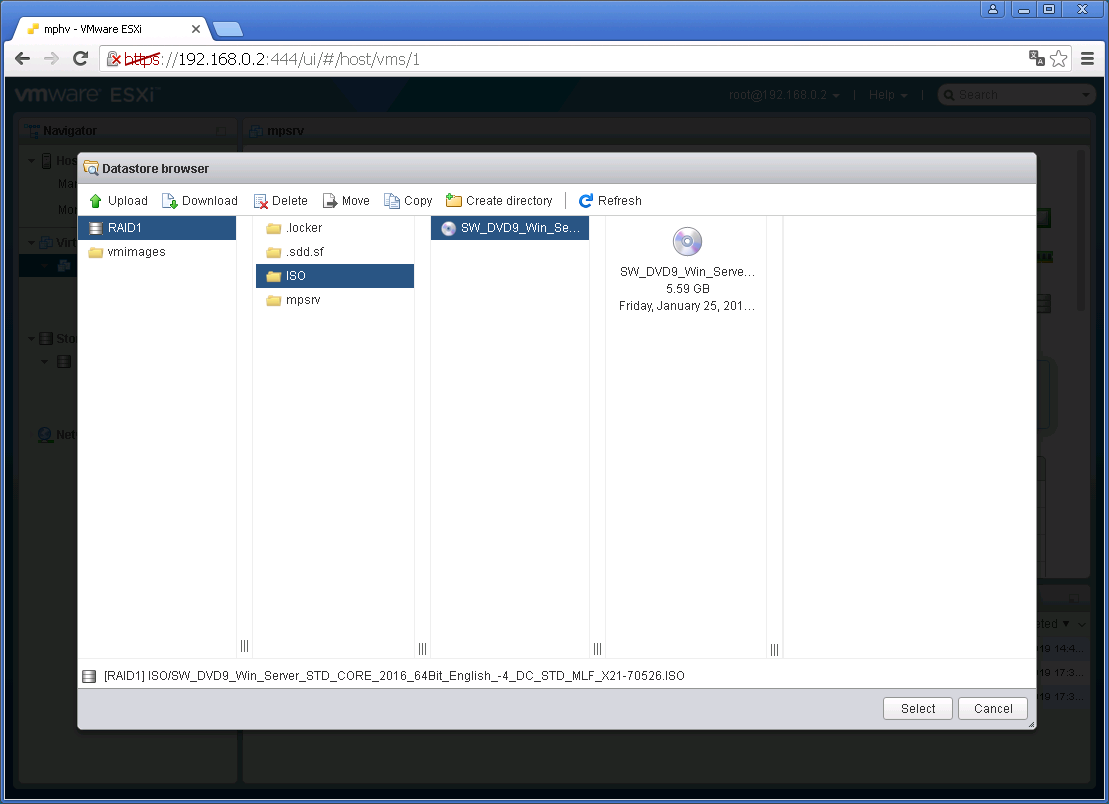
ISO образ цепляется к дисководу виртуалки:

Устанавливаем две галки. Connect at power on и Connect. Save. Включаем виртуалку:
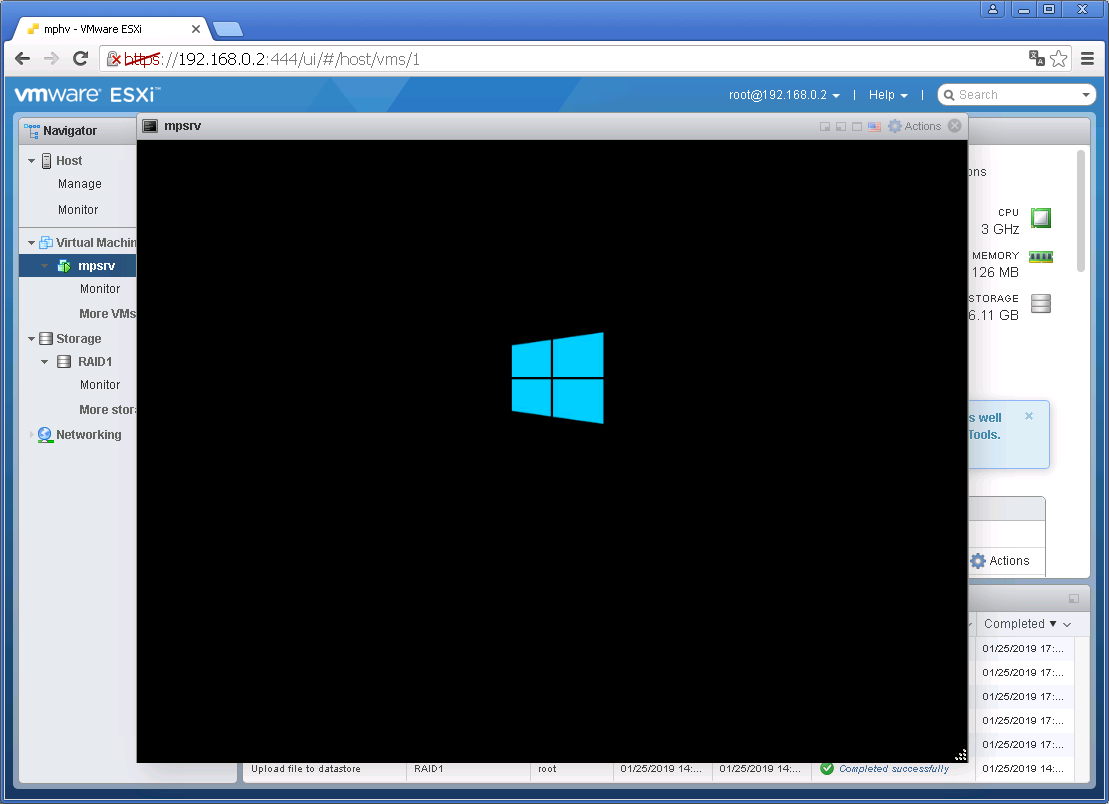
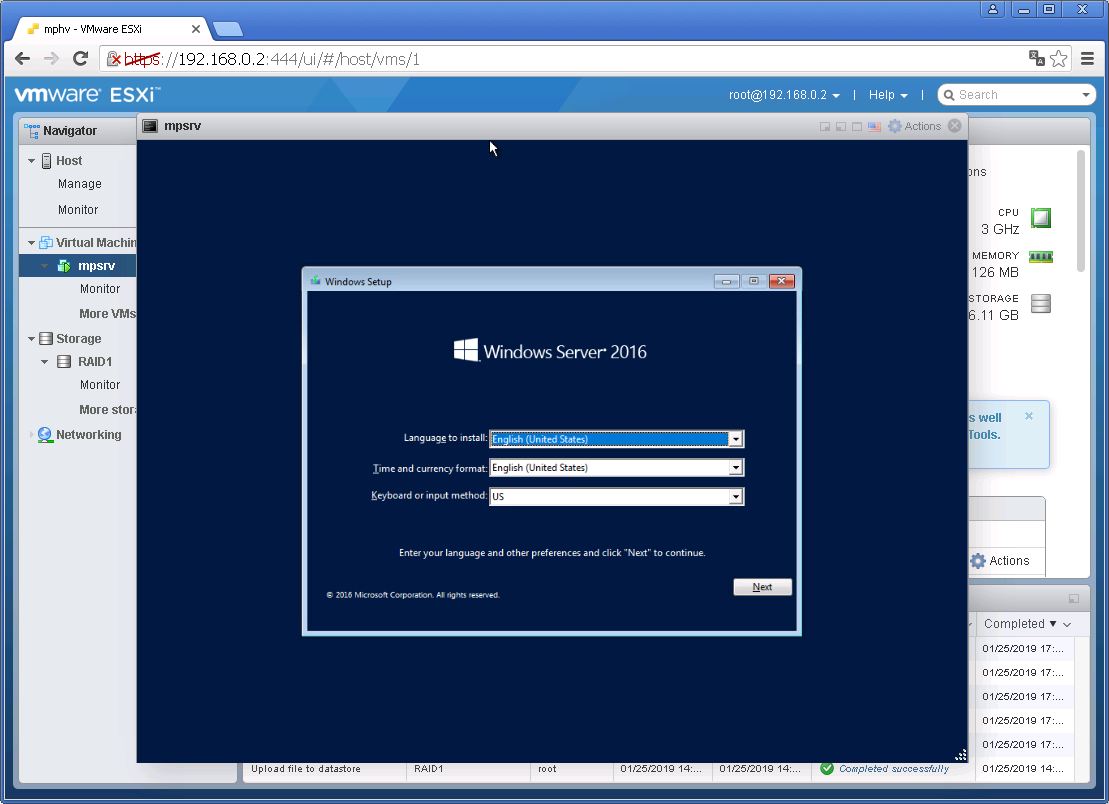
Для начала установки нужно будет успеть нажать любую клавишу. Выбираем язык, время, клавиатуру. Next.
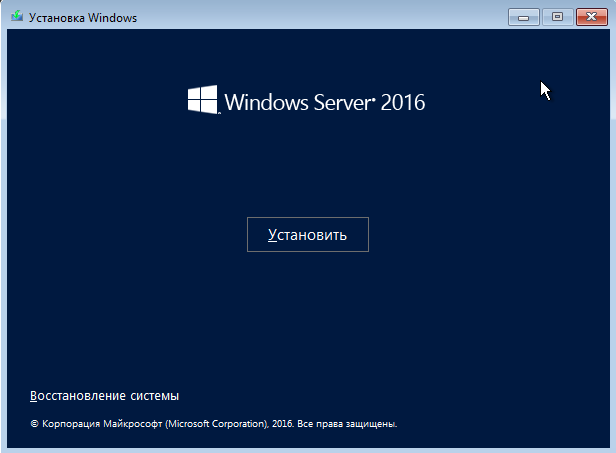
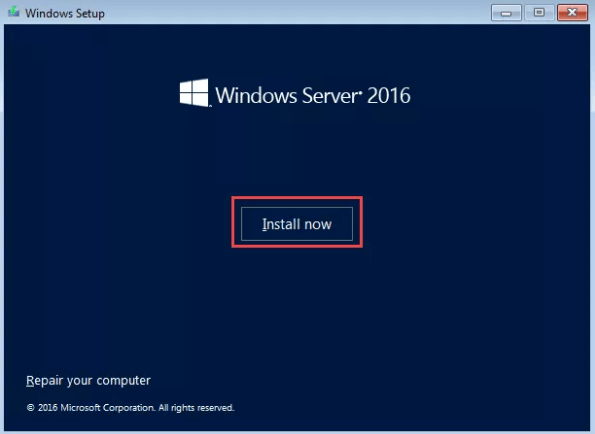
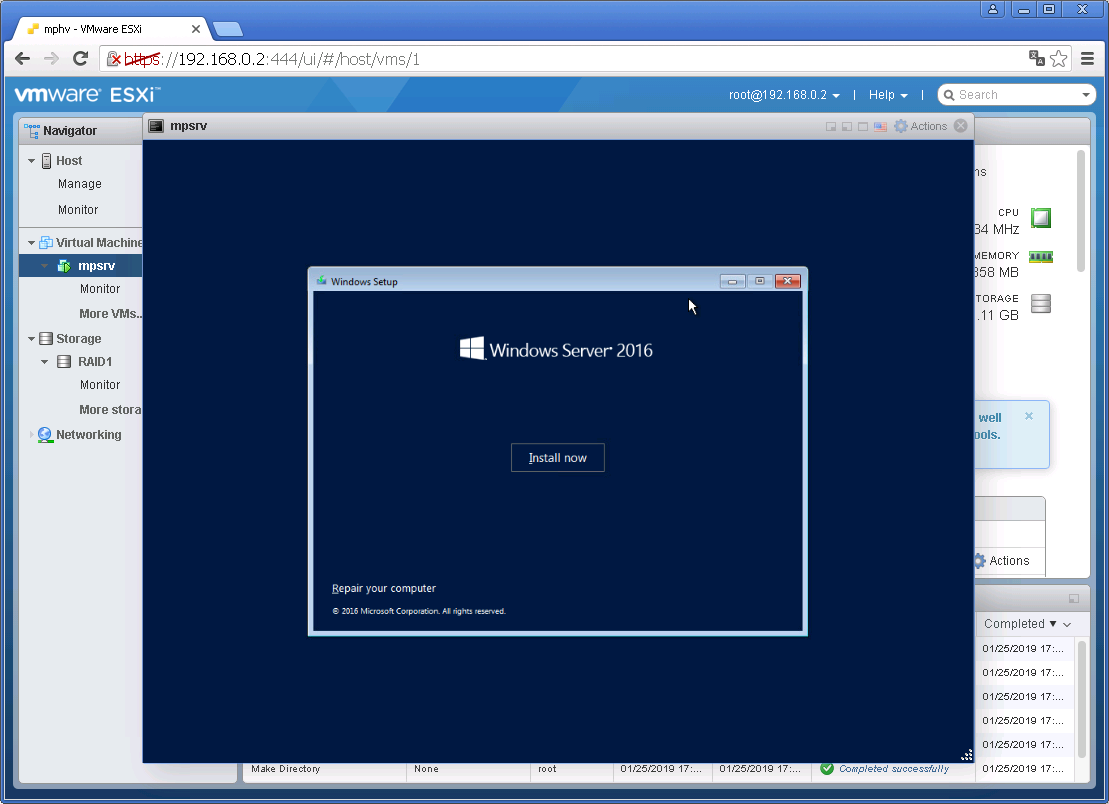
Install now:
Setup is starting:

Выбираем тип установки.
- Standard без GUI
- Standard с GUI
- Datacenter без GUI
- Datacenter с GUI
Next:

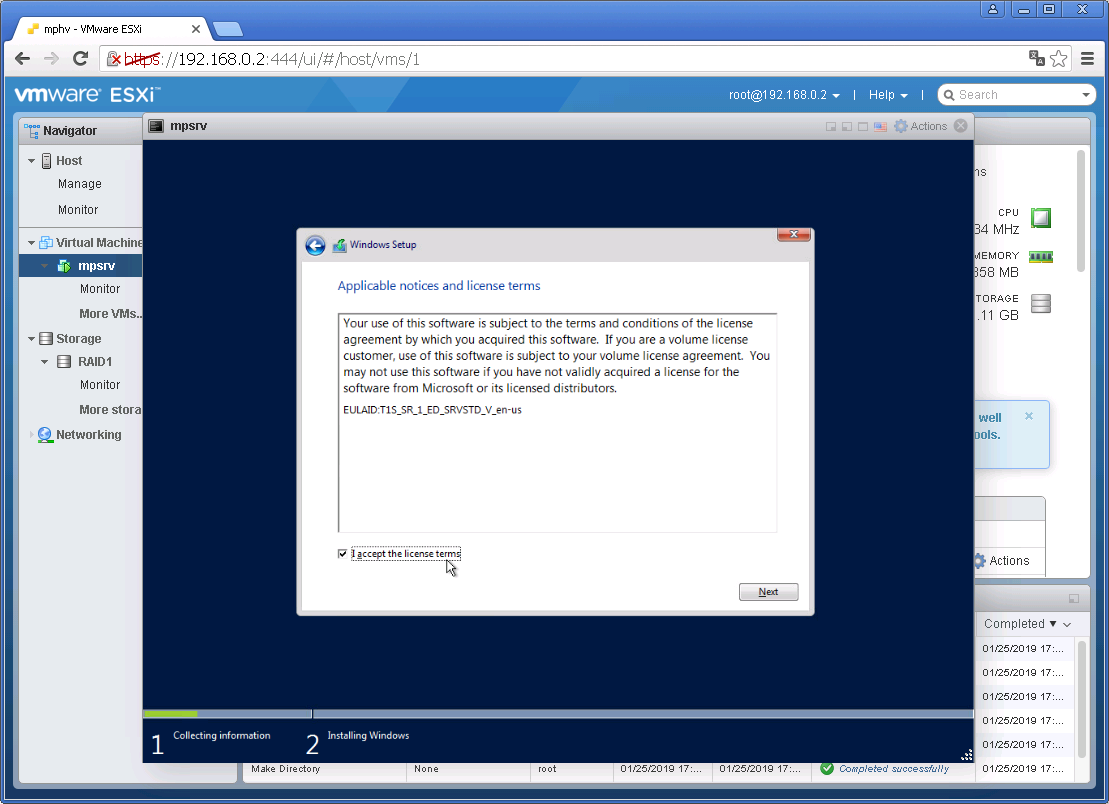
Принимаем лицензионное соглашение, Next:
Выбираем Custom: Install Windows only (advanced):
Выбираем винт, у меня он уже выбран, поскольку один. Next:
Потекло по трубам:
Через несколько минут нам предложат указать пароль от пользователя Administrator. Указываем, Finish:

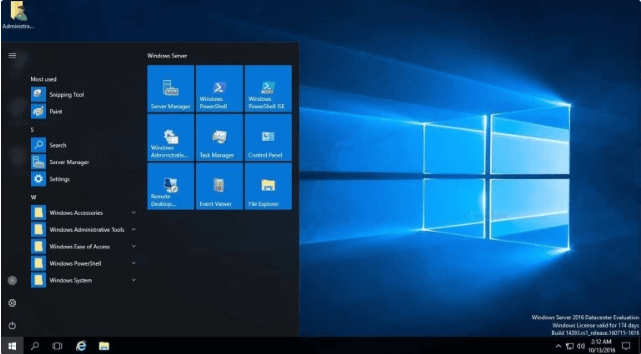
Винда поставилась. Очень напоминает десятку.
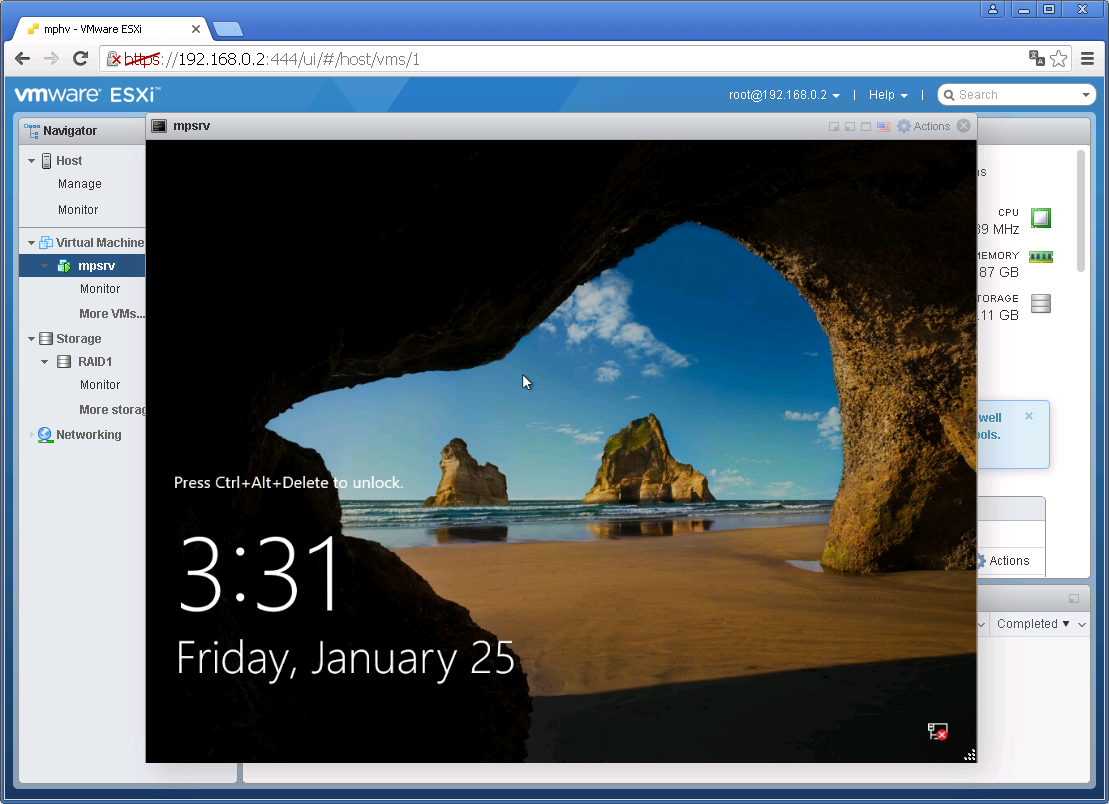
Посылаем Ctrl+Alt+Del:
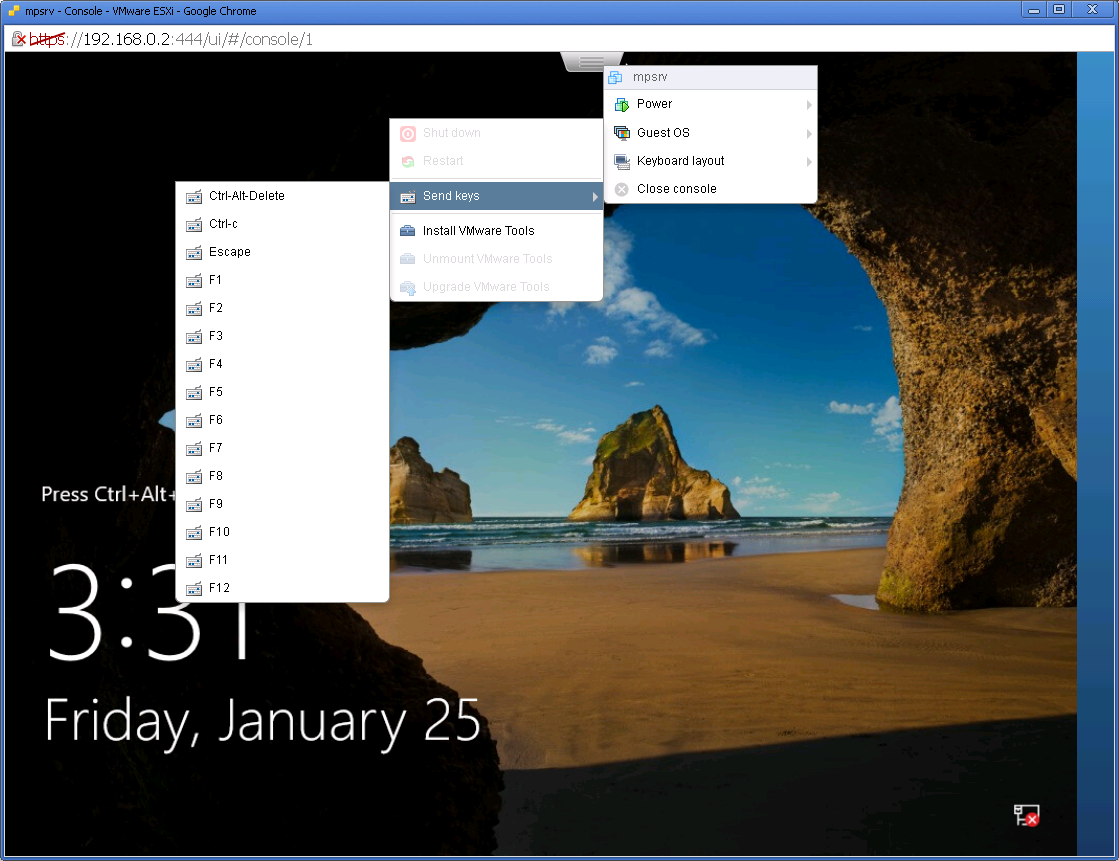
Логинимся.
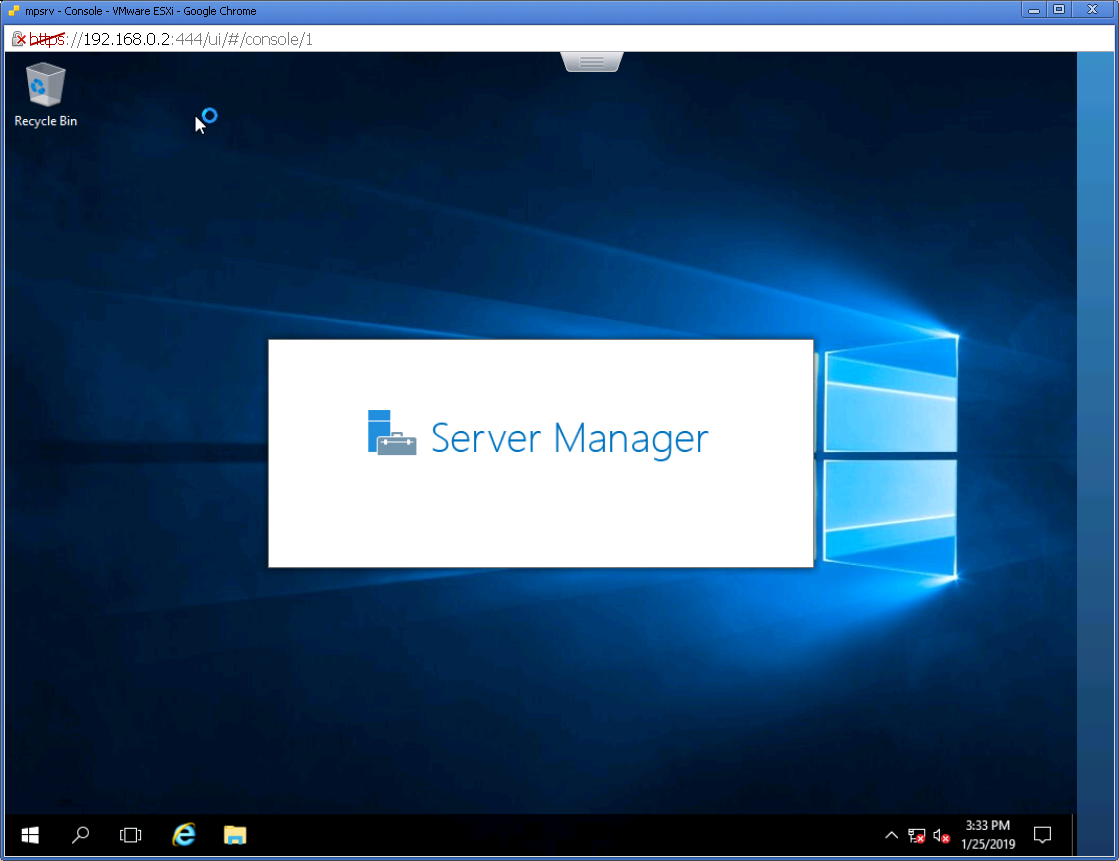
Внутри смесь десятки, метро и 2012-го сервера.

The Windows Server 2016 is the cloud-ready operating system that delivers new layers of security and Azure-inspired innovation for the applications and infrastructure. Please see the following guides on how to perform Post OS Installation configuration of Windows Server 2019 Properties, how to install Windows Server 2019 Operating System. Also, you may be interested in my YouTube video on how to setup Windows Server 2019 on a VMware Workstation. If you would like to try this out in a lab environment, download it here. Also, see this guide on how to perform an in-place upgrade from Windows Server 2016 to Windows Server 2019.
Below are the features of Windows Server 2016: See this guide for how to install Windows Server 2022 on VMware Workstation.

- Built-in Security: Windows Server 2016 gives you the power to prevent attacks and detect suspicious activity with new features to control privileged access, protect virtual machines, and harden the platform against emerging threats.
- Software-defined Infrastructure: Windows Server 2016 delivers a more flexible and cost-efficient operating system for your data center, using software-defined compute, storage, and network virtualization features inspired by Azure.
- Cloud-ready Application Platform: Windows Server 2016 delivers new ways to deploy and run both existing and cloud-native applications – whether on-premises or in Microsoft Azure – using new capabilities such as Windows containers and the lightweight Nano Server installation option.
Windows Server 2016 Operating System on VirtualBox
The steps are similar to installing Windows Server on a dedicated appliance. see this guide for how to install Windows Server 2019. Load the ISO image in a VM or DVD onto a physical server and boot the VM or Server from it.

In the setup window, select your desired language, time format and language to install.

Click on install in the next Window as shown below

This will continue the setup process as shown below

Select the Operating System you wish to install. This ISO evaluation is for the Datacenter and Standard editions. The Datacenter edition is a complete edition and includes the new datacenter-specific features (Shielded Virtual Machines, Storage Spaces Direct, Storage Replica, and Software-Defined Networking) in addition to unlimited server virtualization.
I will be choosing Windows Server 2016 Datacenter Evaluation (Desktop Experience)
– Click on Next
Note: A Server with Desktop Experience is a complete installation and includes a full graphical user interface (GUI).

Accept the license and click on Next as show below
– If you do not tick the checkbox, you cannot proceed. As you can see it is grayed out.

Since we are not performing an upgrade, I will be selecting the second option
– Custom: Install Windows only (advanced). Just click on it to proceed

In this Window below, you will select where to install Window. I am okay installing it on Drive 0.
– Note: You can create a new Drive as shown below if you want to have Windows installed to it.
– Because I do not want to create a new drive, I will click on Cancel 🙂
– Then click on Next


This will now start the process of installing Windows Server 2016 on your server or VM. This can take a while but seat back with and enjoy your glass of Palm wine 😉

Note: Your server will restart multiple times as Windows is being installed.

Now it is time to customise your your Server Settings

This completes and finalize the entire Windows Server 2016 installation process. As you can see below, you can now log on to your server.

Log on to the device with the local administrators account and password as created above.

That is all. You can start installing applications etc on your server. Since I have a DHCP server running in my Network, the server automatically received a DHCP IP Address. See the guide “How to configure a Windows client to obtain IP Address automatically from a DHCP Server“.

If you would like to configure your server statically, see the guide on Post installation of Windows Server 2019 Properties.
– You can configure all settings from the Server Manager on the fly as shown below.

I hope you found this blog post helpful. If you have any questions, please let me know in the comment session.
In this post we will see the process to install windows server 2016 in Virtual Box. But before we start installation let’s check minimum system requirement to install windows server 2016.
Minimum system requirement to install windows server 2016
The minimum required processor is a 1.4 GHz 64-bit x86 processor with 512 MB of RAM and 32 GB of disk space.
How to install Windows Server 2016
First download Windows server 2016 Evaluation edition ISO image from Microsoft TechNet Evaluation Center.
https://www.microsoft.com/en-us/evalcenter/evaluate-windows-server-2016
Start your Virtual Box and create one VM with below configuration.
Name: As you wish
Type:- Microsoft Windows
Version:- Windows 10 (64-bit)
RAM:- 2048 MB
Create Dynamically Expanding VDI with size 100 GB
After creating VM click on start.
Mount the ISO image which we downloaded earlier and follow below video tutorial to install Windows Server 2016 in VirtualBox.
Post Views: 4,817
How to Install Windows Server 2016 in Virtual Box