 Исходное положение: имеется старый десктоп с Win2K на борту. Установлены некие древние, но очень дефицитные программы, инсталляции к которым утеряны в веках, т. е. переустановке на новую систему не подлежат, да и совместимость хотя бы с WinXP под вопросом. Наряду с этим имеется свежайший десктоп с крутым i7 процессором и предустановленным Windows 7. Задача: избавиться от старого компа, сохранив при этом старые проги со всеми установками.
Варианты решения:
1. Перенос Win2K на новый комп в качестве второй системы с мультизагрузчиком. Создать новый логический диск, клонировать на него Win2K, установить на Семерке мультизагрузчик (например, бесплатный EasyBCD), решить проблему совместимости с SATA AHCI и прочими драйверами. Несомненный минус этого варианта — необходимость выгружаться из каждой системы для входа в другую, и это при условии, что нашлись драйвера для весьма-таки старой системы под современное оборудование. Да и установка драйверов контроллера SATA через Intel Matrix Storage — те еще танцы с бубном, да и не факт, что получится.
2. Перенос на виртуальную машину. На мой взгляд — оптимальный вариант. Но могут встретиться подводные камни, описанию и преодолению которых и посвящена данная статья.
Я давно использую VMWare Workstation и считаю ее очень удобным инструментом. Преимущества виртуальных машин общеизвестны — наличие нескольких операционных систем (клиентов) на одном физическом компьютере (хосте) с возможностью одновременного их и хоста использования, соединения в сеть между собой и физическими машинами и совместного использования ресурсов, устройств и портов хоста. Пробовал и Virtual PC, и VirtualBox, но остановился на VMWare — показался наиболее удобным. К тому же имеется VMWare Player — бесплатный вариант VMWare Workstation с несколько усеченной функциональностью. Поэтому описывать буду процесс миграции именно на VMWare.
В свое время я успешно переносил Windows XP на VMWare машины используя VMWare Converter. Однако в данном случае несколько разных версий конвертера одинаково не справились и выдали ошибки конвертации. Пришлось действовать ассиметрично.
Описанный ниже процесс подходит для миграции как Win2K, так и WinXP.
Дисклеймер: все выполняется вами на ваш страх и риск. В случае материального или морального ущерба автор статьи умывает руки ;))
Итак: хост — новый комп с Windows 7 64 bit, на нем установлена свеженькая (на время написания статьи) VMWare Workstation 8.0.2. Что иметь перед процессом:
1. Утилиту для создания и восстановления образа и клонирования разделов и дисков (Acronis True Image, Symantec Norton Ghost (платные), Clonezilla (бесплатный) и др.). Я использовал первую, и в дальнейшем для краткости буду называть ее просто «Акронис».
2. Дистрибутив Windows 2000 или XP (CD или ISO-образ) — для запуска консоли восстановления (Recovery Console).
3. Образ дискеты с драйвером SCSI для VMWare (можно скачать здесь или здесь).
4. Обновление KB835732 (на сайте Microsoft: Win2K — английский, русский; WinXP — английский, русский)
5. Внешний USB HDD (если при переносе системы (шаг 3) используется способ 1) или IDE to USB адаптер или коробка (способ 2).
Пошагово:
1. Подготовка Win2K к переносу.
a. Убедиться, что установлен SP4. Не повредит установить все возможные обновления.
b. Скачать соответствующий нашей системе KB835732 и скопировать его в корень (или другой легкодоступный фолдер) системного диска.
2. Создание новой виртуальной машины. Выбираем Windows 2000 Professional на предложение выбрать операционную систему для VM (Select a Guest Operating System). На вопрос о максимальном размере диска я выставил 40 ГБ, поскольку таков размер физического диска с Win2K, и заполнен он более чем на две трети. Остальное можно по умолчанию. Дойдя до экрана Ready to Create Virtual Machine, жмем на кнопку Customize Hardware… и меняем тип New CD/DVD с дефолтного IDE на SCSI. Если оставить IDE, система не подключит CD/DVD после первого успешного запуска, а он нужен для установки VMWare Tools. После установки VMWare Tools и, соответственно, всех виртуальных драйверов можно поменять тип обратно на IDE.
3. Перенос содержимого физического диска на диск VM. Есть несколько способов:
Способ 1:
a. Создаем Акронисом образ физического диска с Win2K и копируем его на внешний USB диск. Подсоединяем диск с образом к хосту.
b. Стартуем виртуальную машину с CD или образа Акронис, и в меню VM > Removable Devices находим наш внешний диск и жмем на подменю Connect (Disconnect from Host). Диск теперь будет распознан Акронисом.
Если Акронис загружается из ISO-образа, то этот образ должен находиться на диске, отличном от подключенного нами внешнего диска, поскольку тот отсоединяется от хоста.
c. Восстанавливаем образ на диск виртуальной машины
Способ 2:
a. Снимаем оригинальный диск со старого компа, подсоединяем его как внешний (через адаптер или коробку) к хосту.
b. Те же действия, что и в п. b способа 1.
c. Клонируем содержимое физического диска (или переносим только нужные разделы) на виртуальный.
Первый способ требует только внешний диск (или даже большую и быструю флешку, что в наше время не редкость). Если нет IDE to USB адаптера или лениво снимать оригинальный диск — он предпочтительнее. Да и лишний бэкап системы не помешает. Минус — если в старом компе USB1.1, процесс создания образа может быть долгим. Ну так поставьте на ночь!
Возможен еще третий путь — работать напрямую с физическим диском из VM. Диск снимается со старой машины, подсоединяется к хосту как внешний или внутренний и монтируется в VM как виртуальный. Этот метод более трудоемкий, поскольку там надо перед монтированием удалять буквы всех партиций для предотвращения одновременного доступа к диску со стороны хоста и VM, а при самом монтировании — опознать диск в списке вида PhysicalDrive0, PhysicalDrive1 и т. д. Если уж снимать диск — лучше второй способ переноса. Третий способ — только для тех, у кого нет места на новом компе (хосте), и кто собирается запускать VM с физическим диском постоянно.
4. Запуск виртуальной машины — система вылетает в BSOD с сообщением:
Inaccessible boot device.
Это происходит из-за того, что диск в VM подключен к виртуальному SCSI контроллеру, и в системе нет соответствующего драйвера. Разрешить данную проблемы можно, заменив файл драйвера IDE atapi.sys на файл с таким же именем, но содержащий драйвер виртуального SCSI контроллера VMWare. Этот трюк обманет систему на момент загрузки, подсунув ей нужный драйвер с именем, соответствующим настройкам в реестре.
a. Вставляем в CD/DVD-ROM диск с дистрибутивом Win2K/WinXP и в настройках VM CD/DVD указываем использовать физический привод, или же монтируем образ дистрибутива (ISO image) в привод виртуальной машины. Во флоппи VM монтируем образ дискеты с драйвером SCSI для VMWare. Отмечаем чекбоксы Connect at power on в разделе Device status для обоих вышеуказанных виртуальных устройств.
b. Запускаем VM с CD/DVD (выставив последовательность загрузки в BIOS виртуальной машины раз и навсегда, либо же нажав Esc после включения VM и выбрав CD-ROM drive). Стартует процесс установки Windows. Заходим в Recovery Console, выбираем нашу систему и попадаем в системный фолдер C:\WINDOWS или C:\WINNT. В командной строке вводим:
cd SYSTEM32\DRIVERS
del atapi.sys
copy a:\vmscsi.sys atapi.sys
Вторую строку можно пропустить, тогда соглашаемся перезаписать существующий atapi.sys.
Все вышеописанное относится к случаю, когда старый диск IDE типа. Если же он подключен к SCSI или SATA контроллеру, atapi.sys не может быть использован. Нужно определить, какой файл содержит драйвер контроллера вашего типа диска и заменить его на vmscsi.sys. Команда консоли восстановления LISTSVC, выдающая список сервисов системы, может помочь идентифицировать файл драйвера. Он должен относиться в категории Boot (2й столбец).
c. Перезапускаем VM, введя exit в командную строку. На этот раз система загружается успешно.
Здесь надо отметить, что система при старте заменяет подсунутый ей поддельный IDE драйвер обратно на оригинальный, так что в случае перезагрузки без установки в системе драйвера VM SCSI контроллера синий экран вернется. Поэтому я отверг все предложения системы по ручной установке драйверов и перезагрузке и первым же делом установил драйвер SCSI Controller через Device Manager с той же дискеты. Теперь перезагрузка не чревата синим экраном, и система стартует успешно (а перезагрузиться разок таки пришлось, о чем далее). Если вы случайно перегрузили VM и снова получили BSOD — повторите 4-й шаг.
5. Установка VMware Tools. Запускаю — и получаю сообщение:
Microsoft Runtime DLLs cannot be installed on this operating system.
Please see Microsoft KB835732 for details.
Поставил обновление KB835732, перегрузился (теперь можно), и VMware Tools установились без проблем. Ура, мы успешно переехали в виртуальную машину!
Кстати, не факт, что у вас тоже выскочит подобная проблема с установкой VMware Tools. Особенно если, как я упоминал в начале, в оригинальной системе еще до переноса были установлены все обновления. Все же имейте KB835732 под рукой, желательно — прямо на диске для удобства доступа.
In this article, we will examine how to set up and run Windows 2000 on a new virtual machine using VMware Workstation 17 Pro on Windows 10 64 Bit operating system.
How to Set Up Windows 2000 Professional SP4 on Windows 10 using VMware Workstation 17
Microsoft released the Windows 2000 operating system on February 17, 2020, for personal, laptop and server computers.
Originally Windows 2000 was originally called NT 5.0, but this name was changed to 2000 on October 27, 1998. Also, another common name is Windows 2K. The Windows 2000 system, which was the predecessor of NT 4.0, was fundamentally reliable but received a lot of criticism for having more than 63,000 flaws in this system.
The development of Windows 2000 was more geared towards corporate business computers and offered a more secure Internet connection compared to Windows 95 and 98.
Key features of the Windows 2000 operating system include FAT16, FAT32, NTFS file system, EFS, directory service, DFS, ASR, and RAID. In addition, services such as RAS, VPN, RADIUS, IIS, Active Directory, and RIS have been developed for data communication.
Additionally, Windows 2000 is the first Microsoft system to include the Guest account, which includes user accounts and restrictions on accessing the system for other users.
Users who want to use the Win200 system, whose support was terminated on July 13, 2010, can now install it on a computer with old hardware. If this is not possible, they can run this old operating system on their physical computers using virtualization software such as VMware Workstation.
How to Create a New Virtual Machine for Windows 2000
If you want to experience using the Windows 2000 system, you don’t need an old PC. After installing the VMware program on your computer with the virtualization feature, you can create a new virtual machine and use this operating system on your host virtually.
In order to install Windows 2000 with VMware, you must have the ISO image file of the system. Or if you have a physical CD/DVD installation media, you can also install it. However, download the image file from this link to your computer, as installing the ISO file on the virtual computer will provide more performance.
Step 1
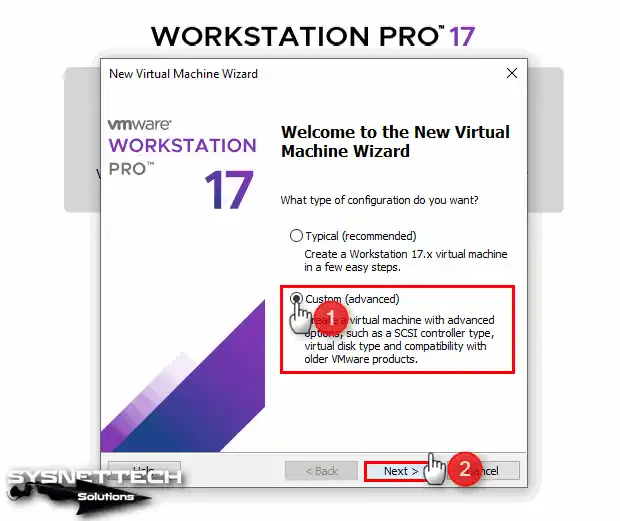
After installing the VMware 17 Pro software on your computer, run it and click Create a New Virtual Machine from the options on the program’s homepage.
Then, when the VM wizard opens as in the image below, select the Custom (Advanced) option and click the Next button.
Step 2
By default, Workstation 17.x is selected in the VMware hardware compatibility window because the latest version of the virtualization program is installed on your system. If you are using an old VMware version, you will see the hardware version of that version here.
Change the hardware version to Workstation 10.x so that you can run the Windows 200 system completely correctly, and then click Next.

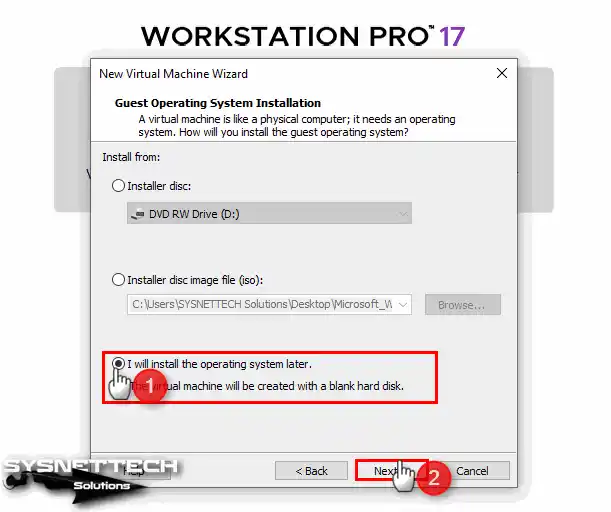
Step 3
If you have a CD/DVD installation media as we mentioned above, you should continue with the Installer Disc option in this window. However, since you downloaded the ISO file to your computer, select I will install the operating system later in this step and click Next.
Step 4
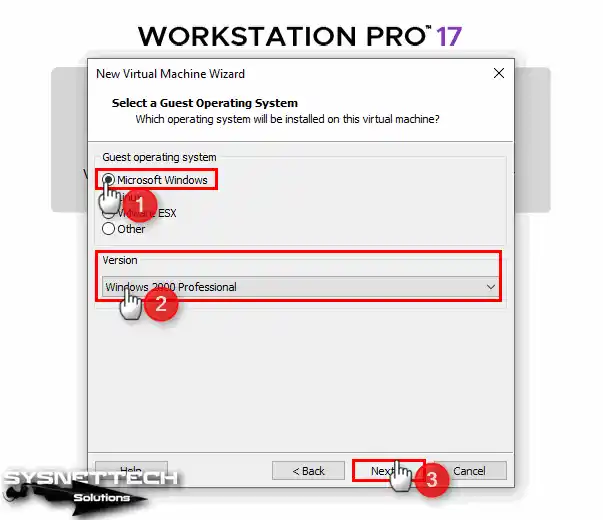
In the Guest operating system selection window, you must first select the manufacturer and then the version of the system you will install. Therefore, tick Microsoft in Guest Operating System and select Windows 2000 Professional version in Version.
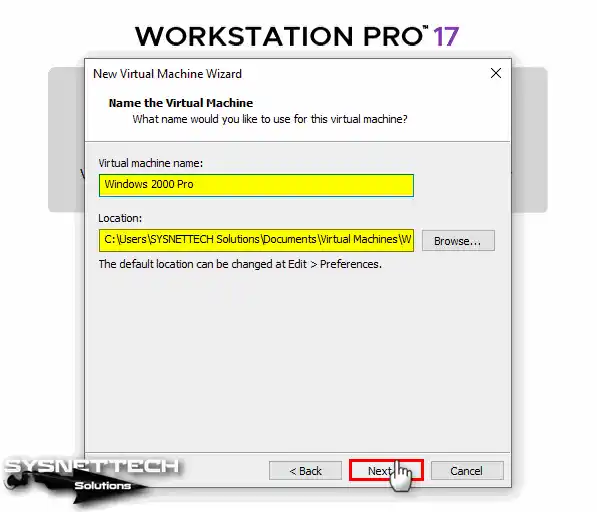
Step 5
In this window, you can change the name of the virtual machine you will install, and you can also select the location to install it via the Browse button. If you have an old computer, since installing the VM on an external SSD disk will be convenient for both performance and data security, change the location and click Next to continue.
Or if you have a more recent computer and your disk is SSD or NVMe, you can choose to install your virtual system on the host disk.
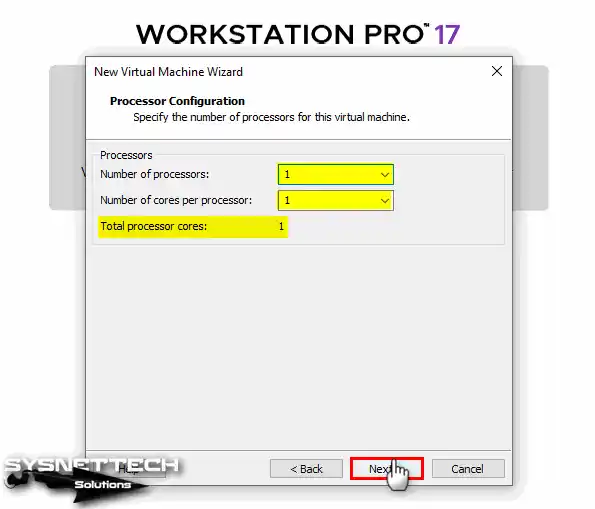
Step 6
In the processor configuration window, configure 1 processor and 1 core number for the Windows 2000 system. If you configure more CPU/Core values, the VM may not run properly.
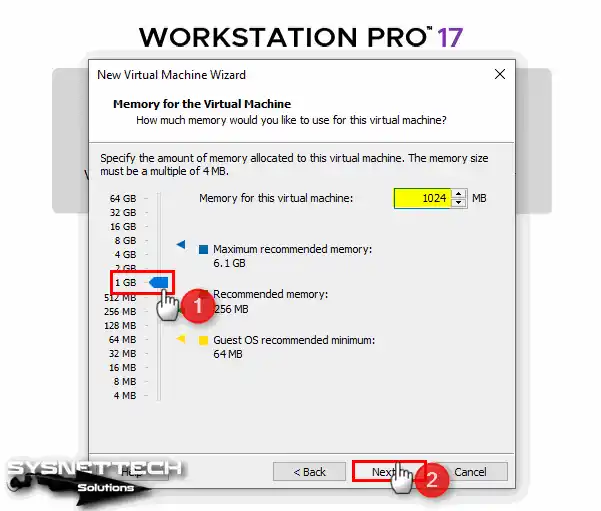
Step 7
Configure 1 GB RAM size in the memory setting window for the virtual machine and click Next.
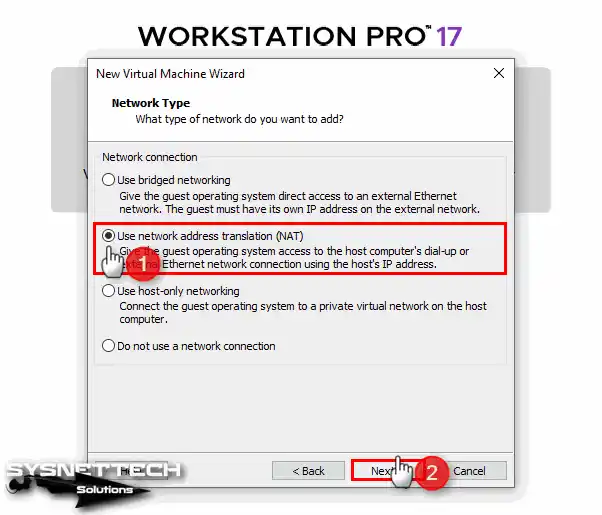
Step 8
Select NAT for the network adapter of the virtual PC on Workstation Pro and click Next.
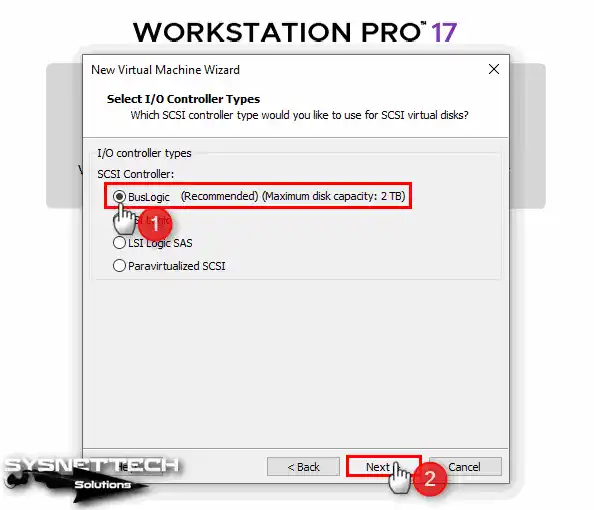
Step 9
In the I/O Controller types window, select BusLogic for more efficient operation of the virtual disk and click Next.
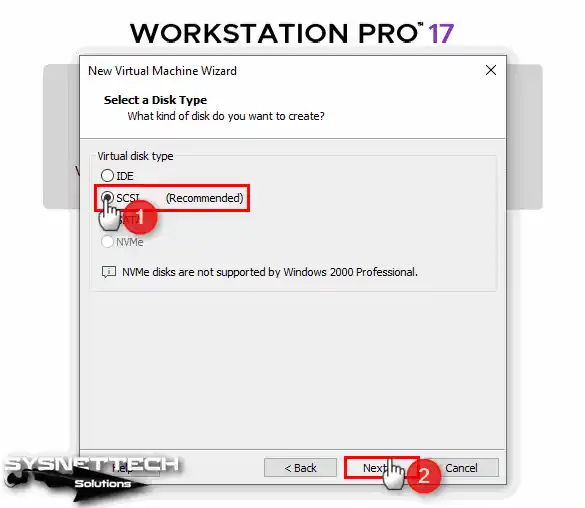
Step 10
Select the type of virtual disk as SCSI and continue with Next.
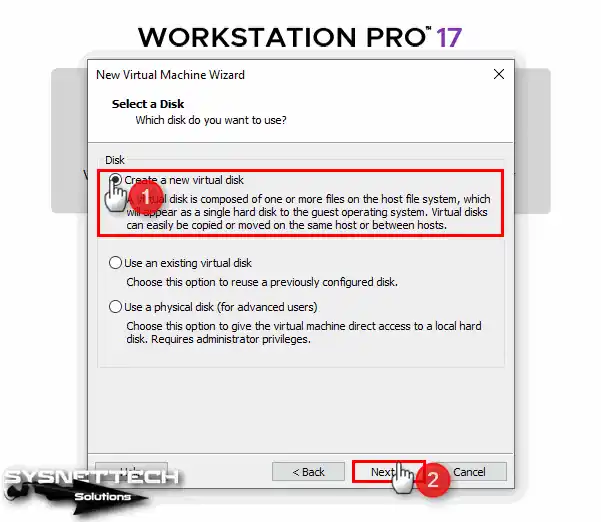
Step 11
Since you will be installing a clean Windows 2000 system, select the Create a New Virtual Disk option in the Select a Disk window. If you have a disk backup that you have installed before, you can add an existing disk in this window.
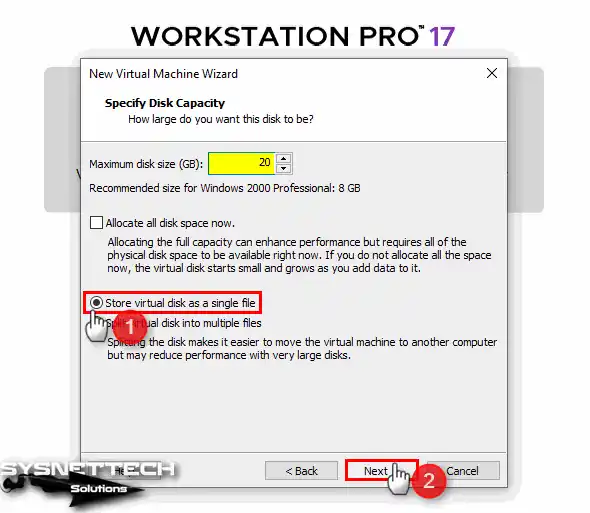
Step 12
Adjust the capacity of the virtual disk according to the operations you will perform on the system and the applications you will use. Here you can choose the recommended disk size for Windows 2000, 8GB, or specify a higher size. Also, store the virtual disk as a single file on your host or external HDD.
Step 13
In the disk file specify window, you can change the name and location of your virtual disk but continue with the default configuration.
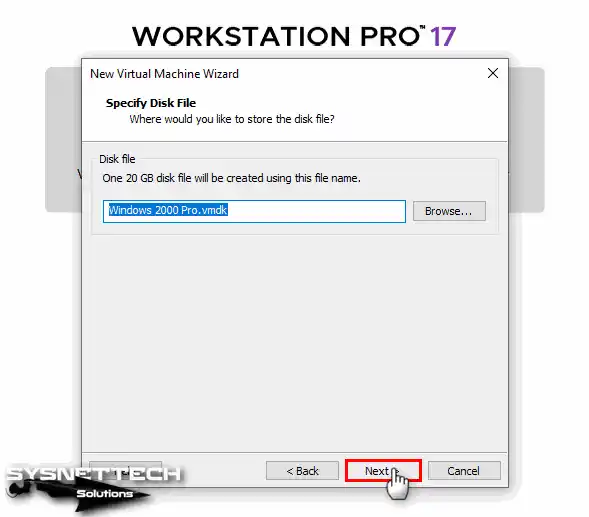
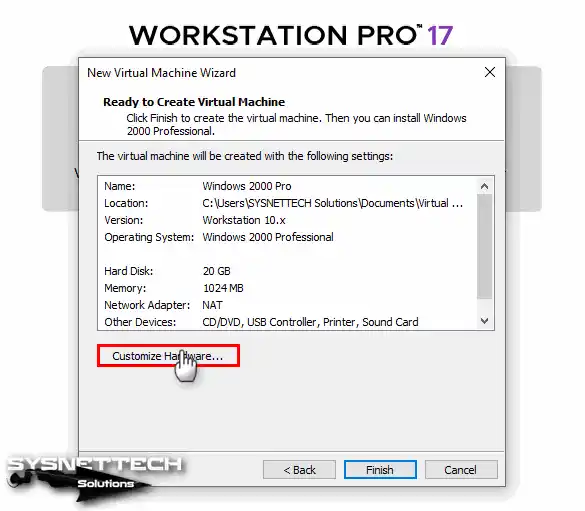
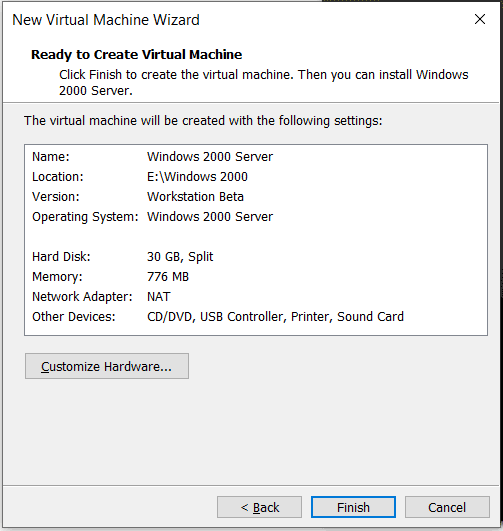
Step 14
Click the Customize Hardware button in the window containing the summary information of the settings you have configured for the virtual machine.
Step 15
After clicking on the Processors device, enable the virtualization feature by ticking all the options in the Virtualization Engine section.
- Virtualize Intel VT-x/EPT or AMD-V/RVI
- Virtualize CPU Performance Counters

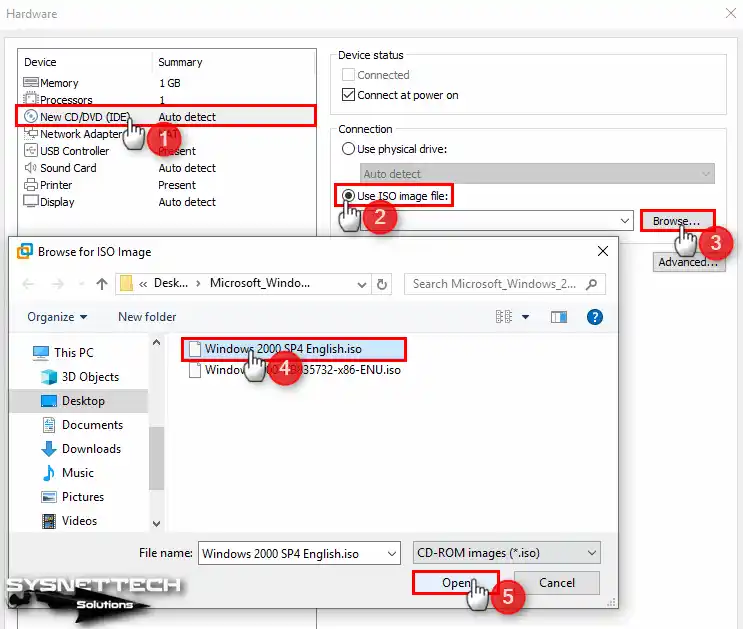
Step 16
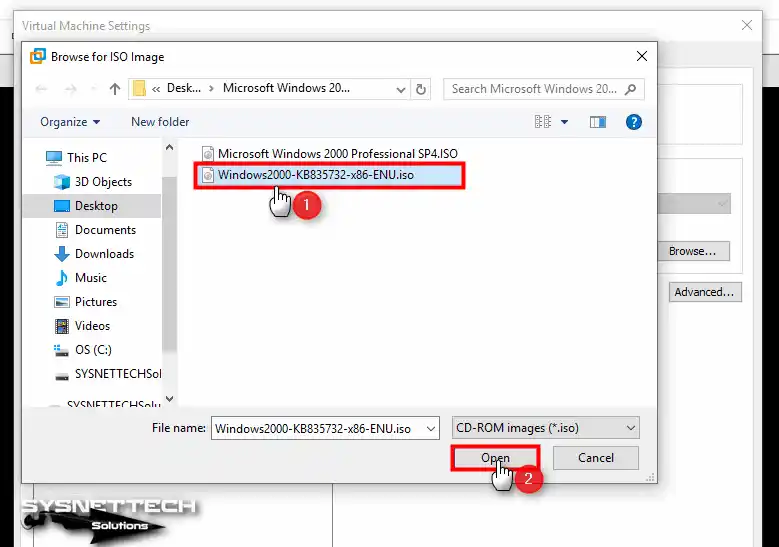
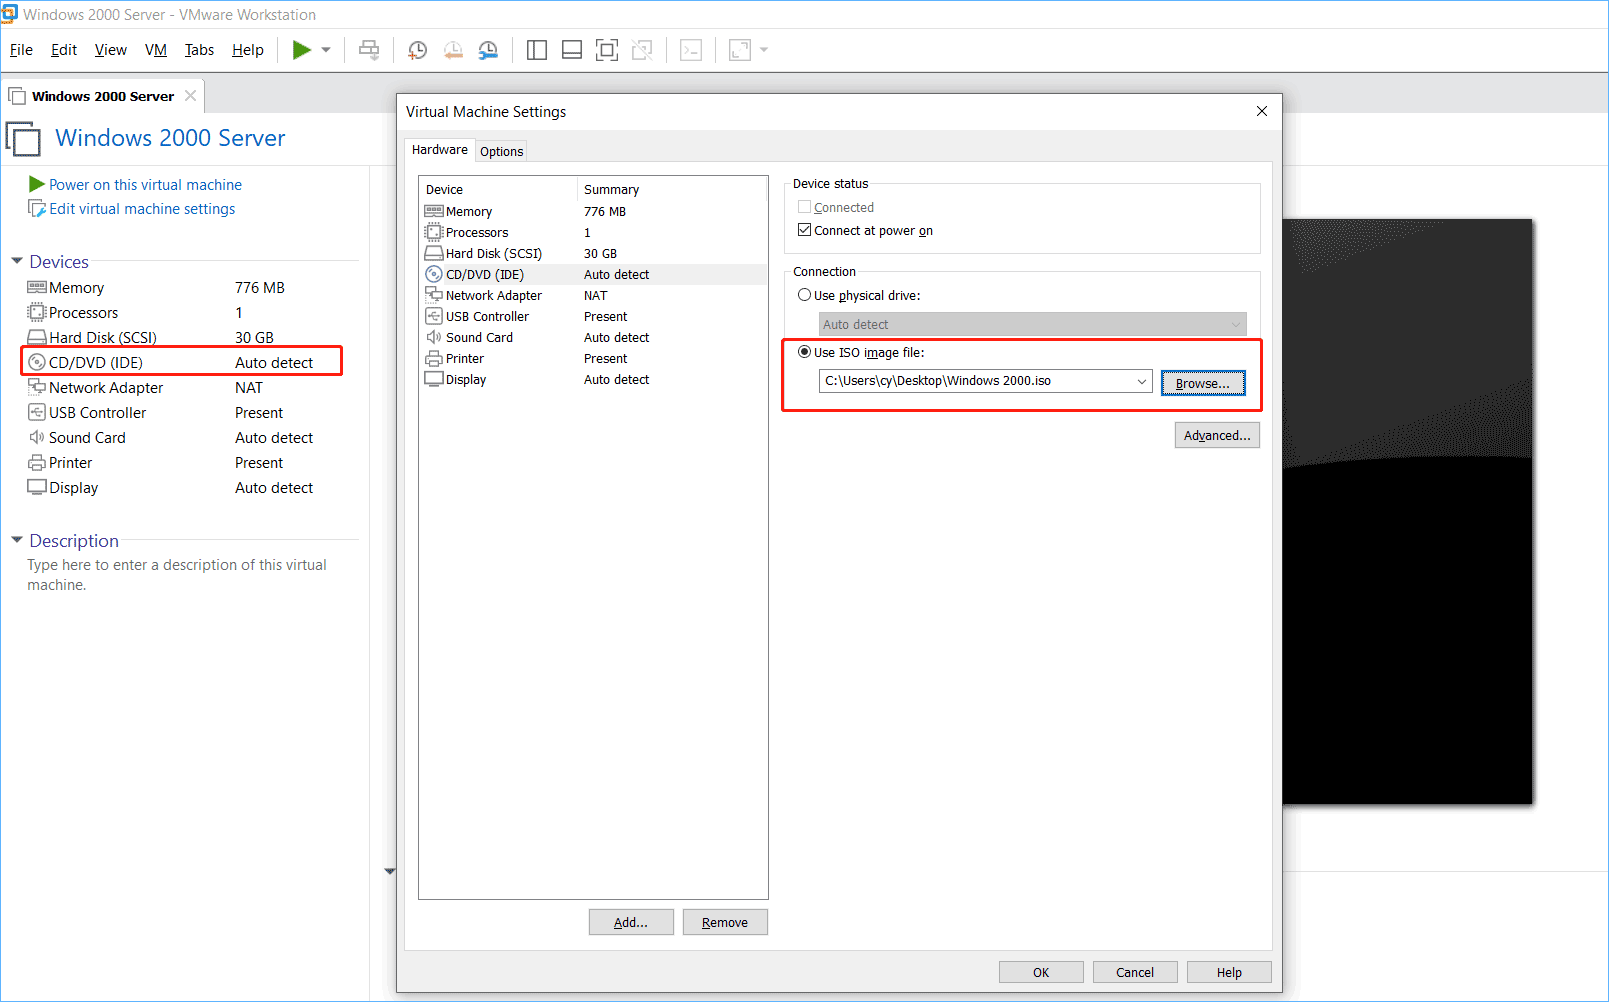
To add the Windows 2000 ISO file to the CD/DVD device, click the Browse button after enabling the Use ISO Image File option. Select the ISO image file you downloaded to your computer and click the Open button.
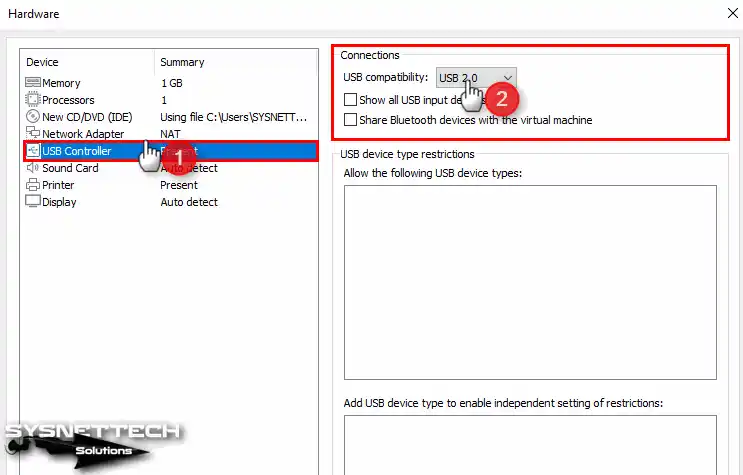
Step 17
In order to use your USB devices in your virtual system, select the 2.0 compatibility type from the USB Controller device settings.
Step 18
For the Display setting, enable the 3D Graphics feature and do not change the display scaling setting.
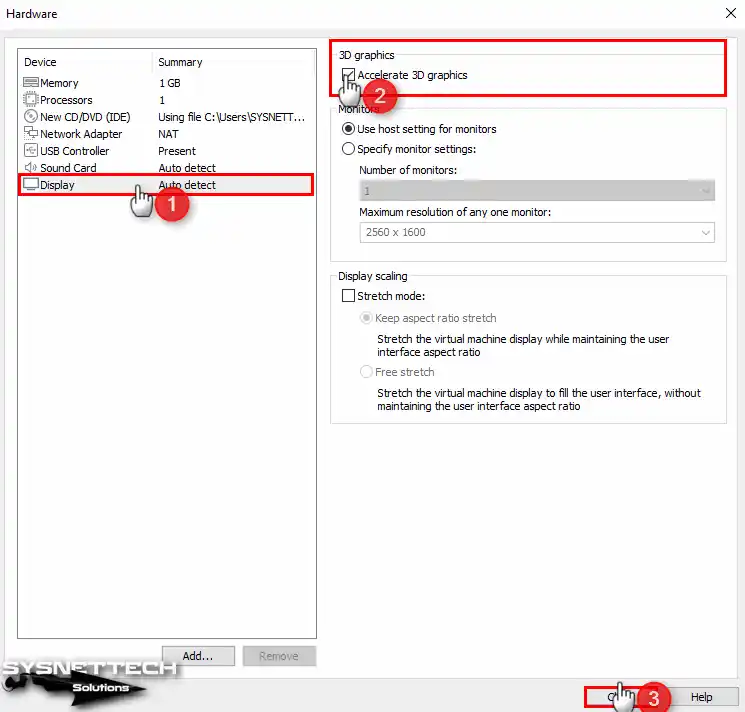
Step 19
After preparing the virtual machine, close the summary window and proceed to the installation steps.
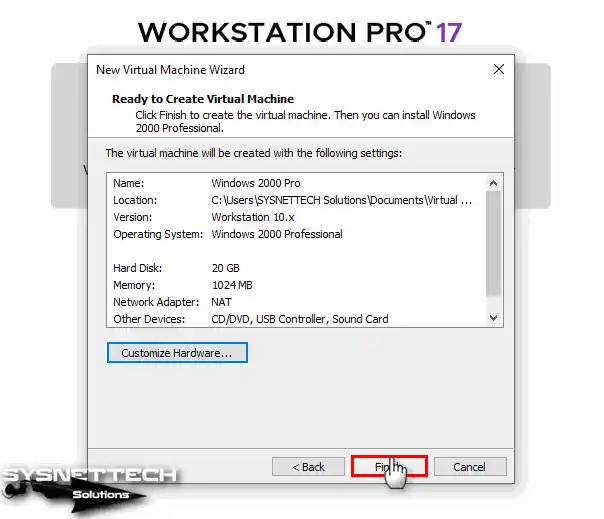
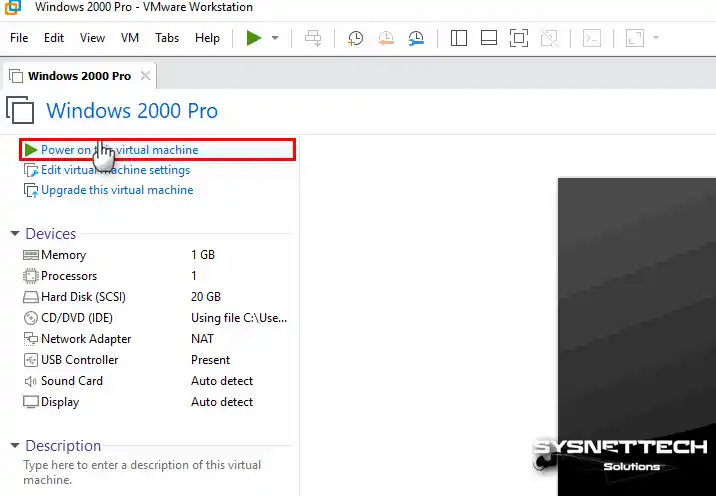
Step 20
Click Power on this virtual machine to run the Windows 2000 Professional virtual machine.
How to Install Windows 2000
After you prepare the Windows 2000 virtual machine, when you run it, the system will boot from the ISO image file you added to the VM. When you see the installation wizard, you can now start the installation without any problems.
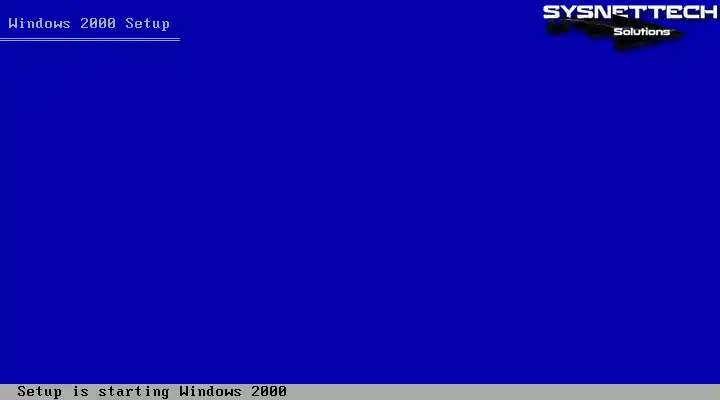
Step 1
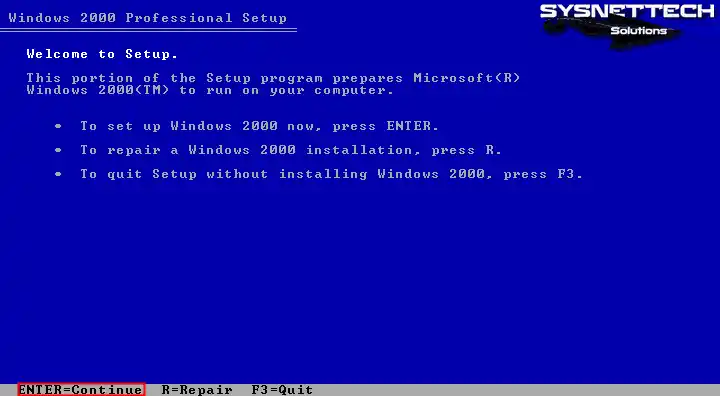
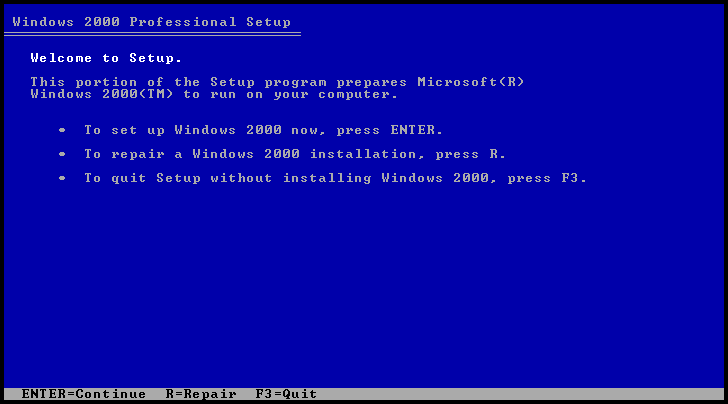
Wait for a while when the Windows 2000 Setup screen opens as in the image below.
Step 2
On the Welcome screen, you can switch to the relevant screen by pressing the R key to repair your system. In this article, press the Enter key as we will install the Win2000 system from scratch.
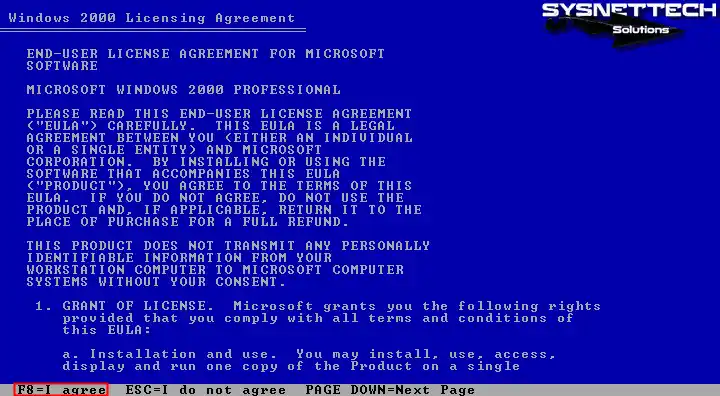
Step 3
Accept the Microsoft Windows 2000 Professional license agreement on your virtual computer.
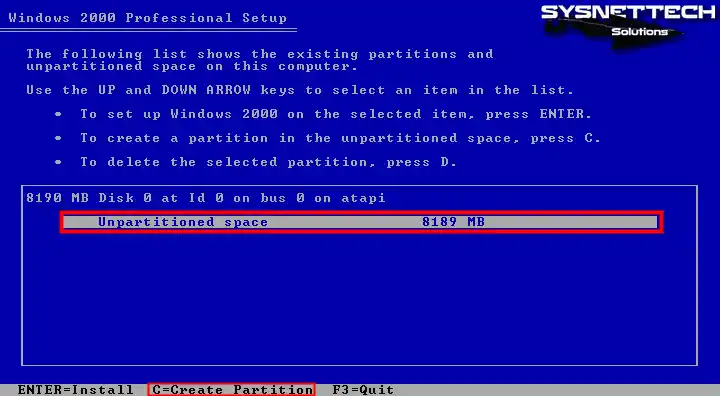
Step 4
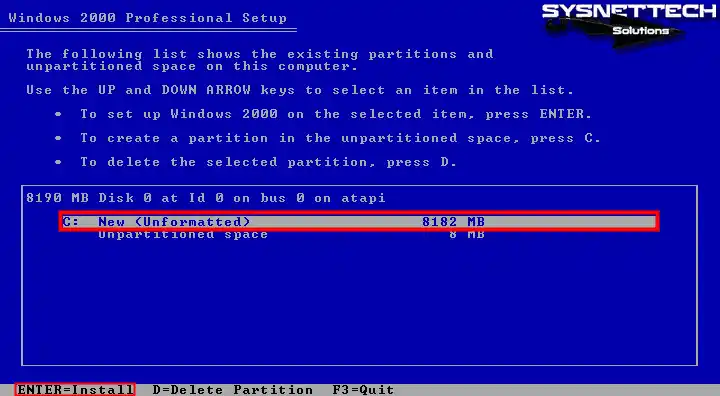
Here you can see the size you assigned to the virtual disk in the steps to prepare the virtual PC. Press C to create a new Partition on the disk.
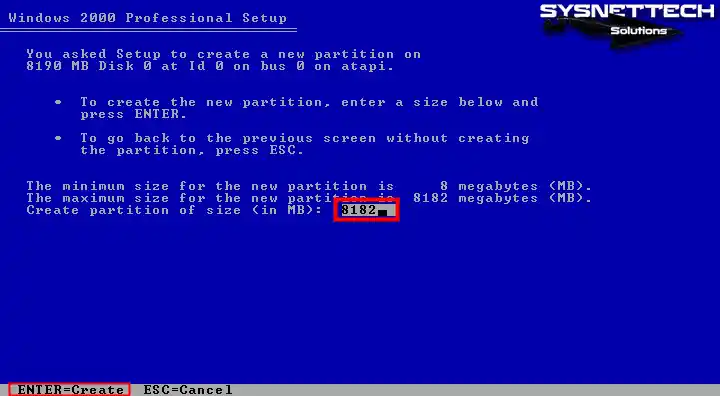
Step 5
Press Enter to accept the automatically set value for the virtual disk.
Step 6
After creating the C partition on the disk, press Enter to start the installation.
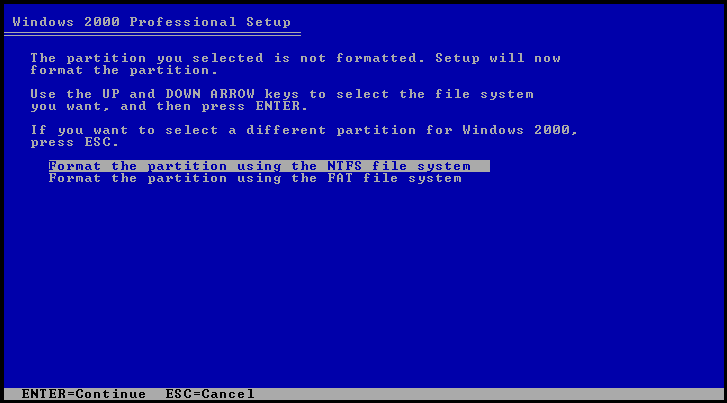
Step 7
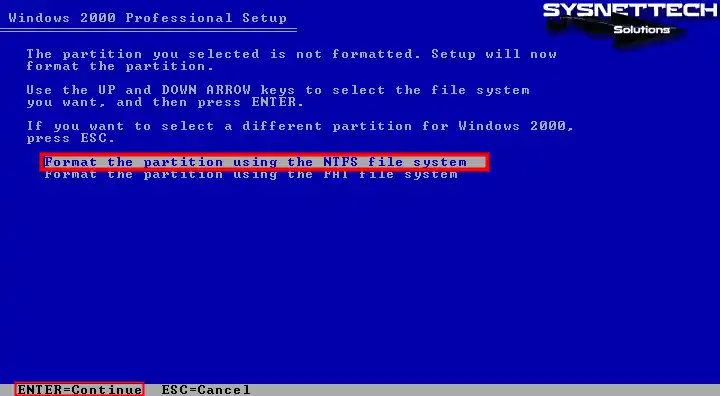
Press Enter on the “Format the partition using NTFS file system” option to configure and format the file format of the disk as NTFS.
Step 8
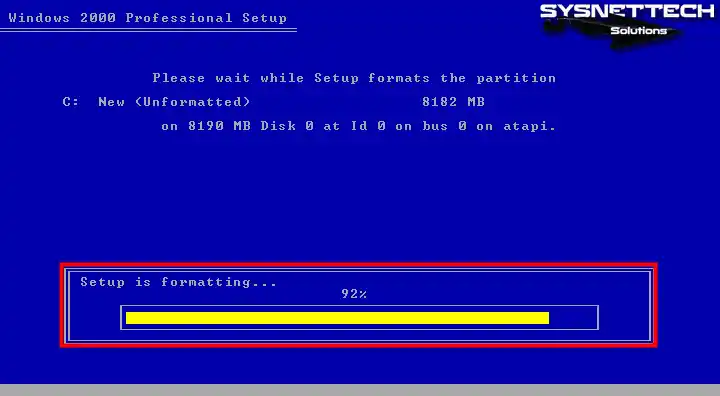
Wait while the setup wizard formats the disk. This will take very little time on the VM, but on a physical computer it may take some time.
Step 9
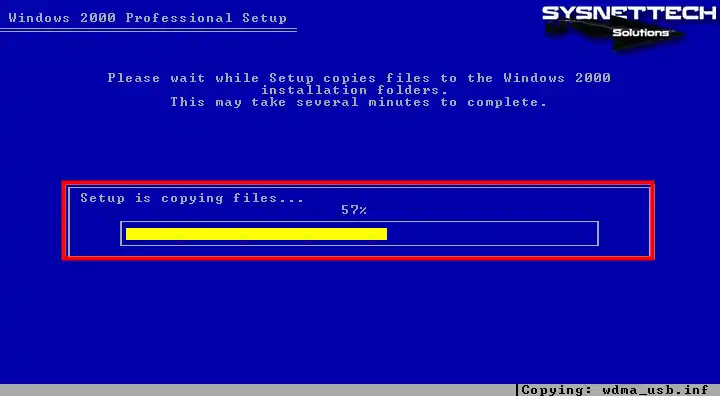
Wait while the setup wizard copies the Windows 2K system files to disk.
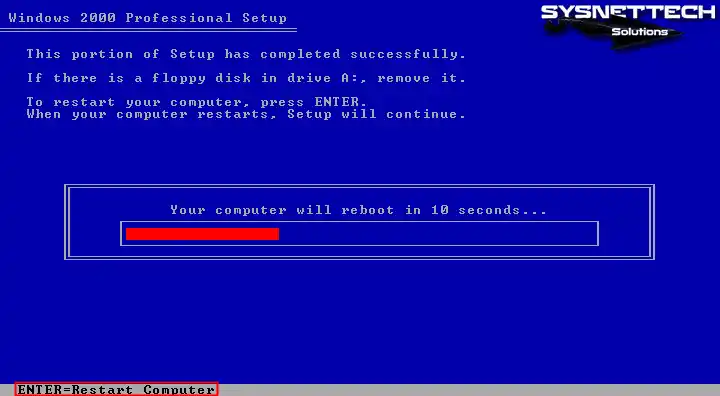
Step 10
Your virtual computer will restart after the time specified by the timer has elapsed, but press Enter to manually reboot your system.
Step 11
Wait while your Windows 2K virtual system boots up.

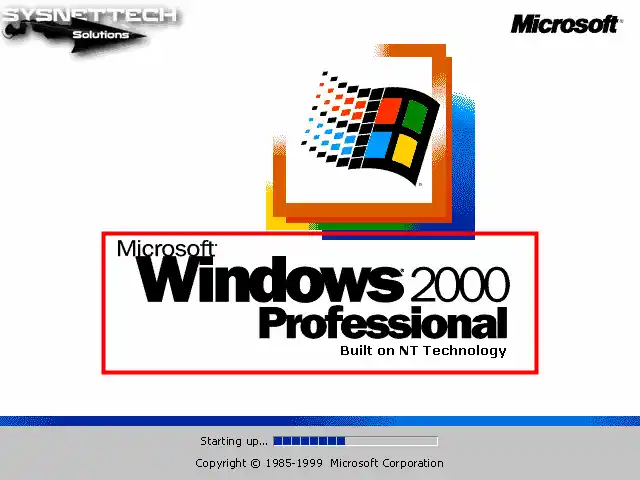
Step 12
Wait while Microsoft Windows 2000 Professional (Built on NT Technology) starts up.
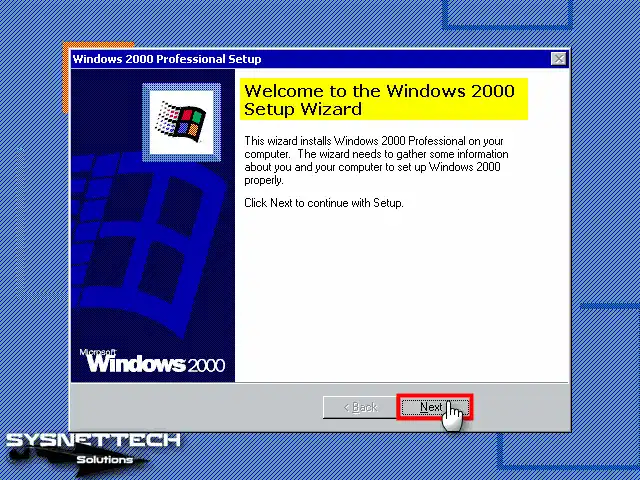
Step 13
It is reported that some information about your virtual computer will be collected for installation when the Win2K setup wizard opens, so click Next to continue.
Step 14
Wait while the setup wizard installs the drivers for your virtual PC devices such as the keyboard and mouse. At this step, the screen of your virtual PC may flicker, so do not turn off your system.

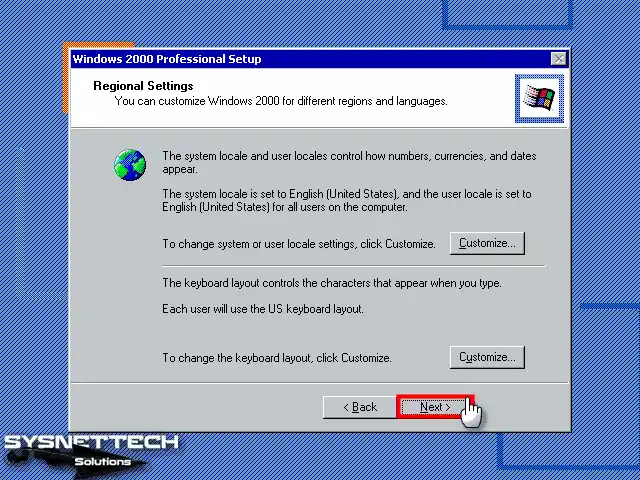
Step 15
Configure the region and location of your system according to where you live and click Next.
Step 16
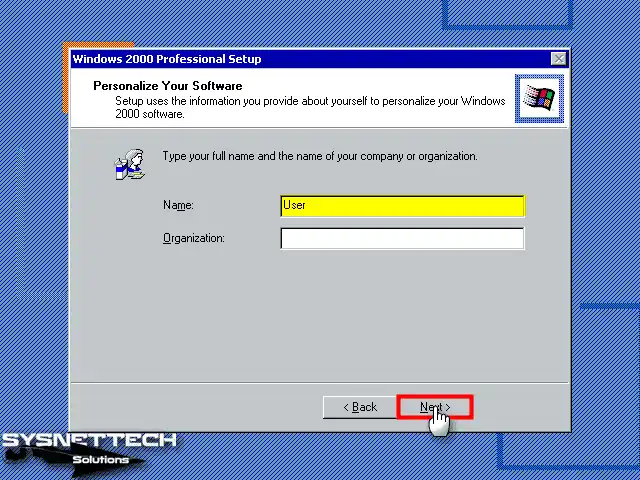
Type a user account name for your virtual system and continue.
Step 17
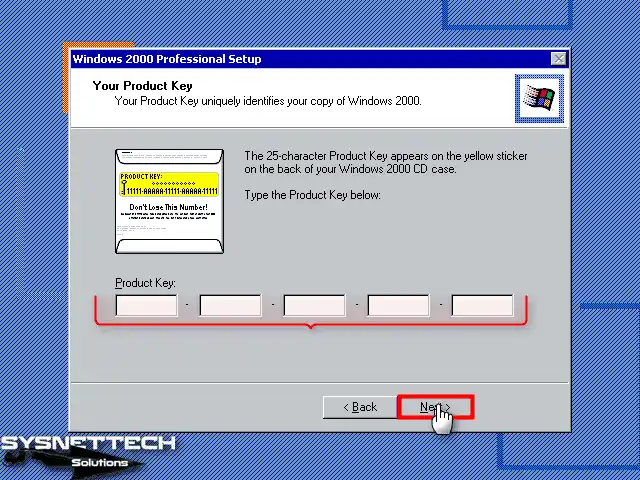
Enter the product key of the Windows 2000 Professional operating system correctly and click Next.
Step 18
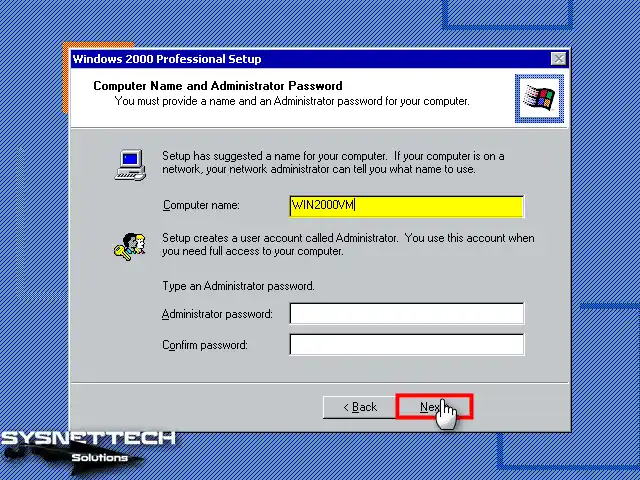
In this window, type a computer name and also set an administrator password for your system.
Step 19
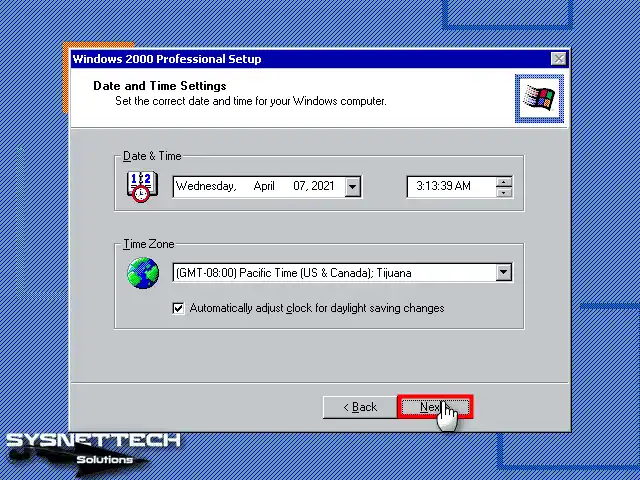
Configure the date and time settings of your virtual system according to the country and location you live in.
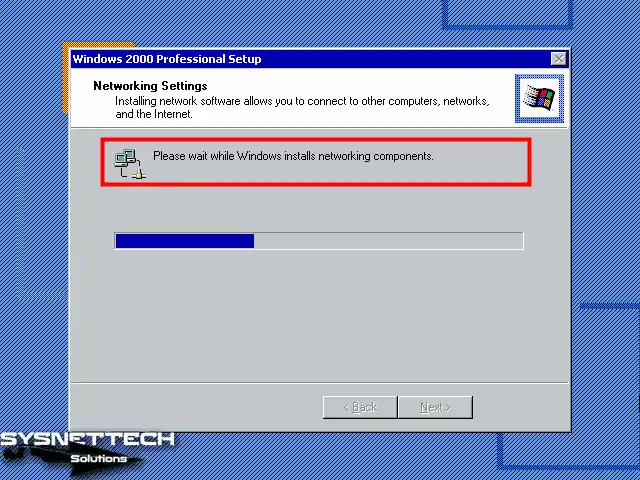
Step 20
Wait while Windows installs the system and network components.
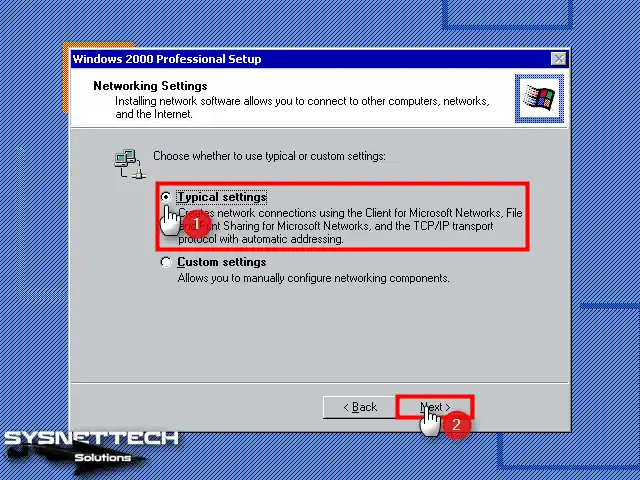
Step 21
Configure the network settings to Typical for Windows 2000 and continue.
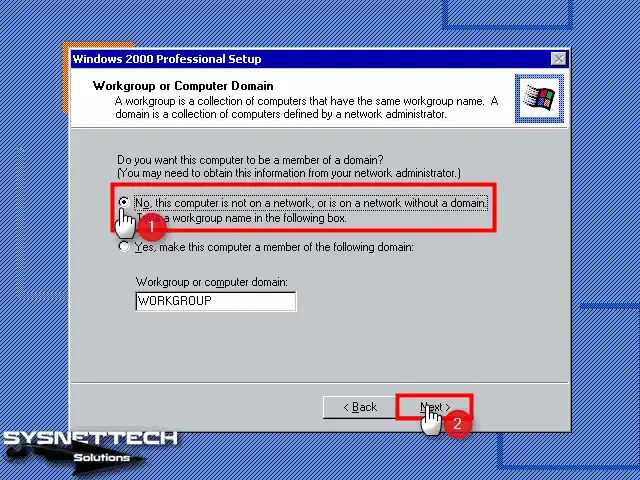
Step 22
If you are using the Active Directory service on a server in your network structure, you can add your virtual system to the domain environment. Otherwise, configure WORKGROUP for default local network settings.
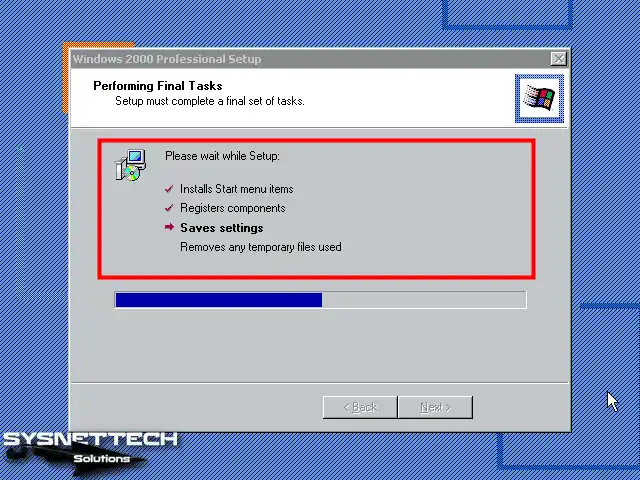
Step 23
Wait while the setup wizard configures your system’s start menu items, registry components, and other settings.
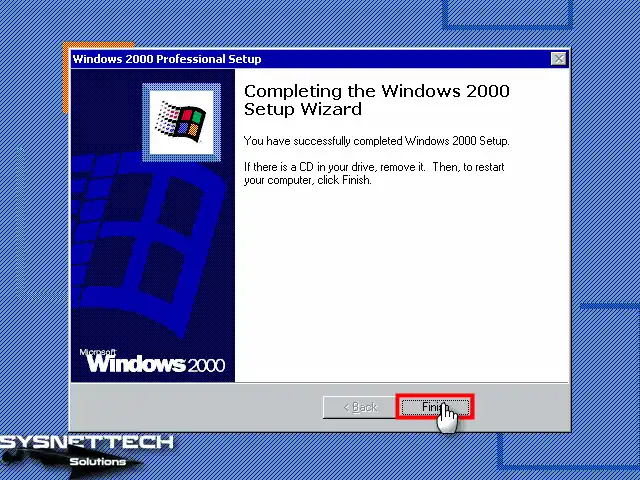
Step 24
After successfully installing the Windows system, click Finish to close the window. In this step, your virtual PC will restart.
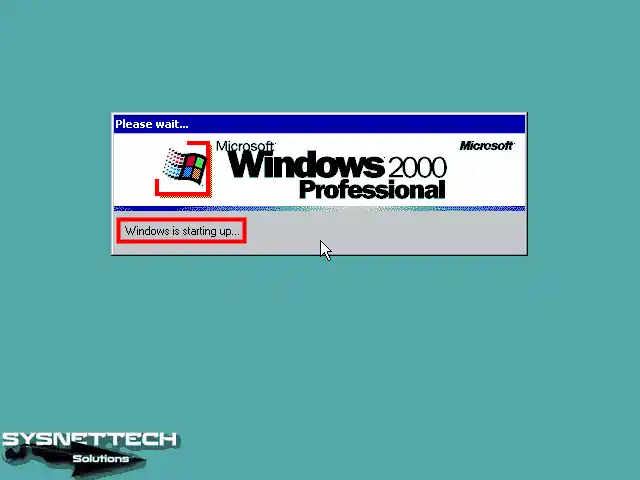
Step 25
Wait while Win2000 Pro starts up.
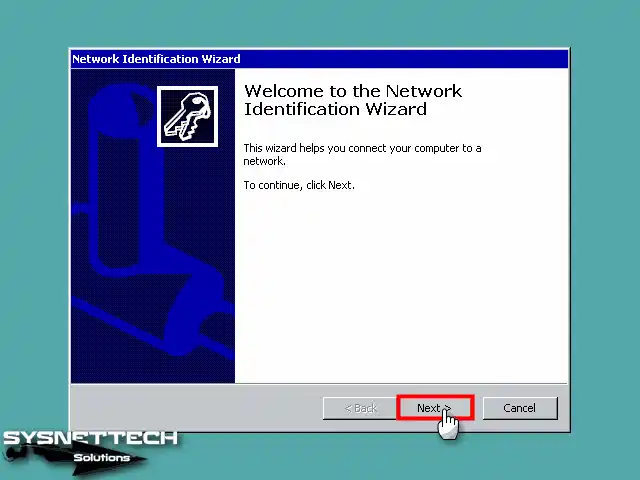
Step 26
Click Next when the Network Identification wizard opens.
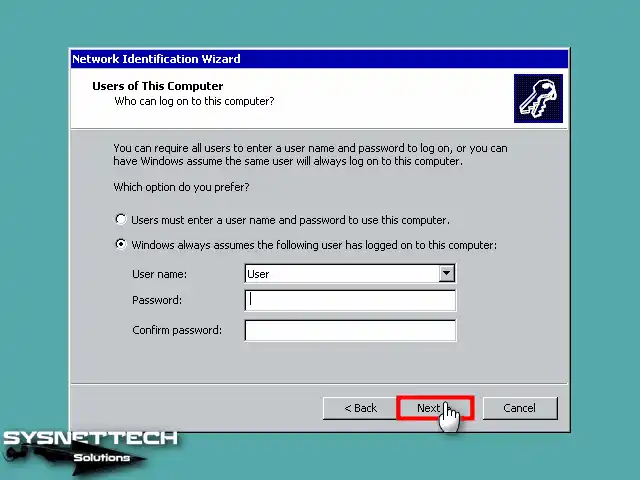
Step 27
If you are going to use only one user account on your system by default, you can assign a password to your user account in this window. You can also set password enforcement at users login to restrict use by unauthorized persons.
Step 28
After configuring the network and login settings, click Finish.

Step 29
When your Windows 2K operating system starts, you will see the first desktop screen as in the image below.
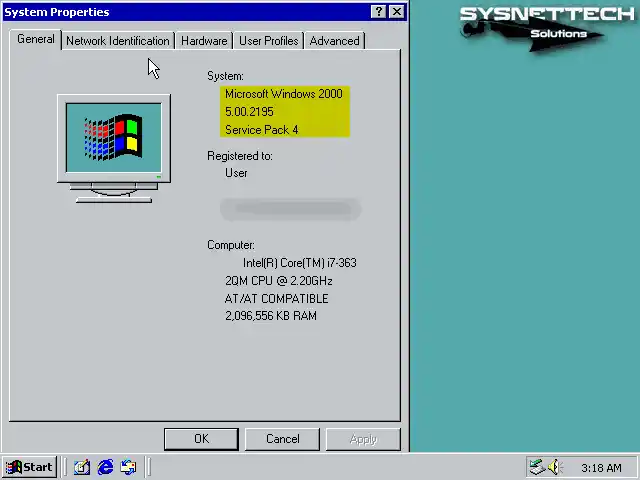
Step 30
After right-clicking on My Computer, click Properties from the listed options and check the system information.
How to Install VMware Tools
After successfully installing the Windows 2K system on a new virtual machine until this step, you need to install VMware Tools to fix problems such as screen resolution.
Thanks to VMware Tools, you can use your virtual system running in your VM more efficiently and performance.
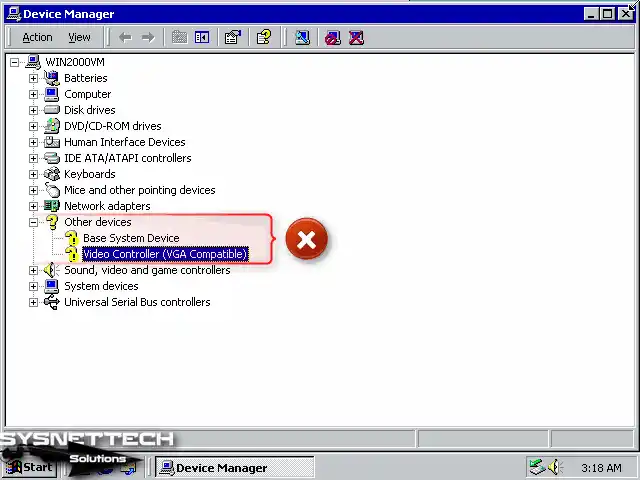
Step 1
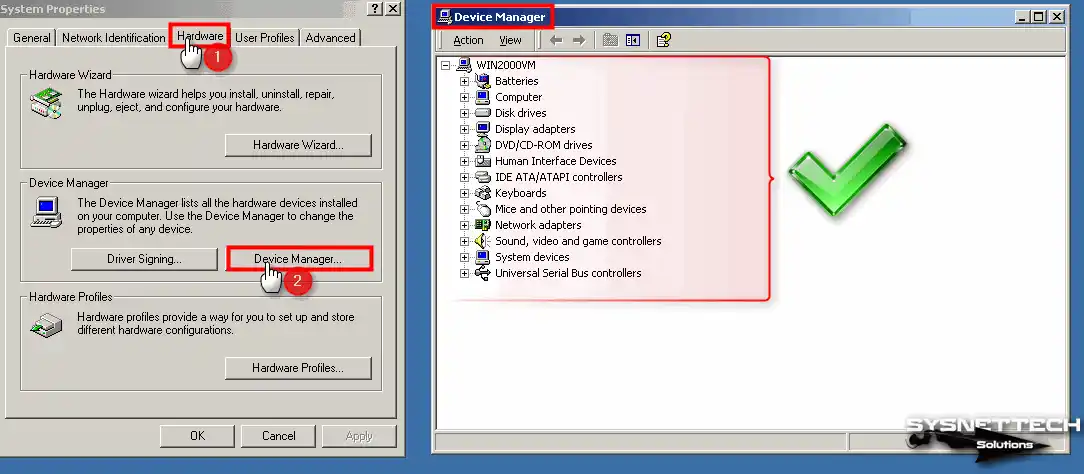
First, right-click on My Computer, then open Properties / Hardware / Device Manager and check for drivers not installed on your VM.
Step 2
Click VM / Install VMware Tools in Workstation Pro’s menu.

Step 3
If you get the following error while trying to open the VMware Tools wizard, you need to install the KB835732 update on your system. You can find the KB835732 update in the Win2K ISO file you downloaded to your computer.
Microsoft Runtime DLLs cannot be installed on this operating system.
Please see Microsoft KB835732 for details.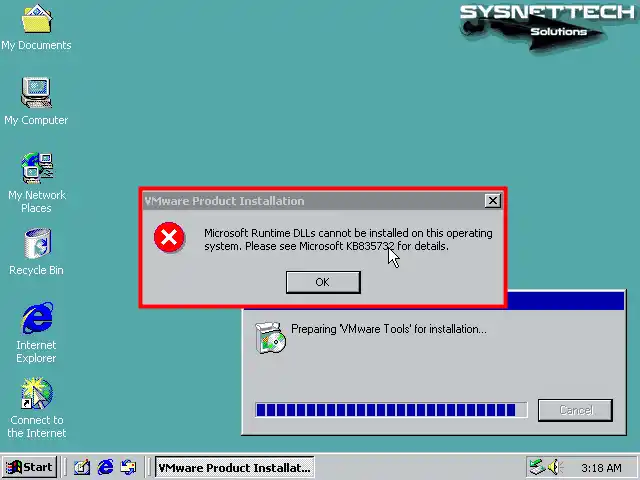
Step 4
Add the KB835732 ISO file to the CD/DVD device of the virtual machine.
Step 5
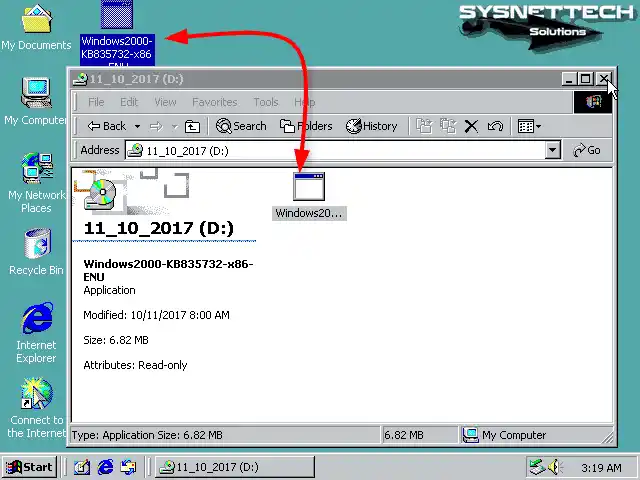
Open My Computer and copy the EXE file in the image file to the desktop location.
Step 6
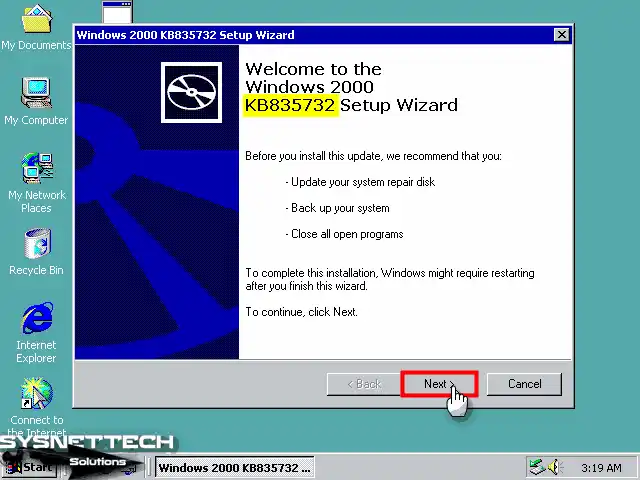
To install the Win2000 KB835732 update, open the setup file and click Next in the setup wizard.
Step 7
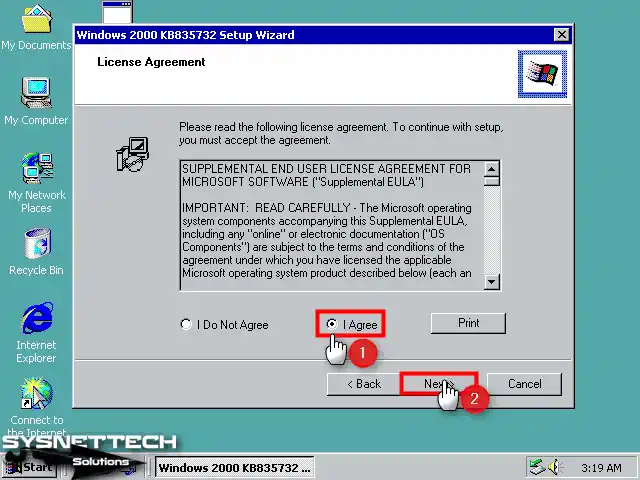
Accept the license agreement of the Windows KB835732 update and click Next.
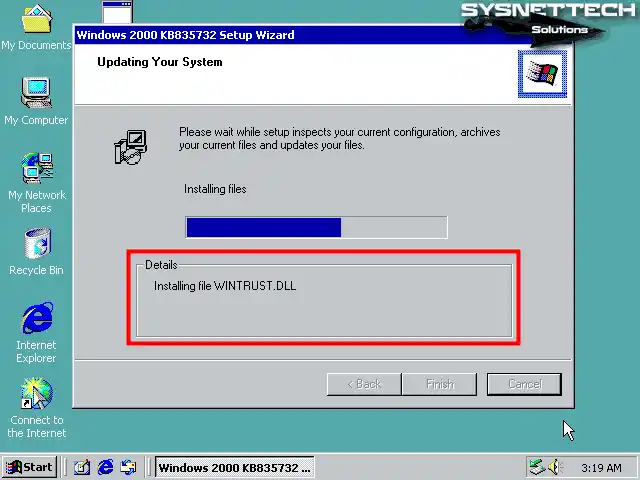
Step 8
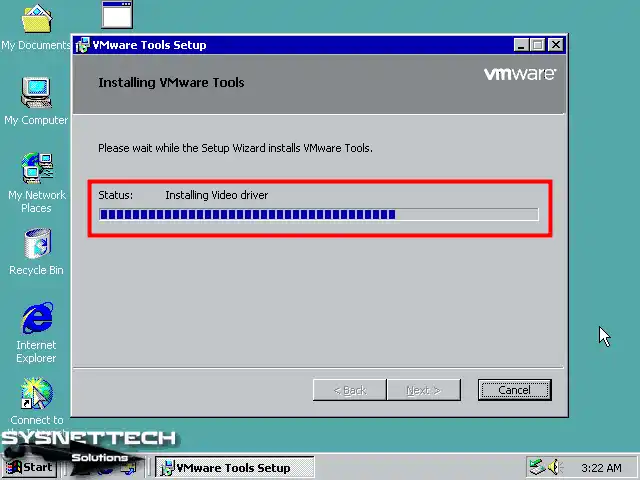
Wait while the setup wizard is updating your system and do not turn off your system.
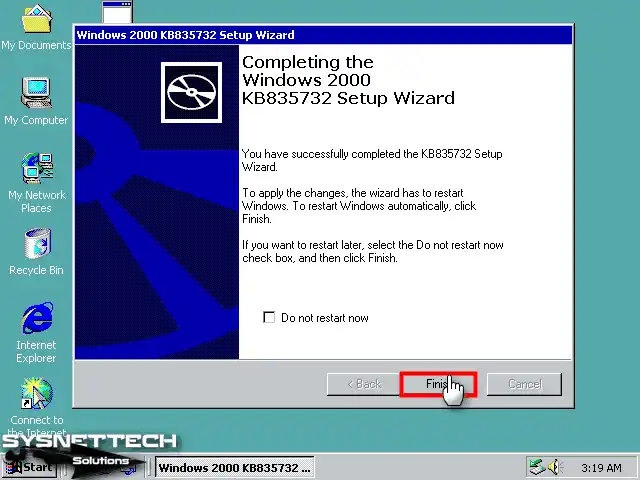
Step 9
After completing the installation, click Finish and restart your system.
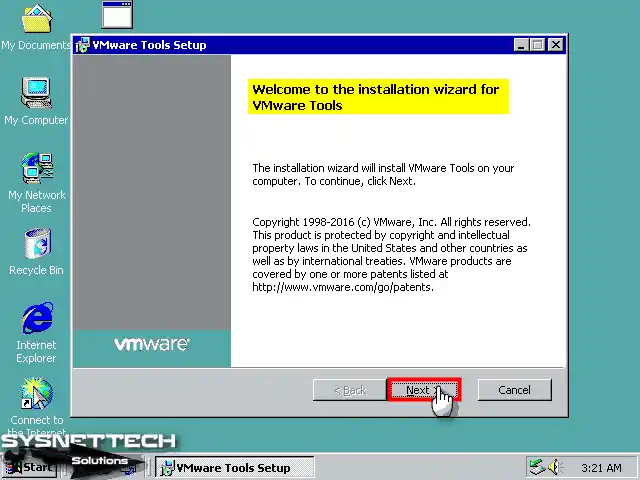
Step 10
When you start the VMware Tools installation again, this time continue with Next when the installation wizard opens.
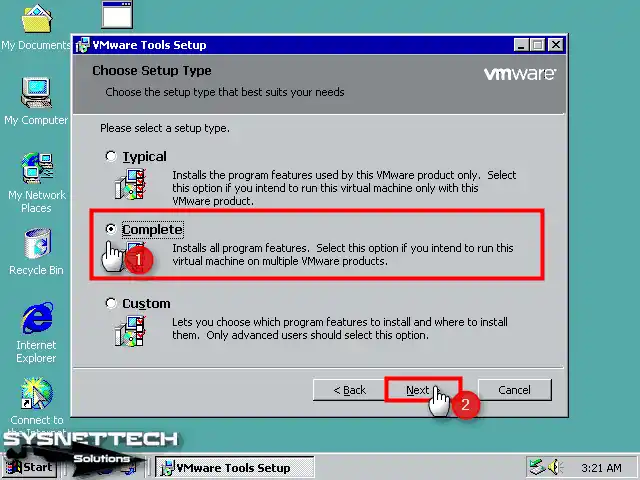
Step 11
Select Complete as the installation type and continue.
Step 12
Finally, click the Install button to start the installation of the virtual machine tools.
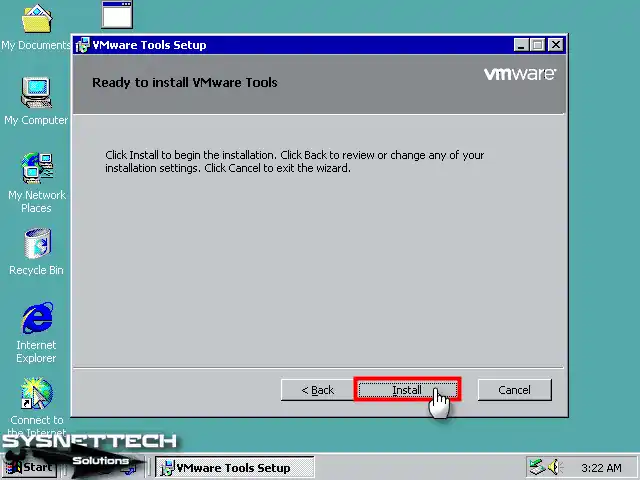
Step 13
Finally, click the Install button to start the installation of the virtual machine tools.
Step 14
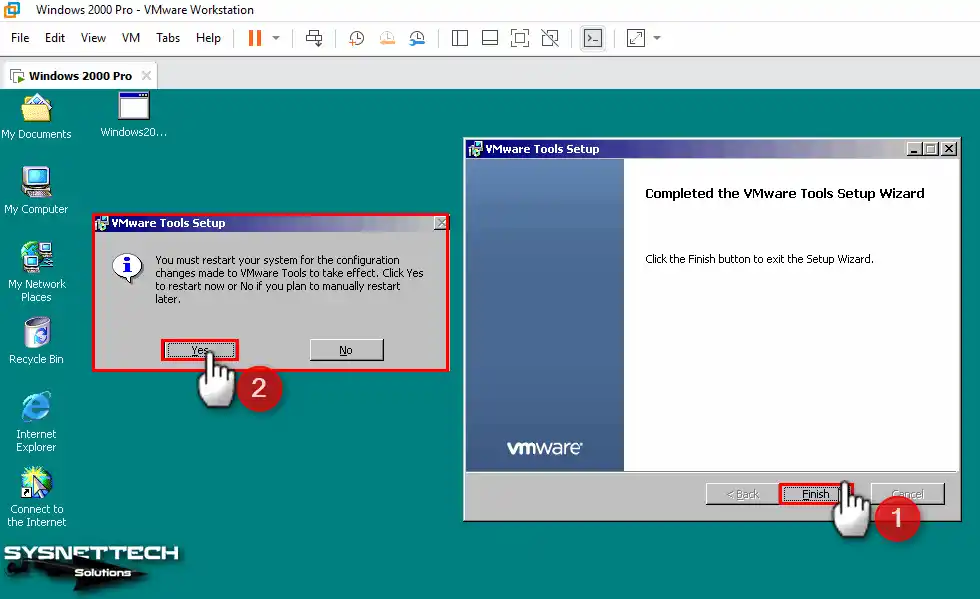
After completing the VM Tools installation, click Finish and after closing the window, restart your virtual system and ensure the settings are active.
Step 15
When you view Device Manager again after your system boots up, you can see that all drivers are installed.
Step 16
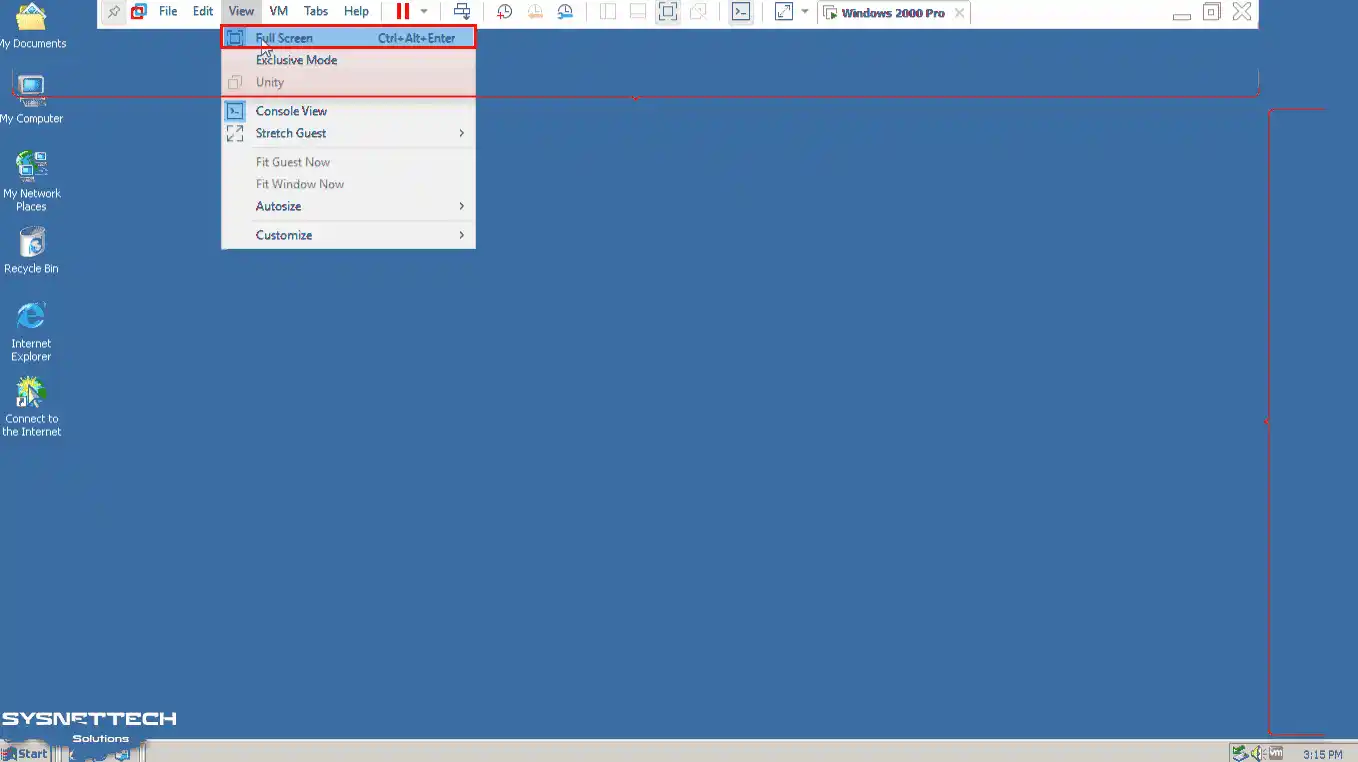
When you want to use your Windows guest machine in full-screen mode, click View / Full Screen from the tool menu and check that the resolution of the VM is adapted to the screen of your host PC.
Step 17
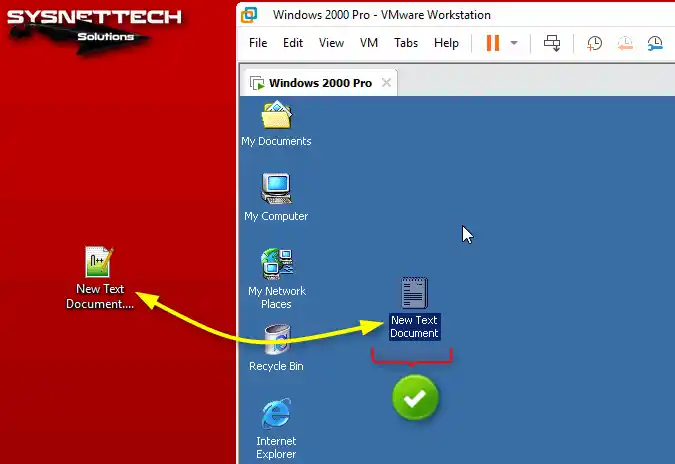
At the same time, simply drag and drop any of your files to quickly transfer files from your host system to your guest’s virtual system.
How to Configure the Internet Connection
Another thing you will do on your virtual computer is to check the network and Internet connection. After you set the internet connection settings, you can easily access services such as Google.
Step 1
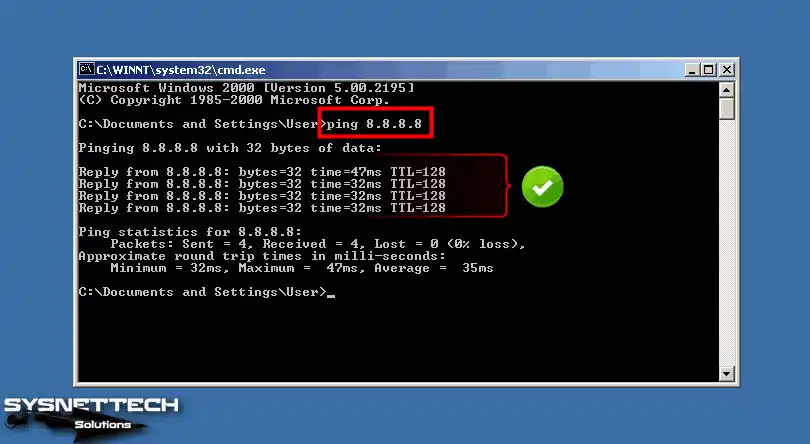
First, open the Run agent from the Start Menu and type CMD in the text box, and press Enter. After opening the CMD command prompt, check that you can access Google servers with the ping 8.8.8.8 command.
Step 2
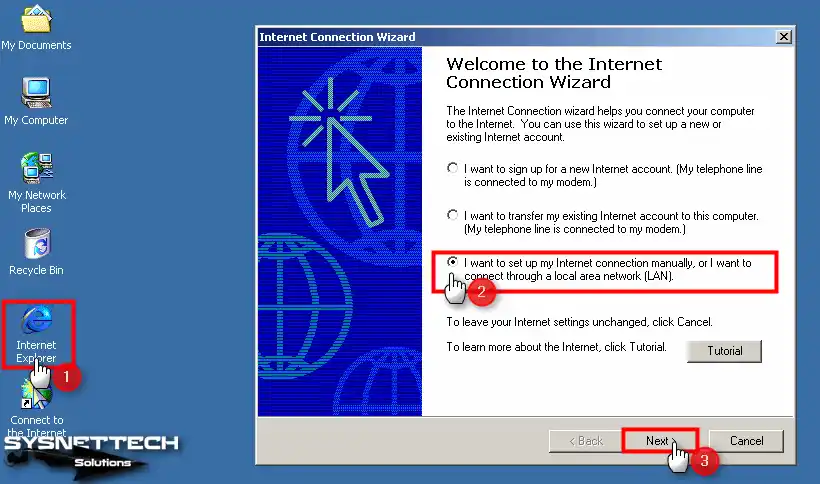
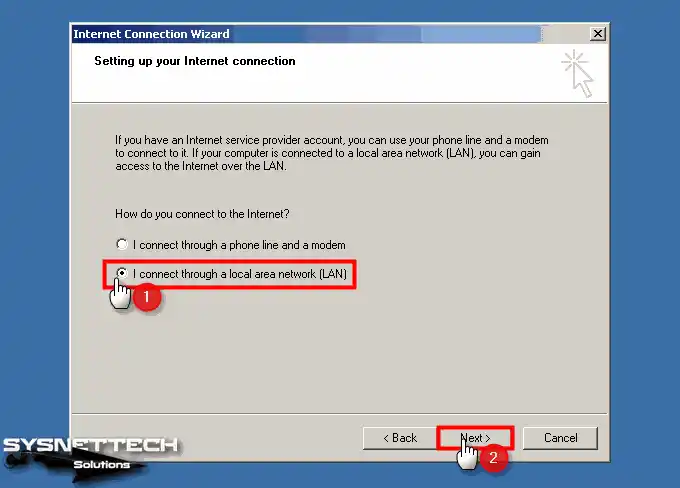
If your internet connection is working, when you click on the Internet Explorer browser, the Internet Connection Wizard will open. In this window, select I connect to the Internet via LAN option and click Next.
Step 3
Select the LAN connection setting again and click Next.
Step 4
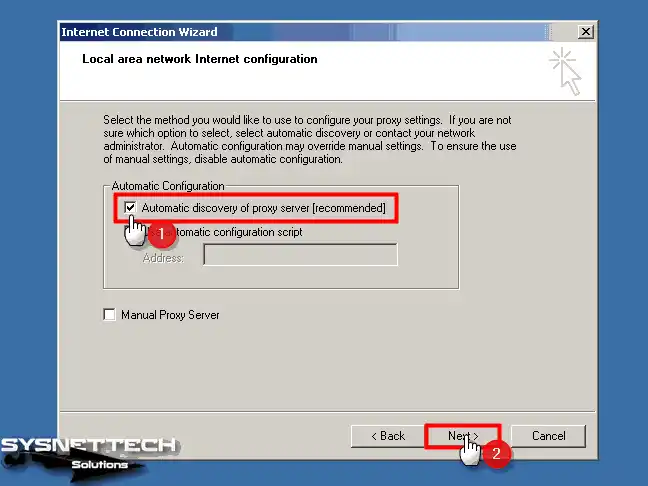
Enable automatic discovery of proxy servers and continue.
Step 5
If you want to set up an Internet Mail account, you can select Yes and make the necessary settings. Here, select No to configure the mail account later and click Next.

Step 6
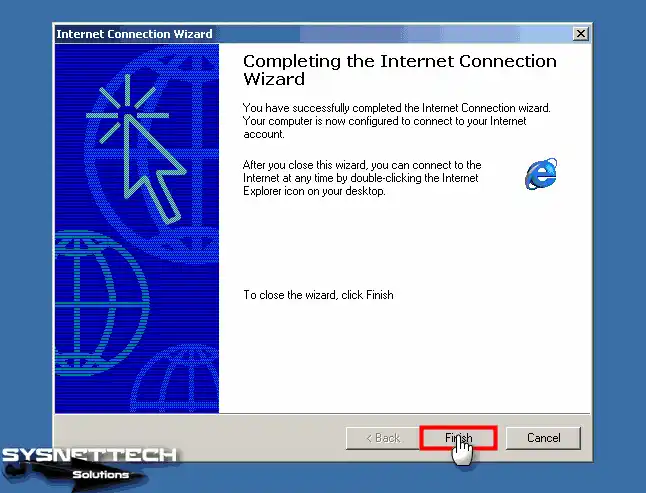
After configuring the Internet connection settings, click Finish to close the window.
Step 7
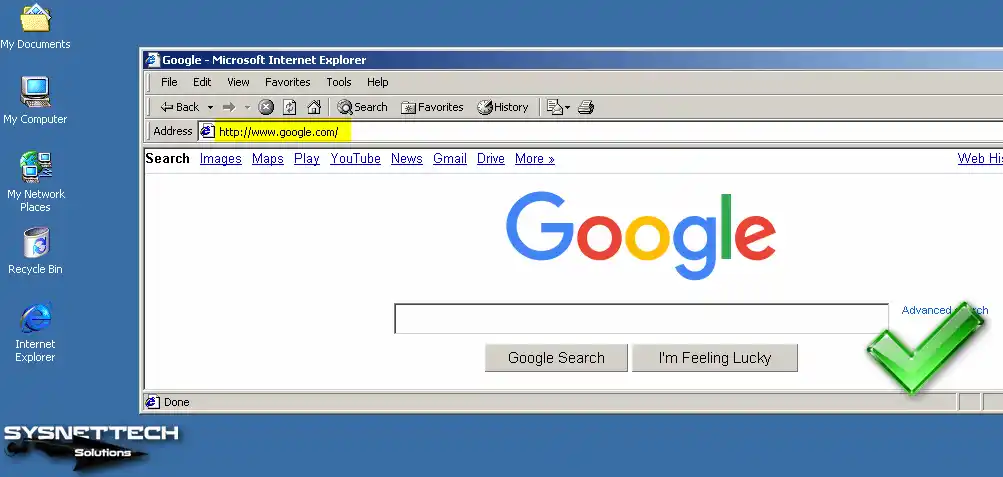
When the Internet Explorer browser automatically opens, visit the Google website and check your connection.
How to Configure Shared Folder
By activating the Shared Folder feature on your virtual computer, you can transfer files between the host and the VM more easily.
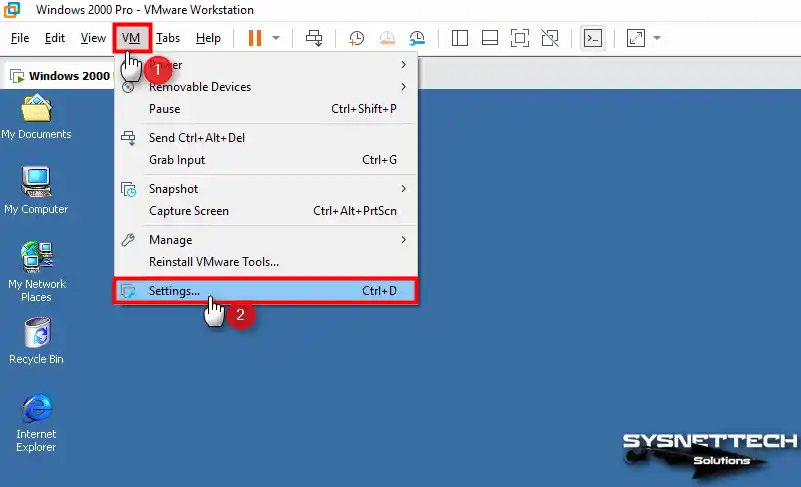
Step 1
Click VM / Settings to enable Shared Folder on Win2000 VM.
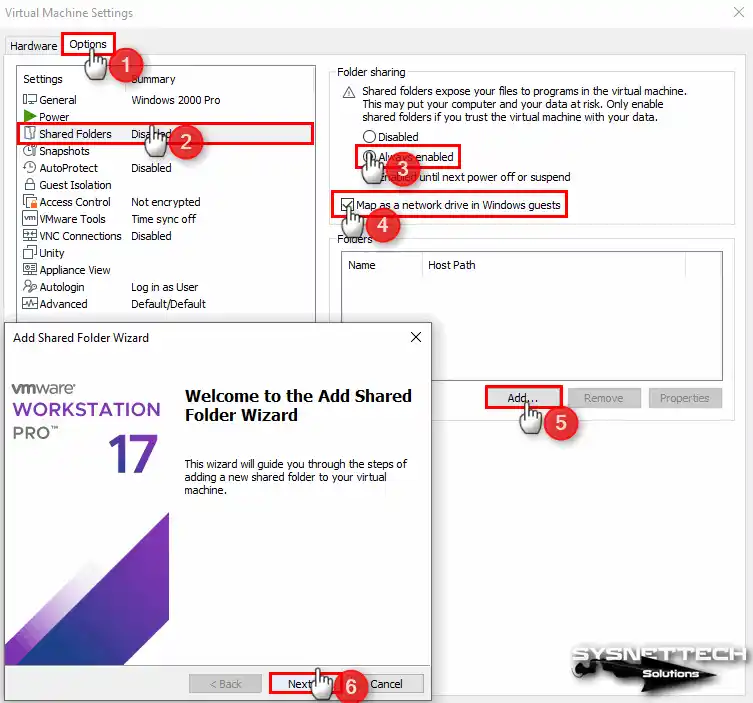
Step 2
In the Virtual Machine Settings window, click Options and then select the Shared Folders feature.
Enable the Folder Sharing setting on the right and check the relevant option to use the shared folder as a network drive and click the Add button to select a shared folder on the host.
When the Shared Folder wizard opens, click Next to continue.
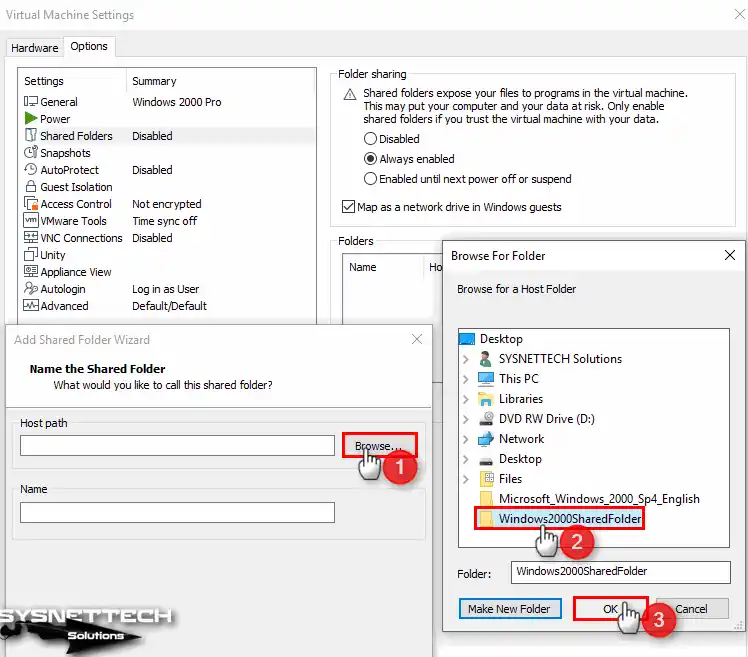
Step 3
Select and select a folder on your host via the Browse button.
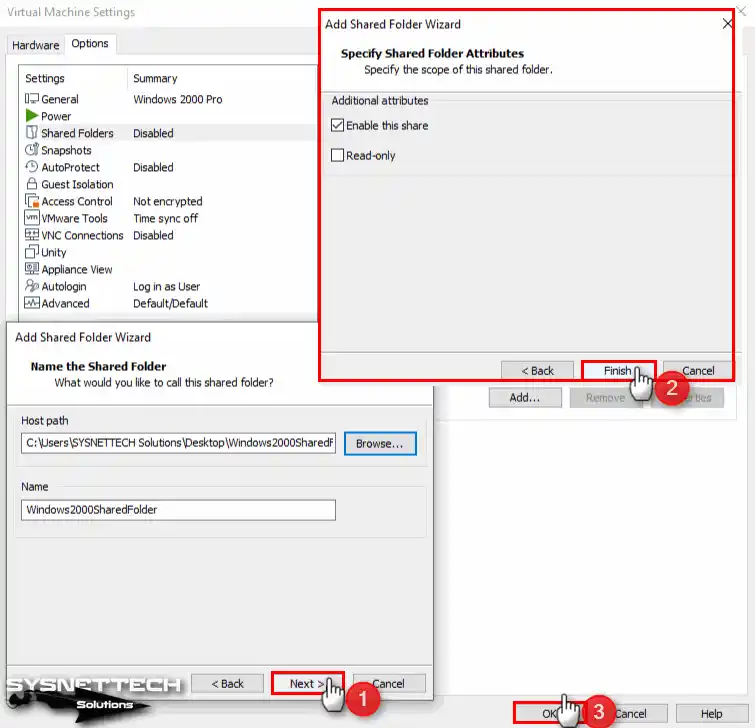
Step 4
Enable public folder sharing in this window and click Finish.
Step 5
Click My Network Places and you can see that the operation is successful when you try to access the shared folder on the host as in the image below.

Step 6
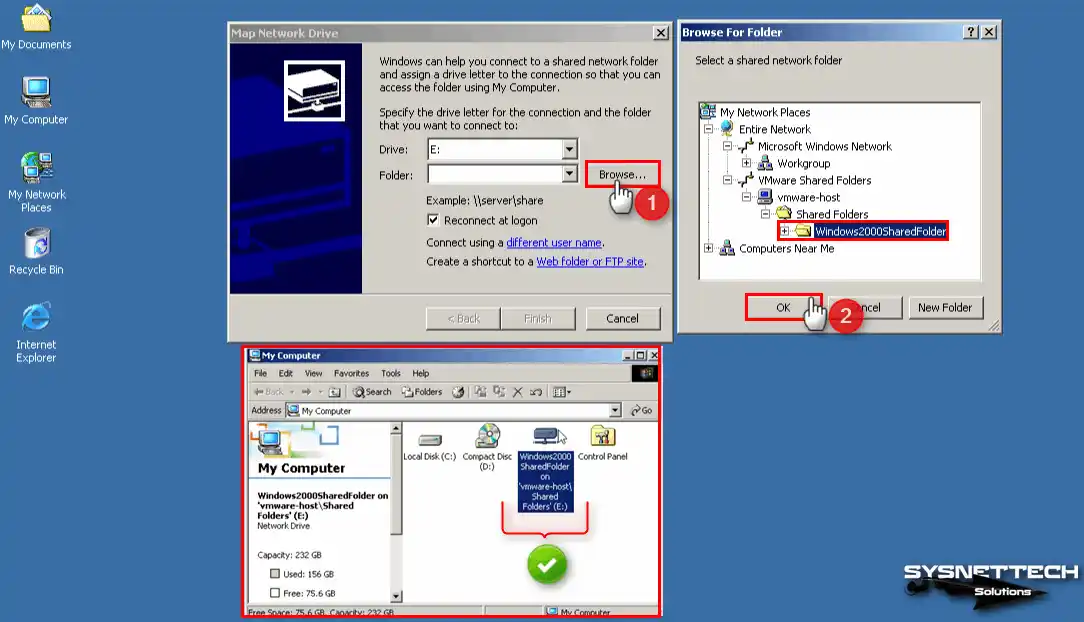
Also, to use the public folder as a network drive, click Map Network Drive on My Computer, and then add the Shared Folder location via Browse to the Folder section.
How to Use USB Flash Memory
Using a Flash Memory or Portable Hard Disk using the USB connection port on Windows 2000 is possible without driver installation.
Step 1
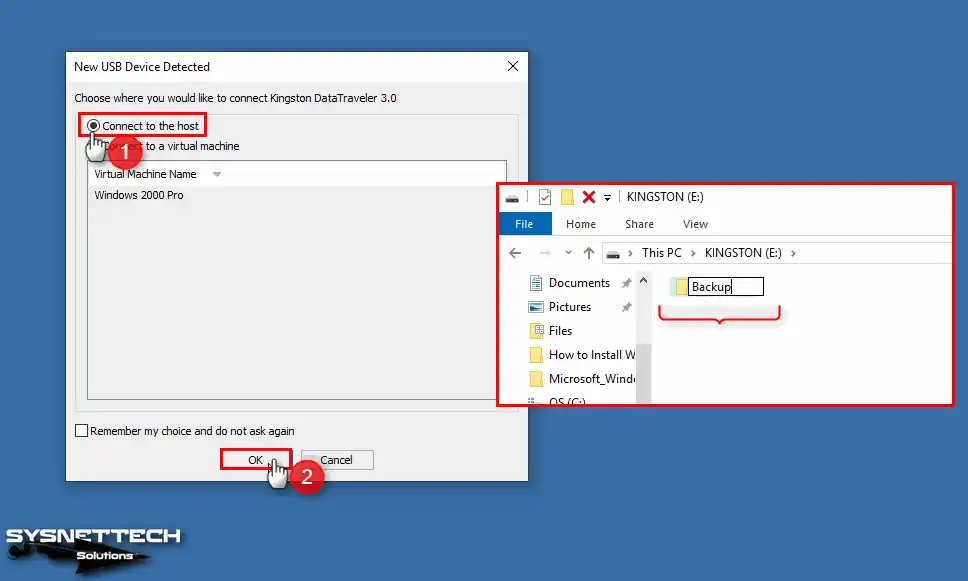
After plugging your USB flash drive into the host’s USB port, the New USB Device Detected window will open on VMware. In this window, first, enable the Connect to the host option and click OK.
Create a folder called Backup in your USB memory on your host system.
Step 2
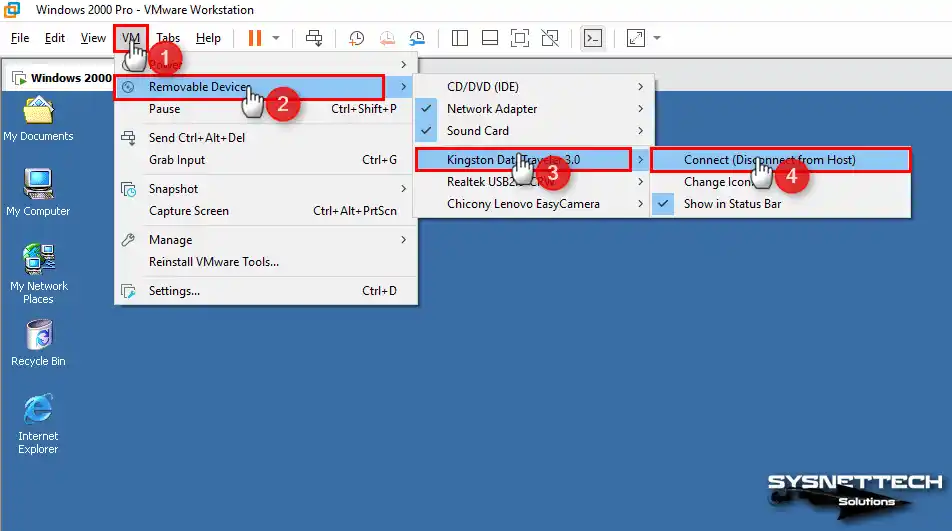
To connect your USB disk to the VM, click VM / Removable Devices / Name of your USB / Connect from the Workstation tool menu.
Step 3
The drivers for your USB flash memory will be automatically installed by the system. When you check Device Manager, you can see that KINGSTON DataTraveler 3.0 USB Device is active.

How to Check Direct3D
After installing your Win2K system on the virtual PC, you should be able to play games outside of your work or use applications that require 3D acceleration.
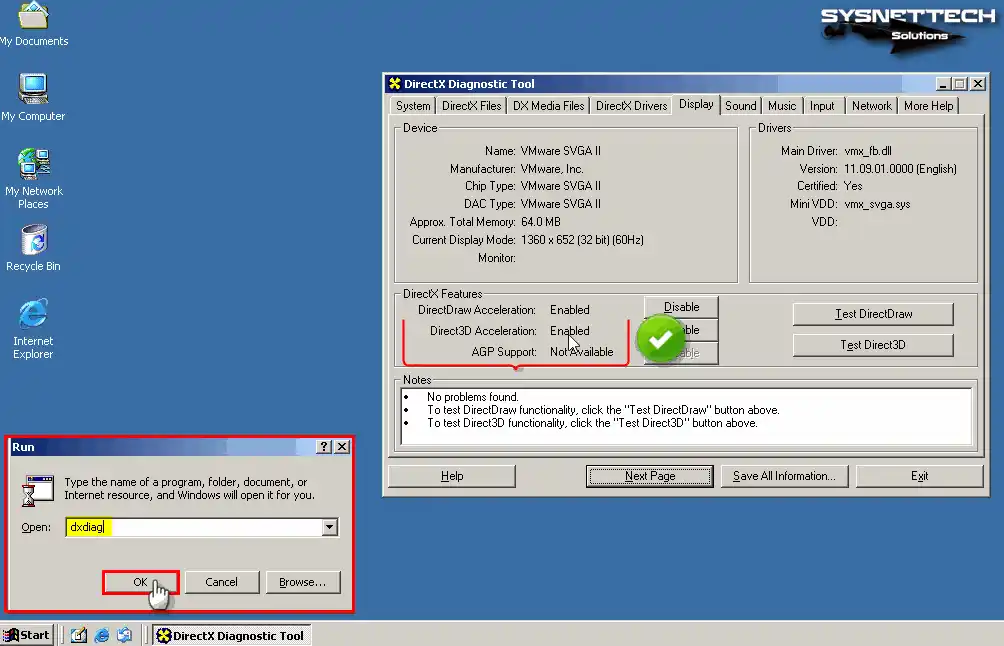
If you had selected a higher virtual hardware compatibility value instead of 10.x when creating the VM, Direct3D Acceleration would not be enabled on your virtual system and would appear Disabled.
To check if the Direct3D feature is enabled on your system, press the Windows + R keys together, and then type and run the “dxdiag” command in the window that opens.
To check if the Direct3D feature is enabled on your system, press the Windows + R keys together, and then type and run the “dxdiag” command in the window that opens.
How to Delete the VM
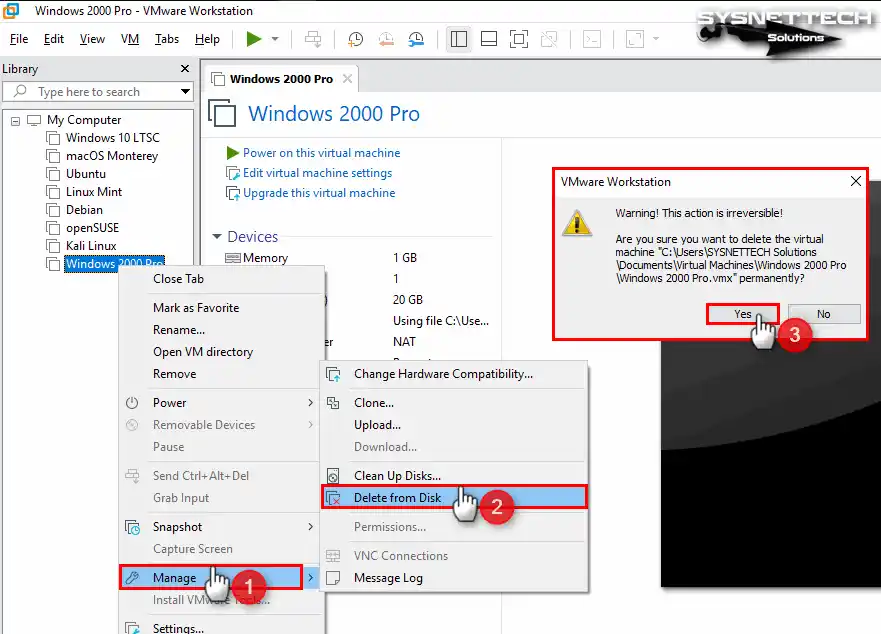
If you no longer want to run your Win2K guest machine on your host PC, we recommend deleting all VM files completely to save disk space.
Right-click on your guest machine from the left panel of Workstation Pro and click Manage / Delete From Disk. In the warning window that opens, click Yes to confirm the deletion of all files of your virtual system.
Video
Installing Old Versions
Workstation Version
Youtube Video
Slide
Related Articles
♦ How to Install Windows 7 with VMware
♦ How to Install Windows 95 with VMware
♦ How to Install Windows 98 with VMware
♦ How to Install Windows 10 with VMware
♦ How to Install Windows Me with VMware
Table of contents
- Video
- Download Links
- Create Unofficial Service Pack 5 ISO
- Setting up the Windows 2000 VM
- Installing Windows 2000
- Installing the Unofficial Service Pack
- Installing VMware Tools
Video
Download Links
The Windows 2000 Professional ISO and Product Key can be downloaded from WinWorld. in this guide I used the Windows 2000 Professional English 5.00.2195.1 ISO (325.88 MB) ISO:
Create Unofficial Service Pack 5 ISO
In order to install VMtools we need to update the Windows 2000 installation. We can do this with the Unofficial Service Pack 5 however we will not be able to drag and drop files over to the VM as VMtools aren’t installed. To overcome this we will need to create an ISO of the unofficial service pack which we can load into the VM.
To do this we need to first of all extract the zip file. We can do this by right clickin the Unofficial Service Pack 5 zip file and selecting Extract All:

This gives the following extracted folder:

Next we can launch NCH Express Burn. Select Data CD and then create:

We can select Add Folder:

Click into the Extracted folder.

And then select Select Folder:

To the bottom right we can select Burn Data CD:

Then we can type in the Disc Label and then select Create Image:

Select the location you want to save the ISO in and then select Save:

You should be informed that the ISO has been saved:

You should now have the ISO with the Unofficial Service Pack 5:

Setting up the Windows 2000 VM
Install 7zip and extract the downloaded 7z file to get the Windows 2000 ISO.

Next launch VMware player and select Player → File → New Virtual Machine:

Select Installer disc image file (iso) and then Browse:

Load the W2PIS_EN.iso and select next:

Use the default location for the Virtual Machine:

Change the maximum size to 120 GB and select Next:

Select customise hardware:

Change the memory to 4096 MB:

Change the number of processors to 2:

Use ISO file should be checked alongside connect at power on:

It is ill-advised to connect an end of life OS to the internet so uncheck connect at power on for the network adaptor:

Only USB 1.1 is supported so change USB compatibility to 1.1:

Leave the sound card as default:

Leave the printer as default:

Up the display to 1 GB:

Select Close:

Now select Finish:

The Virtual Machine will now start:

Select [↵] to Continue:

Press [c] to continue the setup:

Press [F8] to accept the license agreement:

Press [↵] to install:

Press [↵] to continue:

The VM will reboot:

Press next to continue:

Here you can alter the language settings, I will change to English (UK). Select customise:

Then change to your desired language:

Select Set Default and set the default to your desired language:

Now select customise to change the keyboard layout:

In this case I will remove English (US):

Then select OK:

Then select ok at the warning:

Once the language settings are selected, select Next:

Type in your user name and select Next:

Type in the 25 digit product key supplied to by WinWorld (right hand side of their website corresponding to Windows 2000 Professional) and select Next:

Type in the name of your computer and select Next:

Select your time zone and select Next:

Select Next:

Select Next:

Select Finish:

We aren’t going to connect to the internet, so just select Cancel at the Network Identification Wizard:

Select OK:

Uncheck show this screen at startup and select Exit:

Installing the Unofficial Service Pack
Select Player → Removable Devices → CD/DVD → Settings…

Select Browse:

Then select the USP5.iso and select Open:

Select Ok:

Select My Computer:

Select USP5 (D:)

Open the sub folder:

Double click the w2ksp51.exe:

Select next:

Select I Agree and then select Next:

Select Next:

Select Finish:

The computer will now restart. Log in:

Select Install Tools:

Open My Computer:

Double click VMware Tools (D:):

Double click the setup:


Select Install:

Select Finish:

Then select Yes to Restart the VM:

Select OK:

The VM can now be resized can now be resized and drag and drop can be carried out between the VM and host PC:


This article shows how to set up Windows 2000 Professional SP4 on a new virtual machine using VMware Workstation 16 Pro on Windows 10.
Windows 2000, aka Windows 2K, has new features such as better hardware scanning, easier Internet connection, multitasking capability, Firewire, USB devices, and support for wireless devices.
Released shortly from Windows XP, Windows 2000 is designed for corporate businesses and home users.
Since the release of this version, Microsoft has received a lot of criticism for multiple vulnerabilities in the system.
Although Windows 2000 is not used today, it may be used on some older machines. Therefore, you need a physical PC or a virtual machine program to use this system.
You can use VMware Workstation Pro as virtual machine software. Thus, you can watch this video or follow the steps below to install the Windows 2000 Pro version on the virtual machine on your Windows 10 computer.
Step 1: First, to run a virtual computer on your Windows 10 computer, follow the steps in this article to install the VMware software.
Step 2: After installing the Workstation software on your system, download the Windows 2000 ISO file used in this video tutorial from the link below.
➦ https://bit.ly/DownloadWindows2000SP4EN
Step 3: Run the VMware virtualization program after downloading the Microsoft 2000 ISO file to your computer.
Step 4: When you start Workstation 16 Pro, click Create a New Virtual Machine from the options on the first screen.
Step 5: In the New Virtual Machine Wizard window, to configure the virtual computer with more detailed settings, select Custom (Advanced) and click Next.
Step 6: In the VMware VM compatibility window, select the version of Workstation (16.x) installed on your system and then click the Next button.
Step 7: In the Guest operating system selection window, select I will install the operating system later and continue.
Step 8: Select “Windows 2000” for the second version in the Guest Operating System window and click Next.
Step 9: In the Name and Platform window, type a name for Win2000 and choose a location on your external hard drive for the installation location or use the default location.
Step 10: In the Firmware Type window, select BIOS for Win2000 and continue.
Step 11: In the Processor window, set 1 processor and two core counts for the Win2000 virtual machine and continue.
Step 12: Select and configure the 2 GB RAM size for Win2000 in the Memory window.
Step 13: In the Network Type window, select the NAT type to use a different IP block than your host’s IP block and continue.
Step 14: For the I/O Controller, select the Paravirtualized SCSI disk controller and click Next.
Step 15: Select the IDE disk in the Select a Disk Type window and click Next.
Step 16: In the Select a Disk window, select Create a New Virtual Disk and click Next to create a new disk for a clean system configuration.
Step 17: In the Specify Disk Capacity window, configure the virtual disk size for Win2000 and store the VM files as a single file type on your host and continue.
Step 18: After creating a new machine for Win2000, add the ISO file you downloaded to your computer to the virtual device.
Step 19: After starting your virtual computer by clicking the Power on this virtual machine button, click Enter when the Setup screen opens and start the installation.
Step 20: After installing the Windows 2000 system, click on VM / Install VMware Tools from the menu. Click Next in the installation wizard and then select the installation type as Complete to install VM Tools and restart your VM for the changes to take effect. If you get the KB835732 error during the installation process, download the relevant Windows update and rerun the VM Tools wizard after installing it and install it.
Step 21: After installing VMware Tools, you can transfer files between your host and your VM and use the host’s hardware on your virtual device.
Related Posts
1. How to Install Windows Vista
2. How to Install Windows 95
3. How to Install Windows 98
4. How to Install Windows XP
5. How to Install Windows 10
-
Home
-
News
- How to Download Windows 2000 ISO for VMware/VirtualBox & Install
By Vera | Follow |
Last Updated
What is Windows 2000? How to download Windows 2000 ISO for VirtualBox or VMware? How to install Windows 2000 on a virtual machine? After reading this post, you know much information about this operating system. Let’s look through the guide from MiniTool.
Overview of Windows 2000
Windows 2000 (also called Win2K) is a major release of the Windows NT operating system from Microsoft that was released on December 15, 1999 and was released to retail on February 17, 2000. This operating system is the successor to Windows NT 4.0. On the market, four editions are available including Professional, Server, Advanced Server, and Datacenter Server.
Windows 2000 introduces Encrypting File System, basic and dynamic disk storage, Active Directory, the support for different languages, new Accessibility Options, and more. Windows 2000 is succeeded by Windows XP while Windows 2000 Server is succeeded by Windows Server 2003.
Although Windows 2000 is an old operating system, sometimes you need to install this system for use, especially use it on a virtual machine. In the following part, we will show how to download Windows 2000 ISO for VMware or VirtualBox and then install it.
Windows 2000 ISO Downloads for VirtualBox/VMware
Now there is no official download page for you to download Windows 2000 ISO but you can get an ISO file from some third-party web pages. Just search for Windows 2000 SP4.ISO, Windows 2000 Professional ISO, Windows 2000 ISO download 64 bit or other related words in Google Chrome and you can find some download pages. Open them and download the ISO you need.
Of course, you can directly search for the ISO file of Windows 2000 you need on the website of archive.org and download it.
How to Install Windows 2000 in a Virtual Machine?
After getting the Windows 2000 ISO file, you can install the system on a virtual machine and here we will take VMware as an example.
Tip: If you want to install Windows 2000 in VirtualBox, go to click New and configure the virtual machine for the setup.
Step 1: Launch your VMware Workstation on your PC. Then, click File > New Virtual Machine.
Step 2: Choose Custom and click Next.
Step 3: Select the virtual machine hardware compatibility and then choose I will install the operating system later.
Step 4: In the Guest Operating System section interface, choose Microsoft Windows > Windows 2000 Server, then change the name of the virtual machine and specify a location.
Step 5: Make processor and RAM configuration, choose a network type, I/O controller type, and virtual disk type.
Step 6: Select Create a new virtual disk, adjust the maximum disk size, specify disk file (continue with the default value) and click Finish.
After configuring the new virtual machine, it’s time to install Windows 2000 with the ISO file you have downloaded.
Step 1: Click CD/DVD > Use ISO image file to choose the Windows 2000 ISO file you get and click OK.
Step 2: Click Power on this virtual machine and the Windows 2000 Setup screen appears.
Step 3: Press Enter to set up Windows 2000 now.
Step 4: Accept the license agreement by pressing F8.
Step 5: You can see the disk size you have assigned to the virtual disk before and you can press C to create a new partition or directly press Enter to install.
Step 6: Format the partition using the NTFS file system.
Step 7: Then, the setup is formatting and installing the system. Follow the on-screen instructions to finish all the setup operations.
Tip: After Windows 2000 Setup, you need to install VMware tools. Just click VM > Install VMware Tools for the work.
Final Words
That’s all the information on Windows 2000 ISO downloads for VMware or VirtualBox and installation. Just get the ISO file and install the system on your virtual machine.
About The Author

Position: Columnist
Vera is an editor of the MiniTool Team since 2016 who has more than 7 years’ writing experiences in the field of technical articles. Her articles mainly focus on disk & partition management, PC data recovery, video conversion, as well as PC backup & restore, helping users to solve some errors and issues when using their computers. In her spare times, she likes shopping, playing games and reading some articles.