Приветствую Вас!
Понадобилось мне в свою R-Жаву DiCE подключить. Устройство, по быстрому, в ReVolvo приобрел, pin4ers поспособствовал (респект, если читаешь!). Да вот только незадача какая приключилась — ноут, дармовой, на Windows 10 крутится, а как многие знают VIDA не особо-то и любит её для употребления 
Читал, смотрел… выводы напрашивались неутешительные:
— либо через установку VIDA 2012A -> обновляемой до 2014D
— либо через в Virtualbox`е запускать какой-то образ.
все это показалось муторно и долго, решил замутить нативную установку
Итак, начнем
Для установки нам понадобится скачать из Интернетов следующие пакеты:
— Java SE Development Kit 7u80 (x64) (jdk-7u80-windows-x64.exe)
— Microsoft SQL Server 2008 R2 SP1 Express x64 English (SQLEXPR_x64_ENU.exe)
— Microsoft SQL Server 2008 R2 Service Pack 3 x64 English (SQLServer2008R2SP3-KB2979597-x64-ENU.exe)
Так же не забудет про саму VIDA2014D, и про её патч (патч от версии 2014A вполне себе работает). Где взять — не подскажу, но гугл пока ещё работает.
2014A.exe 137 KB (140 785 байт)
CRC32: E5F6F31C
MD5: 4E8084C08BDC59CB7D4DA16E708CDD8B
SHA-1: 4A1A38ECBF4608F7E36FDB38867F3A03D96D1B4C
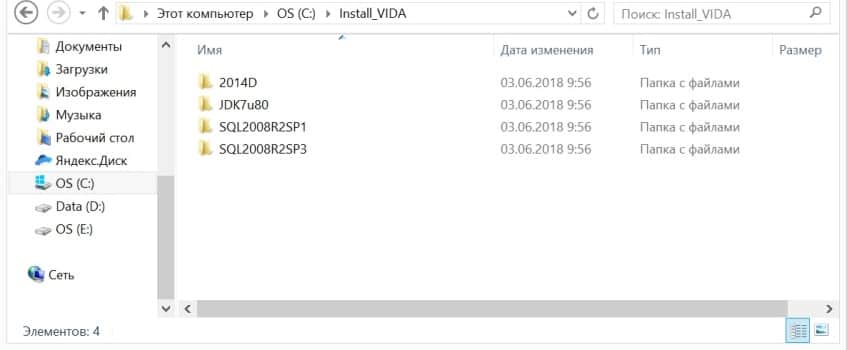
Для удобства работы копипистера, в корне диска C: создаем папочку VIDAInstall
Скачиваем выше названые файлики и кладем в папочки внутри VIDAInstall
— Java в C:\VIDAInstall\JDK7u80
— SQL в C:\VIDAInstall\SQL2008R2SP1
— сервис-пак в C:\VIDAInstall\SQL2008R2SP3
— образ VIDA в C:\VIDAInstall
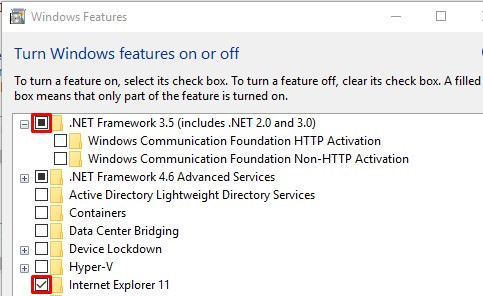
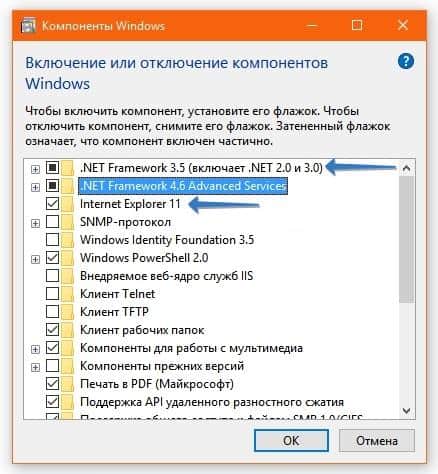
Проверяем (на всякий случай) наличие в системе Internet Explorer 11 и .Net Framework 3.5
Подготовка прошла успешно и мы начинаем установку!
1. Ставим SQL Express.
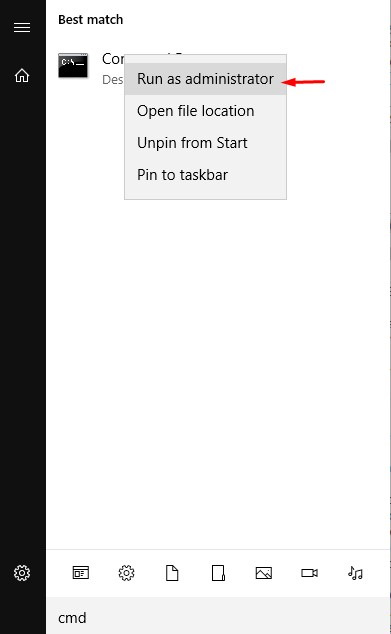
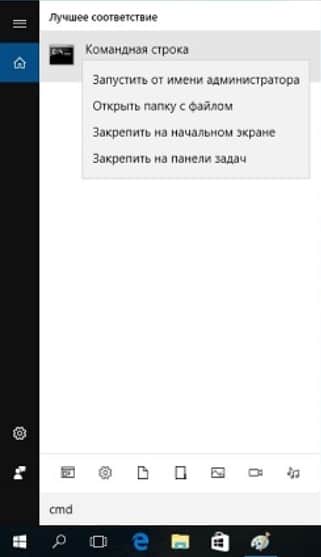
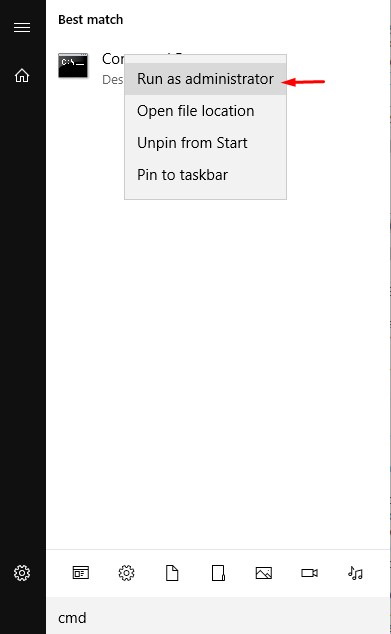
Для этого запускаем командную строчку с правами администратора. Достаточно открыть меню «Пуск» и напечатать «cmd». На иконке правой клавишей мышки и выбираем запуск «от администратора»
В командной строке вводим такую строчку и жмем Enter 
«C:\VIDAInstall\SQL2008R2SP1\SQLEXPR_x64_ENU.exe» /ACTION=Install /IACCEPTSQLSERVERLICENSETERMS /ROLE=AllFeatures_WithDefaults /INSTANCENAME=VIDA /SAPWD=GunnarS3g3 /SECURITYMODE=SQL /SQLSVCACCOUNT=»NT AUTHORITY\SYSTEM» /BROWSERSVCSTARTUPTYPE=Automatic /TCPENABLED=1 /ENU /QS
Если компьютер не ожидает перезагрузки (обновления там установились, или ещё что) то просто ждем завершения установки, будут открываться окошки и прочее, но Вашего вмешательства потребоваться не должно. SQL установлен!
2. Устанавливаем VIDA 2014D
Windows 10 отлично монтирует в систему образы дисков, по этому не требуется записывать её на DVD или распаковывать в отдельный каталог. По этому просто двойной клик на файле образа Виды и он откроется.
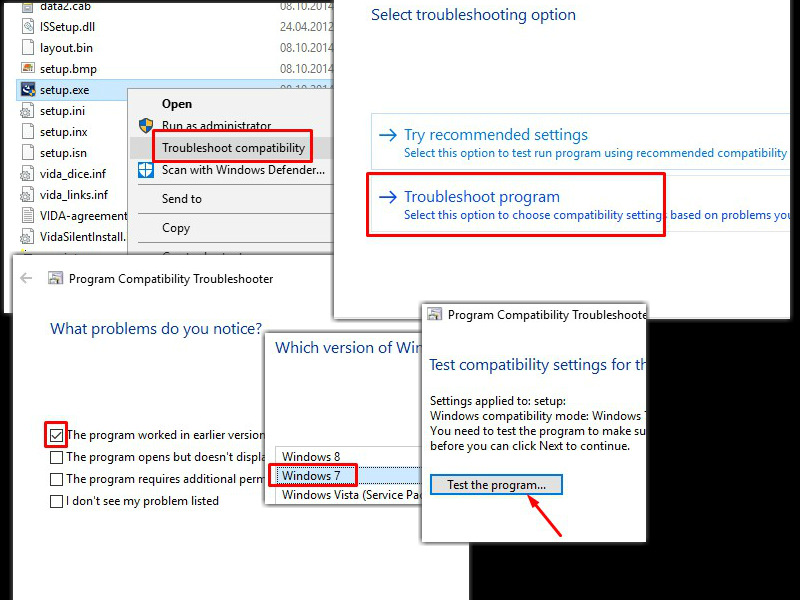
— запускаем setup.exe, который лежит в каталоге «\Install\DVD\Vida_dvdheader\Main». Запускать установщик нам надо в режиме совместимости с предыдущими версиями Windows. Для этого правой кнопкой на setup.exe и выбираем «исправление неполадок совместимости» (в моем случае — по английски)
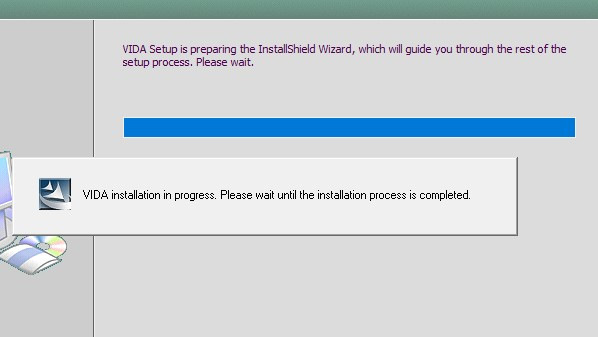
Начнётся установка VIDA.
— с лицензионным соглашением согласился
— Устанавливал «VIDA All-In-One»
— путь по умолчанию оставил C:\Vida
Вообще конечно это неприлично долго продолжалось (ну больше 10 минут точно)
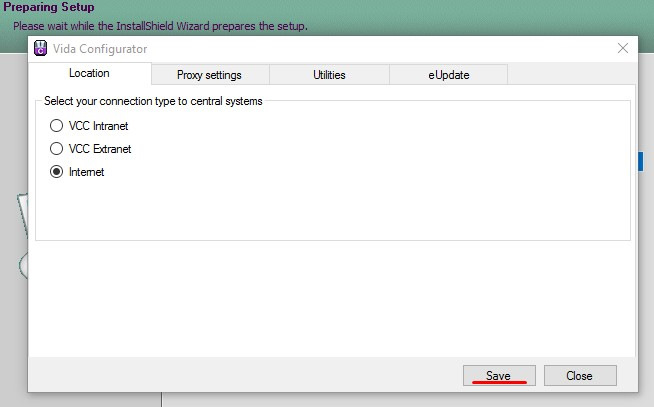
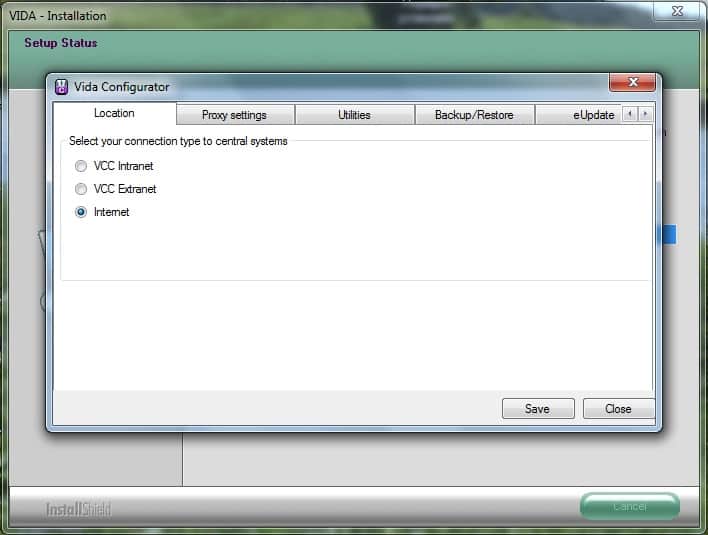
, но в результате вылезло окошко с предложением что-то настроить 
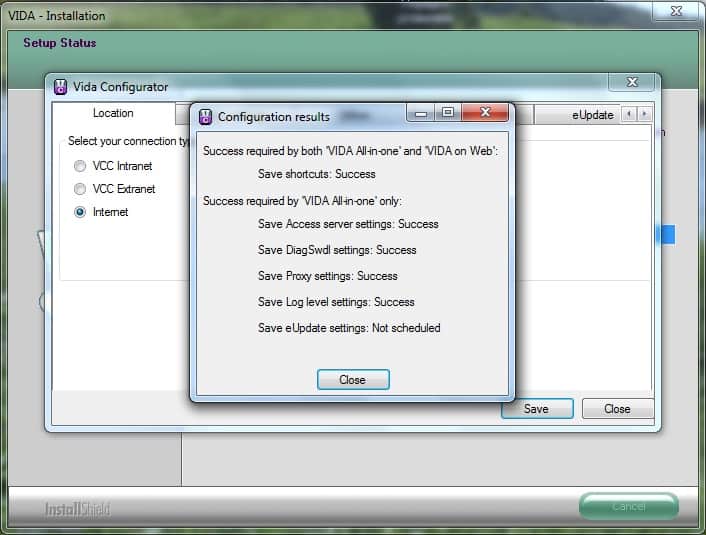
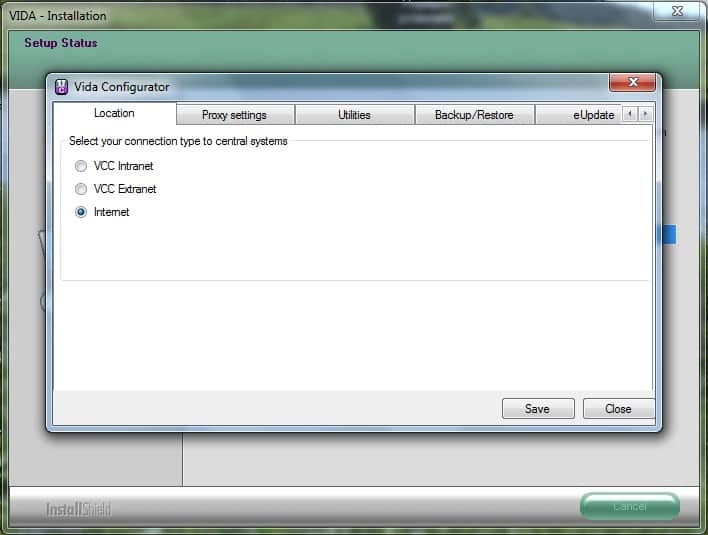
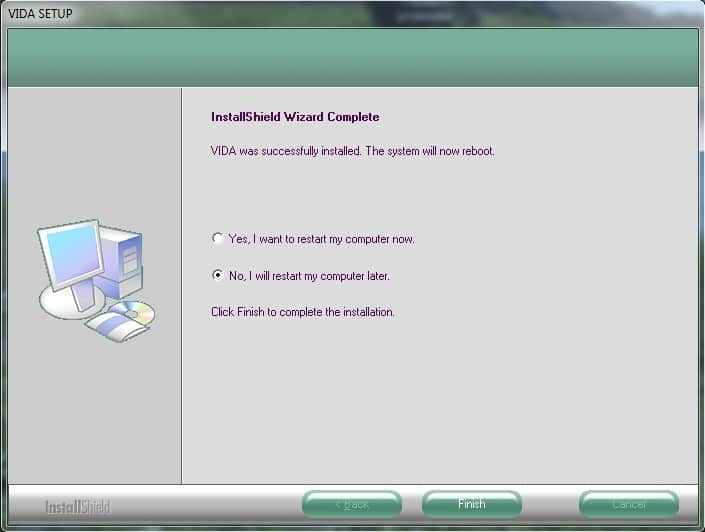
Жмем Save, далее на всплывшем подтверждении Close и ещё раз Close на вот этот окне. В конце установки программа запросит перегрузить компьютер, но Вы это отложите на потом («No, I will restart my computer later»), т.к. надо ещё пару пунктиков сделать…
VIDA установлена на нашем компьютере, иконки на рабочем столе уже появились, но не спешите щелкать и запускать все подряд! Все дело в деталях!
3. Установка Java
— Запустите C:\VIDAInstall\JDK7u80\jdk-7u80-windows-x64.exe. Дождитесь окончания.
— Внутри «C:\VIDA\» переименуйте папку «jdk» в «jdk.old» (ну или удалите её)
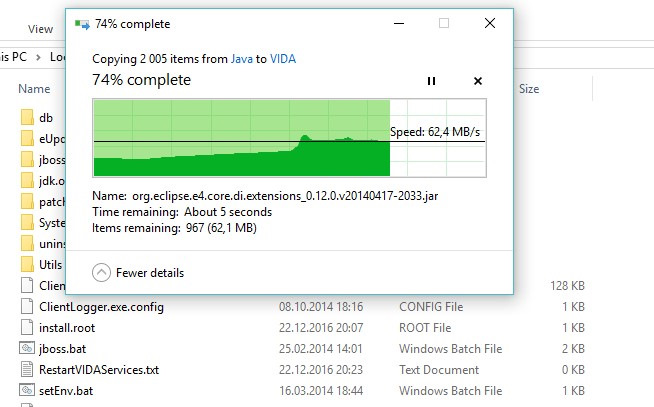
— Из «C:\Program Files\Java» скопируйте папочку «jdk1.7.0_80» в «C:\VIDA\».
— Переименуйте скопированную папку «jdk1.7.0_80» в «C:\VIDA\» и назовите лаконично «jdk».
Можно теперь удалить «Java SE Development Kit 7 Update 80 (64-bit)» и «Java 7 Update 80 (64-bit)» через «Установку и удаление программ». Java нам больше не понадобится, т.к. все нужное VIDA лежит теперь рядом с ней…
4. Пропатчите VIDA 2014D
НЕ пытайтесь запустить патч просто щелкнув на него!
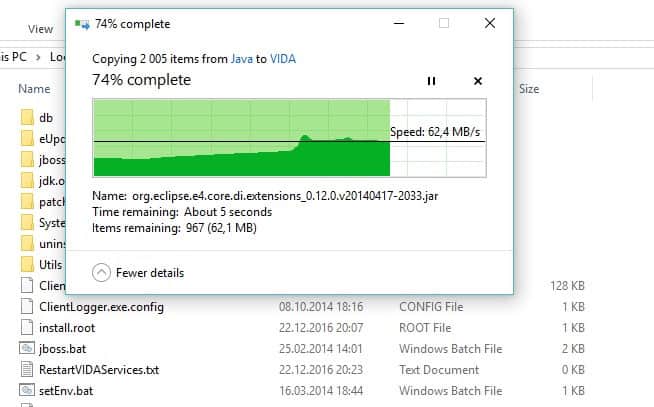
— Распакуйте этот архив (да, это архив), и скопируйте в C:\VIDA, соглашаясь с перезаписью существующих файлов
— Зайдите в C:\VIDA\patch и увидите файл filldb.cmd
— С помощью правой клавиши мышки запускаем этот файл с правами администратора. Быстро проскочет черное окошко — патч установлен.
5. Установка сервис-пака на SQL
Так же как и в первом пункте (про установку SQL) запустите командную строку с правами администратора и введите там следующую команду:
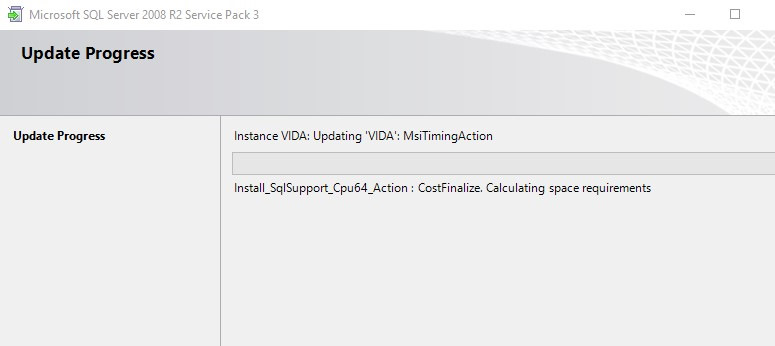
«C:\VIDAInstall\SQL2008R2SP3\SQLServer2008R2SP3-KB2979597-x64-ENU.exe» /IACCEPTSQLSERVERLICENSETERMS /ALLINSTANCES /ENU /QS
Ожидайте окончания установки.
6. Перезагрузитесь!
После перезагрузки Windows Firewall может показать Вам предупреждение, мол «Java™ Platform SE binary» куда-то просится, отметьте ей «Частные сети» и «Публичные сети» и нажмите «Разрешить доступ».
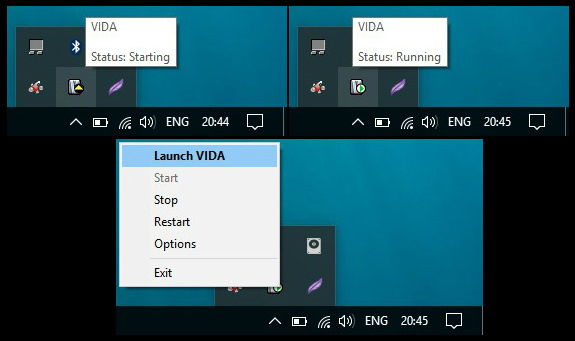
Ну и вот — должно все работать! Рядом с часами будет висеть Vida Monitor.
Дождитесь «зеленого» и двойным кликом запускайте VIDA!
Спасибо за минутку Вашего внимания.
Рекомендуемой операционной системой для установки VIDA 2014D является Windows 7, при этом установить данную версию на Windows XP не возможно, а для установки на Windows 10 следует произвести ряд процедур.
Купить Volvo VIDA DiCE (полная версия) в интернет-магазине TOPDIAG.BY (возможна доставка в Россию и др. страны)
Инсталляция VIDA 2014D на Windows 7 не требует установки каких-либо дополнительных системных программ и сводится к установке самой VIDA и ее последующей активации.
Для инсталляции Vida на Windows 10 необходимо скачать следующие системные программы:
— Java SE Development Kit 7u80 x64 (jdk-7u80-windows-x64.exe);
— Microsoft SQL Server 2008 R2 SP1 Express x64 (SQLEXPR_x64_RUS.exe);
— Microsoft SQL Server 2008 R2 Service Pack 3 x64 (SQLServer2008R2SP3-KB2979597-x64-RUS.exe).
Скачать все вышеперечисленное по ссылке:
Создаем папку на диске С:\Install_VIDA\ и переносим в нее ранее скачанные системные программы, а также установочные файлы Vida с диска:
— Java в С:\Install_VIDA\JDK7u80\
— SQL Server в С:\Install_VIDA\SQL2008R2SP1\
— Service Pack в С:\Install_VIDA\SQL2008R2SP3\
— VIDA в С:\Install_VIDA\2014D\ (если инсталлятор Vida находится в образе диска iso, то его стоит распаковать)
Проверяем наличие в системе .Net Framework 3.5 и Internet Explorer 11 в наборе инструментов «Включение или отключение компонентов Windows»
Производим установку SQL Server 2008 R2 SP1 Express.
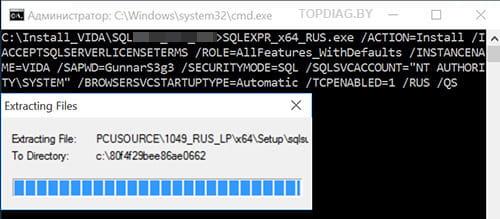
Производим запуск командой строки с правами администратора (меню «Пуск» -> печатаем «cmd» -> на значке щелкаем правой кнопкой мышки и выбираем «Запустить от имени администратора». Более подробно по ссылке)
В командной строке вводим:
С:\Install_VIDA\SQL2008R2SP1\SQLEXPR_x64_RUS.exe /ACTION=Install /IACCEPTSQLSERVERLICENSETERMS /ROLE=AllFeatures_WithDefaults /INSTANCENAME=VIDA /SAPWD=GunnarS3g3 /SECURITYMODE=SQL /SQLSVCACCOUNT=»NT AUTHORITY\SYSTEM» /BROWSERSVCSTARTUPTYPE=Automatic /TCPENABLED=1 /RUS /QS
и жмем ввод.
Производим установку VIDA 2014D
Если инсталлятор Vida находится в образе диска iso, то его стоит распаковать, так как в ряде случаев в установщике отсутствует русский язык. Стоит отметить, что выбрать язык можно только в момент инсталляции Vida Dice, после установки программы добавить русский язык не возможно. О том, как добавить русский язык в VIDA 2014D можно почитать в нашей статье.
Для начала установки производим запуск setup.exe, который находится в каталоге С:\Install_VIDA\2014D\Install\DVD\Vida_dvdheader\Main\
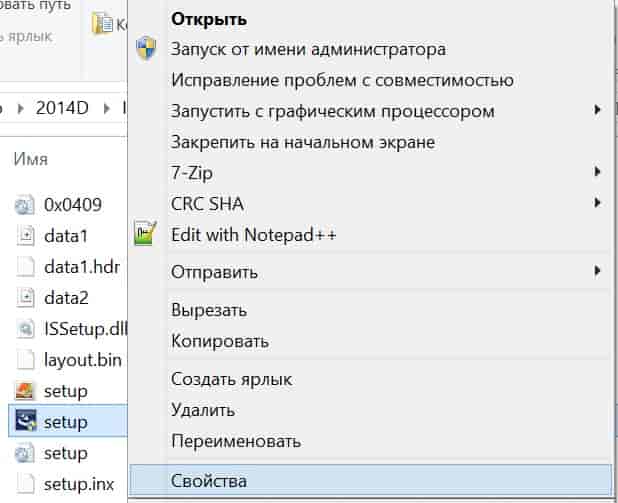
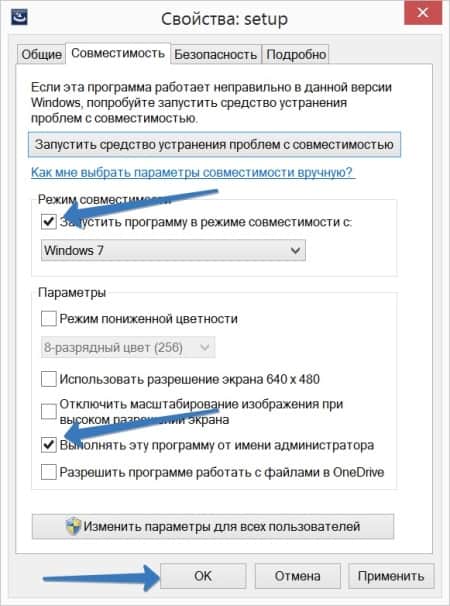
Запуск производим от имени администратора в режиме совместимости с Windows 7 (щелкаем правой кнопкой мышки на setup.exe -> «Свойства» -> вкладка «Совместимость» -> выбираем «Запустить программу в режиме совместимости с: Windows 7». Более подробно по ссылке)
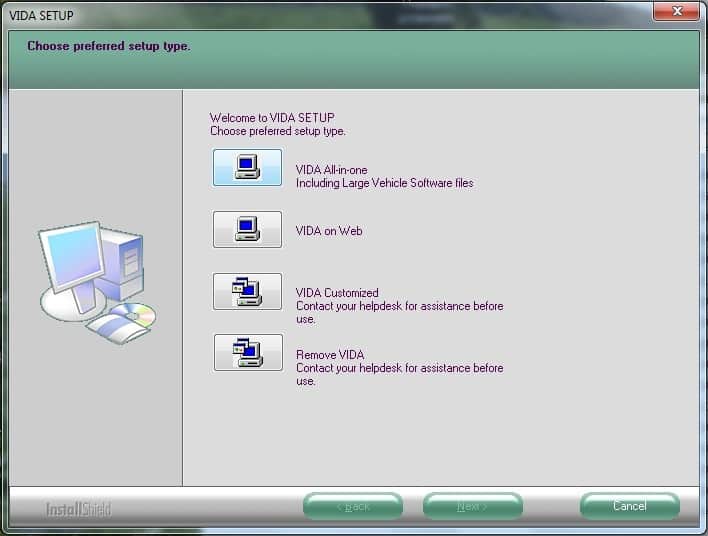
Выбираем тип установки «VIDA All-in-one»
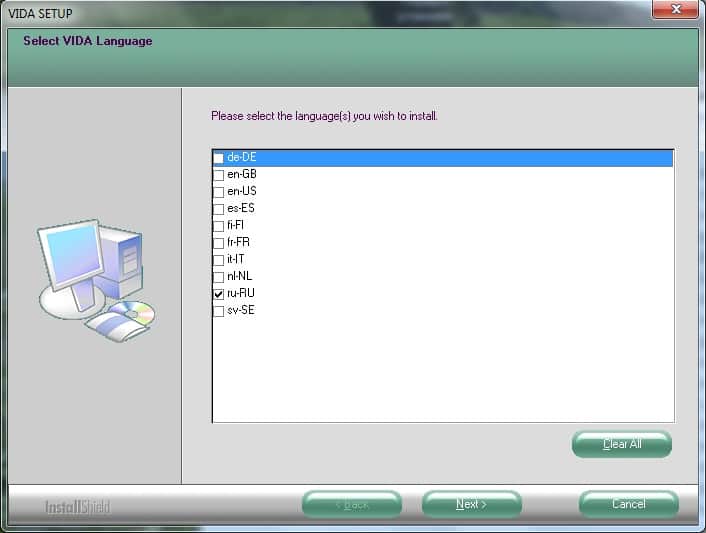
Выбираем язык установки. Для установки русского языка выбираем «ru-RU». Внимание, выбрать язык можно только в момент установки Vida Dice, после завершения установки программы добавить язык не возможно. О том, как добавить русский язык в VIDA 2014D можно почитать в нашей статье.
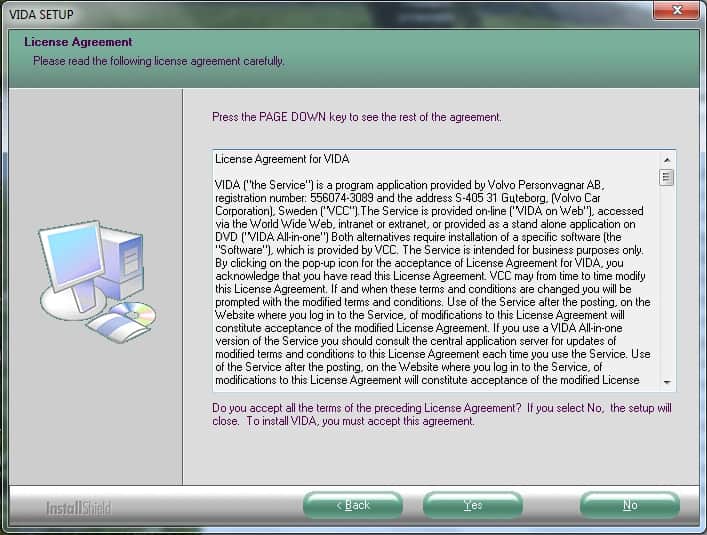
Происходит проверка технических параметров ПК на совместимость с программой, после чего появляется окно с лицензионным соглашением. Соглашаемся с лицензионным соглашением.
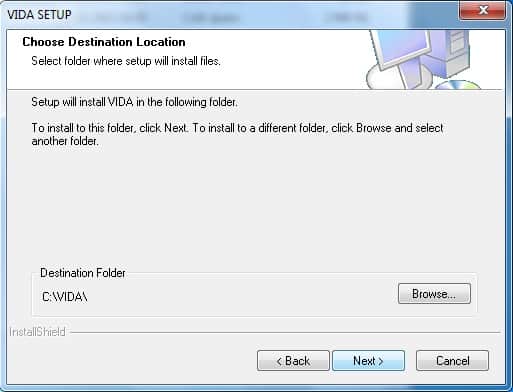
Путь оставляем по умолчанию C:\Vida\
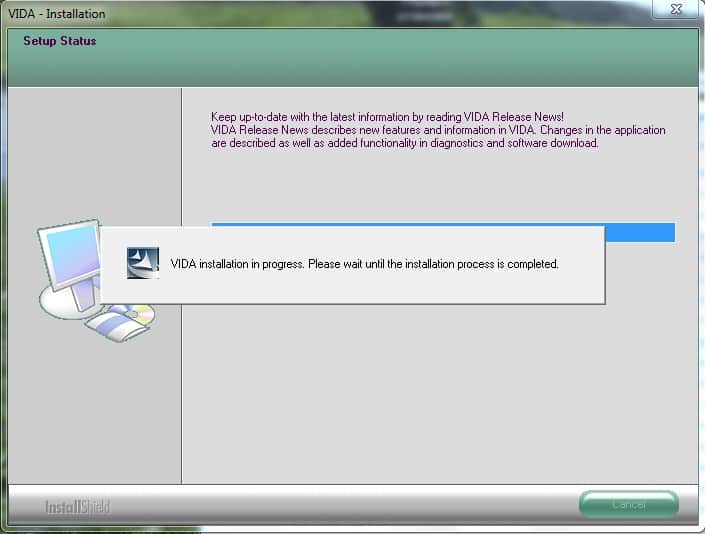
Начинается длительный процесс установки Vida, без каких-либо сообщений
В результате появляется сообщение. Ничего не меняем и оставляем значения по умолчанию и нажимаем «Save»
Окно «Configuration results» закрываем, нажав «Close»
Жмем «Close» и ждем окончания установки
В завершении установки появится сообщение о перезагрузке компьютера, отказываемся и выбираем пункт «No, I will restart my computer later»
Производим установку Java.
— Запускаем С:\Install_VIDA\JDK7u80\jdk-7u80-windows-x64.exe и ждем окончания установки;
— В папке C:\VIDA\ меняем название папки «jdk» в «jdk.old»
— Из C:\Program Files\Java\ копируем папку «jdk1.7.0_80» в «C:\VIDA\
— Меняем название скопированной папки «jdk1.7.0_80» на «jdk»
Производим активацию программного обеспечения.
Выполняем все требования по активации, согласно рекомендациям (срок действия до 2050 года скачать).
Производим установку Service Pack SQL Server
Производим запуск командной строки с правами администратора (см. этап установки SQL Server 2008 R2 SP1 Express) и вводим команду:
«С:\Install_VIDA\SQL2008R2SP3\SQLServer2008R2SP3-KB2979597-x64-RUS.exe» /IACCEPTSQLSERVERLICENSETERMS /ALLINSTANCES /RUS /QS
и жмем ввод.
Производим перезагрузку.
Если Firewall Windows выдает сообщение о запросе доступа в интернет «Java™ Platform SE binary», то доступ разрешаем выбрав «Публичные сети».
Ждем пока в области уведомлений на панели задач в нижнем правом углу экрана появится Vida Monitor с зеленой стрелкой, что говорит о возможности дальнейшего запуска Vida.
Запуск VIDA производится по ярлыку на рабочем столе «VIDA All-In-One»
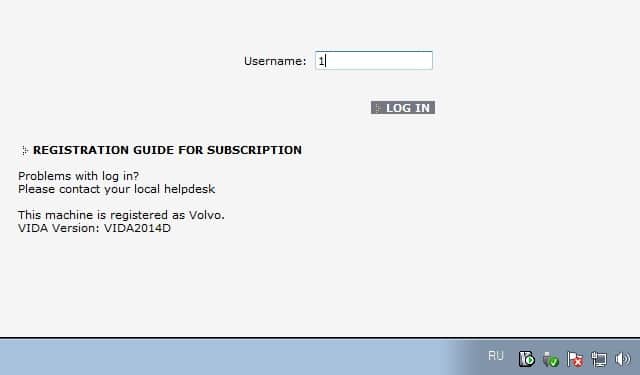
Пароль для входа Username: «1»
Возможные вопросы при установке:
1) При вводе пароля для входа Username: «1» нет дальнейшего запуска Vida.
Использовался старый активатор, действие которого закончилось 1 января 2018 года. Производим повторную регистрацию программы актуальным активатором (срок действия до 2050 года скачать), выполняя все рекомендации.
2) VidaMonitor не запускается, так как занят 80-ый порт.
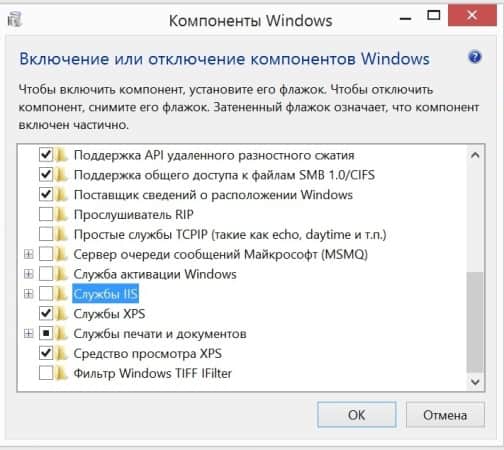
Отключаем службы IIS в наборе инструментов «Включение или отключение компонентов Windows»
3) Происходит запуск Vida, однако недоступен коммуникационный инструмент, а вместо него черный крестик.
Производим запуск всех reg-файлов из установочных файлов С:\Install_VIDA\2014D\Install\Utils\
4) Ошибка по java при запуске: You got a javax.servlet.jsp.JspException: Define tag cannot set a null value и др.
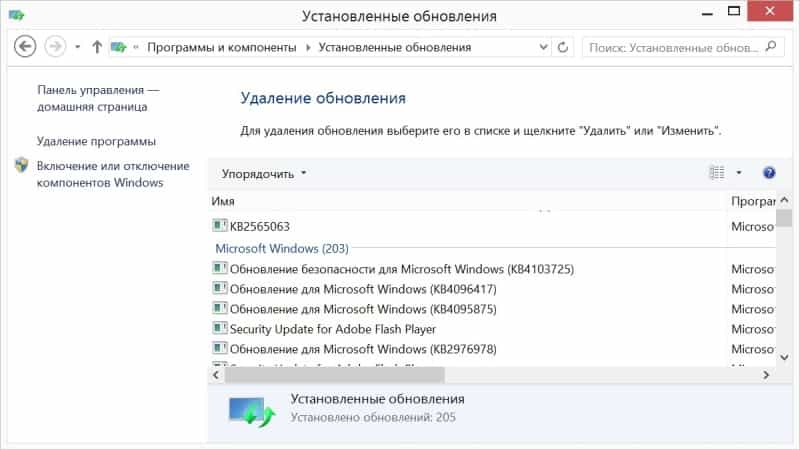
Для решения данного вопроса удаляем обновления безопасности windows KB3163018 (Панель управления -> Все элементы панели управления -> Программы и компоненты -> Установленные обновления).
Купить Vida Dice качественную полную версию в Минске в интернет-магазине TOPDIAG.BY

Как установить Vida Dice? Типичные проблемы и ошибки при установке Volvo Vida Dice.
Для установки нам понадобится скачать из Интернетов следующие пакеты:
— Java SE Development Kit 7u80 (x64) (jdk-7u80-windows-x64.exe)
— Microsoft SQL Server 2008 R2 SP1 Express x64 English (SQLEXPR_x64_ENU.exe)
— Microsoft SQL Server 2008 R2 Service Pack 3 x64 English (SQLServer2008R2SP3-KB2979597-x64-ENU.exe)
Так же не забываем про саму VIDA2014D, и про её патч. (в комплекте)
Для удобства работы, в корне диска C: создаем папочку VIDAInstall
Скачиваем выше названые файлики и кладем в папочки внутри VIDAInstall
— Java в C:VIDAInstallJDK7u80
— SQL в C:VIDAInstallSQL2008R2SP1
— сервис-пак в C:VIDAInstallSQL2008R2SP3
— образ VIDA в C:VIDAInstall
В результате получаем вот такой вид
Проверяем (на всякий случай) наличие в системе Internet Explorer 11 и .Net Framework 3.5
установка компонентов
Подготовка прошла успешно и мы начинаем установку!
1. Ставим SQL Express.
Для этого запускаем командную строчку с правами администратора. Достаточно открыть меню «Пуск» и напечатать «cmd». На иконке правой клавишей мышки и выбираем запуск «от администратора»
примерно так
В командной строке вводим такую строчку и жмем Enter 
«C:VIDAInstallSQL2008R2SP1SQLEXPR_x64_ENU.exe» /ACTION=Install /IACCEPTSQLSERVERLICENSETERMS /ROLE=AllFeatures_WithDefaults /INSTANCENAME=VIDA /SAPWD=GunnarS3g3 /SECURITYMODE=SQL /SQLSVCACCOUNT=»NT AUTHORITYSYSTEM» /BROWSERSVCSTARTUPTYPE=Automatic /TCPENABLED=1 /ENU /QS
Если компьютер не ожидает перезагрузки (обновления там установились, или ещё что) то просто ждем завершения установки, будут открываться окошки и прочее, но Вашего вмешательства потребоваться не должно. SQL установлен!
2. Устанавливаем VIDA 2014D
Windows 10 отлично монтирует в систему образы дисков, по этому не требуется записывать её на DVD или распаковывать в отдельный каталог. По этому просто двойной клик на файле образа Виды и он откроется.
— запускаем setup.exe, который лежит в каталоге «InstallDVDVida_dvdheaderMain». Запускать установщик нам надо в режиме совместимости с предыдущими версиями Windows. Для этого правой кнопкой на setup.exe и выбираем «исправление неполадок совместимости» (в моем случае — по английски)
вот так
Начнётся установка VIDA.
— с лицензионным соглашением согласился
— Устанавливал «VIDA All-In-One»
— путь по умолчанию оставил C:Vida
Набираемся терпения и ждем. (больше 15 минут точно)
В этом окне ничего не меняем:
Жмем Save, далее на всплывшем подтверждении Close и ещё раз Close на вот этот окне. В конце установки программа запросит перегрузить компьютер, но Вы это отложите на потом («No, I will restart my computer later»), т.к. надо ещё пару пунктов сделать…
VIDA установлена на нашем компьютере, иконки на рабочем столе уже появились, но не спешите щелкать и запускать все подряд! Все дело в деталях!
3. Установка Java
— Запустите C:VIDAInstallJDK7u80jdk-7u80-windows-x64.exe. Дождитесь окончания.
— Внутри «C:VIDA» переименуйте папку «jdk» в «jdk.old» (ну или удалите её)
— Из «C:Program FilesJava» скопируйте папочку «jdk1.7.0_80» в «C:VIDA».
— Переименуйте скопированную папку «jdk1.7.0_80» в «C:VIDA» и назовите лаконично «jdk».
Можно теперь удалить «Java SE Development Kit 7 Update 80 (64-bit)» и «Java 7 Update 80 (64-bit)» через «Установку и удаление программ». Java нам больше не понадобится, т.к. все нужное VIDA лежит теперь рядом с ней.
4. Пропатчите VIDA 2014D
НЕ пытайтесь запустить патч просто щелкнув на него!
— Распакуйте этот архив (да, это архив), и скопируйте в C:VIDA, соглашаясь с перезаписью существующих файлов
— Зайдите в C:VIDApatch и увидите файл filldb.cmd
— С помощью правой клавиши мышки запускаем этот файл с правами администратора. Быстро проскочет черное окошко — патч установлен.
5. Установка сервис-пака на SQL
Так же как и в первом пункте (про установку SQL) запустите командную строку с правами администратора и введите там следующую команду:
«C:VIDAInstallSQL2008R2SP3SQLServer2008R2SP3-KB2979597-x64-ENU.exe» /IACCEPTSQLSERVERLICENSETERMS /ALLINSTANCES /ENU /QS
Ожидайте окончания установки.
Долго!
6. Перезагрузитесь!
После перезагрузки Windows Firewall может показать Вам предупреждение, мол «Java™ Platform SE binary» куда-то просится, отметьте ей «Частные сети» и «Публичные сети» и нажмите «Разрешить доступ».
Ну и вот — должно все работать! Рядом с часами будет висеть Vida Monitor.
Дождитесь «зеленого» и двойным кликом запускайте VIDA!
Типичные проблемы:
1) VidaMonitor отказалась запускаться из-за занятого 80-го порта. Решается путем отключения служб IIS (Панель управленияПрограммыПрограммы и компоненты где выбираем «Включение или отключение компонентов Windows», в появившемся окошке убираем галочку напротив строки «Службы IIS»). Первая проблема на этом решена.
2) Vida запускается, но коммуникационный инструмент недоступен — на его месте черный крестик. Для решения идем туда, где у нас находятся установочные файлы с Vida и запускаем все reg-файлы из папки VIDAInstallUtils.
3) При запуске появляется ошибка про java:
You got a javax.servlet.jsp.JspException: Define tag cannot set a null value …… При этом неделю назад все работало как часы?
Помогает удаление последнего обновления безопасности windows KB3163018.
Обновления компонентов windows находятся по адресу:
Панель управления-Все элементы панели управления-Программы и компоненты-Установленные обновления
Decided it was time to bring all the install information together in one place.
—————————————————————————————————
Files you need.
2014D_Repack.iso
Patch 2014A-B-D-2099.zip
Click the link above to get the 2099 patch. Upack it to a folder.
To get the 2014D_Repack.iso Copy the magnet link in the line below to your clipboard.
magnet:?xt=urn:btih:1b2995ac6b8926893e3dea41c01ce92208b19c8d
In qBitorrent go to File on the menu then select Add Torrent link.
In the box start a new line and paste the magnet link from the clipboard.
Click download.
Other bittorrent clients have a means to manually add the magnet link.
1. Manually install .net framework 3.5.
- Control Panel\All Control Panel Items\Programs and Features\Turn Windows Features on and off\ Check mark the box for .Net Frame 3.5. Click [ OK ] wait for .Net Frame 3.5 to install then reboot.
While you are there enable Internet Explorer 11 if it is not enabled
2. In Windows File Explorer navigate to the 2014D_Repack.iso. Select, Left click then Mount.
- The iso will show in the right panel as a DVD drive.
3. Run scripts 1- 3, in the root directory of VIDA2014D_RePack.iso, one at a time.
4. Run the 2099 patch
5. Run Script 4
- . Do not run Script 5
6. Reboot
7. Wait for Java to request a firewall exception.
8. Wait for Vida monitor to turn green.
9. In Microsoft Edge install the extension IE Tab. Use IE Tab to open http://localhost/Vida/ this will take you to the VIDA login in page. Approve the install of the IE Tab helper program. How bookmark the VIDA login page. From now on use the bookmark to startup VIDA.
There is also a IE Tab for Google chrome. You can use it to operate VIDA in Google Chrome.
- Note: Do not uninstall IE11. IE Tab uses the IE11 rendering engine.
10. Password: admin or 1 — 4 for specific Partner groups.
Clean up: Uninstall Russian language Adobe reader if you are not going to use it.
You can delete the short cuts on the Desktop.
If DiCE does not work correctly. Run DiCE setup in :\3PP\Products\DiCE\
If you get a X in the interface box.
Run VidaMedia:\Install\Utils\EnableIEHostingxxx.reg .
Make sure you run the right one for your operating system.
xxx =x64 is for 64bit operating systems.
xxx =x86 is for 32bit operating systems.
⸙⸙⸙⸙⸙⸙⸙⸙⸙⸙⸙⸙⸙⸙⸙⸙⸙⸙⸙⸙⸙⸙⸙⸙⸙⸙⸙⸙⸙⸙⸙⸙⸙⸙⸙⸙⸙⸙⸙⸙⸙⸙⸙⸙⸙⸙⸙⸙⸙⸙⸙⸙⸙⸙⸙⸙⸙⸙⸙⸙⸙⸙⸙⸙⸙⸙⸙⸙⸙⸙⸙⸙⸙
1998 C70, B5234T3, 16T, AW50-42, Bosch Motronic 4.4, Special Edition package.
2003 S40, B4204T3, 14T twin scroll AW55-50/51SN, Siemens EMS 2000.
2004 S60R, B8444S TF80 AWD. Yamaha V8 conversion
2005 XC90 T6 Executive, B6294T, 4T65 AWD, Bosch Motronic 7.0.
VIDA is a catalog of parts with a variety of instructions and manuals. Also, diagnostics, maintenance and adjustment of some parameters will be available using DiCE .
Below is a small example of working with VIDA 2014D and Volvo DiCE , and also described TWO ways of installing TWO variants (original and repack) of VIDA on Windows 10 (also installed on Windows 8.1). Additionally, added options for solving common problems with / after installation and some useful settings.
(The document was translated from Russian forum)
Volvo VIDA 2014D is the last (not the last) file version of VIDA available locally, i.e. installed and running on a separate PC. Accordingly, available to a simple user.
Since the beginning of 2015, the program is only online!
Temporary workplace is ready.
Example of using VIDA + DiCE – diagnostics and error removal
Start, enter 4 to enter the EUR region.
We read the car.
The Diagnostics section, the Details tab.
The Diagnostics section, the Network tab.
The Diagnostics section, the Troubleshooting tab.
On the Troubleshooting tab, the module with errors is highlighted in red (green – everything is normal, gray – missing / not installed). Select it with the mouse, below it will be a list of errors. Select the line – the information about the error appears. With a double-click – a window opens with the expanded info. Before erasing – carefully read. Go to the Delivery tab , at the bottom there will be actions – Erase everything and Erase
The existing CEM module error.
The window with the expanded information by mistake and recommendations on elimination.
The existing error is nothing more than the LED license plate lights that I have installed. So, while these lamps are standing – there will be a fault, it does not lead to the device and it makes no sense to erase at the moment.
The Diagnostics section, the Reference tab.
Diagnostics section, Maintenance tab.
How to install Volvo VIDA 2014D on a PC with Windows 8.1 / 10 Pro / Core x86 / x64
-This instruction for installing VIDA 2014D from an .iso image (or from a folder) on a PC with Windows 10x86-x64 of all versions and versions (as of 08.10.2016). Suitable for Windows 8 of all versions and versions.
In Windows 7, install the usual way – run \ Install \ DVD \ Vida_dvdheader \ Main \ setup.exe
-If you have an image without the Russian language (and it is needed) – unpack the image by any archiver into a folder (for example VIDA2014D), download the archive at the end of the post , create the folder ru-RU in VIDA2014D \ DB , put the downloaded archive servicerep_ru-RU.zip into it , you can start the installation.
-If the PC has 2GB of RAM, 20GB of hard disk space (3GB and 30GB for 2014D) and less, you need to unpack the image and make the appropriate changes to the file \ VIDA2014D \ Install \ DVD \ Vida_dvdheader \ Compinfo.ini , in the lines Win7MinValue = write 512 , in Win7 Recommend = write 5,000,000 (or erase one digit at the end), save.
-If the PC is shaken by unsuccessful attempts to install different versions of VIDA – it is necessary to prepare for the new installation, clean up the OS (uninstall the components VIDA, SQL, remove the remaining folders, remove the remaining keys in the registry).
Method 1
1 . Preparation.
There is nothing to install additionally, except as specified in this manual. Also, there is NO need to disable / stop any of the default components in Windows 10 (defender, firewall, etc.).
a ) Install the .NET Framework 3.5 from:
– Control Panel – Programs and Features – Turn Windows features on or off
In the Windows Components window , note .NET Framework 3.5 , then OK , the .NET Framework 3.5will be loaded and installed , you may need to restart. If already installed, go to the next step.
b) Insert the image into the virtual drive (in Windows 10 it is present by default) by double clicking on VIDA2014D.iso .
Open the explorer folder with the image.
c ) Run cmd from the administrator from the open folder with the image VIDA2014D:
– File – Open the command line – Open the command line as an administrator
Before finishing the installation DO NOT close the cmd window , we need it twice.
2 . Install and configure Microsoft SQL Server 2008 R2 .
Copy / paste into the cmd window and press Enter :
“3PP \ Products \ SqlExpress \ SQLEXPR_x86_ENU.exe” / ACTION = Install / IACCEPTSQLSERVERLICENSETERMS / ROLE = AllFeatures_WithDefaults / INSTANCENAME = VIDA / SAPWD = GunnarS3g3 / SECURITYMODE = SQL / SQLSVCACCOUNT = “NT AUTHORITY \ SYSTEM” / BROWSERSVCSTARTUPTYPE = Automatic / TCPENABLED = 1 / HIDECONSOLE / ENU / QS
Wait until the installation is complete. You can check the correctness of the previous installation in:
– Start – All applications – Microsoft SQL Server 2008 R2 – SQL Server Installation Center – Tools – Installed SQL Server features discovery report
The default browser with the report will open. Look – there are two lines in the table (at the end of No, it should be), close the SQL Server Installation Center .
3 . Installation of VIDA 2014D .
Copy / paste OBE lines to the cmd window and press Enter :
set __compat_layer = WIN7RTM
“Install \ DVD \ Vida_dvdheader \ Main \ setup.exe”
Select VIDA All-in-one .
Choose only ONE language (install TWO languages and switch them you can – see Method 2 ).
Accept the license agreement.
Choose the installation path. It is recommended to leave it as default.
Installation takes a long time. You can control in the Task Manager by the activity of the alba process . At the end of the installation, icons appear on the desktop.
Select in the pop-up window Internet , then Save , then Close , and again Close .
Refuse to reboot.
Close the cmd window .
4 . Treatment and first run.
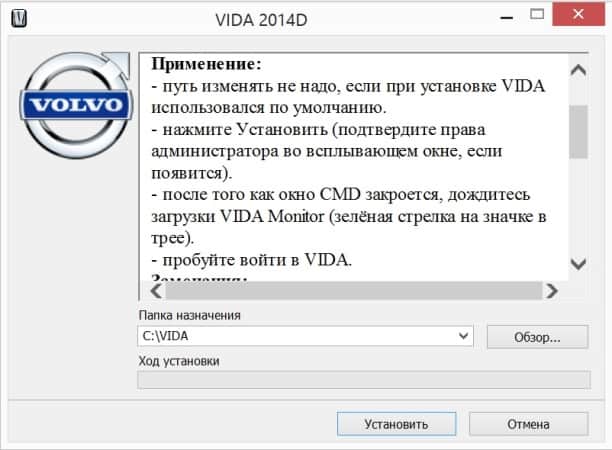
Run 2014A-BD.exe from the administrator. If you changed the default VIDA installation path, change only the LETTER drive in the opened window (if you installed it to the root of another disk / partition). Select Install , VIDA Monitor should start after that , after some time its icon in the tray should have a green arrow instead of a yellow arrow.
In the pop-up window of the regular firewall, select Allow access for Java.
Start VIDA with the VIDA All-in-One icon on the desktop (or in the Start menu, or right-click on the VIDA Monitor icon in the tray).
If Internet Explorer prompts you to select and enable add-ins, enable it.
Enter in the fieldUsername : 4 for Europe region (others – 1, 2, 3).
Wait for IsoView to load .
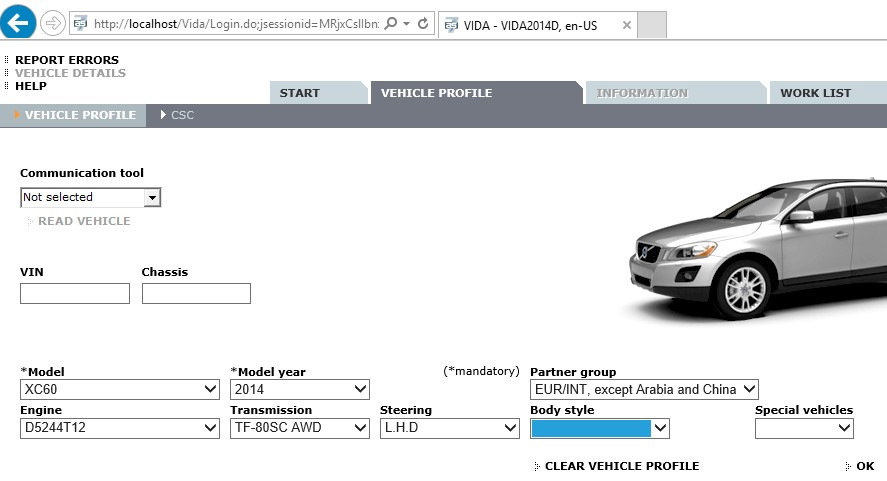
Click the Vehicle Profile tab , enter the VIN code. There should be a car. If Write Access is denied – check and enter the VIN code manually (NOT through copy / paste).
Disable VIDA eUpdate in the Task Manager on the Startup tab , the Java ™ Platform SE binary line .
You can also disable VIDA Monitor from startup and run it as needed from the shortcut to Start – VIDA .
Adobe Reader XI, which was installed with VIDA, can be deleted (if you use another application for pdf or not needed).
Done, you can use.
* If the server does not start – after a while on the icon appears red “?”, The fault is the update KB3163018or 1607 AU . Download the archive with the folder jdk , unload VIDA Monitor, delete the folder jdk from C: \ VIDA , unpack downloaded to C: \ VIDA , then reboot the PC. Archive with the necessary, to solve this problem, you can download at the end of the post.
* If the Username field is NOT active– the tablet did not work, apply again (after unloading the VIDA Monitor ) carefully following all the conditions, then restart the PC. Another option is to unpack the contents of 2014A-BD.exe into C: \ VIDA by agreeing to the replacement. Start from the administrator C: \ VIDA \ patch \ filldb.cmd (previously unloading the VIDA Monitor ).
Method 2 (recommended)
– At the bottom of the post there is a link to the resource where you can download the ready version with the adaptation to the extreme update of Windows 10 and the ability to use two languages - Russian and English. Contains an easy way to install with cmd files (nothing needs to be entered manually). Everything necessary for installation and normal operation on Windows 10 is already in the image.
Correction of the “cross” in the field “Communication tool”
If after starting, in the field “Communication tool” – a cross , you must run the reg.file from \ Install \ Utilson the image / disk with VIDA EnableIEHostingx86.reg or EnableIEHostingx64.reg (for x64 OS).
Done.
IE must be closed! Archive with the necessary files, to solve this problem, you can download at the end of the post.
Connecting and installing DiCE
If you plan to use Volvo VIDA DiCE:
– Connect the device to the OBD connector of the car (or supply it with power 5-12 V / 1-2 A suitable BP, dais does not get power via USB!).
– Connect it to the USB connector of the PC.
– Wait for the device to be installed in Windows.
– Start VIDA, make sure that DiCE is installed in the “Communication tool” field.
Done.
If you want to use DiCE on bluetooth (first necessarily connect via USB!), Run (corresponding to the bit depth of the OS) reg.file and search / add devices WT to the OS. The manual with the necessary reg.file for connection on bluetooth and driver for using DiCE without VIDA can be downloaded at the end of the post.
To check the device, use the regular DiCE Diagnostic utility in – Start – All applications – DiCE .
Installing EWD schemas in VIDA
To scheme EWD were available from VIDA , you must copy the contents of a folder Rus from the disc (image) in the EWD:
\ VIDA \ the jboss \ the standalone \ deployments \ VidaEar.ear \ VidaWeb.war \ wiring_diagrams \ Rus
When a disc / image EWD no folder Rus – copy the contents from, for example, US_Eng , in diagrams and in “English” everything is clear Copy it to the Rus folder , if VIDA is in Russian (if there is no such folder, create it). After restarting VIDA Monitor.
Done.
Are in the Information – Troubleshooting – Wiring diagrams .
– At the bottom of the post there is a link to the resource where you can download EWD .
EWD 2014D
Access to VIDA over the network
For VIDA to be available over the network, you need to stop VIDA Monitor, change the line in the file:
VIDA \ jboss \ standalone \ configuration \ standalone.xml
<interface name = “public”>
< inet-address value = “$ {jboss.bind.address : 127.0.0.1} “ />
</ interface>
to:
<interface name =” public “>
< any-ipv4-address />
</ interface>
Then run VIDA Monitor (or restart the PC). On another PC, you need to install the accompanying software – IsoView and the DiCE driver (if needed there). From this PC (in the local network, VPN, etc.) in IE, enter the address of the PC with VIDA – * IP of the computer * / Vida (for example 192.168.1.25/Vida) or create a shortcut with the object “C:computer * / Vida.
Done.
How to delete car profiles that have already been read / entered
Run the file:
\ VIDA \ db \ dbutils \ clearDatabase.bat
Done.
All profiles are deleted! Separately, there is no way to delete. After, it is necessary to apply the tablet again .
VIDA 2014D on Windows 10
VIDA 2014D on Windows 8.1
Ways to solve problems with installation and startup on Windows 8.1 / 10 are taken HERE

