Termux для ПК | Как установить Termux в Windows.
True HackTrue Hack — не забудь подписаться на канал, чтоб не пропустить новые статьи!
И так, приступим!
В этом посте я покажу вам, как вы можете установить приложение termux на вашем Windows🔥. Я собираюсь показать вам 2 метода, в первом из них, я собираюсь показать вам, как вы можете установить termux на вашем компьютере с помощью эмулятора. И во втором способе, я покажу вам, как вы можете установить Termux на вашем компьютере без эмулятора.
Мы не призываем вас к каким-либо действиям, статья написана исключительно в ознакомительных целях, чтобы уберечь читателя от противоправных действий.
Как установить Termux для ПК
Если вы являетесь пользователем termux, вы должны знать, что termux-это эмулятор терминала для Linux. По сути, это более легкая версия интерфейса командной строки Linux. Поскольку это более легкая версия, которую они сделали, она немного проще, чем терминал Linux. И если вы запускаете команды Termux в оболочке Linux, некоторые из них не будут работать.
Существует два способа установки Termux на вашем ПК, в первом способе мы будем использовать Bluestack Android Emulator, и мы установим приложение termux на нем. Каждый раз, когда мы хотим использовать termux, мы открываем BlueStack и используем его так же, как и на android.
Во втором способе мы установим мы будем использовать подсистему Linux для windows, чтобы установить оболочку Linux в Windows. Поскольку мы используем подсистему Linux, мы будем устанавливать полную версию Linux shell, а не светлую версию termux. Это будет работать гораздо быстрее, чем 1-й метод, и он не будет отставать вообще, и Bluestack будет отставать много, если у вас есть 4 ГБ оперативной памяти ПК.
Но единственная трудность в использовании 2-го метода заключается в том, что только несколько команд будут отличаться от команд termux. Например, вы должны использовать apt, а не pkg, и некоторое время вам нужно будет вводить sudo перед командами, потому что терминал будет так сказать рутирован.
Способ 1: Установите Termux в Windows с помощью эмулятора:
В этом методе мы установим Bluestack, а затем установим Termux на него. Этот метод будет работать на любом ПК с Windows, но у вас должна быть хорошая конфигурация, иначе он будет отставать.
Шаг 1:
Прежде всего , вам необходимо установить BlueStack на свой компьютер, просто нажмите на ссылку ниже, и на вашем ПК будет установлен установочный файл размером менее 2 МБ.
Шаг 2:
Нажмите на загруженный файл в нижнем левом углу вашего chrome.
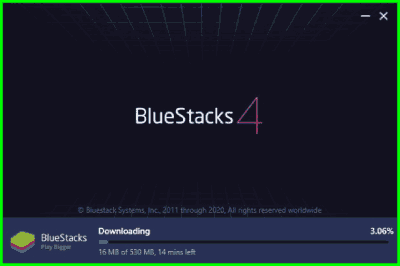
и установщик откроется, просто нажмите на кнопку Установить, и он начнет загружать инструмент в вашу Windows.
Синий стек займет около 500 МБ для загрузки.
Шаг 3:
Теперь, после завершения установки, он попросит вас войти в google play store. Нажмите на кнопку Войти, а затем введите свой адрес электронной почты и пароль, и вы войдете в систему.
Шаг 4:
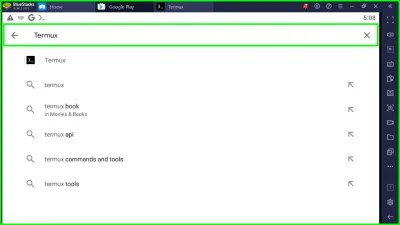
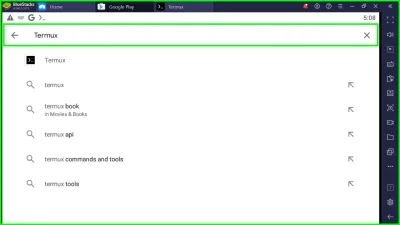
Теперь вы можете увидеть PlayStore в своем BlueStack, просто нажмите Click в строке поиска, введите Termux и нажмите Enter.
Шаг 5:
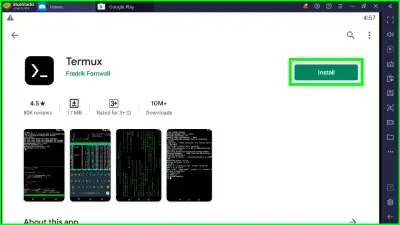
Установите Termux, как вы обычно делаете в вашем телефоне android. После его установки нажмите кнопку Открыть.
Шаг 6:
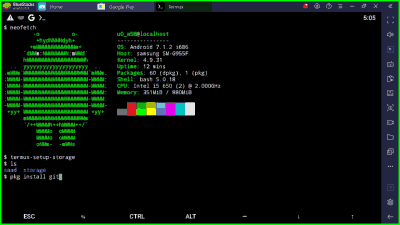
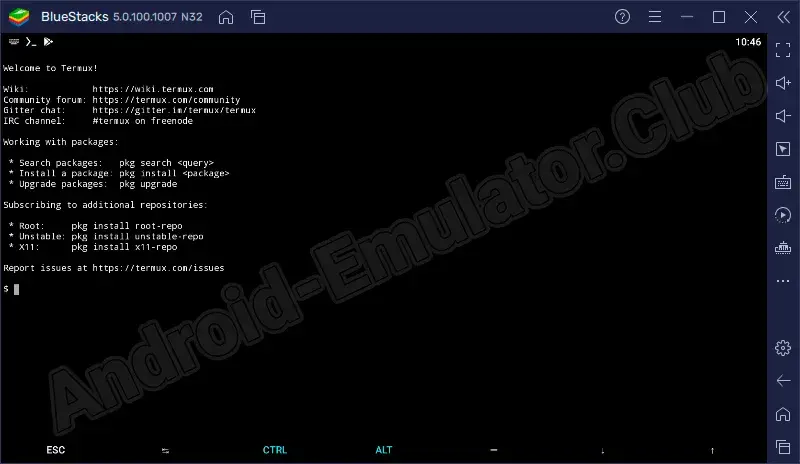
Теперь вы можете видеть, что я могу использовать termux в Windows10 без каких-либо перерывов.
Совет :
Чтобы снова запустить termux, вам нужно открыть синий стек, и там вы увидите значок Termux, а также он создаст значок Termux на вашем домашнем экране. Вы можете использовать команды Termux так же, как и в вашем телефоне.
Способ 2: Установите Termux на ПК без эмулятора:
В этом методе мы не будем устанавливать эмулятор для запуска termux, мы установим терминал Linux в Windows, чтобы мы могли использовать инструменты Linux в Windows, которые являются такими же, как Linux.
Шаг 1:
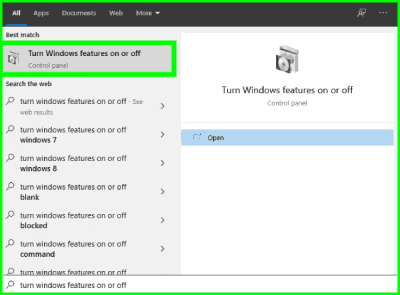
Нажмите клавишу Windows на клавиатуре и введите «включить или выключить функции windows», а затем выберите верхнюю опцию, и она откроет нижеприведенное окно на ваших компьютерах.
Шаг 2:
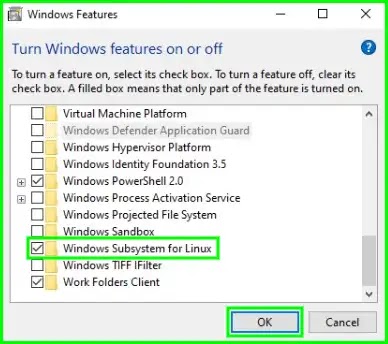
Теперь прокрутите страницу вниз и включите подсистему Windows для Linux. а затем нажмите Ok.
Шаг 3:
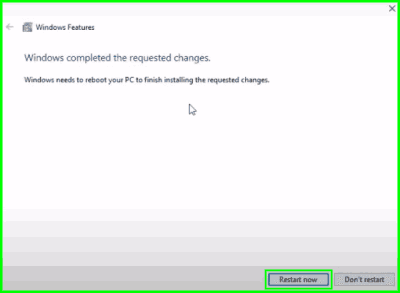
Теперь он будет проверять компоненты, чтобы включить функции подсистемы, а затем он применит изменения, и он попросит вас перезагрузить систему, нажмите на кнопку перезагрузки.
Шаг 4:
Теперь вам нужно установить терминал Kali Linux в вашу Windows из магазина Microsoft Store, нажав на ссылку ниже. А затем нажмите на кнопку Получить приложение или установить и установите инструмент.
Шаг 5:
После загрузки вы можете непосредственно запустить приложение Kali Linux, и в первый раз оно попросит вас ввести ваше имя пользователя и пароль, просто введите любое простое имя пользователя и пароль, потому что вам придется много вводить этот пароль при установке чего-либо.
Шаг 6:
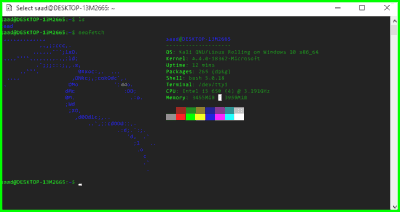
Теперь все настроено, и вы просто должны использовать этот терминал, как вы используете termux, но имейте в виду, что это фактический Linux, поэтому вам нужно использовать команды Linux. Команды Linux такие же, как и termux, вы просто должны использовать apt здесь, а не pkg. Вам также придется ввести sudo перед командами, если они не работают нормально. Ниже вы можете видеть, что я установил Neofetch в оболочке Kali Linux.
Метод 3: Используйте Termux в Windows с помощью сервера SSH:
Это бонусный совет, с помощью этого метода вы сможете получить доступ к своему termux в вашем Windows10 без каких-либо задержек и без установки каких-либо вещей. Это самый последний и проверенный метод, и он намного лучше, чем два вышеупомянутых метода, если у вас есть телефон с вами.
Вывод :
Это наиболее распространенные методы для использования termux в ПК. Честно говоря, Bluestack точен, потому что вы на самом деле используете Termux, но он занимает все ваши ресурсы и сильно отстает. Чтобы протестировать все сценарии, которые я делаю, я использую Подсистема Windows для Linux, это гораздо быстрее, чище, и это же, как termux. Если вы можете использовать Linux Shell, нежели это означает, что вы хороший пользователь Linux. Если вы столкнулись с какой-либо ошибки при установке и использовании этих средств просто напишите комментарий и я обязательно дам вам ответ. Спасибо, что читаете ребят, и как всегда оставайтесь этичными👾.
● Buratinopol — хакинг, кибербезопасность, приватность, анонимность
● SOFTWARE — хранилище приватных софтов и прочей годноты. Подпишись!
● CODING — программирование доступным языком.
● Termux — one — гайды и статьи по Termux.
In this post, I am gonna show you How you can install the termux app on your Windows🔥. I am gonna show you 2 methods, in the first one, I am gonna show you how you can install termux on you PC using Emulator. And in the second method, I will show you how you can install Termux on Your PC without Emulator.
How to Install Termux for PC — 2020
If you are a termux user you should know that the termux is a Terminal Emulator for Linux. Basically, it’s a Lighter version on the Linux command-line interface. Since it is a Lighter version they made is a little bit simpler than the Linux terminal. And If you Run Termux Commands on Linux shell, some of them won’t work.
There are two ways you can install the Termux in your PC, In the first method we will use Bluestack Android Emulator and we will install the termux App on it. Every time we want to use the termux we will open BlueStack and use it like we do on android.
In the second method, we will install we will use Linux Subsystem for windows to install the Linux shell in Windows. Since we are using the Linux subsystem we will be installing the full version Linux shell and not the light version termux. This will run much faster than the 1st method and it will not lag at all and Bluestack will lag a lot if you have 4gb ram PC.
But the only difficulty in using the 2nd method is that only a few commands will differ from the termux commands. Like you must have to use apt and not the pkg and some time you will need to type sudo before commands because the terminal will be rooted😍.
Method 1: Install Termux in Windows Using Emulator:
In this method, we will install the Bluestack and then we will install Termux on it. This method will work on any Windows PC But you must have a good configuration else it will lag.
Step 1:
First of all, you have to Install BlueStack in your PC, Just Click on the below Download link and a setup file of less than 2 MB will be installed on your PC.
Step 2:
Click on the Downloaded File in the bottom left corner of your chrome.
and the Installer will Open Just click on Install and it will start Downloading the Tool in your Windows.
The Blue stack will take around 500MB to download.
Step 3:
Now after the installation is done, It will ask you to sign in the google play store. Click on the sign in Button and then Enter your email and password and you will be logged in.
Step 4:
Now you can see the PlayStore in your BlueStack, Just Click on the Search bar and Type Termux and Press Enter.
Step 5:
Install the Termux Like you normally do in your android Phone. After it’s installed Press Click Open.
Step 6:
Now you can see I can use termux in Windows10 without any Interruption. I am also running the cool header script, If you also want to add this header then you read this [Termux-Cool-Header]
Tip :
To Run the termux again you need to open the blue stack and there you can see the Termux Icon also it will Create a Termux icon on your Home Screen you can also click that icon to run the Termux in your Windows. You can use Termux commands like you do in your Phone.
Method 2: Install Termux on PC Without Emulator :
In this method, we will Not install an Emulator to run termux, We will install the Linux terminal in Windows so that we can use Linux tools in Windows which is the same as Linux.
Step 1:
Press the Windows key on your keyboard and type «turn windows features on or off» and select the top Option and it will open the below window in your computers.
Step 2:
Now Scroll to the Bottom and then Turn on the Windows Subsystem for Linux. and then press Ok.
Step 3:
Now it will check for the components to turn on the subsystem features and then it will apply the changes and it will ask you to restart the System, Click on the Restart Button.
Step 4:
Now You have to install the Kali Linux Terminal in your Windows from the Microsoft Store click on the below link. And Click on the get app or install Button and install the tool.
After Downloading, You can Directly Launch the Kali Linux application and the For the First time it will ask you for your username and password, Just Type any simple Username and password, Because you will have to type this password a lot while installing anything.
Step 6:
Now everything is Set and you just have to use this Terminal like you use termux but Keep in mind that this is Actual Linux, so you need to use Linux commands. The Linux commands are the same as termux you just have to use apt here and not pkg. You will also have to type sudo before commands if they are not working normally. Here is a Linux Cheat Sheet That you can follow for a better experience. Below, you can see that I have installed Neofetch in Kali Linux shell.
Method 3: Use Termux in Windows Using SSH Server:
This is a Bonus tip, using this method you will be able to access your termux in your Windows10 without any lag and without installing any things. This is the latest and tested method and it is far better than the above two methods if you have a phone with you. i have written a dedicated post on this topic so you can read it here : [ Termux SSH : Use Termux in Windows Using SSH Server ]
Conclusion :
These are the most common methods to use termux in PC. To be honest the Bluestack is accurate because you are actually using Termux BUT it takes all your resources and It lags a lot. To test all the scripts that I make, I use the windows subsystem for Linux, It is a much faster, Cleaner, and it is same as the termux. If you can use Linux Shell than that means you are a good Linux user. If you are facing any error while installing and using these tools just drop a comment I will surely give you a reply. Thanks For reading Guys, and as always Stay Ethical👾.
Если вы оказались на этой страничке, значит, ищете, где можно скачать мобильное приложение Termux на ПК. Программное обеспечение является отличным сочетанием эмуляции терминала и обширной коллекции пакетов Linux. Утилита значительно расширяет возможности пользователя Android. Впрочем, давайте обо всем по порядку.
Содержание
- Обзор программы
- Как пользоваться
- Загрузка и установка
- Работа с Termux
- Особенности
- Достоинства и недостатки
- Похожие программы
- Скачать
- Видеообзор
- Вопросы и ответы
Обзор программы
Итак, первым делом следует понять, что же представляет собой инструмент. Это специальное приложение, являющееся эмулятором терминала с Chroot средой Linux. Здесь поддерживается управление без Root-прав, что является несомненным преимуществом программы.
Здесь можно воспользоваться такими функциями, как работа с оболочками Zsh и Bash, тестирование игр с помощью Frotz, проверка созданного проекта с помощью git, поддержка работы с консолью Python, выполнение доступа к серверам SSH, поиск пакетов по репозиторию и многое другое. Выполнять любые операции следует только при понимании этого процесса. Вводить какие-либо команды, не зная их значения, не рекомендуется.
Разработчики постоянно трудятся над усовершенствованием программы, добавлением новых возможностей, а также над устранением ошибок, что делает использование приложения максимально комфортным.
Как пользоваться
Прокрутив страничку вниз, вы сможете прочитать подробное пошаговое руководство по установке утилиты на ПК. Инструкция подкреплена скриншотами.
Загрузка и установка
Чтобы скачать мобильное приложение Termux на компьютер или ноутбук для Windows 7, 8 или 10, нам потребуется эмулятор операционной системы Android. Речь идет о программе BlueStacks, являющейся лучшей среди себе подобных. Загрузить эмулятор можно внизу по прикрепленной там ссылке. Как только инструмент будет готов, сделать будет необходимо следующее:
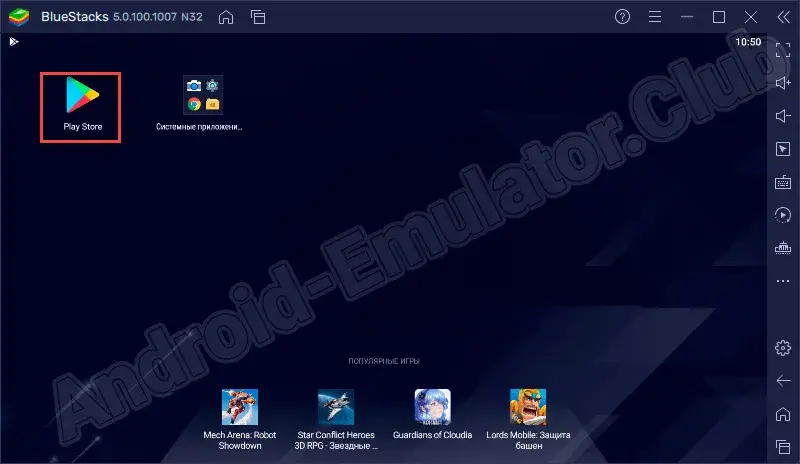
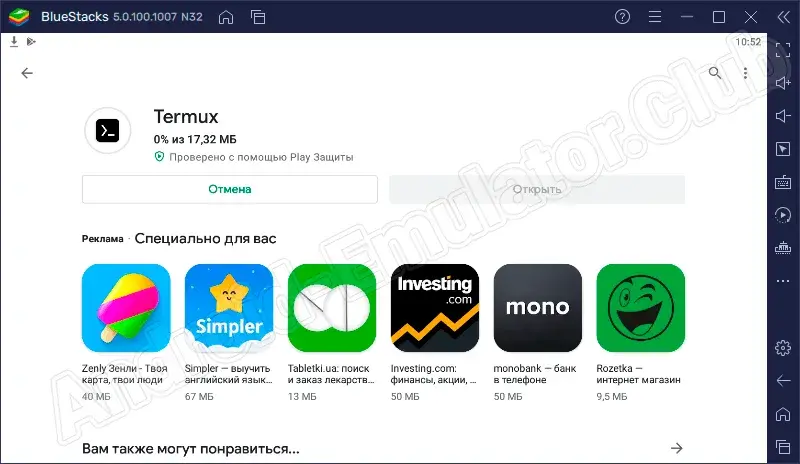
- Для начала запускаем BlueStacks и переходим в Play Market.
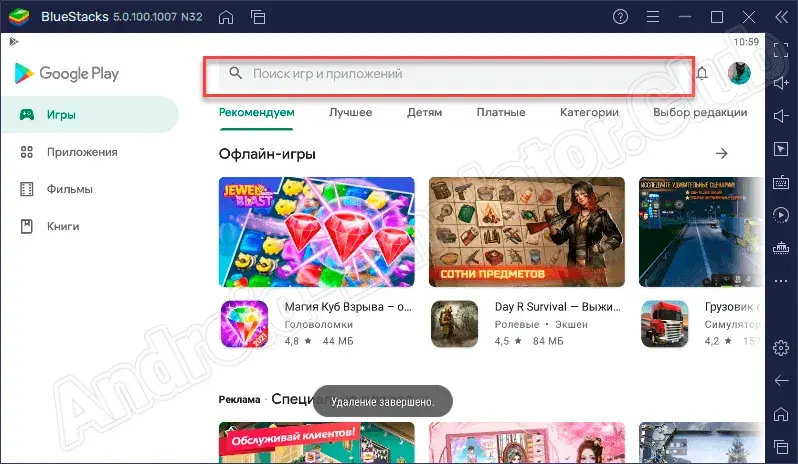
- Производим клик по строке поиска. Она расположена вверху.
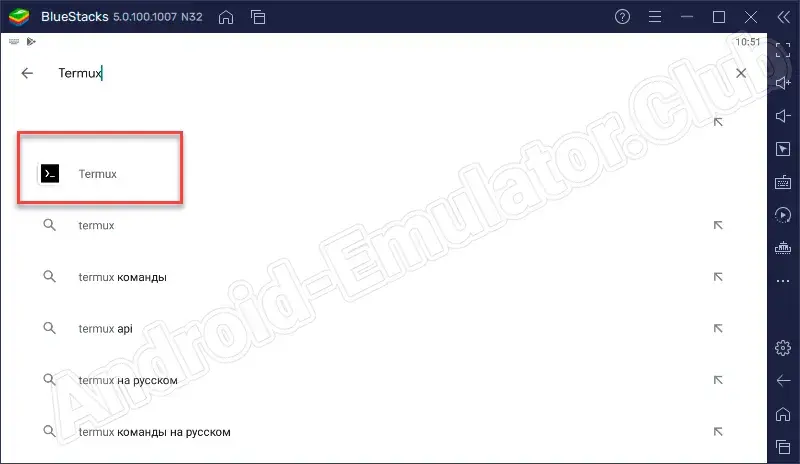
- Пишем, что именно нужно найти. Из поисковой выдачи выбираем подходящий результат.
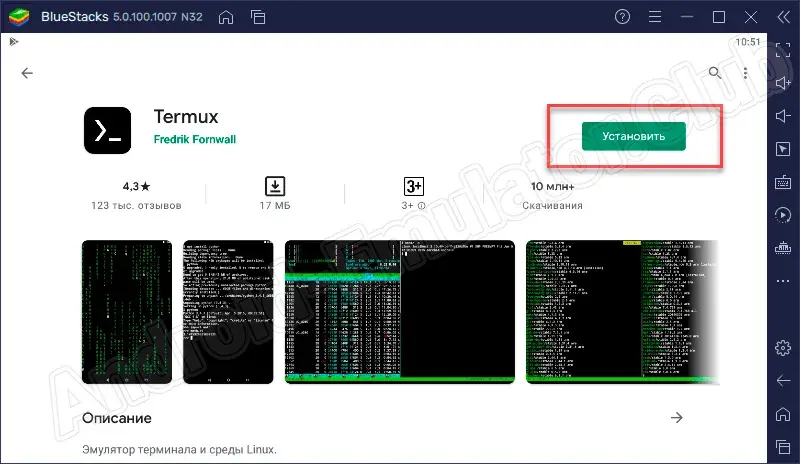
- Кликнув по соответствующей кнопке, начинаем инсталляцию приложения.
- Ждем несколько секунд, пока программа будет установлена на устройство.
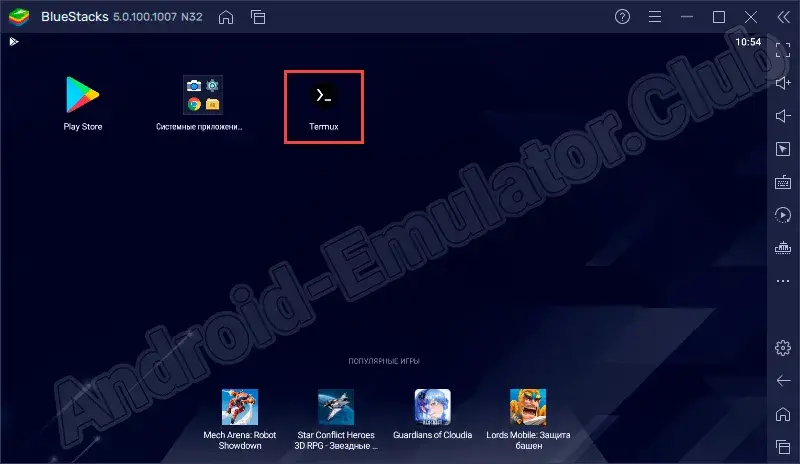
- Теперь жмем по кнопке «Открыть», чтобы запустить терминал на PC.
- Запускать утилиту можно также с домашнего экрана эмулятора.
Все готово к тому, чтобы начать пользоваться инструментом. Скажем об этом несколько слов.
Работа с Termux
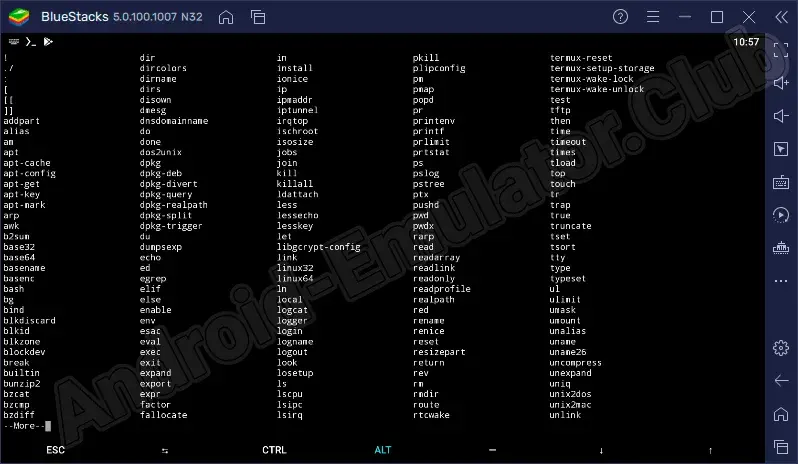
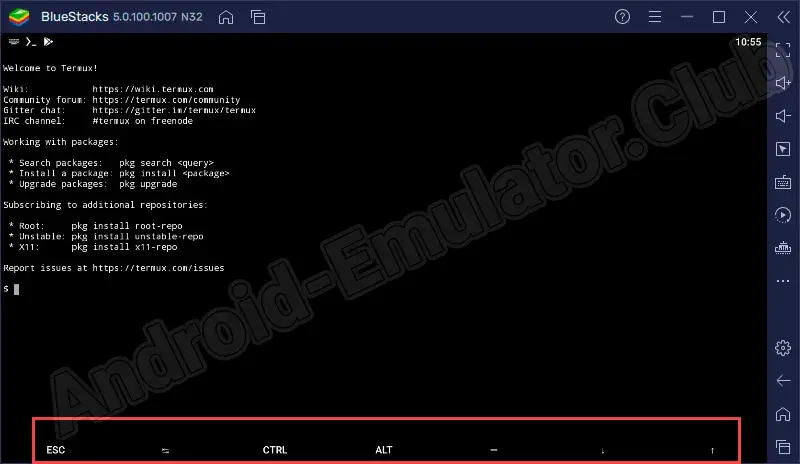
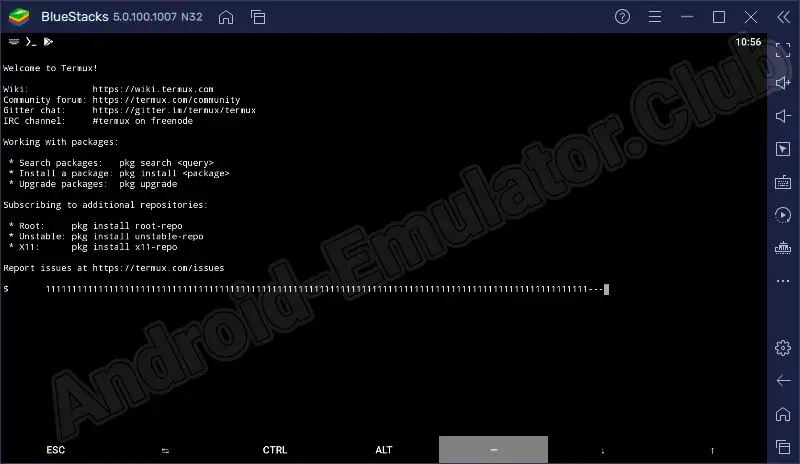
После запуска приложения на своем устройстве пользователь увидит окно в виде консоли, где и прописываются нужные команды. Внизу окна можно увидеть клавиши, используемые при работе.
Стоит понимать, что, если вы плохо разбираетесь с данной темой, не следует экспериментировать и вводить неизвестные команды. Это может плохо сказаться на работе устройства, где используется инструмент.
Приложение очень интересное и позволяет значительно расширить функциональные возможности Android.
Особенности
Все действия здесь происходят через специальную консоль, где пользователь имеет возможность прописывать различные команды. При этом для внесения тех или иных изменений не потребуются Root-права. Инструмент отлично справляется с обработкой данных, а также поддерживает большое число языков программирования.
Достоинства и недостатки
Скажем несколько слов о преимуществах и недостатках программного обеспечения.
Плюсы:
- Бесплатное использование.
- Легковесность.
- Поддержка работы с оболочками Bash и Zsh.
- Использование консоли Python.
- Обширная коллекция пакетов Linux.
Минусы:
- Неопытному пользователю разобраться будет сложно.
Похожие программы
Если поискать программы, похожие по смыслу или возможностям, можно выделить такие аналоги:
- Aris – Linux.
- Terminal Emulator for Android.
- Изучите этический взлом.
- Хакер Икс.
- Mitnick.
- Pro coding.
Скачать
Загружайте мощную эмуляцию терминала на компьютер и получайте массу дополнительных инструментов по работе с ним.
| Название: | Termux |
| Разработчик: | Fredrik Fornwall |
| Лицензия: | Бесплатно |
| Язык: | Английский |
| Информация актуальна: | 2023 год |
Скачать Termux на ПК
Инструкция по установке
Видеообзор
Смотрите обучающее тематическое видео, которое поможет быстрее разобраться с программой.
Вопросы и ответы
Воспользовавшись формой для комментариев, расположенной немного ниже, посетители сайта могут задать вопросы специалистам сайта и получить на них быстрый ответ. Это может потребоваться в том случае, если с загрузкой или инсталляцией приложения на ПК что-то пошло ни так.
Are you looking for ways to install Termux on your Windows 10 or Windows 11 PC? This guide is for you!
This article explains various easy methods to install and use Termux app on your Windows 10 or Windows 11 PC.
Termux for PC
Here are the 3 methods to download and install Termux on Windows 10/11:
- Using BlueStacks
- Using LDPlayer
- Using Noxplayer
1. Install Termux Using BlueStacks

To install Termux on your PC using BlueStacks, follow these steps:
Step 1: Download the latest version of BlueStacks.
Step 2: After installation, launch BlueStacks. On its first launch, you will be asked to log in to your Google PlayStore account.
Step 3: After completing the sign-in process, launch PlayStore inside Bluestack.
Step 4: Click on the search icon in the top right and type “Termux”.
Step 5: Select the official Termux in the search results and then click the “Install” button.
Step 6: Wait till the downloading and installation of Termux for PC is completed.
Step 7: Once done, go back to the home screen and click the Termux icon to launch it.
2. Install Termux Using LDPlayer

LDPlayer is another free Android emulator that lets you enjoy Android apps on your PC. To install Termux using LDPlayer, follow the below-mentioned steps:
Step 1: First, download and install the latest version of the LDPlayer emulator.
Step 2: Launch LDPlayer and open the “System Apps” folder.
Step 3: Click on Play Store to open it and then log in to your Google account.
Step 4: Inside Play Store, type “Termux” in the search field, and then select the official Termux from the search results. Click on the “Install” button to begin the downloading and installation process.
Step 5: When Termux is successfully installed, go back to the LDPlayer home screen and click on the Termux icon to launch it.
3. Install Termux Using Noxplayer

If you are having issues with BlueStacks or LDPlayer, you can still install Termux on your Windows 11/10 computer using Noxplayer.
Here’s how:
Step 1: Download the latest version of the Noxplayer Android emulator and install it.
Step 2: Launch the Noxplayer on your Windows PC and open PlayStore.
Step 3: Click on the search icon in PlayStore, type “Termux” and hit Enter.
Step 4: Click on the “Install” button. Wait till Termux is installed.
Step 5: Once installation is completed, click on the Termux icon on the home screen to open it.
About Termux
Termux is an emulator for Android. It runs open source terminals. It gives the user a feeling of Linux OS on Android.
If you are an advanced user who knows his way around Linux, you will find Termux useful. It is available for free and has over 10 million downloads on Google Play with a rating of 4.2.
Conclusion
If you are looking for a terminal emulation app, give Termux a try!
Though it is an Android app, by following the above-mentioned methods, you can easily install Termux on your computer running on Windows 10 or Windows 11.
Termux is a powerful Linux terminal available for android users. If you want to download Termux on PC, then here in this article, you can download it for Windows 10 and 11. With the help of this app, you can use the bash and zsh shells on your pc.
It is possible to install Linux on Windows with WSL. But if you are used to the Termux app and only want to use this terminal on your windows, then you need to use an android emulator.
As no official version of the Termux app is available for windows or mac, it’s only designed for android users. But you can easily download and use Termux on your pc with LDPlayer or Bluestacks emulators.
If you are okay with using LDPlayer as your android emulator to run the Termux app, you can directly download it from the above download button. And if you want to use another emulator or access Termux on a Mac, you can install it manually as well.
How To Use Termux on PC? [Windows]
Now let’s check out how to use Termux on your windows device after installing it with an android emulator.
- First, open the android emulator on your pc, click on the app icon, and it will load the app on your emulator.
- On the latest version, you may face issues with installing or updating packages; in this case, you can check out the solution here.
- You can install all the packages you want to use apt package manager as you do with Termux on an android phone.
- To have an extra level of security while using Termux on a PC, you can also use the Speed VPN app.
Using this terminal app on your pc with an android emulator is much more convenient. As you get access to the keyboard on your laptop or computer, it is easy to use the Termux app.
Termux Features on PC
This app is by far one of the best free terminal apps on android devices, and it is because of all the fantastic features this app has. Check them out here:
- This app supports three file editors, including nano, vim, and emacs. You can use any of them to edit your files in the app.
- With the help of SSH, you can access any server with this terminal app. You can also do the same if using Termux on a PC with an emulator.
- It is free, there are no ads in the app, and you get regular updates from the developer to keep this app the latest and safe.
- You can use the python console as a pocket calculator and run text-based games with Frotz in this app.
Other than all these features, you can also check projects with git on the Termux app. It is truly one of the best Linux terminals for an android device.
FAQs
Is Termux available for PC?
No official version of it is available for PC as it is designed for only android users. But you can use Termux on windows with the help of an android emulator.
Can I install Termux on Windows 10?
Yes, you can install it on your windows 10 and 11. First, download the android emulator on your pc and then install this app on the emulator from the play store.
Can iPhone run Termux?
No, this app is only available for android users. But you can check out iSH Shell or Termius, which are good alternatives to the Termux on the iPhone.
Is Termux free to use?
Yes, Termux is an open-source and free app you can use on your android without any ads.
There are multiple benefits of using Termux on PC. We hope with this article, you can download this free terminal app on your windows device. You can inform us in the comment box if you get any errors while installing it.
Or you can check out the Termux GitHub for more details. If you want to secure your device with 2FA, you can check out google authenticator on pc. And if you like this article, please share it with your other friends.


