Suricata is an intrusion detection and prevention system. This tool introduces itself as a complete ecosystem for security monitoring. One of the most important features of Suricata compared to other tools is that it works up to the application layer. This allows Suricata to identify risks that other tools may ignore because they are split into multiple packages. In this article, we are going to teach you How to Install Suricata on Windows 10 RDP. It should be noted that you can visit the packages available in Eldernode if you want to buy a Windows VPS server.
Table of Contents
Suricata functionality is not limited to the application layer. It also works at lower levels and protocols such as TLS, ICMP, TCP, and UDP. Suricata also examines HTTP, FTP, and SMB protocols to find hidden intrusion attempts in the form of unusual requests. It should note that Suricata also uses the ability to extract files so that administrators can check for suspicious files.
Note that the Suricata is very cleverly designed and distributes its workload across multiple processor cores and chips to achieve the best performance. It also transfers some of its workloads to the graphics card, which is a great feature for servers.
In the rest of this article, join us to explain step by step how to Install Suricata on Windows 10 RDP.
Install Suricata on Windows 10 RDP Server
In this section, we will discuss how to Install Suricata on Windows 10 RDP. To do this, please follow the steps below in order. The first step is to download Suricata for Windows.
In the window that opens, click on Run.
Then click Next.
Check I accept… and click Next to accept the license agreement.
In the next step, you can choose the method you want to install. Then click Next.
Click Install.
*
Finally, you have to click on Finish.
Once you have successfully installed Suricata, you should now create a folder with your configurations, rules, and test captures. Note that this folder is C:\Suricata. You need to create a folder log, rules, and projects in that folder.
In the Rules folder, you must copy the contents of the Rules folder to the Suricata program’s directory.
Threshold.config is an empty file.
suricata.yaml is a copy of suricata.yaml found in the Suricata application list.
Note: You can find the modifications I make to suricata.yaml on GitHub.
In the next step, for each project or test, you should create a folder in folder projects. Like this mimikatz folder:
Here, we use the following BAT file to start Suricata with our rules and capture file:
C:\Program Files (x86)\Suricata\suricata.exe” -c ..\..\suricata.yaml -S mimikatz.rules -l logs -k none -v -r drsuapi-DsGetNCChanges.pcap pause1. With option -S we can use our rule file mimikatz.rules (exclusively, no other rule file will be loaded).
2. Option -l logs uses our local logs directory to write the log files.
3. -k none disable checksum checks.
4. -v means verbose.
5. -r .pcap reads our capture file for processing by Suricata.
The important point is that if you encounter an error message like the one below, you should follow the steps below.
How to Install WinPcap on Windows 10
Visit the WinPcap website and download it. Then go to the place where you downloaded the file and double click on it.
In the window that opens, click Next.
Then click on I Agree to confirm the license agreement.
Click Install to start installing WinPcap.
Finally, click on Finish.
How to Run Suricata on Windows 10 Server
Note that you can download the rules from Emerging Threats. Then extract the files from the rules folder to the C:\Suricata\rules folder.
You can process your capture file without explicit rule such as the image below:
Conclusion
Suricata is an open-source intrusion detection engine developed by OISF. The Beta version was released in late 2009 and the standard version was released in mid-2010. This engine can be used as an intrusion detection system (IDS), intrusion prevention system (IPS), or as a network security monitor. Suricata monitors network traffic using an extensive set of rules and signature language. In this article, we tried to teach you to step by step how to Install Suricata on Windows 10 RDP.
NOTE —
2020-04-29 edit
—-
Before installing Suricata on windows, install this prerequisite. Newer npcap versions may not work.
https://nmap.org/npcap/dist/npcap-0.992.exe
—-
Suricata installation (and/or compilation from scratch) can be found here:
https://redmine.openinfosecfoundation.org/projects/suricata/files
also a windows binary — self extracting auto install package is available here:
http://www.openinfosecfoundation.org/index.php/download-suricata
2020-04-29 edit
—-
Note In order to avoid errors like this: «The logging directory C:\\Program Files\\Suricata/log supplied by suricata.yaml doesn’t exist. (note this orphan «/») Consider installing into this directory C:\Suricata and not into C:\Program Files\Suricata.
—-
Preparing the build environment
The instructions below should be followed in the order they appear. If your configuration requires unique actions to compile the package and/or you significantly modify the configure shell script, please e-mail the details of your requirements and/or solution to bugreports@openinfosecfoundation.org.
Set up MinGW environment from http://mingw.org/
Do not use the automatic installer, as it is deprecated. Instead, manually unpack the following packages to c:\mingw (you may use newer versions if you prefer):
* binutils
    o binutils-2.20-1-mingw32-bin.tar.gz
* mingw-runtime (dev and dll)
    o mingwrt-3.17-mingw32-dll.tar.gz
    o mingwrt-3.17-mingw32-dev.tar.gz
* w32api
    o w32api-3.14-mingw32-dev.tar.gz
* Required runtime libraries for GCC (gmp, libiconv, MPFR and pthreads)
    o gmp-4.2.4-mingw32-dll.tar.gz
    o libiconv-1.13.1-1-mingw32-dll-2.tar.lzma
    o mpfr-2.4.1-mingw32-dll.tar.gz
    o pthreads-w32-2.8.0-mingw32-dll.tar.gz
* gcc-core (bin and dll)
    o gcc-core-4.4.0-mingw32-bin.tar.gz
    o gcc-core-4.4.0-mingw32-dll.tar.gz
* make
    o make-3.81-20090914-mingw32-bin.tar.gz
* zlib
    o libz-1.2.3-1-mingw32-dll-1.tar.gz
    + libz-1.2.3-1-mingw32-dev.tar.gz
Download MSYS
Get MSYS from http://sourceforge.net/projects/mingw/files/ and install
MSYS-1.0.11.exe (MSYS Base System)
msysDTK-1.0.1.exe (MSYS Suplementary Tools)
autoconf-2.63-1-msys-1.0.11-bin.tar.lzma
automake-1.11-1-msys-1.0.11-bin.tar.lzma
libtool-2.2.7a-1-msys-1.0.11-bin.tar.lzma
MSYS will ask the following questions during installation.
Accept Post Install: [y]
MinGW Installed? : [y]
path to MinGW: [c:/MinGW]
Download pkg-config
Install pkg-config taken from http://wiki.videolan.org/Win32CompileMSYSNew#PKG-CONFIG
Download and extract the following into c:\Msys\1.0
   http://ftp.gnome.org/pub/GNOME/binaries/win32/glib/2.18/glib_2.18.2-1_win32.zip
   ftp://ftp.gnome.org/pub/gnome/binaries/win32/dependencies/pkg-config_0.23-3_win32.zip
   ftp://ftp.gnome.org/pub/gnome/binaries/win32/dependencies/pkg-config-dev_0.23-3_win32.zip
Set PKG_CONFIG_PATH=/win32/lib/pkgconfig(e.g. by adding the Windows environment variable PKG_CONFIG_PATH in «Control Panel»->»System»->»Advanced System Settings»->»Environment Variables» and setting the value to /win32/lib/pkgconfig)
Download Git sources
Get Git sources from http://code.google.com/p/msysgit/
Unpack to /msys/1.0
Remember to edit ~/.gitconfig to set your username
Download libpcre
Get libpcre from http://www.pcre.org/
./configure --enable-utf8 --disable-cpp --prefix=/mingw
make
make install
Download libyaml
Download libyaml from http://pyyaml.org/wiki/LibYAML
Though libyaml does not support mingw compilation, it does work in static mode.
./configure --prefix=/mingw CFLAGS="-DYAML_DECLARE_STATIC"
make
make install
Download libpcap
Download the developer pack from http://www.winpcap.org/devel.htm
To have the driver in the system, download and install a corresponding installer package from http://www.winpcap.org/install/default.htm
Copy includes to c:/mingw/include and libs (.a) to c:/mingw/lib
Rename libwpcap.a to libpcap.a
Get and compile Suricata
git clone git://phalanx.openinfosecfoundation.org/oisf.git
cd oisf
Because of an autotools port bug, you will need to do the following:
dos2unix.exe libhtp/configure.ac
dos2unix.exe libhtp/htp.pc.in
dos2unix.exe libhtp/Makefile.am

./autogen.sh
./configure CFLAGS="-DYAML_DECLARE_STATIC"
Add —enable-nfqueue as a configurable parameter to enable inline mode.
make
If the full installation is successful, suricata.exe will be located in src/.lib. To test your build, you will need libpcre-0.dll, libz-1.dll, and pthreadGC2.dll, all of which should already be installed under c:/mingw or c:/msys.
preparing the runtime environment.
To prepare the runtime environment, you must copy the executable and DLLs to a dedicated directory. Get the classification.config and suricata.yaml, and then edit suricata.yaml to ensure the directories are correctly identified.
pcap mode
If you have not already done so, install winpcap runtime and its driver. Then, determine your eth device UUID in the registry:
HKEY_LOCAL_MACHINE\SYSTEM\CurrentControlSet\Services\Tcpip\Parameters\Interfaces\
suricata.exe -c suricata.yaml -i \device\
In the example above, device should be replaced with your device uuid.
Inline mode
To operate in inline mode, you must download, compile and install netfilterforwin, which is the netfilter.sys driver and Windows port of the libnetfilter_queue library.
Download and install the Windows Driver Kit from Microsoft
http://www.microsoft.com/downloads/details.aspx?displaylang=en&FamilyID=36a2630f-5d56-43b5-b996-7633f2ec14ff
Download netfilterforwin from http://sourceforge.net/projects/netfilterforwin/
Unpack it so the netfilterforwin directory is beside the oisf directory. You must omit the version from its name.
Compile the driver
Open the correct build environment from your Start menu
Start > All Programs > Windows Driver Kits > WDK xxxx.yyyy.z > Build Environments > Windows Server 2003 > x86 Free Build Environment
At your command line prompt, enter the following:
cd netfilterforwin/netfilter
nmake
Install the driver
Copy inf/* files and the freshly built netfilter.sys to a separate directory, and then open the network connections.
Right-click an interface, then select Properties
Click install…
Select Service
Click Add
Click Have disk…
Browse to the directory with the inf files and netfilter.sys, select netfilter.inf, and then click Ok.
Confirm everything
The driver is now installed.
Run Suricata in inline mode
suricata.exe -c suricata.yaml -q 0
The purpose of this document is to build Suricata on Windows for the
purpose of development and CI. It does not cover installing or running
Suricata on Windows.
Install MSYS2
URL: https://www.msys2.org/
Install msys2-x86_64.
Install Npcap:
URL: https://nmap.org/npcap/
Download the Npcap Windows installer and install it.
Then download the SDK zip file and extract to C:\npcap.
Install Dependencies
From the Windows start menu, launch «MSYS2 MinGW 64-bit».
pacman -Sy \
  automake \
  autoconf \
  gcc \
  git \
  jansson-devel \
  libtool \
  libyaml-devel \
  make \
  mingw-w64-x86_64-rust \
  mingw-w64-x86_64-pcre \
  mingw-w64-x86_64-jansson \
  mingw-w64-x86_64-libyaml \
  mingw-w64-x86_64-nss \
  mingw-w64-x86_64-nspr \
  pcre-devel \
  pkg-config \
  python3

cargo install --root /usr  --force cbindgen
If you wish to run Suricata-Verify:
pacman -Sy python3-pip mingw-w64-x86_64-jq

pip3 install PyYAML
Checkout and Build Suricata
git clone https://github.com/OISF/suricata

git clone https://github.com/OISF/libhtp suricata/libhtp

cd suricata

./autogen.sh

./configure --enable-gccprotect \
    --with-libpcap-libraries=/c/npcap/Lib/x64 \
    --with-libpcap-includes=/c/npcap/Include \
    --enable-gccprotect
Suricata-Verify
To run Suricata-Verify on Windows you should use the MSYS2 Python, and
not the mingw version of Python. Example:
/usr/bin/python3 /path/to/suricata-verify/run.py
There are issues with Python mingw-w64-x86_64-python3, it doesn’t
appear to work as well in the unix-like environment of MSYS2.
Running
TODO
- How do you specify an interface in Windows, etc…
This guide explains how to work with Suricata in layer 4 inline mode using
WinDivert on Windows.
First start by compiling Suricata with WinDivert support. For instructions, see
Windows Installation.
This documentation has not yet been updated with WinDivert information, so make
sure to add the following flags before configuring Suricata with configure:
--enable-windivert=yes --with-windivert-include=<include-dir> --with-windivert-libraries=<libraries-dir>
WinDivert.dll and WinDivert.sys must be in the same directory as the Suricata
executable. WinDivert automatically installs the driver when it is run. For more
information about WinDivert, see https://www.reqrypt.org/windivert-doc.html.
To check if you have WinDivert enabled in your Suricata, enter the following
command in an elevated command prompt or terminal:
suricata -c suricata.yaml --windivert [filter string]
For information on the WinDivert filter language, see
https://www.reqrypt.org/windivert-doc.html#filter_language
If Suricata is running on a gateway and is meant to protect the network behind
that gateway, you need to run WinDivert at the NETWORK_FORWARD layer. This can
be achieved using the following command:
suricata -c suricata.yaml --windivert-forward [filter string]
The filter is automatically stopped and normal traffic resumes when Suricata is
stopped.
A quick start is to examine all traffic, in which case you can use the following
command:
suricata -c suricata.yaml --windivert[-forward] true
A few additional examples:
Only TCP traffic:
suricata -c suricata.yaml --windivert tcp
Only TCP traffic on port 80:
suricata -c suricata.yaml --windivert "tcp.DstPort == 80"
TCP and ICMP traffic:
suricata -c suricata.yaml --windivert "tcp or icmp"
Время на прочтение
5 мин
Количество просмотров 27K
Если верить статистике, объем сетевого трафика увеличивается примерно на 50% каждый год. Это приводит к росту нагрузки на оборудование и, в частности, повышает требования к производительности IDS/IPS. Можно покупать дорогостоящее специализированное железо, но есть вариант подешевле — внедрение одной из систем с открытым исходным кодом. Многие начинающие администраторы считают, будто установить и сконфигурировать бесплатную IPS довольно сложно. В случае с Suricata это не совсем верно — поставить и ее и начать отражать типовые атаки с набором бесплатных правил можно за несколько минут.

Snort или Suricata. Часть 1: выбираем бесплатную IDS/IPS для защиты корпоративной сети
Зачем нужна еще одна открытая IPS?
Долгое время считавшаяся стандартом система Snort разрабатывается с конца девяностых, поэтому изначально она была однопоточной. За долгие годы в ней появились все современные фишки, вроде поддержки IPv6, возможности анализа протоколов прикладного уровня или универсальный модуль доступа к данным.
Базовый движок Snort 2.X научился работать с несколькими ядрами, но так и остался однопоточным и потому не может оптимально использовать преимущества современных аппаратных платформ.
Проблема была решена в третьей версии системы, но ее готовили так долго, что на рынке успела появиться написанная с нуля Suricata. В 2009 году ее начали разрабатывать именно как многопоточную альтернативу Snort, обладающую из коробки функциями IPS. Код распространяется под лицензией GPLv2, но финансовые партнеры проекта имеют доступ к закрытой версии движка. Некоторые проблемы с масштабируемостью в первых версиях системы возникали, но они довольно быстро были решены.
Почему Suricata?
В Suricata есть нескольких модулей (как и в Snort): захвата, сбора, декодирования, обнаружения и вывода. По умолчанию захваченный трафик идет до декодирования одним потоком, хотя это больше нагружает систему. При необходимости потоки можно разделить в настройках и распределить по процессорам — Suricata очень хорошо оптимизируется под конкретное железо, хотя это уже не уровень HOWTO для начинающих. Стоит также отметить наличие в Suricata основанных на библиотеке HTP продвинутых средств инспектирования HTTP. Они же могут быть использованы для протоколирование трафика без детектирования. Система также поддерживает декодирование IPv6, включая туннели IPv4-in-IPv6, IPv6-in-IPv6 и другие.
Для перехвата трафика могут использоваться разные интерфейсы (NFQueue, IPFRing, LibPcap, IPFW, AF_PACKET, PF_RING), а в режиме Unix Socket можно автоматически анализировать захваченные другим сниффером файлы PCAP. Кроме того, модульная архитектура Suricata упрощает подключение новых элементов для захвата, декодирования, анализа и обработки сетевых пакетов. Важно также отметить, что в Suricata блокировка трафика осуществляется средствами штатного фильтра операционной системы. В GNU/Linux доступно два варианта работы IPS: через очередь NFQUEUE (режим NFQ) и через zero copy (режим AF_PACKET). В случае первом случае попадающий в iptables пакет направляется в очередь NFQUEUE, где может обрабатываться на пользовательском уровне. Suricata прогоняет его по своим правилам и выносит один из трех вердиктов: NF_ACCEPT, NF_DROP и NF_REPEAT. Первые два пояснений не требуют, а последний позволяет промаркировать пакеты и отправить их в начало текущей таблицы iptables. Режим AF_PACKET отличается более высоким быстродействием, но накладывает на систему ряд ограничений: она должна иметь два сетевых интерфейса и работать в качестве шлюза. Заблокированный пакет просто не пересылается на второй интерфейс.
Важная фишка Suricata — возможность использования наработок для Snort. Администратору доступны, в частности, наборы правил Sourcefire VRT и OpenSource Emerging Threats, а также коммерческие Emerging Threats Pro. Унифицированный вывод можно анализировать с помощью популярных бэкендов, также поддерживается вывод в PCAP и Syslog. Настройки системы и правила хранятся в файлах формата YAML, который легко читается и может обрабатываться автоматически. Движок Suricata распознает множество протоколов, поэтому в правилах нет необходимости привязываться к номеру порта. Кроме того в правилах Suricata активно практикуется концепция flowbits. Для отслеживания срабатывания используются переменные сессии, позволяющие создавать и применять различные счетчики и флаги. Многие IDS рассматривают разные TCP-соединения как отдельные сущности и могут не увидеть связи между ними, свидетельствующей о начале атаки. Suricata старается видеть картину целиком и во многих случаях распознает распределенный по разным соединениям вредоносный трафик. О ее преимуществах можно рассуждать долго, мы лучше перейдем к установке и настройке.
Как установить?
Мы будем устанавливать Suricata на виртуальный сервер, работающий под управлением Ubuntu 18.04 LTS. Все команды необходимо выполнять от имени суперпользователя (root). Наиболее безопасный вариант — подключиться к серверу по SSH с правами обычного пользователя, а затем применить утилиту sudo для повышения привилегий. Для начала необходимо установить пакеты, которые нам понадобятся:
sudo apt -y install libpcre3 libpcre3-dev build-essential autoconf automake libtool libpcap-dev libnet1-dev libyaml-0-2 libyaml-dev zlib1g zlib1g-dev libmagic-dev libcap-ng-dev libjansson-dev pkg-config libnetfilter-queue-dev geoip-bin geoip-database geoipupdate apt-transport-httpsПодключаем внешний репозиторий:
sudo add-apt-repository ppa:oisf/suricata-stable
sudo apt-get update
Устанавливаем последнюю стабильную версию Suricata:
sudo apt-get install suricataПри необходимости правим конфигурационные файлы имя, заменив использующийся по умолчанию eth0 на фактическое имя внешнего интерфейса сервера. Настройки по умолчанию хранятся в файле /etc/default/suricata, а пользовательские — в /etc/suricata/suricata.yaml. Настройка IDS по большей части ограничивается правкой этого конфигурационного файла. В нем множество параметров, которые по названию и назначению совпадают с аналогами из Snort. Синтаксис тем не менее совершенно другой, но файл читать намного проще чем конфиги Snort, к тому же он хорошо прокомментирован.
sudo nano /etc/default/suricata
и
sudo nano /etc/suricata/suricata.yaml
Внимание! Перед запуском стоит проверить значения переменных из раздела vars.
Чтобы завершить настройку потребуется установить suricata-update для обновления и загрузки правил. Сделать это довольно просто:
sudo apt install python-pip
sudo pip install pyyaml
sudo pip install <a href="https://github.com/OISF/suricata-update/archive/master.zip">https://github.com/OISF/suricata-update/archive/master.zip</a>
sudo pip install --pre --upgrade suricata-update
Дальше нам нужно запустить команду suricata-update для установки набора правил Emerging Threats Open:
sudo suricata-update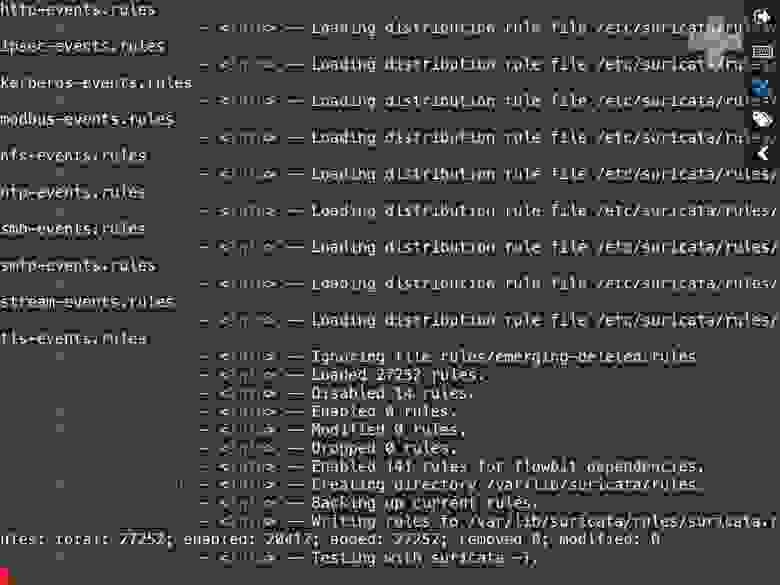
Для просмотра списка источников правил выполняем следующую команду:
sudo suricata-update list-sources
Обновляем источники правил:
sudo suricata-update update-sources
Повторно просматриваем обновленные источники:
sudo suricata-update list-sourcesПри необходимости можно включить доступные бесплатные источники:
sudo suricata-update enable-source ptresearch/attackdetection
sudo suricata-update enable-source oisf/trafficid
sudo suricata-update enable-source sslbl/ssl-fp-blacklist
После этого необходимо еще раз обновить правила:
sudo suricata-updateНа этом установку и первичную настройку Suricata в Ubuntu 18.04 LTS можно считать законченной. Дальше начинается самое интересное: в следующей статье мы подключим виртуальный сервер к офисной сети через VPN и начнем анализировать весь входящий и исходящий трафик. Особое внимание уделим блокированию атак DDoS, активности вредоносного ПО и попыткам эксплуатации уязвимостей в доступных из сетей общего пользования сервисов. Для наглядности будут смоделированы атаки наиболее распространенных типов.