
![]()
Здравствуй, юный сисадмин. Сегодня мы с тобой установим Windows Server 2019. Устанавливать будем ознакомительную версию, которая работает 180 дней. Установка производится на виртуальную машину VMware, я использую домашний сервер с ESXi на борту.
Дистрибутив Windows Server 2019
Переходим по ссылке:
https://www.microsoft.com/ru-ru/windows-server
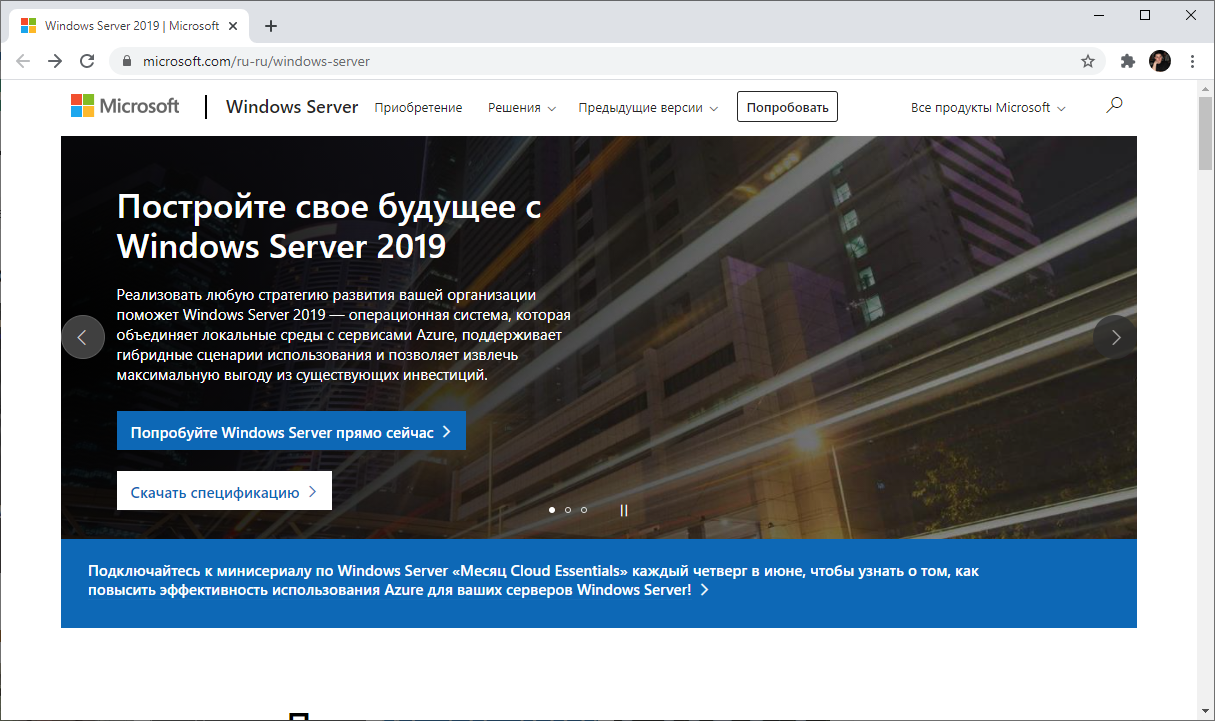
Нажимаем кнопку «Попробуйте Windows Server прямо сейчас».
https://www.microsoft.com/ru-RU/windows-server/trial
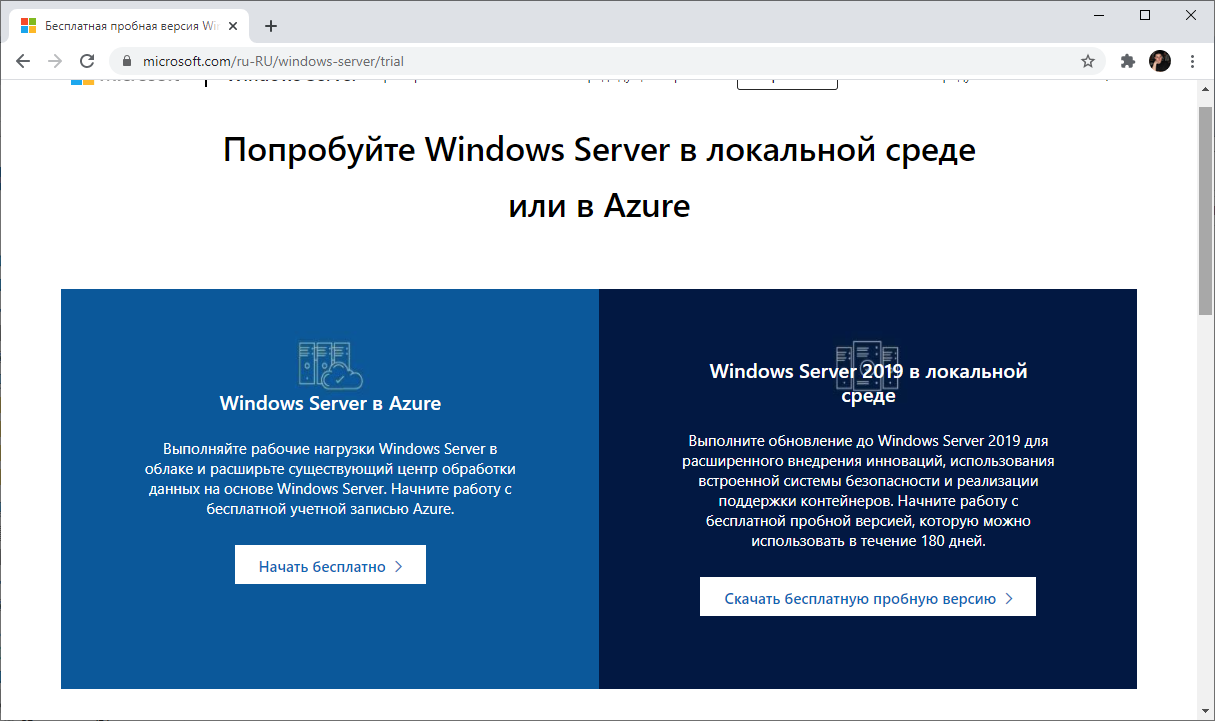
Нас интересуем Windows Server 2019 в локальной среде. «Скачать бесплатную пробную версию».
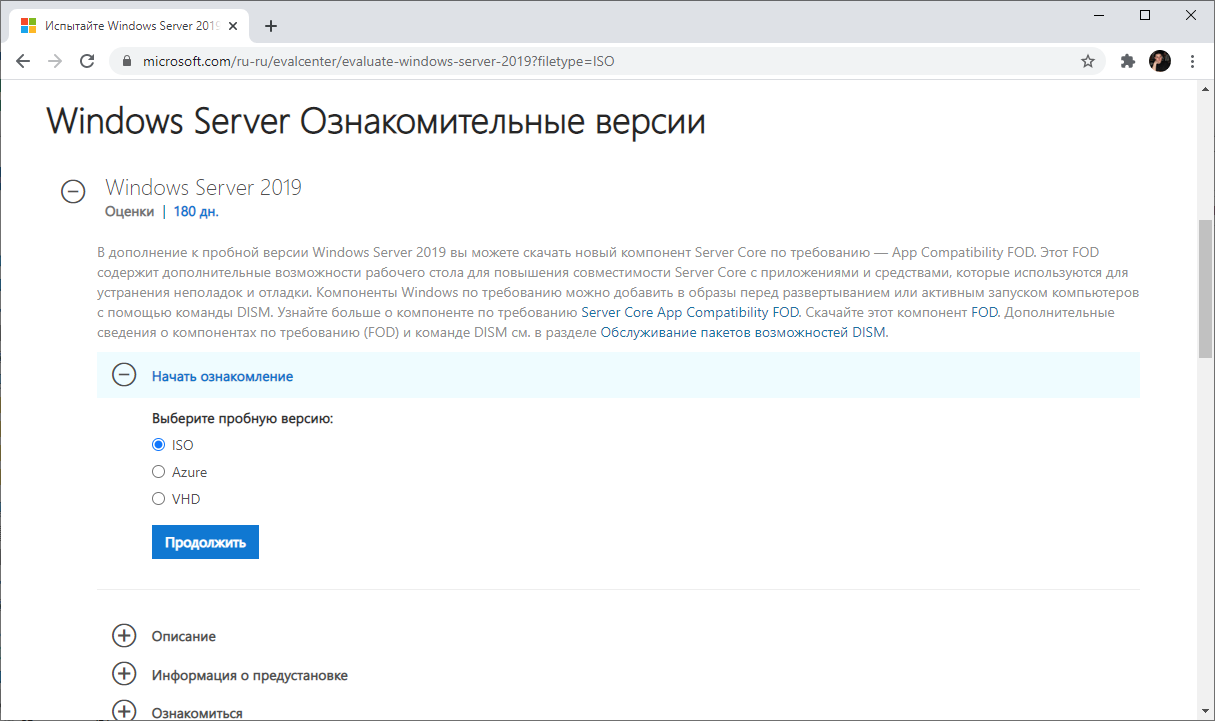
Нам нужен ISO образ, выбираем, «Продолжить».
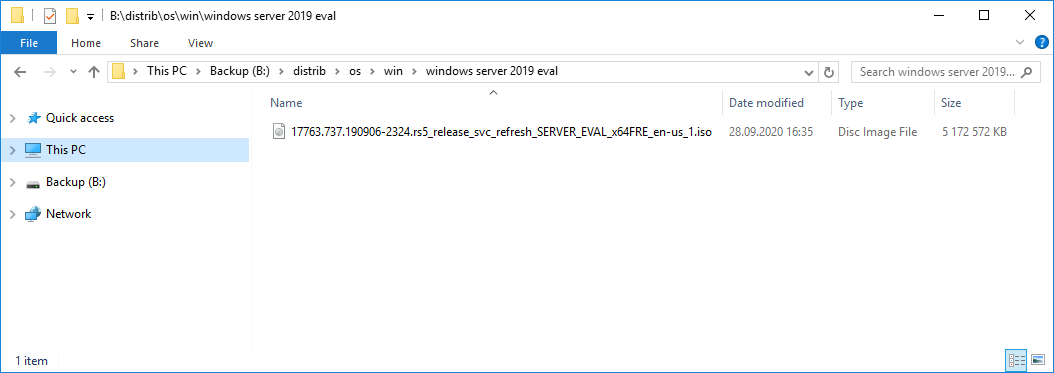
Итак, дистрибутив Windows Server 2019 в виде ISO образа у нас есть.
Системные требования Windows Server 2019
https://docs.microsoft.com/en-us/windows-server/get-started-19/sys-reqs-19
Минимальные системные требования для работы Windows Server 2019:
- Процессор
- 64-разрядный процессор с частотой 1,4 ГГц
- Совместимость с набором инструкций x64
- Поддержка NX и DEP
- Поддержка CMPXCHG16b, LAHF/SAHF и PrefetchW
- Поддержка трансляции адресов второго уровня (EPT или NPT)
- Память
- 512 МБ (2 ГБ для сервера с возможностью установки Desktop Experience)
- ECC (Error Correcting Code) или аналогичная технология для развертывания физического хоста
- Диск
- 32 ГБ для core mode + IIS
- 36 ГБ для GUI mode + IIS
При установке на виртуальную машину минимальных требований (1 процессор и 512 МБ оперативки может быть недостаточно, установка завершится с ошибкой. В этом случае можно сделать следующее:
- Выделите более 800 МБ памяти, после завершения установки можно уменьшить количество памяти до 512 МБ. Если вы используете дополнительный язык, то может потребоваться больше 800 МБ.
- Прервите процесс установки SHIFT+F10. В командной строке используйте diskpart.exe для создания и форматирования раздела для установки. Выполните wpeutil createpagefile /path=C:\pf.sys, где C: — это выделенный раздел. Закройте командную строку и продолжите установку.
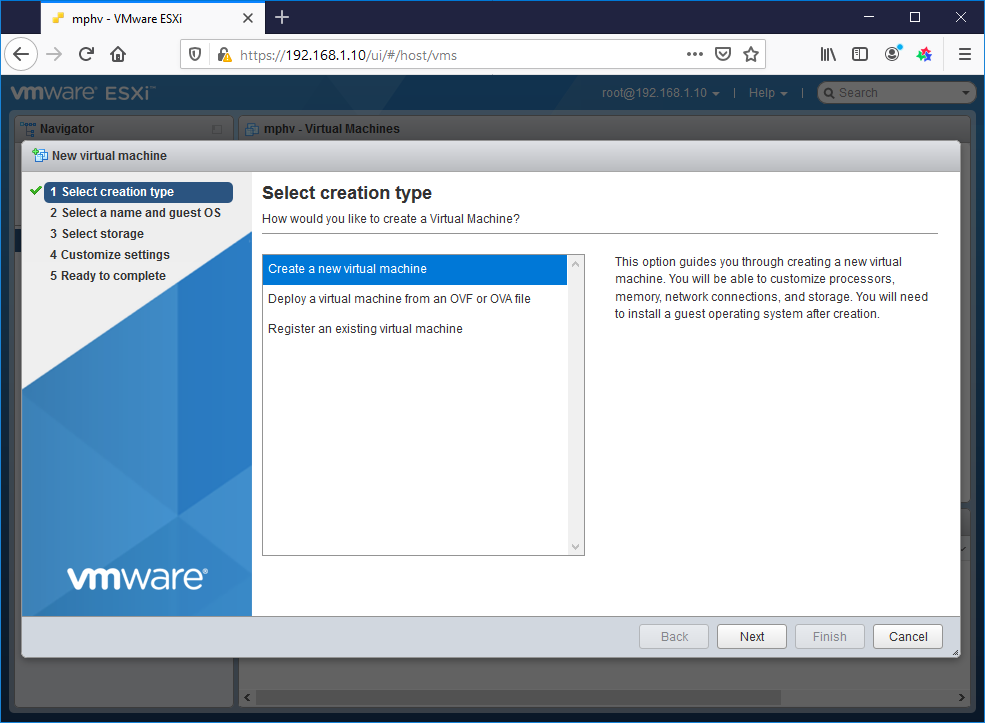
Подготовка виртуальной машины для Windows Server 2019
Создаём виртуалку.
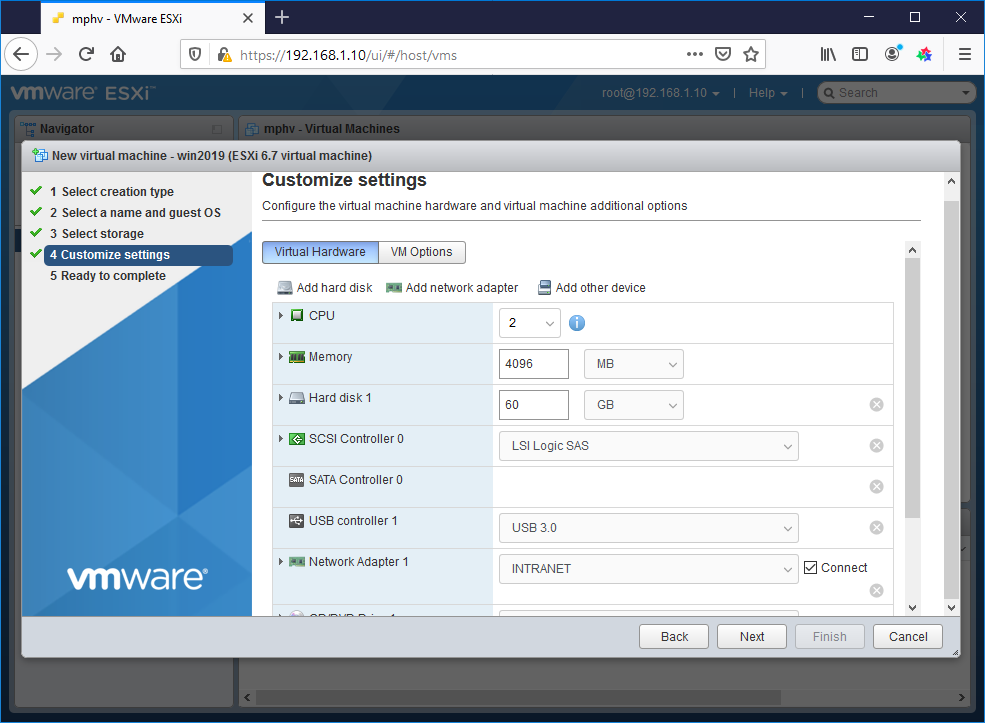
Минимальные требования не будем устанавливать. Я выделил:
- 2 процессора
- 4 ГБ оперативки
- 60 ГБ места на диске
Загружаю в хранилище ISO образ.
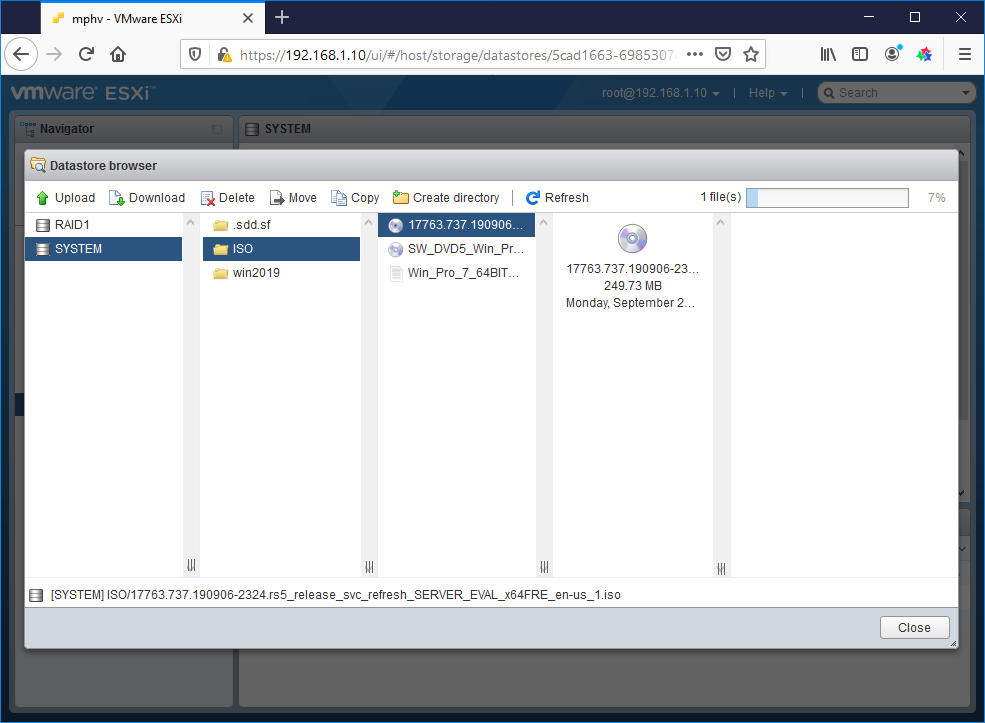
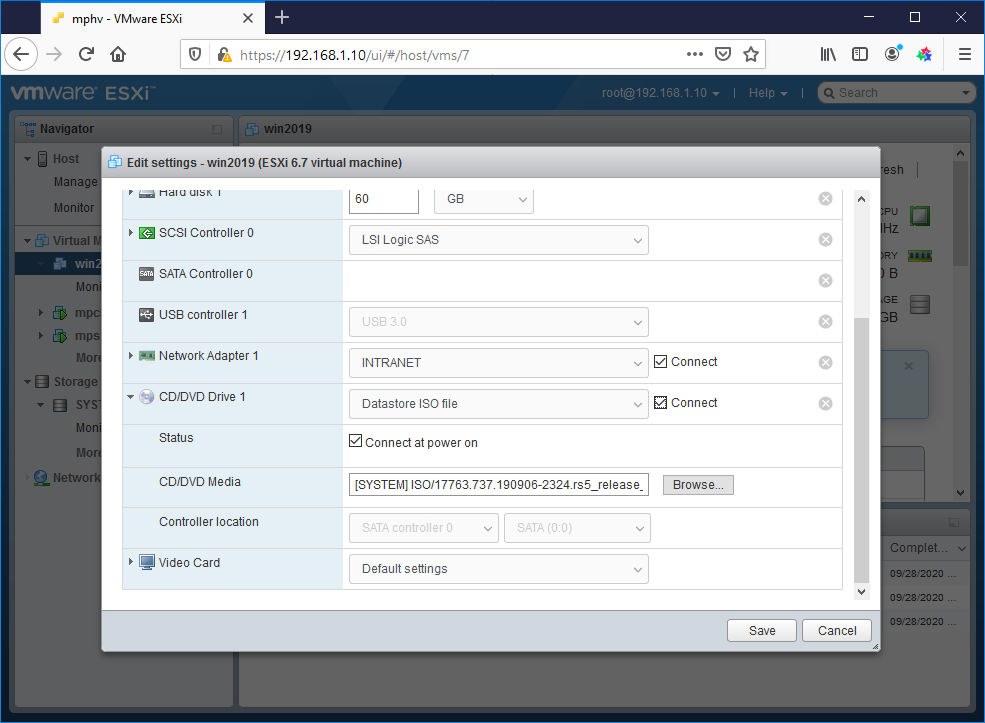
Монтирую ISO образ как CD\DVD.
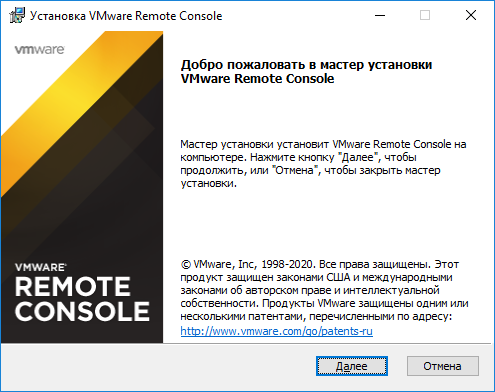
Для удобства устанавливаю VMware Remote Console.
Установка Windows Server 2019
Включаем виртуалку.
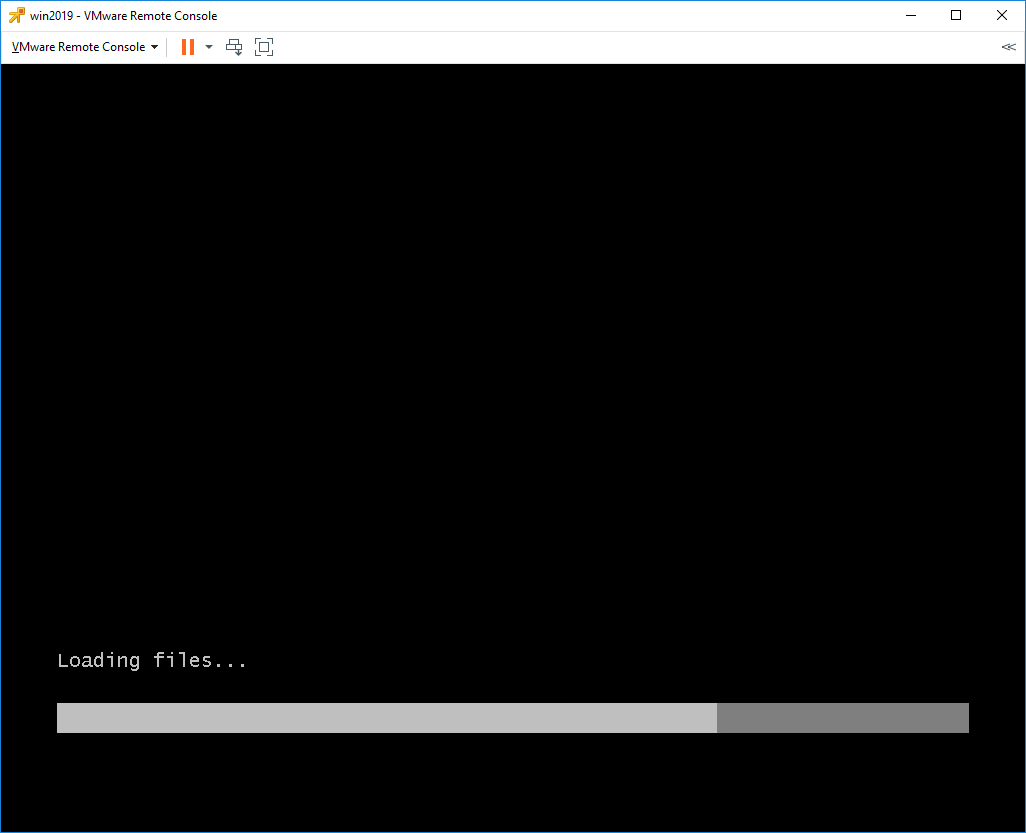
Установочный образ подцепился.

Запускается Windows Setup.
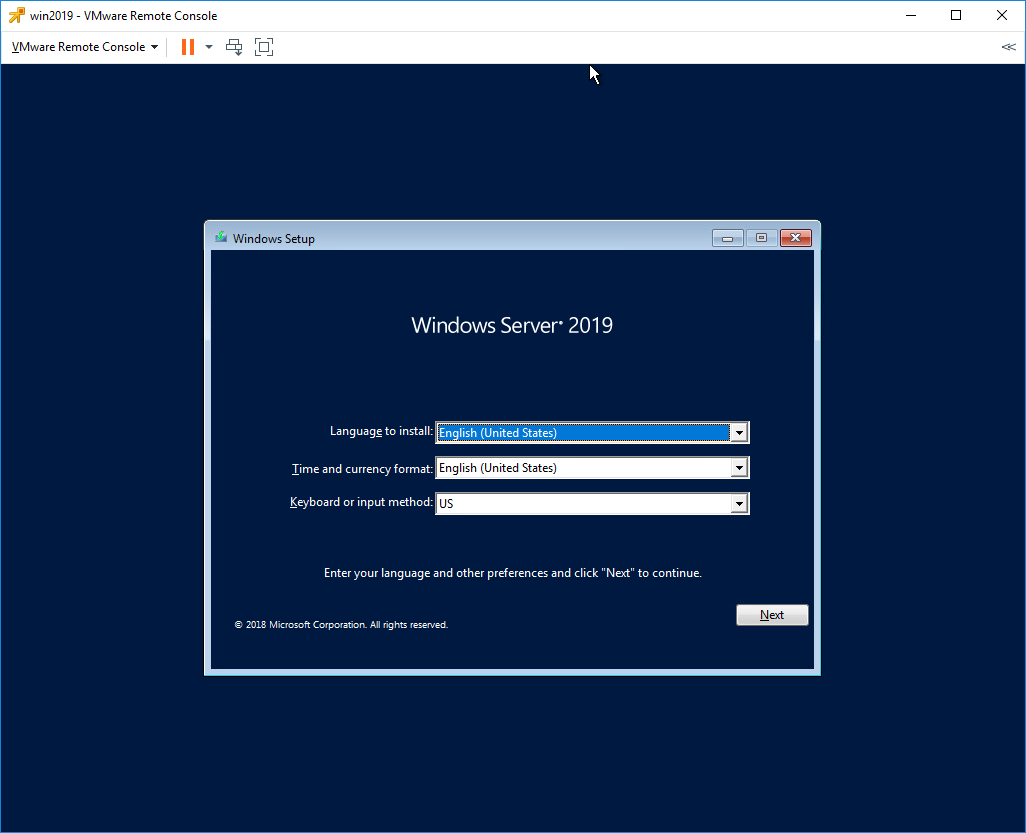
Я предпочитаю устанавливать Windows Server на английском языке, мне так привычнее. Чем меньше лишнего — тем лучше. Единственное исключение делаю для терминальных серверов, так как с ними потом будут работать юзеры.
Выбираем язык установки, Next.
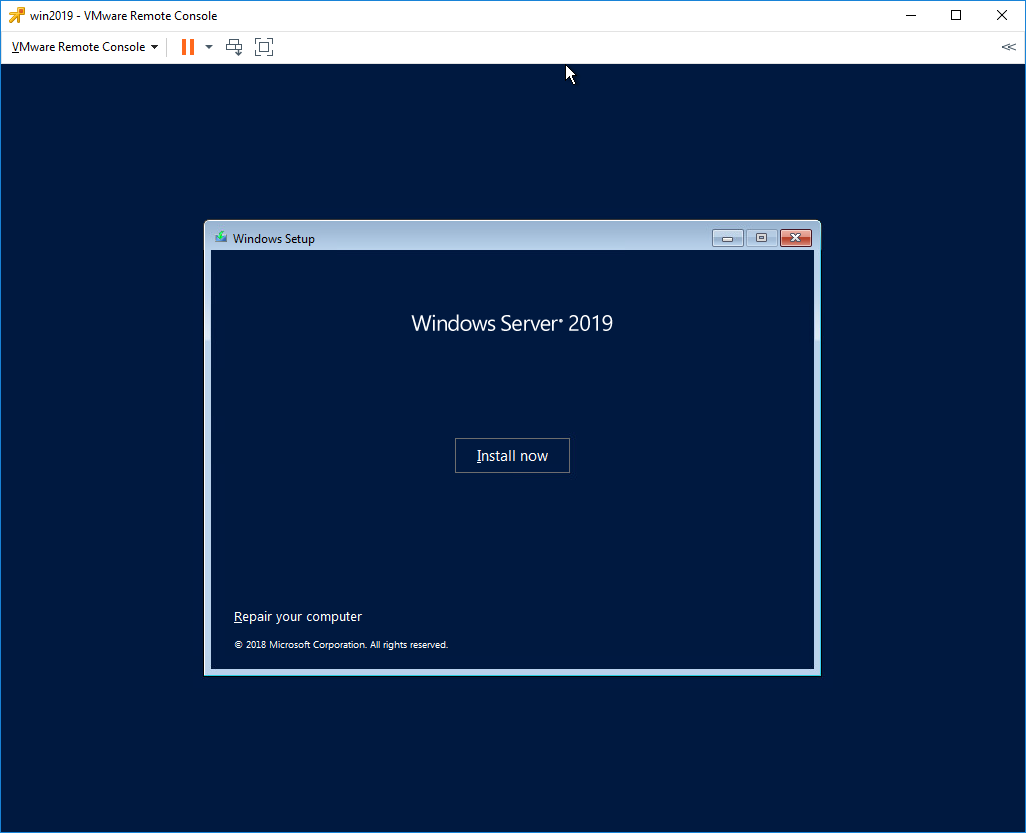
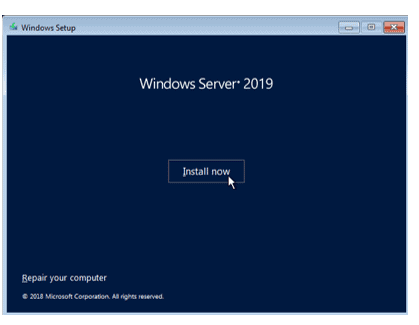
Install now.
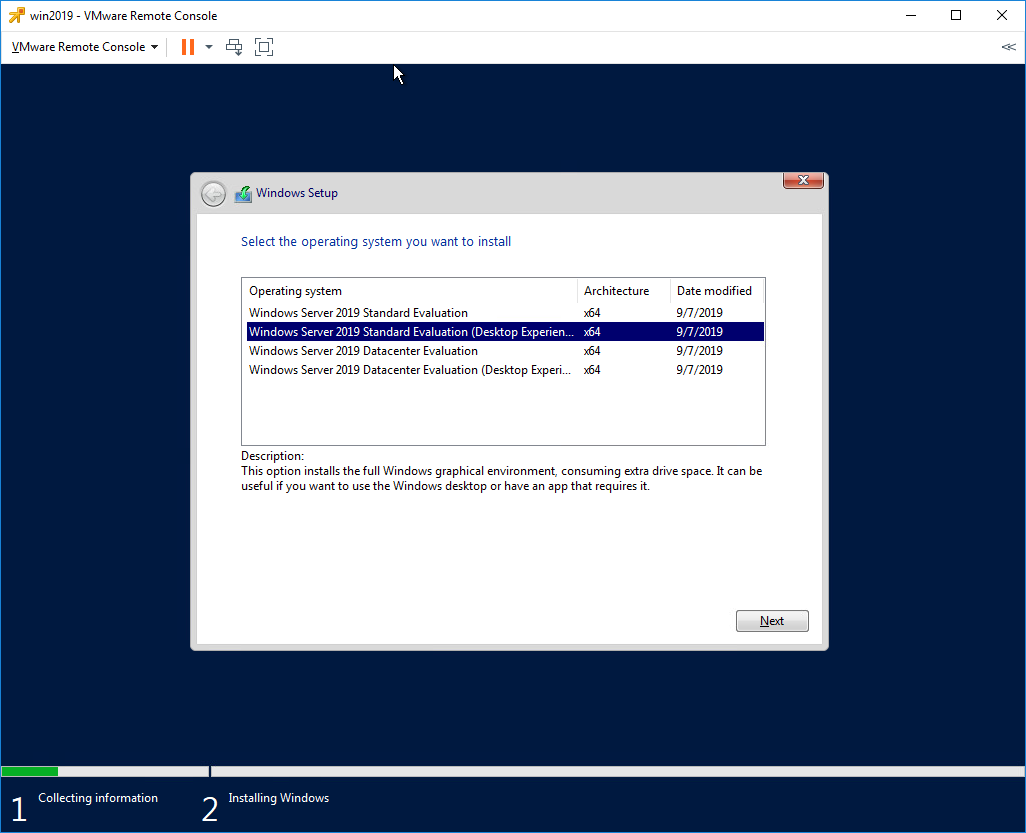
Выбираем Standard версию с GUI. Next.
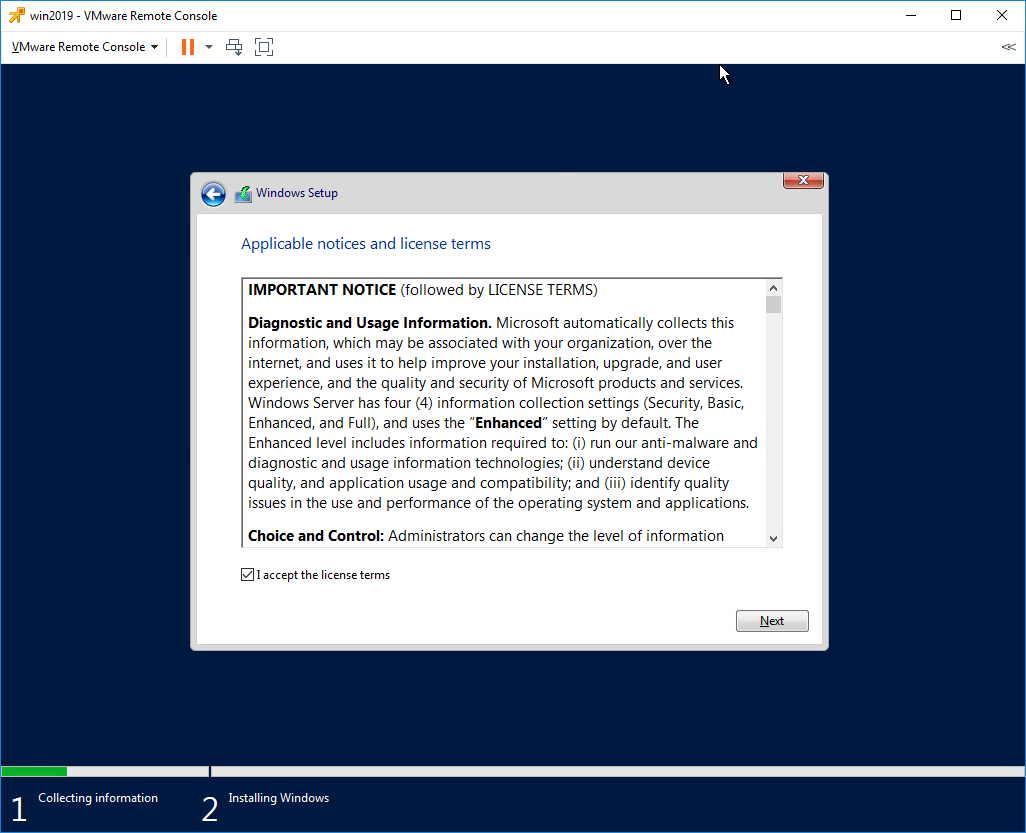
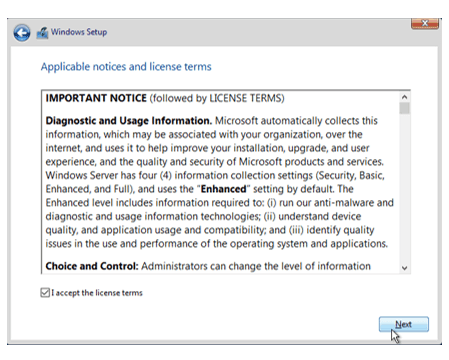
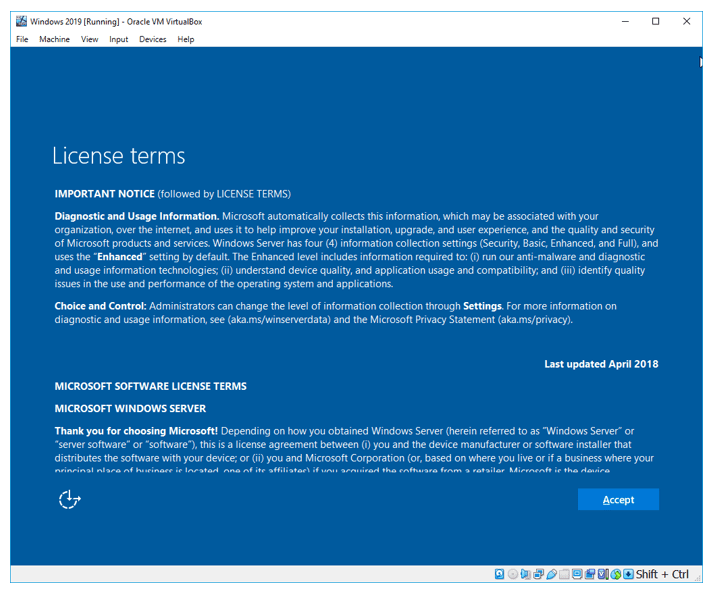
Принимаем лицензионное соглашение. Next.
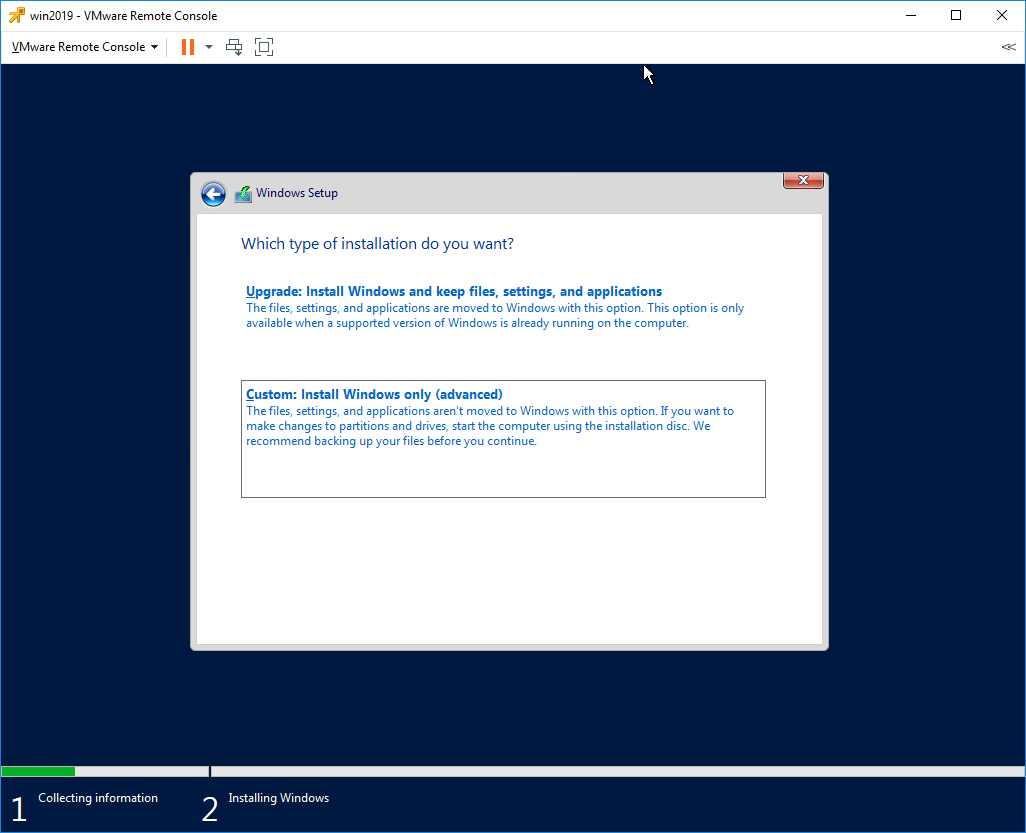
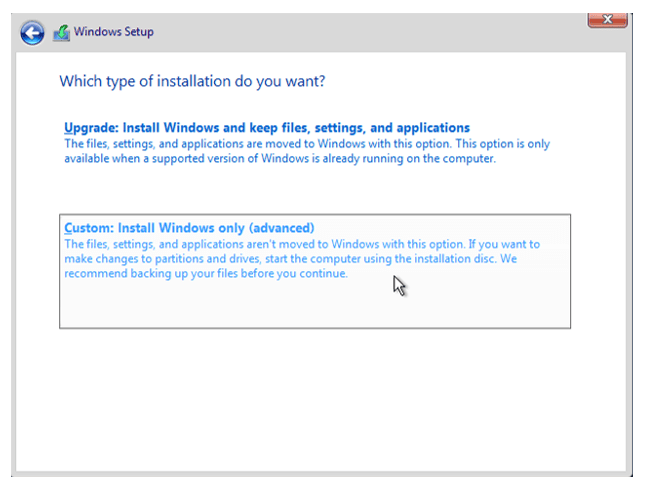
Тип установки — Custom: Install Windows only (advanced). У нас новый сервер.
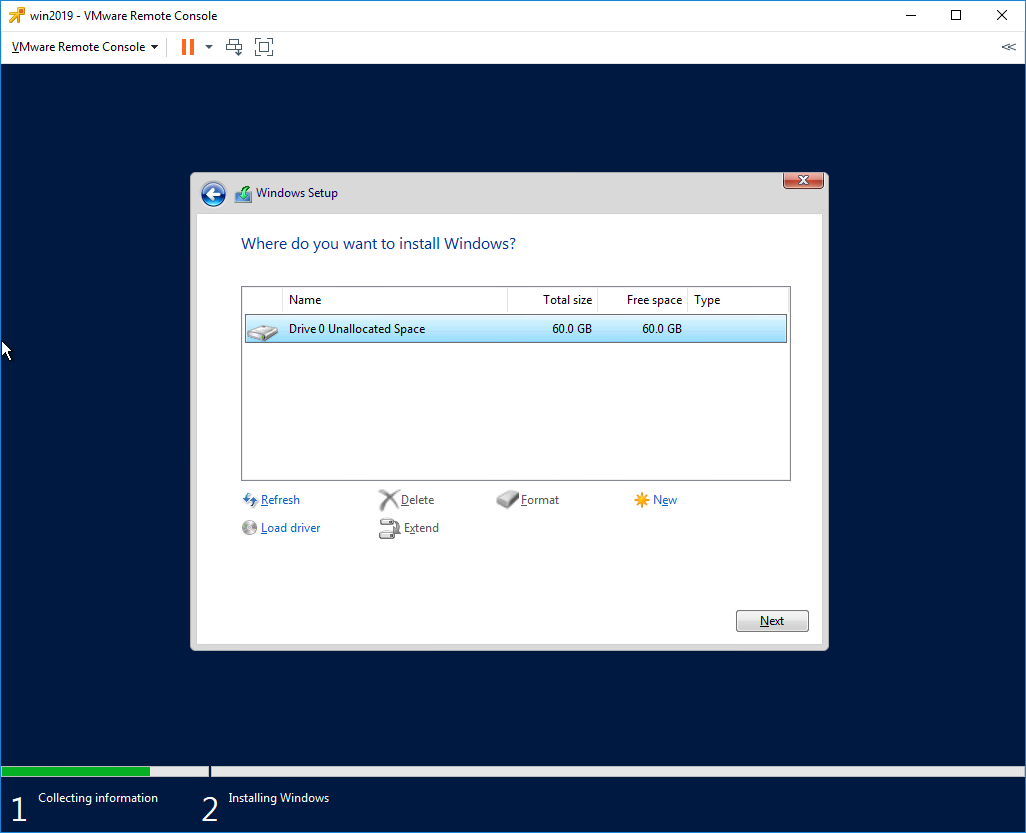
Выбираем диск для установки. На виртуальной машине он у нас выделен один. Next.
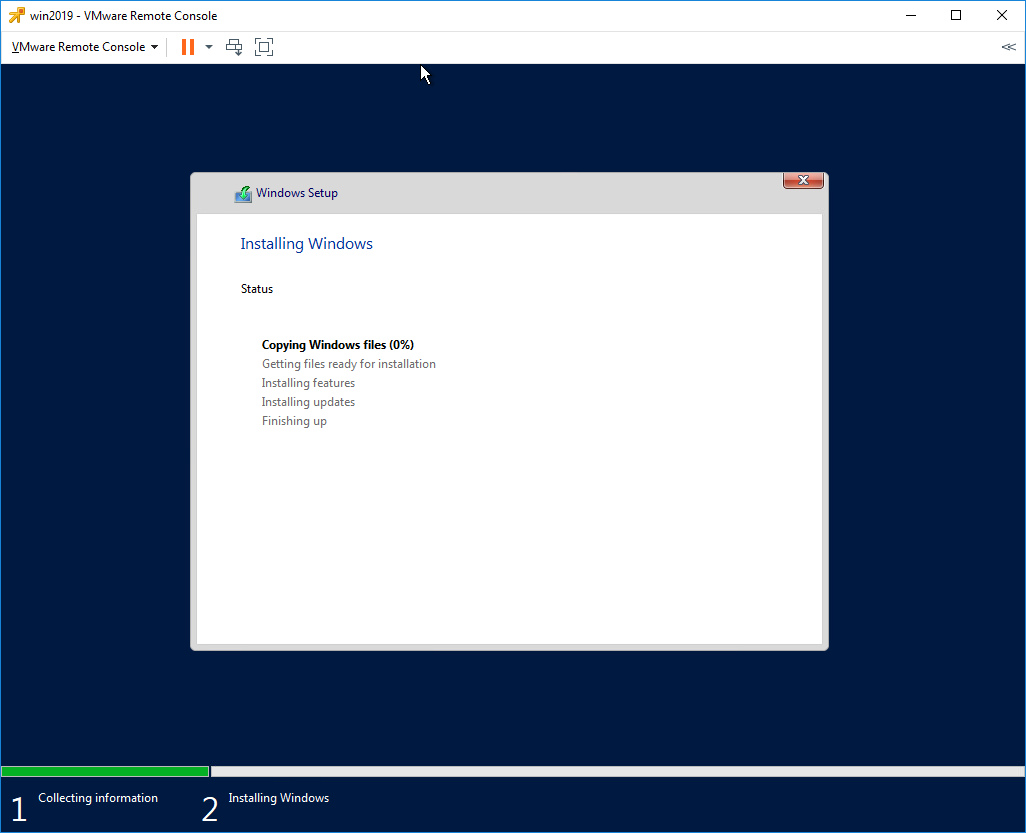
Откиньтесь на спинку кресла, начинают копироваться установочные файлы.
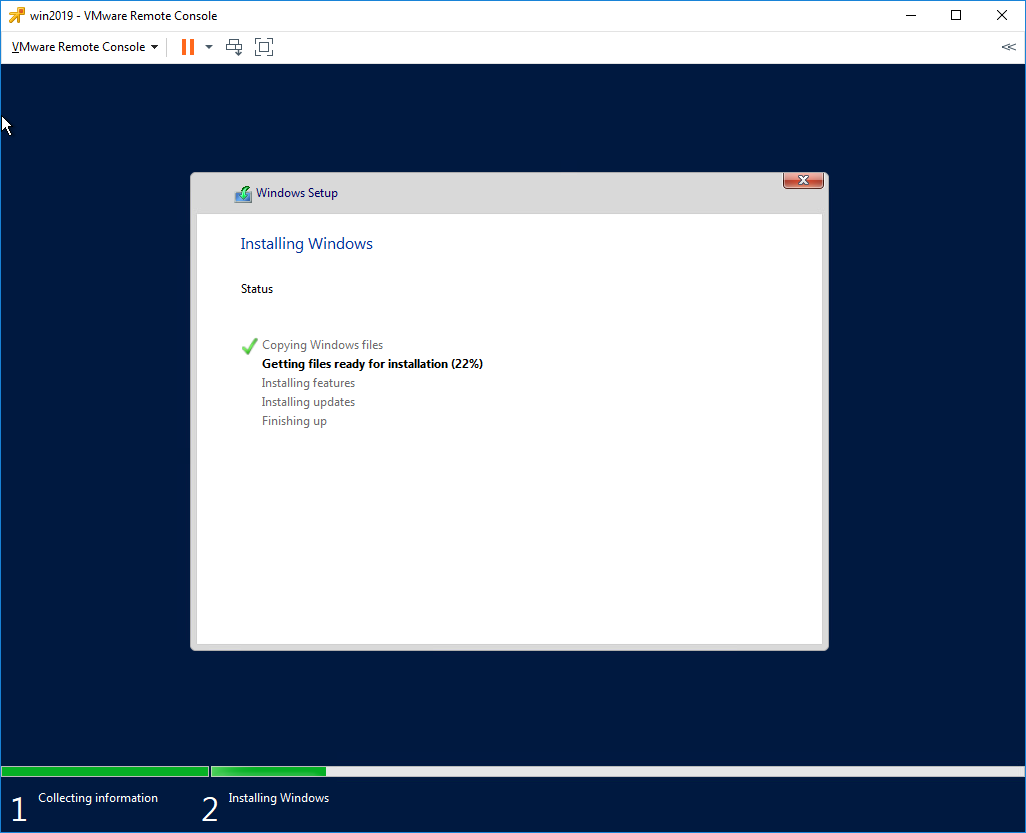
Идёт подготовка для установки Windows Server 2019.

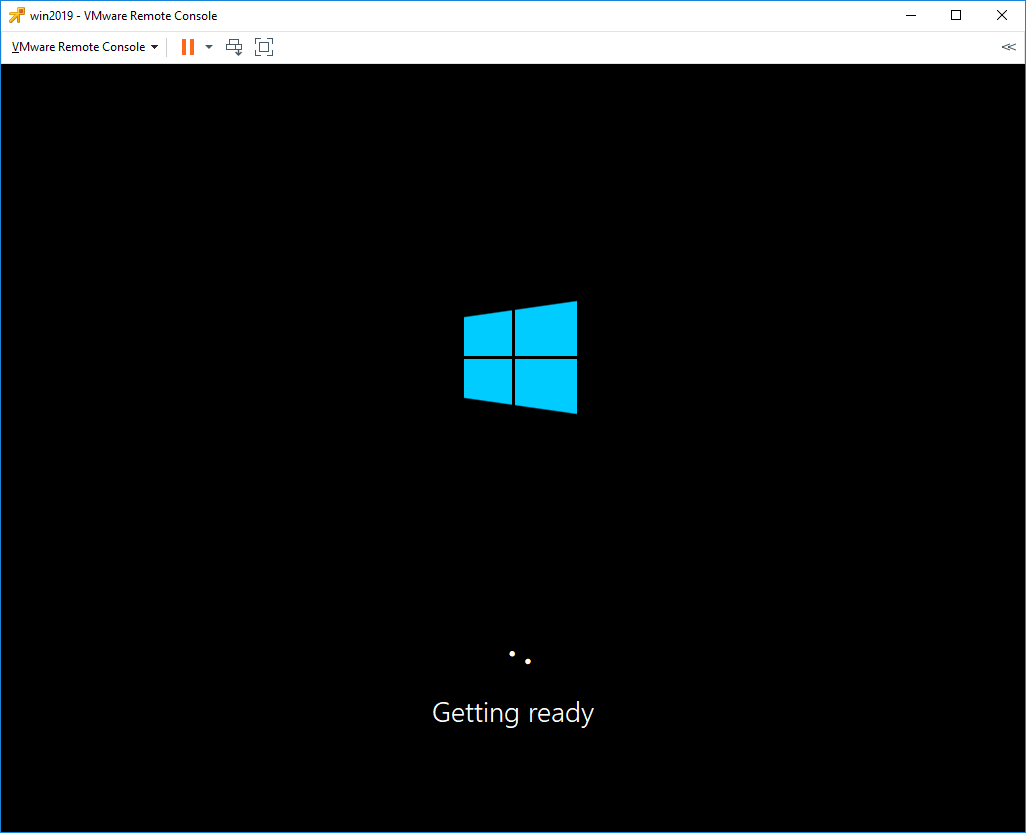
В процессе установки Windows может несколько раз перезагрузиться.

Нужно запастись терпением.
Открывается окно для установки пароля администратора.
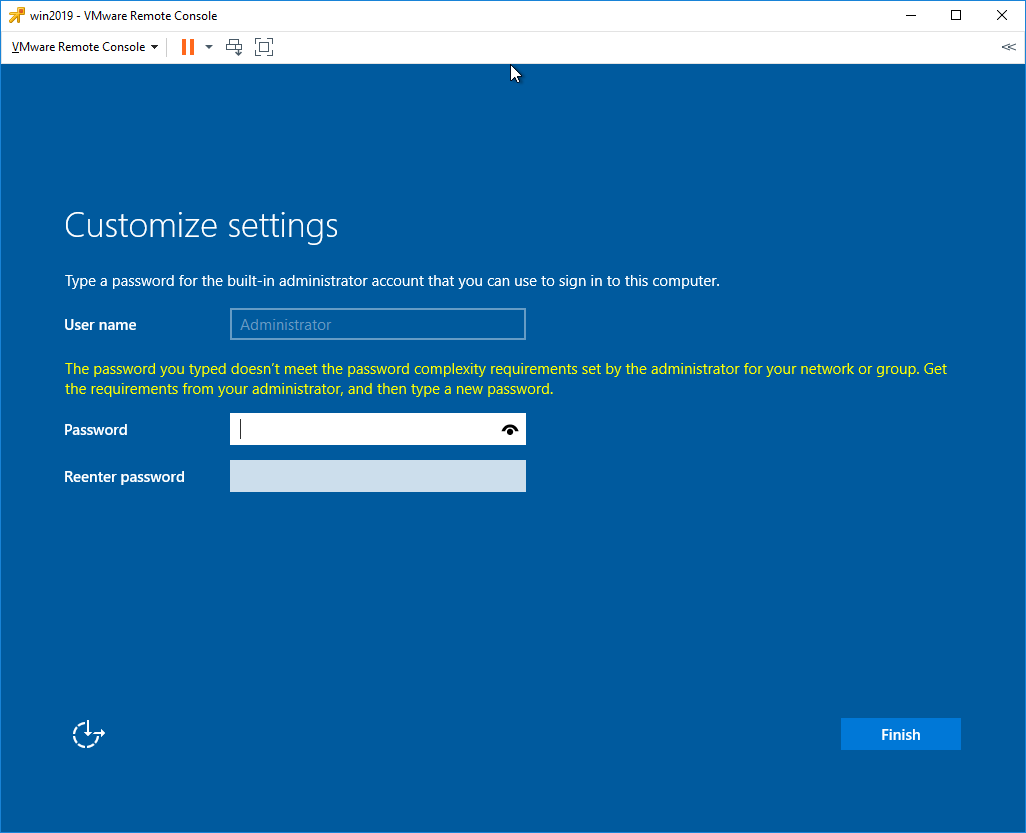
Требования к сложности пароля усилились. Два раза вводим пароль для администратора. Finish.
Первоначальная настройка завершена.
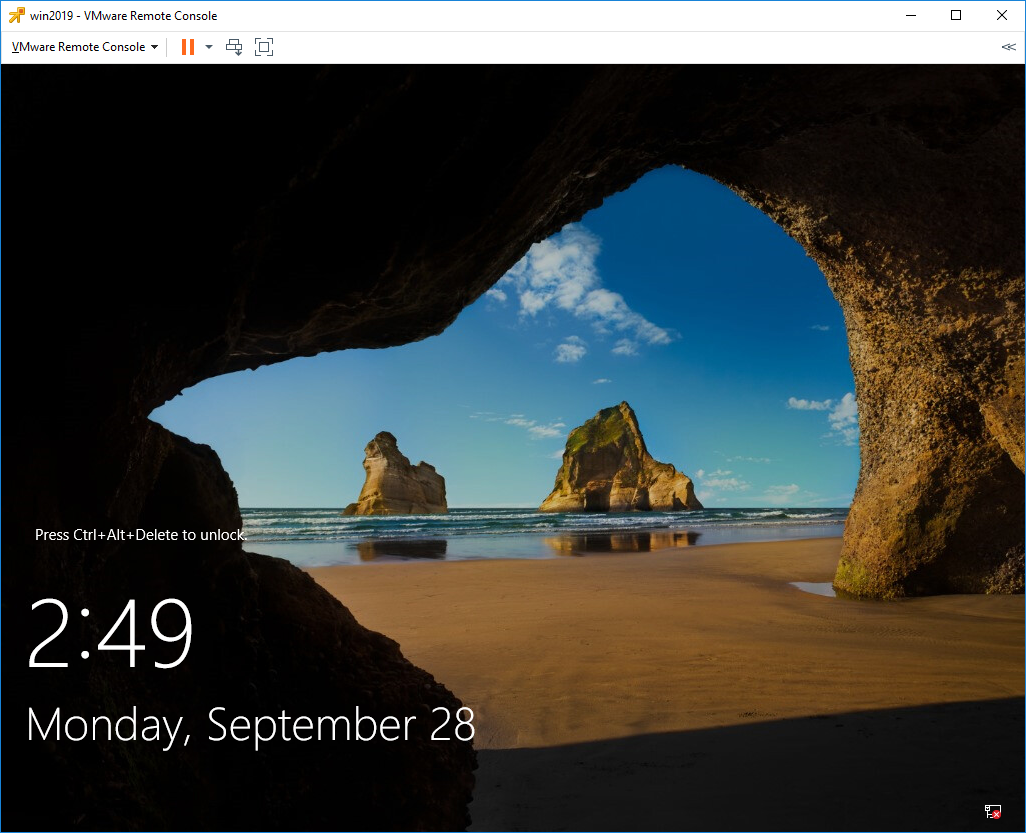
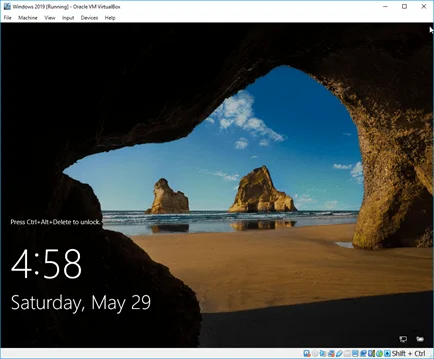
Для входа нужно нажать Ctrl+Alt+Del. Установка Windows Server 2019 завершена.
You wanted to test something in the windows server operating system; maybe you want to create a domain controller, a DHCP server, or even a DNS server.
The best way to test the windows server configuration is to perform them on a LAB environment. And Some of you may not have lab access, so your available option would be to virtualize the windows server on a hypervisor.
That way, whatever you do on the machine will stay in a virtualized environment. There are multiple hypervisors you can use to spin up the Windows server. And in my last article, we had covered how you can install the windows server on a KVM host. And In this blog, we are going to install the windows server on a VirtualBox.
Can you run Windows Server in VirtualBox?
You can run most operating systems with VirtualBox, provided it should be bootable or a virtual hard disk. Most of the users out there will have Windows server ISO file, and it works perfectly fine. However, you have a choice from Microsoft to download the virtual hard disk in VHD format. You can use that as well to install the windows server on the VirtualBox. And the windows server works great with the VirtualBox.
To get better performance after the installation of the windows, you will also have to install the VirtualBox guest additions. We will cover that as well in this article.
How do I download windows server images for VirtualBox?
You can go to Microsoft windows server evaluation center and download the Version of your choice. When you choose the Version, you will have multiple options; you can either select ISO or VHD. After choosing the Version, you will have to submit the form and post which you will get a link to download the software.
When it comes to the installation, compared to the ISO installation, the VHD file is the easiest way; however, the VHD file size is about 8GB, so you need to be mindful of that.
We will see how we can install the windows server 2019 with both the ISO file and the Virtual hard disk file.
Though we are installing the windows server 2019 in a VirtualBox, the steps mentioned here are identical for other Version of windows as well, such as windows server 2016,2012 and so on.
Prerequisite.
- Download and install the VirtualBox.
- Download the windows server image (Either ISO or VHD)
- Installation using the ISO file.
- How to install windows server using virtual hard disk (VHD) in VirtualBox?
Installation using the ISO file.
1. Creation of Windows server VM in VirtualBox.
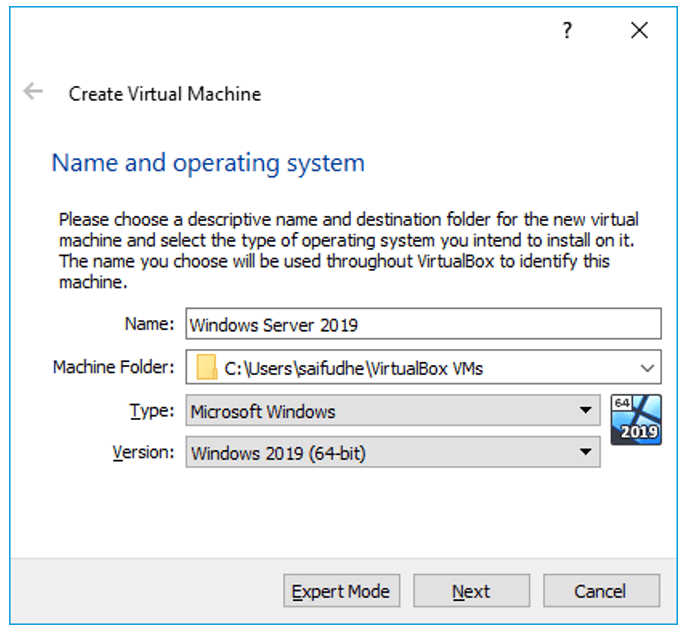
Open VirtualBox and click on New or CTRL+N to start the windows server VM installation.
A new Create Virtual machine window will pop up; you can choose either Guided Mode or Expert Mode. We are using the Guided Mode for our lab.
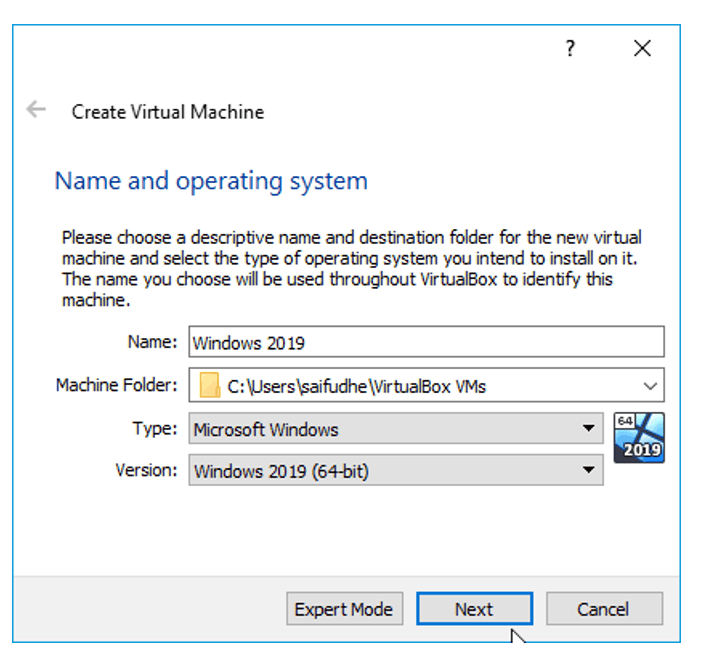
- Enter the name of the VM.
- Select the folder where you want to keep the VM Hard disk files, I left as a default folder.
- Choose the Type as Microsoft Windows.
- Version as Windows 2019 (64bit), for other Version of windows server you may choose them here. For Example, Windows 2016 (64bit)
After specifying the above, you may Click on Next.
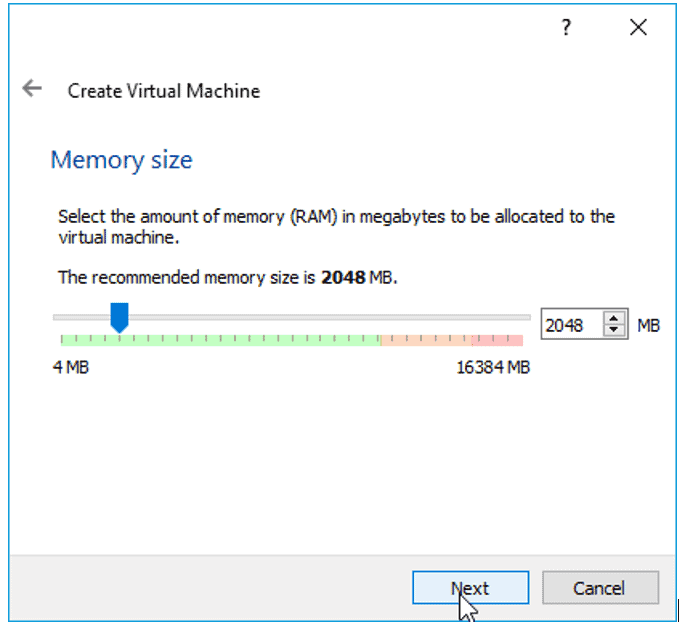
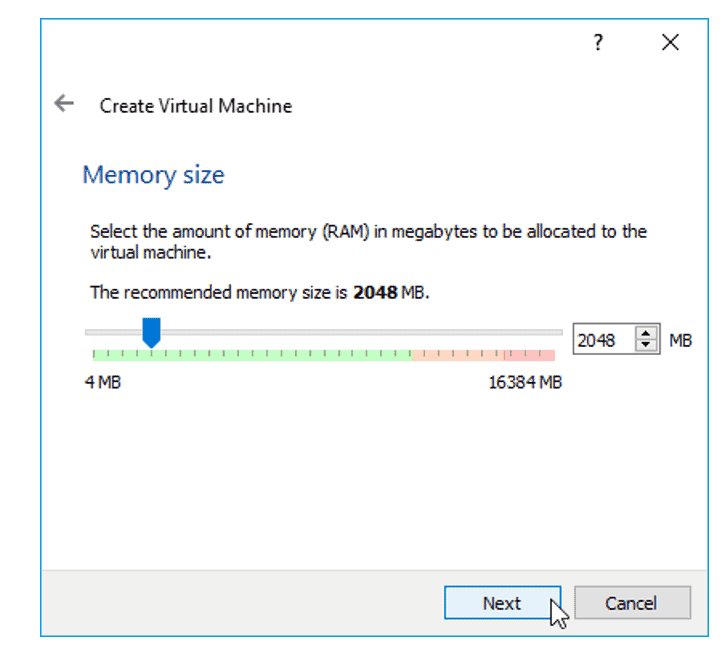
2. Specify the Memory.
You now have to define the Memory for the VM; since I most likely use it for a small Lab, I am fine with 2gigs of RAM. However, if you plan to do more stuff with it, you may need to increase the RAM accordingly.
3. Create virtual Hard disk.
We will create a virtual hard disk for our VM; in the hard disk wizard. Select the option à Create a virtual hard disk now and Click on create.
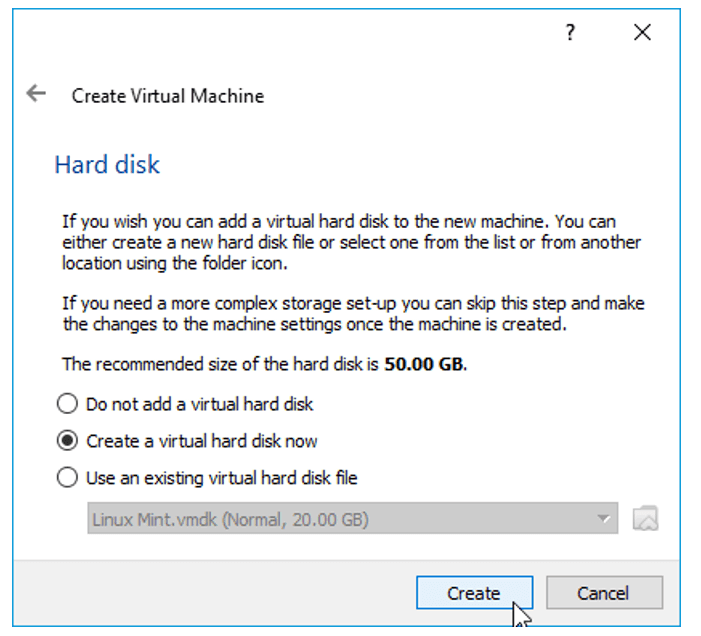
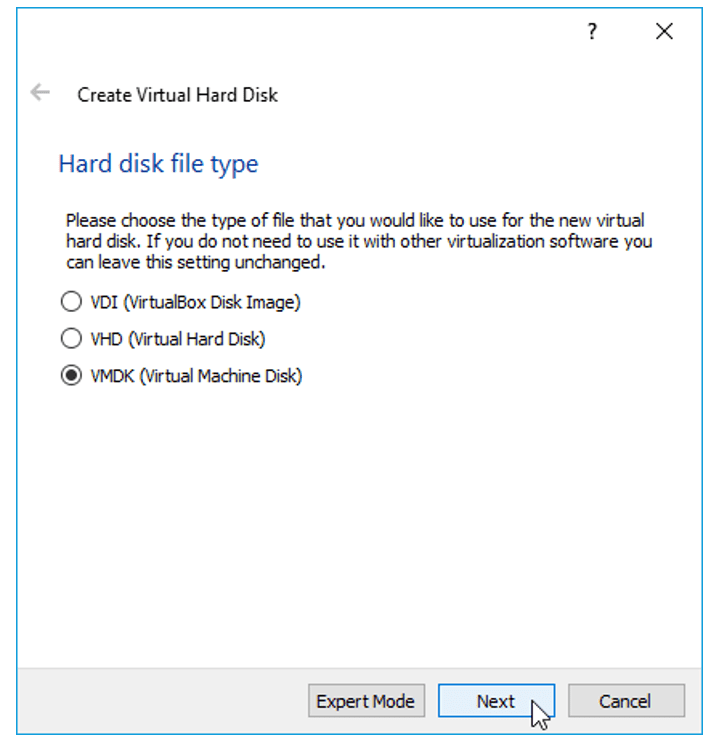
By default, the hard disk type would be VDI, and you may choose the default Value itself if you are planning to use the VirtualBox as your permanent hypervisor.
But I would recommend choosing VMDK so that you have an option to move from the VirtualBox to other hypervisors of your choice. Now Select VMDK and Click on the option Next.
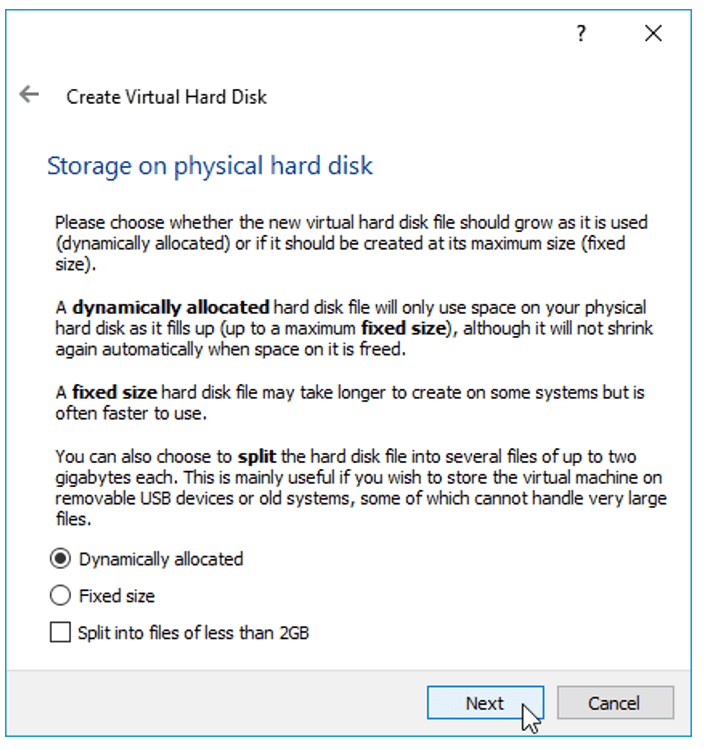
On Storage on Physical hard disk, Choose the default value Dynamically allocated and Click on Next.
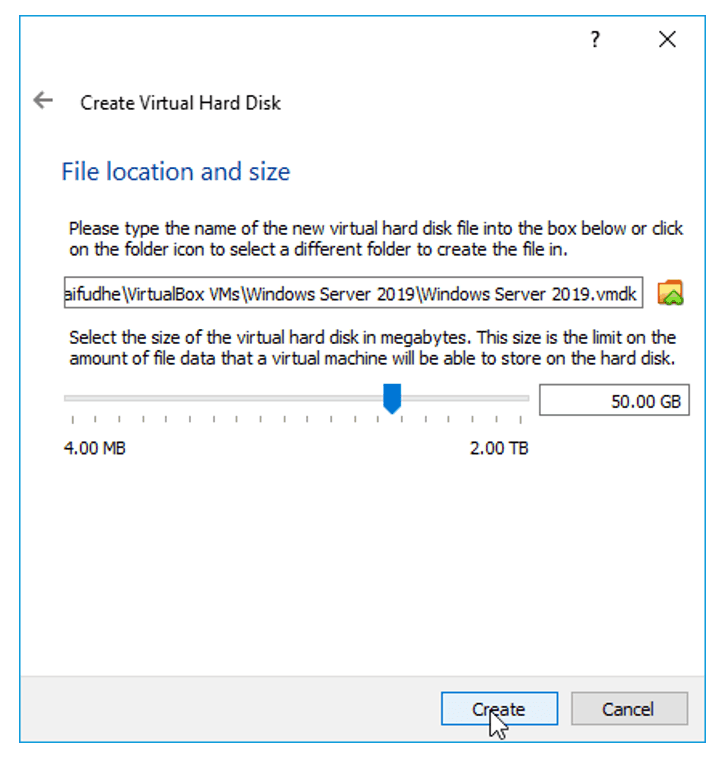
We will now define how much storage you want to provision for the windows server; I choose 50GB which is more than enough for me.
If you feel that you might need some extra space, you choose more based on your requirements and Click on Create.
You will be able to see the windows server VM instance is created.
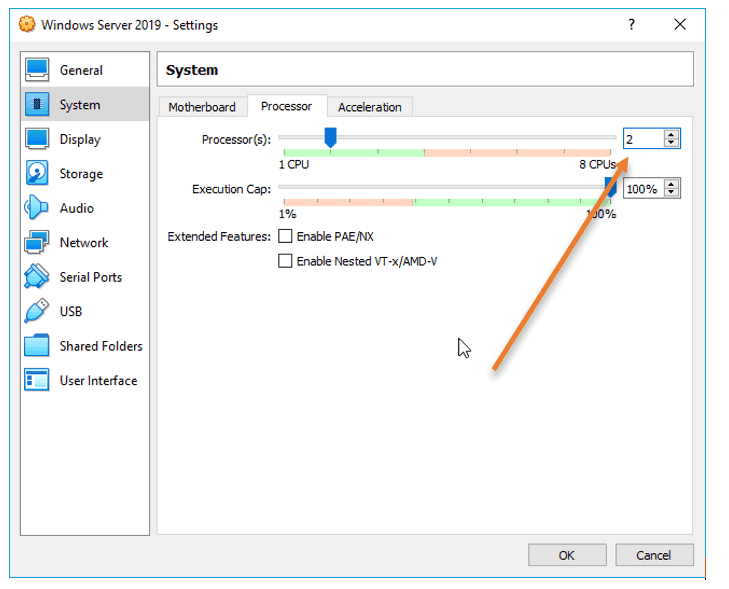
4. Increase the CPU.
By default, the VirtualBox would assign only one processor to the VM, and I need to add one more processor. That way, then the performance would be good. If you do not need more CPU, you may skip this step.
Right-Click on the VM and Click on settings.
Click on System and choose the Processor tab, and in the processor count, increase it to two.
5. Attach the windows server image to the virtualbox.
On the same VirtualBox settings, Click on storage.
Under storage devices, Choose the Empty Disk.
In the attributes, Click on the Disk icon to choose a disk file.
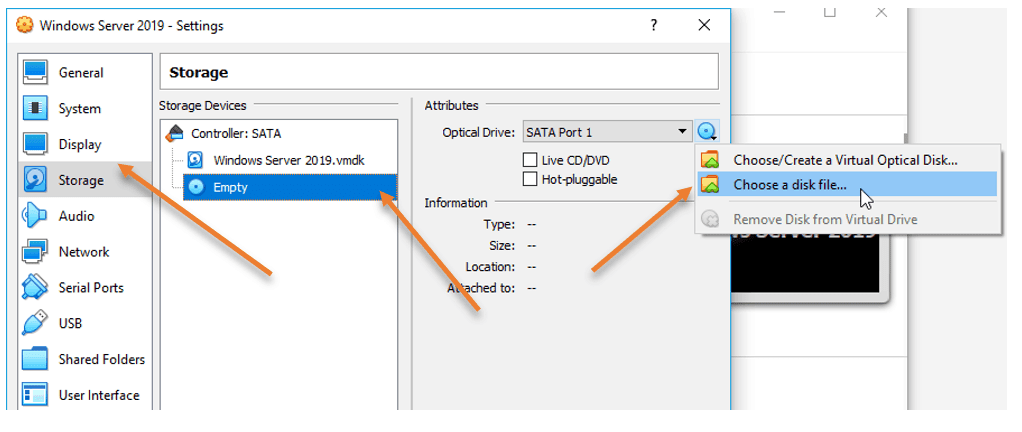
And attach the ISO that we have downloaded earlier and Click on Ok.
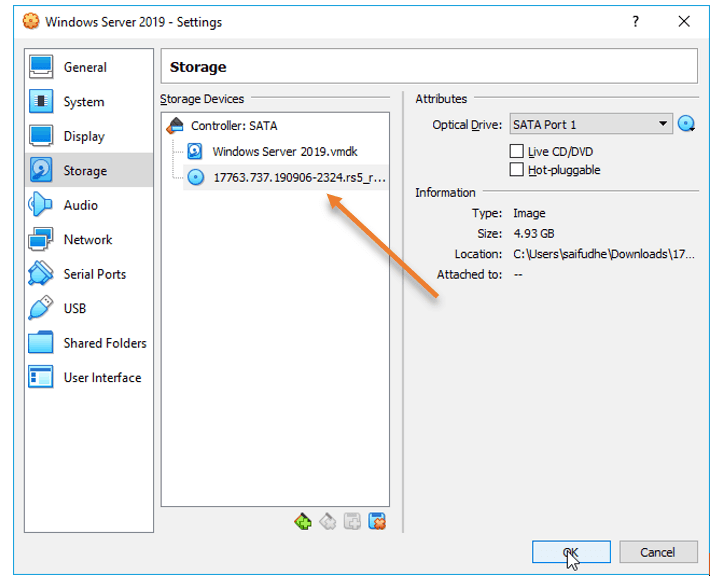
Right-Click on the VM and Click on start.
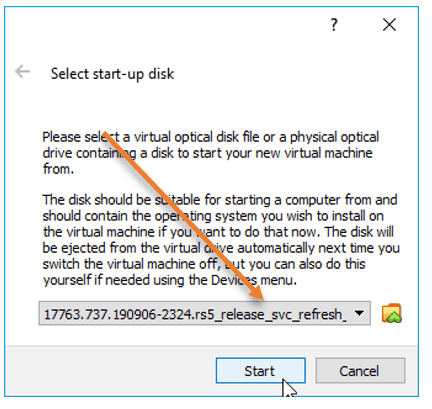
From the start-up disk, choose the ISO image that we have attached and click on start. The VirtualBox instance will boot the windows server image.
6. Begin the windows installation.
After a few seconds, you should see the windows installation screen, Choose the language, and Click on Next.
You can click on Install now.
7. Choose the Version – GUI or CLI.
You will be presented with the different Versions of windows server 2019 on the screen. You must be a little careful here.
If you want to install the windows server with GUI, you may choose Desktop experience, or if you are ok with CLI, you may select the other options.
I need GUI access; hence I selected Windows server 2019 Datacenter evaluation (Desktop Experience)
After you decided on the versions, you may Click on Next.

Accept the license agreement and Click on Next.
Choose the installation as Custom.
Choose hard disk that we have defined earlier, Click on Next.
The windows server installation will now begin; this will take some time to finish.
8. Setup the admin password.
After the installation, you will be prompted to enter the Administrator password. Set the administrator password and Click on Finish.
9. Remove the ISO file.
Installation of Windows server 2019 in Oracle VirtualBox is completed; you may now log in to the windows server.
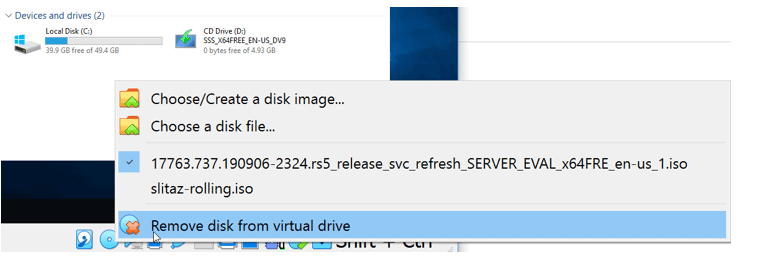
Let’s remove the windows server ISO file that we had attached during the installation.
On the bottom corner of the VirtualBox window, right-click and click on the disk icon and click on Remove disk from virtual drive.
10. Installation of VirtualBox Guest additions.
Finally, we will have to install the VirtualBox guest addition, which will improve the performance of the windows server VM.
To install the VirtualBox guest additions, you may log in to the windows host.
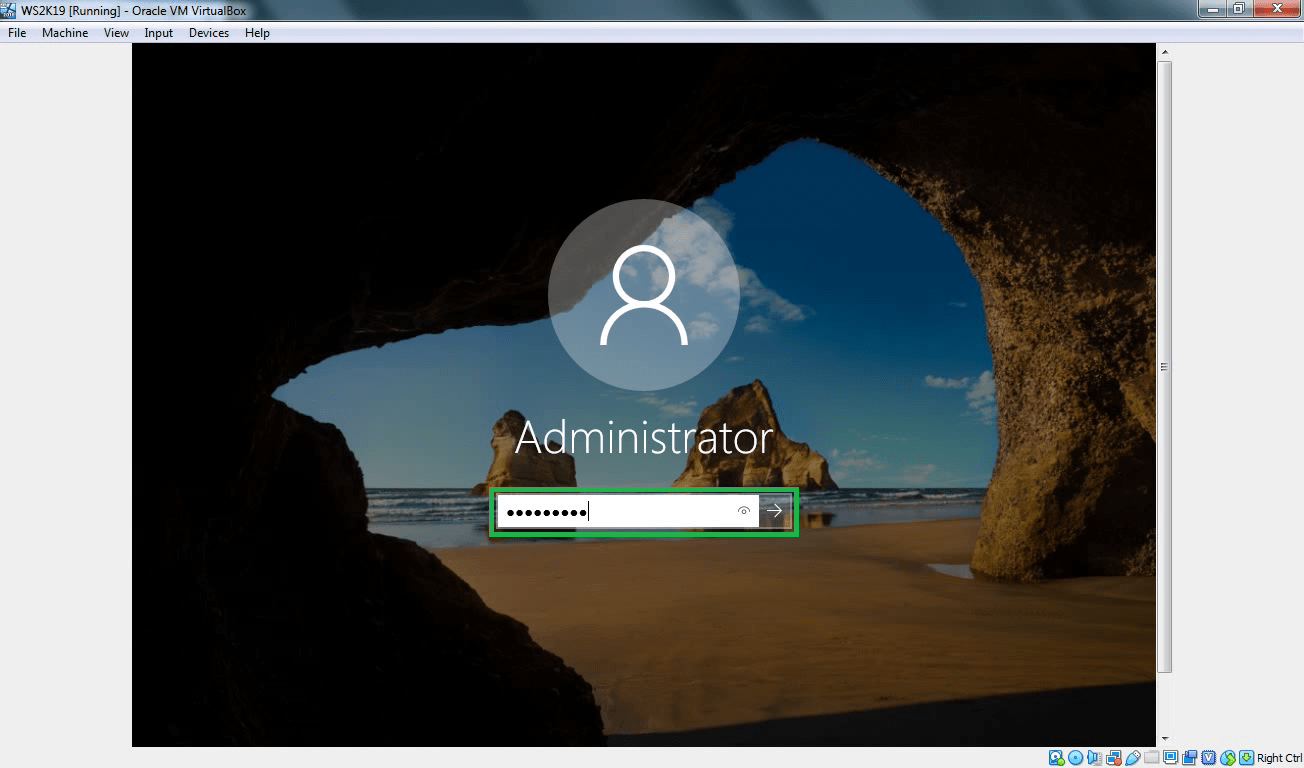
Click on Input–> Keyboard–> Insert Ctrl+Alt+Del
You will be prompted to enter the admin password that we had set up earlier.
After logging in, Click on Devices > Insert Guest Additions CD image…
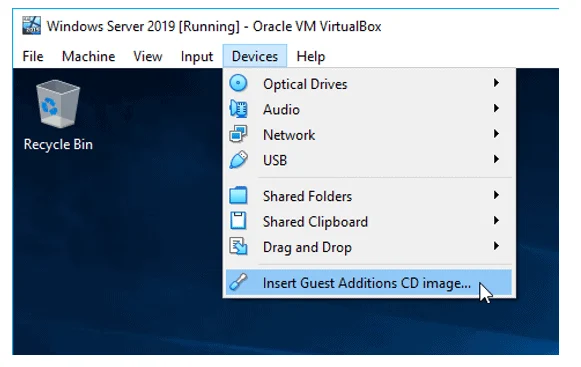
It will attach the Guest addition installation disk to the Windows server VM.
Open This PC, and you should see the VirtualBox Guest additions CD drive and double click on it.
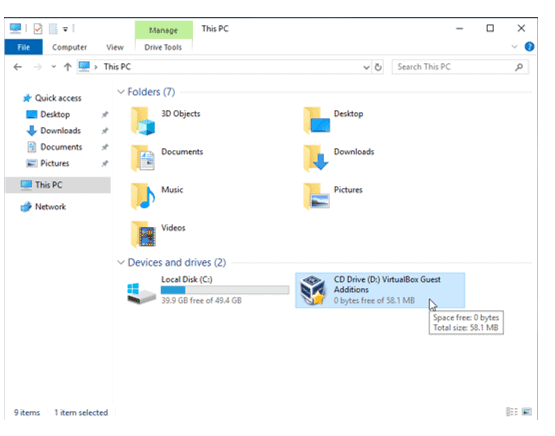
Double click on the Virtualbox Guest addition installation setup file to install the VirtualBox guest additions on your windows server machine.
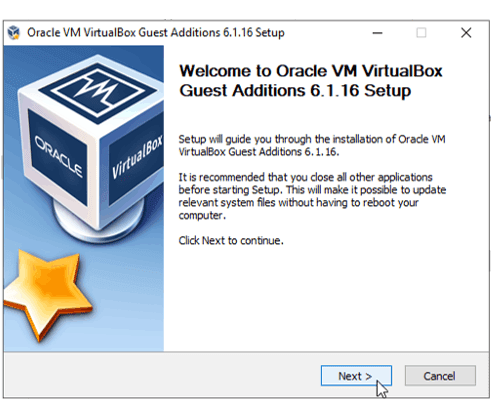
It is a typical software installation and nothing too complex here; you may click on next on all the drive installation prompt that you get.
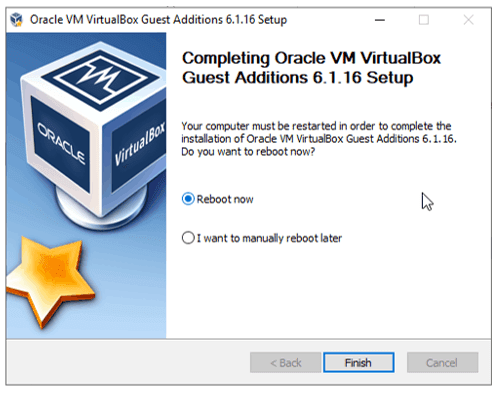
After the installation, you may now go ahead and reboot the VM, and you should be good to go.
How to install Windows Server using Virtual Hard Disk (VHD) in VirtualBox?
We have successfully installed the windows server 2019 on the VirtualBox hypervisor using ISO image. We now will go ahead and install the virtual machine using the virtual hard disk. We already have a VHD file downloaded from the Microsoft site.
1. Creation of the VM.
On the VirtualBox, Click on New.
- Name the VM and the location where you want to save the virtual machine.
- Type as Windows.
- Version: Windows 2019 (64bit)
2. Define the memory size.
We can provide a Memory of 2GB or more, and I am choosing 2GB for now.
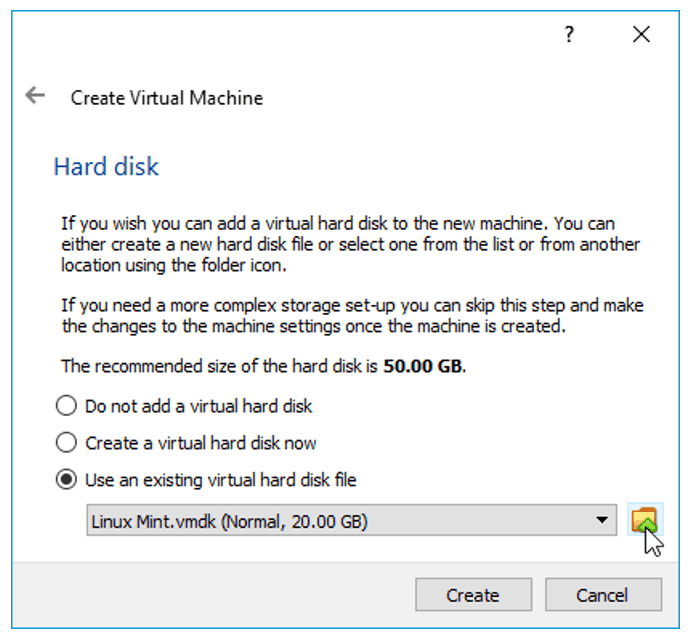
3. Attach the Virtual Hard disk.
When we chose the ISO method of installation, we created a new hard disk in the VirtualBox.
But right now, we already have the virtual hard disk file, We need to attach that here.
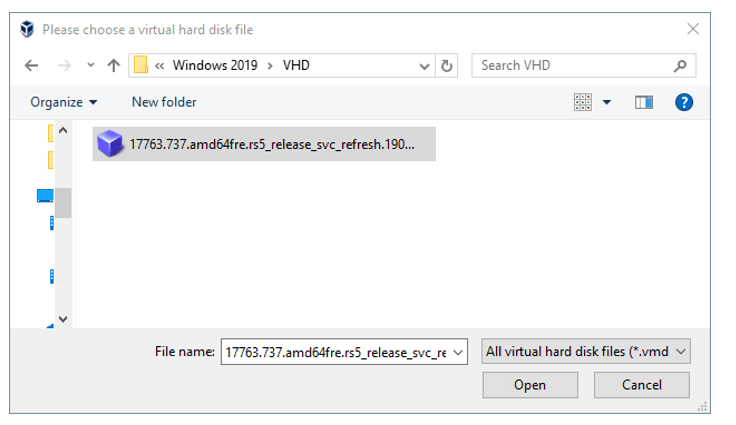
Select use existing virtual hard disk file and click on the browse button next to the drop-down.
You will not see the virtual hard disk in the new pop up; Click on Add.
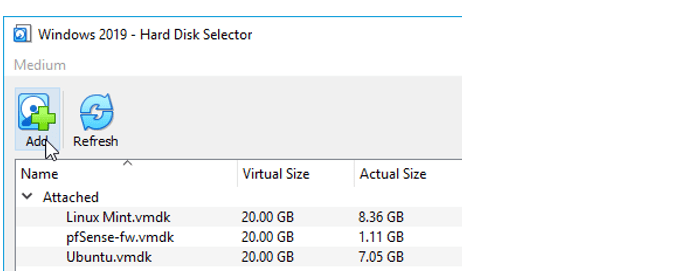
And Select the VHD file which we downloaded from Microsoft.
The new image is added under the not attached section.
Select the image and Click on Choose.
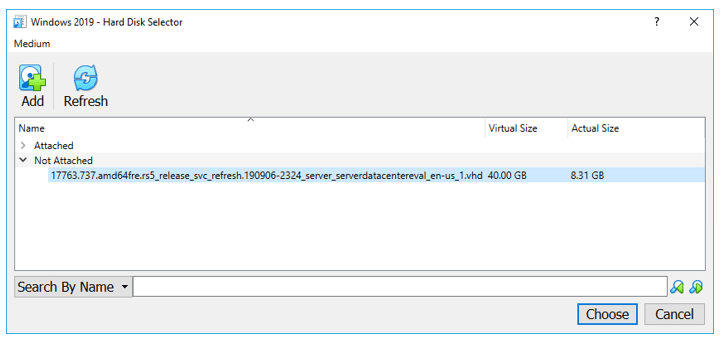
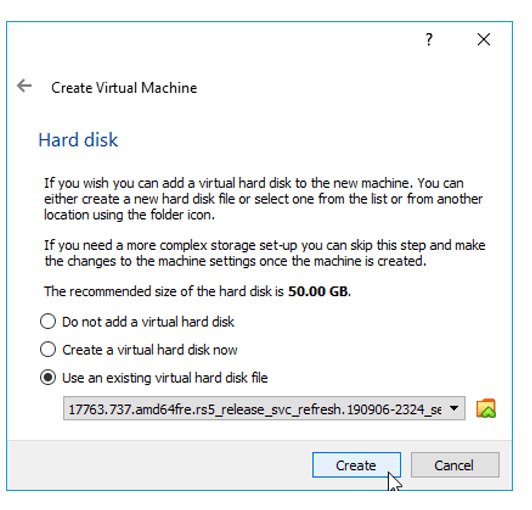
You need to make sure the new virtual hard disk is selected under ‘use existing hard disk file’
Click on Create.
4. Choose the region and Accept the license.
Once you power on the machine, you will get an option to Choose the region, Language, Layout and Click on Next.
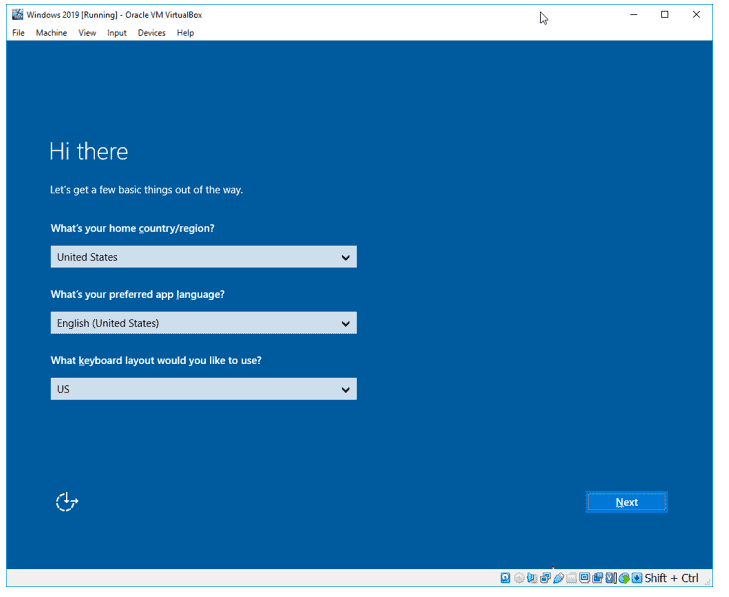
You have to accept the license before you continue.
Follow the Step 8 above to set the admin password. Enter the password and Click on Finish.
Your VirtualBox is ready to use, and you still need to install the VirtualBox guest additions following Step 10 above which is important.

Oracle VM VirtualBox is a free and open-source hosted hypervisor for x86 virtualization, developed by Oracle Corporation. You may want to run multiple VMs on your operating system, with the type 2 virtualization type, this is possible. To achieve this, the following steps below need to be performed. To proceed, ensure you have VirtualBox installed on your device. On how to perform Post OS Installation configuration of Windows Server 2019 Properties, how to install Windows Server 2016 Operating System. Also, you may be interested in my YouTube video on how to setup Windows Server 2019 on a VMware Workstation. On how to install and configure Ubuntu Linux, see the visit link.
Part A: Prepare the Virtualbox environment to hold the windows folders for the new VM. Click on “New” from the Oracle VM VirtualBox Manager. See this guide for how to install Windows Server 2022 on VMware Workstation.

Enter the name, version, desired path to host the VMs and click on continue

Select the memory size as shown below. You can type in the memory size or use the bar to increase it as well.

Click on “create a virtual hard disk now”

This will open the hard disk type window as shown below.
– I will select VDI (Virtual Disk image)

Choose if you wish the hard disk to dynamically increase or use a fixed hard disk file size. I will be using a fixed size which will be entered in the next page

Enter the Hard Disk size of your choice as shown below
– You can also change the file location if you wish from here.

Next, this will create the VM as shown below

Now the VM creation process is complate and VM successfull created.
Part B: To access and attached the Windows Server 2019 ISO file, the following steps should be followed.
Click on the Server and Click or settings or
– Right click on the server and select settings

Click on storage
– Click on Empty under the control IDE
– Select the Disk icon and choose the Operating system you wish to install as shown below

As you can see below, the ISO image has been selected. We can now proceed with our installation.

– Click on “ok”. Next, select the VM and click on start to continue the installation of Windows Server 2019.

This will load windows and prompt for the steps in Part C below.
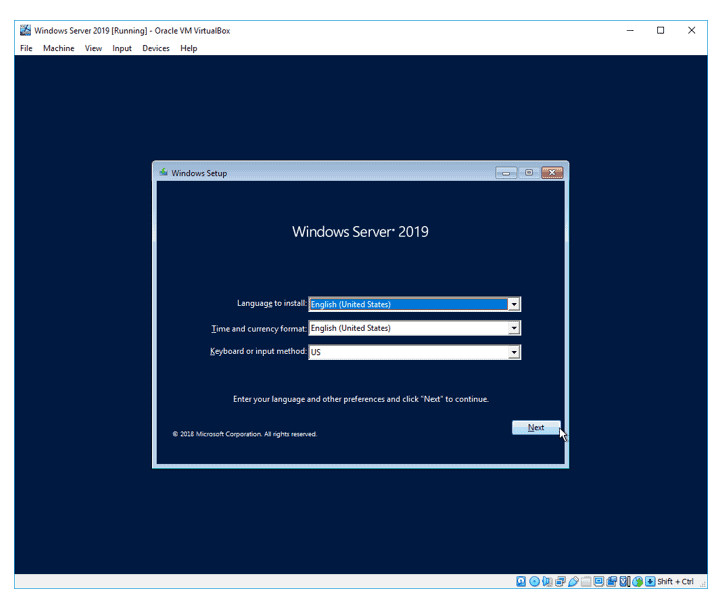
Part C: This step is similar to installing Windows 10, Windows Server 2008, 2012, 2016 on Virtualbox. On the Windows Setup page,
– Select the language to install
– Time and currency format
– Keyboard or input method

Click on Next and Click on “Install now“

Note: Here you could click on repair your computer if this is the approach you need to take or use “Reset this PC”. See how to repair Windows 10 locally for similar steps. Select the operating system you wish to install and click on Next.

Accept the license agreement as shown below and click on next

Select custom install as shown below to install Windows
– Pick Custom: Install Windows only (advanced)

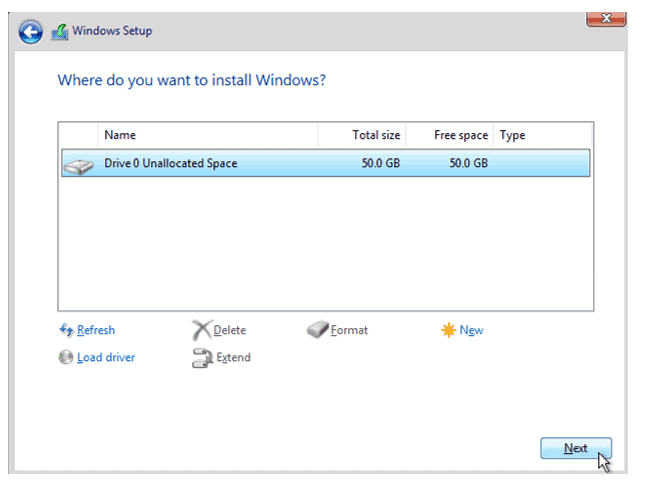
Select the Drive to install Windows and click on Next
Note: You can create an additional drive and install Windows on it. You can also format, delete and extend drives in this window.

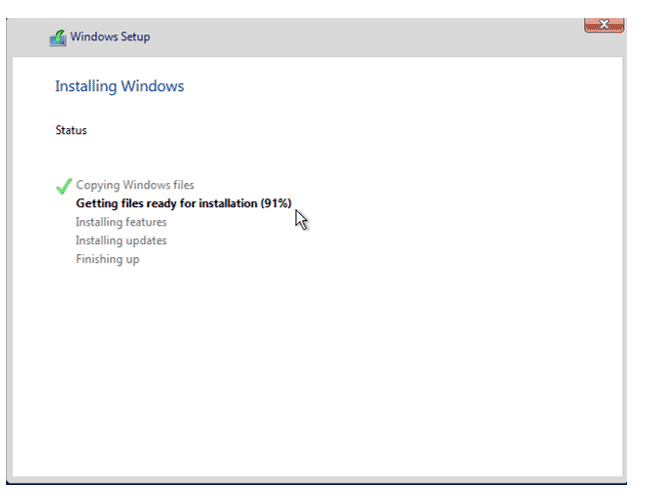
After this step, Windows will be installed unto the system.

When this step complete, the the device will reboot after few seconds
– Note: You can restart immediately

This will prepare and get windows ready as shown below

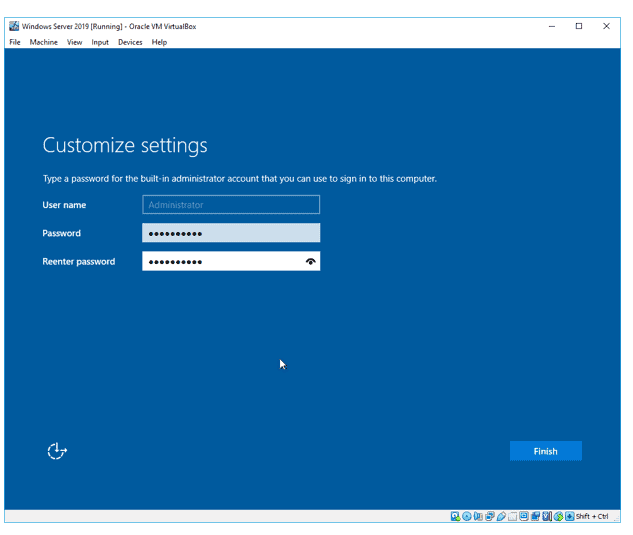
the customise settings window will be displayed. Enter the Password and click on finish to complete Windows Server 2019 Installation.

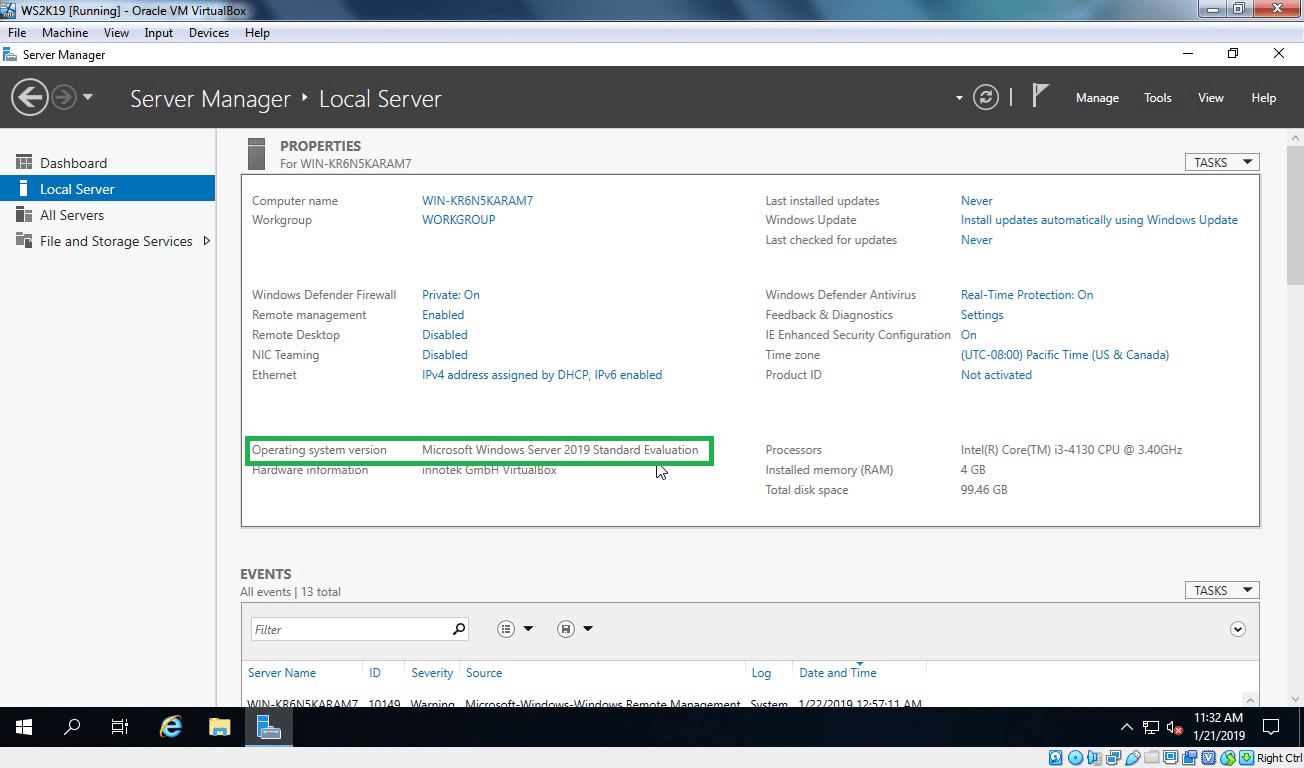
The Windows Server 2019 setup is now complete as shown below.

To access the login windows, use the Contl+Alt+Del and enter your password to access Windows. Refer to this guide for the Post OS Installation and configuration of Windows Server 2019 Properties (Configure TCP/IP Parameters).

I hope you found this blog post helpful. If you have any questions, please let me know in the comment session.
In this post, we will see the process to install windows server 2019 in Virtual Box. But before we start installation let’s check minimum system requirement to install windows server 2019.
Minimum system requirement to install windows server 2019.
- Processor: At least 1.4 GHz or faster 64-bit supported processor
- RAM: 512 MB
- Free Space: 32 GB of available free disk space.
How to install Windows Server 2019
First download Windows server 2019 Evaluation edition ISO image from Microsoft TechNet Evaluation Center. https://www.microsoft.com/en-US/evalcenter/evaluate-windows-server-2019
Link to download Oracle VirtualBox: Click Here
Start your VirtualBox and create one VM with below configuration.
- Name: As you wish
- Type:- Microsoft Windows
- Version:- Windows 2016 (64-bit)
- RAM:- 2048 MB
- Create Dynamically Expanding VDI with size 100 GB
After creating VM click on start.
Mount the ISO image which we have downloaded earlier.
Step:1 On Windows Setup console select the installation language, time and currency format and keyboard layout. You can simply use default settings which will be OK.
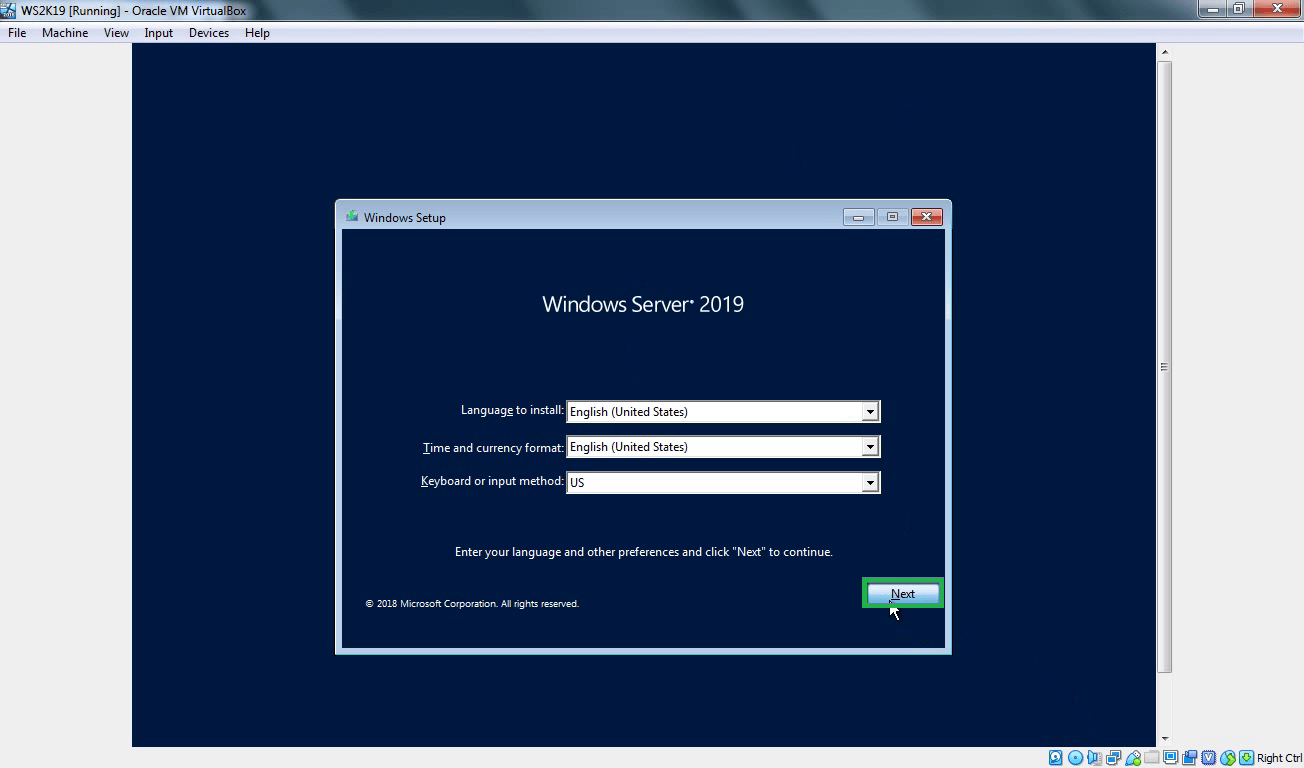
Step:2 Click on Install now to start the installation process.

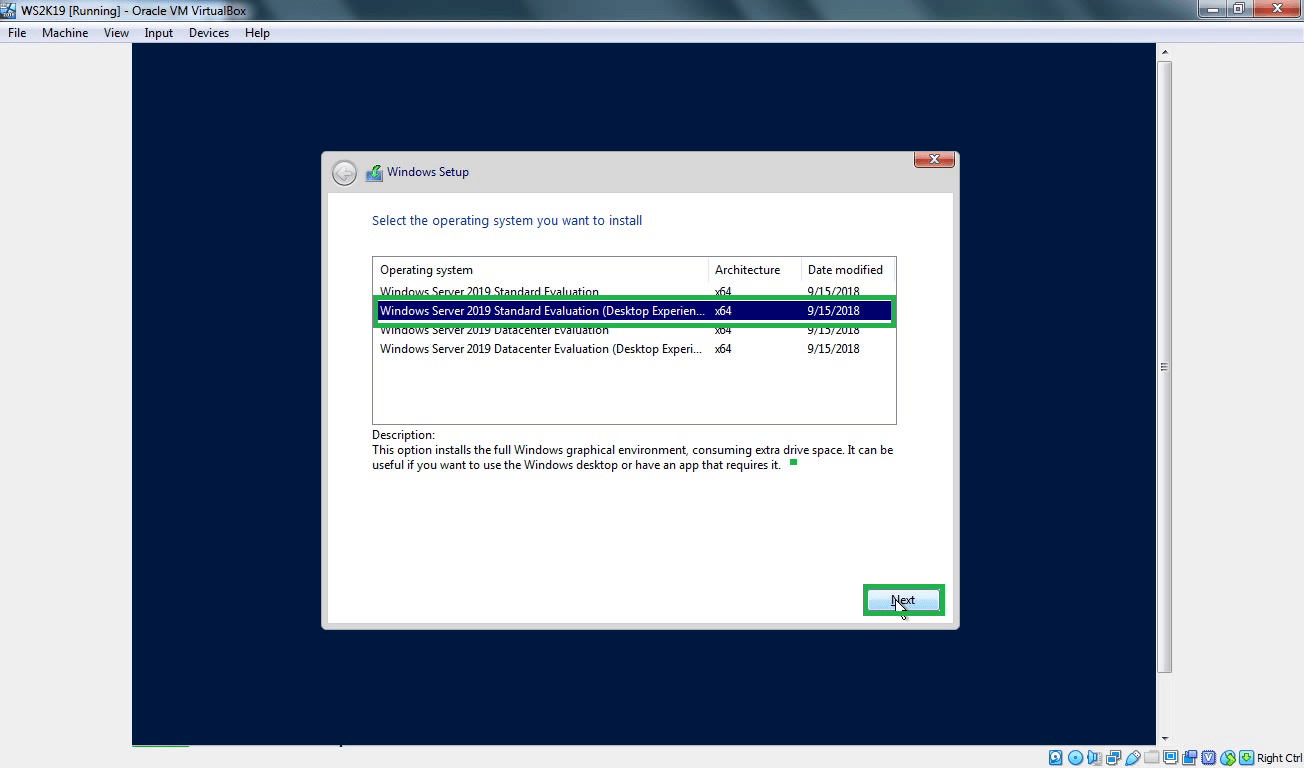
Step:3 Select the operating system which you want to install. (First option will install windows server without a graphical user interface.)
If you want GUI to manage server select second option i.e. Windows Server 2019 Standard Evaluation (Desktop Experience).
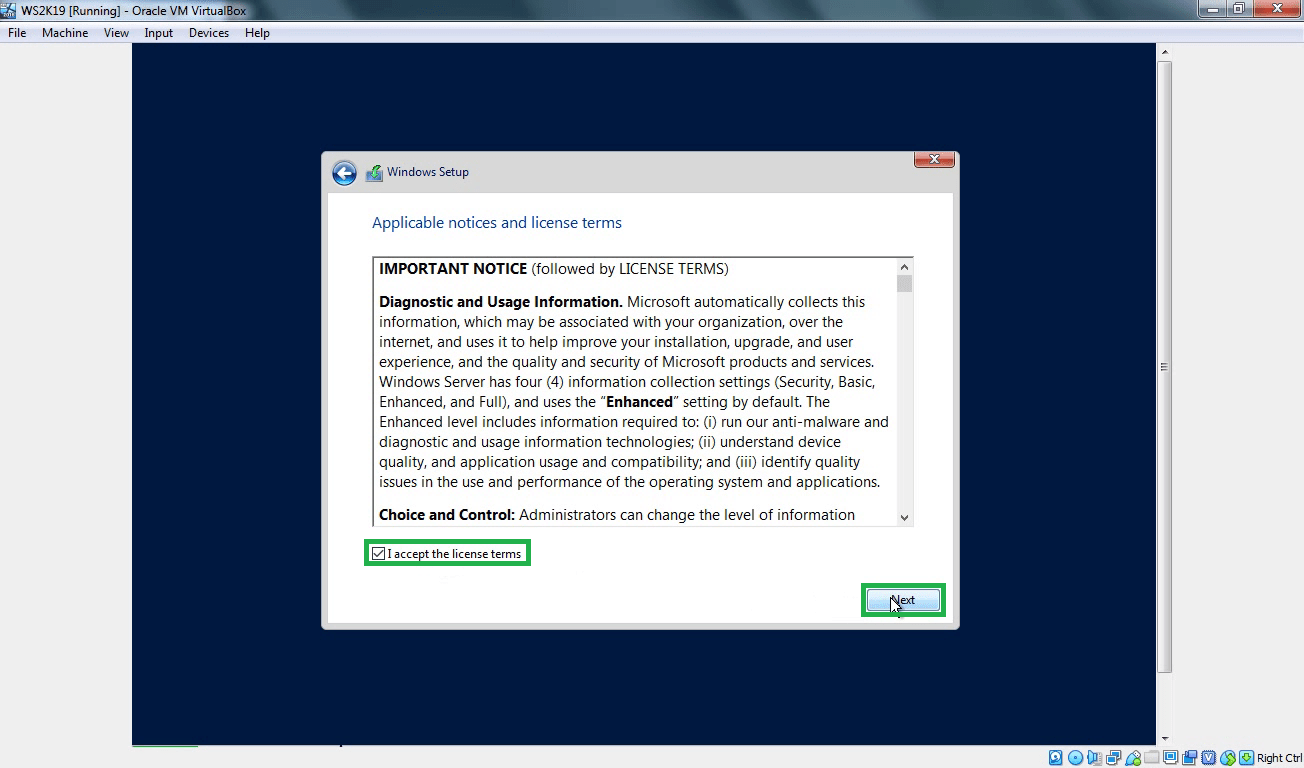
Step:4 Select Accept the license terms and click on next.
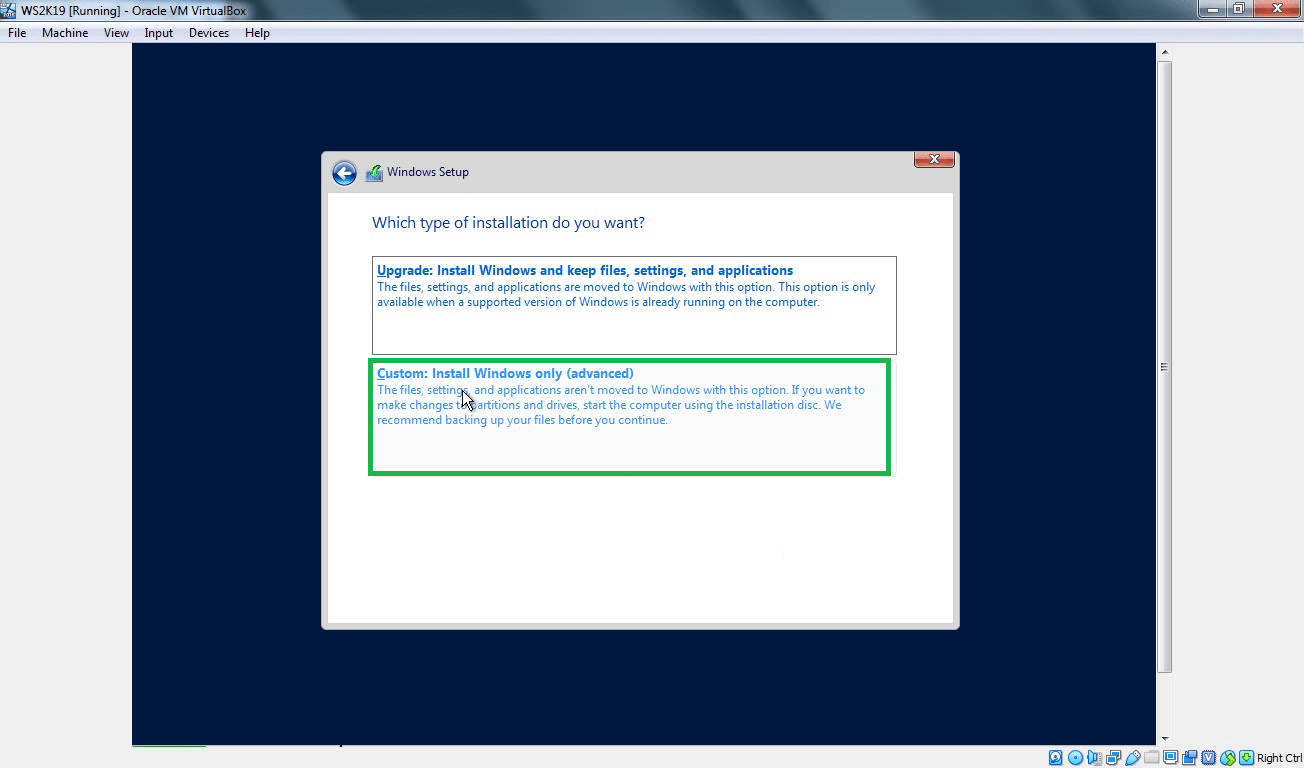
Step:5 For a fresh installation of server 2019 we need to select the second option, Custom: Install Windows Only and then click on next.
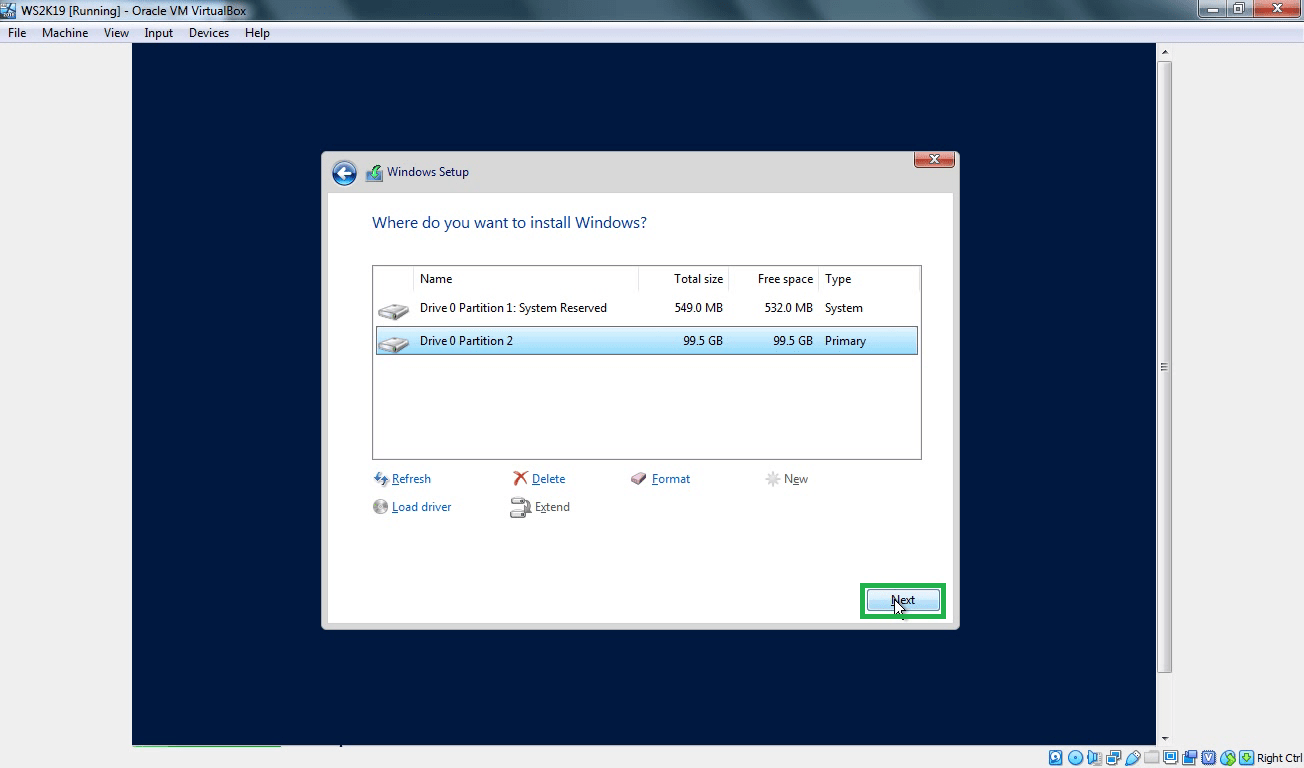
Step:6 Select your virtual hard disk and click on New to create a new partition to install server 2019.
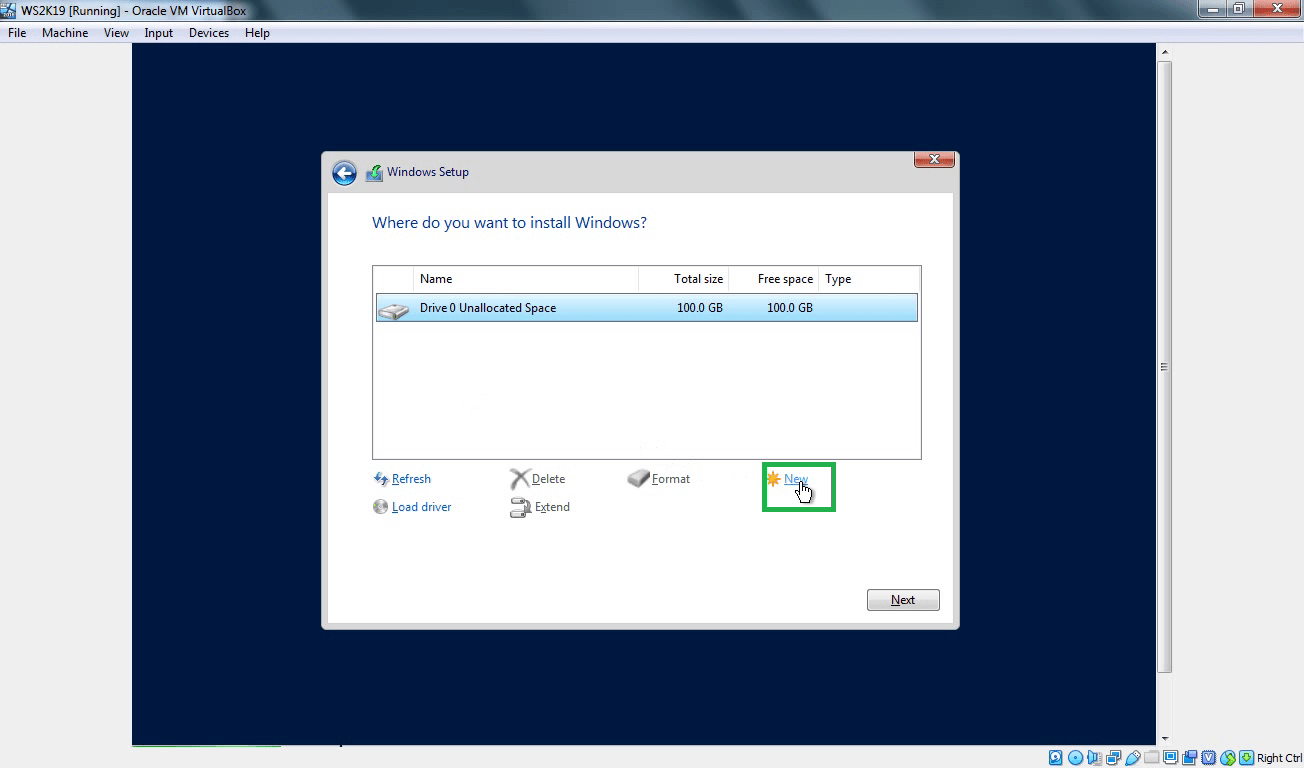
Step:7 For this demo, I am creating only one partition of 100 GB in size.
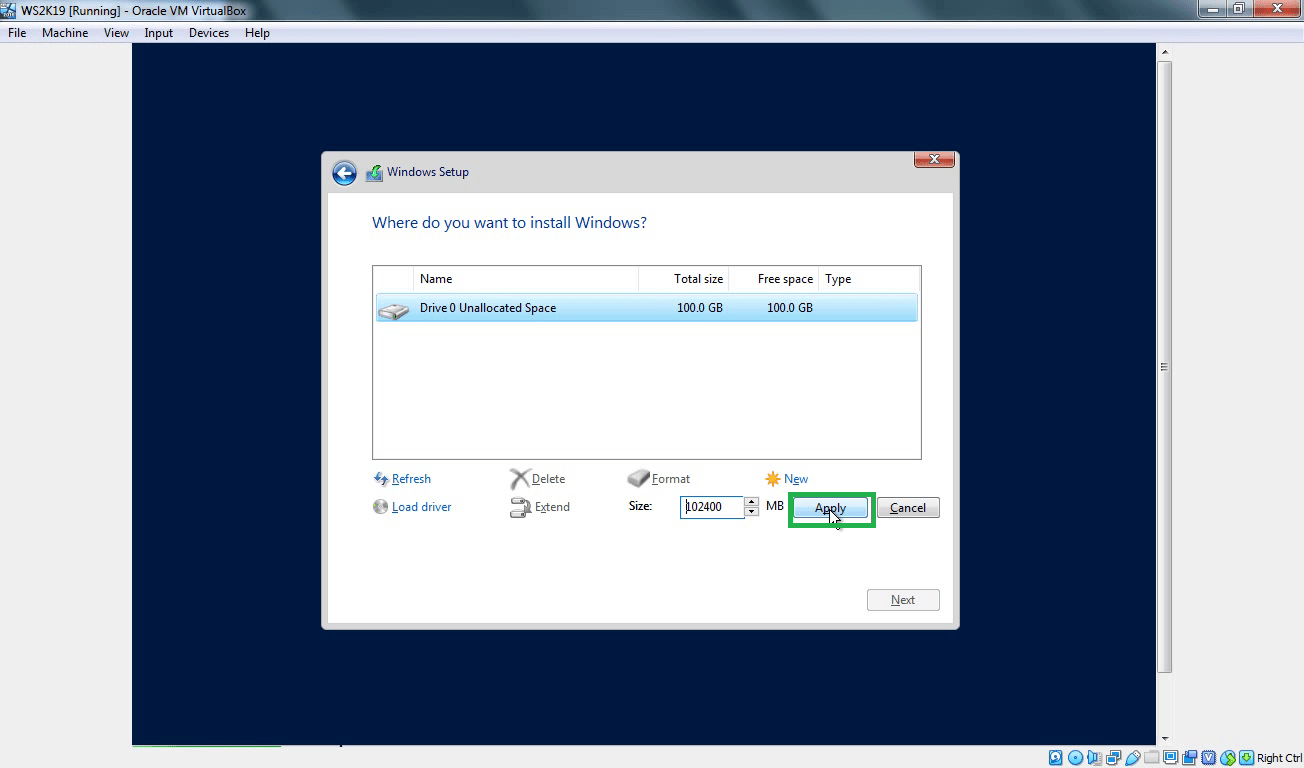
Step:8 After creating a partition, Click on Next to continue.
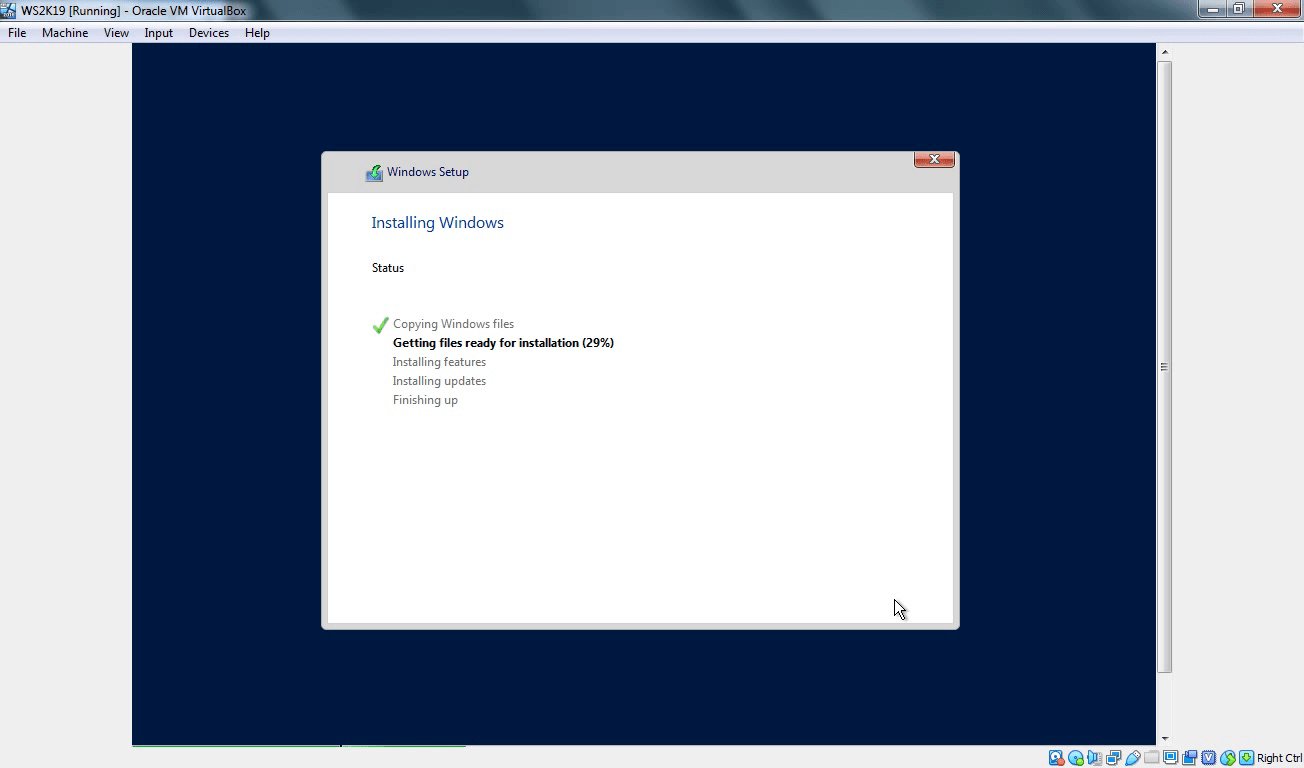
The installation process will take some time to complete the process. Once installation completes server will restart automatically.
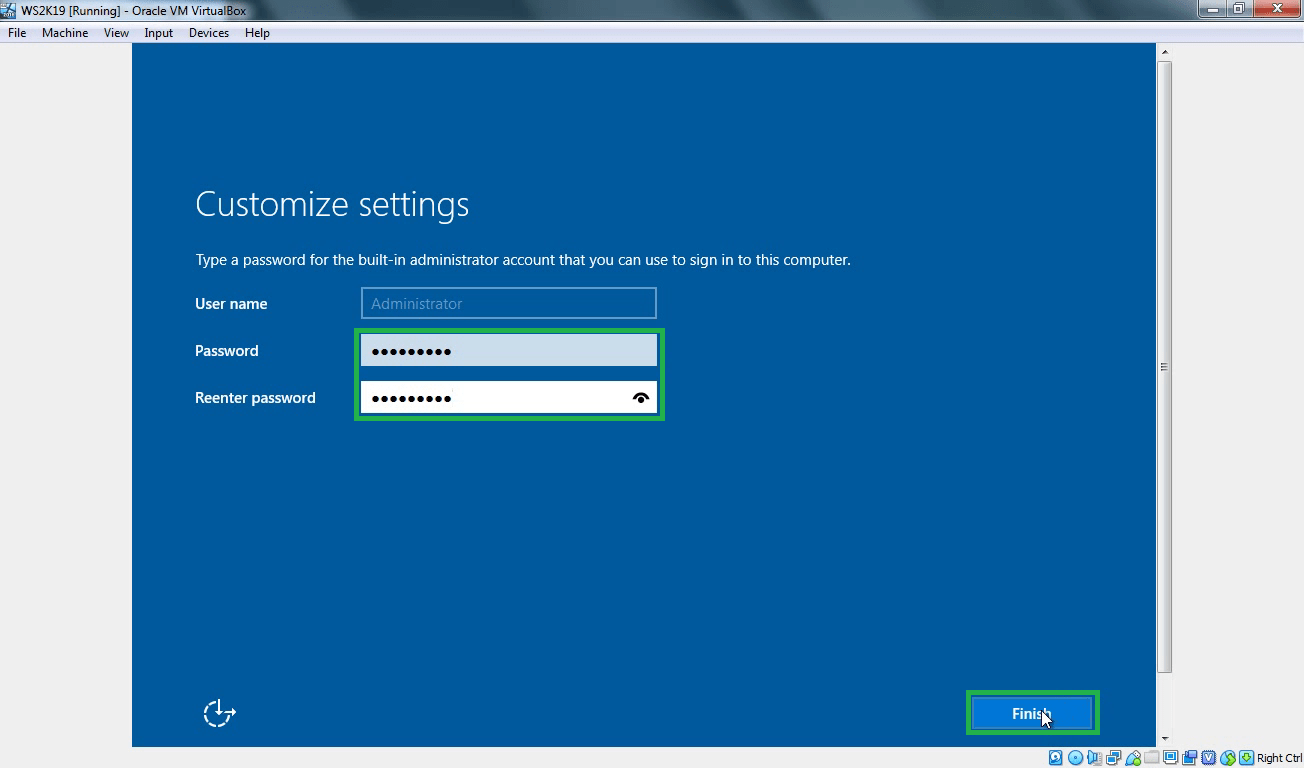
At next boot, you will see below screen asking to set Administrator account password for windows server 2019.
Step:9 Specify the password of your choice to protect Administrator account of Windows Server 2019.
Congratulations! Now you are ready to log in first time on your newly installed Windows Server 2019.
Now press CTRL + ALT + Delete key combination.
Specify the administrator account password and hit the enter key to login to Windows Server 2019.
Here we go.
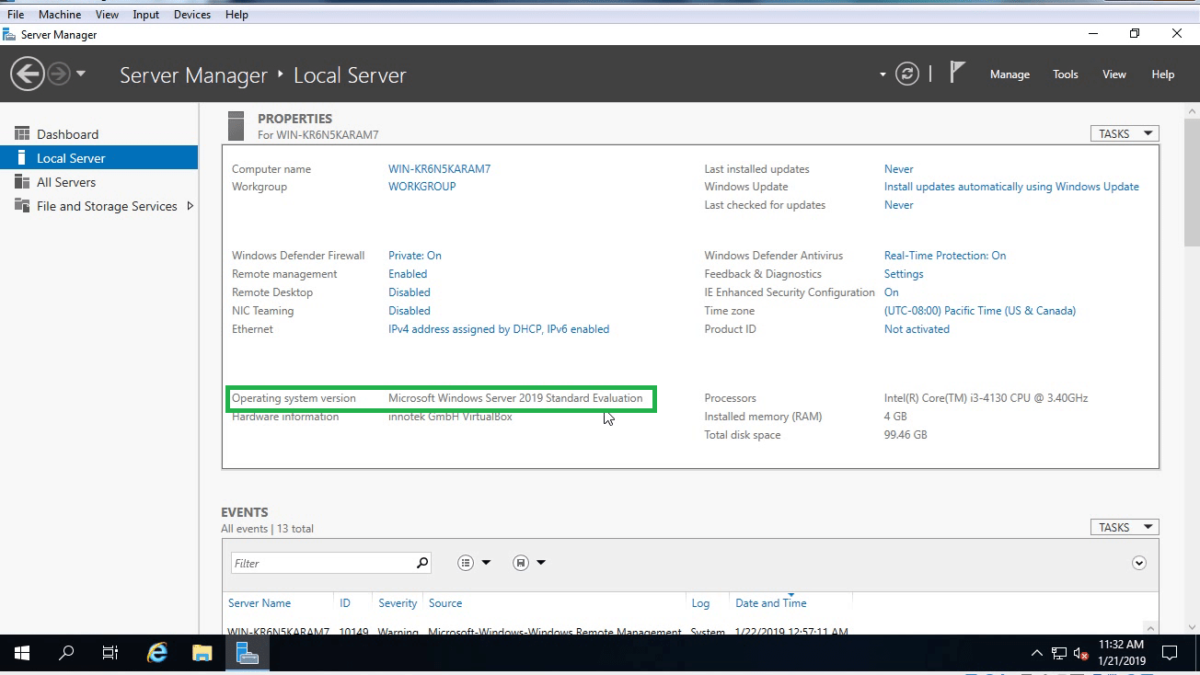
We have successfully installed Windows Server 2019 in Oracle Virtualbox.
Post Views: 7,500
To install Windows Server 2019 on VirtualBox, follow the steps below:
1. Download Windows Server 2019 ISO from Microsoft’s official website.
2. Open VirtualBox and click on «New» to create a new virtual machine.
3. In the «name and operating system» section, enter the name of the virtual machine and select «Microsoft Windows» as the type and «Windows Server 2019 (64-bit)» as the version.
4. Choose the appropriate amount of memory and storage for the virtual machine.
5. In the «Storage» section, click on «Empty» and then on the «CD» icon to select the Windows Server 2019 ISO.
6. Start the virtual machine and follow the on-screen instructions to install Windows Server 2019.
It is important to ensure that you have met the necessary hardware requirements to successfully run Windows Server 2019 on VirtualBox. These include having enough hard disk space, RAM, and a capable CPU. Additionally, it is recommended to keep VirtualBox and Windows Server 2019 updated to the latest version to ensure optimal performance and security.
Video Tutorial:How to install Windows 2019 server on Virtual Box?
To install Windows Server on VirtualBox, please follow these steps:
1. Download the ISO file for Windows Server from a trusted source.
2. Open VirtualBox and create a new virtual machine by clicking on «New» button.
3. Give your virtual machine a name, select «Microsoft Windows» as the type, and select the version of Windows Server from the drop-down menu.
4. Allocate how much RAM and storage space you want to use for the virtual machine, and click «Create«.
5. Select the newly created virtual machine, and click on «Settings«.
6. In the settings window, click on «Storage» and then click on the «Empty» CD icon on the controller.
7. Click on the «Choose Virtual Optical Disk File» button. This will allow you to select the ISO file that you downloaded earlier.
8. Click OK to save the settings and return to the VirtualBox main window.
9. Start the virtual machine and follow the instructions on screen to install Windows Server just like you would on a physical computer.
Once the installation is complete, you can use Windows Server on VirtualBox just like you would on a physical machine.
Can VirtualBox run on Windows Server 2019?
Yes, VirtualBox can run on Windows Server 2019. Here are the steps to install VirtualBox on Windows Server 2019:
1. Download the latest version of VirtualBox for Windows from the official website.
2. Double-click on the downloaded setup file to start the installation process.
3. Follow the instructions on the screen to install VirtualBox.
4. Once the installation is complete, start VirtualBox.
5. You can now create virtual machines on Windows Server 2019 using VirtualBox.
Note: It is important to ensure that the hardware specifications of the Windows Server 2019 meet the minimum requirements for VirtualBox to run properly.
How to create Windows Server 2019 virtual machine?
To create a Windows Server 2019 virtual machine, here are the steps to follow:
Step 1: Choose a Virtualization Platform
There are several virtualization platforms to choose from, including VMware, VirtualBox, and Hyper-V. Choose the one that works best for your needs and operating system.
Step 2: Download the Windows Server 2019 ISO File
Download the Windows Server 2019 ISO file from Microsoft’s website or from a trusted source.
Step 3: Create a New Virtual Machine
Open the virtualization software and create a new virtual machine. Configure the settings such as the amount of RAM, number of processors, and amount of storage.
Step 4: Install Windows Server 2019
Attach the Windows Server 2019 ISO file to the virtual machine and start the virtual machine. Follow the prompts to install Windows Server 2019 on the virtual machine.
Step 5: Configure the Virtual Machine
Once Windows Server 2019 is installed, configure the settings and install the necessary applications and updates to get the virtual machine up and running.
That’s it! You should now have a Windows Server 2019 virtual machine ready to use for your needs.
Can you install Windows Server 2019 without product key?
No, Windows Server 2019 cannot be installed without a product key. A product key is required during the installation process in order to activate Windows Server and ensure that it is a genuine and licensed copy. Attempting to install Windows Server 2019 without a valid product key will result in limited functionality and eventual deactivation of the operating system. It is recommended to purchase a legitimate product key from a trusted retailer to ensure proper licensing and compliance with Microsoft’s terms and conditions.
What are the installation options for Windows Server 2019?
There are different installation options for Windows Server 2019. Here are some of the options:
1. Server Core – This is the recommended installation option for production environments since it has a smaller footprint and fewer updates, reducing the attack surface.
2. Desktop Experience – This option includes a Windows desktop environment, providing a familiar graphical user interface (GUI) and enabling the installation of desktop applications.
3. Nano Server – This installation option has an even smaller footprint than Server Core, with no GUI or local login capability.
4. Semi-Annual Channel – This is a newer installation option, providing more frequent feature updates but requiring more frequent updates and potentially more testing.
5. Headless Server – This option is similar to Server Core but without any local management or monitoring capabilities. It’s intended for use in remote server management scenarios.
When deciding which installation option to choose, consider factors such as the functionalities required, the organization’s security policies, and technology needs.
To install Windows Server 2019, first, you need to have compatible hardware. Second, determine which installation option meets your needs best. Then, download and prepare the installation media, boot from it, and follow the on-screen prompts to complete the installation process.
After installation, you should configure the server settings, install updates, add roles and features, and deploy applications, depending on the specific requirements of your environment.