Edit this page
Toggle table of contents sidebar
In order to start using KivyMD, you must first install the Kivy framework
on your computer. Once you have installed Kivy, you can install KivyMD.
Warning
KivyMD depends on Kivy!
Therefore, before using KivyMD, first learn how to work with Kivy.
Installation#
pip install kivymd
Command above will install latest release version of KivyMD from PyPI.
If you want to install development version from master
branch, you should specify link to zip archive:
Note
Replace master.zip with <commit hash>.zip (eg 51b8ef0.zip) to
download KivyMD from specific commit.
Also you can install manually from sources. Just clone the project and run pip:
git clone https://github.com/kivymd/KivyMD.git --depth 1
cd KivyMD
pip install .
Note
If you don’t need full commit history (about 320 MiB), you can use a
shallow clone (git clone https://github.com/kivymd/KivyMD.git –depth 1)
to save time. If you need full commit history, then remove –depth 1.
First KivyMD application#
from kivymd.app import MDApp
from kivymd.uix.label import MDLabel


class MainApp(MDApp):
    def build(self):
        return MDLabel(text="Hello, World", halign="center")


MainApp().run()
And the equivalent with Kivy:
from kivy.app import App
from kivy.uix.label import Label


class MainApp(App):
    def build(self):
        return Label(text="Hello, World")


MainApp().run()
To left — Kivy, to right — KivyMD:

At first glance, the KivyMD example contains more code…
However, the following example already demonstrates how difficult it is to
create a custom button in Kivy:
from kivy.app import App
from kivy.metrics import dp
from kivy.uix.behaviors import TouchRippleBehavior
from kivy.uix.button import Button
from kivy.lang import Builder
from kivy.utils import get_color_from_hex

KV = """
#:import get_color_from_hex kivy.utils.get_color_from_hex


<RectangleFlatButton>:
    ripple_color: 0, 0, 0, .2
    background_color: 0, 0, 0, 0
    color: root.primary_color

    canvas.before:
        Color:
            rgba: root.primary_color
        Line:
            width: 1
            rectangle: (self.x, self.y, self.width, self.height)

Screen:
    canvas:
        Color:
            rgba: get_color_from_hex("#0F0F0F")
        Rectangle:
            pos: self.pos
            size: self.size
"""


class RectangleFlatButton(TouchRippleBehavior, Button):
    primary_color = get_color_from_hex("#EB8933")

    def on_touch_down(self, touch):
        collide_point = self.collide_point(touch.x, touch.y)
        if collide_point:
            touch.grab(self)
            self.ripple_show(touch)
            return True
        return False

    def on_touch_up(self, touch):
        if touch.grab_current is self:
            touch.ungrab(self)
            self.ripple_fade()
            return True
        return False


class MainApp(App):
    def build(self):
        screen = Builder.load_string(KV)
        screen.add_widget(
            RectangleFlatButton(
                text="Hello, World",
                pos_hint={"center_x": 0.5, "center_y": 0.5},
                size_hint=(None, None),
                size=(dp(110), dp(35)),
                ripple_color=(0.8, 0.8, 0.8, 0.5),
            )
        )
        return screen


MainApp().run()
And the equivalent with KivyMD:
from kivymd.app import MDApp
from kivymd.uix.screen import MDScreen
from kivymd.uix.button import MDRectangleFlatButton


class MainApp(MDApp):
    def build(self):
        self.theme_cls.theme_style = "Dark"
        self.theme_cls.primary_palette = "Orange"

        return (
            MDScreen(
                MDRectangleFlatButton(
                    text="Hello, World",
                    pos_hint={"center_x": 0.5, "center_y": 0.5},
                )
            )
        )


MainApp().run()
KivyMD:

Kivy:

KivyMD 1.1.0

KivyMD is a collection of Material Design compliant widgets for use with
Kivy, a framework for cross-platform, touch-enabled
graphical applications.
The project’s goal is to approximate Google’s
Material Design spec as close as
possible without sacrificing ease of use. This library is a fork of the
KivyMD project. We found the strength and
brought this project to a new level.
Join the project! Just fork the project, branch out and submit a pull request
when your patch is ready. If any changes are necessary, we’ll guide you through
the steps that need to be done via PR comments or access to your for may be
requested to outright submit them.
If you wish to become a project developer (permission to create branches on the
project without forking for easier collaboration), have at least one PR
approved and ask for it. If you contribute regularly to the project the role
may be offered to you without asking too.


Installation
pip install kivymd==1.1.0
Dependencies:
- Kivy >= 2.0.0 (Installation)
- Python 3.7+
- Pillow (for MDColorPicker class)
How to install
Command above will install latest release version of KivyMD from
PyPI.
If you want to install development version from
master
branch, you should specify link to zip archive:
pip install https://github.com/kivymd/KivyMD/archive/master.zip
Tip: Replace master.zip with <commit hash>.zip (eg 51b8ef0.zip) to
download KivyMD from specific commit.
Also you can install manually from sources. Just clone the project and run pip:
git clone https://github.com/kivymd/KivyMD.git --depth 1
cd KivyMD
pip install .
Speed Tip: If you don’t need full commit history (about 1.14 GiB), you can
use a shallow clone (git clone https://github.com/kivymd/KivyMD.git --depth 1)
to save time. If you need full commit history, then remove --depth 1.
How to use with Buildozer
requirements = kivy==2.1.0, kivymd==1.1.0, sdl2_ttf == 2.0.15, pillow
This will download latest release version of KivyMD from PyPI.
If you want to use development version from master
branch, you should specify link to zip archive:
requirements = kivy==2.1.0, https://github.com/kivymd/KivyMD/archive/master.zip
Do not forget to run buildozer android clean or remove .buildozer directory
before building if version was updated (Buildozer doesn’t update already
downloaded packages).
On Linux
- Use Buildozer directly
or via Docker.
On Windows 10
- Install Ubuntu WSL and follow Linux steps.
On Windows without WSL
- Install VirtualBox and follow steps from
here.
Build automatically via GitHub Actions
- Use ArtemSBulgakov/buildozer-action@v1
to build your packages automatically on push or pull request. - See full workflow example.
How to use with kivy-ios
toolchain build python3 kivy pillow
toolchain pip install --no-deps kivymd
Documentation
- See documentation at https://kivymd.readthedocs.io
- Wiki with examples of using KivyMD widgets: https://github.com/kivymd/KivyMD/wiki
Demos
Kitchen sink app demonstrates every KivyMD widget.
You can see how to use widget in code of app.
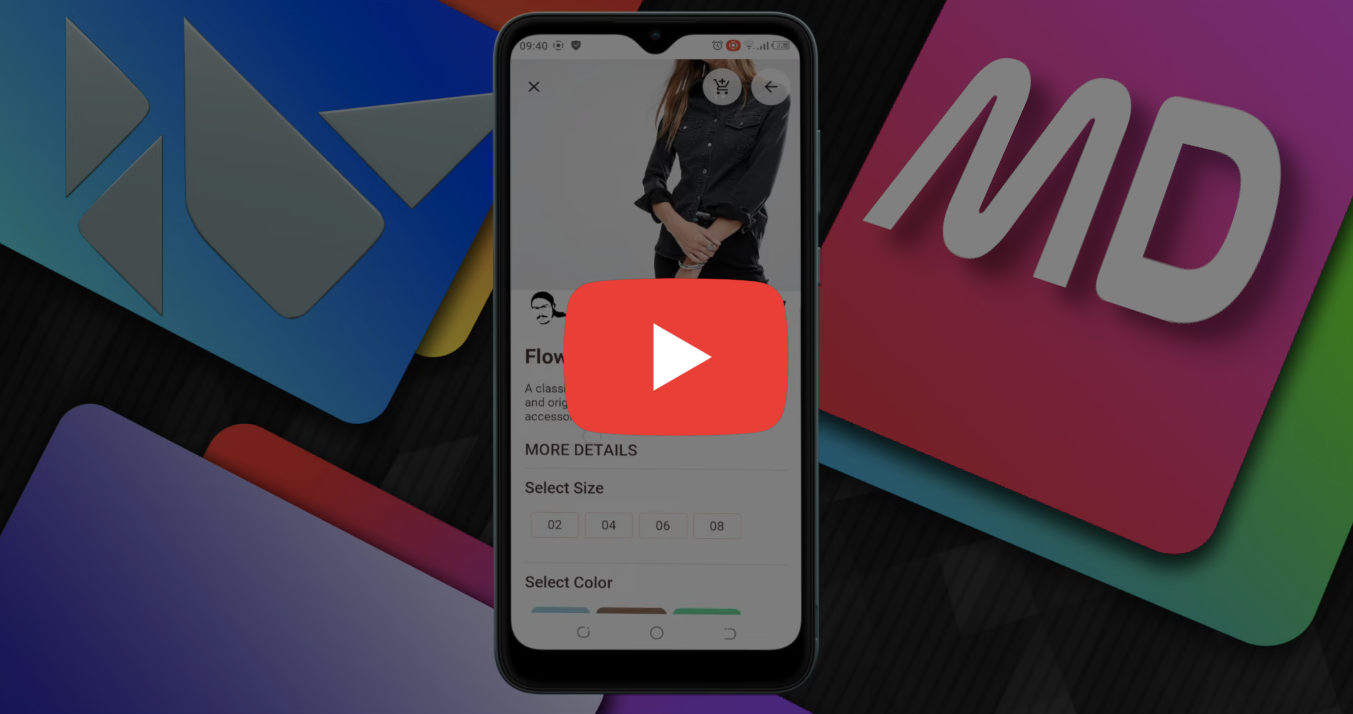
Comparison of Flutter & KivyMD
| Sky View Concept | Healthy Food Delivery |
|---|---|
 |
 |
| Asics Shoes Concept | Facebook Desktop Redesign |
 |
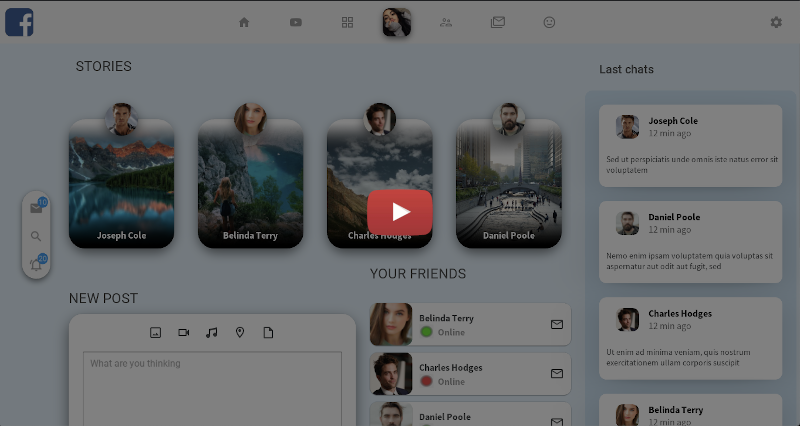 |
Use MVC and Hot Reload

Support
If you need assistance or you have a question, you can ask for help on our mailing list:
- Discord server: https://discord.gg/wu3qBST (English #support, Russian #ru-support)
- StackOverflow tag: kivymd
- Email: kivydevelopment@gmail.com
Settings
Syntax highlighting and auto-completion for Kivy/KivyMD .kv files in PyCharm/Intellij IDEA
Promo Video

Contributing
We always welcome your Bug reports,
Feature requests
and Pull requests!
Check out CONTRIBUTING.md
and feel free to improve KivyMD.
Setup environment
We recommend you to use PyCharm to work with KivyMD code. Install
Kivy and
development dependencies to your virtual environment:
pip install -e .[dev,docs]
pre-commit install
Format all files and run tests:
pre-commit run --all-files
pytest kivymd/tests --timeout=600 --cov=kivymd --cov-report=term
pre-commit will format modified files with Black and sort imports with isort.
Sister projects

KivyMD Extensions
Additional extensions for the KivyMD library.
https://github.com/kivymd-extensions

KivyMDBuilder
Build apps visually.
https://github.com/kivymd/KivyMDBuilder
License
- KivyMD is released under the terms of the
MIT License,
same as Kivy. - Roboto font
is licensed and distributed under the terms of the
Apache License, Version 2.0. - Iconic font by the
Material Design Icons community covered by
SIL Open Font License 1.1
Contributors
KivyMD Team
They spent a lot of time to improve KivyMD.
- Yuri Ivanov @HeaTTheatR — Core developer
- Artem Bulgakov @ArtemSBulgakov — Technical administrator, contributor
- Andrés Rodríguez @mixedCase — First author of KivyMD project, contributor
Code Contributors
This project exists thanks to all the people who contribute.
How to contribute

Financial Contributors
Become a financial contributor
on OpenCollective and help us sustain our community.
Gold Sponsors
Become a Gold Sponsor
and get your logo on our Readme with a link to your website.

Backers
Become a Backer if you want to help develop this project.

Приветствую вас, дорогие любители и знатоки Python! Прошло пол года с момента моей последней публикации на Хабре. Был погружен в пучину обстоятельств и сторонние проекты. Начиная с сегодняшней, статьи будут выходить с периодичностью раз в месяц. В этой статье мы рассмотрим как создать и анимировать контент для слайдов а также сделать parallax эффект для фонового изображения с помощью фреймворка Kivy и библиотеки KivyMD. Для тех, кто незнаком ни с первым ни со второй, вкратце напомню:

Kivy — кроссплатформенный фреймворк с открытым исходным кодом, написанный с использованием Python/Cython. Поддерживает устройства ввода: WM_Touch, WM_Pen, Mac OS X Trackpad Magic Mouse, Mtdev, Linux Kernel HID, TUIO…

KivyMD — библиотека, реализующая набор виджетов в стиле Google Material Design, для использования с фреймворком Kivy. Вне экосистемы Kivy библиотека не используется. Текущее состояние — бета.
Установка зависимостей
pip install "kivy[base] @ https://github.com/kivy/kivy/archive/master.zip"
pip install https://github.com/kivymd/KivyMD/archive/master.zip
Первая команда установит фреймворк Kivy мастер версии, а вторая — библиотеку KivyMD также мастер версии. Все. Можем работать. Но для начала нам нужно познакомиться с архитектурой демонстрационного проекта PizzaAppConcept, которое сегодня мы будем разбирать. Приложение небольшое, всего один экран, но поскольку я люблю организацию в любом своем коде, я решил, что архитектура проекта будет построена на паттерне MVC, потому что по моему субъективному мнению этот шаблон как нельзя лучше подходит для организации порядка в проекте. Что такое архитектура MVC я не буду подробно рассматривать здесь. Детали раскроются сами собой по ходу углубления в сегодняшний материал.
Архитектура MVC

Проект выглядит следующим образом:

-
assets — изображения, шрифты и дополнительные файлы проекта
-
Controller — модули контроллеров
-
Model — модули моделей
-
Utility — дополнительные модули проекта
-
View — пакеты представлений
Развернутый проект имеет следующую структуру:

Обратите внимание, что модули модели, представления и контроллера имеют одинаковые имена.
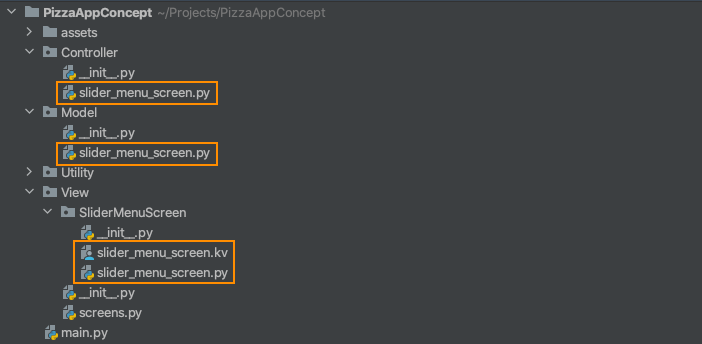
Это помогает быстро ориентироваться в проекте, если проект большой. Например, в моем последнем проекте шестнадцать моделей и соответственно столько же представлений и контроллеров.
Перед тем как приступить к созданию представления экрана приложения нам нужно создать абстрактный класс-наблюдатель. Этот класс должен быть унаследован каждым представлением. Класс-наблюдатель реализует единственный метод model_is_changed — метод, который будет вызываться каждый раз, когда изменяются данные в классах моделей, таким образом сигнализируя представлению о произошедших изменениях.
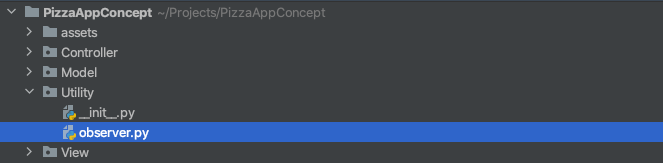
Класс-наблюдатель модуля observer.py:
# Of course, "very flexible Python" allows you to do without an abstract
# superclass at all or use the clever exception `NotImplementedError`. In my
# opinion, this can negatively affect the architecture of the application.
# I would like to point out that using Kivy, one could use the on-signaling
# model. In this case, when the state changes, the model will send a signal
# that can be received by all attached observers. This approach seems less
# universal - you may want to use a different library in the future.


class Observer:
    """Abstract superclass for all observers."""

    def model_is_changed(self):
        """
        The method that will be called on the observer when the model changes.
        """
Как объясняется в комментариях к классу Observer, мы можем использовать properties такие как NumericProperty, StringProperty, DictProperty и др. Давайте сравним свойства Python и Kivy:
Python:
class MyClass:
    def __init__(self, a=1.0):
        super().__init__()
self.a = aKivy:
class MyClass:
    a = NumericProperty(1.0)
Properties в Kivy удобнее. Кроме того, в properties Kivy реализован ряд полезный методов, таких, например, как on_ методы:
class MyClass:
    a = NumericProperty(1)

    def on_a(self, instance_my_class, new_a_value):
        """
        The method called as soon as a new value has been set for the
        'a' attribute.
        """

        print("My property a changed to", new_a_value)
Как видим, мы могли бы использовать properties которые предоставляет фреймворк Kivy, для отслеживания состояния атрибутов класса, что, конечно, намного проще, чем приведенная в статье реализация. Но в таком случае, весь код будет заточен под фреймворк Kivy и в дальнейшем, если вы захотите использовать другой GUI фреймворк для вашего приложения, вам нужно будет все переделывать под новый фреймворк — и модели, и представления, и контроллеры. Данная же реализация выполнена таким образом, что вам достаточно изменить только представление, модель и контроллеры остаются без изменений.
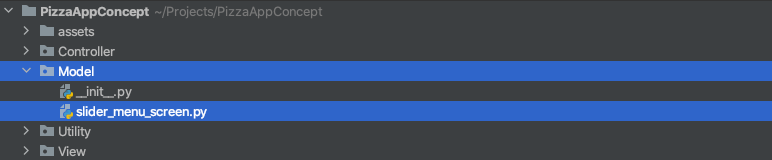
Теперь, когда у нас есть класс наблюдателя, мы можем реализовать представление нашего единственного экрана со слайдами сортов пиццы. В пакете View создадим новый пакет представления с именем SliderMenuScreen, в котором разместим модуль slider_menu_screen.py с классом нашего экрана:

Класс представления SliderMenuScreenView модуля slider_menu_screen.py:
from kivy.properties import ObjectProperty

from kivymd.uix.screen import MDScreen

from Utility.observer import Observer


class SliderMenuScreenView(MDScreen, Observer):
    """
    A class that implements a visual representation of the model data
    :class:`~Model.slider_menu_screen.SliderMenuScreenModel`.

    Implements a screen with slides of pizza varieties.
    """

    controller = ObjectProperty()
    """
    Controller object -
    :class:`~Controller.slider_menu_screen.SliderMenuScreenController`.

    :attr:`controller` is an :class:`~kivy.properties.ObjectProperty`
    and defaults to `None`.
    """

    model = ObjectProperty()
    """
    Model object - :class:`~Model.slider_menu_screen.SliderMenuScreenModel`.

    :attr:`model` is an :class:`~kivy.properties.ObjectProperty`
    and defaults to `None`.
    """

    manager_screens = ObjectProperty()
    """
    Screen manager object - :class:`~kivy.uix.screenmanager.ScreenManager`.

    :attr:`manager_screens` is an :class:`~kivy.properties.ObjectProperty`
    and defaults to `None`.
    """

    def __init__(self, **kw):
        super().__init__(**kw)
        self.model.add_observer(self)

    def model_is_changed(self):
        """
        The method that will be called on the observer when the model changes.
        """
Каждый класс представления должен иметь три обязательных поля:
-
controller — объект класса контроллера
-
model — объект класса модели
-
manager_screens — объект класса kivy.uix.screenmanager.ScreenManager (экранный менеджер, который управляет переключением экранов приложения)
В конструкторе мы добавляем наблюдателя, которым является само представление и реализуем метод model_is_changed для отслеживания изменений модели. Также класс представления SliderMenuScreenView наследуется от класса kivymd.uix.screen.MDScreen: любой экран, который добавляется в ScreenManager должен быть унаследован от класса MDScreen.
Теперь создадим модель для представления SliderMenuScreenView:
Класс модели SliderMenuScreenModel:
# The model implements the observer pattern. This means that the class must
# support adding, removing, and alerting observers. In this case, the model is
# completely independent of controllers and views. It is important that all
# registered observers implement a specific method that will be called by the
# model when they are notified (in this case, it is the `model_is_changed`
# method). For this, observers must be descendants of an abstract class,
# inheriting which, the `model_is_changed` method must be overridden.


class SliderMenuScreenModel:
    """Implements screen logic for pizza variety slides."""

    def __init__(self):
        # List of observer classes. In our case, this will be the
        # `View.SliderMenuScreen.slider_menu_screen.py` class.
        # See `__init__` method of the above class.
        self._observers = []

    def notify_observers(self):
        """
        The method that will be called on the observer when the model changes.
        """

        for observer in self._observers:
            observer.model_is_changed()

    def add_observer(self, observer):
        self._observers.append(observer)

    def remove_observer(self, observer):
        self._observers.remove(observer)
Модель реализует три метода: добавление/удаление/оповещение наблюдателей. Пока наша модель не имеет данных. Перейдем к созданию контроллера:

Класс контроллера SliderMenuScreenController:
from View.SliderMenuScreen.slider_menu_screen import SliderMenuScreenView


class SliderMenuScreenController:
    """
    The `SliderMenuScreenController` class represents a controller
    implementation. Coordinates work of the view with the model.

    The controller implements the strategy pattern. The controller connects
    to the view to control its actions.
    """

    def __init__(self, model):
        self.model = model  # Model.slider_menu_screen.SliderMenuScreenModel
        self.view = SliderMenuScreenView(controller=self, model=self.model)

    def get_view(self) -> SliderMenuScreenView:
        return self.view
Контроллер отслеживает все события, которые происходят на экране: пользовательский ввод, взаимодействие с элементами пользовательского интерфейса и т.д. Регистрируя эти события, контроллер вызывает соответствующие методы модели и представления, координируя таким образом логику и отображение данных представлением. В конструкторе класса SliderMenuScreenController мы создаем объект представления и возвращаем этот объект в методе get_view. Пока никаких событий пользовательского интерфейса в контроллере мы не отслеживаем. На этом мы закончим с шаблоном MVC. Двигаемся дальше…
Точка входа в приожение
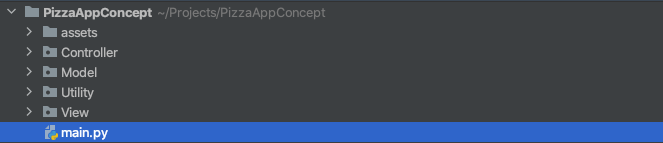
С этого модуля начинается выполнение Kivy приложения. Но перед тем как начать рассматривать этот модуль нам нужно создать модуль screens.py в директории View:
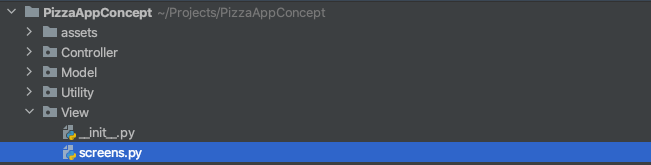
Этот модуль содержит словарь с классами модулей и контроллеров. В точке входа в приложении — в модуле main.py — в цикле мы пройдемся по элементам этого словаря, создадим все необходимые объекты, передадим им нужные аргументы, создадим представления экранов, добавим их в экранный менеджер и отобразим этот менеджер на экране. Это очень удобно, когда нам, например, понадобиться в будущем добавить еще несколько экранов в приложение. Мы просто откроем модуль screens.py и добавим нужные классы в словарь.
Модуль screens.py:
# The screens dictionary contains the objects of the models and controllers
# of the screens of the application.

from Model.slider_menu_screen import SliderMenuScreenModel
from Controller.slider_menu_screen import SliderMenuScreenController

screens = {
    # name screen
    "slider menu screen": {
        "model": SliderMenuScreenModel,  # class of model
        "controller": SliderMenuScreenController,  # class of controller
    },
}
Ключи словаря screens — это имена экранов по которым мы сможем в дальнейшем эти экраны переключать, устанавливая в экранном менеджере имя текущего экрана, значения — словарь типа ‘model/controller’: ‘Model class/Controller class’.
Точка входа в приложение — модуль main.py:
"""
The entry point to the application.

The application uses the MVC template. Adhering to the principles of clean
architecture means ensuring that your application is easy to test, maintain,
and modernize.

You can read more about this template at the links below:

https://github.com/HeaTTheatR/LoginAppMVC
https://en.wikipedia.org/wiki/Model–view–controller
"""

from kivy.uix.screenmanager import ScreenManager
from kivy.config import Config

Config.set("graphics", "height", "799")
Config.set("graphics", "width", "450")

from kivymd.app import MDApp

from View.screens import screens


class PizzaAppConcept(MDApp):
    def __init__(self, **kwargs):
        super().__init__(**kwargs)
        self.load_all_kv_files(self.directory)
        # This is the screen manager that will contain all the screens of your
        # application.
        self.manager_screens = ScreenManager()

    def build(self):
        """
        Initializes the application; it will be called only once.
        If this method returns a widget (tree), it will be used as the root
        widget and added to the window.

        :return:
            None or a root :class:`~kivy.uix.widget.Widget` instance
            if no self.root exists.
        """

        self.theme_cls.primary_palette = "DeepOrange"
        self.generate_application_screens()
        return self.manager_screens

    def generate_application_screens(self):
        """
        Creating and adding screens to the screen manager.
        You should not change this cycle unnecessarily. He is self-sufficient.

        If you need to add any screen, open the `View.screens.py` module and
        see how new screens are added according to the given application
        architecture.
        """

        for i, name_screen in enumerate(screens.keys()):
            model = screens[name_screen]["model"]()
            controller = screens[name_screen]["controller"](model)
            view = controller.get_view()
            view.manager_screens = self.manager_screens
            view.name = name_screen
            self.manager_screens.add_widget(view)


PizzaAppConcept().run()
Этот код вы можете вообще не менять — это шаблон. Выполнение Kivy приложения начинается с класса, который унаследован от класса kivy.app.App или от класса kivymd.app.MDApp если вы используете библиотеку KivyMD. В нашем случае это класс PizzaAppConcept. Данный класс должен в обязательном порядке переопределять метод build (этот метод выполняется после запуска приложения), который должен возвращать любой виджет Kivy/KivyMD (есть условия при которых возвращение виджета не требуется, но мы не будем это рассматривать). Мы будем возвращать виджет менеджера экранов — kivy.uix.screenmanager.ScreenManager.
Пройдемся по логике класса PizzaAppConcept так, как она будет выполняться интерпретатором Python:
-
В конструкторе класса загружаем все *kv (декларативное описание GUI на DSL языке KV Language) файлы из корневой директории приложения и создаем объект менеджера экранов.
-
В методе build вызовем метод generate_application_screens, в котором будут созданы все представления на основе данных словаря screen из модуля View.screens.py, представления добавлены в менеджер экранов.
-
Менеджер экранов будет возвращен из метода build.
Вот теперь уж мы можем запустить приложение командой python main.py, увидеть пустой экран и перейти к главному — созданию экрана со слайдами сортов пиццы:
Создание экрана слайдов
Как вы помните, у нас уже есть класс SliderMenuScreenView. Но пока это просто пустой экран, наследник от класса MDScreen. Пора разместить в нем виджеты. Для отображения слайдов будем использовать класс kivymd.uix.carousel.MDCarousel. Весь UI будет описан в *kv файлах, в Python модулях мы будем лишь динамически создавать (если требуется) и изменять свойства виджетов. То есть, в Kivy описание виджетов также отделено от логики как представление от модели в шаблоне MVC.
Разместим в пакете нашего представления файл slider_menu_screen.kv:

Обратите внимание, что модуль с классом представления и kv файл описанием GUI носят идентичные имена. Это не правило, но хороший тон. Также в модуле представления должен размещаться только один класс самого представления, как и в файле kv должно быть только описание класса представления. Это также не является правилом, но заметно облегчит вам жизнь, когда ваш проект начнет расти.
Описание GUI класса SliderMenuScreenView в файле slider_menu_screen.kv:
MDCarousel:
    id: carousel
А вот здесь уже правило должно совпадать с именем базового Python класса для которого мы создаем разметку на языке KV Language и это — правило. В kv файлах не нужно импортировать Kivy/KivyMD виджеты, они уже импортированы автоматически.
Теперь наш экран содержит виджет MDCarousel, но все еще будет пустым, если мы запустим приложение, так как MDCarousel пока не содержит других виджетов. Для простой демонстрации мы можем разместить в MDCarousel три кнопки:
MDCarousel:
    id: carousel

    MDRaisedButton:
        text: "SLIDE 1"
        pos_hint: {"center_x": .5, "center_y": .5}

    MDRaisedButton:
        text: "SLIDE 2"
        pos_hint: {"center_x": .5, "center_y": .5}

    MDRaisedButton:
        text: "SLIDE 3"
        pos_hint: {"center_x": .5, "center_y": .5}
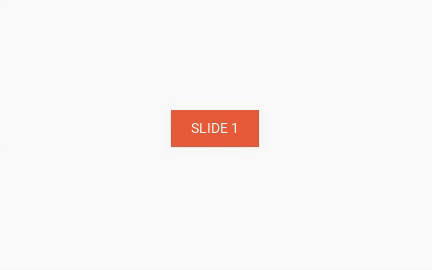
Отлично! Все работает. Теперь немного об архитектуре самого представления. У нас есть пакет SliderMenuScreen, который содержит базовый класс представления и файл kv с описанием GUI на языке KV Language:

Теперь нам нужно создать слад, который будет размещаться к виджете MDCarousel. Для этих целей я создаю в каждом пакете представления пакет с именем components в котором размещаются все виджеты, использующиеся в текущем экране:

Каждый компонент должен быть отдельным пакетом с базовым Python классом и его kv правилом. Создадим компонент card:

Начнем с базовых Python классов в модуле card.py. Реализуем слайд на основе виджета MDCard:
from kivymd.uix.card import MDCard


class PizzaCard(MDCard):
    """The class implements the slide card."""
Опишем свойства карточки PizzaCard в правиле kv файла card.kv:
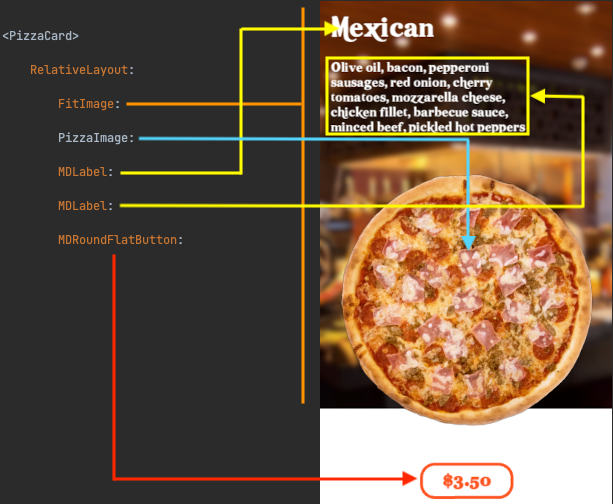
<PizzaCard>
    size_hint: .9, .95
    pos_hint: {"center_x": .5, "center_y": .5}
    radius: 20
    elevation: 24
Мы дали значения параметрам карточки: подсказка размера для ширины и высоты (значения от 0 до 1, что эквивалентно 0-100%), позиция карточки на экране (значения от 0 до 1, что эквивалентно 0-100%), радиус округления уголов и значение тени карточки. Теперь, поскольку у нас на экране, скорее всего, будет не одна, а несколько карточек, мы будем создавать их в Python коде и добавлять в виджет MDCarousel. Откроем класс представления View.SliderMenuScreen.slider_menu_screen.SliderMenuScreenView и добавим два метода:
from View.SliderMenuScreen.components import PizzaCard
class SliderMenuScreenView(MDScreen, Observer):
def on_enter(self):
self.ids.carousel.clear_widgets()
self.generate_and_added_slides_to_carousel()
def generate_and_added_slides_to_carousel(self):
for i in range(3):
card = PizzaCard()
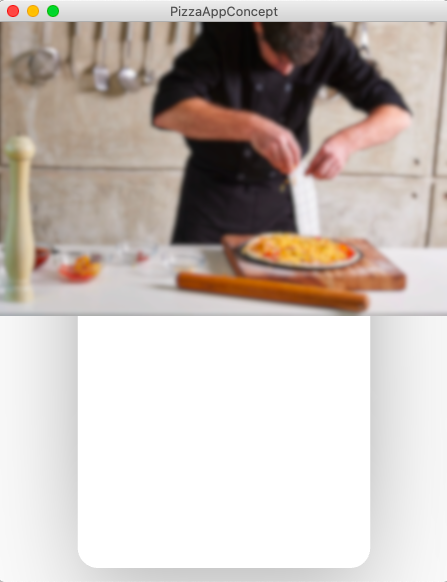
self.ids.carousel.add_widget(card)Для наглядности все, что мы ранее уже добавляли в этот класс, я не буду дублировать из примера в пример. Это экономит и место и сразу видно, что конкретно мы добавили/изменили в классе. Добавили мы (точнее, переопределили) метод on_enter, который вызывается автоматически как только экран станет виден пользователю. В этом методе мы через id получили ссылку на объект виджета MDCarousel, который у нас находится в kv файле, очистили MDCarousel от всех виджетов и вызвали метод generate_and_added_slides_to_carousel для генерации и добавление слайдов в MDCarousel. После запуска приложения получаем при пустых слайда:

Теперь, перед тем как пробовать добавлять элементы в слайд, давайте создадим json файл с названиями сортов и описаний пиццы:

Файл pizza-description.json:
{
  "Mexican":
      [
          "Olive oil, bacon, pepperoni sausages, red onion, cherry tomatoes, mozzarella cheese, chicken fillet, barbecue sauce, minced beef, pickled hot peppers",
          "$3.50"
      ],
  "Contandino":
      [
          "Eggplant, green onion, tomato, parmesan cheese, mozzarella cheese, chicken fillet, zucchini",
          "$4.75"
      ],
  "Munich":
      [
          "Olive oil, salami, hunting sausages, pepperoni sausages, homemade sausages, red onion, parsley, mozzarella cheese, sweet and sour sauce",
          "$2.99"
      ]
}
Поскольку файл pizza-description.json в данном демонстрационном приложении хранит данные для приложения мы прочитаем эти данные в нашей модели и будем пользоваться ими в представлении.
Model.slider_menu_screen.SliderMenuScreenModel:
import json
from pathlib import Path

BASE_DIR = Path(__file__).resolve().parent.parent
DATA_DIR = BASE_DIR.joinpath("assets", "data")


class SliderMenuScreenModel:
    def __init__(self):
        self.pizza_description = {}
        path_to_pizza_description = DATA_DIR.joinpath(
            DATA_DIR, "pizza-description.json"
        )
        if path_to_pizza_description.exists():
            with open(path_to_pizza_description) as json_file:
                self.pizza_description = json.loads(json_file.read())
        self._observers = []
Теперь мы можем создать слайды с более менее реальными данными и добавить в слайд первый элемент — фоновое изображение. Для этого в классе View.SliderMenuScreen.components.card.card.PizzaCard нужно добавить поле (path_to_bg_image), которое будет принимать строковое значение — путь к фоновому изображению слайда:
from kivy.properties import StringProperty

from kivymd.uix.card import MDCard


class PizzaCard(MDCard):
    path_to_bg_image = StringProperty()
… и описать виджет фонового изображения в соответствующем правиле в kv файле.
View/SliderMenuScreen/components/card/card.kv:
<PizzaCard>
    size_hint: .9, .95
    pos_hint: {"center_x": .5, "center_y": .5}
    radius: 20
    elevation: 24

    MDRelativeLayout:

        FitImage:
            id: image_bg
            source: root.path_to_bg_image
            size_hint: None, .8
            width: root.width
            y: root.height - self.height
В правиле PizzaCard фоновое изображение, представленное виджетом FitImage, как и все последующие виджеты, будет размещаться в макете MDRelativeLayout. Этот макет позволяет размещать виджеты один над другим и, поскольку в слайде у нас над фоновым изображением еще будут «летать» метки с названием и описанием пиццы, а также изображение самой пиццы, то макет MDRelativeLayout подходит для нашей задачи. Виджет же FitImage позволяет вписывать изображение без искажения пропорций в указанный размер.
Сейчас мы уже можем переделать цикл создания слайдов на основе данных модели в методе generate_and_added_slides_to_carousel в классе представления:
import os


class SliderMenuScreenView(MDScreen, Observer):
    def generate_and_added_slides_to_carousel(self):
        for pizza_name in self.model.pizza_description.keys():
            card = PizzaCard(
                path_to_bg_image=os.path.join(
                    "assets", "images", f"{pizza_name}-bg.png"
                )
            )
            self.ids.carousel.add_widget(card)
Я намеренно дал изображениям имена названий сортов пиццы из фала pizza-description.json, чтобы в коде особо не парится с путями к изображениям:
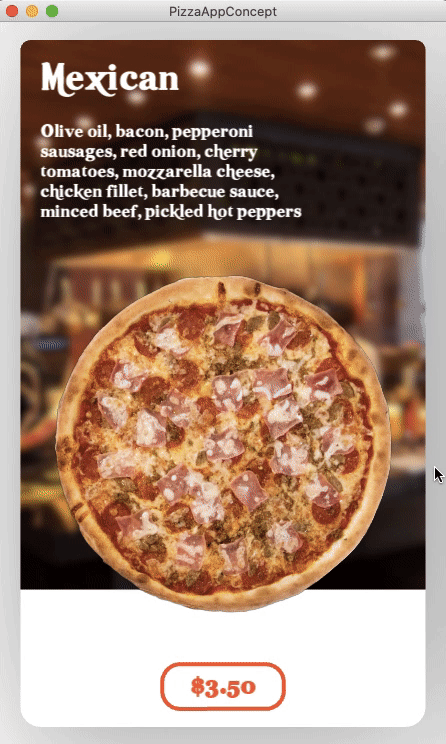
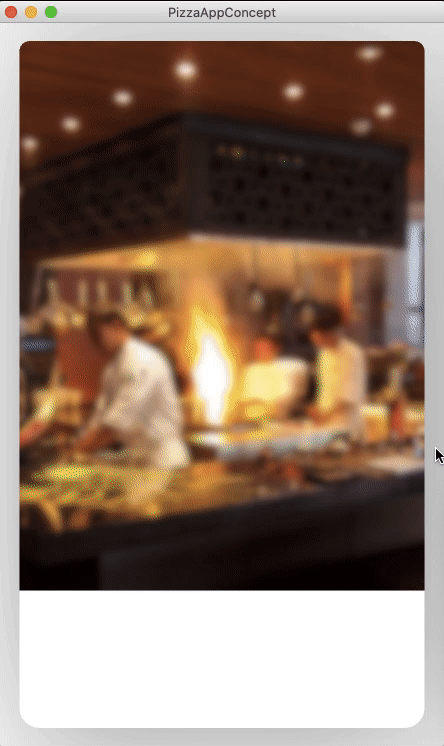
После запуска приложения слайды выглядят следующим образом:

Как добавить parallax эффект к фоновому изображению слайда? Какого-то встроенного API для этого ни фреймворк Kivy, ни библиотека KivyMD пока не предоставляют (ParallaxContainer для класса MDCarousel библиотеки KivyMD находится на стадии разработки). Поэтому сделаем все сами. План такой:
-
Увеличить ширину фонового изображения для parallax сдвига
-
Применить к классу PizzaCard трафарет
-
Зарегистрировать событие движения слайдов
□ локализовать направление движения слайдов
□ вычислить offset значение положения слайда относительно ширины экрана
□ сделать инкремент/декремент offset значения для ширины фонового изображения
Виджет MDCarousel, в котором размещены наши слайды, имеет событие on_slide_progress, вызываемое автоматически при свайпе слайдов. Для его использования мы должны назначить этому событию соответствующий метод, который в качестве аргументов принимает два параметра: объект класса MDCarousel и offset значение слайда. Как мы помним, все события в нашем мини проекте обрабатывает класс контроллера. Поэтому добавим нужный метод в класс контроллера Controller.slider_menu_screen.SliderMenuScreenController:
class SliderMenuScreenController:
    def on_slide_progress(self, instance_carousel, offset_value):
        """
        Called when the user swipes on the screen (the moment the slides move).
        """

        self.view.do_animation_card_content(instance_carousel, offset_value)
Атрибут self.view, как вы уже поняли, это объект класса представления. Теперь в правиле представления SliderMenuScreen в файле View.SliderMenuScreen.slider_menu_screen.kv присвоим событию on_slide_progress метод on_slide_progress, который мы только что создали в классе контроллера:
<SliderMenuScreenView>

    MDCarousel:
        id: carousel
        on_slide_progress: root.controller.on_slide_progress(*args)
Идентификатор root в kv файлах всегда ссылается на свой базовый Python класс. Здесь базовый Python класс для правила SliderMenuScreenView это View.SliderMenuScreen.slider_menu_screen.SliderMenuScreenView. Добавим в этот класс новый метод do_animation_card_content, который вызывается из класса контроллера и два новый поля — parallax_step (значение сдвига фонового изображения для слайда) и внутренний для поиска направления слайда — _cursor_pos_x. Также определим метод get_direction_swipe, который будет возвращать строку с направлением свайпа слайда («left/right»):
class SliderMenuScreenView(MDScreen, Observer):
    # The value to shift the background image for the slide.
    parallax_step = NumericProperty(50)

    _cursor_pos_x = 0

    def on_slide_progress(self, instance_carousel, offset_value):
        """
        Called when the user swipes on the screen (the moment the slides move).
        """

    def get_direction_swipe(self, offset_value):
        if self._cursor_pos_x > offset_value:
            direction = "left"
        else:
            direction = "right"
        return direction
Передадим классу слайда объект представления, чтобы мы могли иметь доступ к свойству parallax_step и объекту MDCarousel в правиле PizzaCard в файле View.SliderMenuScreen.components.card.card.kv:
<PizzaCard>
    size_hint: .9, .95
    pos_hint: {"center_x": .5, "center_y": .5}
    radius: 20
    elevation: 24

    MDRelativeLayout:

        FitImage:
            id: image_bg
            source: root.path_to_bg_image
            size_hint: None, .8
            x: -root.view.parallax_step
            y: root.height - self.height
            width:
                root.width + \
                root.view.parallax_step * len(root.view.ids.carousel.slides)
Из нового: мы увеличили ширину фонового изображения слайда (умножили значение сдвига фонового изображения на количество слайдов) и сдвинули фоновое изображение на 50 пикселей влево (тоже самое значение parallax_step):
Теперь в базовом Python классе PizzaCard создадим поле view — объект представления экрана SliderMenuScreenView:
from kivy.properties import ObjectProperty


class PizzaCard(MDCard):
    # View.SliderMenuScreen.slider_menu_screen.SliderMenuScreenView class
    view = ObjectProperty()
При создании слайдов в методе generate_and_added_slides_to_carousel в классе представления SliderMenuScreenView передам классу PizzaCard аргумент view:
class SliderMenuScreenView(MDScreen, Observer):
    def generate_and_added_slides_to_carousel(self):
        for pizza_name in self.model.pizza_description.keys():
            card = PizzaCard(
                path_to_bg_image=os.path.join(
                    "assets", "images", f"{pizza_name}-bg.png"
                ),
                view=self,
            )
            self.ids.carousel.add_widget(card)
Уже можно добавить код в метод do_animation_card_content класса представления SliderMenuScreenView, который будет управлять parallax эффектом:
class SliderMenuScreenView(MDScreen, Observer):
    def do_animation_card_content(self, instance_carousel, offset_value):
        direction = self.get_direction_swipe(offset_value)
        self._cursor_pos_x = offset_value
        offset_value = max(min(abs(offset_value) / Window.width, 1), 0)

        for instance_slide in [
            instance_carousel.current_slide,
            instance_carousel.next_slide,
            instance_carousel.previous_slide
        ]:
            if instance_slide:
                if direction == "left":
                    instance_slide.ids.image_bg.x -= offset_value
                elif direction == "right":
                    instance_slide.ids.image_bg.x += offset_value
Вычисляем направление свайпа, offset_value значение сдвига слайда (от 0 до 1) и, в зависимости от направления свайпа делаем инкремент/декремент для позиции фонового изображения по оси x проходя в цикле по предыдущему/текущему/следующему слайдам. Получается не очень:

Это потому, что нам еще нужно унаследовать класс трафарета (kivymd.uix.templates.StencilWidget) для класса PizzaCard:
from kivymd.uix.templates import StencilWidget


class PizzaCard(MDCard, StencilWidget):
    [...]
Уже лучше:
На текущий момент модель, представление, контроллер и компонент слайда имеют следующий код:
Модель
import json
from pathlib import Path

BASE_DIR = Path(__file__).resolve().parent.parent
DATA_DIR = BASE_DIR.joinpath("assets", "data")


class SliderMenuScreenModel:
    def __init__(self):
        self.pizza_description = {}
        path_to_pizza_description = DATA_DIR.joinpath(
            DATA_DIR, "pizza-description.json"
        )
        if path_to_pizza_description.exists():
            with open(path_to_pizza_description) as json_file:
                self.pizza_description = json.loads(json_file.read())
        self._observers = []

    def notify_observers(self):
        for observer in self._observers:
            observer.model_is_changed()

    def add_observer(self, observer):
        self._observers.append(observer)

    def remove_observer(self, observer):
        self._observers.remove(observer)
Представление
import os

from kivy.core.window import Window
from kivy.properties import ObjectProperty, NumericProperty

from kivymd.uix.screen import MDScreen

from Utility.observer import Observer
from View.SliderMenuScreen.components import PizzaCard


class SliderMenuScreenView(MDScreen, Observer):
    controller = ObjectProperty()
    model = ObjectProperty()
    manager_screens = ObjectProperty()
    parallax_step = NumericProperty(50)

    _cursor_pos_x = 0

    def __init__(self, **kw):
        super().__init__(**kw)
        self.model.add_observer(self)

    def on_enter(self):
        self.ids.carousel.clear_widgets()
        self.generate_and_added_slides_to_carousel()

    def generate_and_added_slides_to_carousel(self):
        for pizza_name in self.model.pizza_description.keys():
            card = PizzaCard(
                path_to_bg_image=os.path.join(
                    "assets", "images", f"{pizza_name}-bg.png"
                ),
                view=self,
            )
            self.ids.carousel.add_widget(card)

    def do_animation_card_content(self, instance_carousel, offset_value):
        direction = self.get_direction_swipe(offset_value)
        self._cursor_pos_x = offset_value
        offset_value = max(min(abs(offset_value) / Window.width, 1), 0)

        for instance_slide in [
            instance_carousel.current_slide,
            instance_carousel.next_slide,
            instance_carousel.previous_slide
        ]:
            if instance_slide:
                if direction == "left":
                    instance_slide.ids.image_bg.x -= offset_value
                elif direction == "right":
                    instance_slide.ids.image_bg.x += offset_value

    def get_direction_swipe(self, offset_value):
        if self._cursor_pos_x > offset_value:
            direction = "left"
        else:
            direction = "right"
        return direction

    def model_is_changed(self):
        pass
Контролер
from View.SliderMenuScreen.slider_menu_screen import SliderMenuScreenView


class SliderMenuScreenController:
    def __init__(self, model):
        self.model = model
        self.view = SliderMenuScreenView(controller=self, model=self.model)

    def on_slide_progress(self, instance_carousel, offset_value):
        self.view.do_animation_card_content(instance_carousel, offset_value)

    def get_view(self):
        return self.view
Слайд
from kivy.properties import StringProperty, ObjectProperty

from kivymd.uix.card import MDCard
from kivymd.uix.templates import StencilWidget


class PizzaCard(MDCard, StencilWidget):
    path_to_bg_image = StringProperty()
    view = ObjectProperty()
<PizzaCard>
size_hint: .9, .95
pos_hint: {"center_x": .5, "center_y": .5}
radius: 20
elevation: 24
MDRelativeLayout:
FitImage:
id: image_bg
source: root.path_to_bg_image
size_hint: None, .8
x: -root.view.parallax_step
y: root.height - self.height
width:
root.width + \
root.view.parallax_step * len(root.view.ids.carousel.slides)Ну и последнее, что нам осталось сделать, — добавить в слайд название и описание сортов и изображения пиццы:

Здесь уже все просто. Мы добавляем виджет для изображения пиццы, виджет для подписи сортов пиццы в уже написанное нами правило PizzaCard и изменяем свойства этих виджетов (позицию по оси x для меток и значения scale и angle,масштаб и вращение, для изображения) в том же методе класса представления, который управляет parallax эффектом. Для начала создадим новый класс PizzaImage и одноименное правило для изображения пиццы в модуле View/SliderMenuScreen/components/card/card.py и файле View/SliderMenuScreen/components/card/card.kv:
from kivy.properties import StringProperty, NumericProperty
from kivy.uix.image import Image
from kivymd.uix.card import MDCard
from kivymd.uix.templates import StencilWidget, ScaleWidget, RotateWidget
class PizzaImage(Image, ScaleWidget, RotateWidget):
"""The class implements the pizza image in the slide card."""
angle = NumericProperty(-45)
scale = NumericProperty(1)
class PizzaCard(MDCard, StencilWidget):
pizza_image = StringProperty()
pizza_name = StringProperty()
pizza_description = StringProperty()
pizza_cost = StringProperty()Помимо класса Image, мы унаследовали класс PizzaImage от классов ScaleWidge и RotateWidget, с помощью которых мы будем управлять вращением и масштабом изображения пиццы.
<PizzaImage>
scale_value_x: self.scale
scale_value_y: self.scale
rotate_value_angle: self.angle
rotate_value_axis: (0, 0, 1)Полный код правила с фоновым изображением слайда, изображением пиццы, метками сортов пиццы и кнопкой цены в файле View/SliderMenuScreen/components/card/card.kv:
<PizzaImage>
scale_value_x: self.scale
scale_value_y: self.scale
rotate_value_angle: self.angle
rotate_value_axis: (0, 0, 1)
<PizzaCard>
    size_hint: .9, .95
    pos_hint: {"center_x": .5, "center_y": .5}
    radius: 20
    elevation: 24

    MDRelativeLayout:

        FitImage:
            id: image_bg
            source: root.path_to_bg_image
            size_hint: None, .8
            x: -root.view.parallax_step
            y: root.height - self.height
            width:
                root.width + \
                root.view.parallax_step * len(root.view.ids.carousel.slides)
PizzaImage:
id: pizza_image
source: root.pizza_image
size_hint: None, None
size: root.width / 1.2, root.width / 1.2
pos_hint: {"center_x": .5}
y: image_bg.y - dp(24)
MDLabel:
id: pizza_name
text: root.pizza_name
bold: True
adaptive_size: True
font_style: "H4"
font_name: "assets/font/hot-pizza.ttf"
color: 1, 1, 1, 1
x: dp(20)
y: root.height - self.height - dp(20)
MDLabel:
text: root.pizza_description
adaptive_size: True
text_size: root.width - (root.width * dp(30) / 100), None
color: 1, 1, 1, 1
font_name: "assets/font/hot-pizza.ttf"
x: pizza_name.x
y: pizza_name.y - self.height - dp(20)
MDRoundFlatButton:
text: root.pizza_cost
size_hint: .3, .065
pos_hint: {"center_x": .5}
y: "18dp"
line_width: 2
font_name: "assets/font/hot-pizza.ttf"
font_size: "24sp"Если более наглядно, то это выглядит следующим образом:
Поскольку мы добавили новые поля в класс PizzaCard для изображения пиццы, меток и пр., нам нужно обновить метод generate_and_added_slides_to_carousel в классе представления:
class SliderMenuScreenView(MDScreen, Observer):
def generate_and_added_slides_to_carousel(self):
for pizza_name in self.model.pizza_description.keys():
pizza_name = pizza_name.lower()
scale = 1 if pizza_name == "mexican" else 2
card = PizzaCard(
path_to_bg_image=os.path.join(
"assets", "images", f"{pizza_name}-bg.png"
),
pizza_name=pizza_name.capitalize(),
pizza_description=self.model.pizza_description[pizza_name.capitalize()][
0
],
pizza_cost=self.model.pizza_description[pizza_name.capitalize()][1],
pizza_image=os.path.join("assets", "images", f"{pizza_name}.png"),
view=self,
)
card.ids.pizza_image.scale = scale
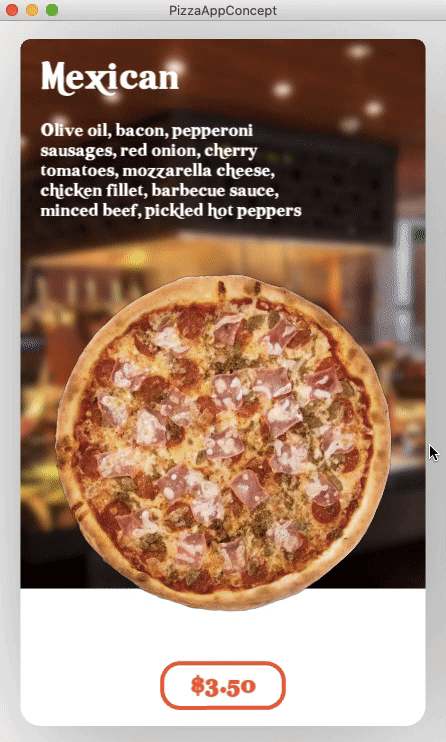
self.ids.carousel.add_widget(card)На первом слайде с сортом пиццы Mexican изображению пиццы мы дали масштаб 1, остальным слайдам задали масштаб равным 2. Так что при запуске приложения получим следующую картину:
Анимация изображения пиццы и меток текста проста: для предыдущего/текущего/следующего слайдов в каждом направлении свайпа («right/left«) мы делаем инкремент/декремент значения offset_value для таких свойств как масштаб изображения пиццы, его вращение, положение метки текста по оси x:
# Current slide.
instance_carousel.current_slide.ids.image_bg.width += offset_value
instance_carousel.current_slide.ids.pizza_image.scale = 1 - offset_value
instance_carousel.current_slide.ids.pizza_image.angle += offset_value
instance_carousel.current_slide.ids.pizza_name.x = (
    self.width - abs(progress_value - self.width) + dp(20)
)
После этих вычислений метод do_animation_card_content в классе представления становится немного раздутым:
    def do_animation_card_content(self, instance_carousel, offset_value):
        direction = self.get_direction_swipe(offset_value)
        self._cursor_pos_x = offset_value
        progress_value = offset_value
        offset_value = max(min(abs(offset_value) / Window.width, 1), 0)

        for instance_slide in [
            instance_carousel.current_slide,
            instance_carousel.next_slide,
            instance_carousel.previous_slide,
        ]:
            if instance_slide:
                if direction == "left":
                    instance_slide.ids.image_bg.x -= offset_value
                elif direction == "right":
                    instance_slide.ids.image_bg.x += offset_value

        if direction == "left":
            # Current slide.
            instance_carousel.current_slide.ids.image_bg.width += offset_value
            instance_carousel.current_slide.ids.pizza_image.scale = 1 - offset_value
            instance_carousel.current_slide.ids.pizza_image.angle += offset_value
            instance_carousel.current_slide.ids.pizza_name.x = (
                self.width - abs(progress_value - self.width) + dp(20)
            )
            # Next slide.
            if instance_carousel.next_slide:
                instance_carousel.next_slide.ids.image_bg.width += offset_value
                instance_carousel.next_slide.ids.pizza_image.scale = 2 - offset_value
                instance_carousel.next_slide.ids.pizza_image.angle += offset_value
                instance_carousel.next_slide.ids.pizza_name.x = (
                    self.width - abs(progress_value) + dp(20)
                )
            # Previous slide.
            if instance_carousel.previous_slide:
                instance_carousel.previous_slide.ids.image_bg.width += offset_value
                instance_carousel.previous_slide.ids.pizza_image.scale = 2 - offset_value
                instance_carousel.previous_slide.ids.pizza_image.angle += offset_value
                instance_carousel.previous_slide.ids.pizza_name.x = dp(20) - abs(progress_value)
        elif direction == "right":
            # Current slide.
            instance_carousel.current_slide.ids.image_bg.width -= offset_value
            instance_carousel.current_slide.ids.pizza_image.scale = 1 - offset_value
            instance_carousel.current_slide.ids.pizza_image.angle -= offset_value
            instance_carousel.current_slide.ids.pizza_name.x = (
                self.width - abs(progress_value - self.width) + dp(20)
            )
            # Next slide.
            if instance_carousel.next_slide:
                instance_carousel.next_slide.ids.image_bg.width -= offset_value
                instance_carousel.next_slide.ids.pizza_image.scale = 2 - offset_value
                instance_carousel.next_slide.ids.pizza_image.angle -= offset_value
            # Previous slide.
            if instance_carousel.previous_slide:
                instance_carousel.previous_slide.ids.image_bg.width -= offset_value
                instance_carousel.previous_slide.ids.pizza_image.scale = 2 - offset_value
                instance_carousel.previous_slide.ids.pizza_image.angle -= offset_value
                instance_carousel.previous_slide.ids.pizza_name.x = -(
                    self.width - (progress_value + dp(20))
                )
В методе явно прослеживаются однотипные вычисления и, скорее всего, все эти вычисления можно ужать до одного цикла, но мне уже было лень. Статья переписывалась два раза с нуля после того, как новый редактор Хабра вдруг показал мне пустой экран после нажатия кнопки «Вы хотите восстановить старые изменения». Я уже молчу про добавление изображений, которые загружаются только спустя десять попыток… Но это уже другая статья. После запуска приложения мы наконец-то получаем долгожданный эффект:
P.S.
Видео было залито несколько ранее, чем вышла данная статья, и parallax эффекта для фонового изображения на нем нет. И, конечно, в статье не раскрыто полностью использование шаблона MVC, но такая цель и не преследовалась. Более приближенный к реальности шаблон MVC для Kivy доступен в этом репозитории. До новых встреч!
KivyMD 1.1.1
![]()
KivyMD is a collection of Material Design compliant widgets for use with
Kivy, a framework for cross-platform, touch-enabled
graphical applications.
The project’s goal is to approximate Google’s
Material Design spec as close as
possible without sacrificing ease of use. This library is a fork of the
KivyMD project. We found the strength and
brought this project to a new level.
Join the project! Just fork the project, branch out and submit a pull request
when your patch is ready. If any changes are necessary, we’ll guide you through
the steps that need to be done via PR comments or access to your for may be
requested to outright submit them.
If you wish to become a project developer (permission to create branches on the
project without forking for easier collaboration), have at least one PR
approved and ask for it. If you contribute regularly to the project the role
may be offered to you without asking too.

![]()
![]()
Installation
pip install kivymd==1.1.1
Dependencies:
- Kivy >= 2.2.0 (Installation)
- Python 3.7+
- Pillow
- MaterialColor
How to install
Command above will install latest release version of KivyMD from
PyPI.
If you want to install development version from
master
branch, you should specify link to zip archive:
pip install https://github.com/kivymd/KivyMD/archive/master.zip
Tip: Replace master.zip with <commit hash>.zip (eg 51b8ef0.zip) to
download KivyMD from specific commit.
Also you can install manually from sources. Just clone the project and run pip:
git clone https://github.com/kivymd/KivyMD.git --depth 1
cd KivyMD
pip install .
Speed Tip: If you don’t need full commit history (about 1.14 GiB), you can
use a shallow clone (git clone https://github.com/kivymd/KivyMD.git --depth 1)
to save time. If you need full commit history, then remove --depth 1.
How to fix a shader bug on an android device
Use Kivy from master branch or Kivy >= 2.2.0 and KivyMD (from master branch):
pip install https://github.com/kivy/kivy/archive/master.zip
pip install https://github.com/kivymd/KivyMD/archive/master.zip
And use with Buildozer:
requirements = kivy==master, https://github.com/kivymd/KivyMD/archive/master.zip
How to use with Buildozer
requirements = kivy==2.1.0, kivymd==1.1.1
This will download latest release version of KivyMD from PyPI.
If you want to use development version from master
branch, you should specify link to zip archive:
requirements = kivy==2.1.0, https://github.com/kivymd/KivyMD/archive/master.zip
Do not forget to run buildozer android clean or remove .buildozer directory
before building if version was updated (Buildozer doesn’t update already
downloaded packages).
On Linux
- Use Buildozer directly
or via Docker.
On Windows 10
- Install Ubuntu WSL and follow Linux steps.
Build automatically via GitHub Actions
- Use ArtemSBulgakov/buildozer-action@v1
to build your packages automatically on push or pull request. - See full workflow example.
How to use with kivy-ios
toolchain build python3 kivy pillow
toolchain pip install --no-deps kivymd
Documentation
- See documentation at https://kivymd.readthedocs.io
- Wiki with examples of using KivyMD widgets: https://github.com/kivymd/KivyMD/wiki
Demos

Kitchen sink app demonstrates every KivyMD widget.
You can see how to use widget in code of app.
Comparison of Flutter & KivyMD
| Sky View Concept | Healthy Food Delivery |
|---|---|
 |
 |
| Asics Shoes Concept | Facebook Desktop Redesign |
 |
 |
Use MVC and Hot Reload

Support
If you need assistance or you have a question, you can ask for help on our mailing list:
- Discord server: https://discord.gg/wu3qBST (English #support, Russian #ru-support)
- StackOverflow tag: kivymd
- Email: KivyMD-library@yandex.com
Settings
Syntax highlighting and auto-completion for Kivy/KivyMD .kv files in PyCharm/Intellij IDEA
Promo Video

Contributing
We always welcome your Bug reports,
Feature requests
and Pull requests!
Check out CONTRIBUTING.md
and feel free to improve KivyMD.
Setup environment
We recommend you to use PyCharm to work with KivyMD code. Install
Kivy and
development dependencies to your virtual environment:
pip install -e .[dev,docs]
pre-commit install
Format all files and run tests:
pre-commit run --all-files
pytest kivymd/tests --timeout=600 --cov=kivymd --cov-report=term
pre-commit will format modified files with Black and sort imports with isort.
Sister projects
![]()
KivyMD Extensions
Additional extensions for the KivyMD library.
https://github.com/kivymd-extensions
![]()
KivyMDBuilder
Build apps visually.
https://github.com/kivymd/KivyMDBuilder
License
- KivyMD is released under the terms of the
MIT License,
same as Kivy. - Roboto font
is licensed and distributed under the terms of the
Apache License, Version 2.0. - Iconic font by the
Material Design Icons community covered by
SIL Open Font License 1.1
Contributors
KivyMD Team
They spent a lot of time to improve KivyMD.
- Yuri Ivanov @HeaTTheatR — Core developer
- Artem Bulgakov @ArtemSBulgakov — Technical administrator, contributor
- Andrés Rodríguez @mixedCase — First author of KivyMD project, contributor
Code Contributors
This project exists thanks to all the people who contribute.
How to contribute
Financial Contributors
Become a financial contributor
on OpenCollective and help us sustain our community.
Gold Sponsors
Become a Gold Sponsor
and get your logo on our Readme with a link to your website.

Backers
Become a Backer if you want to help develop this project.
Table Of Contents
- Installing Kivy
- Using pip
- Setup terminal and pip
- Create virtual environment
- Install Kivy
- Pre-compiled wheels
- From source
- Pre-release, pre-compiled wheels
- Development install
- Checking the demo
- Installation using Conda
- Installing Kivy’s dependencies
- Python glossary
- Installing Python
- How to use the command line
- What is pip and what are wheels
- What are nightly wheels
- Using pip
Installation for Kivy version 2.2.1. Read the changelog here.
For other Kivy versions, select the documentation from the dropdown on the top left.
Kivy 2.2.1 officially supports Python versions 3.7 — 3.11.
|
|
Platform |
Installation |
Packaging |
|---|---|---|---|
|
|
Windows |
pip |
PyInstaller |
|
|
macOS |
pip, Kivy.app |
Kivy.app, PyInstaller |
|
|
Linux |
pip, PPA |
— |
|
|
*BSD (FreeBSD,..) |
pip |
— |
|
|
RPi |
pip |
— |
|
|
Android |
python-for-android |
python-for-android |
|
|
iOS |
kivy-ios |
kivy-ios |
|
|
Anaconda |
conda |
— |


Using pip
The easiest way to install Kivy is with pip, which installs Kivy using either a
pre-compiled wheel, if available, otherwise from source (see below).
Kivy provides pre-compiled wheels for the supported Python
versions on Windows, macOS, Linux, and RPi.
If no wheels are available pip will build the package from sources (i.e. on *BSD).
Alternatively, installing from source is required for newer Python versions not listed
above or if the wheels do not work or fail to run properly.
On RPi, when using a 32 bit OS, wheels are provided for Python 3.7 (Raspberry Pi OS Buster) and Python 3.9 (Raspberry Pi OS Bullseye),
via the PiWheels project. For other Python versions, on 32 bit OSes, you will need to
install from source.
Setup terminal and pip
Before Kivy can be installed, Python and pip needs to be pre-installed.
Then, start a new terminal that has
Python available. In the terminal, update pip and other installation
dependencies so you have the latest version as follows (for linux users you may have to
substitute python3 instead of python and also add a --user flag in the
subsequent commands outside the virtual environment):
python -m pip install --upgrade pip setuptools virtualenv
Create virtual environment
Create a new virtual environment
for your Kivy project. A virtual environment will prevent possible installation conflicts
with other Python versions and packages. It’s optional but strongly recommended:
-
Create the virtual environment named
kivy_venvin your current directory:python -m virtualenv kivy_venv
-
Activate the virtual environment. You will have to do this step from the current directory
every time you start a new terminal. This sets up the environment so the newkivy_venv
Python is used.For Windows default CMD, in the command line do:
kivy_venv\Scripts\activate
If you are in a bash terminal on Windows, instead do:
source kivy_venv/Scripts/activate
If you are in linux or macOS, instead do:
source kivy_venv/bin/activate
Your terminal should now preface the path with something like (kivy_venv), indicating that
the kivy_venv environment is active. If it doesn’t say that, the virtual environment
is not active and the following won’t work.
Install Kivy
Finally, install Kivy using one of the following options:
Pre-compiled wheels
The simplest is to install the current stable version of kivy and optionally kivy_examples
from the kivy-team provided PyPi wheels. Simply do:
python -m pip install "kivy[base]" kivy_examples
This also installs the minimum dependencies of Kivy. To additionally install Kivy with
audio/video support, install either kivy[base,media] or kivy[full].
See Kivy’s dependencies for the list of selectors.
From source
If a wheel is not available or is not working, Kivy can be installed from source
with some additional steps. Installing from source means that Kivy will be installed
from source code and compiled directly on your system.
First install the additional system dependencies listed for each platform:
Windows, macOS,
Linux, *BSD,
RPi
Note
In past, for macOS, Linux and BSD Kivy required the installation of the SDL dependencies from package
managers (e.g. apt or brew). However, this is no longer officially supported as the version
of SDL provided by the package managers is often outdated and may not work with Kivy as we
try to keep up with the latest SDL versions in order to support the latest features and bugfixes.
You can still install the SDL dependencies from package managers if you wish, but we no longer
offer support for this.
Instead, we recommend installing the SDL dependencies from source. This is the same process
our CI uses to build the wheels. The SDL dependencies are built from source and installed into a
specific directory.
With all the build tools installed, you can now install the SDL dependencies from source for SDL support
(this is not needed on Windows as we provide pre-built SDL dependencies for Windows)
In order to do so, we provide a script that will download and build the SDL dependencies
from source. This script is located in the tools directory of the Kivy repository.
Create a directory to store the self-built dependencies and change into it:
mkdir kivy-deps-build && cd kivy-deps-build
Then download the build tool script, according to your platform:
On macOS:
curl -O https://raw.githubusercontent.com/kivy/kivy/master/tools/build_macos_dependencies.sh -o build_kivy_deps.sh
On Linux:
curl -O https://raw.githubusercontent.com/kivy/kivy/master/tools/build_linux_dependencies.sh -o build_kivy_deps.sh
Make the script executable:
chmod +x build_kivy_deps.sh
Finally, run the script:
The script will download and build the SDL dependencies from source. It will also install
the dependencies into a directory named kivy-dependencies. This directory will be used
by Kivy to build and install Kivy from source with SDL support.
Kivy will need to know where the SDL dependencies are installed. To do so, you must set
the KIVY_DEPS_ROOT environment variable to the path of the kivy-dependencies directory.
For example, if you are in the kivy-deps-build directory, you can set the environment
variable with:
export KIVY_DEPS_ROOT=$(pwd)/kivy-dependencies
With the dependencies installed, and KIVY_DEPS_ROOT set you can now install Kivy into the virtual environment.
To install the stable version of Kivy, from the terminal do:
python -m pip install "kivy[base]" kivy_examples --no-binary kivy
To install the latest cutting-edge Kivy from master, instead do:
python -m pip install "kivy[base] @ https://github.com/kivy/kivy/archive/master.zip"
If you want to install Kivy from a different branch, from your forked repository, or
from a specific commit (e.g. to test a fix from a user’s PR) replace the corresponding
components of the url.
For example to install from the stable branch, the url becomes
https://github.com/kivy/kivy/archive/stable.zip. Or to try a specific commit hash, use e.g.
https://github.com/kivy/kivy/archive/3d3e45dda146fef3f4758aea548da199e10eb382.zip
Pre-release, pre-compiled wheels
To install a pre-compiled wheel of the last pre-release version of Kivy, instead of the
current stable version, add the --pre flag to pip:
python -m pip install --pre "kivy[base]" kivy_examples
This will only install a development version of Kivy if one was released to
PyPi. Instead, one can also install the
latest cutting-edge Nightly wheels from the Kivy server with:
python -m pip install kivy --pre --no-deps --index-url  https://kivy.org/downloads/simple/
python -m pip install "kivy[base]" --pre --extra-index-url https://kivy.org/downloads/simple/
It is done in two steps, because otherwise pip may ignore the wheels on the server and install
an older pre-release version from PyPi.
Development install
Note
We suggest to select master or relevant branch/version of doc from top left,
ensuring correct version/branch of kivy git repository you are working with.
If you want to edit Kivy before installing it, or if you want to try fixing some Kivy issue
and submit a pull request with the fix, you will need to first download the Kivy source code.
The following steps assumes git is pre-installed and available in the terminal.
The typical process is to clone Kivy locally with:
git clone https://github.com/kivy/kivy.git
This creates a kivy named folder in your current path. Next, follow the same steps of the
Installing from source above, but instead of installing Kivy via a
distribution package or zip file, install it as an
editable install.
In order to do so, first change into the Kivy folder you just cloned::
and then install Kivy as an editable install:
cd kivy
python -m pip install -e ".[dev,full]"
Now, you can use git to change branches, edit the code and submit a PR.
Remember to compile Kivy each time you change cython files as follows:
python setup.py build_ext --inplace
Or if using bash or on Linux, simply do:
to recompile.
To run the test suite, simply run:
or in bash or Linux:
On *BSD Unix remember to use gmake (GNU) in place of make (BSD).
Checking the demo
Kivy should now be installed. You should be able to import kivy in Python or,
if you installed the Kivy examples, run the demo.
on Windows:
python kivy_venv\share\kivy-examples\demo\showcase\main.py
in bash, Linux and macOS:
python kivy_venv/share/kivy-examples/demo/showcase/main.py
on *BSD Unix:
python3 kivy_venv/share/kivy-examples/demo/showcase/main.py
The exact path to the Kivy examples directory is also stored in kivy.kivy_examples_dir.
The 3d monkey demo under kivy-examples/3Drendering/main.py is also fun to see.
Installation using Conda
If you use Anaconda, you can
install Kivy with its package manager Conda using:
conda install kivy -c conda-forge
Do not use pip to install kivy if you’re using Anaconda, unless you’re installing from source.
Installing Kivy’s dependencies
Kivy supports one or more backends for its core providers. E.g. it supports glew, angle,
and sdl2 for the graphics backend on Windows. For each category (window, graphics, video,
audio, etc.), at least one backend must be installed to be able to use the category.
To facilitate easy installation, we provide extras_require
groups
that will install selected backends to ensure a working Kivy installation. So one can install
Kivy more simply with e.g.«pip install “kivy[base,media,tuio]”«. The full list of selectors and
the packages they install is listed in
setup.py. The exact packages in each selector
may change in the future, but the overall goal of each selector will remain as described below.
We offer the following selectors:
- base: The minimum typical dependencies required for Kivy to run,
not including video/audio.
- media: Only the video/audio dependencies required for Kivy to
be able to play media.
- full: All the typical dependencies required for Kivy to run, including video/audio and
most optional dependencies.
- dev: All the additional dependencies required to run Kivy in development mode
(i.e. it doesn’t include the base/media/full dependencies). E.g. any headers required for
compilation, and all dependencies required to run the tests and creating the docs.tuio: The dependencies required to make TUIO work (primarily oscpy).
The following selectors install backends packaged as wheels by kivy under the Kivy_deps namespace.
They are typically released and versioned to match specific Kivy versions, so we provide selectors
to facilitate installation (i.e. instead of having to do pip install kivy kivy_deps.sdl2==x.y.z,
you can now do pip install "kivy[sdl2]" to automatically install the correct sdl2 for the Kivy
version).
- gstreamer: The gstreamer video/audio backend, if it’s available
(currently only on Windows)
- angle: A alternate OpenGL backend, if it’s available
(currently only on Windows)
- sdl2: The window/image/audio backend, if it’s available (currently only on Windows,
on macOS, Linux and *BSD Unix is already included in the main Kivy wheel).
glew: A alternate OpenGL backend, if it’s available (currently only on Windows)
Following are the kivy_deps dependency wheels:
-
gstreamer (optional)
kivy_deps.gstreameris an optional dependency which is only needed for audio/video support.
We only provide it on Windows, for other platforms it must be installed independently.
Alternatively, use ffpyplayer instead. -
glew and/or
anglekivy_deps.glewandkivy_deps.angleare for OpenGL.
You can install both, that is no problem. It is only available on Windows. On other
platforms it is not required externally.One can select which of these to use for OpenGL using the
KIVY_GL_BACKENDenvironment variable: By setting it toglew
(the default),angle_sdl2, orsdl2. Here,angle_sdl2is a substitute for
glewbut requireskivy_deps.sdl2be installed as well. -
sdl2
kivy_deps.sdl2is for window/images/audio and optionally OpenGL. It is only available on Windows
and is included in the main Kivy wheel for other platforms.
Python glossary
Here we explain how to install Python packages, how to use the command line and what wheels are.
Installing Python
Kivy is written in
Python
and as such, to use Kivy, you need an existing
installation of Python.
Multiple versions of Python can be installed side by side, but Kivy needs to
be installed as package under each Python version that you want to use Kivy in.
To install Python, see the instructions for each platform:
Windows, macOS,
Linux, RPi,
*BSD.
Once Python is installed, open the console and make sure
Python is available by typing python --version.
How to use the command line
To execute any of the pip or wheel commands given here, you need a command line (here also called console, terminal, shell or bash, where the last two refer to Linux / *BSD Unix style command lines) and Python must be on the PATH.
The default command line on Windows is the
command prompt, short cmd. The
quickest way to open it is to press Win+R on your keyboard.
In the window that opens, type cmd and then press enter.
Alternative Linux style command lines on Windows that we recommend are
Git for Windows or Mysys.
Note, the default Windows command line can still be used, even if a bash terminal is installed.
To temporarily add your Python installation to the PATH, simply open your command line and then use the cd command to change the current directory to where python is installed, e.g. cd C:\Python37.
If you have installed Python using the default options, then the path to Python will already be permanently on your PATH variable. There is an option in the installer which lets you do that, and it is enabled by default.
If however Python is not on your PATH, follow the these instructions to add it:
-
Instructions for the windows command line
-
Instructions for bash command lines
What is pip and what are wheels
In Python, packages such as Kivy can be installed with the python package
manager, named pip (“python install package”).
When installing from source, some packages, such as Kivy, require additional steps, like compilation.
Contrary, wheels (files with a .whl extension) are pre-built
distributions of a package that has already been compiled.
These wheels do not require additional steps when installing them.
When a wheel is available on pypi.org (“Python Package Index”) it can be installed with pip. For example when you execute python -m pip install kivy in a command line, this will automatically find the appropriate wheel on PyPI.
When downloading and installing a wheel directly, use the command
python -m pip install <wheel_file_name>, for example:
python -m pip install C:\Kivy-1.9.1.dev-cp27-none-win_amd64.whl
What are nightly wheels
Every day we create a snapshot wheel of the current development version of Kivy (‘nightly wheel’).
You can find the development version in the master branch of the
Kivy Github repository.
As opposed to the last stable release (which we discussed in the previous section), nightly
wheels contain all the latest changes to Kivy, including experimental fixes.
For installation instructions, see Pre-release, pre-compiled wheels.
Warning
Using the latest development version can be risky and you might encounter
issues during development. If you encounter any bugs, please report them.