JupyterLab can be installed using conda, mamba, pip, pipenv or docker.
Warning
New versions of JupyterLab may break backwards compatibility with extensions and other
Jupyter customizations. As noted in Backwards Compatibility, Versions and Breaking Changes, JupyterLab development and
release cycles follow semantic versioning, so we recommend planning your installation and
upgrade procedures to account for possible breaking changes that may disrupt your usage
of JupyterLab and any related tools that are critical to your workflows.
conda#
If you use conda, you can install it with:
conda install -c conda-forge jupyterlab
mamba#
If you use mamba, you can install it with:
mamba install -c conda-forge jupyterlab
pip#
If you use pip, you can install it with:
If you are using a macOS version that comes with Python 2, run pip3
instead of pip.
If installing using pip install --user, you must add the user-level
bin directory to your PATH environment variable in order to launch
jupyter lab. If you are using a Unix derivative (FreeBSD, GNU/Linux,
macOS), you can do this by running export PATH="$HOME/.local/bin:$PATH".
pipenv#
If you use pipenv, you can install it as:
pipenv install jupyterlab
pipenv shell
or from a git checkout:
pipenv install git+git://github.com/jupyterlab/jupyterlab.git#egg=jupyterlab
pipenv shell
When using pipenv, in order to launch jupyter lab, you must activate the project’s virtualenv.
For example, in the directory where pipenv’s Pipfile and Pipfile.lock live (i.e., where you ran the above commands):
Alternatively, you can run jupyter lab inside the virtualenv with
Docker#
If you have Docker installed, you can install and use JupyterLab by selecting one
of the many ready-to-run Docker images
maintained by the Jupyter Team. Follow the instructions in the Quick Start Guide
to deploy the chosen Docker image.
Ensure your docker command includes the -e JUPYTER_ENABLE_LAB=yes flag to ensure
JupyterLab is enabled in your container.
Usage with JupyterHub#
Read the details on our JupyterLab on JupyterHub documentation page.
Supported browsers#
The latest versions of the following browsers are currently known to work:
-
Firefox
-
Chrome
-
Safari
Earlier browser versions may also work, but come with no guarantees.
JupyterLab uses CSS Variables for styling, which is one reason for the
minimum versions listed above. IE 11+ or Edge 14 do not support
CSS Variables, and are not directly supported at this time.
A tool like postcss can be used to convert the CSS files in the
jupyterlab/build directory manually if desired.
Installation problems#
If your computer is behind corporate proxy or firewall,
you may encounter HTTP and SSL errors due to the proxy or firewall blocking connections to widely-used servers. For example, you might see this error if conda cannot connect to its own repositories:
CondaHTTPError: HTTP 000 CONNECTION FAILED for url <https://repo.anaconda.com/pkgs/main/win-64/current_repodata.json>
Here are some widely-used sites that host packages in the Python and JavaScript open-source ecosystems. Your network administrator may be able to allow http and https connections to these domains:
-
pypi.org
-
pythonhosted.org
-
continuum.io
-
anaconda.com
-
conda.io
-
github.com
-
githubusercontent.com
-
npmjs.com
-
yarnpkg.com
Alternatively, you can specify a proxy user (usually a domain user with password),
that is allowed to communicate via network. This can be easily achieved
by setting two common environment variables: HTTP_PROXY and HTTPS_PROXY.
These variables are automatically used by many open-source tools (like conda) if set correctly.
# For Windows
set HTTP_PROXY=http://USER:PWD@proxy.company.com:PORT
set HTTPS_PROXY=https://USER:PWD@proxy.company.com:PORT

# For Linux / MacOS
export HTTP_PROXY=http://USER:PWD@proxy.company.com:PORT
export HTTPS_PROXY=https://USER:PWD@proxy.company.com:PORT
In case you can communicate via HTTP, but installation with conda fails
on connectivity problems to HTTPS servers, you can disable using SSL for conda.
Warning
Disabling SSL in communication is generally not recommended and involves potential security risks.
# Configure npm to not use SSL
conda config --set ssl_verify False
You can do a similar thing for pip.
The approach here is to mark repository servers as trusted hosts,
which means SSL communication will not be required for downloading Python libraries.
# Install pandas (without SSL)
pip install --trusted-host pypi.org --trusted-host files.pythonhosted.org pandas
Using the tips from above, you can handle many network problems
related to installing Python libraries.
Many Jupyter extensions require having working npm and jlpm (alias for yarn) commands,
which is required for downloading useful Jupyter extensions or other JavaScript dependencies. If npm cannot connect to its own repositories, you might see an error like:
ValueError: "@jupyterlab/toc" is not a valid npm package
You can set the proxy or registry used for npm with the following commands.
# Set proxy for NPM
npm config set proxy http://USER:PWD@proxy.company.com:PORT
npm config set proxy https://USER:PWD@proxy.company.com:PORT

# Set default registry for NPM (optional, useful in case if common JavaScript libs cannot be found)
npm config set registry http://registry.npmjs.org/
jlpm config set registry https://registry.yarnpkg.com/
In case you can communicate via HTTP, but installation with npm fails
on connectivity problems to HTTPS servers, you can disable using SSL for npm.
Warning
Disabling SSL in communication is generally not recommended and involves potential security risk.
# Configure npm to not use SSL
npm set strict-ssl False
Project Jupyter’s tools are available for installation via the Python Package Index, the leading repository of software created for the Python programming language.
This page uses instructions with pip, the recommended installation tool for Python. If you require environment management as opposed to just installation, look into conda, mamba, pipenv, and Homebrew.
JupyterLab
Install JupyterLab with pip:
Note: If you install JupyterLab with conda or mamba, we recommend using the conda-forge channel.
Once installed, launch JupyterLab with:
Jupyter Notebook
Install the classic Jupyter Notebook with:
To run the notebook:
Voilà
Install Voilà with:
Once installed, launch Voilà with:
Homebrew
Homebrew is a package manager for macOS and Linux.
You can use it to install Jupyter by running:
Working with the ‘jupyter’ Notebook is familiar to everybody who is engaged in developing through Python. This is an ‘iPython’ console which is regarded as the best for carrying out data analysis and machine learning related work. The notebook provides easy code execution and displays various graphs and glyphs within the console. Also, it provides the provision to download Python packages within its console and allows users to carry out web scraping related activities. But, what if I tell you that there is more to it that is; there is one cooler version of this ‘jupyter’ that provides more no. of features than this obsolete one.
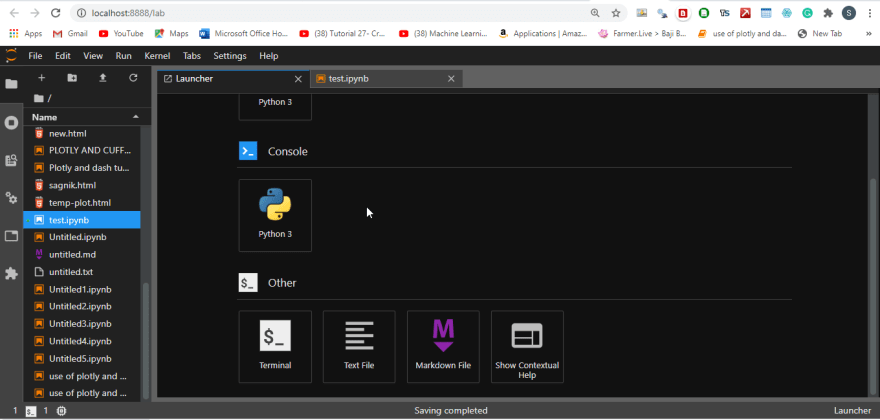
Yes, the name of this advanced jupyter is jupyter Lab. It is an extension to the normal jupyter Notebook as it allows users to work in multiple files. This can be elaborated as jupyter Lab provides much functionality that users can access at the same time while working with a notebook like opening the text editor that is provided within jupyter lab, opening Markdown editor, opening the command prompt, python console. This makes jupyter lab more robust and acceptable by Python developers out there. We can even replicate our present iPython notebook into many to view our work more easily.
All the work that we have done can either be saved to our local system or can be saved within the Jupyter lab. So, it acts as a vault in saving our work to access it in the future. Also, this lab comes with a provision to set different themes we like (Dark and White) and also increase and decrease the UI size as per our comfort. These things make this a powerful tool when it comes to performing data analytics related work as well as general Python related development.
So, how to download jupyter Lab for our Windows operating system and how to open the same??? The answer to this question is given below:
Pre Requisites
- Python
- Pip should be installed within the system.(mostly it will be installed while installing python)
- Good internet connection.
Installing Jupyter Lab via Python Through Terminal:
The installation steps of this tool are just like other packages that is can be installed through pip.
- Just open your terminal (if your using windows open cmd)
- Just type in the command prompt:
pip install jupyterlab
Enter fullscreen mode
Exit fullscreen mode
After the installation finishes type command within the command prompt and wait for the browser to open jupyter lab for you.
jupyter lab
   (or)
python  -m jupyterlab
Enter fullscreen mode
Exit fullscreen mode
We can install jupyterlab through anaconda, and desktop version also available.
click here to try the jupyterlab
Conclusion
We can conclude that Jupyter lab dominates over the normal Jupyter and one must prioritize this rather than going with the Jupyter installation..
Jupyter lab is an interactive development environment and the way forward for people using Jupyter notebook. It has become one of the most preferred ways to code in data science field and academia. Notebook cell-based structure was very convenient for doing data exploration, model building etc. but it was lagging in creating and running scripts or code from text files(.py, .R etc). Jupyter lab has removed these shortcomings and has added new useful features such as running code blocks from text files, edit and view popular data files, rearrange cells by dragging them etc. In this post, I will discuss how to install and configure it on windows so that it is more convenient to use.
Installing Jupyter Lab
Installing jupyter lab is very easy and might depend on how you have installed python. If you are using anaconda then most probably jupyter lab is already there. If not you can install it using the command:-
conda install -c conda-forge jupyterlab
If you are not using anaconda and have installed python separately, you can install it using
Pip install jupyter
Pip install jupyterlab
It is important to have Jupyter notebook installed before installing Jupyter Lab. The first command installs Jupyter notebook in your system. You can skip it if it is already installed. Now, Let’s launch Jupyter lab by typing jupyter lab in command prompt.

Changing default directory
By default, Jupyter lab set up c:/users/username as the default directory. As can be seen in the above picture, it will show all of the files in that folder which can make the whole setup very cluttered. We can change the default directory so that it is easier to manage projects. For changing it, we will need to first generate jupyter lab configuration file.
Jupyter notebook --generate-config
This will create a configuration file at c:/users/username/.jupyter/jupyter_notebook_config.py.
Now, we can edit default directory location in this configuration file by defining the value of #c.NotebookApp.notebook_dir = ”. You will need to uncomment this by removing # and store the path of default desired directory there. You should use double quotes if there is any space in the directory path.
After changing the directory, relaunch the jupyter lab again. You will notice that project view has fewer files and directory.

Running it in chrome application mode
We can use application mode of chrome browser to convert Jupyter Lab in a standalone desktop app. It is useful as it will remove all the unnecessary toolbars and UI and gives a feeling of native application or IDE rather than a website running on your browser.
There are two ways to do this. Either you can launch in this mode manually every time or we can save configuration for this in jupyter lab configuration file and make it as our default launch.
Let’s first do it manually:-
$ jupyter lab --no-browser
It will launch Jupyter Lab without any browser. You will need to copy the token from the command prompt. After this start chrome in application mode and paste above token by typing below command in windows search bar
Chrome.exe --app=copied token
We can also put these options in the configuration file and make it default launch by adding following in the notebook config file
c.NotebookApp.browser = "C:/Program Files (x86)/Google/Chrome/Application/chrome.exe --app=%s"
It will launch Jupyter Lab like a standalone desktop app

and
Changing theme and making a shortcut for it
Jupyter lab has two inbuilt theme light and dark. Light theme is also the default one and you can switch to dark one by going to setting in Jupyter lab and clicking on Jupyeterlab Dark.

Also, we can make a shortcut on our desktop to launch jupyter. Follow this path Right click on the desktop > New > Shortcut to create a shortcut link. It will open a window and will ask you to input location path. You will need to input jupyterlab.exe path here. It will be in your python installation folder > scripts folder.

Click on next and give any name you want to and finish. Now you can see this shortcut on your desktop and click on it will launch jupyter lab. If you have any icon file then you can also use that to set an icon for this application by giving the path of the icon file in properties options.
Jupyter Lab is becoming one of the most convenient tools for the data scientist. By converting and configuring it, it becomes more convenient and easier to work with. Considering that you will be spending most of your time on this tool, it is important to use the most useful and comfortable tool. You can also look into installing few useful extensions on it so to expand its utility.
You can also check this post to know about available Jupyter Lab shortcut and magic functions.
JupyterLab Desktop
JupyterLab Desktop is the cross-platform desktop application for JupyterLab. It is the quickest and easiest way to get started with Jupyter notebooks on your personal computer, with the flexibility for advanced use cases.

Installation
If you have an existing JupyterLab Desktop installation, please uninstall it first by following the uninstall instructions.
- Debian, Ubuntu Linux Installer
- Red Hat, Fedora, SUSE Linux Installer
- macOS Intel Installer, macOS Apple silicon Installer
- Windows Installer
Additionally, JupyterLab Desktop can be installed on Windows via winget: winget install jupyterlab.
Please check out the Python Environment Customization Guide if you plan to customize the Python environment to add new packages.
Launching JupyterLab Desktop
JupyterLab Desktop can be launched from the GUI of your operating system by clicking the application’s icon or by using jlab command from the command line. Double clicking .ipynb files is also supported and it will launch JupyterLab Desktop and load the notebook file.
JupyterLab Desktop sets File Browser’s root directory based on the launch method.
- If launched from the application icon on GUI or by using
jlabcommand without any arguments, then the default working directory is set as the root directory. The default working directory is user home directory but it can be customized from the Settings dialog. - If launched by double clicking
.ipynbfile orjlabcommand with a file path as the argument, then file’s parent directory is set as the root directory. Similarly, if a file is opened using theOpen...orOpen File...links in the Start section or by using drag & drop, then file’s parent directory is set as the root directory. - If
jlabcommand is used with a directory path as the argument or with the--working-dirargument then the directory in the argument is set as the root directory. Similarly, if a folder is opened using theOpen Folder...link in the Start section or by using drag & drop, then the opened directory is set as the root directory
Sessions and Projects
Sessions represent local project launches and connections to existing JupyterLab servers. Each JupyterLab UI window in the app is associated with a separate session and sessions can be restored with the same configuration later on.
Each launch of JupyterLab in a different working directory is a separate project and projects can have their own configuration such as Python environment and UI layout.
Session start options
You can start a new session by using the links at the Start section of the Welcome Page.

New notebook...creates a new notebook in the default working directory.New session...launches a new JupyterLab session in the default working directory.Open...starts a new JupyterLab session in the selected working directory. If files are chosen, selected files’ parent directory becomes the working directory and selected files are opened in the session. On Windows and LinuxOpen Folder...andOpen Files...options are presented as separate items.Connect...creates a session by connecting to an existing JupyterLab server running locally or remotely. Locally running JupyterLab servers are automatically detected and listed in the Connect dialog.
Similarly, CLI launches of the application, dropping files and folders, and double clicking to open files create new sessions as well.
Previously opened sessions are stored as part of application data and they are listed on Welcome Page. Clicking an item in the Recent sessions list restores the selected session.

jlab command-line launch examples
- Open directories using relative or absolute path
jlab .launch in current directoryjlab ../notebookslaunch with relative pathjlab /Users/username/notebookslaunch with absolute path
- Open notebooks and other files using relative or absolute path
jlab /Users/username/notebooks/test.ipynblaunch notebook with absolute pathjlab ../notebooks/test.ipynblaunch notebook with relative pathjlab ../test.pylaunch python file with relative path
- Open with a custom Python environment
jlab --python-path /Users/username/custom_env/bin/python ../notebooks/test.ipynblaunch notebook with custom Python environment
For additional CLI options run jlab --help in command line.
JupyterLab Extension support
JupyterLab Desktop currently supports user-friendly prebuilt extensions. Source extensions which require rebuilding are not supported.