This detailed step-by-step guide shows you how to install the latest Hadoop (v3.2.1) on Windows 10. It’s based on the previous articles I published with some updates to reflect the feedback collected from readers to make it easier for everyone to install.
Please follow all the instructions carefully. Once you complete the steps, you will have a shiny pseudo-distributed single node Hadoop to work with.
*The yellow elephant logo is a registered trademark of Apache Hadoop; the blue window logo is registered trademark of Microsoft.
References
Refer to the following articles if you prefer to install other versions of Hadoop or if you want to configure a multi-node cluster or using WSL.
- Install Hadoop 3.0.0 on Windows (Single Node)
- Configure Hadoop 3.1.0 in a Multi Node Cluster
- Install Hadoop 3.2.0 on Windows 10 using Windows Subsystem for Linux (WSL)
Required tools
Before you start, make sure you have these following tools enabled in Windows 10.
| Tool | Comments |
| PowerShell |
We will use this tool to download package. In my system, PowerShell version table is listed below: $PSversionTable
Name Value
---- -----
PSVersion 5.1.18362.145
PSEdition Desktop
PSCompatibleVersions {1.0, 2.0, 3.0, 4.0...}
BuildVersion 10.0.18362.145
CLRVersion 4.0.30319.42000
WSManStackVersion 3.0
PSRemotingProtocolVersion 2.3
SerializationVersion 1.1.0.1
|
| Git Bash or 7 Zip |
We will use Git Bash or 7 Zip to unzip Hadoop binary package. You can choose to install either tool or any other tool as long as it can unzip *.tar.gz files on Windows. |
| Command Prompt | We will use it to start Hadoop daemons and run some commands as part of the installation process. |
| Java JDK |
JDK is required to run Hadoop as the framework is built using Java. In my system, my JDK version is jdk1.8.0_161. Check out the supported JDK version on the following page. https://cwiki.apache.org/confluence/display/HADOOP/Hadoop+Java+Versions |
Now we will start the installation process.
Step 1 — Download Hadoop binary package
Select download mirror link
Go to download page of the official website:
Apache Download Mirrors — Hadoop 3.2.1
And then choose one of the mirror link. The page lists the mirrors closest to you based on your location. For me, I am choosing the following mirror link:
http://apache.mirror.digitalpacific.com.au/hadoop/common/hadoop-3.2.1/hadoop-3.2.1.tar.gz
info In the following sections, this URL will be used to download the package. Your URL might be different from mine and you can replace the link accordingly.
Download the package
info In this guide, I am installing Hadoop in folder big-data of my F drive (F:\big-data). If you prefer to install on another drive, please remember to change the path accordingly in the following command lines. This directory is also called destination directory in the following sections.
Open PowerShell and then run the following command lines one by one:
$dest_dir="F:\big-data"
$url = "http://apache.mirror.digitalpacific.com.au/hadoop/common/hadoop-3.2.1/hadoop-3.2.1.tar.gz"
$client = new-object System.Net.WebClient
$client.DownloadFile($url,$dest_dir+"\hadoop-3.2.1.tar.gz")
It may take a few minutes to download.
Once the download completes, you can verify it:
PS F:\big-data> cd $dest_dir
PS F:\big-data> ls


    Directory: F:\big-data


Mode                LastWriteTime         Length Name
----                -------------         ------ ----
-a----       18/01/2020  11:01 AM      359196911 hadoop-3.2.1.tar.gz


PS F:\big-data>
You can also directly download the package through your web browser and save it to the destination directory.
warning Please keep this PowerShell window open as we will use some variables in this session in the following steps. If you already closed it, it is okay, just remember to reinitialise the above variables: $client, $dest_dir.
Step 2 — Unpack the package
Now we need to unpack the downloaded package using GUI tool (like 7 Zip) or command line. For me, I will use git bash to unpack it.
Open git bash and change the directory to the destination folder:
cd F:/big-data
And then run the following command to unzip:
tar -xvzf hadoop-3.2.1.tar.gz
The command will take quite a few minutes as there are numerous files included and the latest version introduced many new features.
After the unzip command is completed, a new folder hadoop-3.2.1 is created under the destination folder.

info When running the command you will experience errors like the following:
tar: hadoop-3.2.1/lib/native/libhadoop.so: Cannot create symlink to ‘libhadoop.so.1.0.0’: No such file or directory
Please ignore it for now as those native libraries are for Linux/UNIX and we will create Windows native IO libraries in the following steps.
Step 3 — Install Hadoop native IO binary
Hadoop on Linux includes optional Native IO support. However Native IO is mandatory on Windows and without it you will not be able to get your installation working. The Windows native IO libraries are not included as part of Apache Hadoop release. Thus we need to build and install it.
I also published another article with very detailed steps about how to compile and build native Hadoop on Windows: Compile and Build Hadoop 3.2.1 on Windows 10 Guide.
The build may take about one hourand to save our time, we can just download the binary package from github.
warning These libraries are not signed and there is no guarantee that it is 100% safe. We use if purely for test&learn purpose.
Download all the files in the following location and save them to the bin folder under Hadoop folder. For my environment, the full path is: F:\big-data\hadoop-3.2.1\bin. Remember to change it to your own path accordingly.
https://github.com/cdarlint/winutils/tree/master/hadoop-3.2.1/bin
Alternatively, you can run the following commands in the previous PowerShell window to download:
$client.DownloadFile("https://github.com/cdarlint/winutils/raw/master/hadoop-3.2.1/bin/hadoop.dll",$dest_dir+"\hadoop-3.2.1\bin\"+"hadoop.dll")
$client.DownloadFile("https://github.com/cdarlint/winutils/raw/master/hadoop-3.2.1/bin/hadoop.exp",$dest_dir+"\hadoop-3.2.1\bin\"+"hadoop.exp")
$client.DownloadFile("https://github.com/cdarlint/winutils/raw/master/hadoop-3.2.1/bin/hadoop.lib",$dest_dir+"\hadoop-3.2.1\bin\"+"hadoop.lib")
$client.DownloadFile("https://github.com/cdarlint/winutils/raw/master/hadoop-3.2.1/bin/hadoop.pdb",$dest_dir+"\hadoop-3.2.1\bin\"+"hadoop.pdb")
$client.DownloadFile("https://github.com/cdarlint/winutils/raw/master/hadoop-3.2.1/bin/libwinutils.lib",$dest_dir+"\hadoop-3.2.1\bin\"+"libwinutils.lib")
$client.DownloadFile("https://github.com/cdarlint/winutils/raw/master/hadoop-3.2.1/bin/winutils.exe",$dest_dir+"\hadoop-3.2.1\bin\"+"winutils.exe")
$client.DownloadFile("https://github.com/cdarlint/winutils/raw/master/hadoop-3.2.1/bin/winutils.pdb",$dest_dir+"\hadoop-3.2.1\bin\"+"winutils.pdb")
After this, the bin folder looks like the following:
Step 4 — (Optional) Java JDK installation
Java JDK is required to run Hadoop. If you have not installed Java JDK please install it.
You can install JDK 8 from the following page:
https://www.oracle.com/technetwork/java/javase/downloads/jdk8-downloads-2133151.html
Once you complete the installation, please run the following command in PowerShell or Git Bash to verify:
$ java -version
java version "1.8.0_161"
Java(TM) SE Runtime Environment (build 1.8.0_161-b12)
Java HotSpot(TM) 64-Bit Server VM (build 25.161-b12, mixed mode)
If you got error about ‘cannot find java command or executable’. Don’t worry we will resolve this in the following step.
Step 5 — Configure environment variables
Now we’ve downloaded and unpacked all the artefacts we need to configure two important environment variables.
Configure JAVA_HOME environment variable
As mentioned earlier, Hadoop requires Java and we need to configure JAVA_HOME environment variable (though it is not mandatory but I recommend it).
First, we need to find out the location of Java SDK. In my system, the path is: D:\Java\jdk1.8.0_161.
Your location can be different depends on where you install your JDK.
And then run the following command in the previous PowerShell window:
SETX JAVA_HOME "D:\Java\jdk1.8.0_161"
Remember to quote the path especially if you have spaces in your JDK path.
infoYou can setup evironment variable at system by adding option /M however just in case you don’t have access to change system variables, you can just set it up at user level.
The output looks like the following:
Configure HADOOP_HOME environment variable
Similarly we need to create a new environment variable for HADOOP_HOME using the following command. The path should be your extracted Hadoop folder. For my environment it is: F:\big-data\hadoop-3.2.1.
If you used PowerShell to download and if the window is still open, you can simply run the following command:
SETX HADOOP_HOME $dest_dir+"/hadoop-3.2.1"
The output looks like the following screenshot:
Alternatively, you can specify the full path:
SETX HADOOP_HOME "F:\big-data\hadoop-3.2.1"
Now you can also verify the two environment variables in the system:
Configure PATH environment variable
Once we finish setting up the above two environment variables, we need to add the bin folders to the PATH environment variable.
If PATH environment exists in your system, you can also manually add the following two paths to it:
- %JAVA_HOME%/bin
- %HADOOP_HOME%/bin
Alternatively, you can run the following command to add them:
setx PATH "$env:PATH;$env:JAVA_HOME/bin;$env:HADOOP_HOME/bin"
If you don’t have other user variables setup in the system, you can also directly add a Path environment variable that references others to make it short:
Close PowerShell window and open a new one and type winutils.exe directly to verify that our above steps are completed successfully:
You should also be able to run the following command:
hadoop -version
java version "1.8.0_161"
Java(TM) SE Runtime Environment (build 1.8.0_161-b12)
Java HotSpot(TM) 64-Bit Server VM (build 25.161-b12, mixed mode)
Step 6 — Configure Hadoop
Now we are ready to configure the most important part — Hadoop configurations which involves Core, YARN, MapReduce, HDFS configurations.
Configure core site
Edit file core-site.xml in %HADOOP_HOME%\etc\hadoop folder. For my environment, the actual path is F:\big-data\hadoop-3.2.1\etc\hadoop.
Replace configuration element with the following:
<configuration>
   <property>
     <name>fs.default.name</name>
     <value>hdfs://0.0.0.0:19000</value>
   </property>
</configuration>
Configure HDFS
Edit file hdfs-site.xml in %HADOOP_HOME%\etc\hadoop folder.
Before editing, please correct two folders in your system: one for namenode directory and another for data directory. For my system, I created the following two sub folders:
- F:\big-data\data\dfs\namespace_logs
- F:\big-data\data\dfs\data
Replace configuration element with the following (remember to replace the highlighted paths accordingly):
<configuration>
   <property>
     <name>dfs.replication</name>
     <value>1</value>
   </property>
   <property>
     <name>dfs.namenode.name.dir</name>
     <value>file:///F:/big-data/data/dfs/namespace_logs</value>
   </property>
   <property>
     <name>dfs.datanode.data.dir</name>
     <value>file:///F:/big-data/data/dfs/data</value>
   </property>
</configuration>
In Hadoop 3, the property names are slightly different from previous version. Refer to the following official documentation to learn more about the configuration properties:
Hadoop 3.2.1 hdfs_default.xml
infoFor DFS replication we configure it as one as we are configuring just one single node. By default the value is 3.
infoThe directory configuration are not mandatory and by default it will use Hadoop temporary folder. For our tutorial purpose, I would recommend customise the values.
Configure MapReduce and YARN site
Edit file mapred-site.xml in %HADOOP_HOME%\etc\hadoop folder.
Replace configuration element with the following:
<configuration>
    <property>
        <name>mapreduce.framework.name</name>
        <value>yarn</value>
    </property>
    <property>
        <name>mapreduce.application.classpath</name>
        <value>%HADOOP_HOME%/share/hadoop/mapreduce/*,%HADOOP_HOME%/share/hadoop/mapreduce/lib/*,%HADOOP_HOME%/share/hadoop/common/*,%HADOOP_HOME%/share/hadoop/common/lib/*,%HADOOP_HOME%/share/hadoop/yarn/*,%HADOOP_HOME%/share/hadoop/yarn/lib/*,%HADOOP_HOME%/share/hadoop/hdfs/*,%HADOOP_HOME%/share/hadoop/hdfs/lib/*</value>
    </property>
</configuration>
Edit file yarn-site.xml in %HADOOP_HOME%\etc\hadoop folder.
<configuration>
    <property>
        <name>yarn.nodemanager.aux-services</name>
        <value>mapreduce_shuffle</value>
    </property>
    <property>
        <name>yarn.nodemanager.env-whitelist</name>
        <value>JAVA_HOME,HADOOP_COMMON_HOME,HADOOP_HDFS_HOME,HADOOP_CONF_DIR,CLASSPATH_PREPEND_DISTCACHE,HADOOP_YARN_HOME,HADOOP_MAPRED_HOME</value>
    </property>
</configuration>
Step 7 — Initialise HDFS & bug fix
Run the following command in Command Prompt
hdfs namenode -format
This command failed with the following error and we need to fix it:
2020-01-18 13:36:03,021 ERROR namenode.NameNode: Failed to start namenode.
java.lang.UnsupportedOperationException
        at java.nio.file.Files.setPosixFilePermissions(Files.java:2044)
        at org.apache.hadoop.hdfs.server.common.Storage$StorageDirectory.clearDirectory(Storage.java:452)
        at org.apache.hadoop.hdfs.server.namenode.NNStorage.format(NNStorage.java:591)
        at org.apache.hadoop.hdfs.server.namenode.NNStorage.format(NNStorage.java:613)
        at org.apache.hadoop.hdfs.server.namenode.FSImage.format(FSImage.java:188)
        at org.apache.hadoop.hdfs.server.namenode.NameNode.format(NameNode.java:1206)
        at org.apache.hadoop.hdfs.server.namenode.NameNode.createNameNode(NameNode.java:1649)
        at org.apache.hadoop.hdfs.server.namenode.NameNode.main(NameNode.java:1759)
2020-01-18 13:36:03,025 INFO util.ExitUtil: Exiting with status 1: java.lang.UnsupportedOperationException
Refer to the following sub section (About 3.2.1 HDFS bug on Windows) about the details of fixing this problem.
Once this is fixed, the format command (hdfs namenode -format) will show something like the following:
About 3.2.1 HDFS bug on Windows
This is a bug with 3.2.1 release:
https://issues.apache.org/jira/browse/HDFS-14890
It will be resolved in version 3.2.2 and 3.3.0.
We can apply a temporary fix as the following change diff shows:
Code fix for HDFS-14890
I’ve done the following to get this temporarily fixed before 3.2.2/3.3.0 is released:
- Checkout the source code of Hadoop project from GitHub.
- Checkout branch 3.2.1
- Open pom file of hadoop-hdfs project
- Update class StorageDirectory as described in the above code diff screen shot:
if (permission != null) {
    	  try {
              Set<PosixFilePermission> permissions =
                  PosixFilePermissions.fromString(permission.toString());
              Files.setPosixFilePermissions(curDir.toPath(), permissions);
            } catch (UnsupportedOperationException uoe) {
              // Default to FileUtil for non posix file systems
              FileUtil.setPermission(curDir, permission);
            }
      }
- Use Maven to rebuild this project as the following screenshot shows:
Fix bug HDFS-14890
I’ve uploaded the JAR file into the following location. Please download it from the following link:
https://github.com/FahaoTang/big-data/blob/master/hadoop-hdfs-3.2.1.jar
And then rename the file name hadoop-hdfs-3.2.1.jar to hadoop-hdfs-3.2.1.bk in folder %HADOOP_HOME%\share\hadoop\hdfs.
Copy the downloaded hadoop-hdfs-3.2.1.jar to folder %HADOOP_HOME%\share\hadoop\hdfs.
warning This is just a temporary fix before the official improvement is published. I publish it purely for us to complete the whole installation process and there is no guarantee this temporary fix won’t cause any new issue.
Refer to this article for more details about how to build a native Windows Hadoop: Compile and Build Hadoop 3.2.1 on Windows 10 Guide.
Step 8 — Start HDFS daemons
Run the following command to start HDFS daemons in Command Prompt:
%HADOOP_HOME%\sbin\start-dfs.cmdTwo Command Prompt windows will open: one for datanode and another for namenode as the following screenshot shows:
Step 9 — Start YARN daemons
warning You may encounter permission issues if you start YARN daemons using normal user. To ensure you don’t encounter any issues. Please open a Command Prompt window using Run as administrator.
Alternatively, you can follow this comment on this page which doesn’t require Administrator permission using a local Windows account:
https://kontext.tech/article/377/latest-hadoop-321-installation-on-windows-10-step-by-step-guide#comment314
Run the following command in an elevated Command Prompt window (Run as administrator) to start YARN daemons:
%HADOOP_HOME%\sbin\start-yarn.cmdSimilarly two Command Prompt windows will open: one for resource manager and another for node manager as the following screenshot shows:
Step 10 — Useful Web portals exploration
The daemons also host websites that provide useful information about the cluster.
HDFS Namenode information UI
http://localhost:9870/dfshealth.html#tab-overview
The website looks like the following screenshot:
HDFS Datanode information UI
http://localhost:9864/datanode.html
The website looks like the following screenshot:
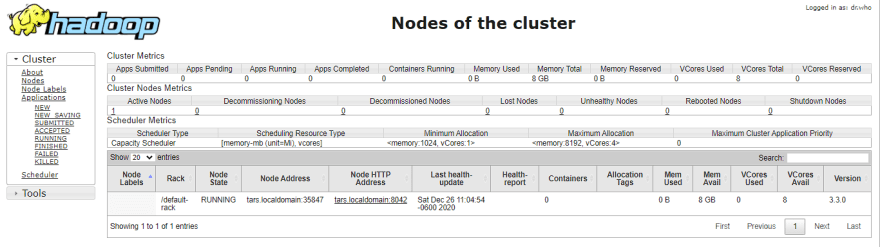
YARN resource manager UI
http://localhost:8088
The website looks like the following screenshot:
Through Resource Manager, you can also navigate to any Node Manager:
Step 11 — Shutdown YARN & HDFS daemons
You don’t need to keep the services running all the time. You can stop them by running the following commands one by one:
%HADOOP_HOME%\sbin\stop-yarn.cmd
%HADOOP_HOME%\sbin\stop-dfs.cmd
check Congratulations! You’ve successfully completed the installation of Hadoop 3.2.1 on Windows 10.
Let me know if you encounter any issues. Enjoy with your latest Hadoop on Windows 10.

This article provides a step-by-step guide to install Hadoop 3.3.0 on Windows 10 via WSL (Windows Subsystem for Linux). These instructions are also applicable for installing Hadoop on Linux systems.
Hadoop 3.3.0 (released on July 14, 2020) is the most recent release in the Apache Hadoop 3.3 line as of the time of this article.
Prerequisites
Follow the steps mentioned on the page below to first enable Windows Subsystem for Linux and then install a Linux distribution of your choice.
Windows Subsystem for Linux Installation Guide for Windows 10
Initial Linux Configuration (optional)
Create a dedicated Hadoop user
We will create a dedicated Hadoop user for executing Hadoop commands. Although not required, it is a recommended step as it separates the Hadoop installation from other software applications and user accounts running on the same machine.
- Create a user group
hadoop
sudo addgroup hadoop
Enter fullscreen mode
Exit fullscreen mode
- Create a user
hduser
sudo adduser hduser
Enter fullscreen mode
Exit fullscreen mode
It will ask for password 2 times followed by user details, just press enter for each prompt and confirm Yes in the end.
- Add user
hduserto user grouphadoop
sudo adduser hduser hadoop
Enter fullscreen mode
Exit fullscreen mode
- Add
hduserto sudoers list so thathdusercan do admin tasks
sudo visudo
Enter fullscreen mode
Exit fullscreen mode
Append after the line «#Allow member of group sudo to execute any command»
hduser ALL=(ALL) ALL
Enter fullscreen mode
Exit fullscreen mode
Then save and close the file.
- Logout of the current session
logout
Enter fullscreen mode
Exit fullscreen mode
- Login again as
hduser
su hduser
cd
Enter fullscreen mode
Exit fullscreen mode
Configure passphraseless ssh
Hadoop requires SSH access to manage its nodes.
This is a critical step and please make sure you follow the steps
Make sure you can SSH to localhost in Ubuntu:
ssh localhost
Enter fullscreen mode
Exit fullscreen mode
If you encounter the error ssh: connect to host localhost port 22: Connection refused, run the following commands:
sudo apt remove openssh-server
sudo apt install openssh-server
sudo service ssh start
Enter fullscreen mode
Exit fullscreen mode
If you cannot ssh to localhost without a passphrase, run the following command to initialize your private and public keys:
ssh-keygen -t rsa -P '' -f ~/.ssh/id_rsa
cat ~/.ssh/id_rsa.pub >> ~/.ssh/authorized_keys
chmod 0600 ~/.ssh/authorized_keys
Enter fullscreen mode
Exit fullscreen mode
Now ssh localhost should work without any passphrase.
Hadoop Installation
Install Java JDK
Update the package index:
sudo apt update
Enter fullscreen mode
Exit fullscreen mode
Check whether Java is already installed:
java -version
Enter fullscreen mode
Exit fullscreen mode
If Java isn’t installed, install Java 8 from OpenJDK via the following command:
sudo apt-get install openjdk-8-jdk
Enter fullscreen mode
Exit fullscreen mode
Check the version installed:
java -version
openjdk version "1.8.0_275"
OpenJDK Runtime Environment (build 1.8.0_275-8u275-b01-0ubuntu1~20.04-b01)
OpenJDK 64-Bit Server VM (build 25.275-b01, mixed mode)
Enter fullscreen mode
Exit fullscreen mode
Download Hadoop binary
Visit the Hadoop releases page to find a download URL for Hadoop 3.3.0:
Hadoop Releases
Run the following command to download the latest binary for Hadoop 3.3.0:
wget https://downloads.apache.org/hadoop/common/hadoop-3.3.0/hadoop-3.3.0.tar.gz
Enter fullscreen mode
Exit fullscreen mode
Wait until the download is completed.
Unzip Hadoop binary
Create a hadoop folder under the user home folder:
mkdir ~/hadoop
Enter fullscreen mode
Exit fullscreen mode
Unzip the downloaded binary package:
tar -xvzf hadoop-3.3.0.tar.gz -C ~/hadoop
Enter fullscreen mode
Exit fullscreen mode
After the package is unzipped, change the current directory to the Hadoop folder:
cd ~/hadoop/hadoop-3.3.0/
Enter fullscreen mode
Exit fullscreen mode
Setup environment variables
nano ~/.bashrc
Enter fullscreen mode
Exit fullscreen mode
Setup Hadoop and Java environment variables at the end of the .bashrc file as below and then save the bash file and close it.
#Set Hadoop-related environment variables
export JAVA_HOME=/usr/lib/jvm/java-8-openjdk-amd64
export HADOOP_HOME=~/hadoop/hadoop-3.3.0
export PATH=$PATH:$HADOOP_HOME/bin
export PATH=$PATH:$HADOOP_HOME/sbin
export HADOOP_CONF_DIR=$HADOOP_HOME/etc/hadoop
export HADOOP_MAPRED_HOME=$HADOOP_HOME
export HADOOP_COMMON_HOME=$HADOOP_HOME
export HADOOP_HDFS_HOME=$HADOOP_HOME
export YARN_HOME=$HADOOP_HOME
Enter fullscreen mode
Exit fullscreen mode
For applying all these changes to the current Terminal, execute the source command.
source ~/.bashrc
Enter fullscreen mode
Exit fullscreen mode
Make sure that Java and Hadoop have been properly installed on your system and can be accessed through the Terminal by,
java -version
openjdk version "1.8.0_275"
OpenJDK Runtime Environment (build 1.8.0_275-8u275-b01-0ubuntu1~20.04-b01)
OpenJDK 64-Bit Server VM (build 25.275-b01, mixed mode)
Enter fullscreen mode
Exit fullscreen mode
hadoop version
Hadoop 3.3.0
Source code repository https://gitbox.apache.org/repos/asf/hadoop.git -r aa96f1871bfd858f9bac59cf2a81ec470da649af
Compiled by brahma on 2020-07-06T18:44Z
Compiled with protoc 3.7.1
From source with checksum 5dc29b802d6ccd77b262ef9d04d19c4
This command was run using /home/daftdey/hadoop/hadoop-3.3.0/share/hadoop/common/hadoop-common-3.3.0.jar
Enter fullscreen mode
Exit fullscreen mode
Configure the pseudo-distributed mode (Single Node mode)
This page below is the official documentation to configure a single node cluster:
Pseudo-Distributed Operation
All the Hadoop configuration files should be located in the ~/hadoop/hadoop-3.3.0/etc/hadoop directory.
cd ~/hadoop/hadoop-3.3.0/etc/hadoop
Enter fullscreen mode
Exit fullscreen mode
The configuration setup steps are as follows:
-
Edit file
hadoop-env.sh:nano hadoop-env.shSet Java environment variable as,
# Java path export JAVA_HOME=/usr/lib/jvm/java-8-openjdk-amd64 -
Edit file
core-site.xml:
core-site.xmlinforms the Hadoop daemon where NameNode runs in the cluster. It contains configuration settings of Hadoop core such as I/O settings that are common to HDFS & MapReduce.nano core-site.xmlAdd the following configuration:
<configuration> <property> <name>fs.defaultFS</name> <value>hdfs://localhost:9000</value> </property> </configuration> -
Edit file
hdfs-site.xml:
hdfs-site.xmlcontains configuration settings of HDFS daemons (i.e. NameNode, DataNode, Secondary NameNode). It also includes the replication factor and block size of HDFS.nano hdfs-site.xmlAdd the following configuration:
<configuration> <property> <name>dfs.replication</name> <value>1</value> </property> </configuration> -
Edit file
mapred-site.xml:
mapred-site.xmlcontains configuration settings of MapReduce application like the number of JVM that can run in parallel, the size of the mapper and the reducer process, CPU cores available for a process, etc.nano mapred-site.xmlAdd the following configuration:
<configuration> <property> <name>mapreduce.framework.name</name> <value>yarn</value> </property> <property> <name>mapreduce.application.classpath</name> <value>$HADOOP_MAPRED_HOME/share/hadoop/mapreduce/*:$HADOOP_MAPRED_HOME/share/hadoop/mapreduce/lib/*</value> </property> </configuration> -
Edit file
yarn-site.xml:
yarn-site.xmlcontains configuration settings of ResourceManager and NodeManager like application memory management size, the operation needed on program & algorithm, etc.nano yarn-site.xmlAdd the following configuration:
<configuration>
    <property>
        <name>yarn.nodemanager.aux-services</name>
        <value>mapreduce_shuffle</value>
    </property>
    <property>
        <name>yarn.nodemanager.env-whitelist</name>
        <value>JAVA_HOME,HADOOP_COMMON_HOME,HADOOP_HDFS_HOME,HADOOP_CONF_DIR,CLASSPATH_PREPEND_DISTCACHE,HADOOP_YARN_HOME,HADOOP_MAPRED_HOME</value>
    </property>
</configuration>
Format namenode
Go to the Hadoop home directory and format the Hadoop namenode:
cd ~/hadoop/hadoop-3.3.0
bin/hdfs namenode -format
Enter fullscreen mode
Exit fullscreen mode
This formats the HDFS via the NameNode. Formatting the file system means initializing the directory specified by the dfs.name.dir variable.
This command should be executed only for the first time. Never format an up and running Hadoop filesystem. You will lose all your data stored in the HDFS.
Run HDFS daemons
The NameNode is the centerpiece of an HDFS file system. It keeps the directory tree of all files stored in the HDFS and tracks all the files stored across the cluster.
On startup, a DataNode connects to the Namenode and it responds to the requests from the Namenode for different operations.
Start NameNode daemon and DataNode daemon
sbin/start-dfs.sh
Starting namenodes on [localhost]
Starting datanodes
Starting secondary namenodes [tars]
Enter fullscreen mode
Exit fullscreen mode
Check status via jps command
jps
8544 SecondaryNameNode
8304 DataNode
8149 NameNode
8702 Jps
Enter fullscreen mode
Exit fullscreen mode
When the HDFS services are successfully initiated, you should be able to see these four processes running.
View name node portal
Now open the browser and go to the following URL to view the NameNode interface. Scroll down and see the number of live nodes.
http://localhost:9870/dfshealth.html#tab-overview
The web UI looks like this:

Data nodes information can be also viewed through the Datanodes menu link:

Run YARN daemon
ResourceManager is the master that arbitrates all the available cluster resources and thus helps in managing the distributed applications running on the YARN system. Its work is to manage each NodeManagers and each application’s ApplicationMaster.
The NodeManager in each machine framework is the agent that is responsible for managing containers, monitoring their resource usage, and reporting the same to the ResourceManager.
Start ResourceManager daemon and NodeManager daemon
sbin/start-yarn.sh
Starting resourcemanager
Starting nodemanagers
Enter fullscreen mode
Exit fullscreen mode
Check status using the jps command
jps
11831 ResourceManager
11352 DataNode
12347 Jps
11196 NameNode
11981 NodeManager
11597 SecondaryNameNode
Enter fullscreen mode
Exit fullscreen mode
Once the YARN services are started, two more processes for NodeManager and ResourceManage can be seen running.
View YARN web portal
Now open the browser and go to the following URL to view the YARN resource manager web UI.
http://localhost:8088/cluster
The web UI looks like this:
Execution of all the Hadoop applications can be monitored through this web portal.
Shutdown Hadoop services
After completion of the execution of all Hadoop applications, the HDFS and YARN services can be stopped as follows:
sbin/stop-yarn.sh
sbin/stop-dfs.sh
Enter fullscreen mode
Exit fullscreen mode
Verify status via jps command, only the jps service should be running:
jps
13257 Jps
Enter fullscreen mode
Exit fullscreen mode
Summary
Congratulations, you have successfully installed a single-node Hadoop cluster in one go on your Linux subsystem of Windows 10. It’s relatively easier compared to installing on Windows as we don’t need to download or build native Hadoop HDFS libraries.
Have fun exploring with Hadoop.
Try out an example application: Hadoop MapReduce computational model to perform analyses on DBLP publication data
If you encounter any issues while following the steps, please post a comment and I will try my best to help.
Further References
Install Hadoop 3.3.0 on Windows 10 using WSL
Install Hadoop: Setting up a Single Node Hadoop Cluster
Hadoop 3.2.1 Windows 10 Installation step by step guide and running MapReduce Jobs
Setup Hadoop on Windows 10 machines
Consolidated instructions on how to setup and run Hadoop on Windows 10 machines. This is exactly written from Hadoop 3.2.1 Installation on Windows 10 step by step guide. Big thanks to Raymond, the original writer. If you already have Hadoop installed and configured on your machine, you can go to the Running MapReduce Jobs section.
Required tools
- Java JDK — used to run the Hadoop since it’s built using Java
- 7Zip or WinRAR — unzip Hadoop binary package; anything that unzips
tar.gz - CMD or Powershell — used to test environment variables and run Hadoop
Step 1 — Download and extract Hadoop
Download Hadoop from their official website and unzip the file. We’ll be using Hadoop 3.2.1. Hadoop is portable so you can store it on an external hard drive. For the purpose of documentation, I will extract it to C:/Users/Anthony/Documents/cp-master.
If there are permission errors, run your unzipping program as administrator and unzip again.
Step 2 — Install Hadoop native IO binary
Clone or download the winutils repository and copy the contents of hadoop-3.2.1/bin into the extracted location of the Hadoop binary package. In our example, it will be C:\Users\Anthony\Documents\cp-master\hadoop-3.2.1\bin
Step 3 — Install Java JDK
Java JDK is required to run Hadoop, so if you haven’t installed it, install it.
Oracle requires you sign up and login to download it. I suggest you find an alternative resource to download it from for example here (JDK 8u261). This resource might not exist forever, so Google ‘jdk version download’.
Run the installation file and the default installation directory will be C:\Program Files\Java\jdk1.8.0_261.
After installation, open up CMD or Powershell and confirm Java is intalled:
$ java -version
java version "1.8.0_261"
Java(TM) SE Runtime Environment (build 1.8.0_261-b12)
Java HotSpot(TM) 64-Bit Server VM (build 25.261-b12, mixed mode)
Step 4 — Configure environment variables
Open the Start Menu and type in ‘environment’ and press enter. A new window with System Properties should open up. Click the Environment Variables button near the bottom right.
JAVA_HOME environment variable
- From step 3, find the location of where you installed Java. In this example, the default directory is
C:\Program Files\Java\jdk1.8.0_261 - Create a new User variable with the variable name as
JAVA_HOMEand the value asC:\Program Files\Java\jdk1.8.0_261
HADOOP_HOME environment variable
- From step 1, copy the directory you extracted the Hadoop binaries to. In this example, the directory is
C:\Users\Anthony\Documents\cp-master\hadoop-3.2.1 - Create a new User variable with the variable name as
HADOOP_HOMEand the value asC:\Users\Anthony\Documents\cp-master\hadoop-3.2.1
PATH environment variable
We’ll now need to add the bin folders to the PATH environment variable.
- Click
PaththenEdit - Click
Newon the top right - Add
C:\Users\Anthony\Documents\cp-master\hadoop-3.2.1\bin - Add
C:\Program Files\Java\jdk1.8.0_261\bin
Hadoop environment
Hadoop complains about the directory if the JAVA_HOME directory has spaces. In the default installation directory, Program Files has a space which is problematic. To fix this, open the %HADOOP_HOME%\etc\hadoop\hadoop-env.cmd and change the JAVA_HOME line to the following:
set JAVA_HOME=C:\PROGRA~1\Java\jdk1.8.0_261
After setting those environment variables, you reopen CMD or Powershell and verify that the hadoop command is available:
$ hadoop -version
java version "1.8.0_261"
Java(TM) SE Runtime Environment (build 1.8.0_261-b12)
Java HotSpot(TM) 64-Bit Server VM (build 25.261-b12, mixed mode)
Step 5 — Configure Hadoop
Now we are ready to configure the most important part — Hadoop configurations which involves Core, YARN, MapReduce, and HDFS configurations.
Each of the files are in %HADOOP_HOME%\etc\hadoop. The full path for this example is C:\Users\Anthony\Documents\cp-master\hadoop-3.2.1\etc\hadoop
Configure core site
Edit core-site.xml and replace the configuration element with the following:
<configuration>
  <property>
    <name>fs.default.name</name>
    <value>hdfs://0.0.0.0:19000</value>
  </property>
</configuration>
Configure HDFS
Create two folders, one for the namenode directory and another for the data directory. The following are the two created folders in this example:
C:\Users\Anthony\Documents\cp-master\hadoop-3.2.1\data\dfs\namespace_logsC:\Users\Anthony\Documents\cp-master\hadoop-3.2.1\data\dfs\data
Edit hdfs-site.xml and replace the configuration element with the following:
<configuration>
  <property>
    <name>dfs.replication</name>
    <value>1</value>
  </property>
  <property>
    <name>dfs.namenode.name.dir</name>
    <!-- <value>file:///DIRECTORY 1 HERE</value> -->
    <value>file:///C:/Users/Anthony/Documents/cp-master/hadoop-3.2.1/data/dfs/namespace_logs</value>
  </property>
  <property>
    <name>dfs.datanode.data.dir</name>
    <!-- <value>file:///DIRECTORY 2 HERE</value> -->
    <value>file:///C:/Users/Anthony/Documents/cp-master/hadoop-3.2.1/data/dfs/data</value>
  </property>
</configuration>
Configure MapReduce and YARN site
Edit mapred-site.xml and replace the configuration element with the following:
<configuration>
  <property>
    <name>mapreduce.framework.name</name>
    <value>yarn</value>
  </property>
  <property>
    <name>mapreduce.application.classpath</name>
    <value>%HADOOP_HOME%/share/hadoop/mapreduce/*,%HADOOP_HOME%/share/hadoop/mapreduce/lib/*,%HADOOP_HOME%/share/hadoop/common/*,%HADOOP_HOME%/share/hadoop/common/lib/*,%HADOOP_HOME%/share/hadoop/yarn/*,%HADOOP_HOME%/share/hadoop/yarn/lib/*,%HADOOP_HOME%/share/hadoop/hdfs/*,%HADOOP_HOME%/share/hadoop/hdfs/lib/*</value>
  </property>
</configuration>
Edit yarn-site.xml and replace the configuration element with the following:
<configuration>
  <property>
    <name>yarn.resourcemanager.hostname</name>
    <value>localhost</value>
  </property>
  <property>
    <name>yarn.nodemanager.aux-services</name>
    <value>mapreduce_shuffle</value>
  </property>
  <property>
    <name>yarn.nodemanager.env-whitelist</name>
    <value>JAVA_HOME,HADOOP_COMMON_HOME,HADOOP_HDFS_HOME,HADOOP_CONF_DIR,CLASSPATH_PREPEND_DISTCACHE,HADOOP_YARN_HOME,HADOOP_MAPRED_HOME</value>
  </property>
</configuration>
Step 6 — Initialize HDFS and bugfix
Run the following command and you should find the following error:
$ hdfs namenode -format
...
ERROR namenode.NameNode: Failed to start namenode.
...
To fix this, you’ll need to download the a JAR file with the fix. Overwrite the existing hadoop-hdfs-3.2.1.jar in %HADOOP_HOME%\share\hadoop\hdfs with this new JAR file (you can make a backup of the current one before overwriting if you wish).
Step 7 — Start HDFS daemons
Run the following command to start HDFS daemons. When you do so, there should be two new windows that open: one for datanode and the other for namenode:
$ %HADOOP_HOME%\sbin\start-dfs.cmd
Step 8 — Start YARN daemons
You might encounter permission issues as a normal user, so open a command line with elevated permissions. If you have the yarn package manager, you will NOT be able to run YARN daemons since both use the yarn command. To fix this, you must uninstall yarn package manager.
Run the following command (with elevated permissions) to start YARN daemons. When you do so, there should be two new windows that open: one for resource manager and the other for node manager:
$ %HADOOP_HOME%\sbin\start-yarn.cmd
Step 9 — Useful Web portals
The daemons also host websites that provide useful information about the cluster
HDFS Namenode UI info
http://localhost:9870/dfshealth.html#tab-overview
HDFS Datanode UI info
http://localhost:9864/datanode.html
YARN resource manager UI
http://localhost:8088
Step 10 — Shutdown YARN and HDFS daemons
You can stop the daemons by running the following commands:
$ %HADOOP_HOME%\sbin\stop-dfs.cmd
$ %HADOOP_HOME%\sbin\stop-yarn.cmd
Running MapReduce Jobs
After setting up your environment and running the HDFS and YARN daemons, we can start working on running MapReduce jobs on our local machine. We need to compile our code, produce a JAR file, move our inputs, and run a MapReduce job on Hadoop.
Step 1 — Configure extra environment variables
As a preface, it is best to setup some extra environment variables to make running jobs from the CLI quicker and easier. You can name these environment variables anything you want, but we will name them HADOOP_CP and HDFS_LOC to not potentially conlict with other environment variables.
Open the Start Menu and type in ‘environment’ and press enter. A new window with System Properties should open up. Click the Environment Variables button near the bottom right.
HADOOP_CP environment variable
This is used to compile your Java files. The backticks (eg. `some command here`) do not work on Windows so we need to create a new environment variable with the results. If you need to add more packages, be sure to update the HADOOP_CP environment variable.
- Open a CLI and type in
hadoop classpath. This will produce all the locations to the Hadoop libraries required to compile code, so copy all of this - Create a new User variable with the variable name as
HADOOP_CPand the value as the results ofhadoop classpathcommand
HDFS_LOC environment variable
This is used to reference the HDFS without having to constantly type the reference
- Create a new User variable with the variable name as
HDFS_LOCand the value ashdfs://localhost:19000
After creating those two extra environment variables, you can check by calling the following in your CLI:
$ echo %HADOOP_CP%
$ echo %HDFS_LOC%
Step 2 — Compiling our project
Run the following commands in your CLI with your respective .java files.
$ mkdir dist/
$ javac -cp %HADOOP_CP% <some_directory>/*.java -d dist/
Step 3 — Producing a JAR file
Run the following commands to create a JAR file with the compiled classes from Step 2.
$ cd dist
$ jar -cvf <application_name>.jar <some_directory>/*.class
added manifest
...
Step 4 — Copy our inputs to HDFS
Make sure that HDFS and YARN daemons are running. We can now copy our inputs to the HDFS using the copyFromLocal command and verify the contents with the ls command :
$ hadoop fs -copyFromLocal <some_directory>/input %HDFS_LOC%/input
$ hadoop fs -ls %HDFS_LOC%/input
Found X items
...
Step 5 — Run our MapReduce Job
Run the following commands in the dist folder when we originally compiled our code:
$ hadoop jar <application_name>.jar <pkg_name>.<class_name> %HDFS_LOC%/input %HDFS_LOC%/output
2020-10-16 17:44:40,331 INFO client.RMProxy: Connecting to ResourceManager at localhost/127.0.0.1:8032
...
2020-10-16 17:44:43,115 INFO mapreduce.Job: Running job: job_1602881955102_0001
2020-10-16 17:44:55,439 INFO mapreduce.Job: Job job_1602881955102_0001 running in uber mode : false
2020-10-16 17:44:55,441 INFO mapreduce.Job:  map 0% reduce 0%
2020-10-16 17:45:04,685 INFO mapreduce.Job:  map 100% reduce 0%
2020-10-16 17:45:11,736 INFO mapreduce.Job:  map 100% reduce 100%
2020-10-16 17:45:11,748 INFO mapreduce.Job: Job job_1602881955102_0001 completed successfully
...
We can verify the contents of our output by using the cat command just like in shell:
$ hadoop fs -cat %HDFS_LOC%/output/part*
2020-10-16 18:19:50,225 INFO sasl.SaslDataTransferClient: SASL encryption trust check: localHostTrusted = false, remoteHostTrusted = false
...
Step 6 — Copy outputs to our local machine
Once we are satisfied with the results, we can copy the contents to our local machine using the copyToLocal command:
$ hadoop fs -copyToLocal %HDFS_LOC%/output <some_output_directory>/
The web is not the only one to generate large masses of information. Modern product tracking management, logistics or traceability for example, exploiting the generalized identification of objects and RFID-type paths also generates immeasurable amounts of precious data.
Massive analyzes then allow much finer optimizations. GPS tracking, whether for a more accurate control of the costs of the itinerant or for a new economic model of auto insurance will be detailed, cross-checked and consolidated down to the line, with these new tools.
Hadoop, in a few words,
In principle, Hadoop consists of,
- HDFS for Hadoop Distributed File system, the distributed data file system, an extremely powerful distributed data management system
- Map-reduce
- A collection of specific tools for HRFS and Map Reduce
Structure of Hadoop: construction and basic elements
When talking about Hadoop, it is usually the entire software ecosystem that we are talking about. In addition to the kernel components (Core Hadoop), there are many extensions with original names, such as Pig, Chukwa, Oozie or ZooKeeper, which allow the framework to work with very large amounts of data. These projects, built on top of each other, are supported by the Apache Software Foundation.
The core, or Core Hadoop, is the fundamental foundation of the Hadoop ecosystem. Its components are present in version 1 of the Hadoop Common base module, the Hadoop Distributed File System (HDFS) and the MapReduce Engine. Starting with version 2.3, the YARN cluster management system (also known as MapReduce 2.0) replaces it. This excludes the MapReduce algorithm from the management system, which always works from YARN.
Hadoop Common
The Hadoop Common module therefore has a very wide range of basic functions. Part of this is Java Archive Data (JAR), which is required to start Hadoop. Libraries for data serialization as well as the Hadoop Common source code module are available for project and subproject documentation.
Hadoop Distributed File System (HDFS)
HDFS is a particularly available file system, which aims to store large amounts of data in a cluster of computers and which is responsible for data maintenance. The files are composed of blocks of data and without a classification scheme, and shared redundantly on different nodes. Therefore, HDFS is capable of processing several million data.
The length of the data blocks as well as their degree of redundancy can be configured.
The Hadoop cluster operates on the master / slave principle. The framework architecture is made up of master nodes, to which many slave nodes are subordinate. This principle is reflected in the construction of HDFS, which is based on a NameNode and various subordinate DataNodes. The NameNode manages several metadata of the file system, directory structure, and subordinate DataNodes. To minimize data loss, files are split into different blocks and stored on different nodes. The standard configuration is available three times in each run.
Each DataNode regularly sends a sign of life to the NameNode, this is called the heartbeat. If this signal does not appear, the NameNode declares the slave «dead» and uses file copies and other nodes to ensure that there are enough data blocks in the cluster that are available. Thus, the NameNode plays an essential role in the framework. To prevent it from reaching the «Single Point of Failure» stage, it is customary to make a SecondaryNameNode available to the master node. This allows the various changes made to the metadata to be stored and the central control instance to be retrievable.
For the transition from Hadoop 1 to Hadoop 2, HDFS has been extended to various backup systems: NameNode HA (High Availability) which supplements the program with a system in the event of a NameMode failure, so that replacement components are used automatically. A Snapshot copy function also allows the system to be restored to the previous status. The Federation extension also allows various NameNodes to operate within a single cluster.
MapReduce Engine
Another core component of Core Hadoop is the Google MapReduce algorithm, which is implemented in version 1 of the framework. The main duty of the MapReduce Engine is to manage the resources and guide the calculation process (Job scheduling / monitoring). Data work is based on the «map» and «reduce» phases, which allow files to be worked on directly where they are stored (data locality).
This speeds up compute time and minimizes excessive consumption of network bandwidth. As part of the MAP phase, complex calculation processes (jobs) are divided into units and shared by the JobTracker on the master node on different slave systems in the cluster. The TaskTrackers then ensure that the various part processes are processed in parallel. During the subsequent Reduce Phase, the intermediate results of the MapReduce Engine are collected and deliver an overall result.
While the master node is generally housed by the NameNode and JobTracker components, a DataNode and a TaskTracker work on each subordinate slave. The following graphic shows the basic structure of Hadoop according to version 1, shared in MapReduce Layer and HDFS Layer.
With the release of version 2.3 of Hadoop, the MapReduce-Engine has been reworked. The result gave the method of management of YARN / MapReduce 2.0 clusters, of which the management of resources and the management of tasks (Job Scheduling / Monitoring) of MapReduce were coupled. Thus, the framework offers many possibilities in terms of new working models and a wide range of Hadoop applications for Big Data.
YARN / MapReduce 2.0
With the introduction of the YARN («Yet Another Resource Negotiator») module from version 2.3, the architecture of Hadoop has been significantly changed. This is why we are talking about a move from Hadoop 1 to Hadoop 2.
While users of Hadoop 1 have only had MapReduce available as an application, the coupling to the resource and task manager of the data manipulation model has made it possible to integrate many applications for Big Data into the framework. Under Hadoop 2, MapReduce is just one of the many possible data processing possibilities of the framework. YARN adopts the role of a distributed operational system for managing resources for Hadoop Big Data applications.
The basic changes to the Hadoop architecture primarily concern the two MapReduce-Engine trackers, which no longer exist as single components in Hadoop version 2. Instead, the YARN module has three new entities: ResourceManager, NodeManager, and ApplicationMaster.
- ResourceManager
The global ResourceManager is the highest authority of the Hadoop structure (Master), of which various NodeManagers are subordinate as slaves. This role is to manage the IT cluster, distribute resources to subordinate NodeManagers and orchestrate applications. The ResourceManager knows where the unique slave systems are in the cluster and what resources can be made available. An important component of the ResourceManagers is the ResourceScheduler, which determines how the available cluster resources will be shared. - NodeManager
a NodeManager acts on each node of the cluster of computers. This takes into account the position of the slaves in the Hadoop 2 infrastructure and acts as a recipient of commands from the ResourceManager. If a NodeManager is started in a node of the cluster, it conveys the information to the ResourceManager and sends a periodic sign of life (heartbeat). Each NodeManager is responsible for the resources of its own node and makes part of them available to the cluster. It is the ResourceManager’s ResourceScheduler that directs how resources are used in the cluster. - ApplicationMaster
each node within the YARN system includes an ApplicationMaster, whose ResourceManager and NodeManager resources are mobilized and divided in the form of containers. On this container, the accumulation of Big Data is monitored and executed by the ApplicationMaster.
Here is a diagram showing the structure of Hadoop 2,
If a Big Data application is running on Hadoop, three actors are involved,
- a Client
- a ResourceManager
- One or more NodeManagers
In the first step, the ResourceManager client is tasked with starting the big data application in the Hadoop cluster. This then allocates a container. In other words: the ResourceManager reserves the cluster resources for the application and contacts the NodeManager. The NodeManager in question starts the container and runs the ApplicationMaster, which is responsible for running the application and monitoring it.
Advantages of Hadoop
Range of data sources
The data collected from various sources will be in structured or unstructured form. Sources can be social media, data per click, or even email conversations. It would take a long time to convert all the collected data into a single format, Apache Hadoop saves this time because it can extract valuable data from any form of data. It also performs various functions, such as data warehousing, fraud detection, market campaign analysis, etc.
Profitable
Before, companies had to spend a considerable portion of their benefits to store large amounts of data. In some cases, they even had to delete large sets of unprocessed data to make room for new data. It was possible that valuable information could be lost in such cases. Thanks to Apache Hadoop, this problem has been completely solved. It is a cost effective solution for data storage. It helps in the long run as it stores all of the raw data generated by a business. If the business changes the direction of its processes in the future, it can easily refer to the raw data and take the necessary action. This would not have been possible in the traditional approach as raw data would have been suppressed due to increased spending.
Speed
Every organization uses a platform to get work done faster. Hadoop empowers every business to address its data storage challenges. It uses a storage system in which data is stored on a distributed file system. Since the tools used for data processing are located on the same servers as the data, processing is also performed at a faster rate. As a result, you can process terabytes of data in minutes using Apache Hadoop.
Multiple copies
Hadoop automatically duplicates the data stored there and creates multiple copies. This is done to ensure that in the event of a failure, the data is not lost. Apache Hadoop understands that the data stored by the company is important and should not be lost unless the company gives it up.
Disadvantages of Hadoop
Lack of preventive measures
During the processing of sensitive data collected by a company, it is necessary to provide the mandatory security measures. In Hadoop, security measures are disabled by default. The data analyst is aware and takes the necessary measures to secure the data.
Small data issues
There are big data platforms on the market that are not suitable for small data. Hadoop is one such platform where only large companies generating big data can reap its benefits. This is because Hadoop cannot operate efficiently in small data environments.
Risky operation
Java is one of the most popular programming languages in the world. It is also linked to various controversies as cyber criminals can easily exploit frameworks built on Java. Hadoop is one such framework entirely based in Java. Therefore, the platform is very vulnerable and can suffer damage.
Hadoop Deployment Methods
Standalone Mode
It is the default mode of configuration of Hadoop. It doesn’t use hdfs instead, it uses a local file system for both input and output. It is useful for debugging and testing.
Pseudo-Distributed Mode
Also called a single node cluster where both NameNode and DataNode resides in the same machine. All the daemons run on the same machine in this mode. It produces a fully functioning cluster on a single machine.
Fully Distributed Mode
Hadoop runs on multiple nodes wherein there are separate nodes for master and slave daemons. The data is distributed among a cluster of machines providing a production environment.
Hadoop Installation on Windows 10
Prerequisites
To install Hadoop, you should have Java version 1.8 in your system.
Check your java version through this command on command prompt
- java –version

If java is not installed in your system, then visit this link.

After choosing the appropriate version for the relevant architecture of your machine, accept the license,

After downloading java version 1.8, download hadoop version 3.1 from this link
Extract it to a folder,

Setup System Environment Variables
Open control panel to edit the system environment variable,

Go to environment variable in system properties,

Create a new user variable. Put the Variable_name as HADOOP_HOME and Variable_value as the path of the bin folder where you extracted hadoop.
Likewise, create a new user variable with variable name as JAVA_HOME and variable value as the path of the bin folder in the Java directory.

Now we need to set Hadoop bin directory and Java bin directory path in system variable path.

Edit Path in system variable

Click on New and add the bin directory path of Hadoop and Java in it.

Configuration
Now we need to edit some files located in the hadoop directory of the etc folder where we installed hadoop,
- core-site.xml
- hadoop-env
- hdfs-site.xml
- map-red.xm
- yarn-site.xml
Edit the file core-site.xml in the hadoop directory. Copy this xml property in the configuration in the file
- <configuration>
- <property>
- <name>fs.defaultFS</name>
- <value>hdfs:
- </property>
- </configuration>
Edit mapred-site.xml and copy this property in the cofiguration
- <configuration>
- <property>
- <name>mapreduce.framework.name</name>
- <value>yarn</value>
- </property>
- </configuration>
Create a folder ‘data’ in the hadoop directory

Create a folder with the name ‘datanode’ and a folder ‘namenode’ in this data directory
Edit the file hdfs-site.xml and add below property in the configuration
Note
The path of namenode and datanode across value would be the path of the datanode and namenode folders you just created.
- <configuration>
- <property>
- <name>dfs.replication</name>
- <value>1</value>
- </property>
- <property>
- <name>dfs.namenode.name.dir</name>
- <value>C:\Users\hp\Downloads\hadoop-3.1.0\hadoop-3.1.0\data\namenode</value>
- </property>
- <property>
- <name>dfs.datanode.data.dir</name>
- <value> C:\Users\hp\Downloads\hadoop-3.1.0\hadoop-3.1.0\data\datanode</value>
- </property>
- </configuration>
Edit the file yarn-site.xml and add below property in the configuration
- <configuration>
- <property>
- <name>yarn.nodemanager.aux-services</name>
- <value>mapreduce_shuffle</value>
- </property>
- <property>
- <name>yarn.nodemanager.auxservices.mapreduce.shuffle.class</name>
- <value>org.apache.hadoop.mapred.ShuffleHandler</value>
- </property>
- </configuration>
Edit hadoop-env.cmd and replace %JAVA_HOME% with the path of the java folder where your jdk 1.8 is installed

Hadoop needs some Windows OS specific files which are not available with default download of Hadoop.
To include those files, replace the bin folder in hadoop directory with the bin folder provided in this github link.
Download it as zip file. Extract it and copy the bin folder in it. If you want to save the old bin folder, rename it like bin_old and paste the copied bin folder in that directory.

Now it’s time to chech if Hadoop is successfully installed by running this command on cmd,
- hadoop version

Format the NameNode
After installing Hadoop, it is time to format the NameNode is done once when hadoop is installed (and not for running hadoop filesystem).
Run this command,
- hdfs namenode –format
Result


Now change the directory in cmd to sbin folder of hadoop directory with this command :
- cd C:\hadoop-3.1.0\sbin
Start namenode and datanode with this command :
- start-dfs.cmd
Two more cmd windows will open for NameNode and DataNode.
Now start yarn through this command,
- start-yarn.cmd
Two more windows will open, one for yarn resource manager and one for yarn node manager.
Note
Make sure all the 4 Apache Hadoop Distribution windows are up n running. If they are not running, you will see an error or a shutdown message. In that case, you need to debug the error.
To access information about resource manager current jobs, successful and failed jobs, go to this link in yout browser : http://localhost:8088/cluster

To check the details about the hdfs (namenode and datanode),
Open this link in your browser : http://localhost:9870/
NB: for Hadoop versions prior to 3.0.0 – Alpha 1, use port http://localhost:50070/

To Perform setting up and installing Hadoop in the pseudo-distributed mode in Windows 10 using the following steps given below as follows. Let’s discuss one by one.
Step 1: Download Binary Package :
Download the latest binary from the following site as follows.
http://hadoop.apache.org/releases.html

For reference, you can check the file save to the folder as follows.
C:\BigData
Step 2: Unzip the binary package
Open Git Bash, and change directory (cd) to the folder where you save the binary package and then unzip as follows.
$ cd C:\BigData
MINGW64: C:\BigData
$ tar -xvzf  hadoop-3.1.2.tar.gz
For my situation, the Hadoop twofold is extricated to C:\BigData\hadoop-3.1.2.
Next, go to this GitHub Repo and download the receptacle organizer as a speed as demonstrated as follows. Concentrate the compress and duplicate all the documents present under the receptacle envelope to C:\BigData\hadoop-3.1.2\bin. Supplant the current records too.

Step 3: Create folders for datanode and namenode :
- Goto C:/BigData/hadoop-3.1.2 and make an organizer ‘information’. Inside the ‘information’ envelope make two organizers ‘datanode’ and ‘namenode’. Your documents on HDFS will dwell under the datanode envelope.

- Set Hadoop Environment Variables
- Hadoop requires the following environment variables to be set.
HADOOP_HOME=” C:\BigData\hadoop-3.1.2”
HADOOP_BIN=”C:\BigData\hadoop-3.1.2\bin”
JAVA_HOME=<Root of your JDK installation>”
- To set these variables, navigate to My Computer or This PC.
Right-click -> Properties -> Advanced System settings -> Environment variables.
- Click New to create a new environment variable.

- In the event that you don’t have JAVA 1.8 introduced, at that point you’ll have to download and introduce it first. In the event that the JAVA_HOME climate variable is now set, at that point check whether the way has any spaces in it (ex: C:\Program Files\Java\… ). Spaces in the JAVA_HOME way will lead you to issues. There is a stunt to get around it. Supplant ‘Program Files ‘to ‘Progra~1’in the variable worth. Guarantee that the variant of Java is 1.8 and JAVA_HOME is highlighting JDK 1.8.
Step 4: To make Short Name of Java Home path


- Set Hadoop Environment Variables
- Edit PATH Environment Variable

- Click on New and Add %JAVA_HOME%, %HADOOP_HOME%, %HADOOP_BIN%, %HADOOP_HOME%/sin to your PATH one by one.

- Now we have set the environment variables, we need to validate them. Open a new Windows Command prompt and run an echo command on each variable to confirm they are assigned the desired values.
echo %HADOOP_HOME%
echo %HADOOP_BIN%
echo %PATH%
- On the off chance that the factors are not instated yet, at that point it can likely be on the grounds that you are trying them in an old meeting. Ensure you have opened another order brief to test them.
Step 5: Configure Hadoop
Once environment variables are set up, we need to configure Hadoop by editing the following configuration files.
hadoop-env.cmd
core-site.xml
hdfs-site.xml
mapred-site.xml
yarn-site.xml
hadoop-env.cmd
First, let’s configure the Hadoop environment file. Open C:\BigData\hadoop-3.1.2\etc\hadoop\hadoop-env.cmd and add below content at the bottom
set HADOOP_PREFIX=%HADOOP_HOME%
set HADOOP_CONF_DIR=%HADOOP_PREFIX%\etc\hadoop
set YARN_CONF_DIR=%HADOOP_CONF_DIR%
set PATH=%PATH%;%HADOOP_PREFIX%\bin
Step 6: Edit hdfs-site.xml
After editing core-site.xml, you need to set the replication factor and the location of namenode and datanodes. Open C:\BigData\hadoop-3.1.2\etc\hadoop\hdfs-site.xml and below content within <configuration> </configuration> tags.
<configuration>
 <property>
    <name>dfs.replication</name>
    <value>1</value>
 </property>
 <property>
    <name>dfs.namenode.name.dir</name>
    <value>C:\BigData\hadoop-3.2.1\data\namenode</value>
 </property>
 <property>
    <name>dfs.datanode.data.dir</name>
    <value>C:\BigData\hadoop-3.1.2\data\datanode</value>
 </property>
</configuration>
Step 7: Edit core-site.xml
Now, configure Hadoop Core’s settings. Open C:\BigData\hadoop-3.1.2\etc\hadoop\core-site.xml and below content within <configuration> </configuration> tags.
<configuration>
 <property>
   <name>fs.default.name</name>
   <value>hdfs://0.0.0.0:19000</value>
 </property>
</configuration>
Step 8: YARN configurations
Edit file yarn-site.xml
Make sure the following entries are existing as follows.
<configuration> <property>
<name>yarn.nodemanager.aux-services</name>
<value>mapreduce_shuffle</value> </property>
<property>
<name>yarn.nodemanager.aux-services.mapreduce.shuffle.class</name>
<value>org.apache.hadoop.mapred.ShuffleHandler</value>
</property>
</configuration>
Step 9: Edit mapred-site.xml
At last, how about we arrange properties for the Map-Reduce system. Open C:\BigData\hadoop-3.1.2\etc\hadoop\mapred-site.xml and beneath content inside <configuration> </configuration> labels. In the event that you don’t see mapred-site.xml, at that point open mapred-site.xml.template record and rename it to mapred-site.xml
<configuration>
 <property>
    <name>mapreduce.job.user.name</name>    <value>%USERNAME%</value>
 </property>
 <property>
    <name>mapreduce.framework.name</name>
    <value>yarn</value>
 </property>
 <property>
    <name>yarn.apps.stagingDir</name>    <value>/user/%USERNAME%/staging</value>
 </property>
 <property>
    <name>mapreduce.jobtracker.address</name>
    <value>local</value>
 </property>
</configuration>
Check if C:\BigData\hadoop-3.1.2\etc\hadoop\slaves file is present, if it’s not then created one and add localhost in it and save it.
Step 10: Format Name Node :
To organize the Name Node, open another Windows Command Prompt and run the beneath order. It might give you a few admonitions, disregard them.
- hadoop namenode -format

Format Hadoop Name Node
Step 11: Launch Hadoop :
Open another Windows Command brief, make a point to run it as an Administrator to maintain a strategic distance from authorization mistakes. When opened, execute the beginning all.cmd order. Since we have added %HADOOP_HOME%\sbin to the PATH variable, you can run this order from any envelope. In the event that you haven’t done as such, at that point go to the %HADOOP_HOME%\sbin organizer and run the order.

You can check the given below screenshot for your reference 4 new windows will open and cmd terminals for 4 daemon processes like as follows.
- namenode
- datanode
- node manager
- resource manager
Don’t close these windows, minimize them. Closing the windows will terminate the daemons. You can run them in the background if you don’t like to see these windows.

Step 12: Hadoop Web UI
In conclusion, how about we screen to perceive how are Hadoop daemons are getting along. Also you can utilize the Web UI for a wide range of authoritative and observing purposes. Open your program and begin.
Step 13: Resource Manager
Open localhost:8088 to open Resource Manager

Step 14: Node Manager
Open localhost:8042 to open Node Manager

Step 15: Name Node :
Open localhost:9870 to check out the health of Name Node

Step 16: Data Node :
Open localhost:9864 to check out Data Node
