Abstract
This page (it was PEP 103) collects information about git. There is, of
course, a lot of documentation for git, so the PEP concentrates on
more complex (and more related to Python development) issues,
scenarios and examples.
Documentation
Git is accompanied with a lot of documentation, both online and
offline.
Advanced documentation
Git Magic,
with a number of translations.
Pro Git. The Book about git. Buy it at
Amazon or download in PDF, mobi, or ePub form. It has translations to
many different languages. Download Russian translation from GArik.
Git Wiki.
Git Buch (German).
Builtin help
Run git help $TOPIC. For example, run git help git or
git help help. Run git help -a to list help topics for all
available commands; git help -g to list help guides, i.e. help topics
that aren’t commands.
Quick start
Initial configuration
This simple code is often appears in documentation, but it is
important so let repeat it here. Git stores author and committer
names/emails in every commit, so configure your real name and
preferred email:
$ git config --global user.name "User Name"
$ git config --global user.email user.name@example.org
Examples in this PEP
Examples of git commands in this PEP use the following approach. It is
supposed that you, the user, works with a local repository named
python that has an upstream remote repo named origin. Your
local repo has two branches v1 and master. For most examples
the currently checked out branch is master. That is, it’s assumed
you have done something like that:
$ git clone https://git.python.org/python.git
$ cd python
$ git branch v1 origin/v1
The first command clones remote repository into local directory
python`, creates a new local branch master, sets
remotes/origin/master as its upstream remote-tracking branch and
checks it out into the working directory.
The last command creates a new local branch v1 and sets
remotes/origin/v1 as its upstream remote-tracking branch.
The same result can be achieved with commands:
$ git clone -b v1 https://git.python.org/python.git
$ cd python
$ git checkout --track origin/master
The last command creates a new local branch master, sets
remotes/origin/master as its upstream remote-tracking branch and
checks it out into the working directory.
Branches and branches
Git terminology can be a bit misleading. Take, for example, the term
«branch». In git it has two meanings. A branch is a directed line of
commits (possibly with merges). And a branch is a label or a pointer
assigned to a line of commits. It is important to distinguish when you
talk about commits and when about their labels. Lines of commits are
by itself unnamed and are usually only lengthening and merging.
Labels, on the other hand, can be created, moved, renamed and deleted
freely.
Remote repositories and remote branches
Remote-tracking branches are branches (pointers to commits) in your
local repository. They are there for git (and for you) to remember
what branches and commits have been pulled from and pushed to what
remote repos (you can pull from and push to many remotes).
Remote-tracking branches live under remotes/$REMOTE namespaces,
e.g. remotes/origin/master.
To see the status of remote-tracking branches run:
$ git branch -rv
To see local and remote-tracking branches (and tags) pointing to
commits:
$ git log --decorate
You never do your own development on remote-tracking branches. You
create a local branch that has a remote branch as upstream and do
development on that local branch. On push git pushes commits to the
remote repo and updates remote-tracking branches, on pull git fetches
commits from the remote repo, updates remote-tracking branches and
fast-forwards, merges or rebases local branches.
When you do an initial clone like this:
$ git clone -b v1 https://git.python.org/python.git
git clones remote repository https://git.python.org/python.git to
directory python, creates a remote named origin, creates
remote-tracking branches, creates a local branch v1, configure it
to track upstream remotes/origin/v1 branch and checks out v1 into
the working directory.
Some commands, like git status —branch and git branch —verbose,
report the difference between local and remote branches.
Please remember they only do comparison with remote-tracking branches
in your local repository, and the state of those remote-tracking
branches can be outdated. To update remote-tracking branches you
either fetch and merge (or rebase) commits from the remote repository
or update remote-tracking branches without updating local branches.
Updating local and remote-tracking branches
To update remote-tracking branches without updating local branches run
git remote update [$REMOTE…]. For example:
$ git remote update
$ git remote update origin
Fetch and pull
There is a major difference between
$ git fetch $REMOTE $BRANCH
and
$ git fetch $REMOTE $BRANCH:$BRANCH
The first command fetches commits from the named $BRANCH in the
$REMOTE repository that are not in your repository, updates
remote-tracking branch and leaves the id (the hash) of the head commit
in file .git/FETCH_HEAD.
The second command fetches commits from the named $BRANCH in the
$REMOTE repository that are not in your repository and updates both
the local branch $BRANCH and its upstream remote-tracking branch. But
it refuses to update branches in case of non-fast-forward. And it
refuses to update the current branch (currently checked out branch,
where HEAD is pointing to).
The first command is used internally by git pull.
$ git pull $REMOTE $BRANCH
is equivalent to
$ git fetch $REMOTE $BRANCH
$ git merge FETCH_HEAD
Certainly, $BRANCH in that case should be your current branch. If you
want to merge a different branch into your current branch first update
that non-current branch and then merge:
$ git fetch origin v1:v1  # Update v1
$ git pull --rebase origin master  # Update the current branch master
                                   # using rebase instead of merge
$ git merge v1
If you have not yet pushed commits on v1, though, the scenario has
to become a bit more complex. Git refuses to update
non-fast-forwardable branch, and you don’t want to do force-pull
because that would remove your non-pushed commits and you would need
to recover. So you want to rebase v1 but you cannot rebase
non-current branch. Hence, checkout v1 and rebase it before
merging:
$ git checkout v1
$ git pull --rebase origin v1
$ git checkout master
$ git pull --rebase origin master
$ git merge v1
It is possible to configure git to make it fetch/pull a few branches
or all branches at once, so you can simply run
$ git pull origin
or even
$ git pull
Default remote repository for fetching/pulling is origin. Default
set of references to fetch is calculated using matching algorithm: git
fetches all branches having the same name on both ends.
Push
Pushing is a bit simpler. There is only one command push. When you
run
$ git push origin v1 master
git pushes local v1 to remote v1 and local master to remote master.
The same as:
$ git push origin v1:v1 master:master
Git pushes commits to the remote repo and updates remote-tracking
branches. Git refuses to push commits that aren’t fast-forwardable.
You can force-push anyway, but please remember — you can force-push to
your own repositories but don’t force-push to public or shared repos.
If you find git refuses to push commits that aren’t fast-forwardable,
better fetch and merge commits from the remote repo (or rebase your
commits on top of the fetched commits), then push. Only force-push if
you know what you do and why you do it. See the section Commit
editing and caveats below.
It is possible to configure git to make it push a few branches or all
branches at once, so you can simply run
$ git push origin
or even
$ git push
Default remote repository for pushing is origin. Default set of
references to push in git before 2.0 is calculated using matching
algorithm: git pushes all branches having the same name on both ends.
Default set of references to push in git 2.0+ is calculated using
simple algorithm: git pushes the current branch back to its
@{upstream}.
To configure git before 2.0 to the new behaviour run:
$ git config push.default simple
To configure git 2.0+ to the old behaviour run:
$ git config push.default matching
Git doesn’t allow to push a branch if it’s the current branch in the
remote non-bare repository: git refuses to update remote working
directory. You really should push only to bare repositories. For
non-bare repositories git prefers pull-based workflow.
When you want to deploy code on a remote host and can only use push
(because your workstation is behind a firewall and you cannot pull
from it) you do that in two steps using two repositories: you push
from the workstation to a bare repo on the remote host, ssh to the
remote host and pull from the bare repo to a non-bare deployment repo.
That changed in git 2.3, but see the blog post
for caveats; in 2.4 the push-to-deploy feature was further improved.
Private information
When cloning/fetching/pulling/pushing git copies only database objects
(commits, trees, files and tags) and symbolic references (branches and
lightweight tags). Everything else is private to the repository and
never cloned, updated or pushed. It’s your config, your hooks, your
private exclude file.
If you want to distribute hooks, copy them to the working tree, add,
commit, push and instruct the team to update and install the hooks
manually.
Commit editing and caveats
A warning not to edit published (pushed) commits also appears in
documentation but it’s repeated here anyway as it’s very important.
It is possible to recover from a forced push but it’s PITA for the
entire team. Please avoid it.
To see what commits have not been published yet compare the head of the
branch with its upstream remote-tracking branch:
$ git log origin/master..  # from origin/master to HEAD (of master)
$ git log origin/v1..v1  # from origin/v1 to the head of v1
For every branch that has an upstream remote-tracking branch git
maintains an alias @{upstream} (short version @{u}), so the commands
above can be given as:
$ git log @{u}..
$ git log v1@{u}..v1
To see the status of all branches:
$ git branch -avv
To compare the status of local branches with a remote repo:
$ git remote show origin
Read how to recover from upstream rebase.
It is in git help rebase.
On the other hand, don’t be too afraid about commit editing. You can
safely edit, reorder, remove, combine and split commits that haven’t
been pushed yet. You can even push commits to your own (backup) repo,
edit them later and force-push edited commits to replace what have
already been pushed. Not a problem until commits are in a public
or shared repository.
Undo
Whatever you do, don’t panic. Almost anything in git can be undone.
git checkout: restore file’s content
git checkout, for example, can be used to restore the content of
file(s) to that one of a commit. Like this:
git checkout HEAD~ README
The commands restores the contents of README file to the last but one
commit in the current branch. By default the commit ID is simply HEAD;
i.e. git checkout README restores README to the latest commit.
(Do not use git checkout to view a content of a file in a commit,
use git cat-file -p; e.g. git cat-file -p HEAD~:path/to/README).
git reset: remove (non-pushed) commits
git reset moves the head of the current branch. The head can be
moved to point to any commit but it’s often used to remove a commit or
a few (preferably, non-pushed ones) from the top of the branch — that
is, to move the branch backward in order to undo a few (non-pushed)
commits.
git reset has three modes of operation — soft, hard and mixed.
Default is mixed. ProGit explains the
difference very clearly. Bare repositories don’t have indices or
working trees so in a bare repo only soft reset is possible.
Unstaging
Mixed mode reset with a path or paths can be used to unstage changes —
that is, to remove from index changes added with git add for
committing. See The Book for details
about unstaging and other undo tricks.
git reflog: reference log
Removing commits with git reset or moving the head of a branch
sounds dangerous and it is. But there is a way to undo: another
reset back to the original commit. Git doesn’t remove commits
immediately; unreferenced commits (in git terminology they are called
«dangling commits») stay in the database for some time (default is two
weeks) so you can reset back to it or create a new branch pointing to
the original commit.
For every move of a branch’s head — with git commit, git
checkout, git fetch, git pull, git rebase, git reset
and so on — git stores a reference log (reflog for short). For every
move git stores where the head was. Command git reflog can be used
to view (and manipulate) the log.
In addition to the moves of the head of every branch git stores the
moves of the HEAD — a symbolic reference that (usually) names the
current branch. HEAD is changed with git checkout $BRANCH.
By default git reflog shows the moves of the HEAD, i.e. the
command is equivalent to git reflog HEAD. To show the moves of the
head of a branch use the command git reflog $BRANCH.
So to undo a git reset lookup the original commit in git
reflog, verify it with git show or git log and run git
reset $COMMIT_ID. Git stores the move of the branch’s head in
reflog, so you can undo that undo later again.
In a more complex situation you’d want to move some commits along with
resetting the head of the branch. Cherry-pick them to the new branch.
For example, if you want to reset the branch master back to the
original commit but preserve two commits created in the current branch
do something like:
$ git branch save-master  # create a new branch saving master
$ git reflog  # find the original place of master
$ git reset $COMMIT_ID
$ git cherry-pick save-master~ save-master
$ git branch -D save-master  # remove temporary branch
git revert: revert a commit
git revert reverts a commit or commits, that is, it creates a new
commit or commits that revert(s) the effects of the given commits.
It’s the only way to undo published commits (git commit —amend,
git rebase and git reset change the branch in
non-fast-forwardable ways so they should only be used for non-pushed
commits.)
There is a problem with reverting a merge commit. git revert can
undo the code created by the merge commit but it cannot undo the fact
of merge. See the discussion How to revert a faulty merge.
One thing that cannot be undone
Whatever you undo, there is one thing that cannot be undone —
overwritten uncommitted changes. Uncommitted changes don’t belong to
git so git cannot help preserving them.
Most of the time git warns you when you’re going to execute a command
that overwrites uncommitted changes. Git doesn’t allow you to switch
branches with git checkout. It stops you when you’re going to
rebase with non-clean working tree. It refuses to pull new commits
over non-committed files.
But there are commands that do exactly that — overwrite files in the
working tree. Commands like git checkout $PATHs or git reset
—hard silently overwrite files including your uncommitted changes.
With that in mind you can understand the stance «commit early, commit
often». Commit as often as possible. Commit on every save in your
editor or IDE. You can edit your commits before pushing — edit commit
messages, change commits, reorder, combine, split, remove. But save
your changes in git database, either commit changes or at least stash
them with git stash.
Merge or rebase?
Internet is full of heated discussions on the topic: «merge or
rebase?» Most of them are meaningless. When a DVCS is being used in a
big team with a big and complex project with many branches there is
simply no way to avoid merges. So the question’s diminished to
«whether to use rebase, and if yes — when to use rebase?» Considering
that it is very much recommended not to rebase published commits the
question’s diminished even further: «whether to use rebase on
non-pushed commits?»
That small question is for the team to decide. To preserve the beauty
of linear history it’s recommended to use rebase when pulling, i.e. do
git pull —rebase or even configure automatic setup of rebase for
every new branch:
$ git config branch.autosetuprebase always
and configure rebase for existing branches:
$ git config branch.$NAME.rebase true
For example:
$ git config branch.v1.rebase true
$ git config branch.master.rebase true
After that git pull origin master becomes equivalent to git pull
—rebase origin master.
It is recommended to create new commits in a separate feature or topic
branch while using rebase to update the mainline branch. When the
topic branch is ready merge it into mainline. To avoid a tedious task
of resolving large number of conflicts at once you can merge the topic
branch to the mainline from time to time and switch back to the topic
branch to continue working on it. The entire workflow would be
something like:
$ git checkout -b issue-42  # create a new issue branch and switch to it
    ...edit/test/commit...
$ git checkout master
$ git pull --rebase origin master  # update master from the upstream
$ git merge issue-42
$ git branch -d issue-42  # delete the topic branch
$ git push origin master
When the topic branch is deleted only the label is removed, commits
are stayed in the database, they are now merged into master:
o--o--o--o--o--M--< master - the mainline branch
    \         /
     --*--*--*             - the topic branch, now unnamed
The topic branch is deleted to avoid cluttering branch namespace with
small topic branches. Information on what issue was fixed or what
feature was implemented should be in the commit messages.
But even that small amount of rebasing could be too big in case of
long-lived merged branches. Imagine you’re doing work in both v1
and master branches, regularly merging v1 into master.
After some time you will have a lot of merge and non-merge commits in
master. Then you want to push your finished work to a shared
repository and find someone has pushed a few commits to v1. Now
you have a choice of two equally bad alternatives: either you fetch
and rebase v1 and then have to recreate all you work in master
(reset master to the origin, merge v1 and cherry-pick all
non-merge commits from the old master); or merge the new v1 and
loose the beauty of linear history.
Null-merges
Git has a builtin merge strategy for what Python core developers call
«null-merge»:
$ git merge -s ours v1 # null-merge v1 into master
Branching models
Git doesn’t assume any particular development model regarding
branching and merging. Some projects prefer to graduate patches from
the oldest branch to the newest, some prefer to cherry-pick commits
backwards, some use squashing (combining a number of commits into
one). Anything is possible.
There are a few examples to start with. git help workflows
describes how the very git authors develop git.
ProGit book has a few chapters devoted to branch management in
different projects: Git Branching — Branching Workflows and
Distributed Git — Contributing to a Project.
There is also a well-known article A successful Git branching model by Vincent
Driessen. It recommends a set of very detailed rules on creating and
managing mainline, topic and bugfix branches. To support the model the
author implemented git flow
extension.
Advanced configuration
Line endings
Git has builtin mechanisms to handle line endings between platforms
with different end-of-line styles. To allow git to do CRLF conversion
assign text attribute to files using .gitattributes.
For files that have to have specific line endings assign eol
attribute. For binary files the attribute is, naturally, binary.
For example:
$ cat .gitattributes
*.py text
*.txt text
*.png binary
/readme.txt eol=CRLF
To check what attributes git uses for files use git check-attr
command. For example:
$ git check-attr -a -- \*.py
Useful assets
GitAlias (repository) is a big collection of
aliases. A careful selection of aliases for frequently used commands
could save you a lot of keystrokes!
GitIgnore and
https://github.com/github/gitignore are collections of .gitignore
files for all kinds of IDEs and programming languages. Python
included!
pre-commit (repositories) is a framework for managing and
maintaining multi-language pre-commit hooks. The framework is written
in Python and has a lot of plugins for many programming languages.
Advanced topics
Staging area
Staging area aka index aka cache is a distinguishing feature of git.
Staging area is where git collects patches before committing them.
Separation between collecting patches and commit phases provides a
very useful feature of git: you can review collected patches before
commit and even edit them — remove some hunks, add new hunks and
review again.
To add files to the index use git add. Collecting patches before
committing means you need to do that for every change, not only to add
new (untracked) files. To simplify committing in case you just want to
commit everything without reviewing run git commit —all (or just
-a) — the command adds every changed tracked file to the index and
then commit. To commit a file or files regardless of patches collected
in the index run git commit [—only|-o] — $FILE….
To add hunks of patches to the index use git add —patch (or just
-p). To remove collected files from the index use git reset HEAD
— $FILE… To add/inspect/remove collected hunks use git add
—interactive (-i).
To see the diff between the index and the last commit (i.e., collected
patches) use git diff —cached. To see the diff between the
working tree and the index (i.e., uncollected patches) use just git
diff. To see the diff between the working tree and the last commit
(i.e., both collected and uncollected patches) run git diff HEAD.
See WhatIsTheIndex and
IndexCommandQuickref in Git
Wiki.
Aliases
Recursive aliases
Git doesn’t allow recursive aliases. The expansion of an alias is
interpreted by git as a builtin command. I.e., in the following example
alias com doesn’t work because there is no builtin command git
ci:
[alias]
ci = commit
com = ci
You can trick git by using shell. The following example works albeit a
bit slow:
[alias]
ci = commit
com = !git ci
Literal expansion
Git interprets aliases literally. I.e., when expanding an alias git just
does simple textual substitution. That could be a surprise if an alias
is passed parameters on the command line. For example, the following
alias works without parameters — it pushes configured branch(es) to all
configured remotes:
[alias]
push-to-all-remotes = !git remote | xargs -n1 git push
But it doesn’t work if a user wants to provide a list of branches to
push: the command git push-to-all-remotes master is expanded by git
as !git remote | xargs -n1 git push master which is certainly not
what the user wants — remote’s name must comes first, before branches.
This is a fix:
[alias]
push-to-all-remotes = !git remote | xargs -I% -n1 git push %
Then the command git push-to-all-remotes master is expanded by git
as !git remote | xargs -I% -n1 git push % master; xargs substitutes
% with remote’s name.
Root
Git switches to the root (top-level directory of the project where
.git subdirectory exists) before running any command. Git
remembers though the directory that was current before the switch.
Some programs take into account the current directory. E.g., git
status shows file paths of changed and unknown files relative to the
current directory; git grep searches below the current directory;
git apply applies only those hunks from the patch that touch files
below the current directory.
But most commands run from the root and ignore the current directory.
Imagine, for example, that you have two work trees, one for the branch
v1 and the other for master. If you want to merge v1 from
a subdirectory inside the second work tree you must write commands as
if you’re in the top-level dir. Let take two work trees,
project-v1 and project, for example:
$ cd project/subdirectory
$ git fetch ../project-v1 v1:v1
$ git merge v1
Please note the path in git fetch ../project-v1 v1:v1 is
../project-v1 and not ../../project-v1 despite the fact that
we run the commands from a subdirectory, not from the root.
ReReRe
Rerere is a mechanism that helps to resolve repeated merge conflicts.
The most frequent source of recurring merge conflicts are topic
branches that are merged into mainline and then the merge commits are
removed; that’s often performed to test the topic branches and train
rerere; merge commits are removed to have clean linear history and
finish the topic branch with only one last merge commit.
Rerere works by remembering the states of tree before and after a
successful commit. That way rerere can automatically resolve conflicts
if they appear in the same files.
Rerere can be used manually with git rerere command but most often
it’s used automatically. Enable rerere with these commands in a
working tree:
$ git config rerere.enabled true
$ git config rerere.autoupdate true
You don’t need to turn rerere on globally — you don’t want rerere in
bare repositories or single-branch repositories; you only need rerere
in repos where you often perform merges and resolve merge conflicts.
See Rerere in The
Book.
Database maintenance
Git object database and other files/directories under .git require
periodic maintenance and cleanup. For example, commit editing left
unreferenced objects (dangling objects, in git terminology) and these
objects should be pruned to avoid collecting cruft in the DB. The
command git gc is used for maintenance. Git automatically runs
git gc —auto as a part of some commands to do quick maintenance.
Users are recommended to run git gc —aggressive from time to
time; git help gc recommends to run it every few hundred
changesets; for more intensive projects it should be something like
once a week and less frequently (biweekly or monthly) for lesser
active projects.
git gc —aggressive not only removes dangling objects, it also
repacks object database into indexed and better optimized pack(s); it
also packs symbolic references (branches and tags). Another way to do
it is to run git repack.
There is a well-known message from Linus
Torvalds regarding «stupidity» of git gc —aggressive. The message
can safely be ignored now. It is old and outdated, git gc
—aggressive became much better since that time.
For those who still prefer git repack over git gc —aggressive
the recommended parameters are git repack -a -d -f —depth=20
—window=250. See this detailed experiment
for explanation of the effects of these parameters.
From time to time run git fsck [—strict] to verify integrity of
the database. git fsck may produce a list of dangling objects;
that’s not an error, just a reminder to perform regular maintenance.
Tips and tricks
Command-line options and arguments
git help cli
recommends not to combine short options/flags. Most of the times
combining works: git commit -av works perfectly, but there are
situations when it doesn’t. E.g., git log -p -5 cannot be combined
as git log -p5.
Some options have arguments, some even have default arguments. In that
case the argument for such option must be spelled in a sticky way:
-Oarg, never -O arg because for an option that has a default
argument the latter means «use default value for option -O and
pass arg further to the option parser». For example, git grep
has an option -O that passes a list of names of the found files to
a program; default program for -O is a pager (usually less),
but you can use your editor:
$ git grep -Ovim # but not -O vim
BTW, if git is instructed to use less as the pager (i.e., if pager
is not configured in git at all it uses less by default, or if it
gets less from GIT_PAGER or PAGER environment variables, or if it
was configured with git config [—global] core.pager less, or
less is used in the command git grep -Oless) git grep
passes +/$pattern option to less which is quite convenient.
Unfortunately, git grep doesn’t pass the pattern if the pager is
not exactly less, even if it’s less with parameters (something
like git config [—global] core.pager less -FRSXgimq); fortunately,
git grep -Oless always passes the pattern.
bash/zsh completion
It’s a bit hard to type git rebase —interactive —preserve-merges
HEAD~5 manually even for those who are happy to use command-line,
and this is where shell completion is of great help. Bash/zsh come
with programmable completion, often automatically installed and
enabled, so if you have bash/zsh and git installed, chances are you
are already done — just go and use it at the command-line.
If you don’t have necessary bits installed, install and enable
bash_completion package. If you want to upgrade your git completion to
the latest and greatest download necessary file from git contrib.
Git-for-windows comes with git-bash for which bash completion is
installed and enabled.
bash/zsh prompt
For command-line lovers shell prompt can carry a lot of useful
information. To include git information in the prompt use
git-prompt.sh.
Read the detailed instructions in the file.
Search the Net for «git prompt» to find other prompt variants.
SSH connection sharing
SSH connection sharing is a feature of OpenSSH and perhaps derivatives
like PuTTY. SSH connection sharing is a way to decrease ssh client
startup time by establishing one connection and reusing it for all
subsequent clients connecting to the same server. SSH connection
sharing can be used to speedup a lot of short ssh sessions like scp,
sftp, rsync and of course git over ssh. If you regularly
fetch/pull/push from/to remote repositories accessible over ssh then
using ssh connection sharing is recommended.
To turn on ssh connection sharing add something like this to your
~/.ssh/config:
Host *
ControlMaster auto
ControlPath ~/.ssh/mux-%r@%h:%p
ControlPersist 600
See OpenSSH wikibook and
search for
more information.
SSH connection sharing can be used at GitHub, GitLab and SourceForge
repositories, but please be advised that BitBucket doesn’t allow it
and forcibly closes master connection after a short inactivity period
so you will see errors like this from ssh: «Connection to bitbucket.org
closed by remote host.»
git on server
The simplest way to publish a repository or a group of repositories is
git daemon. The daemon provides anonymous access, by default it is
read-only. The repositories are accessible by git protocol (git://
URLs). Write access can be enabled but the protocol lacks any
authentication means, so it should be enabled only within a trusted
LAN. See git help daemon for details.
Git over ssh provides authentication and repo-level authorisation as
repositories can be made user- or group-writeable (see parameter
core.sharedRepository in git help config). If that’s too
permissive or too restrictive for some project’s needs there is a
wrapper gitolite that can
be configured to allow access with great granularity; gitolite is
written in Perl and has a lot of documentation.
Web interface to browse repositories can be created using gitweb or cgit. Both are CGI scripts (written in
Perl and C). In addition to web interface both provide read-only dumb
http access for git (http(s):// URLs). Klaus is a small and simple WSGI web
server that implements both web interface and git smart HTTP
transport; supports Python 2 and Python 3, performs syntax
highlighting.
There are also more advanced web-based development environments that
include ability to manage users, groups and projects; private,
group-accessible and public repositories; they often include issue
trackers, wiki pages, pull requests and other tools for development
and communication. Among these environments are Kallithea and pagure,
both are written in Python; pagure was written by Fedora developers
and is being used to develop some Fedora projects. GitPrep is yet another GitHub clone,
written in Perl. Gogs is written in Go. GitBucket is written in
Scala. RocketGit is AGPL-licensed
development environment written in PHP (there are plans to rewrite
critical parts in C).
And last but not least, GitLab. It’s
perhaps the most advanced web-based development environment for git.
Written in Ruby, community edition is free and open source (MIT
license).
From Mercurial to git
There are many tools to convert Mercurial repositories to git. The
most famous are, probably, hg-git and
fast-export (many years ago
it was known under the name hg2git).
But a better tool, perhaps the best, is git-remote-hg. It provides transparent
bidirectional (pull and push) access to Mercurial repositories from
git. Its author wrote a comparison of alternatives
that seems to be mostly objective.
To use git-remote-hg, install or clone it, add to your PATH (or copy
script git-remote-hg to a directory that’s already in PATH) and
prepend hg:: to Mercurial URLs. For example:
$ git clone https://github.com/felipec/git-remote-hg.git
$ PATH=$PATH:"`pwd`"/git-remote-hg
$ git clone hg::https://hg.python.org/peps/ PEPs
To work with the repository just use regular git commands including
git fetch/pull/push.
To start converting your Mercurial habits to git see the page
Mercurial for Git users at Mercurial wiki.
At the second half of the page there is a table that lists
corresponding Mercurial and git commands. Should work perfectly in
both directions.
Python Developer’s Guide also has a chapter Mercurial for git
developers that
documents a few differences between git and hg.
Git and GitHub
gitsome — Git/GitHub
command line interface (CLI). Written in Python, work on MacOS, Unix,
Windows. Git/GitHub CLI with autocomplete, includes many GitHub
integrated commands that work with all shells, builtin xonsh with
Python REPL to run Python commands alongside shell commands, command
history, customizable highlighting, thoroughly documented.
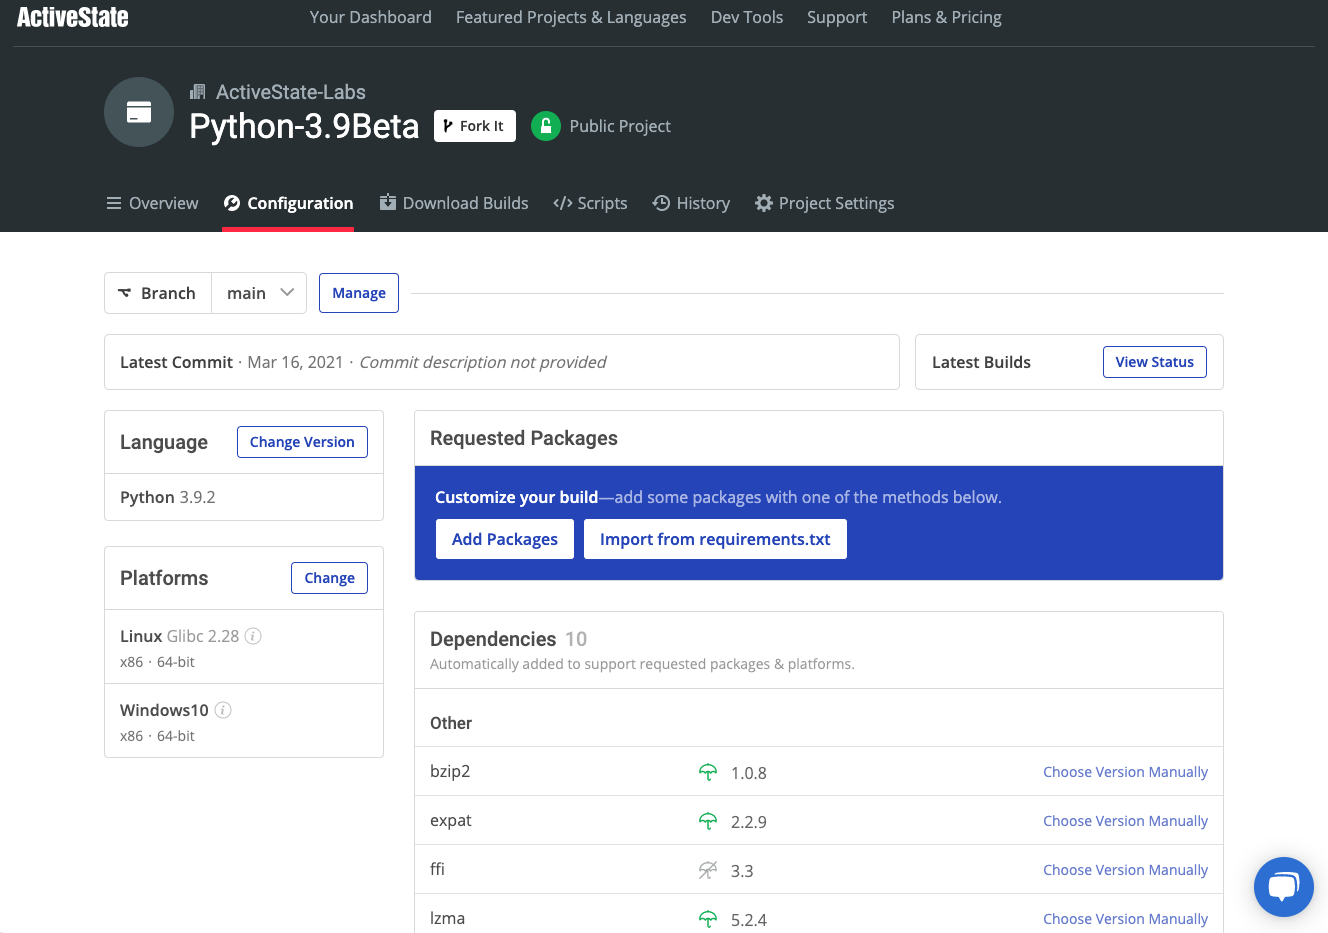
Try a faster and easier way to work with Python packages like Exchangelib. Use Python 3.9 by ActiveState and build your own runtime with the packages and dependencies you need. Get started for free by creating an account on the ActiveState Platform or logging in with your GitHub account.
Pip/pip3 is the official package manager for Python, and is the tool recommended by the Python Packing Authority (PyPA) for installing Python packages. The term ‘pip’ is used interchangeably with ‘pip3’ in this Quick Guide.
By default, pip installs packages and all their required dependencies from the Python Package Index (PyPI), using the command:
pip install <package_name>.
However, pip doesn’t currently support dependency resolution, which can lead to corrupted environments. To avoid this, you may want to try the ActiveState Platform, which is the only Python package management solution that automatically resolves dependencies, flags conflicts, and will even suggest a manual workaround to resolve the conflict. Get started with the ActiveState Platform by signing up for a free account.
Git Version Control
Git is a Version Control System (VCS) for managing changes in source code, as well as other types of files (eg. html) and file structures in Git repositories. It allows developers to collaborate on projects without conflict.
![]()
A Git repository is a .git/ folder inside a software development project. You can deploy Git locally, or use it via a hosted service, such as Github, Gitlab or Bitbucket.
One of the advantages of using pip together with Git is to install the latest commits of unreleased Python packages as branches from Github. Some examples of this are provided below.
Git Installation Prerequisites
First determine whether you have up-to-date versions of Python, pip, and Git. You can check which version of Python (if any) is installed, by entering the following command in a terminal or command window:
python --version
Output should be similar to:
Python 3.8.2
You can check if pip is already installed and up-to-date by entering the following command:
pip --version
Output should be similar to:
pip 20.0.2 from C:\Python38\lib\site-packages\pip (python 3.8)
If either Python or pip is not installed or up-to-date, the simplest way to get an up-to-date Python version with pip for either Linux, MacOS or Windows, is to install Python 3.9 from ActiveState.
Git Installation
Before installing Git, you should first determine whether you have it installed by running the following git command:
git --version
Output should be similar to:
git version 2.32.0.windows.2
For Linux:
Most Linux platforms already have a basic Git installation by default, but they are generally not up-to-date. Git installation commands for various Linux platforms are listed here:
- Debian-based installation, such as Ubuntu:
sudo apt install git-all
or
apt-get install git
- RHEL and CentOS:
sudo dnf install git-all
- Fedora:
# Up to Fedora 21:
yum install git
# Fedora 22 and later:
dnf install git
- openSUSE:
zypper install git
For macOS:
Although MacOS comes with a command line tools installer that includes Git, Homebrew is the recommended option for macOS Git installation.
To install Homebrew, run the following script in your terminal:
/bin/bash -c "$(curl -fsSL https://raw.githubusercontent.com/Homebrew/install/HEAD/install.sh)"
Once Homebrew is installed, you can install Git with the following command:
brew install git
For Windows:
To install Git for Windows, point your browser at https://git-scm.com/download/win. A download of the Windows Git installer will begin automatically. Once complete, you can double-click the installer and follow the steps.
First-Time Git Setup
Once Git is installed, your Git environment and configuration variables need to be customized with git config.
You can view your default Git configuration options with the following command:
git config -h
Output should be similar to:
usage: git config [<options>]
...
Set Your Git Identity
Set your user name and email address. This is important because every Git commit uses this information:
git config --global user.name "John Doe"
git config --global user.email johndoe@example.com
This only needs to be done once on each computer, if you include the –global option.
After you have set your user name and email address, you can check your settings with the following command:
git config --list
Git Usage
Once your Git identity has been configured, you can begin using Git to install Github branches.
Pip Install Git Syntax
The following command syntax can be used to install the default branch of a github project:
pip install git+https://github.com/<owner_name>/<repo_name>.git
Pip Install Git Branch – Example
To install the latest commit of the Exchangelib package, run:
pip install git+https://github.com/ecederstrand/exchangelib
Pip Install Git Subdirectory
This feature is not yet available.
Pip Install Git Version
To pip install a specific version of a repository branch, enter:
pip install https://git+github.com/<owner_name>/<repo_name>.git.@<version#>
Pip Install Git Requirements.txt
To include Git dependencies and submodules dependencies, located at:
https://github.com/<owner_name>/<repos_name>.git@<version#>
in a requirements.txt file:
# requirements.txt should include:
packageA==<version#>
-e https://github.com/<owner_name>/<repo_name>.git@<version#>#egg=<repo_name>
# Install requirements.txt file with -r flag:
pip install -r requirements.txt
Git Clone – Syntax
The Git clone command is used in cloning or downloading a Git project without installing it.
First navigate to the directory where you to locate the cloned repository, then enter:
git clone https://github.com/<owner_name>/<repo_name>
Github Desktop – Clone with SSH Option
Github Desktop is a Windows Github Git client for cloning. It has an SSH authentication option that requires a public SSH key. A link with directions is included.

Figure 1. Github Desktop > Clone > SSH Option:
Pip Install Git With SSH
The following syntax will use SSH to install a Git repository that is not password protected:
pip install git+ssh://github.com/<owner_name>/<repo_name>.git@<version#>#egg=<repo_name>
A modern solution to Python package management – Try ActiveState’s Platform
Dependency resolution is at the core of the ActiveState Platform. When you create a project and start adding requirements, the Platforms tell you what dependencies those requirements have.
The ActiveState Platform is a cloud-based build tool for Python. It provides build automation and vulnerability remediation for:
- Python language cores, including Python 2.7 and Python 3.5+
- Python packages and their dependencies, including:
- Transitive dependencies (ie., dependencies of dependencies)
- Linked C and Fortran libraries, so you can build data science packages
- Operating system-level dependencies for Windows, Linux, and macOS
- Shared dependencies (ie., OpenSSL)
- Find, fix and automatically rebuild a secure version of Python packages like Django and environments in minutes
 The ActiveState Platform aims to handle every dependency for every language. That means handling libraries down to the C/C++ level, external tools, and all the conditional dependencies that exist. To take things even further, our ultimate goal is to support multi-language projects. That means that you can create a project using both Python and Perl packages, and we’ll make sure that both languages are using the same (up to date) OpenSSL version.
Python Package Management In Action
Get a hands-on appreciation for how the ActiveState Platform can help you manage your dependencies for Python environments. Just run the following command to install Python 3.9 and our package manager, the State Tool:
Windows
powershell -Command "& $([scriptblock]::Create((New-Object Net.WebClient).DownloadString('https://platform.activestate.com/dl/cli/install.ps1'))) -activate-default ActiveState-Labs/Python-3.9Beta"
Linux
sh <(curl -q https://platform.activestate.com/dl/cli/install.sh) --activate-default ActiveState-Labs/Python-3.9Beta
Now you can run state install <packagename>. Learn more about how to use the State Tool to manage your Python environment.
Let us know your experience in the ActiveState Community forum.
Watch this video to learn how to use the ActiveState Platform to create a Python 3.9 environment, and then use the Platform’s CLI (State Tool) to install and manage it.
Overview / Install
GitPython is a python library used to interact with git repositories, high-level like git-porcelain, or low-level like git-plumbing.
It provides abstractions of git objects for easy access of repository data, and additionally allows you to access the git repository more directly using either a pure python implementation, or the faster, but more resource intensive git command implementation.
The object database implementation is optimized for handling large quantities of objects and large datasets, which is achieved by using low-level structures and data streaming.
Requirements
- Python >= 3.7
-
- Git 1.7.0 or newer
- It should also work with older versions, but it may be that some operations
involving remotes will not work as expected.
- GitDB — a pure python git database implementation
- typing_extensions >= 3.7.3.4 (if python < 3.10)
Installing GitPython
Installing GitPython is easily done using
pip. Assuming it is
installed, just run the following from the command-line:
This command will download the latest version of GitPython from the
Python Package Index and install it
to your system. More information about pip and pypi can be found
here:
- install pip
- pypi
Alternatively, you can install from the distribution using the setup.py
script:
# python setup.py install
Note
In this case, you have to manually install GitDB as well. It would be recommended to use the git source repository in that case.
Limitations
Leakage of System Resources
GitPython is not suited for long-running processes (like daemons) as it tends to
leak system resources. It was written in a time where destructors (as implemented
in the __del__ method) still ran deterministically.
In case you still want to use it in such a context, you will want to search the
codebase for __del__ implementations and call these yourself when you see fit.
Another way assure proper cleanup of resources is to factor out GitPython into a
separate process which can be dropped periodically.
Getting Started
- GitPython Tutorial — This tutorial provides a walk-through of some of
the basic functionality and concepts used in GitPython. It, however, is not
exhaustive so you are encouraged to spend some time in the
API Reference.
API Reference
An organized section of the GitPython API is at API Reference.
Source Code
GitPython’s git repo is available on GitHub, which can be browsed at:
- https://github.com/gitpython-developers/GitPython
and cloned using:
$ git clone https://github.com/gitpython-developers/GitPython git-python
Initialize all submodules to obtain the required dependencies with:
$ cd git-python
$ git submodule update --init --recursive
Finally verify the installation by running unit tests:
License Information
GitPython is licensed under the New BSD License. See the LICENSE file for
more information.
A Virtual Environment is a mechanism that can be compared with a separating funnel, when we are creating or using different projects which require different types of packages and modules we will create a virtual environment for each of them so that the packages/modules we install for say project A doesn’t affect project B. Virtual environment’s main job is to manage different python packages used for different python projects so that no package version or anything gets overlapped with other project and cause any failure. To know more about Virtual Environments and their necessity, click here.
Downloading and Installation of Git in Virtualenv
Users can write the commands in Command Prompt or the terminal of any IDE like PyCharm of VSCode. Here, we will be using the cmd. Follow the further steps to install git in virtualenv.
Step 1: Write the below command in cmd or any terminal of the user’s choice.
mkdir test-venv && cd test-venv
If the user uses any other terminal than cmd then break the above command into two like the below as the ‘&&’ will be unrecognized by other terminals.
mkdir test-venv && cd test-venv

Running the mkdir and cd command together
Step 2: After changing the directory to the newly created one, write the below command.
python -m venv env
Now, if the user gets any error with python change it to python3. Using the above command we have now created a Virtual Environment inside of that directory named test-venv (The user can give any name it doesn’t matter).
Step 3: Now, it is time to activate/start the virtual environment.
cd env
Scripts\activate
Remember to use uppercase S for Scripts. If the user is using any other terminal rather than cmd then use the command below.
source env/bin/activate
Cmd doesn’t understand the source so that’s why we had to first change the directory manually and then activate it.

output after activating the venv
As it is visible in front of the path we have an (env) which indicates that everything we do or every module we will install will only be available in that env (i.e Virtual Environment) and no other project will be affected by this.
Step 3: Now, for example, we will install a basic package here, one of the most common and required modules for Data Science is pandas, so we will install it here as it is lightweight and necessary. So run the following command.
pip install pandas

installing pandas module
Step 4: Now write deactivate in the terminal or cmd to stop the Virtual Environment. As of now, we will initialize the repo with git. Write the below command.
deactivate
git init

deactivating the venv
Step 5: Now we will add the env folder into .gitignore so that the virtual environment is ignored every time during the source control.
echo ‘env’ > .gitignore
Step 6 (Optional): If the user wants that their repository will be used by others and the dependencies (modules/packages) they have used in their code should be installed before running their code on a different machine then it is better to create a requirements.txt file with all the dependencies used. Write the below command to do that.
pip freeze > requirements.txt
Now add it using git.
git add requirements.txt
Step 7: After adding it we will now commit it. Users can give some messages (it is recommended to do that) while committing some new changes,
git commit -m “Adding the requirements.txt file”

committing the newly added files
Step 8 (Optional): Now if the user wants to see the changes reflected in GitHub then they must create a new repository without having any gitignore or readme files for now. Then write the following commands one by one.
git branch -M main
Now after using the above command user need to copy their remote_url from GitHub.

Github remote URL
Copy the highlighted url from the user’s repository. Then write the following command in terminal
git remote add origin <REMOTE_URL_COPED_FROM_GITHUB>
Now, for reassurance, the user might run the git add and the git commit commands again to re-assure that everything is being traced and added before pushing it to the branch. Write the below command:
git push -u origin main

pushing into main branch
Now users need to refresh their GitHub page and see all the files are being updated there.

after pushing updated github screen
Last Updated :
13 Dec, 2022
Like Article
Save Article
![]()

Gitoxide: A peek into the future…
I started working on GitPython in 2009, back in the days when Python was ‘my thing’ and I had great plans with it.
Of course, back in the days, I didn’t really know what I was doing and this shows in many places. Somewhat similar to
Python this happens to be ‘good enough’, but at the same time is deeply flawed and broken beyond repair.
By now, GitPython is widely used and I am sure there is a good reason for that, it’s something to be proud of and happy about.
The community is maintaining the software and is keeping it relevant for which I am absolutely grateful. For the time to come I am happy to continue maintaining GitPython, remaining hopeful that one day it won’t be needed anymore.
More than 15 years after my first meeting with ‘git’ I am still in excited about it, and am happy to finally have the tools and
probably the skills to scratch that itch of mine: implement git in a way that makes tool creation a piece of cake for most.
If you like the idea and want to learn more, please head over to gitoxide, an
implementation of ‘git’ in Rust.
GitPython
GitPython is a python library used to interact with git repositories, high-level like git-porcelain,
or low-level like git-plumbing.
It provides abstractions of git objects for easy access of repository data often backed by calling the git
command-line program.
DEVELOPMENT STATUS
This project is in maintenance mode, which means that
- …there will be no feature development, unless these are contributed
- …there will be no bug fixes, unless they are relevant to the safety of users, or contributed
- …issues will be responded to with waiting times of up to a month
The project is open to contributions of all kinds, as well as new maintainers.
REQUIREMENTS
GitPython needs the git executable to be installed on the system and available in your PATH for most operations.
If it is not in your PATH, you can help GitPython find it by setting
the GIT_PYTHON_GIT_EXECUTABLE=<path/to/git> environment variable.
- Git (1.7.x or newer)
- Python >= 3.7
The list of dependencies are listed in ./requirements.txt and ./test-requirements.txt.
The installer takes care of installing them for you.
INSTALL
GitPython and its required package dependencies can be installed in any of the following ways, all of which should typically be done in a virtual environment.
From PyPI
To obtain and install a copy from PyPI, run:
(A distribution package can also be downloaded for manual installation at the PyPI page.)
From downloaded source code
If you have downloaded the source code, run this from inside the unpacked GitPython directory:
By cloning the source code repository
To clone the the GitHub repository from source to work on the code, you can do it like so:
git clone https://github.com/gitpython-developers/GitPython
cd GitPython
./init-tests-after-clone.sh
On Windows, ./init-tests-after-clone.sh can be run in a Git Bash shell.
If you are cloning your own fork, then replace the above git clone command with one that gives the URL of your fork. Or use this gh command (assuming you have gh and your fork is called GitPython):
Having cloned the repo, create and activate your virtual environment.
Then make an editable install:
In the less common case that you do not want to install test dependencies, pip install -e . can be used instead.
Limitations
Leakage of System Resources
GitPython is not suited for long-running processes (like daemons) as it tends to
leak system resources. It was written in a time where destructors (as implemented
in the __del__ method) still ran deterministically.
In case you still want to use it in such a context, you will want to search the
codebase for __del__ implementations and call these yourself when you see fit.
Another way assure proper cleanup of resources is to factor out GitPython into a
separate process which can be dropped periodically.
Windows support
See Issue #525.
RUNNING TESTS
Important: Right after cloning this repository, please be sure to have executed
the ./init-tests-after-clone.sh script in the repository root. Otherwise
you will encounter test failures.
Install test dependencies
Ensure testing libraries are installed. This is taken care of already if you installed with:
Otherwise, you can run:
pip install -r test-requirements.txt
Test commands
To test, run:
To lint, and apply automatic code formatting, run:
pre-commit run --all-files
- Linting without modifying code can be done with:
make lint - Auto-formatting without other lint checks can be done with:
black .
To typecheck, run:
CI (and tox)
The same linting, and running tests on all the different supported Python versions, will be performed:
- Upon submitting a pull request.
- On each push, if you have a fork with GitHub Actions enabled.
- Locally, if you run
tox(this skips any Python versions you don’t have installed).
Configuration files
Specific tools:
- Configurations for
mypy,pytest,coverage.py, andblackare in./pyproject.toml. - Configuration for
flake8is in the./.flake8file.
Orchestration tools:
- Configuration for
pre-commitis in the./.pre-commit-config.yamlfile. - Configuration for
toxis in./tox.ini. - Configuration for GitHub Actions (CI) is in files inside
./.github/workflows/.
Contributions
Please have a look at the contributions file.
INFRASTRUCTURE
- User Documentation
- Questions and Answers
- Please post on Stack Overflow and use the
gitpythontag - Issue Tracker
- Post reproducible bugs and feature requests as a new issue.
Please be sure to provide the following information if posting bugs:- GitPython version (e.g.
import git; git.__version__) - Python version (e.g.
python --version) - The encountered stack-trace, if applicable
- Enough information to allow reproducing the issue
- GitPython version (e.g.
- Post reproducible bugs and feature requests as a new issue.
How to make a new release
- Update/verify the version in the
VERSIONfile. - Update/verify that the
doc/source/changes.rstchangelog file was updated. - Commit everything.
- Run
git tag -s <version>to tag the version in Git. - Optionally create and activate a virtual environment using
venvorvirtualenv.
(When run in a virtual environment, the next step will automatically take care of installingbuildandtwinein it.) - Run
make release. - Close the milestone mentioned in the changelog and create a new one. Do not reuse milestones by renaming them.
- Go to GitHub Releases and publish a new one with the recently pushed tag. Generate the changelog.
How to verify a release (DEPRECATED)
Note that what follows is deprecated and future releases won’t be signed anymore.
More details about how it came to that can be found in this issue.
Please only use releases from pypi as you can verify the respective source
tarballs.
This script shows how to verify the tarball was indeed created by the authors of
this project:
curl https://files.pythonhosted.org/packages/09/bc/ae32e07e89cc25b9e5c793d19a1e5454d30a8e37d95040991160f942519e/GitPython-3.1.8-py3-none-any.whl > gitpython.whl
curl https://files.pythonhosted.org/packages/09/bc/ae32e07e89cc25b9e5c793d19a1e5454d30a8e37d95040991160f942519e/GitPython-3.1.8-py3-none-any.whl.asc >  gitpython-signature.asc
gpg --verify gitpython-signature.asc gitpython.whl
which outputs
gpg: Signature made Fr  4 Sep 10:04:50 2020 CST
gpg:                using RSA key 27C50E7F590947D7273A741E85194C08421980C9
gpg: Good signature from "Sebastian Thiel (YubiKey USB-C) <byronimo@gmail.com>" [ultimate]
gpg:                 aka "Sebastian Thiel (In Rust I trust) <sebastian.thiel@icloud.com>" [ultimate]
You can verify that the keyid indeed matches the release-signature key provided in this
repository by looking at the keys details:
gpg --list-packets ./release-verification-key.asc
You can verify that the commit adding it was also signed by it using:
git show --show-signature ./release-verification-key.asc
If you would like to trust it permanently, you can import and sign it:
gpg --import ./release-verification-key.asc
gpg --edit-key 4C08421980C9

> sign
> save
Projects using GitPython
- PyDriller
- Kivy Designer
- Prowl
- Python Taint
- Buster
- git-ftp
- Git-Pandas
- PyGitUp
- PyJFuzz
- Loki
- Omniwallet
- GitViper
- Git Gud
LICENSE
New BSD License. See the LICENSE file.