Если приложение «Фото» не запускается или вызывает ошибку, вы можете восстановить его с помощью PowerShell. Вот шаги для Windows 10.
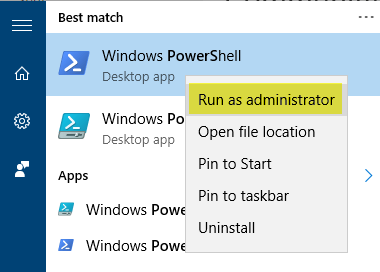
Нажмите Пуск, введите powershell, щелкните правой кнопкой мыши Windows Powershell и выберите Запуск от имени администратора
Чтобы заново зарегистрировать или переустановить приложение «Фото», используйте один из следующих способов:
Опция 1
Выполните следующую команду:
Get-AppxPackage -allusers Microsoft.Windows.Photos | Foreach {Add-AppxPackage -DisableDevelopmentMode -Register "$($_.InstallLocation)\AppXManifest.xml"}
Вариант 2
Сначала выполните следующую команду, чтобы получить идентификатор пакета приложения «Фото», а затем используйте его во второй команде ниже:
Get-AppxPackage Microsoft.Windows.Photos -allusers | select PackageFullName
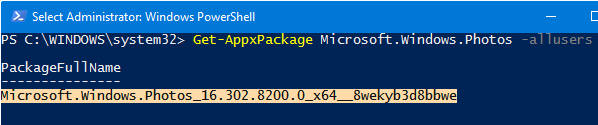
Запишите имя показанного пакета. Например, если имя пакета указано как Microsoft.Windows.Photos_16.302.8200.0_x64__8wekyb3d8bbwe, выполните следующую команду следующим образом:
Add-AppxPackage -register "C:\Program Files\WindowsApps\Microsoft.Windows.Photos_16.302.8200.0_x64__8wekyb3d8bbwe\AppxManifest.xml" -DisableDevelopmentMode

Это переустанавливает приложение Фотографии.
Другой вариант установки Photos — загрузить его из Магазина Windows.
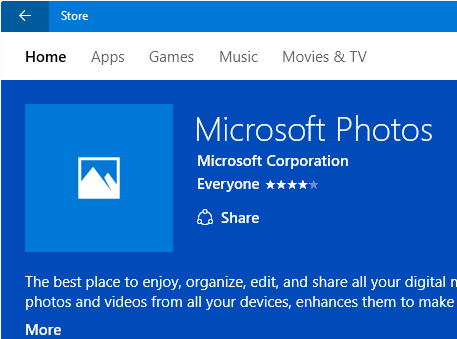
Откройте Магазин Windows из Пуск / Поиск.
В App Store найдите Microsoft Photos и установите его.
Удаление приложения «Фотографии»
Введите следующую команду и нажмите {ENTER}
Get-AppxPackage Microsoft.Windows.Photos | Remove-AppxPackage
Это удаляет приложение «Фото».
Корпорация Майкрософт пришла к выводам, что стандартное средство просмотра фотографий устарело и не подходит для использования на устройствах с наличием сенсорного управления. Обновленное приложение для просмотра фотографий позволяет не только просматривать изображения, но и редактировать и применять различные фильтры.
Данная статья расскажет что делать в первую очередь, когда не открываются фотографии на Windows 10. Приложение фотографии может не работать по множеству различных причин. Но способы устранения проблемы являются универсальными для всех приложений с Microsoft Store. Обычно сброс настроек и переустановка приложения решает проблему запуска, но при необходимости можно перерегистрировать приложение фотографии в Windows 10.
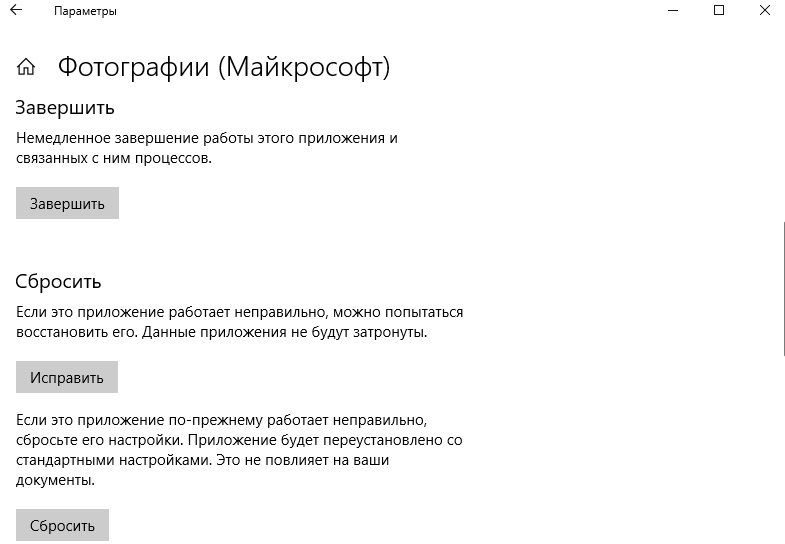
Если приложение работает не правильно, можно попытаться восстановить его. В таком случае данные приложения не будут затронуты. Если это приложение по-прежнему работает не правильно, сбросьте его настройки. Приложение будет переустановлено со стандартными настройками.
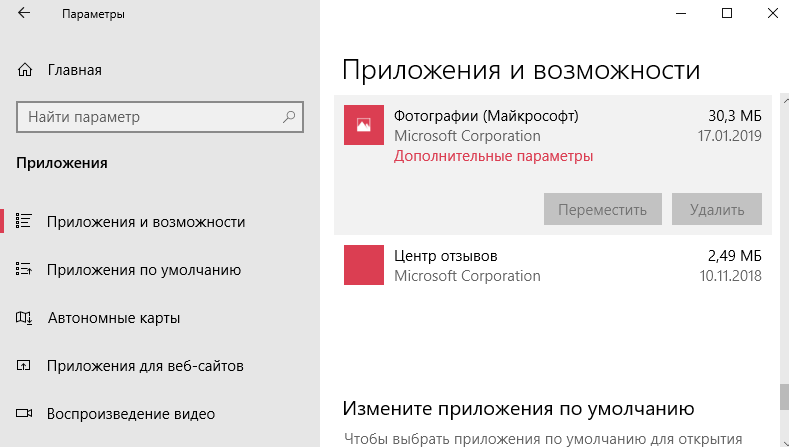
- Откройте Пуск > Параметры > Приложения > Приложения и возможности.
- В списке приложений выделите Фотографии (Майкрософт), и выберите пункт Дополнительные параметры.

- Дальше для восстановления работоспособности нажмите по очереди кнопки Завершить, Исправить и Сбросить.

Как перерегистрировать приложение фотографии Windows 10
Перерегистрация приложений используется для восстановления работоспособности стандартных приложений в Windows 10 с Microsoft Store. После выполнения буквально одной конкретной команды в оболочке Windows PowerShell исправляемое таким способом приложение начинает нормально работать.
- Запустите оболочку Windows PowerShell выбрав в контекстном меню кнопки пуск Windows PowerShell (администратор).
- В открывшемся окне выполните команду: Get-AppXPackage | Foreach {Add-AppxPackage -DisableDevelopmentMode -Register «$($_.InstallLocation)\AppXManifest.xml»}
После выполнения команды будет выполнена перерегистрация всех стандартных приложений Windows 10. Для перерегистрации только приложения фотографии необходимо выполнить команду: Get-Appxpackage -Allusers -Name Microsoft.Windows.Photos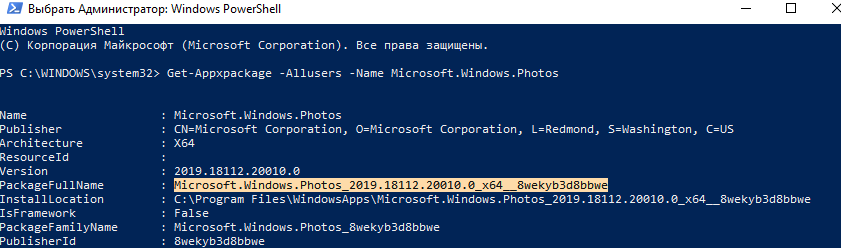
Дальше копируем полное имя приложения фотографии в пункте PackageFullName и вставляем его в команду вместо PackageFullName. Не можно сделать скопировать универсальную команду и просто выполнить, так как в разных версиях операционной системы PackageFullName отличается.
[stextbox id=’download’]Add-AppxPackage -register «C:\Program Files\WindowsApps\PackageFullName\AppxManifest.xml» –DisableDevelopmentMode[/stextbox]
Как установить приложение фотографии по умолчанию Windows 10
Возможно достаточно будет просто установить приложение Фотографии (Майкрософт) по умолчанию для просмотра фотографий. Более подробно как установить приложение по умолчанию мы рассматривали ранее. Пользователю достаточно один раз выбрать приложение для просмотра фотографий, чтобы при последующих запуска изображений оно сразу же открывалось.
- Открываем Пуск > Параметры > Приложения > Приложения по умолчанию.
- В пункте Просмотр фотографий выбираем приложение Фотографии, рекомендованное для Windows 10.
Дальше все изображения будут открываться в приложении Фотографии Windows 10. У пользователей которые привыкли к предыдущему приложению есть возможность включить классический просмотр фотографий в Windows 10.
Средство устранения неполадок Windows 10
Корпорация Майкрософт не плохо поработала над средством устранения неполадок в Windows 10. Действительно в многих ситуациях оно способно решить проблему возникшую в операционной системе. Если возникли проблемы в работе, попробуйте запустить обновленное средство устранения неполадок. Средства устранения неполадок могут найти и исправить много распространенных проблем.
- Перейдите в Пуск > Параметры > Обновление и безопасность > Устранение неполадок.
- В категории Поиск и устранение других проблем выберите Приложения из Магазина Windows и нажмите Запустить средство устранения неполадок.

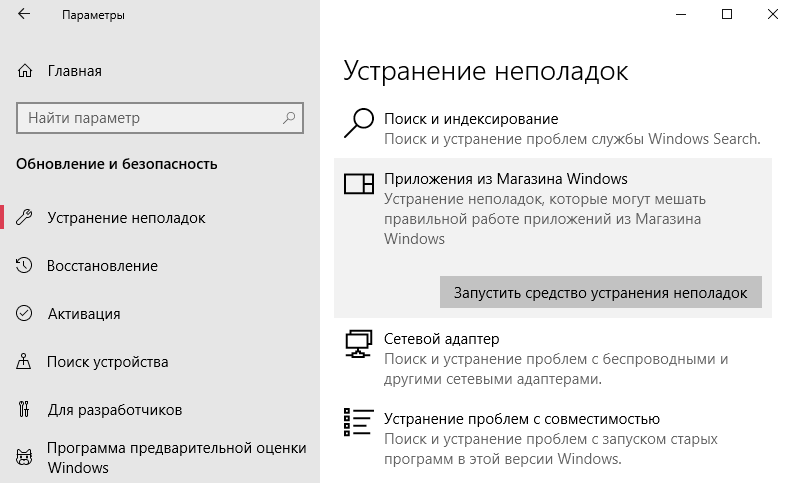
В открывшемся окне средства устранения неполадок дождитесь завершения диагностики и следуйте предложениям средства. Зачастую оно помогает устранить неполадки, которые мешают правильной работе приложений из Магазина Windows. А также возможно предложит выполнить сброс приложение, о котором мы говорили ранее.
Заключение
Обновленное приложение для просмотра фотографий в операционной системе Windows 10 действительно заслуживает Вашего внимания. Приложение фотографии позволяет не только просматривать изображения на компьютере, но и проводить редактирование. Хоть и возможностей не так много как на профессиональных фото редакторах, но оно постоянно обновляется и дорабатывается.
Если же у Вас не открывается приложение фотографии на Windows 10 используйте наши способы восстановления работоспособности стандартных приложений. А также рекомендуем проверить целостность системных файлов и заранее создавать резервную копию Windows 10.
(3 оценок, среднее: 2,33 из 5)
Администратор и основатель проекта Windd.pro. Интересуюсь всеми новыми технологиями. Знаю толк в правильной сборке ПК. Участник программы предварительной оценки Windows Insider Preview. Могу с лёгкостью подобрать комплектующие с учётом соотношения цены — качества. Мой Компьютер: AMD Ryzen 5 3600 | MSI B450 Gaming Plus MAX | ASUS STRIX RX580 8GB GAMING | V-COLOR 16GB Skywalker PRISM RGB (2х8GB).
If the Photos app does not start or causes an error and the reset and repair method hasn’t helped, you can uninstall and reinstall the app using PowerShell. Here are the steps for Windows 10 and 11.
To re-register or reinstall the Photos app, use one of the following methods:
Click Start, type powershell, right-click Windows Powershell, and choose Run as Administrator.

Execute the following commands to uninstall and then reinstall Photos:
Get-AppxPackage Microsoft.Windows.Photos | Remove-AppxPackage
Get-AppxPackage -allusers Microsoft.Windows.Photos | Foreach {Add-AppxPackage -DisableDevelopmentMode -Register "$($_.InstallLocation)\AppXManifest.xml"}

The above commands remove and then reinstall the Photos App.
Alternate Way
Alternately, you can find the PackageFullName (or InstallLocation) and install it using a different command:
Run the following command to get the Package name of the Photos App.
Get-AppxPackage Microsoft.Windows.Photos -allusers | select PackageFullName

Copy the Package name displayed in the output. And then use the package name/path in the 2nd command below:
For example, if the Package name is listed as Microsoft.Windows.Photos_2022.30060.30007.0_x64__8wekyb3d8bbwe, execute the next command as follows:
Add-AppxPackage -register "C:\Program Files\WindowsApps\Microsoft.Windows.Photos_2022.30060.30007.0_x64__8wekyb3d8bbwe\AppxManifest.xml" -DisableDevelopmentMode
This reinstalls the Photos App.
You can also install it from Microsoft Store
After uninstalling the Photos app, you can also reinstall it from Microsoft Store.
- Open Microsoft Store from Start/Search.
- In the Store App, search for “Microsoft Photos” and install it.


Error 0x80073D02
If you get the following error 0x80073D02 when reinstalling the Photos app, it’s possible that the Photos app is currently running (or in a suspended state).
Add-AppxPackage : Deployment failed with HRESULT: 0x80073D02, The package could not be installed because resources it modifies are currently in use.
Open Task Manager and terminate the Photos app.
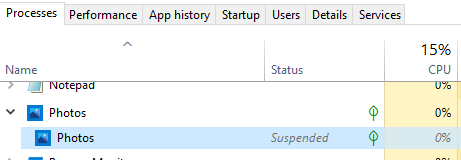
Attempt to reinstall Photos now.
Uninstalling Photos app
Type the following command and press {ENTER}
Get-AppxPackage Microsoft.Windows.Photos | Remove-AppxPackage
This uninstalls the Photos App for the current user account.
One small request: If you liked this post, please share this?
One «tiny» share from you would seriously help a lot with the growth of this blog.
Some great suggestions:
- Pin it!
- Share it to your favorite blog + Facebook, Reddit
- Tweet it!
So thank you so much for your support. It won’t take more than 10 seconds of your time. The share buttons are right below. 
Ramesh Srinivasan is passionate about Microsoft technologies and he has been a consecutive ten-time recipient of the Microsoft Most Valuable Professional award in the Windows Shell/Desktop Experience category, from 2003 to 2012. He loves to troubleshoot and write about Windows.
Ramesh founded Winhelponline.com in 2005.
This article will serve as an informative guide and give you a clear understanding of how to perform silent or interactive installs and uninstalls of the Microsoft Photos (Microsoft Store App) using the Powershell App Deployment Toolkit. The PowerShell App Deployment Toolkit can be used to replace your WiseScript, VBScript and Batch wrapper scripts with one versatile, re-usable and extensible tool. This tool is an absolute must for Microsoft Endpoint Manager Configuration Manager (MEMCM) / (SCCM) Administrators or anyone who is responsible for packaging and deploying software.
How to Install the Microsoft Photos (Microsoft Store App) Using the PowerShell App Deployment Toolkit
- Download the Powershell App Deployment Toolkit 3.8.4:
- https://github.com/PSAppDeployToolkit/PSAppDeployToolkit/releases/download/3.8.4/PSAppDeployToolkit_v3.8.4.zip
- Download the zip file to a folder created at (C:\Downloads)
- Open Windows PowerShell by Right-Clicking on Windows PowerShell and selecting Run as Administrator
- Enter the following command to remove the Zone.Identifier:
Unblock-File -Path C:\Downloads\PSAppDeployToolkit_v3.8.4.zip
- Enter the following command to extract the contents of the zip file:
Expand-Archive -Path C:\Downloads\PSAppDeployToolkit_v3.8.4.zip -DestinationPath C:\Downloads\PADT
- Enter the following commands to copy the AppDeployToolkit & Files folder to “C:\Downloads\PhotosApp“:
Copy-Item -Path "C:\Downloads\PADT\Toolkit\AppDeployToolkit" -Destination "C:\Downloads\PhotosApp\AppDeployToolkit" -RecurseCopy-Item -Path "C:\Downloads\PADT\Toolkit\Files" -Destination "C:\Downloads\PhotosApp\Files"
You should now see the AppDeploymentToolkit folder with files & the empty Files folder at “C:\Downloads\PhotosApp”
Next we’ll want to download the Microsoft Photos (Microsoft Store App) & dependency files using PowerShell.
- Copy the PowerShell script below to “C:\Downloads” & name it Get_Store_Downloads.ps1
- Script Reference: https://flexxible.com/automating-msix-packaging-with-powershell/
#Requires -version 3
<#
.SYNOPSIS
Get links to Microsoft Store downloads and optionally download packages
.DESCRIPTION
Downloaded packages can be installed via Add-AppxPackage -Path
.PARAMETER packageFamilyName
A list of package family names to download
.PARAMETER name
A regular expression which will select the family package names for existing AppX package names that match
.PARAMETER packageTypeFilter
The types of package to download
.PARAMETER downloadFolder
The folder to download non-excluded files to. Will be created if does not exist. If not specified, files will not be downloaded
.PARAMETER ring
The release ring to download
.PARAMETER proxy
Proxy server to use
.PARAMETER excludeExtensions
List of file extensions to not download
.PARAMETER excluderegex
If download Links match this regular expression they will not be downloaded
.PARAMETER language
The language for downloading files
.PARAMETER force
Overwrite files which already exist
.PARAMETER all
Interrogate all local AppX packages rather than just those available to the user running the script (requires elevation). Use with -name
.EXAMPLE
Powershell.exe -ExecutionPolicy ByPass "&" '.\Get_Store_Downloads.ps1' -packageFamilyName Microsoft.Windows.Photos_8wekyb3d8bbwe -downloadFolder C:\Downloads\PhotosApp\Files -excludeRegex 'arm' -force
Downloads the resources from the Microsoft Store for the Microsoft Photos App, excluding files for arm and arm64 architecture and save the files to C:\Downloads\PhotosApp\Files
.NOTES
Modification History:
2022/03/18 @guyrleech Initial public release
2022/03/29 modified by Jason Bergner
#>
<#
Copyright © 2022 Guy Leech
Permission is hereby granted, free of charge, to any person obtaining a copy of this software and associated documentation files (the “Software”), to deal in the Software without restriction,
including without limitation the rights to use, copy, modify, merge, publish, distribute, sublicense, and/or sell copies of the Software, and to permit persons to whom the Software is furnished to do so, subject to the following conditions:
The above copyright notice and this permission notice shall be included in all copies or substantial portions of the Software.
THE SOFTWARE IS PROVIDED “AS IS”, WITHOUT WARRANTY OF ANY KIND, EXPRESS OR IMPLIED, INCLUDING BUT NOT LIMITED TO THE WARRANTIES OF MERCHANTABILITY, FITNESS FOR A PARTICULAR PURPOSE AND NONINFRINGEMENT.
IN NO EVENT SHALL THE AUTHORS OR COPYRIGHT HOLDERS BE LIABLE FOR ANY CLAIM, DAMAGES OR OTHER LIABILITY, WHETHER IN AN ACTION OF CONTRACT, TORT OR OTHERWISE, ARISING FROM, OUT OF OR IN CONNECTION WITH THE SOFTWARE OR THE USE OR OTHER DEALINGS IN THE SOFTWARE.
#>
[CmdletBinding()]
Param
(
[Parameter(Mandatory=$true,ParameterSetName='Family')]
[string[]]$packageFamilyName ,
[Parameter(Mandatory=$true,ParameterSetName='Name')]
[string]$name ,
[Parameter(Mandatory=$false,ParameterSetName='Name')]
[string]$packageTypeFilter = 'All' ,
[string]$downloadFolder ,
[ValidateSet('Slow','Retail','Fast,','RP')]
[string]$ring = 'retail' ,
[string]$proxy ,
[string[]]$excludeExtensions = ('','blockmap','eappx','eappxbundle') ,
[string]$excludeRegex ,
[string]$language = 'en-US' ,
[switch]$force ,
[Parameter(Mandatory=$false,ParameterSetName='Name')]
[switch]$all
)
[hashtable]$proxyParameters = @{}
if( ! [string]::IsNullOrEmpty( $proxy ) )
{
$proxyServer = New-Object -TypeName 'System.Net.WebProxy'
$proxyServer.Address = [uri]$proxy
$proxyServer.UseDefaultCredentials = $true
[System.Net.WebRequest]::DefaultWebProxy = $proxyServer
$proxyParameters.Add( 'Proxy' , $proxy )
$proxyParameters.Add( 'ProxyUseDefaultCredentials' , $true )
Write-Verbose "Proxy set to $proxy"
}
##https://stackoverflow.com/questions/41897114/unexpected-error-occurred-running-a-simple-unauthorized-rest-query?rq=1
Add-Type -TypeDefinition @'
public class SSLHandler
{
public static System.Net.Security.RemoteCertificateValidationCallback GetSSLHandler()
{
return new System.Net.Security.RemoteCertificateValidationCallback((sender, certificate, chain, policyErrors) => { return true; });
}
}
'@
[System.Net.ServicePointManager]::ServerCertificateValidationCallback = [SSLHandler]::GetSSLHandler()
[Net.ServicePointManager]::SecurityProtocol = [Net.ServicePointManager]::SecurityProtocol -bor [System.Net.SecurityProtocolType]::Tls12
if( $PSCmdlet.ParameterSetName -eq 'Name' )
{
Import-Module -Name AppX -Verbose:$false
[array]$packages = @( Get-AppxPackage -AllUsers:$all -PackageTypeFilter $PackageTypeFilter | Where-Object PackageFamilyName -Match $name )
if( $null -eq $packages -or $packages.Count -eq 0 )
{
Throw "No existing AppX packages found matching $name"
}
$packageFamilyName = $packages | Select-Object -ExpandProperty PackageFamilyName -Unique
}
Write-Verbose -Message "Got $($packageFamilyName.Count) packages"
$webclient = $null
if( -Not [string]::IsNullOrEmpty( $downloadFolder ) )
{
if( -Not ( Test-Path -Path $downloadFolder -ErrorAction SilentlyContinue ) )
{
$null = New-Item -Path $downloadFolder -Force -ItemType Directory -ErrorAction Stop
}
if( -Not ( $webClient = New-Object -TypeName System.Net.WebClient ) )
{
Throw "Failed to create a System.Net.WebClient object"
}
}
[int]$count = 0
ForEach( $package in $packageFamilyName )
{
$count++
[string]$requestBody = "type=PackageFamilyName&url=$package&ring=$ring&lang=$language"
$response = $null
$session = $null
$response = Invoke-WebRequest -URI 'https://store.rg-adguard.net/api/GetFiles' -body $requestBody -Method Post -ContentType 'application/x-www-form-urlencoded' -SessionVariable session @proxyParameters
if( $response -and $response.PSObject.Properties[ 'links' ] -and $response.Links.Count -gt 0 )
{
##Write-Verbose -Message "$count / $($packageFamilyName.Count) : Got $($response.Links.Count) links for $requestBody"
ForEach( $link in ($response.Links | Where-Object href -match '^https?://' ))
{
[string]$extension = [System.IO.Path]::GetExtension( $link.innerText ) -replace '^\.'
if( $extension -in $excludeExtensions )
{
Write-Verbose -Message "Ignoring `"$($link.innerText)`" as extension $extension in exclude list"
}
elseif( -Not [string]::IsNullOrEmpty( $excludeRegex ) -and $link.innerText -match $excludeRegex )
{
Write-Verbose -Message "Ignoring `"$($link.innerText)`" as matches $excludeRegex"
}
else
{
$result = [pscustomobject]@{
'PackageFamilyName' = $package
'File' = $link.innertext
'Link' = $link.href
}
if( -Not [string]::IsNullOrEmpty( $downloadFolder ) )
{
[string]$destinationFile = Join-Path -Path $downloadFolder -ChildPath $link.InnerText
if( ( Test-Path -Path $destinationFile -ErrorAction SilentlyContinue) -and -Not $force )
{
Write-Warning -Message "Not downloading to `"$destinationFile`" as already exists - use -force to overwrite"
}
else
{
try
{
$webclient.DownloadFile( ( $link.href -replace '&' , '&' ) , $destinationFile )
if( $properties = Get-ItemProperty -Path $destinationFile )
{
Add-Member -InputObject $result -NotePropertyMembers @{
'Download' = $properties.FullName
'Size (KB)' = [math]::Round( $properties.Length / 1KB , 1 )
}
}
else
{
Write-Warning -Message "Unable to get file properties for $destinationFile"
}
}
catch
{
Write-Warning -Message "Problem downloading $($link.href) - $_"
}
}
}
$result
}
}
}
else
{
## <img src="../img/stop.png">The server returned an empty list.<br>Either you have not entered the link correctly, or this service does not support generation for this product.</p><script type="text/javascript">
Write-Warning -Message "No data or links returned for $requestBody - $($response.Content -split "`n`r?" , 2 -replace '\<[^\>]+\>' | Select-Object -First 1)"
}
}
- Add the following registry key to suppress the “To Allow this website to provide information personalized for you, will you allow it to put a small file (cookie) on your computer?” popup message
REG ADD "HKCU\SOFTWARE\Microsoft\Windows\CurrentVersion\Internet Settings\Zones\3" /t REG_DWORD /v 1A10 /f /d 0
- Open Windows PowerShell by Right-Clicking on Windows PowerShell and selecting Run as Administrator
- Change the directory to “C:\Downloads”
- PS C:\Downloads>
- Enter the following command to download the installation files:
Powershell.exe -ExecutionPolicy ByPass "&" '.\Get_Store_Downloads.ps1' -packageFamilyName Microsoft.Windows.Photos_8wekyb3d8bbwe -downloadFolder C:\Downloads\PhotosApp\Files -excludeRegex 'arm' -force
- After the download completes, you should see .appx & .appxbundle files inside the “C:\Downloads\PhotosApp\Files” directory
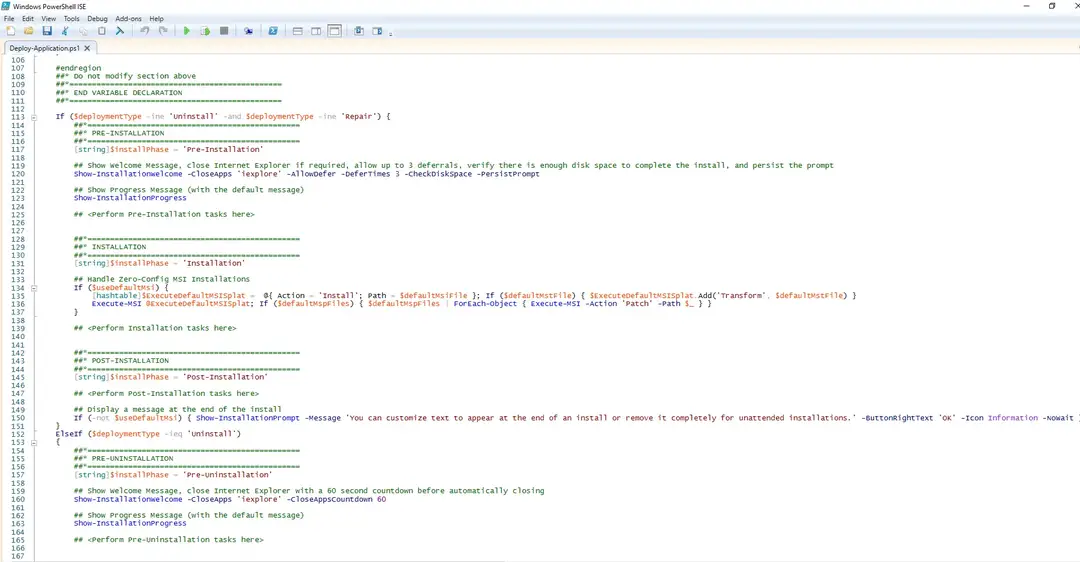
- Copy the PowerShell script below to “C:\Downloads\PhotosApp“ & name it Deploy-PhotosApp.ps1
<#
.SYNOPSIS
	This script performs the installation or uninstallation of the Microsoft Photos Microsoft Store App.
	# LICENSE #
	PowerShell App Deployment Toolkit - Provides a set of functions to perform common application deployment tasks on Windows.
	Copyright (C) 2017 - Sean Lillis, Dan Cunningham, Muhammad Mashwani, Aman Motazedian.
	This program is free software: you can redistribute it and/or modify it under the terms of the GNU Lesser General Public License as published by the Free Software Foundation, either version 3 of the License, or any later version. This program is distributed in the hope that it will be useful, but WITHOUT ANY WARRANTY; without even the implied warranty of MERCHANTABILITY or FITNESS FOR A PARTICULAR PURPOSE. See the GNU General Public License for more details.
	You should have received a copy of the GNU Lesser General Public License along with this program. If not, see <http://www.gnu.org/licenses/>.
.DESCRIPTION
	The script is provided as a template to perform an install or uninstall of an application(s).
	The script either performs an "Install" deployment type or an "Uninstall" deployment type.
	The install deployment type is broken down into 3 main sections/phases: Pre-Install, Install, and Post-Install.
	The script dot-sources the AppDeployToolkitMain.ps1 script which contains the logic and functions required to install or uninstall an application.
.PARAMETER DeploymentType
	The type of deployment to perform. Default is: Install.
.PARAMETER DeployMode
	Specifies whether the installation should be run in Interactive, Silent, or NonInteractive mode. Default is: Interactive. Options: Interactive = Shows dialogs, Silent = No dialogs, NonInteractive = Very silent, i.e. no blocking apps. NonInteractive mode is automatically set if it is detected that the process is not user interactive.
.PARAMETER AllowRebootPassThru
	Allows the 3010 return code (requires restart) to be passed back to the parent process (e.g. SCCM) if detected from an installation. If 3010 is passed back to SCCM, a reboot prompt will be triggered.
.PARAMETER TerminalServerMode
	Changes to "user install mode" and back to "user execute mode" for installing/uninstalling applications for Remote Destkop Session Hosts/Citrix servers.
.PARAMETER DisableLogging
	Disables logging to file for the script. Default is: $false.
.EXAMPLE
    PowerShell.exe .\Deploy-PhotosApp.ps1 -DeploymentType "Install" -DeployMode "NonInteractive"
.EXAMPLE
    PowerShell.exe .\Deploy-PhotosApp.ps1 -DeploymentType "Install" -DeployMode "Silent"
.EXAMPLE
    PowerShell.exe .\Deploy-PhotosApp.ps1 -DeploymentType "Install" -DeployMode "Interactive"
.EXAMPLE
    PowerShell.exe .\Deploy-PhotosApp.ps1 -DeploymentType "Uninstall" -DeployMode "NonInteractive"
.EXAMPLE
    PowerShell.exe .\Deploy-PhotosApp.ps1 -DeploymentType "Uninstall" -DeployMode "Silent"
.EXAMPLE
    PowerShell.exe .\Deploy-PhotosApp.ps1 -DeploymentType "Uninstall" -DeployMode "Interactive"
.NOTES
	Toolkit Exit Code Ranges:
	60000 - 68999: Reserved for built-in exit codes in Deploy-Application.ps1, Deploy-Application.exe, and AppDeployToolkitMain.ps1
	69000 - 69999: Recommended for user customized exit codes in Deploy-Application.ps1
	70000 - 79999: Recommended for user customized exit codes in AppDeployToolkitExtensions.ps1
.LINK
	http://psappdeploytoolkit.com
#>
[CmdletBinding()]
Param (
	[Parameter(Mandatory=$false)]
	[ValidateSet('Install','Uninstall','Repair')]
	[string]$DeploymentType = 'Install',
	[Parameter(Mandatory=$false)]
	[ValidateSet('Interactive','Silent','NonInteractive')]
	[string]$DeployMode = 'Interactive',
	[Parameter(Mandatory=$false)]
	[switch]$AllowRebootPassThru = $false,
	[Parameter(Mandatory=$false)]
	[switch]$TerminalServerMode = $false,
	[Parameter(Mandatory=$false)]
	[switch]$DisableLogging = $false
)

Try {
	## Set the script execution policy for this process
	Try { Set-ExecutionPolicy -ExecutionPolicy 'ByPass' -Scope 'Process' -Force -ErrorAction 'Stop' } Catch {}

	##*===============================================
	##* VARIABLE DECLARATION
	##*===============================================
	## Variables: Application
	[string]$appVendor = ''
	[string]$appName = 'Microsoft Photos Microsoft Store App'
	[string]$appVersion = ''
	[string]$appArch = ''
	[string]$appLang = ''
	[string]$appRevision = ''
	[string]$appScriptVersion = '1.0.0'
	[string]$appScriptDate = 'XX/XX/20XX'
	[string]$appScriptAuthor = 'Jason Bergner'
	##*===============================================
	## Variables: Install Titles (Only set here to override defaults set by the toolkit)
	[string]$installName = ''
	[string]$installTitle = 'Microsoft Photos Microsoft Store App'

	##* Do not modify section below
	#region DoNotModify

	## Variables: Exit Code
	[int32]$mainExitCode = 0

	## Variables: Script
	[string]$deployAppScriptFriendlyName = 'Deploy Application'
	[version]$deployAppScriptVersion = [version]'3.8.4'
	[string]$deployAppScriptDate = '26/01/2021'
	[hashtable]$deployAppScriptParameters = $psBoundParameters

	## Variables: Environment
	If (Test-Path -LiteralPath 'variable:HostInvocation') { $InvocationInfo = $HostInvocation } Else { $InvocationInfo = $MyInvocation }
	[string]$scriptDirectory = Split-Path -Path $InvocationInfo.MyCommand.Definition -Parent

	## Dot source the required App Deploy Toolkit Functions
	Try {
		[string]$moduleAppDeployToolkitMain = "$scriptDirectory\AppDeployToolkit\AppDeployToolkitMain.ps1"
		If (-not (Test-Path -LiteralPath $moduleAppDeployToolkitMain -PathType 'Leaf')) { Throw "Module does not exist at the specified location [$moduleAppDeployToolkitMain]." }
		If ($DisableLogging) { . $moduleAppDeployToolkitMain -DisableLogging } Else { . $moduleAppDeployToolkitMain }
	}
	Catch {
		If ($mainExitCode -eq 0){ [int32]$mainExitCode = 60008 }
		Write-Error -Message "Module [$moduleAppDeployToolkitMain] failed to load: `n$($_.Exception.Message)`n `n$($_.InvocationInfo.PositionMessage)" -ErrorAction 'Continue'
		## Exit the script, returning the exit code to SCCM
		If (Test-Path -LiteralPath 'variable:HostInvocation') { $script:ExitCode = $mainExitCode; Exit } Else { Exit $mainExitCode }
	}

	#endregion
	##* Do not modify section above
	##*===============================================
	##* END VARIABLE DECLARATION
	##*===============================================

	If ($deploymentType -ine 'Uninstall' -and $deploymentType -ine 'Repair') {
		##*===============================================
		##* PRE-INSTALLATION
		##*===============================================
		[string]$installPhase = 'Pre-Installation'

		## Show Welcome Message, Close Microsoft Photos App With a 60 Second Countdown Before Automatically Closing
		Show-InstallationWelcome -CloseApps 'Microsoft.Photos' -CloseAppsCountdown 60

		## Show Progress Message (with the default message)
		Show-InstallationProgress

        ## Remove Any Existing Versions of the Microsoft Photos Microsoft Store App
        $AppPackageNames = @(
        "Microsoft.Windows.Photos"
        )
        foreach ($AppName in $AppPackageNames) {
        Execute-ProcessAsUser -Path "$PSHOME\powershell.exe" -Parameters "-WindowStyle Hidden Get-AppxPackage -Name $AppName | Remove-AppxPackage" -Wait
        #Execute-ProcessAsUser -Path "$PSHOME\powershell.exe" -Parameters "-WindowStyle Hidden Get-AppxPackage -AllUsers -Name $AppName | Remove-AppxPackage -AllUsers" -Wait

        Execute-ProcessAsUser -Path "$PSHOME\powershell.exe" -Parameters "-WindowStyle Hidden Get-AppXProvisionedPackage -Online | Where-Object DisplayName -eq $AppName | Remove-AppxProvisionedPackage -Online" -Wait
        #Execute-ProcessAsUser -Path "$PSHOME\powershell.exe" -Parameters "-WindowStyle Hidden Get-AppXProvisionedPackage -Online | Where-Object DisplayName -eq $AppName | Remove-AppxProvisionedPackage -AllUsers -Online" -Wait
        }

		##*===============================================
		##* INSTALLATION
		##*===============================================
		[string]$installPhase = 'Installation'

        ## Install Microsoft Photos Microsoft Store App Dependencies
        $DependencyPath = Get-ChildItem "$dirFiles" -Include *.appx -File -Recurse -ErrorAction SilentlyContinue

        ForEach ($Dependency in $DependencyPath) {
        Show-InstallationProgress "Installing the Microsoft Photos Microsoft Store App Dependencies. This may take some time. Please wait..."
        Execute-ProcessAsUser -Path "$PSHOME\powershell.exe" -Parameters "-WindowStyle Hidden Add-AppxPackage ""$Dependency""" -Wait
        }

        ## Install Microsoft Photos Microsoft Store App
        $AppPath = Get-ChildItem "$dirFiles" -Include *.appxbundle -File -Recurse -ErrorAction SilentlyContinue

        ForEach ($App in $AppPath) {
        Show-InstallationProgress "Installing the Microsoft Photos Microsoft Store App. This may take some time. Please wait..."
        Execute-ProcessAsUser -Path "$PSHOME\powershell.exe" -Parameters "-WindowStyle Hidden Add-AppxPackage ""$App""" -Wait
        }

		##*===============================================
		##* POST-INSTALLATION
		##*===============================================
		[string]$installPhase = 'Post-Installation'

	}
	ElseIf ($deploymentType -ieq 'Uninstall')
	{
		##*===============================================
		##* PRE-UNINSTALLATION
		##*===============================================
		[string]$installPhase = 'Pre-Uninstallation'

		## Show Welcome Message, Close Microsoft Photos App With a 60 Second Countdown Before Automatically Closing
		Show-InstallationWelcome -CloseApps 'Microsoft.Photos' -CloseAppsCountdown 60

        ## Show Progress Message (With a Message to Indicate the Application is Being Uninstalled)
        Show-InstallationProgress -StatusMessage "Uninstalling the $installTitle. Please Wait..."


		##*===============================================
		##* UNINSTALLATION
		##*===============================================
		[string]$installPhase = 'Uninstallation'

        ## Uninstall Any Existing Versions of the Microsoft Photos App
        $AppPackageNames = @(
        "Microsoft.Windows.Photos"
        )
        foreach ($AppName in $AppPackageNames) {
        #Execute-ProcessAsUser -Path "$PSHOME\powershell.exe" -Parameters "-WindowStyle Hidden Get-AppxPackage -Name $AppName | Remove-AppxPackage" -Wait
        Execute-ProcessAsUser -Path "$PSHOME\powershell.exe" -Parameters "-WindowStyle Hidden Get-AppxPackage -AllUsers -Name $AppName | Remove-AppxPackage -AllUsers" -Wait

        #Execute-ProcessAsUser -Path "$PSHOME\powershell.exe" -Parameters "-WindowStyle Hidden Get-AppXProvisionedPackage -Online | Where-Object DisplayName -eq $AppName | Remove-AppxProvisionedPackage -Online" -Wait
        Execute-ProcessAsUser -Path "$PSHOME\powershell.exe" -Parameters "-WindowStyle Hidden Get-AppXProvisionedPackage -Online | Where-Object DisplayName -eq $AppName | Remove-AppxProvisionedPackage -AllUsers -Online" -Wait
        }

        ## Add Registry Keys to Prevent Windows Apps from Reinstalling
        Write-Log -Message "Adding Registry Keys to Prevent Windows Apps from Reinstalling."

        [scriptblock]$HKCURegistrySettings = {
        Set-RegistryKey -Key 'HKCU\Software\Microsoft\Windows\CurrentVersion\ContentDeliveryManager' -Name 'ContentDeliveryAllowed' -Value 0 -Type DWord -SID $UserProfile.SID
        Set-RegistryKey -Key 'HKCU\Software\Microsoft\Windows\CurrentVersion\ContentDeliveryManager' -Name 'FeatureManagementEnabled' -Value 0 -Type DWord -SID $UserProfile.SID
        Set-RegistryKey -Key 'HKCU\Software\Microsoft\Windows\CurrentVersion\ContentDeliveryManager' -Name 'OemPreInstalledAppsEnabled' -Value 0 -Type DWord -SID $UserProfile.SID
        Set-RegistryKey -Key 'HKCU\Software\Microsoft\Windows\CurrentVersion\ContentDeliveryManager' -Name 'PreInstalledAppsEnabled' -Value 0 -Type DWord -SID $UserProfile.SID
        Set-RegistryKey -Key 'HKCU\Software\Microsoft\Windows\CurrentVersion\ContentDeliveryManager' -Name 'PreInstalledAppsEverEnabled' -Value 0 -Type DWord -SID $UserProfile.SID
        Set-RegistryKey -Key 'HKCU\Software\Microsoft\Windows\CurrentVersion\ContentDeliveryManager' -Name 'SilentInstalledAppsEnabled' -Value 0 -Type DWord -SID $UserProfile.SID
        Set-RegistryKey -Key 'HKCU\Software\Microsoft\Windows\CurrentVersion\ContentDeliveryManager' -Name 'SubscribedContent-314559Enabled' -Value 0 -Type DWord -SID $UserProfile.SID
        Set-RegistryKey -Key 'HKCU\Software\Microsoft\Windows\CurrentVersion\ContentDeliveryManager' -Name 'SubscribedContent-338387Enabled' -Value 0 -Type DWord -SID $UserProfile.SID
        Set-RegistryKey -Key 'HKCU\Software\Microsoft\Windows\CurrentVersion\ContentDeliveryManager' -Name 'SubscribedContent-338388Enabled' -Value 0 -Type DWord -SID $UserProfile.SID
        Set-RegistryKey -Key 'HKCU\Software\Microsoft\Windows\CurrentVersion\ContentDeliveryManager' -Name 'SubscribedContent-338389Enabled' -Value 0 -Type DWord -SID $UserProfile.SID
        Set-RegistryKey -Key 'HKCU\Software\Microsoft\Windows\CurrentVersion\ContentDeliveryManager' -Name 'SubscribedContent-338393Enabled' -Value 0 -Type DWord -SID $UserProfile.SID
        Set-RegistryKey -Key 'HKCU\Software\Microsoft\Windows\CurrentVersion\ContentDeliveryManager' -Name 'SubscribedContentEnabled' -Value 0 -Type DWord -SID $UserProfile.SID
        Set-RegistryKey -Key 'HKCU\Software\Microsoft\Windows\CurrentVersion\ContentDeliveryManager' -Name 'SystemPaneSuggestionsEnabled' -Value 0 -Type DWord -SID $UserProfile.SID
        }
        Invoke-HKCURegistrySettingsForAllUsers -RegistrySettings $HKCURegistrySettings -ErrorAction SilentlyContinue

        ## Add Registry Key to Disable Auto-Updating of Microsoft Store Apps
        Write-Log -Message "Adding Registry Key to Disable Auto-Updating of Microsoft Store Apps."
        Set-RegistryKey -Key 'HKLM\SOFTWARE\Policies\Microsoft\WindowsStore' -Name 'AutoDownload' -Value 2 -Type DWord

        # Add Registry Key to Prevent Suggested Applications from Returning
        Write-Log -Message "Adding Registry Key to Prevent Suggested Applications from Returning."
        Set-RegistryKey -Key 'HKLM\SOFTWARE\Policies\Microsoft\Windows\CloudContent' -Name 'DisableWindowsConsumerFeatures' -Value 1 -Type DWord

		##*===============================================
		##* POST-UNINSTALLATION
		##*===============================================
		[string]$installPhase = 'Post-Uninstallation'


	}
	ElseIf ($deploymentType -ieq 'Repair')
	{
		##*===============================================
		##* PRE-REPAIR
		##*===============================================
		[string]$installPhase = 'Pre-Repair'


		##*===============================================
		##* REPAIR
		##*===============================================
		[string]$installPhase = 'Repair'


		##*===============================================
		##* POST-REPAIR
		##*===============================================
		[string]$installPhase = 'Post-Repair'


    }
	##*===============================================
	##* END SCRIPT BODY
	##*===============================================

	## Call the Exit-Script function to perform final cleanup operations
	Exit-Script -ExitCode $mainExitCode
}
Catch {
	[int32]$mainExitCode = 60001
	[string]$mainErrorMessage = "$(Resolve-Error)"
	Write-Log -Message $mainErrorMessage -Severity 3 -Source $deployAppScriptFriendlyName
	Show-DialogBox -Text $mainErrorMessage -Icon 'Stop'
	Exit-Script -ExitCode $mainExitCode
}
Ok, all the hard work is done and now you can install or uninstall the Microsoft Photos (Microsoft Store App) using one single PowerShell script. Simply change the DeploymentType parameter to install or uninstall. Logging functionality is built-in automatically and you can view the log files under “C:\Windows\Logs\Software”.
Microsoft Photos (Microsoft Store App) NonInteractive Install (PowerShell)
NonInteractive means Very Silent, i.e. no blocking apps. This is automatically set if it is detected that the process is not running in the user session and it is not possible for anyone to provide input using a mouse or keyboard.
- Open Windows PowerShell by Right-Clicking on Windows PowerShell and selecting Run as Administrator
- Change the directory to “C:\Downloads\PhotosApp”
- PS C:\Downloads\PhotosApp>
- Enter the following command:
Powershell.exe -ExecutionPolicy Bypass .\Deploy-PhotosApp.ps1 -DeploymentType "Install" -DeployMode "NonInteractive"
Microsoft Photos (Microsoft Store App) Silent Install (PowerShell)
Silent means no dialogs (progress and balloon tip notifications are suppressed).
- Open Windows PowerShell by Right-Clicking on Windows PowerShell and selecting Run as Administrator
- Change the directory to “C:\Downloads\PhotosApp“
- PS C:\Downloads\PhotosApp>
- Enter the following command:
Powershell.exe -ExecutionPolicy Bypass .\Deploy-PhotosApp.ps1 -DeploymentType "Install" -DeployMode "Silent"
Microsoft Photos (Microsoft Store App) Interactive Install (PowerShell)
Interactive means the install will show dialogs including progress and balloon tip notifications.
- Open Windows PowerShell by Right-Clicking on Windows PowerShell and selecting Run as Administrator
- Change the directory to “C:\Downloads\PhotosApp“
- PS C:\Downloads\PhotosApp>
- Enter the following command:
Powershell.exe -ExecutionPolicy Bypass .\Deploy-PhotosApp.ps1 -DeploymentType "Install" -DeployMode "Interactive"
How to Uninstall the Microsoft Photos (Microsoft Store App) Using the PowerShell App Deployment Toolkit
Microsoft Photos (Microsoft Store App) NonInteractive Uninstall (PowerShell)
NonInteractive means Very Silent, i.e. no blocking apps. This is automatically set if it is detected that the process is not running in the user session and it is not possible for anyone to provide input using a mouse or keyboard.
- Open Windows PowerShell by Right-Clicking on Windows PowerShell and selecting Run as Administrator
- Change the directory to “C:\Downloads\PhotosApp“
- PS C:\Downloads\PhotosApp>
- Enter the following command:
Powershell.exe -ExecutionPolicy Bypass .\Deploy-PhotosApp.ps1 -DeploymentType "Uninstall" -DeployMode "NonInteractive"
Microsoft Photos (Microsoft Store App) Silent Uninstall (PowerShell)
Silent means no dialogs (progress and balloon tip notifications are suppressed).
- Open Windows PowerShell by Right-Clicking on Windows PowerShell and selecting Run as Administrator
- Change the directory to “C:\Downloads\PhotosApp“
- PS C:\Downloads\PhotosApp>
- Enter the following command:
Powershell.exe -ExecutionPolicy Bypass .\Deploy-PhotosApp.ps1 -DeploymentType "Uninstall" -DeployMode "Silent"
Microsoft Photos (Microsoft Store App) Interactive Uninstall (PowerShell)
Interactive means the install will show dialogs including progress and balloon tip notifications.
- Open Windows PowerShell by Right-Clicking on Windows PowerShell and selecting Run as Administrator
- Change the directory to “C:\Downloads\PhotosApp“
- PS C:\Downloads\PhotosApp>
- Enter the following command:
Powershell.exe -ExecutionPolicy Bypass .\Deploy-PhotosApp.ps1 -DeploymentType "Uninstall" -DeployMode "Interactive"
Always make sure to test everything in a development environment prior to implementing anything into production. The information in this article is provided “As Is” without warranty of any kind.
You are here:
Home » Windows 10 » How To Reinstall The Photos App In Windows 10/11
The universal Photos app is the default photo or image viewer in Windows 10/11 operating system. The classic Windows Photo Viewer, although it has not been removed from Windows 10/11, is disabled by default, and one needs to enable Windows Photo Viewer to make it the default photo viewer program in Windows 10.
The new Photos app is not just an image viewer, but it also offers basic image editing and optimizing tools as well. It provides you with options to add various effects and filters to your photos. With the Photos app, you can crop, rotate, straighten, and retouch your images. The app also allows you to remove red-eye from images.
Probably the only problem with the Photos app is that it is not as quick as the classic Windows Photo Viewer or its competitors like ImageGlass to open photos. The other most common issue is reasonably high resource usage.
If the Windows 10/11 Photos app is not opening, crashing soon after the launch, or displaying an error, you can fix those issues by reinstalling the Photos app. However, like any other default Windows 10/11 apps, the Photos app can’t be uninstalled via the Settings app. In this guide, we will see how to easily uninstall and then install the Photos app in Windows 10/11.
Method 1 – uninstall the Photos app via PowerShell and then install it
Method 2 – uninstall Photos via PowerShell
Method 3 – uninstall the Photos app using CCleaner and then install the same
Method 1 of 3
Reinstall the Photos app in Windows 10/11 using PowerShell
Step 1: Open PowerShell as an administrator. To do this, type PowerShell in the Start menu or taskbar search box, right-click on the PowerShell entry in the search results, and then click the Run as administrator option.
Click the Yes button when you see the User Account Control prompt.
Step 2: In the elevated PowerShell, type the following command and press the Enter key to uninstall the Photos app.
get-appxpackage *Microsoft.Windows.Photos* | remove-appxpackage
This should remove the Photos app. If not, follow the next method.
Step 3: Once the app is removed, open the built-in Microsoft Store app, search for the Microsoft Photos app, and install the same to reinstall the Photos app.
Method 2 of 3
Another way to uninstall the Photos app via PowerShell
Step 1: Open the PowerShell with admin rights.
Step 2: Type the following command and press the Enter key to view all installed apps.
Get-AppxPackage –AllUsers
Step 3: Scroll down, and locate the entry named Microsoft.Windows.Photos and copy its PackageFullName to the Notepad program.
Tip: To quickly find the Photos app entry, right-click on the title bar of PowerShell, click Edit, click Find, type Photos, and then click the Find Next button.
To copy PackageFullName, select PackageFullName (refer to the picture below), and then use Ctrl + C hotkey to copy it.
Step 4: Execute the following command to uninstall the Photos app.
remove-AppxPackage PackageFullName
In the above command, replace PackageFullName with the PackageFullName of the Photos app that you copied to Notepad in Step 3.
Step 5: Now that we have uninstalled the Photos app from Windows 10, it’s time to install a fresh copy of the same from the Store. To do so, open the Store app by clicking the Store app tile on the Start menu or searching for it.
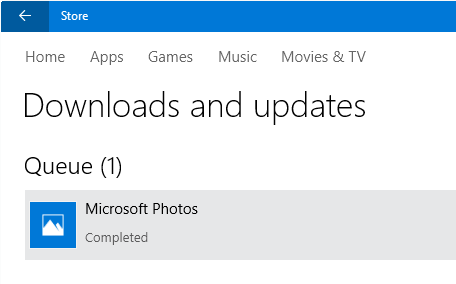
Step 6: Once the Store is launched, type Microsoft Photos in the search box, click on the Microsoft Photos entry, and then click the Install/Get button. If the Install or Get button is not active or you are setting the Open button instead, please close the app once, and then launch the Store app again.
Depending on the speed of your internet connection, the app should be installed and ready to use in 2 to 10 minutes.
Method 3 of 3
Reinstall the photos app using CCleaner
Those of you who are not familiar with PowerShell can use the popular CCleaner (free) software to uninstall the Photos app and then follow the directions mentioned above to install the Photos app from the Store.
Step 1: Download the CCleaner app and install the same on your Windows 10 PC, if not installed already.
Step 2: Launch CCleaner, click Tools and click Uninstall to view all installed apps.
Step 3: Locate the entry named Photos, right-click on it, and click the Uninstall button to uninstall it. Click the OK button when you see the confirmation dialog.
Step 4: Once the Photos app is uninstalled, open the Windows Store app, type Microsoft Photos in the search box, click on Photos app to open its page, and then click Free button to install the Photos app. Simple as that!
Our how to reinstall Solitaire Collection in Windows 10 guide might also interest you.