Download Windows Speedup Tool to fix errors and make PC run faster
Code::Blocks is a free open source IDE; it is established in C++ using wxWdigets as the GUI tool kit. Code::Blocks support compilers such as C, C++, and Fortran. Plugins extend Code::Blocks; its features and functionality are characterized by installing and coding a plugin. It is software for programming.
Code::Blocks support Windows, Linux, Mac, and all operating systems.
Features of Code::blocks
- Compiler: A compiler is computer software that translates source codes into machine- language instruction that can be understood by a digital computer. There are multiple compilers supported in the Code::Block software such as; GCC (MingW / GNU GCC), MSVC++, Borland C++ 5.5, Digital Mars, Clang, and more.
- Debugger: A Debugger is computer software that assists in detecting and correcting an error in other software. The Debugger feature in Code::Code custom memory dump, View CPU registries and offer many more features.
- Interface: Interface is two or more separate components of a computer system exchange information. In Code::Blocks, the features offered for an interface are Code folding for C, C++, Fortran, XML and many more files, Tabbed interface, Smart indent, External customizable “Tools” and more.
In this tutorial, we are going to explain how to:
- How to Download Code::Blocks.
- How to Install Code::Blocks.
1] How to download Code::Blocks
In this tutorial, we are going to download the Code::Blocks software.
Open a browser of your choice and type in the search engine Code::Blocks and press Enter.
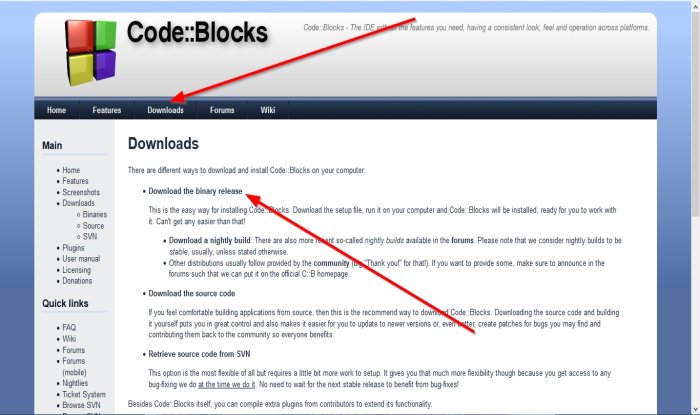
Once you are on the website page of the Code::Blocks, we will click on the Download page.
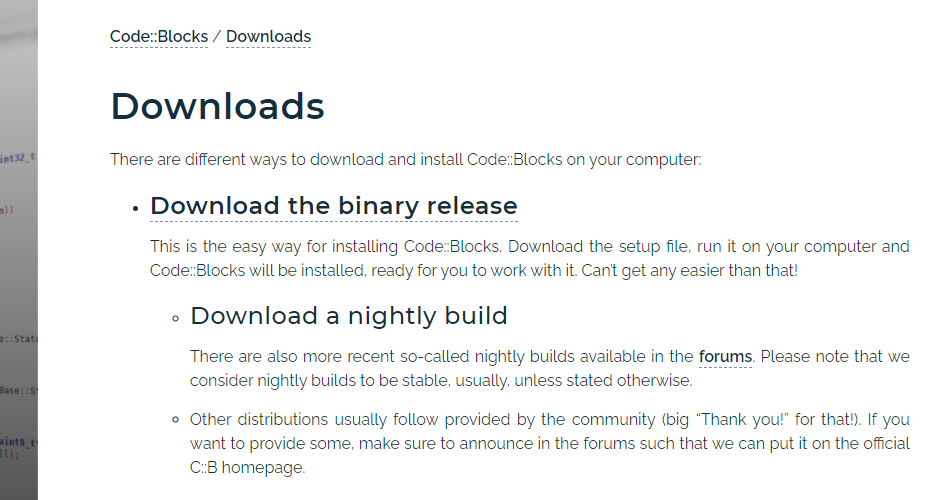
Once on the Download page, select download the Binary release. It will take you to another page.
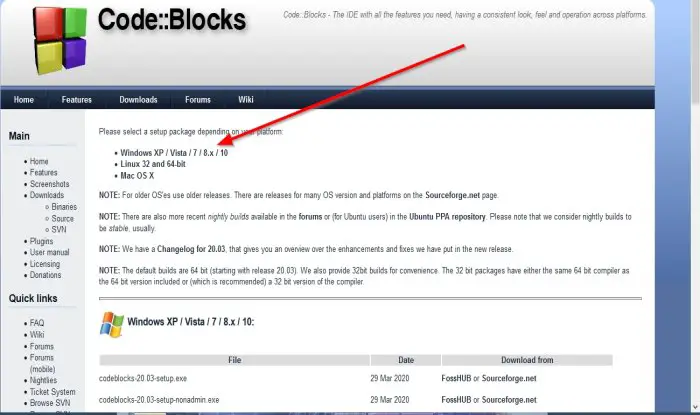
Where you see, “Please select a setup package depending on your platform,” select Windows XP/Vista/7/8.x/10.
It will automatically go to where the Windows downloads are. Choose any one of the options depending on your PC or what you prefer.
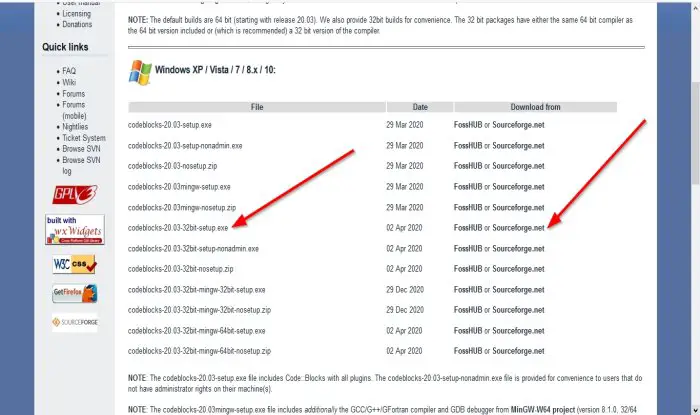
In the article, we choose codeblocks-20.03-32bit-setup.exe.
To download this setup, you can select a link to download Code::Block, either from FossHub or Sourceforge.net, on the right of the page. We chose Sourceforge.net.
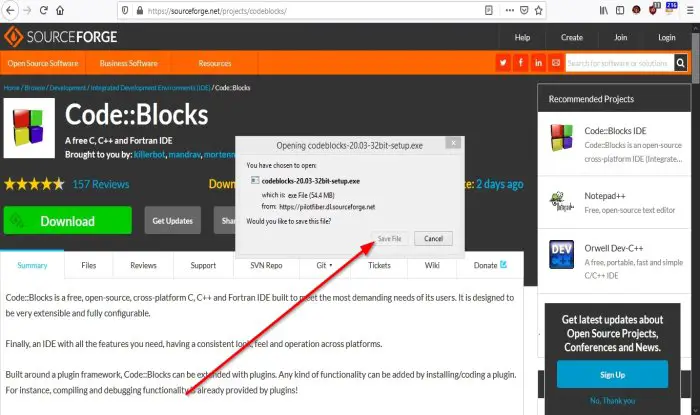
It will transfer to the Sourceforge.net website, but a Dialog box will appear for Download click Save the file.
The software is downloaded.
2] How to Install Code::Block
Go into the File Explorer and double click the installation file in your Download folder.
A window will open asking the question, “Do you want to allow the following program from an unknown publisher to make changes to this computer.” Click Yes.

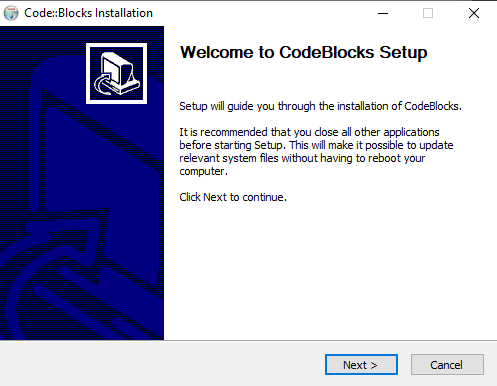
A Code:: Blocks installation dialog box will appear stating welcome to code::Block Setup. Click Next.
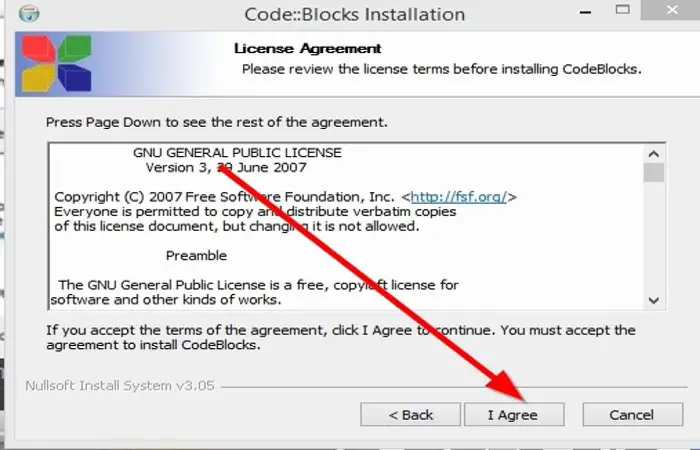
The Dialog Wizard box showcase the license and term agreement. Click I Agree.
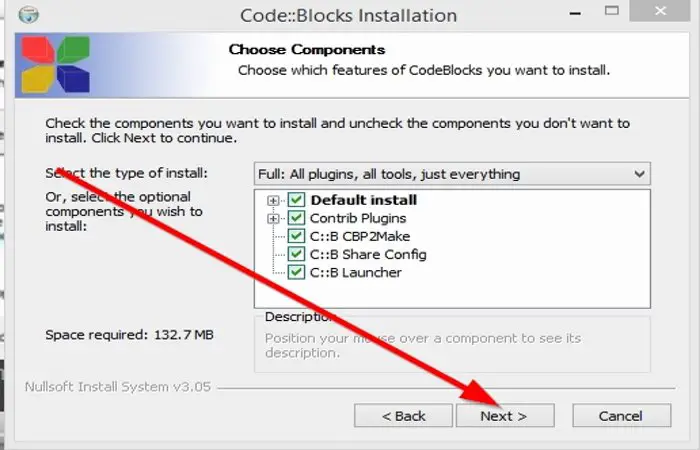
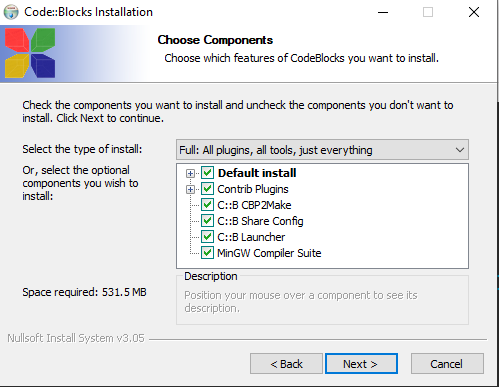
Now choose Components, then Next. In this tutorial, we do not change anything about the components because they are already selected by default.
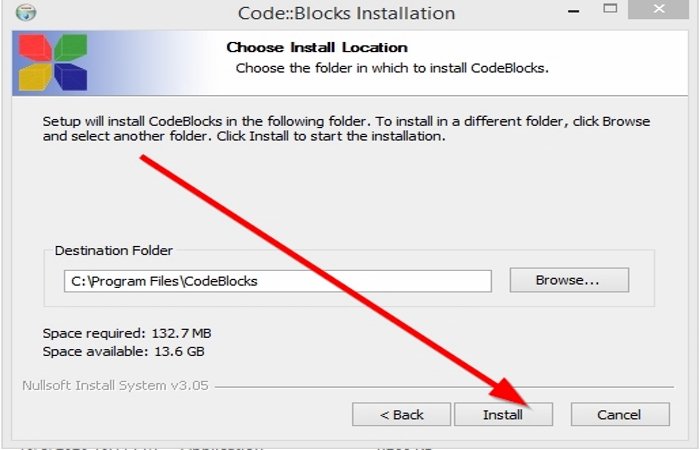
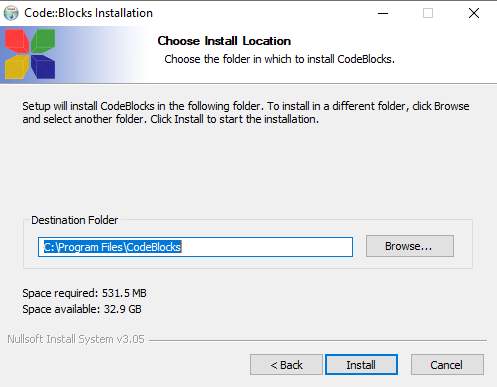
Now, click Install.
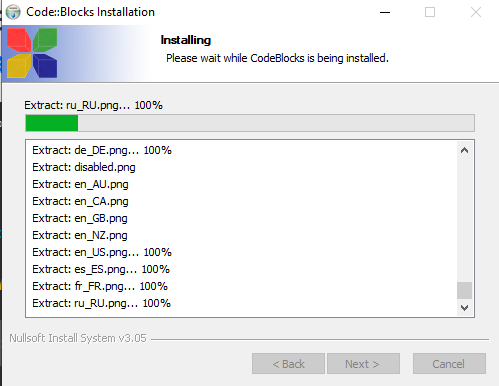
The Program will start to Install.
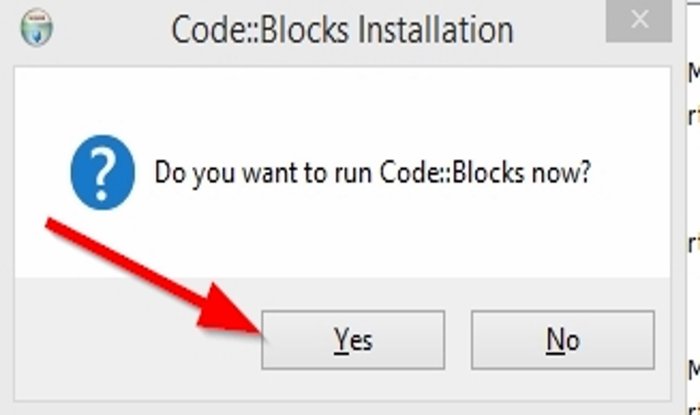
A small dialog box will pop up asking “if you want to run Code::Blocks now”, select Yes.
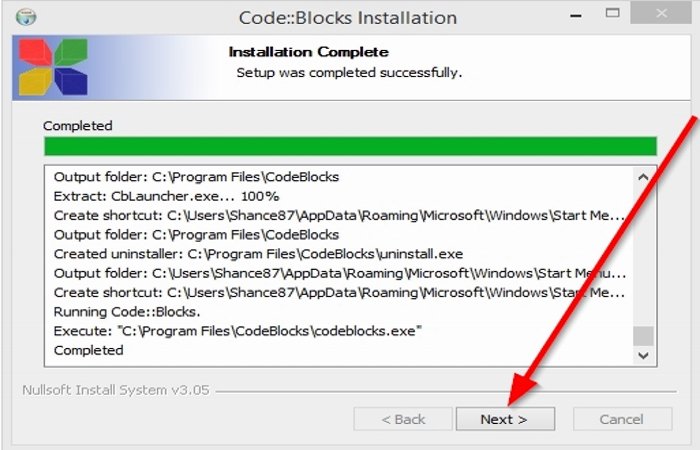
Installation is complete then Next.
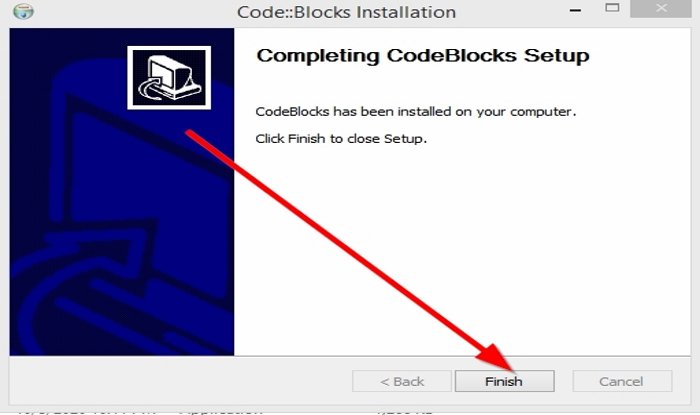
Then click Finish.

The Program is installed.
We hope you find the post useful.
Shantel has studied Data Operations, Records Management, and Computer Information Systems. She is quite proficient in using Office software. Her goal is to become a Database Administrator or a System Administrator.
Содержание
- Как установить CodeBlocks в Windows 10?
- Как вы устанавливаете блоки кода?
- Как установить блоки кода перенасыщения?
- Как вы кодируете C в кодовых блоках?
- Как мне настроить GCC?
- Безопасна ли загрузка блоков кода?
- Как увеличить размер шрифта в блоках кода?
- Кодовые блоки бесплатны?
- Может ли T автоматически определять путь установки GNU?
- Какая последняя версия кодовых блоков?
- Как обновлять блоки кода?
- Как загрузить перенасыщение?
- Как запустить программу OpenGL в Windows?
- Как мне настроить OpenGL?
Посетите codeblocks.org. Нажмите «Загрузить» в меню, затем нажмите «Загрузить двоичную версию». Перейдите в раздел своей операционной платформы (например, Windows XP / Vista / 7 / 8. x / 10), затем загрузите установщик с компилятором GCC, например codeblocks-17.12mingw-setup.exe или нажмите здесь, чтобы загрузить.
Как установить CodeBlocks в Windows 10?
1. Как установить CodeBlocks 13.12
- Шаг 1: Загрузите. Перейти к http://www.codeblocks.org/downloads. Щелкните «Загрузить двоичную версию». Выберите вашу операционную платформу (например, Windows 2000 / XP / Vista / 7). …
- Шаг 2: Установите. Запускаем скачанный установщик. Примите параметры по умолчанию.
Как настроить блоки кода?
Настройка Code:: Blocks в Windows
- Шаг 1: Загрузите Code:: Blocks. Перейдите на этот сайт: http://www.codeblocks.org/downloads. …
- Шаг 2: Установите Code:: Blocks. Дважды щелкните установщик. …
- Шаг 3: Запуск в Code:: Blocks. Вам будет предложено окно автоматического определения компилятора:
Как мне установить блоки кода перенасыщения?
Шаги по установке OpenGL (GLUT) в CodeBlocks:
- Откройте папку include из загруженного файла.
- Скопируйте перенасыщение. …
- Открыть папку lib из загруженного файла.
- Скопируйте все файлы и вставьте в папку «C: Program FilesCodeBlocksMinGWlib».
- Откройте папку bin из загруженного файла.
- Скопируйте перенасыщение.
15 авг. 2014 г.
Как вы кодируете C в кодовых блоках?
Как создать программу на C в IDE CodeBlocks
- Откройте IDE CodeBlocks и создайте новый файл. …
- В окне «Новый шаблон формы» выберите исходный код C / C ++ и нажмите кнопку «Перейти».
- Если вы видите приветственное сообщение, щелкните рядом, чтобы пропустить приветственное сообщение. …
- Дайте имя вашему файлу и укажите местоположение.…
- Напишите и сохраните вашу первую программу на языке C.
10 авг. 2017 г.
Как мне настроить GCC?
Установка GCC в Ubuntu
- Начните с обновления списка пакетов: sudo apt update.
- Установите пакет build-essential, набрав: sudo apt install build-essential. …
- Чтобы убедиться, что компилятор GCC успешно установлен, используйте команду gcc –version, которая выводит версию GCC: gcc –version.
31 окт. 2019 г.
Безопасна ли загрузка блоков кода?
Да, если вы загрузите его из официальной сборки для своей платформы. Оценка того, является ли сайт, с которого вы получаете программу, безопасным источником, — это не просто технический навык. Это требует научного суждения.
Как увеличить размер шрифта в блоках кода?
У вас должна быть возможность просто нажать CTRL +, чтобы увеличить размер текста, если нет, посмотрите ниже.
- наведите указатель мыши на редактор, нажмите и удерживайте CTRL и прокрутите колесико мыши вверх или вниз.
- используйте меню — & gt; редактировать — & gt; специальные команды — & gt; масштабирование — & gt; в | из | сброс настроек.
19 нояб. 2015 г.
Кодовые блоки бесплатны?
Code:: Blocks — это бесплатная IDE на C / C ++ и Fortran, созданная для удовлетворения самых взыскательных потребностей пользователей. Он разработан, чтобы быть очень расширяемым и полностью настраиваемым.
Может ли T автоматически определять путь установки GNU?
Для большинства из вас это будет «компилятор GNU GCC». Щелкните вкладку с надписью «Исполняемые файлы Toolchain», затем нажмите кнопку «Автоопределение». Это должно привести к тому, что установочный каталог компилятора будет автоматически вставлен в текстовое поле слева от кнопки.
Какая последняя версия кодовых блоков?
В настоящее время Code:: Blocks ориентирован на C, C ++ и Fortran. … Код:: Блоки.
| Code:: Blocks 16.01 | |
|---|---|
| Стабильный выпуск | 20.03 / 29 марта 2020 г. |
| Репозиторий | svn.code.sf.net/p/codeblocks/code/trunk |
| Записано на | C ++ (wxWidgets) |
Как вы обновляете блоки кода?
Шаги установки
- Загрузите установщик Code:: Blocks 17.12. …
- Запустите установщик, это стандартный установщик для Windows; просто нажимайте Далее после прочтения каждого экрана.
- Если вы планируете установить компилятор после установки Code:: Blocks, прочтите информацию, содержащуюся в программе установки.
26 февр. 2018 г.
Как загрузить перенасыщение?
Получение дистрибутива исходного кода GLUT
- Загрузите дистрибутив бета-версии GLUT 3.7 (сдвиг влево в Netscape) (формат tar Unix) (формат Windows ZIP).
- Загрузите дистрибутив файла данных образа бета-версии GLUT 3.7 (формат tar Unix) (формат Windows ZIP).
22 мар. 2000 г.
Как запустить программу OpenGL в Windows?
Установка
- Загрузите файлы заголовка GLUT, библиотеки и DLL из OpenGL. (Упоминается на этой странице)
- Вставить перенасыщение. …
- Вставить перенасыщение. …
- Вставить перенасыщение. …
- Откройте проект консольного приложения Windows в Visual Studio или создайте новый:…
- Перейдите в Project & gt; Характеристики. …
- Вот и все.
10 февр. 2019 г.
Как мне настроить OpenGL?
Установите OpenGL в Windows в Code:: Blocks
- Загрузите блок кода и установите его.
- Перейдите по ссылке и загрузите zip-файл по ссылке для загрузки, которая появляется после пакета freeglut MinGW с именем ссылки Download freeglut 3.0. …
- Открыть блокнот с правами администратора и открыть файл из.
8 окт. 2020 г.
Похожие сообщения:
- Как загрузить блоки кода в Windows 10?
- Ваш вопрос: Как загрузить блоки кода в Ubuntu?
- Ваш вопрос: Как установить блоки кода в Ubuntu?
- Как запускать блоки кода в Linux?
- Как вы обновляете блоки кода в Ubuntu?
- Вопрос: Можно ли раскрашивать файлы в Windows 10?
.
If you are running Windows, it can be a bit confusing to get Code Blocks to run. Especially if you get mixed up in the GCC compiler installation stuff. Also, if you downloaded only the .exe of the IDE CodeBlock’s official site without the fancy extra files. A few years ago when I was trying to execute my first C program, I ran into a bunch of compiler errors and didn’t understand what was going wrong.
Mind you, this was the first time I was typing code on my computer. I just didn’t know that we were supposed to set up the GCC compiler separately. So I had to configure the compiler manually and it was a bit time-consuming.
In this post, I will try to present a solution to that problem. Just follow the steps below. This the most efficient and the easiest method to get Code Blocks up and running in a jiffy.
Contents
What’s the fastest and easiest way to install and set up Code Blocks with the GCC compiler?
Simple. Download this file and follow the steps below. It is preconfigured with the GCC compiler binary files so we will be up and running in a couple of minutes. We will explain the manual process of custom installing the IDE and the compiler later. Not for the sake of efficiency, of course. Just because knowing the intricacies involved in downloading the GCC compiler is a handy tool and will help you understand the basics of setting up IDEs. Select the full installation option from the second installation window.

Once that’s done, a window like the one above should pop-up on your screen. This is the auto-compiler detection window that will locate all the compilers in the installation folder and ask you to select the default one. Select GNU GCC and click Ok.
Technically, this should complete your installation process. However, if for some reason, you don’t see any automatic compiler detection window, here’s what you can do. 
Start code blocks normally. Head on to the Settings drop-down menu and select Compiler. Then inside the settings window, navigate to the tab titled ‘Toolchain executables’. Under the field ‘Compiler’s installation directory’, ensure that the last folder in the selected path is MinGW. Cross-reference with the image below and check if your program files are similarly labeled. That should fix most of the issues with the compiler installation.


Step 1: Under the tab titles ‘Start here’, click on ‘Create a new project’. This will create a new project folder to store all the different code files.

Step 2: Select Empty project from the different categories displayed in the menu box. Don’t worry about the other options, we will get to know them later in this course.

Step 3: Enter the name of your project, this will be the folder where your individual files will be stored. Also, make a folder on your drive for the code you will write. In the long run, it pays off to organize your files neatly.

Step 4: Make sure that the selected compiler is the one we just installed. Check the boxes as shown in the screenshot to create the debug files.

Step 5: From the topmost toolbar, select the new file icon and create an empty file. This is where we’ll be writing the code. If you can’t see any toolbars, head on to the ‘View’ drop-down, select toolbars and select Main and Compiler, the toolbars should now appear on your screen. Similarly, if you can’t see the Manager window on the left and the Log window at the bottom, you can select to view them from the ‘View’ drop-down.

Step 6: Save the file with the extension ‘.c’ and your desired filename. Notice how the default folder is the project folder we created in step 2.

Step 7: Check the boxes shown below to include the files in the Debug folders.

Step 8: Write the code for Hello World and click the Build and Run icon located in the toolbar on the top. The icon has a yellow gear and a green play logo.

Step 9: You have successfully written your first C program. Join our free C programming course and get better at C!

Are you still having issues with the compiler?
Please comment below and I’ll be glad to help you out. And if you are not facing any problems and have successfully executed your HelloWorld code, don’t get too comfortable, the course is just beginning!
Can I just skip this software and have an online IDE, please?
Yep! You can compile all of your C code in your browser. There are many online IDEs on the web, but this one is my favorite. Using an online IDE just cuts through the hassle when you are not looking for any extra features except executing some code.
— Advertisement —
Hello, how are you? Today we’re going to talk a bit about Code::Blocks. This is an open-source integrated development environment that supports multiple compilers, including GCC, Clang and Visual C++. Also, it is based on the WxWidgets graphical interface platform. Consequently, it can be used freely in different operating systems. In addition, it is licensed under the GNU General Public License. CodeBlocks is a very powerful tool for developing programs in C++. In this post, we will see how to install CodeBlocks on Windows 10.
Downloading CodeBlocks.
To download the most recent version of the program, just click on the following link. On the download page, there are several versions to download. In theory, all should work properly. However, I have experienced problems with some of them. Therefore, I recommend the installer with the setup that also includes the MINGW compiler:

Once downloaded the file, just double click on it to start the installation.

Next, accept the license:

On the next screen are all the options available for installation. It is possible to select them according to the needs of the user. However, it is preferable to leave the default options and do a complete installation. This increases the stability of the program:

Then the installation path of the program appears. It is possible to leave the default path or set a custom address:

After setting the parameters, the wizard will start the installation.

After the process is finished, press Next to close the window and launch the program.

Configuring the compiler on CodeBlocks
After launching the program, it is necessary to make some configurations. First, CodeBlocks automatically detects the compilers present in the system. If there are none, then the program compiler is set.

Testing CodeBlocks.
Once the program is configured, it is time to create the first project. With this intention, please click on Create a New Project

Immediately an assistant will be opened to guide us during the creation of the project. Please click Next to start the process.

In the next window, select the type of project to start. In that case, please select Console Application.

Next, select the type of language to use. For the purposes of this example, select C++.

Next is the project configuration window. Here you assign the name to the project. In addition, select the folder where the project will be saved.

Below are options for the compiler and other elements of the project. Additionally, leave all options by default and press Finish to continue.

Back to the initial screen, please locate the Workspace menu in the left column. Forthwith, scroll until you get the main.cpp file. Then double click on it and you will see the file with the classic Hello World.

To compile and run the program, click on the icon shown in the image below. Accordingly, just wait a few moments until the file is displayed in a pop-up window.

Conclusion
After finishing the post, we have seen how to install CodeBlocks on Windows 10. It is designed to be very extensible and completely configurable to the needs of developers. In addition, this IDE has been built around a complementary framework. All right, that’s it for now. I hope you find this post useful. Before saying goodbye I invite you to review our post about enabling PING in Windows Server 2019.
In this article, we will look into the process of installing code blocks for C++ on windows.
Installation Code Blocks for C++ on Windows:
Follow the below steps to install Code Blocks for C++ on windows:
Step 1: Open Your Web Browser
Step 2: Go to the Search Panel and Search for “Code Blocks”
Step 3: Click on the First Result shown on the Search Engine or click on this link.

Step 4: Click on the “Downloads” Section.

Step 5: Click On “Download the binary release”.
Step 6: As per this Date, the Latest Version of Code Blocks is 20.03. Now here you’ll find several download options
- codeblocks-20.03-setup.exe : It is a standard executable file that is easier to install.
- codeblocks-20.03-nosetup.zip : It is a zip file which you do not have to install , you can just unzip and run it.
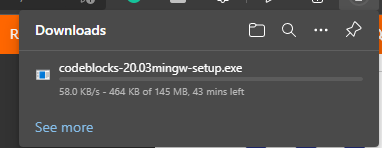
I’ll suggest you download the file with MinGW written on it (“codeblocks-20.03mingw-setup.exe”) as MinGW is a Compiler that is needed to run the Program. If you download the normal setup file then you have to download The compiler separately.

Step 7: Click on Sourceforge.net under the Download Section of your desired file.
Step 8: then Download should begin within some seconds.
Step 9: When the download is completed, Open Your Code Blocks Setup File.
Step 10: Click on Next.
Step 11: Click on I agree.

Step 12: Click On Next ( you need to have at least 600 MB free storage on your drive for the installation).
Step 13: Select your Destination and Click on Install
Step 14: Once Installation gets completed, click on Next and then Click on Finish
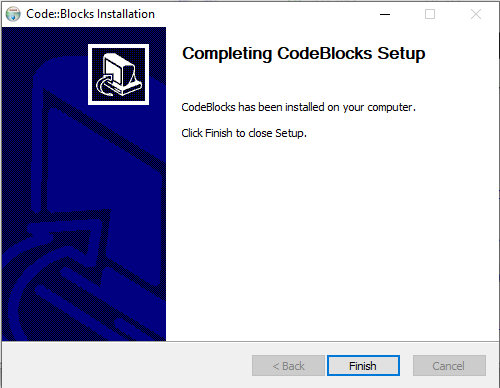
Now You Code Blocks have been installed.
To Set the Environment Path of GCC compiler
Step 1: Go to your Code Blocks MinGW installation folder location ( For me it is C:\Program Files\CodeBlocks\MinGW\bin) and copy the address
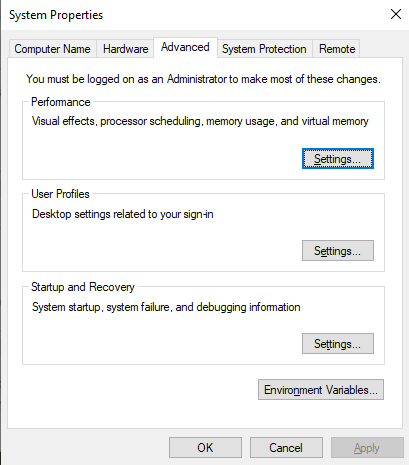
Step 2: Go to Search Panel and type “Edit System environment variables”
Step 3: Click On Environment Variables
Step 4: Under System variables, Click on Path and Select Edit
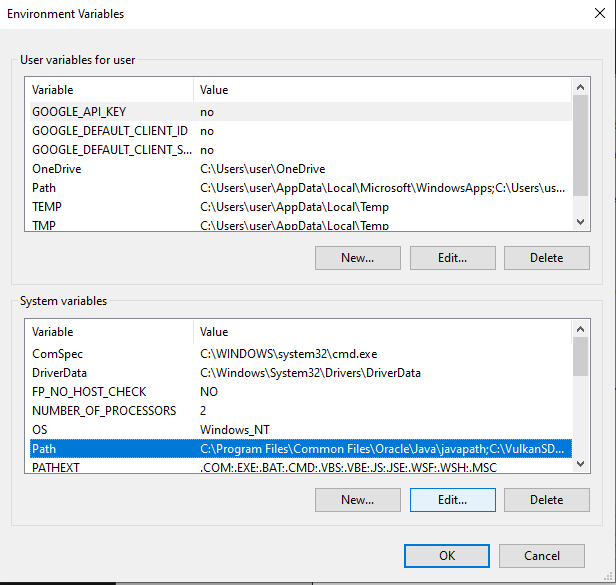
Step 5: Click on New and Paste the Address into it and click on OK

Now Code Blocks will automatically detect GCC Compiler.
Last Updated :
06 Oct, 2021
Like Article
Save Article