Audacity – это полностью бесплатный редактор аудио файлов, позволяющий работать с несколькими дорожками одновременно. Активно используется и в личных целях, и на любительских студиях звукозаписи. Почти не уступает в функционале по сравнению с платными конкурентами, в том числе Adobe Audition. Приложение позволяет убрать шум, почистить звуковую дорожку, свести треки и многое другое. Скачать Audacity можно на нашем сайте, а в материале рассмотрим, как установить и настроить приложение.
Особенности
- Запись с микрофона в реальном времени с активным шумоподавлением. Это позволяет уменьшить затраты времени на последующее редактирование материала.
- Возможность подключать одновременно до 16 аудиоканалов и записывать звук с линейных входов, микшеров и другого оборудования.
- Изменение и сохранение файлов в популярных форматах: WAV, MP3, FLAC и так далее.
- Cкачать Audacity можно не только для Windows. Это кроссплатформенная программа, адаптированная для Linux и Mac OS.
- С помощью встроенного функционала пользователь может изменить темп с сохранением оригинального тона. Также можно поменять тон мелодии без редактирования темпа.
- Универсальный инструмент для сведения звука – добавляя несколько дорожек разного качества и характеристиками, программа позволяет оптимизировать их до одинакового уровня. Алгоритм работает с минимальной потерей качества.
Скачать
Нажатием на кнопку ниже, можно скачать бесплатно аудиоредактор Audacity на русском языке. Файл установки взят с официального сайта и не содержит вирусов.
Скачать Audacity
Рекомендуем! MultiSetup
| Официальный дистрибутив | |
| Тихая установка без диалоговых окон | |
| Рекомендации по установке необходимых программ | |
| Пакетная установка нескольких программ |
Как установить
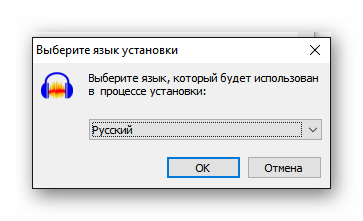
Открываем инсталлятор. Появится уведомление с выбором локализации установщика. Нажимаем на кнопку ОК.
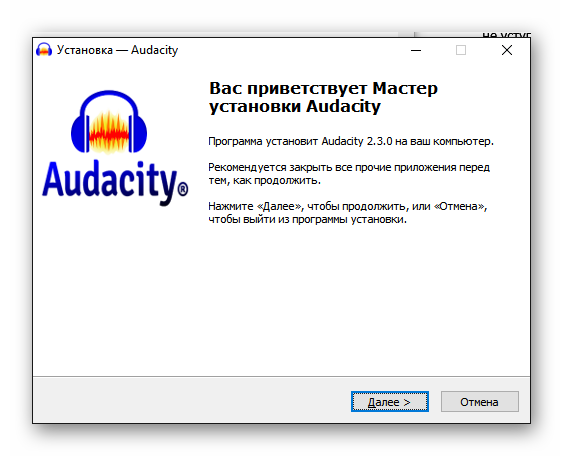
В приветственном окне разработчики рекомендуют закрыть другие приложения перед тем, как продолжить. Это не имеет значения и в большинстве случаев не оказывает влияние на процесс.
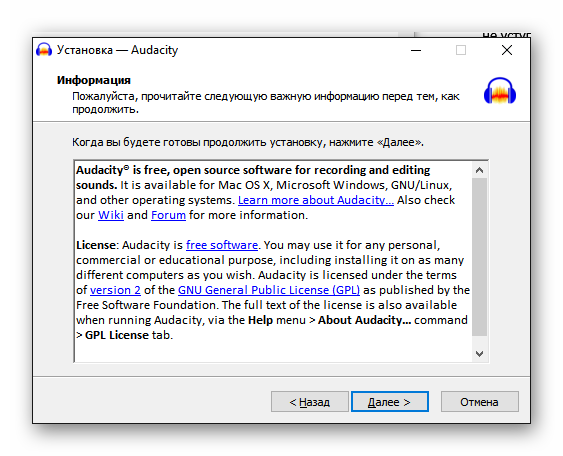
Принимаем условие использования программы. В нем говорится о том, что продукт распространяется на свободном основании для коммерческого или личного использования.
Если на каком-то ресурсе продукт распространяется платно – это незаконная деятельность. Часто подобным занимаются мошенники для личного обогащения.
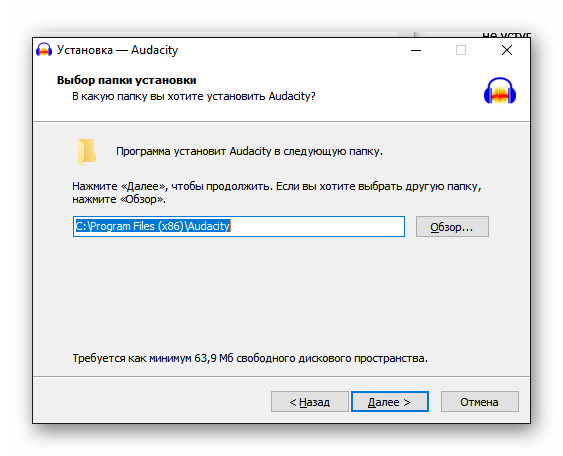
Выбираем путь для загрузки файлов. По умолчанию установка происходит на системный локальный диск.
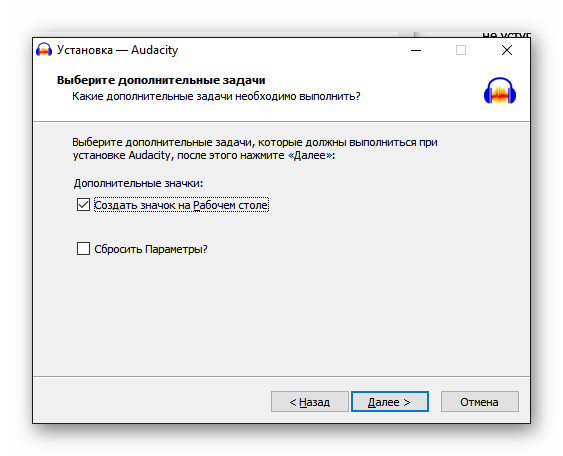
На этом этапе оставляем галочки без изменения. «Сбросить параметры» — понадобится, только если программа устанавливается повторно и нужен чистый клиент. Нажимаем «Далее».
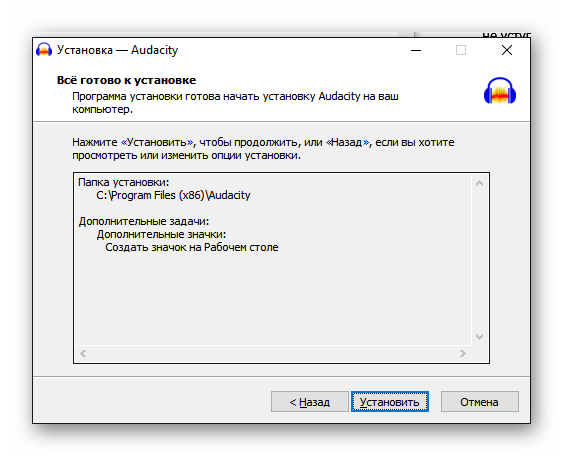
Последнее окно перед установкой повторит выбранные до этого параметры. Выбираем «Установить».
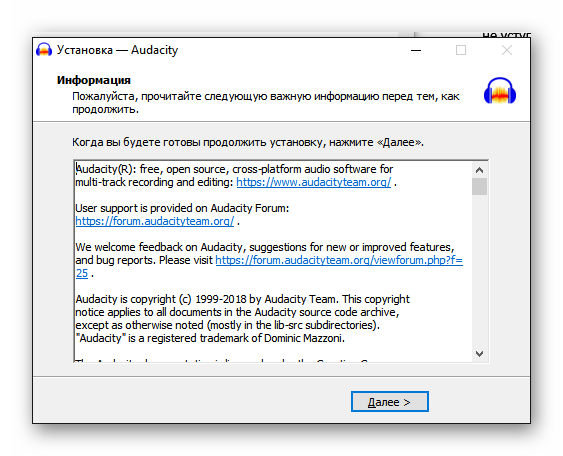
После завершения инсталляции появится окно с лицензионным соглашением Audacity. Подтверждаем, нажав на кнопку «Далее».
У звукового редактора огромное количество функций и настроек, но рассмотрим только основные конфигурации. Включаем программу, находим пункт «Правка» в верхней панели. Из выпадающего меню выбираем «Настройки».
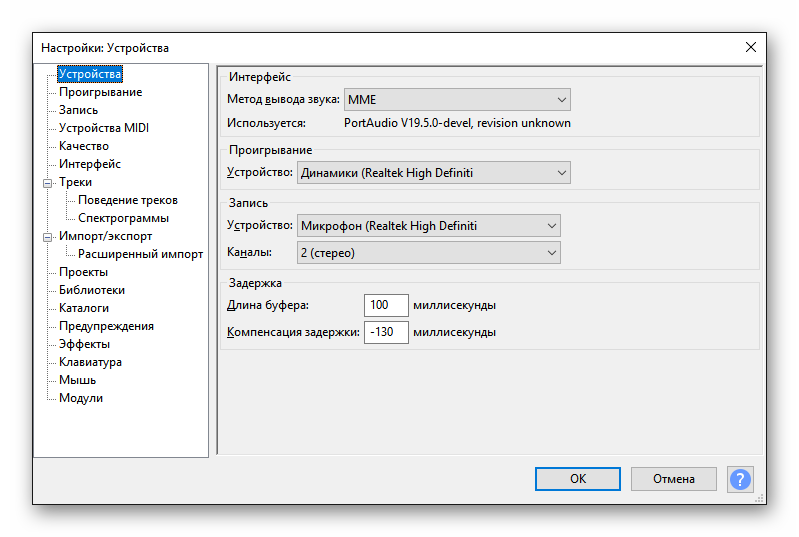
В разделе «Устройства» выбираем метод выведения звука. Здесь расположены регуляторы устройств для записи и воспроизведения материалов в программе.
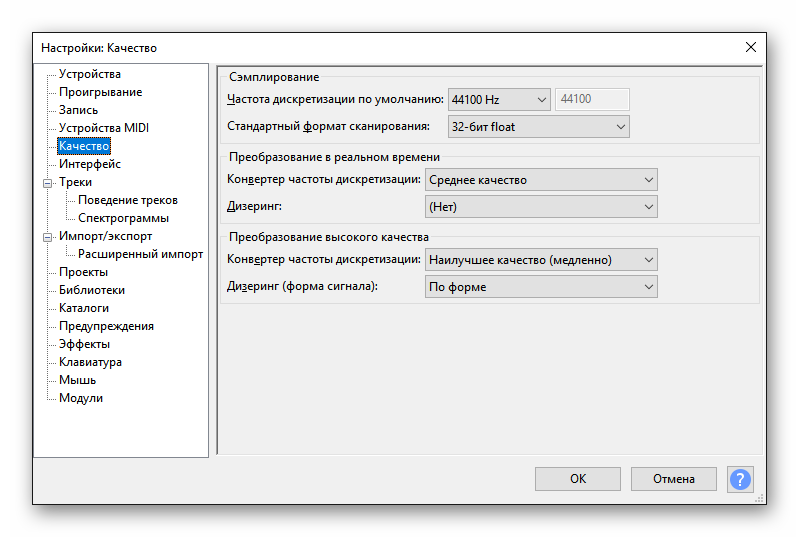
Нажимаем на «Качество». Настраиваем уровень частот воспроизводимых треков, а также стандартный формат сэмплирования песен.
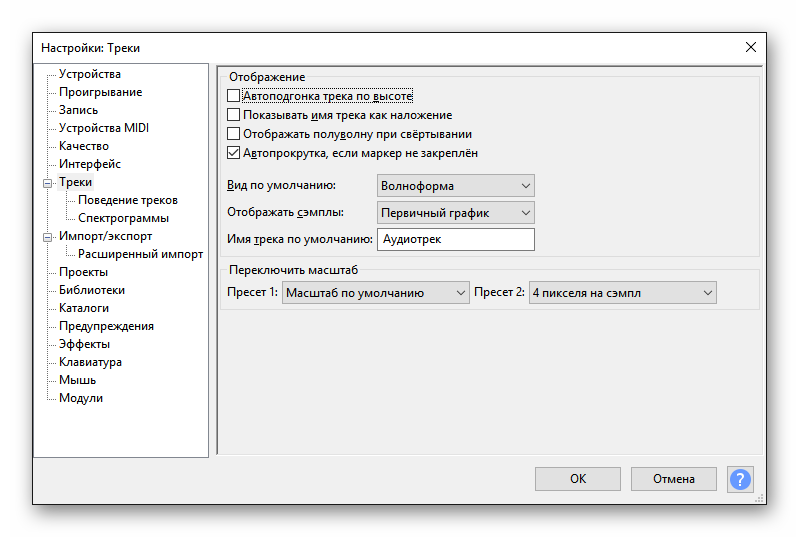
Последний этап — настройка интерфейса. В панели регулируется язык интерфейса, внешний вид и диапазон измерений.
На этом установка и настройка звукового редактора окончена. Теперь можно записывать собственные треки или редактировать уже готовый звук для профессионального или любительского использования.
@как-установить.рф
Downloading through the Microsoft Store
Downloading through the Microsoft Store
-
Click Get in Store App.
-
The Microsoft Store app will open. Click Install to install Audacity.
-
When Windows asks you if the installer may make changes to the system, click Yes.
Audacity is now installed. You can start Audacity from the start menu.
Downloading from the Internet
Downloading from the Internet
-
If prompted, click Run or Save.
-
If you clicked Save, head to your downloads, locate the Audacity installer and double-click it.
-
In Windows 11 it is possible that you get a warning about Audacity being a non Microsoft-verified app. Click Install anyway.
-
Windows 11 warning when running Audacity installer
-
When Windows asks you if the installer may make changes to the system, click Yes.
-
Select the language to use during the installation and click OK.
Select the language to use during the installation
-
In the Welcome page click Next.
Welcome page — Click Next
-
In the Information page you will links to learn more about Audacity and its license. Click Next to proceed.
Information page — Links to learn more about Audacity and its license
-
In the Select Destination Location page you can select a different folder to install Audacity using the Browse… button or simply use the recommended destination. Click Next to continue.
Select the folder to install Audacity
-
In the Select Additional Tasks page you can choose that the installer adds a shortcut to Audacity in your Desktop.
-
If you have installed Audacity previously you will have the option to Reset Preferences.
-
Select if you want to create a shortcut to open Audacity
-
Verify your choices and click Install
Verify your choices and click Install
-
Wait a few seconds until the setup process completes.
Wait until the setup process completes
-
Click Finish to close the installer and Launch Audacity
Click Finish to close the installer
-
It will automatically download the latest version of Audacity after 5 seconds.
-
Once the download has completed to your Downloads folder, double-click the DMG file to mount it.
-
Drag the Audacity.app icon rightwards onto the «Applications» folder shortcut.
-
You can also drag Audacity out of the DMG to any other location. You need the administrator password to copy Audacity to «Applications».
-
-
Launch Audacity.app from /Applications or from your chosen location.
Note: Do not double-click the «Audacity» icon in the DMG to launch Audacity from there. -
Once the program has opened press «OK» to start editing!
-
Additionally, you may check the «Don’t show this again at start up» prompt.
-
Downloading and installing using an AppImage
Downloading and installing using an AppImage
-
2.
Make the downloaded AppImage runnable.
To do this, you can right-click the file -> Properties -> Permissions
or run the following command in the terminal:chmod +x <path to your Audacity.AppImage>
-
3.
Double-click the AppImage to run Audacity.
Note: If you have trouble opening the AppImage, try installing libfuse2. Exact steps for various distributions can be found at
Using a package from a repository
Using a package from a repository
Your Linux distribution (for example Ubuntu, Fedora or Debian) may have an Audacity package as part of the repository. This version is typically older than the latest AppImage, but may be better integrated into your distribution.
To install Audacity through the repository, use the Software Center, App Store or similar software on your computer. Alternatively, you can try the following commands:
-
Ubuntu, Debian, Pop_OS!, Linux Mint:
sudo apt install audacity -
RHEL, Fedora:
sudo yum install audacity -
Arch Linux:
sudo pacman -Syu audacity
Repository packages are maintained by the community, not by the Audacity Team.
Community-maintained Flatpaks and Snaps are available from
Flathub
and
Snapcraft
, respectively.
Audacity is a free and open-source digital audio editor and recording application software. Even two decades after its original launch date, Audacity remains one of the most widely-used open source applications. It’s a free audio editor that works on Windows, Mac, and Linux systems. It is developed by The Audacity Team. It was initially released on May 28, 2000. After installing this nifty little package, you’ll find everything you need to record, edit, and enhance the sound files. The Audacity interface might look a little complex at first, but given the professional-grade tools available through the program.
Installing Audacity on Windows
Follow the below steps to install Audacity on Windows:
Step 1: Visit the official https://www.audacityteam.org/ website using any web browser.
Step 2: Click on the Download Audacity Button.
Step 3: Now check for the executable file in downloads in your system and run it.
Step 4: It will prompt confirmation to make changes to your system. Click on Yes.
Step 5: The next screen is to choose your setup language which you want to choose and click on OK.
Step 6: Now setup will start Click on Next Button.
Step 7: The next screen will be of Information about Audacity Click on Next.
Step 8: The next screen will be of installing location so choose the drive which will have sufficient memory space for installation. It needed a memory space of roughly 87.8 MB. Click on the Next button.
Step 9: The next screen will be an additional task click on Next.
Step 10: Next screen will be ready to install so click on the Install button.
Step 11: After this installation process will start and will take 2-5 minutes depends on your computer speed and specification to complete the installation.
Step 12: Next Screen will be information about audacity Click on Next.
Step 13: Now Click on Finish Button and the Audacity software will open automatically.
Now see the interface.
Congratulations!! At this point, you have successfully installed Audacity on your Windows system.
Addtional resources
FFmpeg import/export library
An optional library which handles additional file formats (like WMA, M4A, AC3 and others)
Link to FFmpeg library
Plugins
Elevate your productions with a vast selection of third-party plug-ins, including VST3, Nyquist and more.
Link to plugins page
About these downloads
System requirements
Audacity is tested on Windows 10 & Windows 11, and may also work on Windows 8.1, 7 and Vista. Both 64-bit and 32-bit versions are available. Audacity has no specific CPU or GPU requirements and should be able to run on any notebook or PC that can run aforementioned operating systems.
Note: Audacity requires fast, uninterrupted access to a hard drive or SSD to operate. Network storage, consumer-grade external hard drives or USB thumbdrives may be unreliable.
Older versions of Audacity
You can download older versions of Audacity on Fosshub.
The last tested compatible versions for relevant operating systems are:
- Windows 7, Vista: Audacity 2.3.3
- Windows 2000, XP; no SSE2: Audacity 2.0.6
- Windows 98, ME: Audacity 2.0.0
Дата статьи:
Автор:
Audacity — свободно распространяемый аудиоредактор, доступный в различных операционных системах. Функционала Audacity вполне хватит для обработки и редактирования аудиофайлов различного назначения.
Для установки Audacity в Windows, достаточно выполнить следующие действия:
- Скачайте последнюю версию Audacity с официальной страницы Audacity.
- Запустите установочный файл.
- Выберите язык, на котором будет производится установка (в моем случае — это русский):
- На приветствие мастера установки, нажимаем на «Далее»:
- Прочитав информацию и лицензию GPL, вновь нажимаем на «Далее»:
- Выбираем каталог, в который будет установлен Audacity (обычно можно все оставить как есть):
- Для того, чтобы, после установки, на рабочем столе был доступен ярлык на Audacity, оставляем чекбокс отмеченным:
- Нажимаем на «Установить»:
- После распаковки файлов:
будет предложено нажать на «Далее»:
Все, Audacity успешно установлен!
Если хотите запустить Audacity прямо после установки, оставьте отметку на чекбоксе «Launch Audacity»:
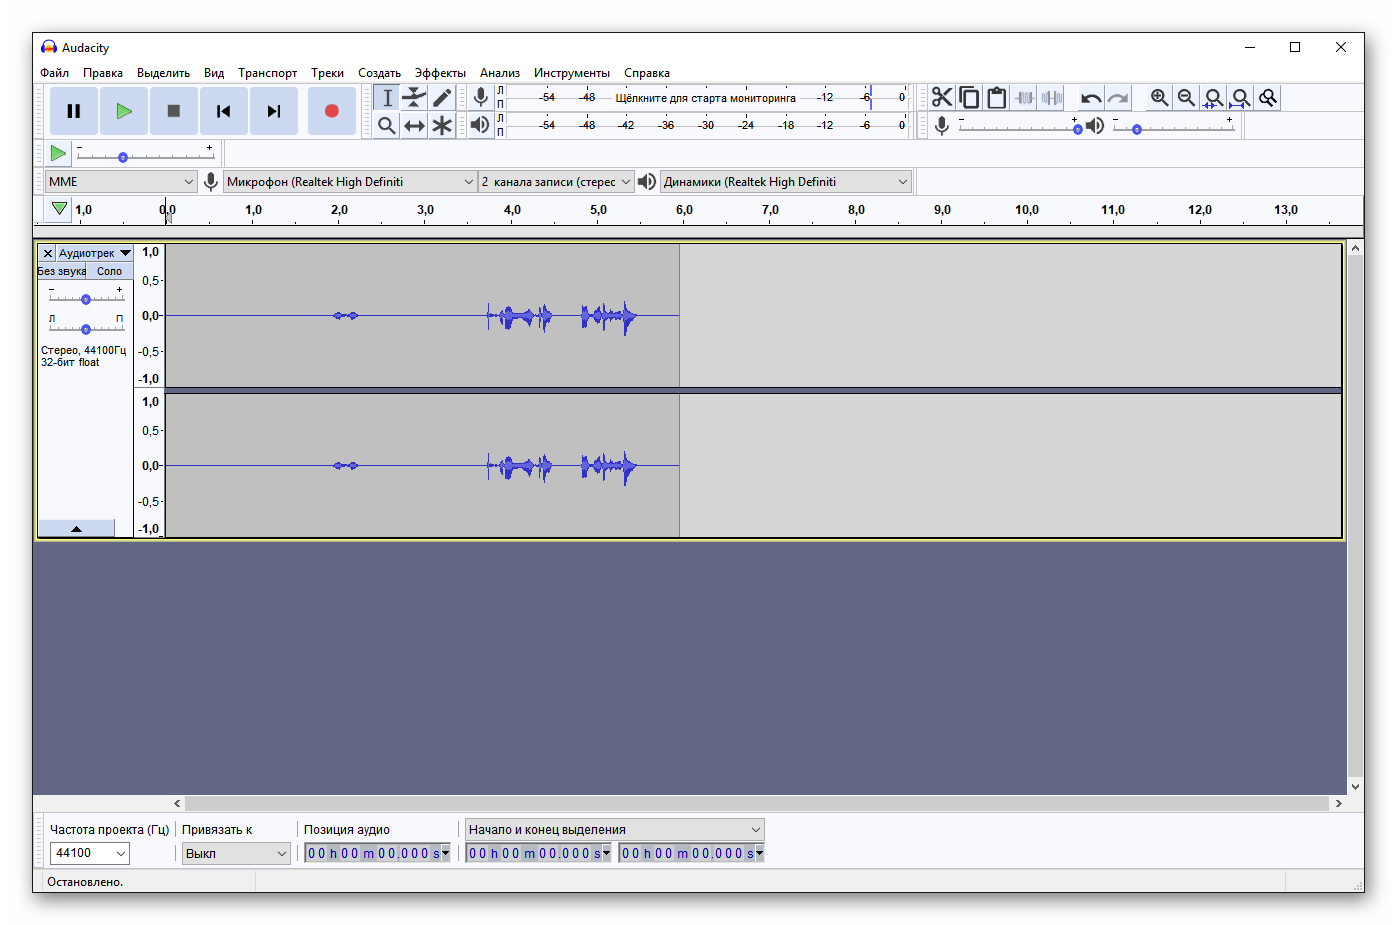
После запуска Audacity вы попадете в главное окно редактора:
Остались вопросы?
Если у Вас что-то не получилось или остались вопросы по данной проблеме — обратитесь к автору и он Вам поможет.
Владимир
Системный администратор
Linux (Ubuntu,Debian,Fedora), MS Windows (Server/Desktop), PHP.
Решение IT-проблем любой сложности.




 будет предложено нажать на «Далее»:
  Все, Audacity успешно установлен!

