
От автора: наладить взаимодействие Angular Windows не всегда получается без проблем. Вы не можете настроить среду разработки? Позвольте нам помочь вам!
Недавно я был наставником ngHeroes. Мне очень понравилось помогать студентам и людям из других отраслей, которые хотели изучать веб-разработку на Angular. Многие из них хотели начать новую карьеру. Я был рад отметить, что посещаемость женщин больше, чем я ожидал, учитывая гендерный разрыв в нашей отрасли.
Я начал свою карьеру в качестве разработчика программного обеспечения 6 лет назад, но я не забыл, что значит быть новичком в программировании. То, что я действительно забыл — сколько работы нам нужно выполнить, чтобы начать работу с необходимыми инструментами.
У студентов ngHeroes были компьютеры на MacOS, Linux и Windows. Нам удалось их запустить, но в процессе возникло несколько сложных моментов. В этой статье я сосредоточусь на установке инструментов и зависимостей, необходимых для разработки приложений Angular на компьютере под управлением Windows. Они почти одинаковы для других платформ.
1. Node.js
Первое, что вам нужно установить, это Node.js. Это среда выполнения JavaScript, которая может запускать веб-серверы, скрипты и консольные приложения. Многие инструменты веб-разработки используют Node.js.
Перейдите на сайт Node.js. На нем предлагаются 2 установочных пакета, исходя из вашей операционной системы и архитектуры процессора: LTS (долгосрочная поддержка) и Текущий.
Вот где начинаются сложности. LTS — правильный выбор, но нам может понадобиться более старая версия LTS. Нам нужна LTS версия Node.js, которую поддерживает Angular CLI (интерфейс командной строки). Angular CLI — это инструмент разработки для проектов Angular.
Таблица 1. Поддержка Node.js в Angular CLI
Для нового приложения мы можем выбрать новейшую версию Angular CLI. На jsDelivr мы можем прочитать описание пакета для последней версии Angular CLI. На момент написания статьи это Angular CLI версии 7.0.5. В описании пакета мы также видим поддерживаемую версию Node.js.
В конце файла JSON вы найдете объект JSON с именем «engines», а внутри него требования для «node». Например, там будет указано «node»: «>= 8.9.0» для Angular CLI версии 7.0.5. Это означает, что нам нужна как минимум версия Node.js 8.9. Как видно из таблицы 1, Angular CLI версии 7.x также поддерживает Node.js 10.
Мы решили использовать новейший Angular CLI. Давайте вернемся на сайт Node.js, загрузим установщик последней версии LTS, поддерживаемой Angular CLI, и запустим его с правами администратора.
Если мастер установки спросит, включать ли Boxtstarter в установку, включите его. Подробнее об этом через минуту. Подождите, пока закончится установка. Это может занять некоторое время и даже может потребовать перезагрузки.
Чтобы убедиться, что Node.js установлен, откройте терминал (командную строку) и запустите node -v, чтобы отобразить установленную версию Node.js.
2. Инструменты сборки Windows

Установка инструментов сборки Windows с помощью NPM CLI
Мы решили использовать новейшую версию Angular CLI, но прежде чем мы сможем ее установить, нам нужно позаботиться о дополнительных зависимостях.
В частности, некоторые инструменты компиляции используются для задач пакетом node-gyp до и после установки для различных пакетов, таких как Angular CLI.
Для Windows нам нужны Python 2.7, инструменты сборки Visual Studio и инструменты сборки C++. К счастью, мы можем установить их все как один пакет, используя интерфейс командной строки NPM.
Если вы ранее установили Node.js с включенной опцией Boxstarter, у вас уже есть эти зависимости. Перейдите к шагу 3.
Выполните следующую команду, чтобы установить все специфичные для Windows зависимости для Angular CLI. Для установки из общедоступного реестра NPM используется интерфейс командной строки NPM (Node Package Manager). Вы установили интерфейс командной строки NPM с Node.js.
Обязательно используйте терминал с правами администратора. То есть, кликните правой кнопкой мыши на командной строке и выберите «Запуск от имени администратора». NPM похож на Composer (PHP), LuaRocks, Maven (Java), NuGet (.NET), pip (Python) и RubyGems, но для JavaScript.
|
npm install —global —production windows—build—tools |
Подождите, пока установка не закончится.
3. Angular CLI
Теперь мы готовы к установке Angular CLI. Как и прежде, мы используем NPM CLI для его установки.
|
npm install —global @angular/cli |
Чтобы убедиться, что Angular CLI установлен, выполните команду, ng —version, которая отображает установленную версию Angular CLI и ее зависимости.
4. Git
Мы почти готовы создать новый проект приложения Angular. Прежде чем мы сможем это сделать, нам нужна система контроля версий, чтобы иметь возможность выполнять резервное копирование исходного кода на сервере. Это также позволит нам своевременно создавать контрольные точки, к которым мы можем вернуться, если застрянем.
Я предлагаю Git, имеющий отличную поддержку в редакторе кода, который мы собираемся использовать. Git также хорошо интегрирован с Angular CLI. Перейдите на сайт Git. Вам будет предложен установочный пакет, исходя из вашей операционной системы.
5. Visual Studio Code

Расширение Angular Language Service для Visual Studio Code добавляет IntelliSense к шаблонам Angular
Нам нужен редактор кода для разработки приложения Angular. Visual Studio Code — это бесплатный редактор кода, предлагаемый Microsoft. Он имеет отличную поддержку Angular и TypeScript через расширения. Visual Studio Code поддерживает Linux, macOS и Windows.
Установите и запустите стабильную сборку с веб-сайта кода Visual Studio Code. Обязательно после этого установите расширение Angular Language Service. Это добавит IntelliSense к вашим шаблонам Angular.
Создание каркаса приложения Angular
Установив все инструменты, мы наконец можем приступить к созданию приложения Angular. Откройте командную строку и перейдите в каталог, в котором вы хотите создать проект.
Используйте следующую команду Angular CLI, чтобы создать необходимый каталог и файлы для нового приложения Angular. Замените my-app на имя приложения, которое также будет именем каталога, созданного Angular CLI.
Кстати, не используйте путь к каталогу, который содержит пробелы, такой как C:\Program Files (x86)\Angular. Сервер разработки Angular CLI имеет проблемы с обслуживанием статических файлов, путь которых содержит пробелы. Вместо этого выберите такой путь, как C:\Projects.
Angular CLI спросит вас, нужна ли вам маршрутизация. Большинство одностраничных приложений (SPA) используют маршрутизацию. Если вы впервые работаете с Angular, вы можете пропустить это.
Вам также будет предложено выбрать формат таблицы стилей. CSS является родным форматом браузера. SCSS — самый популярный препроцессор таблиц стилей. Выберите тот, с которым у вас есть опыт работы, или просто CSS, если вы новичок в веб-разработке.
Установка займет несколько минут, поскольку она включает установку множества инструментов и зависимостей библиотек, которые используются Angular и Angular CLI.
Пора приступать к кодированию
Теперь у вас есть все необходимое для кодирования! Откройте каталог проекта с помощью Visual Studio Code. При разработке приложения вам нужно будет открыть веб-сервер разработки. Angular CLI подготовил для вас тот, который вы можете запустить с помощью следующей команды из корневого каталога проекта.
это ярлык для скрипта NPM для
Как только сервер разработки завершит компиляцию приложения, вы можете открыть его в браузере, перейдя по адресу //localhost:4200.
Каждый раз, когда вы изменяете файл и сохраняете его, ваш браузер обновляется и отображает изменения. Чтобы остановить работающий сервер разработки, вам нужно нажать Ctrl+C, ввести Y и нажать Enter.
Angular CLI определил скрипт start в package.json. Попробуйте добавить в скрипт флаг —open, чтобы получилось ng serve —open, затем сохраните файл package.json и снова запустите сервер npm start.
Теперь все, что вам нужно сделать, это создать приложение. Если вам не хватает идей или уверенности в своих навыках разработки, попробуйте учебное пособие «Путь героев» на Angular.io.
Автор: Lars Gyrup Brink Nielsen
Источник: //medium.freecodecamp.org/
Редакция: Команда webformyself.
Оглавление
1. Как установить Angular, Node и NPM
2. Как создать проект Angular
Предисловие
Последние два месяца я промучился с задачей, на которую я смог найти в Интернете только косвенные ответы. Задача называлась так: «Как упаковать Angular в war и развернуть на Tomcat» (Angular 4 + Maven war + Tomcat). В итоге, меня ждала победа с этим страшным DevOps’ом и мне захотелось помочь тем, кто так же будет мучиться с этой проблемой.
Но, немного подумав, я решил, что стоит рассказать свой путь с самого начала, начиная с момента установки Angular на компьютер. Потом я отдельно рассмотрю deploy чистого Angular на Tomcat, а в самом конце поговорим уже о подготовки war-контейнера и размещении его на сервере с последующим развертыванием.
Итак, для начала давайте разберем, что такое Angular. Немного перефразируем Вики в этом смысле:
Angular – это JavaScript фреймворк с открытым исходным кодом. Основная задача фреймворка – внедрение уже всем известного MVC для разработки браузерных приложений.
Установка Angular на Windows
Теперь перейдем непосредственно к тому как проходит установка Angular на Windows. Для установки Angular Вам понадобится NodeJS. NodeJS – это платформа, в задачу которой входит транслирование JavaScript’а в машинный код. Node – это не User-friendly GUI с кнопочками. К сожалению взаимодействие со средой осуществляется полностью через консоль Windows.

Для установки NodeJS нужно перейти в раздел Download официального сайта (ссылка ) и скачать msi-файл и запустить его после окончания загрузки.
Если у вас Windows 10, то Вы можете получить следующее предупреждение:

В данном случае нужно нажать ссылку в нижней части окна «Открыть параметры» и в открывшимся диалоговом окне, в разделе «Приложения и возможности», в группе «Установка приложений» выбрать нужный Вам пункт, разрешающий установку не из магазина (например, «Разрешить использование приложений из любого места»).
После этого следует установить программу, следуя инструкции установщика (никаких проблем вызвать не должно).
Теперь настало время проверить установку. Нажмите комбинацию клавиш Win + R, введите “cmd” в поле и нажмите Enter. Откроется консоль, в которой введите последовательно:
node –v
npm -v
Если все установлено верно, то в консоли, сразу после введенных команд будут отображены текущие версии NodeJS и NPM. Напомню, что NPM – это специальный пакетный менеджер для управления зависимости. Ну и нам осталось сделать последнее — установить Angular CLI (собственно, это и есть установка Angular). Для этого все в том же терминальном (консольном) окне введем команду:
npm install –g angular-cli
Установка займет какое-то время и весь ее процесс будет отображен в Вашем терминальном окне. Сразу после этого можно приступать к созданию Вашего первого проекта, но об это мы поговорим уже в следующей статье.
Вот собственно и все! Установка Angular на Windows закончена!
Related posts:
Angular has quickly become one of the most popular frameworks for building web applications, thanks to its robust set of features and ease of use. But how do you use it?
Today, we’ll cover everything you need to know about Angular, from its background and importance in web development to a step-by-step guide on how to install it on various operating systems. There’s no time to waste, so let’s get started.
What Is Angular?
Angular is an open-source web application framework developed by Google in 2010. It is based on TypeScript, a statically-typed superset of JavaScript that adds optional types and other features for more robust and maintainable code.
Angular has a component-based architecture, which means that applications are built using reusable components that can be easily integrated into the larger application. This approach allows for better organization, maintainability, and scalability of your projects.
Some of the key features of Angular include:
- It’s component-based
- Focus on scalability and maintainability
- Strong support for two-way data binding and dependency injection
- A comprehensive set of built-in directives and services
Need help organizing your web app? Angular’s component-based approach makes it easy to reuse code and scale your projects. Check it out 🛠️Click to Tweet
Who Uses Angular?
Angular is a popular choice among various types of developers, including:
- Web developers
- Front-end developers
- Full-stack developers
Many major companies use Angular in their projects as well due to its power and flexibility.
Some of these companies include:
- Google: It’s no surprise that Google, the creator of Angular, is also one of its biggest users. Google has used Angular in various products, such as Google AdWords, Google Cloud Platform, and the Google Analytics suite.
- Microsoft: Microsoft has adopted Angular for several of its products, including the popular code editor Visual Studio Code, which is built using Angular and other web technologies. Additionally, Microsoft has integrated Angular into its Azure platform for building and deploying cloud applications.
- IBM: Another major tech company that has embraced Angular for its projects is IBM, which has used Angular in its customer support platform.
- PayPal: The leading global online payment platform, has chosen Angular for its web development projects. The company’s PayPal Checkout product, which allows businesses to securely accept payments online, is built using Angular, demonstrating the framework’s ability to handle secure, large-scale applications.
- Upwork: The popular freelancing platform that connects businesses with professionals also leverages Angular for its web development needs. The company’s Upwork Talent Platform is built using Angular, showcasing the framework’s capabilities in creating a responsive and user-friendly interface for managing projects and hiring freelancers.
- Lyft: The ride-sharing platform uses Angular for its web application development. The company’s Lyft Business platform, which provides transportation solutions for businesses and organizations, is built using Angular, showcasing the framework’s ability to create scalable and robust applications for diverse industries.
With such a wide variety of companies embracing Angular, it’s clear that this powerful framework is an excellent choice for web development projects of all sizes and complexities.
Advantages of Using Angular
Before we dive into the installation process, let’s briefly discuss some of the key advantages of using Angular for your web development projects:
Component-Based Design Promotes Reusability
Angular’s component-based architecture encourages developers to create modular, reusable components that can be easily integrated into larger applications. This approach not only makes your code more organized but also promotes reusability, which can save time and effort in the long run.
Strong Support for TypeScript
TypeScript, the statically-typed superset of JavaScript, is a core part of Angular. TypeScript’s optional types and other features make it easier to write robust and maintainable code, which is especially important for large-scale projects.
Emphasis on Modular Architecture
Angular’s focus on modularity means your applications can be easily organized into smaller, more manageable pieces. This makes it simpler to scale your projects, as well as maintain and update them over time.
Built-In Support for Reactive Programming
Angular has built-in support for reactive programming through the RxJS library. Reactive programming is a powerful paradigm that allows you to work with asynchronous data streams, making it easier to handle complex data flows and user interactions in your applications.
Robust Ecosystem and Tools
Angular boasts a rich ecosystem of tools, libraries, and resources to help you get the most out of the framework. From the Angular CLI (Command Line Interface) to the extensive collection of third-party libraries, you’ll have everything you need to build, test, and deploy your applications with ease.
Angular Prerequisites
Before you start installing Angular, it’s essential to have some basic knowledge and tools in place. Here’s a list of prerequisites you should be familiar with:
- Basic knowledge of JavaScript: Angular is built on JavaScript, so having a solid understanding of the language is crucial. If you’re new to JavaScript, you may want to brush up on your skills first.
- Familiarity with command line/terminal: Throughout the installation process and when using Angular, you’ll need to work with the command line (on Windows) or the terminal (on macOS and Linux). Familiarity with basic commands and navigation is essential to getting started with Angular.
- Familiarity with TypeScript (optional): While not strictly necessary, having a basic understanding of TypeScript can be helpful when working with Angular, as the framework is built on TypeScript. You can learn more about TypeScript through the official documentation.
- Node.js and npm installed: Angular requires both Node.js and the Node Package Manager (npm) to be installed on your system. If you don’t already have them installed, you can follow the instructions in our guide on how to install Node.js.
System Requirements
Before installing Angular on your machine, it’s essential to ensure your system meets the following requirements:
- Operating System: Windows 10, macOS 10.10 (Yosemite) or later, or a recent distribution of Linux (such as Ubuntu 18.04 or later)
- Memory: At least 4 GB RAM
- Storage Space: At least 10 GB of free disk space
These requirements ensure that Angular runs smoothly on your system and that you can effectively develop and test your applications.
How To Install Angular
The process for installing Angular is very similar across Windows, macOS, and Linux operating systems. However, it’s still a good idea to follow the specific instructions for your system for the best results.
How To Install Angular on Windows
In this section, we’ll guide you through the process of installing Angular on a Windows machine. Follow the steps below to get Angular up and running on your system:
- Install Node.js and npm
- Install Angular CLI
- Run Angular CLI commands
- Create a workspace for the application
- Run Angular in your browser
Step 1: Install Node.js and npm
Before you can install Angular, you’ll need to have Node.js and npm (Node Package Manager) installed on your machine. Again, if you haven’t already installed them, follow the instructions in our guide on how to install Node.js.
Step 2: Install Angular CLI Globally
Next, you’ll need to install the Angular CLI tool. To install the Angular CLI globally on your system, open the Command Prompt and run the following command:
npm install -g @angular/cliThis command installs the latest stable version of the Angular CLI tool and makes it available for use throughout your system.
Step 3: Run Angular CLI Commands
Once you have the Angular CLI installed, you can use its commands to manage your Angular projects. To verify that the installation was successful, run the following command in the Command Prompt:
ng --versionThis command displays the installed version of the Angular CLI, along with other relevant information about your environment.
Step 4: Create an Initial Workspace for the Application
To create a new Angular application, you’ll need to create a workspace. A workspace is a directory that contains the configuration files and source code for your Angular projects. To create a new workspace, run the following command in the Command Prompt, replacing my-app with the desired name for your application:
ng new my-appThis command creates a new directory with the specified name, sets up the necessary configuration files, and generates an initial Angular application within the workspace.
Step 5: Run the Angular Application in Your Browser
To test your new Angular application, navigate to the newly created directory using the cd command:
cd my-appThen, start the development server by running the following command:
ng serveThis command compiles your Angular application and starts a development server. By default, the server runs on port 4200.
Open your preferred web browser and navigate to http://localhost:4200/. You should see your new Angular application running in the browser.
Congratulations! You’ve successfully installed Angular on your Windows computer and created your first Angular application. You can now start building your projects.
How To Install Angular on macOS
In this section, we’ll guide you through the process of installing Angular on a macOS machine. Follow these steps to get Angular up and running on your system:
- Install Node.js and npm
- Install Angular CLI globally
- Test that Angular was installed correctly
- Create an Angular application
- Run the application
Step 1: Install Node.js and npm (If Not Already Installed)
As mentioned previously, you need to have Node.js and npm installed on your computer before you can install Angular. If you have it already proceed to step 2. If not, follow along with our how-to guide first, then continue with this tutorial.
Step 2: Install Angular CLI Globally
Just as with the Windows instructions, you need to next install Angular CLI, which is what you need to create (and manage) Angular applications. To do this, open the Terminal and run the following command:
npm install -g @angular/cliBy running this command, you can install the most recent stable release of the Angular CLI tool and access it across your system.
Step 3: Test Angular Installed Correctly
After installing the Angular CLI, you can utilize its commands for managing Angular projects. To confirm a successful installation, run the subsequent command in the Terminal:
ng --versionYou should see the version of Angular CLI displayed.
Step 4: Create an Angular Application
To begin a new Angular application, you need to first create a workspace. This involves making a folder that will store the configuration files and source code for your Angular projects. To create the workspace, open the Terminal and enter the code below. But just like the instructions for Windows and macOS, remember to substitute “my-app” with the name you prefer for your application.
ng new my-appThis command performs three tasks: it creates a new directory with a specified name, sets up the configuration files required, and generates an initial Angular application within the workspace.
Step 5: Run the Application
To check your new Angular application, use the cd command to go to the directory where it was created.
cd my-appThen, start the development server by running the following command:
ng serveTo compile your Angular application and launch a development server, use this command. The server will run on port 4200 by default.
Please open your favorite web browser and go to http://localhost:4200/ to see your new Angular application.
And that’s all there is to it. You now have Angular installed on macOS and have created an Angular application successfully.
How To Install Angular on Linux
Lastly, we’ll guide you through the process of installing Angular on a computer running Linux.
Follow these steps to get Angular up and running quickly:
- Install Node.js and npm
- Install Angular CLI
- Create a new Angular application
- Test the app in your browser
Step 1: Install Node.js and npm (If Not Already Installed)
Just like the Windows and Mac instructions, you need to have Node.js and npm installed prior to getting Angular on your Linux machine. Take a look at our detailed installation guide to learn how to do this or proceed to the next step if you’ve done it already.
Step 2: Install Angular CLI With npm Package Manager
Your next order of business is to install Angular CLI on your system. To do this, open a Terminal window and enter the command below:
npm install -g @angular/cliOr, you can use the following instead:
$ sudo npm install -g @angular/cliThis command installs the latest stable version of the Angular CLI tool and makes it available for use throughout your system.
Step 3: Create a New Angular Project
To create a new Angular application, you’ll need to create a workspace. A workspace is a directory that contains the configuration files and source code for your Angular projects. To create a new workspace, run the following command in the Terminal, replacing my-app with the desired name for your application:
ng new my-appThis command creates a new directory with the specified name and sets up the necessary configuration files for it. It also generates an initial Angular application.
Step 4: Test the New Application in a Web Browser
To test your new Angular application, navigate to the newly created directory using the cd command:
cd my-appThen input the following:
ng serveThe server runs on port 4200, so to access it, you’ll need to open a web browser and go to http://localhost:4200/.
If all went correctly, you should see your new Angular application in the browser.
And with that, you now have Angular installed on Linux. There’s no telling what you might do next!
Building web apps is easier with Angular’s pre-built components! Spend less time coding with its built-in features. Learn more here 👇Click to Tweet
Summary
If you’ve followed along, today we’ve guided you through the process of installing Angular on Windows, macOS, and Linux. And by following the steps outlined for each platform, you should now have a working Angular development environment and be ready to start building web applications using this powerful framework.
As you begin learning and using Angular, don’t forget to explore the extensive resources available to help you master the framework. From official Angular documentation to community-driven resources like Angular University, you’ll find plenty of material to support your learning journey.
You may also wish to consider joining Angular-focused communities, such as the r/Angular subreddit, where you can ask questions, share your experiences, and learn from fellow developers.
Once you’re ready to deploy your Angular applications, consider using Kinsta Application Hosting. Kinsta offers high-performance hosting solutions designed for applications built with frameworks like Angular, ensuring a fast, secure, and reliable experience for your users.
With Angular installed and a wealth of resources at your fingertips, you’re well on your way to becoming a proficient Angular developer. Best of luck!
Introduction
Angular is a comprehensive front-end development framework. You can use Angular to streamline the creation, implementation, and testing of your web applications. It is based on JavaScript, and developers who are already proficient in HTML, CSS, and JavaScript find Angular easy to use.
Learn how to install Angular on Windows and create a local environment for developing web applications.
Follow the steps below to easily install Angular on Windows.
Step 1: Install Node.js
Angular bases its build environments on Node.js, and many of its features depend on NPM packages. Conveniently, the Node Package Manager (NPM) client is part of the default Node.js package.
To install Node.js:
1. Visit the official Node.js page and download the latest Node.js Windows Installer.
2. Access the download location and double-click the Windows Installer Package.
3. Select Next on the initial Node.js Setup Wizard screen.
4. Accept the License Agreement and click Next.
5. Define the destination folder for the installation and select Next.
6. You can customize how to install available features. Make sure that the npm package manager is part of the installation bundle. Click Next to proceed.
7. Check the box if you would like to install tools for compiling native modules automatically. They are not mandatory and require an additional 3 GB of space. Select Next to continue.
8. Click Install to start the installation process.
9. Once the installation is complete, select Finish to exit the Setup Wizard.
10. Access the Windows Command Prompt (or PowerShell) and check the Node.js version:
node -v
The system confirms that Node.js v12.18.3 is installed.
11. To verify the NPM version, use the following command:
npm -v
The output shows you have installed NPM version 6.14.6.
If you need to install a specific version, or update an existing installation, read the detailed guide on how to install Node.js and NPM on Windows.
Step 2: Install TypeScript (Optional)
TypeScript makes JavaScript easier to maintain and understand. You can install TypeScript as an NPM package. The installation is optional, as it is not a prerequisite for developing an Angular application.
1.. Access the Windows Command Prompt and install TypeScript with the following command:
npm install -g typescript
2. Once the installation is complete, verify the TypeScript version:
tsc -v
In this example, the TypeScript version is 4.0.2.
Step 3: Install Angular CLI
The Angular command-line interface (CLI) tool allows you to initialize, develop, and manage your Angular applications. You can use the NPM package manager to install the Angular CLI.
1. Access the Windows Command Prompt and enter the following command:
npm install -g @angular/cli
During the installation process, the system asks you if you would like to share usage data with the Angular Team. You are free to answer either Yes or No as it does not affect functionality.
2. Once all packages have been added, verify the installed version:
ng —version
The Angular CLI version is 10.0.8.
Step 4: Create Angular Project
1. Use the Angular CLI to start a new Angular project. It this example, the name of the project is kitchen-sink. You are free to use the name of your choice for your project name. Type the following command in your Windows Command Prompt:
ng new kitchen-sink
Before proceeding, you can customize the application. Define if you would like to use Angular routing and choose a stylesheet format. These settings can be edited at a later point.
The system takes a few moments to create the project. Once it finishes, you see the “Packages installed successfully” message.
2. Access your project’s root folder (kitchen-sink in this example) from the Windows Command Prompt and enter the following command:
ng serve
The system proceeds to generate the environment for your Angular application.
Keep the Windows Command Prompt running. You can continue using the terminal, and the changes you make will be reflected in the application within your browser.
3. Use any browser to access your Angular local development server on localhost:4200:
http://localhost:4200/
You can now start creating new Angular components.
Conclusion
Now you know how to install Node.js, NPM, and the Angular command-line interface on Windows. The initial steps with Angular CLI should not provide too much of a challenge; exploring Angular’s broad assortment of options might take more time.
In this article, you will learn how you can install Angular CLI on your Windows machine and use it to create real-life Angular Applications/Projects.
As you know, Angular is popularly used to create SPAs (Single page applications). Angular is an in-demand, open-source, and modern web application development framework by Google, as compared to all other Libraries and Frameworks like ReactJs, VueJs, MithrilJs, etc.
The reasons behind this are many. Angular provides you full access to use all its sub-packages like routing, Async calls, Security, etc. To know more about full stack development, check out the best Full Stack course.
Introduction — What you will learn
In this blog, we will cover the installation of Angular on Windows. By end of the article, you will understand how to —
- Install Node/npm on your machine.
- Use and install Angular CLI globally.
- Run Angular CLI commands.
- Create an initial workspace for the application.
- Run the Angular application in Browser.
Get to know more about angular cli.
We assume you are already aware of the basics of web development including HTML, CSS, and JavaScript. (if so, please proceed otherwise we strongly recommand to learn those first before jumping into Angular).
In order to continue, you must have —
- Windows Machine
- Good Internet Connectivity
- Windows user account with all/admin installation privileges where you can install any packages freely.
PS: While working with Angular, knowledge of TypeScript is good to have, but is not mandatory.
A brief note about Node.js
The very first thing required to install is Node.js. (If already installed, skip this part and jump to the next part of this blog.)
Node.js is again an open-source and cross-platform JavaScript run-time environment that allows to execute JavaScript code outside of a browser (on the Server-side). Node.js is responsible to manage and install all npm dependencies for your Angular application. It provides the required libraries to run the Angular project. Node.js acts as a run-time environment for any Angular application which uses servers over localhost. For more information on Node.js refer to official docs.
Angular requires the latest/stable version of Node.js in order to continue. Go to the official website in order to install Node.js on your machine locally.
You can install any version, the current one or latest stable version, as per your need. Just click on the button and it will start downloading the package on your machine.
.png&w=3840&q=75)
Once downloaded click on the icons downloaded and follow the steps, till the installation is completed. To check the version installed of Node.js you can use the following command in a terminal/console window. —
node -v
or
node — — version
Need for NPM for Angular development
As Node.js serves as Run time environment for the application, similarly NPM(node package manager) is used as a dependency management tool for any JavaScript application. NPM will allow us to install the libraries required for any Angular application; for example jQuery, angular-router, angular-http, bootstrap, and many more. Wondering where to begin your developer journey? Check out Web Design Courses online.
You can explore a number of packages available in the npm store here.
Note: Once you have installed Node.js it will automatically install NPM on your machine, and you can check the version installed using the below command.
npm -v
Angular CLI — What it is and complete Installation guide
Earlier in the initial days of Angular, developers used to create whole architecture, webpack files, build process, etc for any project on their own from scratch which was quite a time-consuming and lengthy process. To make it easier for the developer, Angular team come up with the easy-to-use tool named Angular CLI.
As the name suggests CLI (command line interface) provides a user (developer) friendly interface where you can run commands to make your development life easier and faster.
Angular CLI comes with a number of commands available to use from creating a new project, to creating components, creating a routing configuration file, services, and many more.
Installation Process of Angular CLI
To install the Angular CLI on your machine, open the terminal window and run the following command:
npm install -g @angular/cli
where -g denotes that CLI is being installed globally to your machine, which means you can create or run any command of CLI anywhere on your machine. Once you run the above command CLI will be installed on your machine, and you can verify the version installed using the following command:
ng version
To know more about Angular CLI commands, you can refer to this blog which contains a number of commands to use.
Creating a Project using Angular CLI
Now, let’s create our first ever Angular project using Angular CLI. Open your terminal window and type the command below on your machine.
ng new hello-world
Here ng is our CLI prefix, new denotes that we are creating a new project and hello-world is our project name. You can choose any name you want.
After running this command you will find the full architecture of the project in the directory where you run this command. The project folder will be something like below in the image —
%20(1).png&w=3840&q=75)
Angular Project architecture
The first file to render on running this application will be index.html which present in the src folder.
- src folder contains Source files for the root-level application project.
- assets folder contains all the static assets like images, fonts, etc.
- node_modules This folder is created while you run npm installby package manager (npm) and it contains all the project dependencies or any third party modules required for the project.
- e2e folder contains all the source code related to Test Cases.You can customise it as per your requirements.
- README.md file is being used as documentation for the app.
- Package.json configures npm dependencies which are available for the project in the workspace along with their versions specified.
For more details about components/Service and source code you can explore this link. Run the application
one with the installation process of Angular application via CLI, it’s time to run the application locally. Angular CLI comes with complete tool-chain/commands for the development of front-end applications on your machine.
Run the following command on the terminal (Navigate to the project directory if you are not in that directory).
ng serve
or
ng serve --open
The —open (or just -o) option automatically opens your browser to http://localhost:4200/.
ng servecommand will serve your application on localhost server which you can check by navigating to your browser with the below URL http://localhost:4200/. You can customise the port as per your requirement.
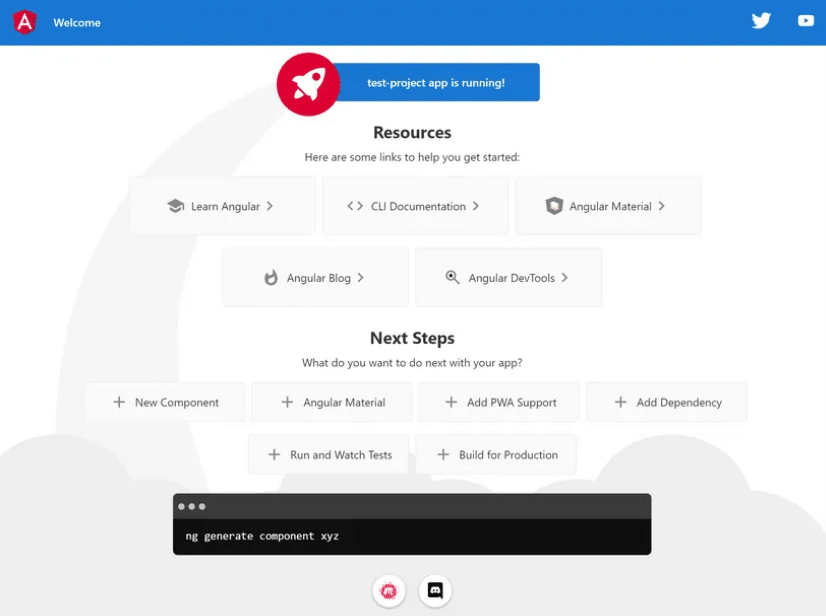
Accessing Angular Web Interface
ng serve command may take a few seconds to run your application, and once completed, you should see a web page similar to the following.
%20(1).png&w=3840&q=75)
And we are done!
Now you can make changes in the default component’s template which is app.component.html .
Also, moving forward, you can generate a number of components/service/routing files using CLI commands as per your requirements and keep learning.
Looking to enhance your programming skills? Dive into the world of Python with our unique python certification course. Unleash your coding potential and become a Python pro today!
Conclusion
In this blog you have learnt —
- What is Node/NPM and how you can install and use it,
- What is Angular CLI and how you can use it after installing it on your Windows machine,
- How to create a new Angular project from scratch using CLI commands and run it.
Now that you have basic hands—on knowledge of getting started with an Angular application, you can start exploring Angular further.
If you have any questions/doubts related to this blog, please let us know in the comment box below…we would be more than happy to help you out!
Uninstall angular cli
There are cases when you need to uninstall Angular-CLI from your operating system, you can simply do so by running this below command on terminal —
npm uninstall -g @angular/cli
It’s always recommended to run the command
npm cache clean
After un installation of Angular CLI from your system in order to avoid unwanted errors while installing it again.