Content loading…
Как отключить настройки программы предварительной оценки Windows 10.
На протяжении многих лет в Параметрах Windows существует специальный раздел, в котором пользователи могут зарегистрироваться в программе предварительной оценки Windows 10 и затем тестировать ранние релизы, новые функции и находить ошибки.
Если устройством пользуется только один человек, пожалуй, нет нужды вносить какие-либо изменения. Если же устройство попадает в руки нескольких пользователей, и вы не хотите, чтобы те экспериментировали с ранними релизами, имеет смысл отключить настройки программы предварительной оценки Windows. После отключения этого раздела пользователи не смогут вносить изменения в параметры программы Windows Insider и получать нестабильные сборки.
Вы можете выключить параметры программы предварительной оценки Windows с помощью двух способов. Первый подразумевает использование редактора локальных политик. Этого компонента нет в Домашней редакции Windows, поэтому он подойдет только для владельцев компьютеров с Windows 10 Профессиональная, Корпоративная или для Учебных заведений. Второй метод использует редактор реестра, который в свою очередь доступен во всех версиях Windows 10.
Для справки: вы можете проверить редакцию Windows на вашем компьютере, перейдя в Параметры – Система – О программе – Характеристики Windows – Выпуск.
- Откройте Редактор локальной групповой политики любым удобным способом. К примеру, нажмите Win + R и введите команду gpedit.msc.
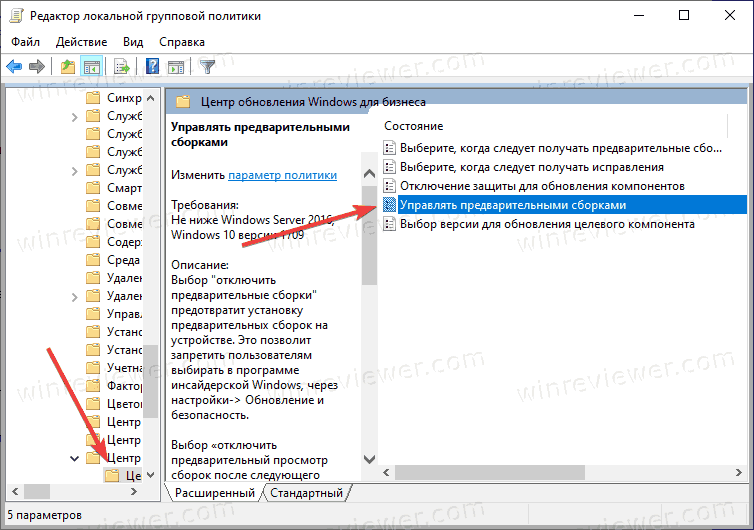
- В левой части экрана перейдите по адресу Конфигурация компьютера – Административные шаблоны – Компоненты Windows – Центр обновления Windows – Центр обновления Windows для бизнеса.
- В правой части окна найдите пункт Управлять предварительными сборками. Дважды кликните на этот пункт.

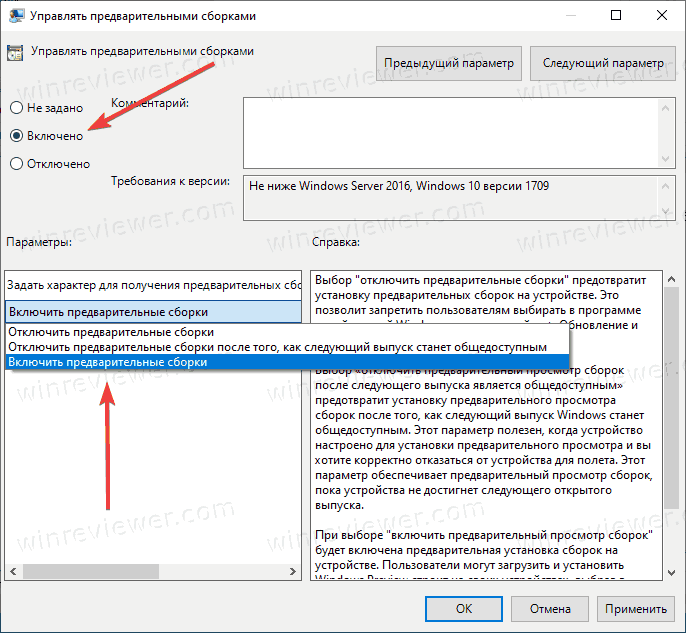
- В новом окне выберите нужный параметр. При включении этого параметра в левой части окна появится выпадающее меню со списком каналов.
- Вы можете указать нужный канал обновлений, чтобы предотвратить изменение настроек.

- Если вы хотите запретить программу предварительной оценки целиком, выберите Включено, а затем из выпадающего списка выберите Отключить предварительные сборки.
- Нажмите Ок для сохранения изменений.
Как выключить параметры программы предварительной оценки Windows
Теперь перейдем к альтернативному способу, который доступен в Windows 10 Домашняя.
Внимание: эта инструкция подразумевает работу с реестром Windows. Не изменяйте реестр операционной системы без понимания, что именно вы делаете, иначе вы рискуете стабильностью работы вашего компьютера.
Чтобы выключить параметры программы предварительной оценки, сделайте следующее.
- Откройте Редактор реестра любым удобным способом.
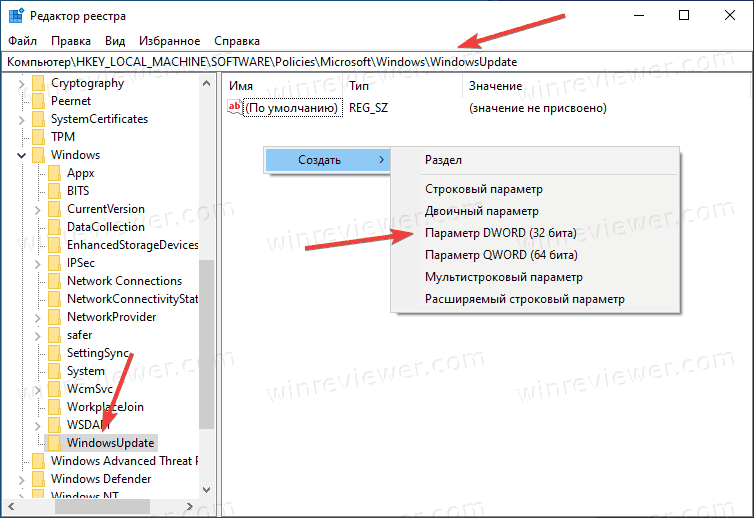
- Перейдите по адресу
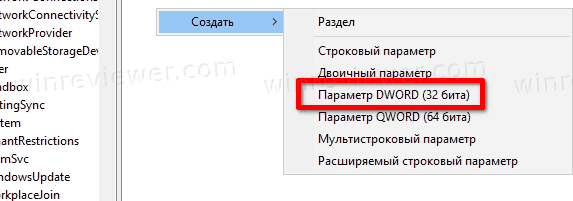
Компьтер\HKEY_LOCAL_MACHINE\SOFTWARE\Policies\Microsoft\Windows\WindowsUpdate. - В правой части окна нажмите правую кнопку мыши по пустому полю и выберите Создать – Параметр DWORD (32-бита).
 Разрядность параметра не зависит от разрядности операционной системы. Создавайте 32-битный параметр даже на 64-битной ОС.
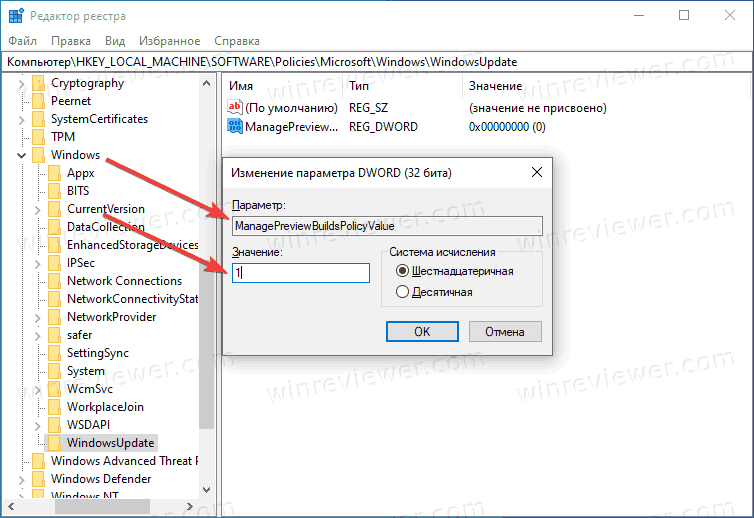
 - Назовите новый параметр ManagePreviewBuildsPolicyValue и установите одно из следующих значений:
 Разрядность параметра не зависит от разрядности операционной системы. Создавайте 32-битный параметр даже на 64-битной ОС.
-
- 1 – включить параметры программы предварительной оценки
- 2 – выключить параметры программы предварительной оценки

- Далее создайте еще один параметр DWORD (тоже 32-бита) с именем BranchReadinessLevel. Присвойте ему одно из следующих значений:
-
- 2 – получать только обновления из Dev Channel.
- 4 – получать только обновления из Beta Channel.
- 8 – получать только обновления из Release Preview.
- Сохраните изменения и закройте редактор реестра.
После применения всех изменений пользователи не смогут изменять параметры программы предварительной оценки или настраивать компьютер на получение предрелизных сборок Windows 10.
💡Узнавайте о новых статьях быстрее. Подпишитесь на наши каналы в Telegram и Twitter.
Судя по тому, что вы читаете этот текст, вы дочитали эту статью до конца. Если она вам понравилась, поделитесь, пожалуйста, с помощью кнопок ниже. Спасибо за вашу поддержку!
by Alexandru Poloboc
With an overpowering desire to always get to the bottom of things and uncover the truth, Alex spent most of his time working as a news reporter, anchor,… read more
Updated on
- Since Microsoft announced the arrival of the new operating system, many users have enrolled as Windows Insiders.
- This program gives us the opportunity to test out Windows 11 and get more familiar with it prior to release.
- However, for various reasons, some people want to end their Insider experience and leave this program for good.
- This article contains the necessary steps you need to go through in order to quit the Windows Insider Program.
As we all know by now, especially the ones involved in the active testing of Windows 11, in order to be able to take the future OS for a test drive, you have to become a Windows Insider.
But what happens when you want to part with this experience and stop being an Insider and receiving new builds altogether?
Do not be discouraged if you want to take this leap, as the process is not hard or time-consuming, so you can just do so whenever you feel like this new experience has run its course.
How to get out of Windows Insider program
Rest assured that we will guide you through this process and make sure you understand the necessary steps that you need to perform.
So, if you made up your mind and no longer want to be an Insider, here’s what you need to do in order to opt out of this service if you are a Windows 10 user.
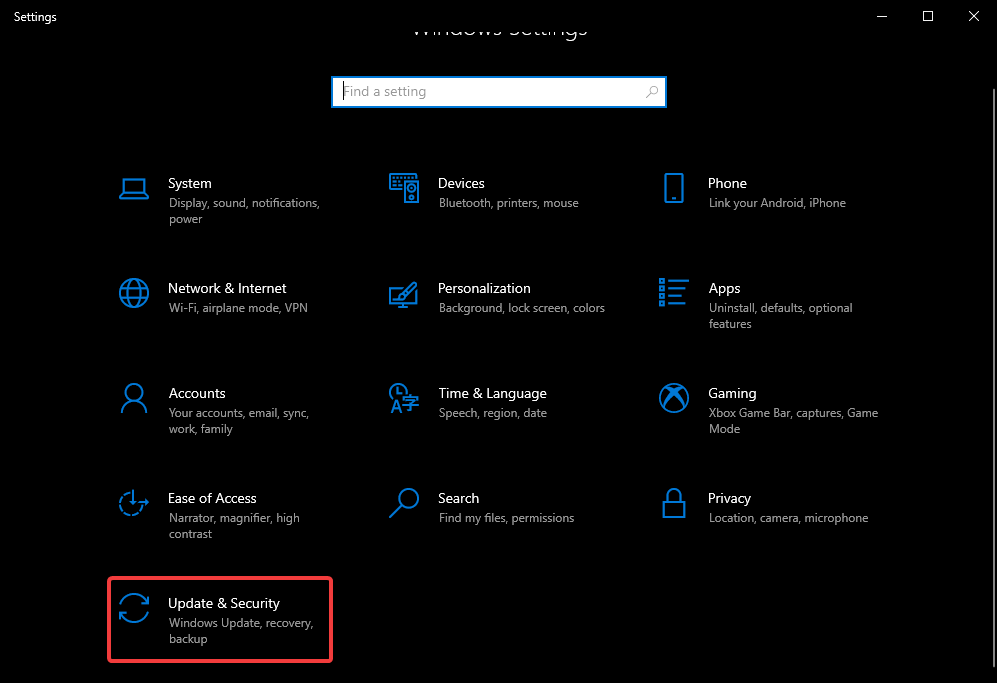
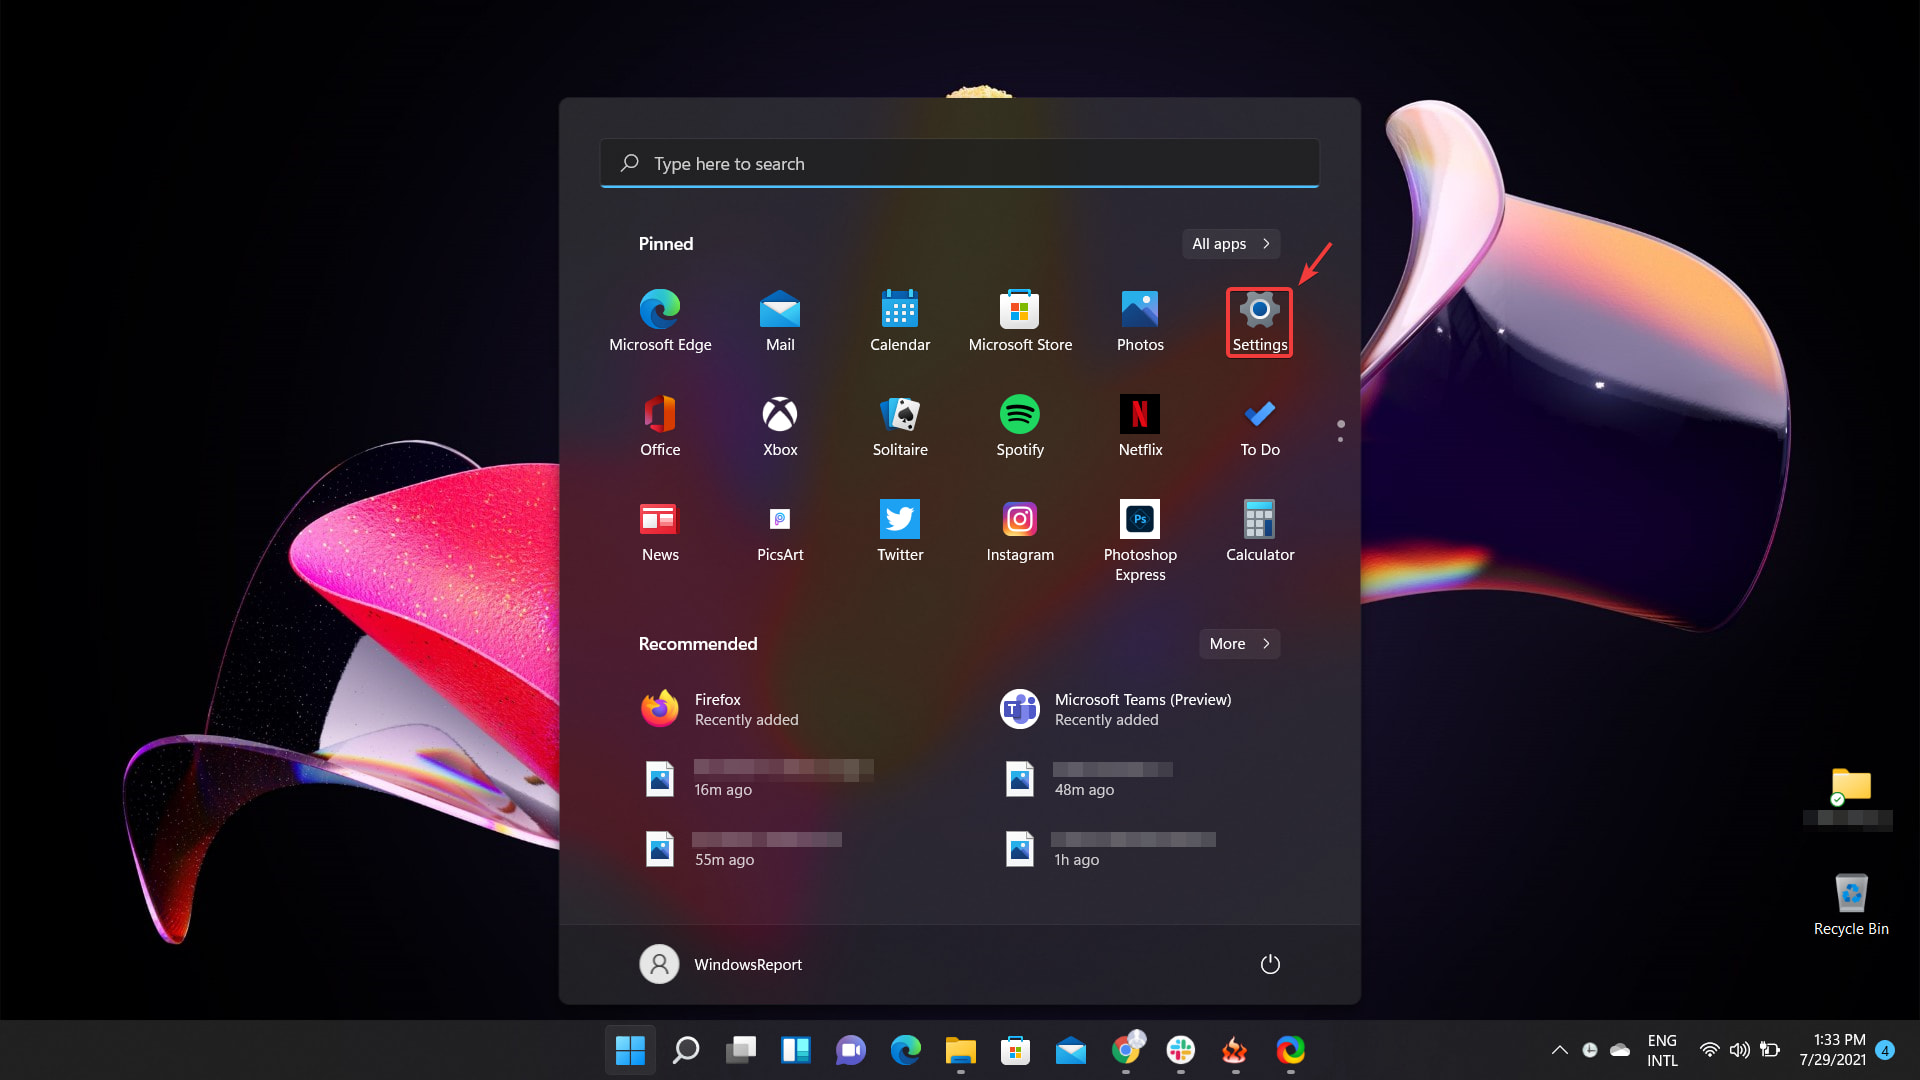
- Access the Settings menu on your device.
- Click on the Update and Security button.

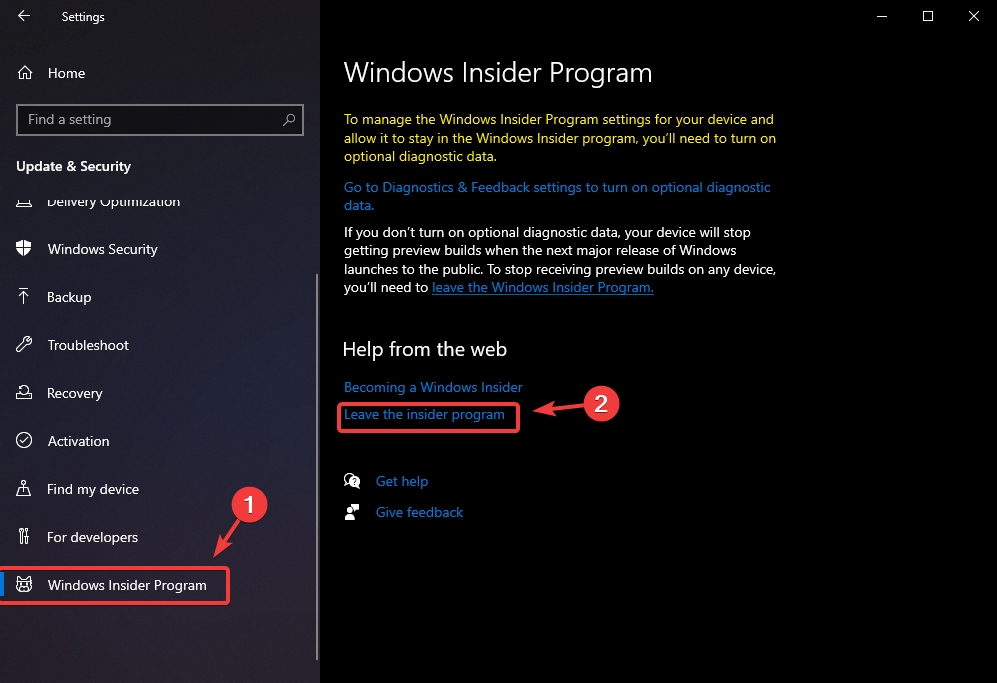
- Select the Windows Insider Program tab and click on Leave the Insider program.
- Follow the steps listed by Microsoft.
So, as you can see, this is a simple process and it will only require a few minutes of your time. Only do this if you are absolutely sure that you are done with being an Insider.
How to opt out of the Windows Insider program on Windows 11
Yes, you can also leave the Insider experience behind on Windows 11, but if you also want to roll back to Windows 10, you have to be in a certain user category in order to do so.
First thing’s first, you have to still be in a so-called trial period, which is 10 days long and starts to be measured since the first time you’ve installed a Windows 11 preview build on your device.
After this time period, you will no longer be able to go back and will be required to reinstall your OS. We wrote a pretty awesome and complete article about this experience that you should definitely check out.
But let’s get back to leaving the Insider program on Windows 11. Don’t be alarmed, as this is a fairly simple process that we are prepared to guide you through. Here’s what you need to do:
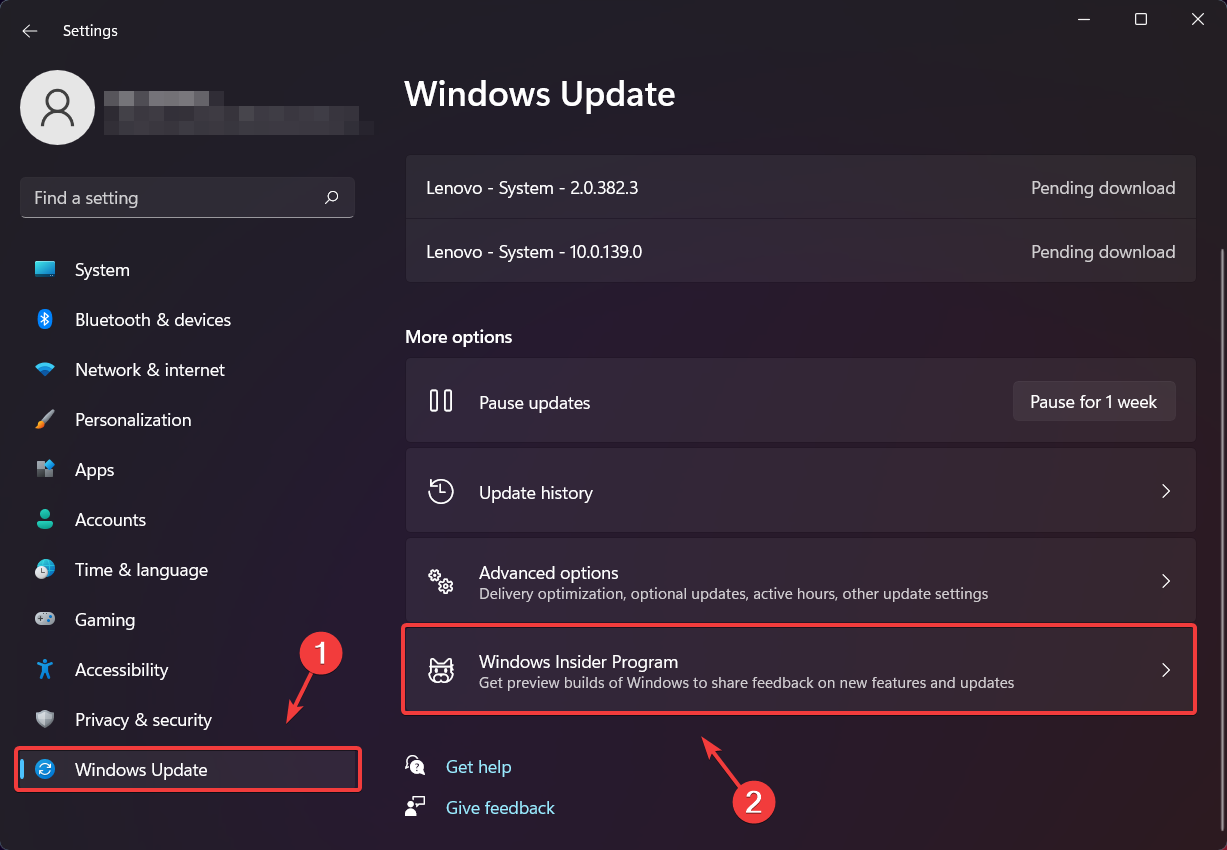
- Access the Settings menu on your Windows 11 device.

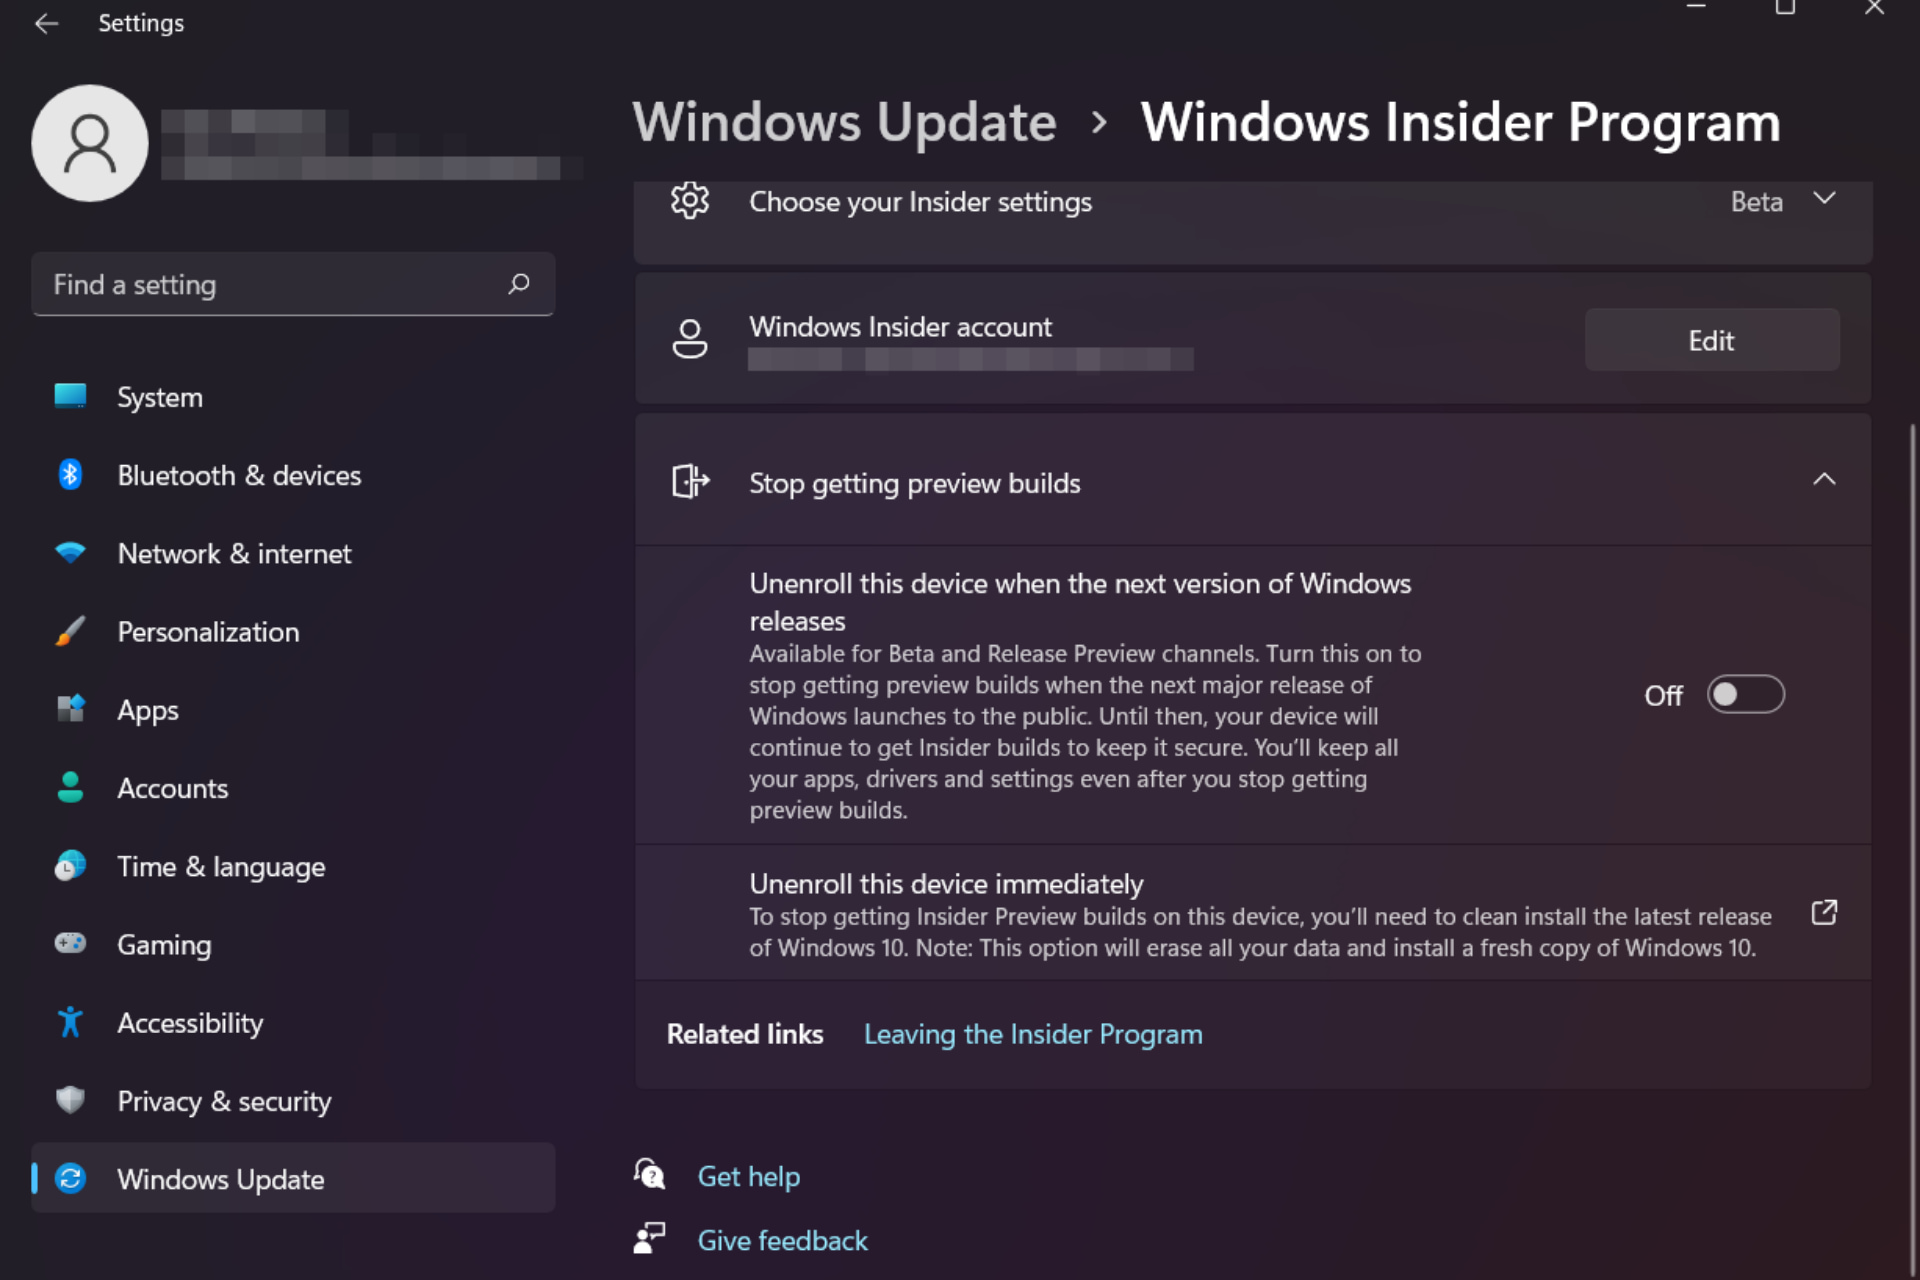
- Select the Windows Update tab and click on the Windows Insider Program button.

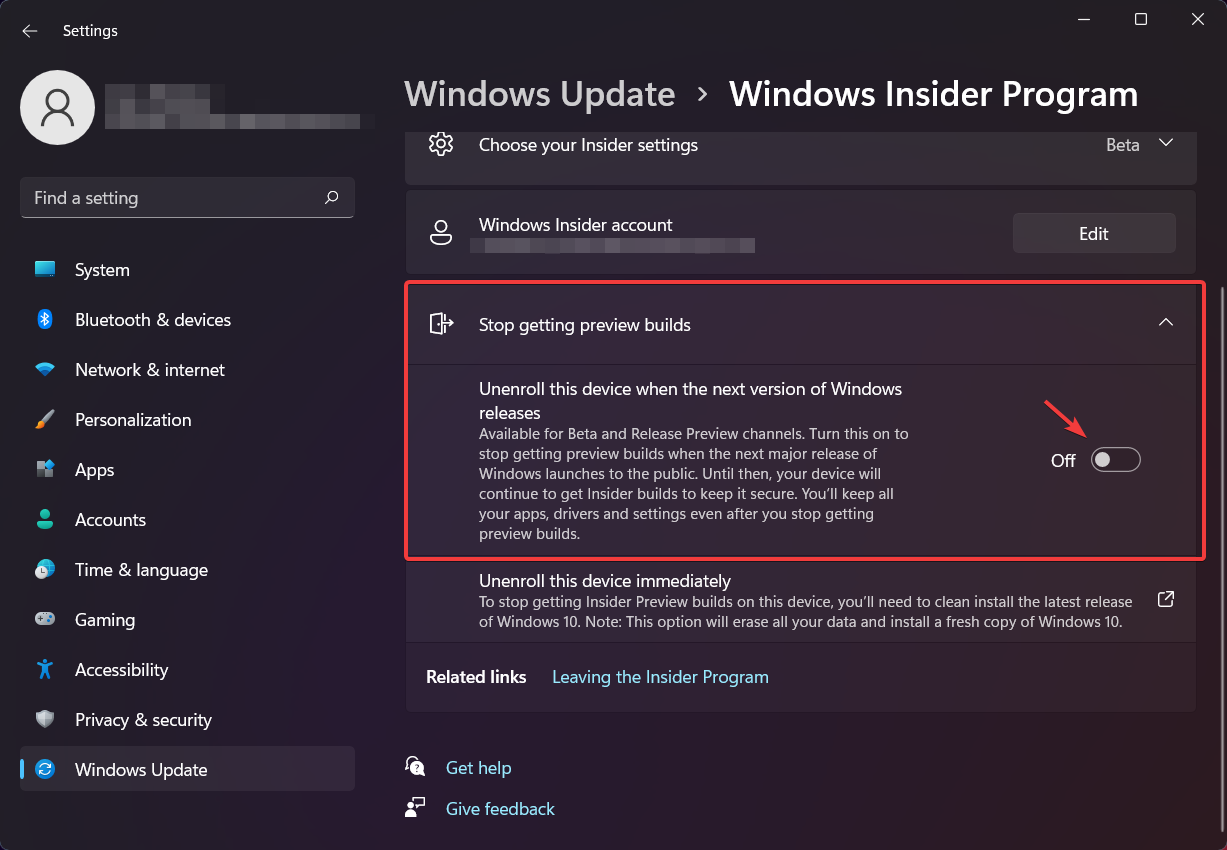
- Click on the Stop getting preview builds button.
- If you just want to stop receiving new builds everytime Microoft releases one, switch the Stop getting preview builds option to On.
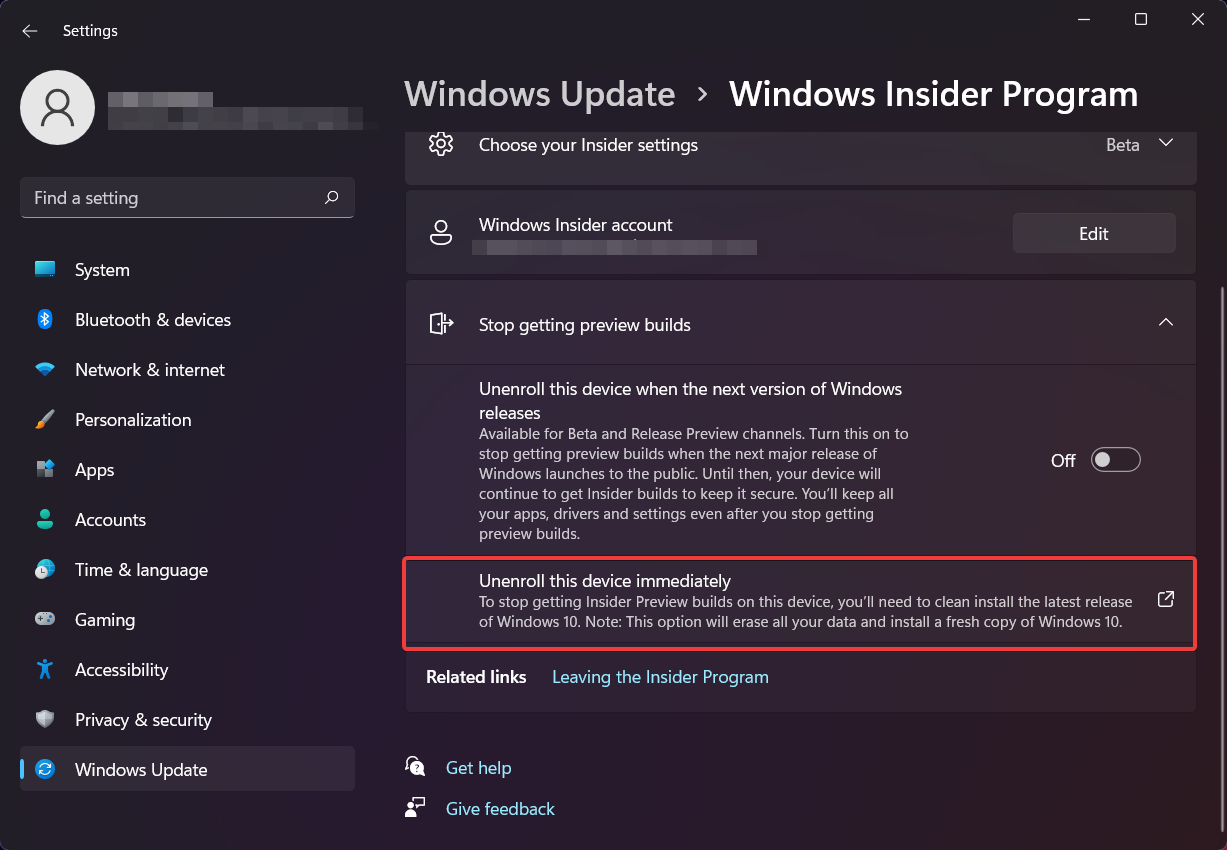
- If you want to leave the Windows Insider Program, click on the Unenroll this device immediately and follow the listed steps.


That’s pretty much all there is to it. As we said, nothing too complicated or time-consuming, so you might want to get on that whenever you have 2 free minutes, if that is really what you want to do.
What can I do if the Unenroll button is greyed out?
There are, however, scenarios in which the Stop getting preview builds option is inaccessible to some users, and it appears totally greyed out.

Rest assured that there is a reason why this is happening, so don’t think of it as an error.
That option will be available when it’s going to release to the public or when an insider build will be the RTM build.
For those unfamiliar with the term, RTM is a document used to ensure that the requirements defined for a system are linked at every point during the verification process. It also ensures that they are duly tested with respect to test parameters and protocols.
Basically, in order for this to work, you need to provide compatibility information to Microsoft, so they can know what they are dealing with.
In order for this information sync to work you need to turn on the diagnostic data options in the Settings menu.
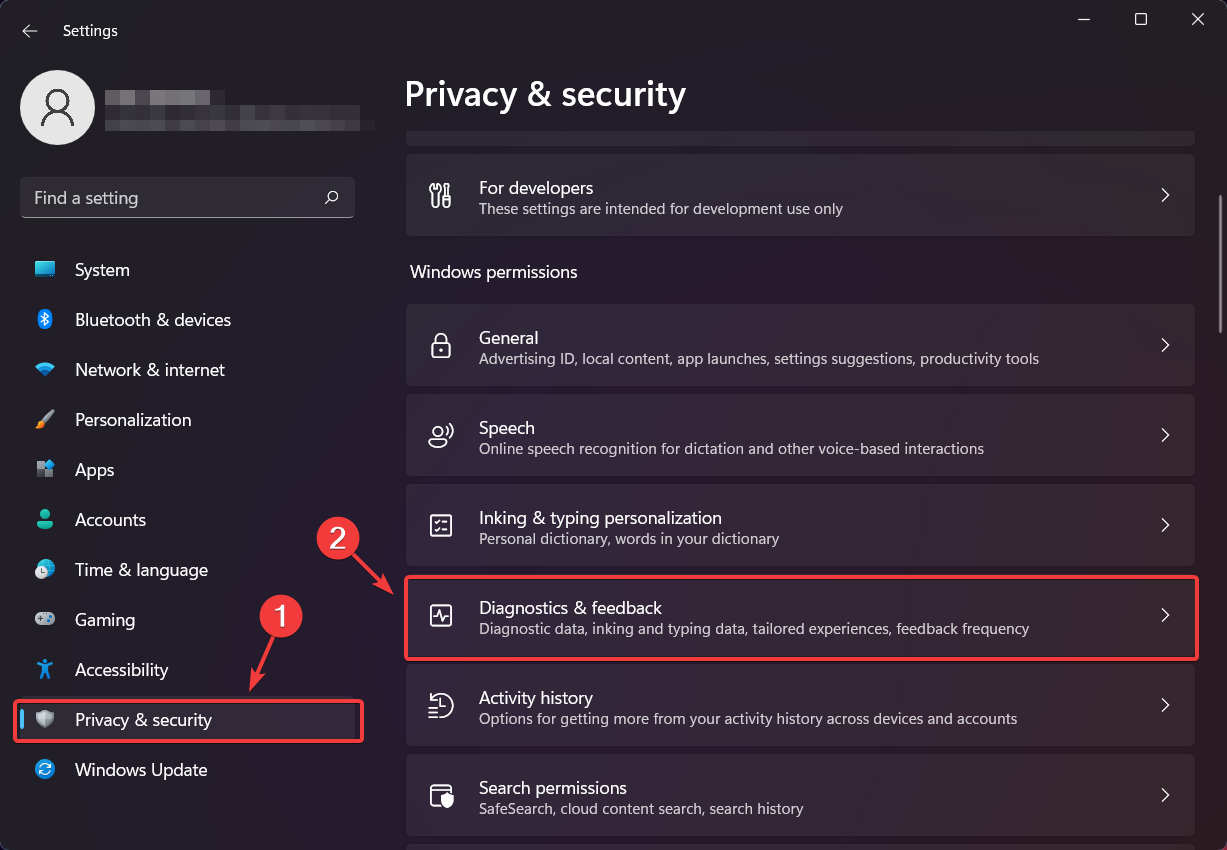
- Access the Settings menu on your device.
- Selct the Privacy & security tab and then click on the Diagnostis & feedback button.
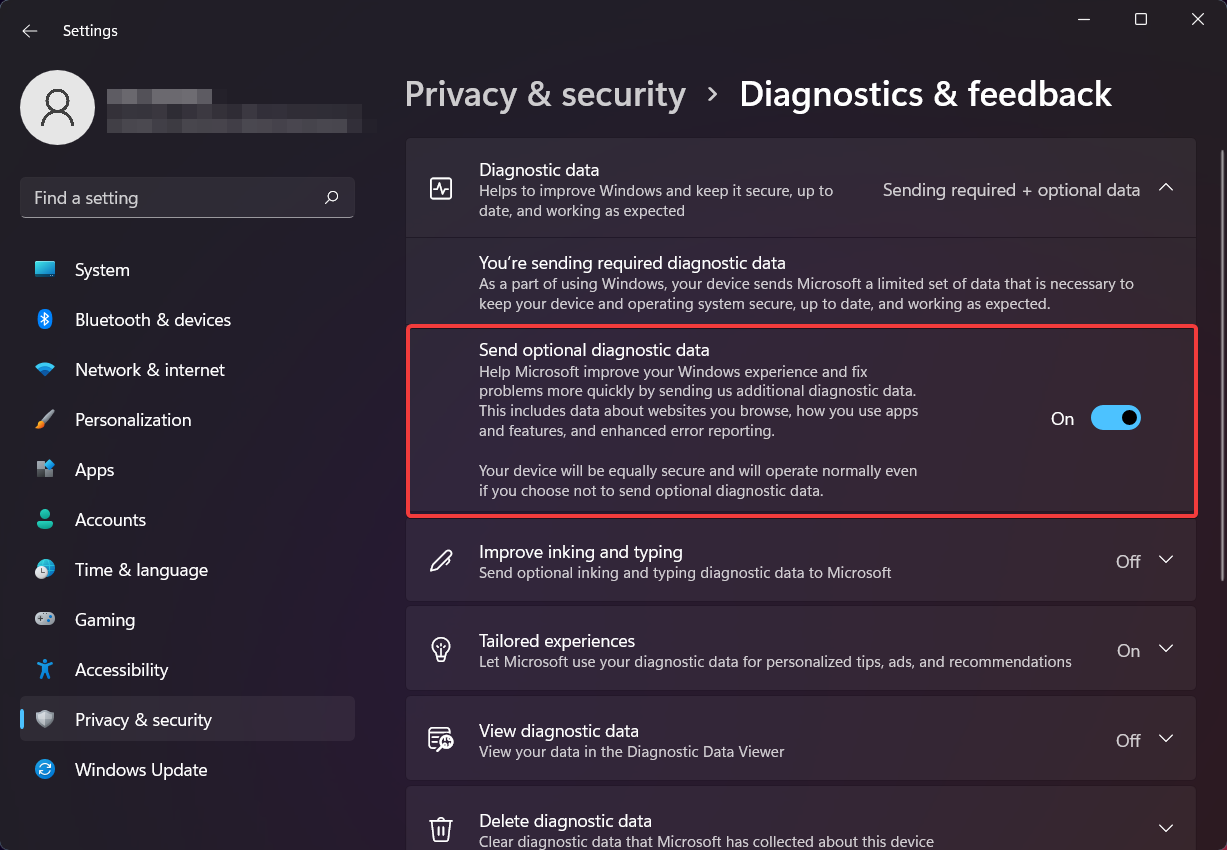
- Turn the Send optional diagnostics data setting to On.
Why leave the Windows Insider program?
Well, this is a bit of a tricky question because nobody is forcing you to do anything. And being a Windows Insider is not a time-limited membership so you can do whatever you please.
If you want to keep testing new Windows features and apps, and even the upcoming OS, then the Windows Insider Program is where you actually need to be.
However, if you got bored with this experience or you are using a production build, which is much more stable, then you can choose to opt out of this service by following the above-listed steps.
There are no mandatory factors here, just your own desire.
Have you decided to leave the Insider program? Tell us in the comments section below if these steps have helped you achieve your goal.
![]()
Возможно, в настройках по-прежнему активировано получение сборок для участников программы предварительной оценки Windows, которые могут содержать ошибки и поэтому пригодны для регулярного использования весьма условно.
Чтобы отключить получение сборок, нажмите [Win] + [I] для вызова окна параметров. Щелкните по категории «Обновление и безопасность».
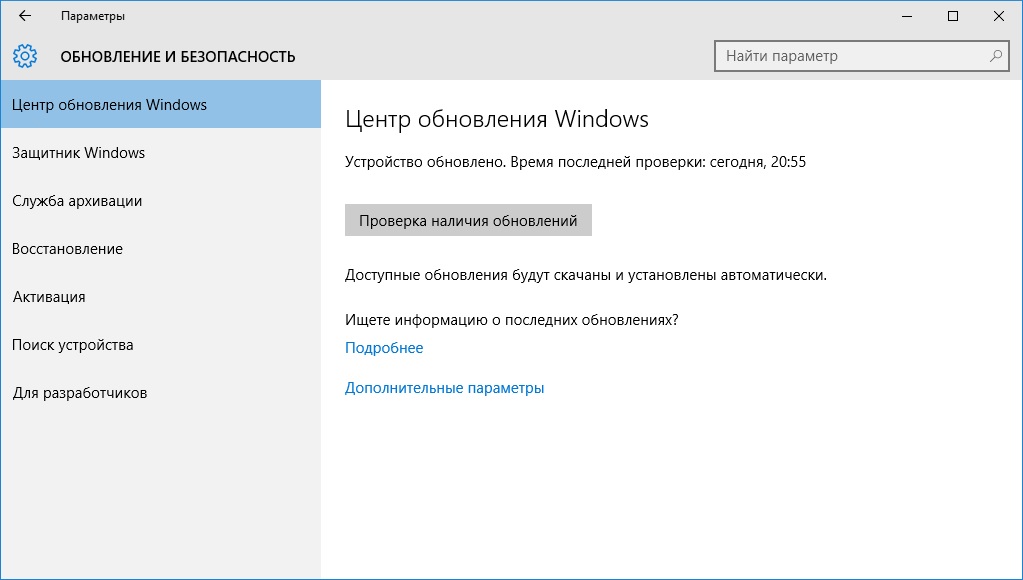
В левом поле выберите «Центр обновления Windows» и далее «Дополнительные параметры», щелкните по кнопке «Остановить получение сборок Insider» под записью «Получение сборок для участников программы предварительной оценки»

Подтвердите процесс в новом окне и перезапустите компьютер. В дальнейшем операционная система будет загружать и устанавливать только финальные обновления для Windows 10.
Фото: компания-производитель
Microsoft first released Windows 10 on July 29th, and yesterday November 12th, the Microsoft servers started delivering the first major update to all computers around the world. While the update is meant for everyone, not every computer is going to get the update at the same time — the update will take a few days to reach everyone.
The Windows 10 November update represent a big milestone for the company. Microsoft says that not only it’s improving the experience, but it feels that the operating system has «reached the point in the platform’s maturity where [Microsoft] can confidently recommend Windows 10 deployment to whole organizations.»
The update fixes a lot of issues, incorporates some tweaks in the UI, Cortana gets smarter, Microsoft Edge receives much-needed performance and security improvement, and the Settings app gets a significant number of changes.
If you have been part of the Windows Insider Program, you have been dealing with a lot of ups and downs since July. Every build Microsoft released for PCs and tablets brought something new to Windows 10, but you also had to put up with a lot known issues here and there.
As such, after installing the Windows 10 November update, perhaps you might want to stop receiving new builds for a while or permanently. Fortunately, Microsoft is making it super easy for Insiders to manage how users get new Insider Preview builds.
In case you decide the latest build of Windows 10 is good enough as your daily driver, you can use the following steps to stop receiving new builds.
How to stop receiving Windows 10 Insider Preview builds
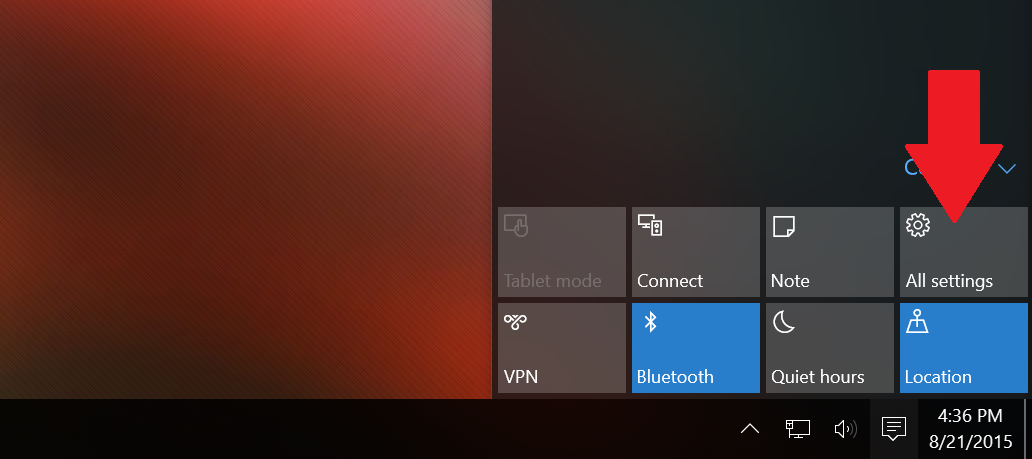
1. All Settings
Open the Settings app
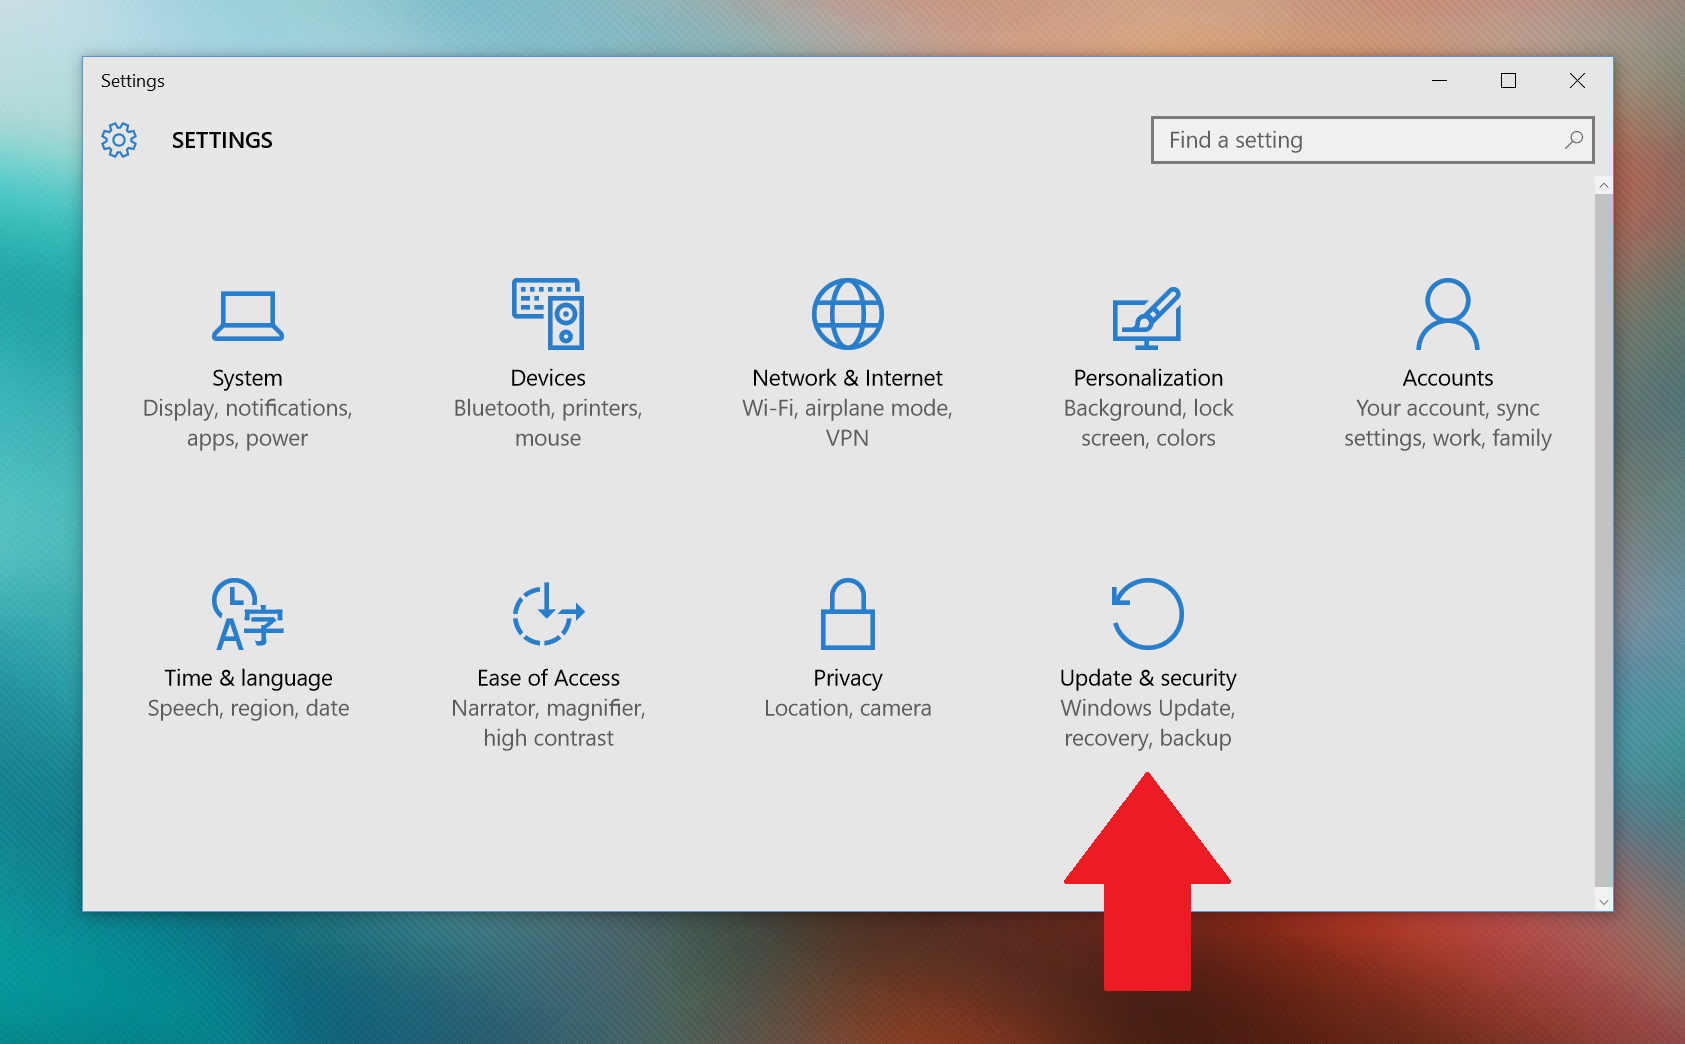
2. Navigate
Go to Update & security and Windows Update.
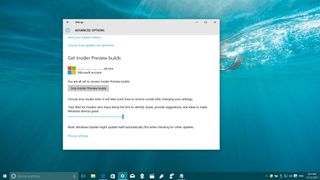
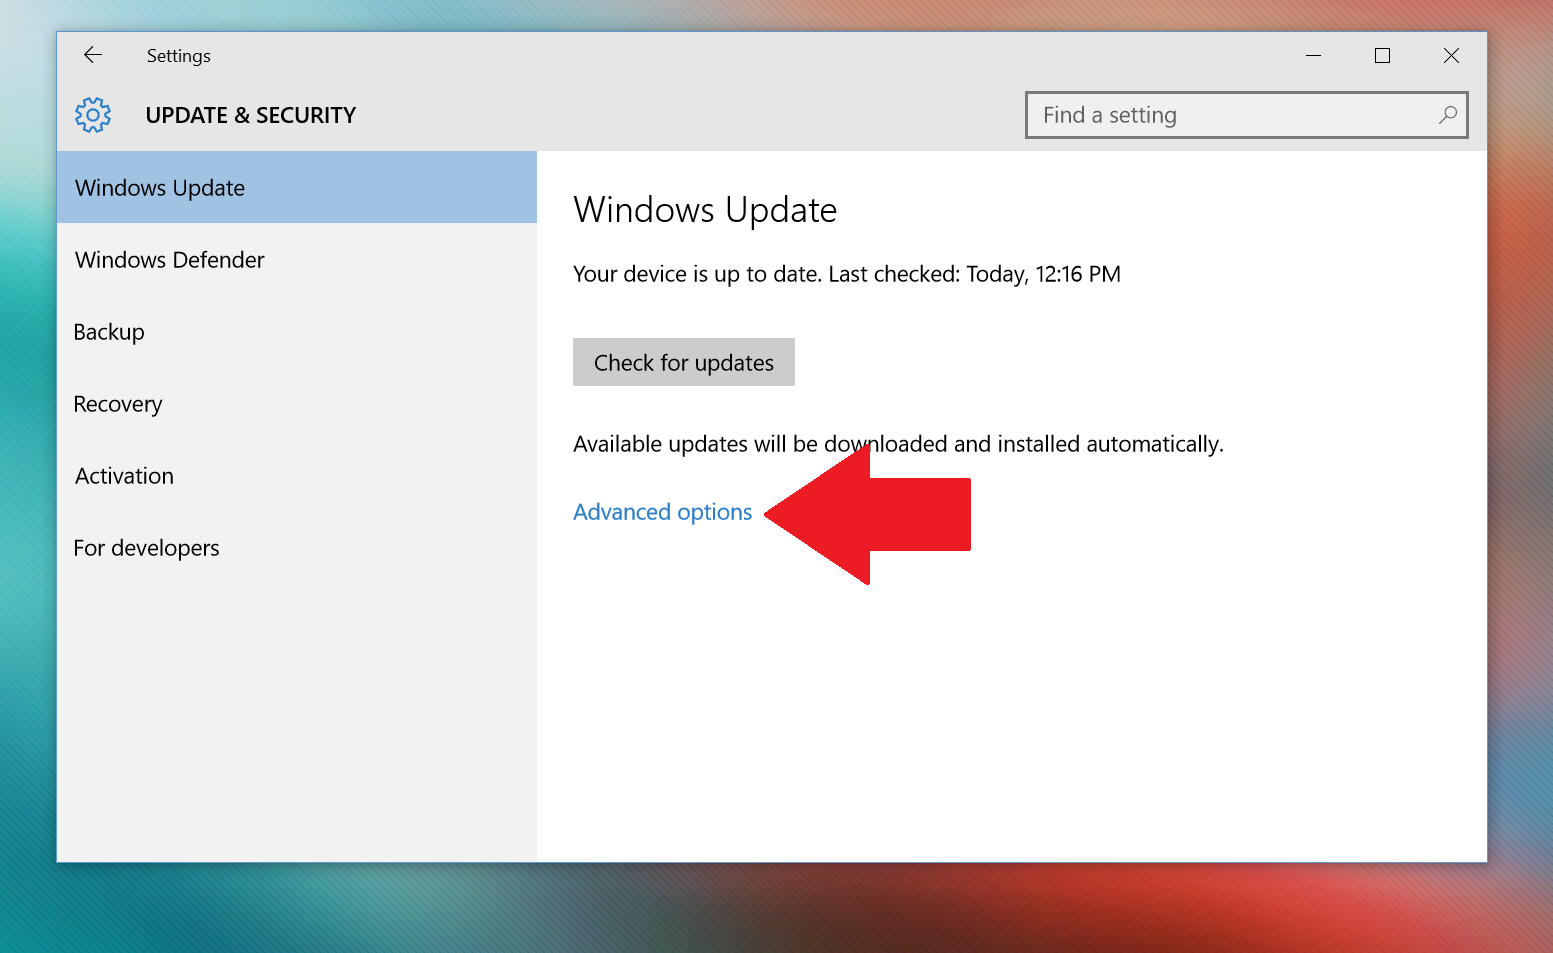
3.Advanced
On Windows Update, click the Advanced options link.
4. Stop
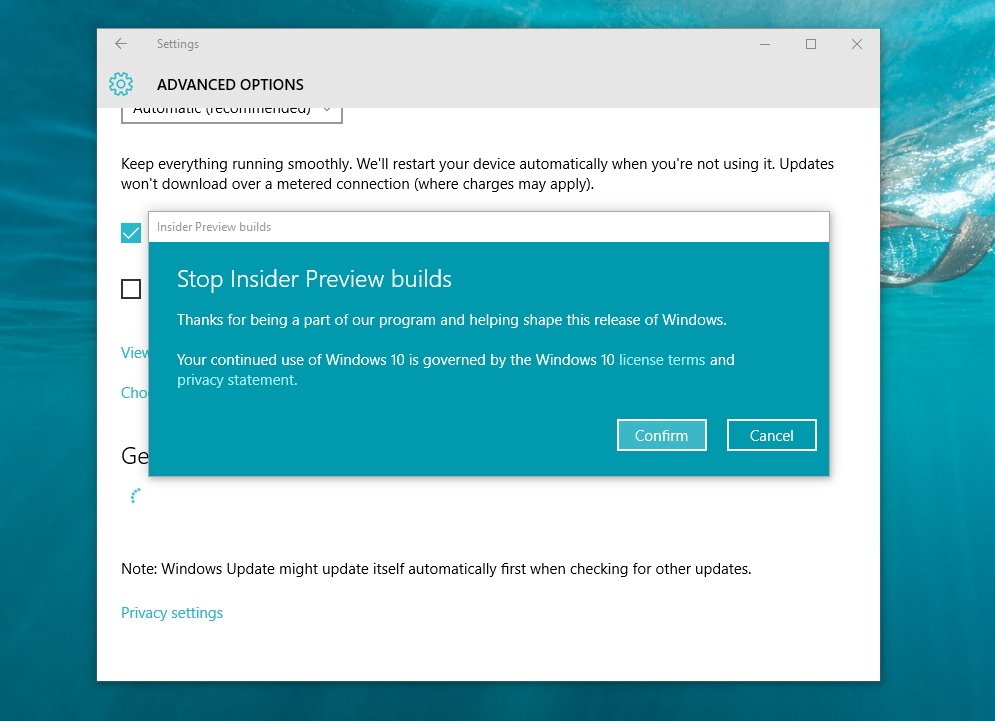
Inside the Advanced Options and scroll down to the «Get Insider Preview builds» section. Then click the Stop Insider Preview builds button, and on the dialog box you’ll have the option to either pause receiving new builds for 1, 3, or 5 days.
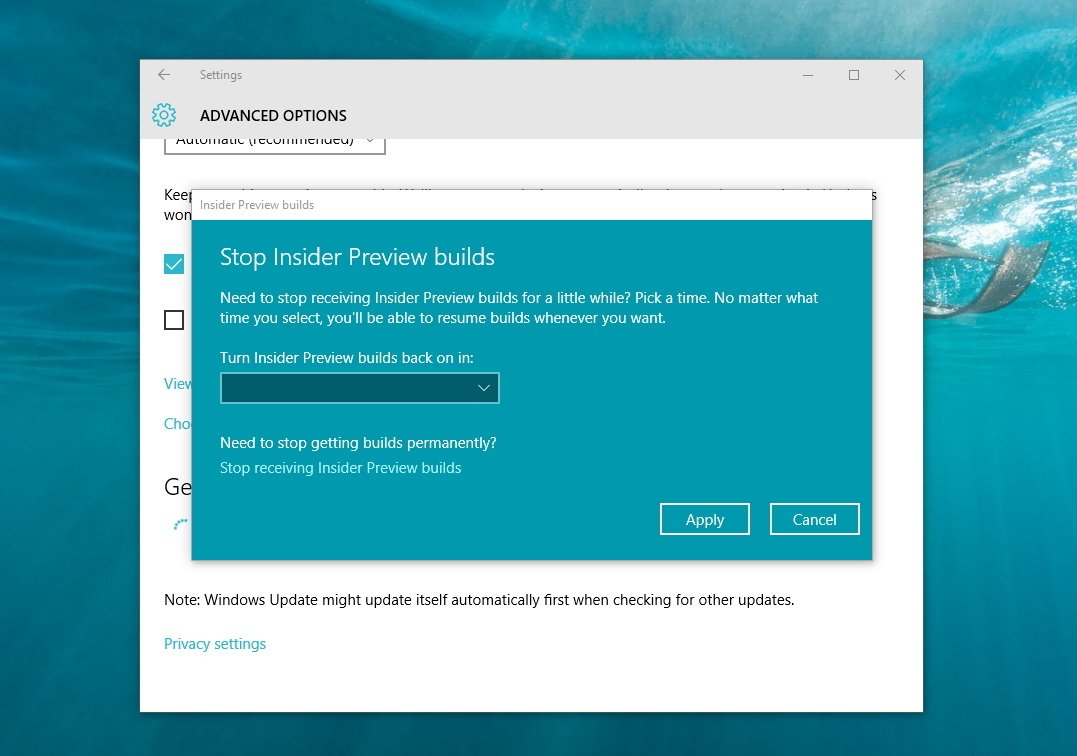
Or you can click the Stop receiving Insider Preview builds and click the «Confirm» button to stop permanently getting new builds.
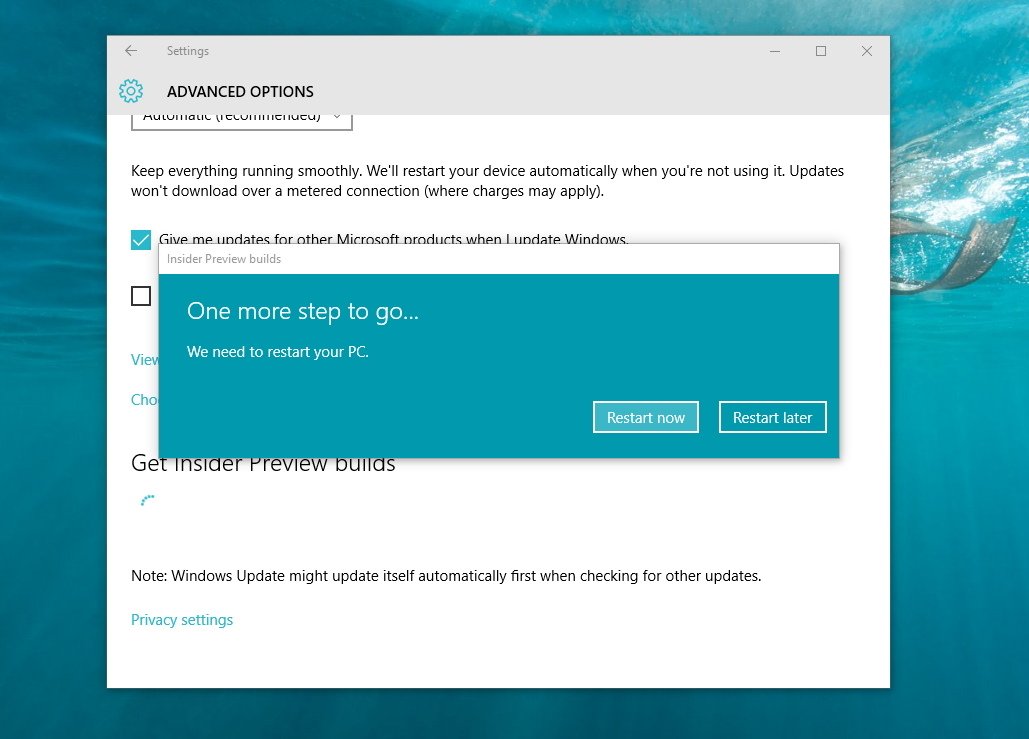
5. Restart
Finally, to complete the process, you’ll need to restart your computer. Now, if you choose to pause receiving new builds for a few days, you won’t need to restart your computer, and anytime you can come back and hit the Resume button.
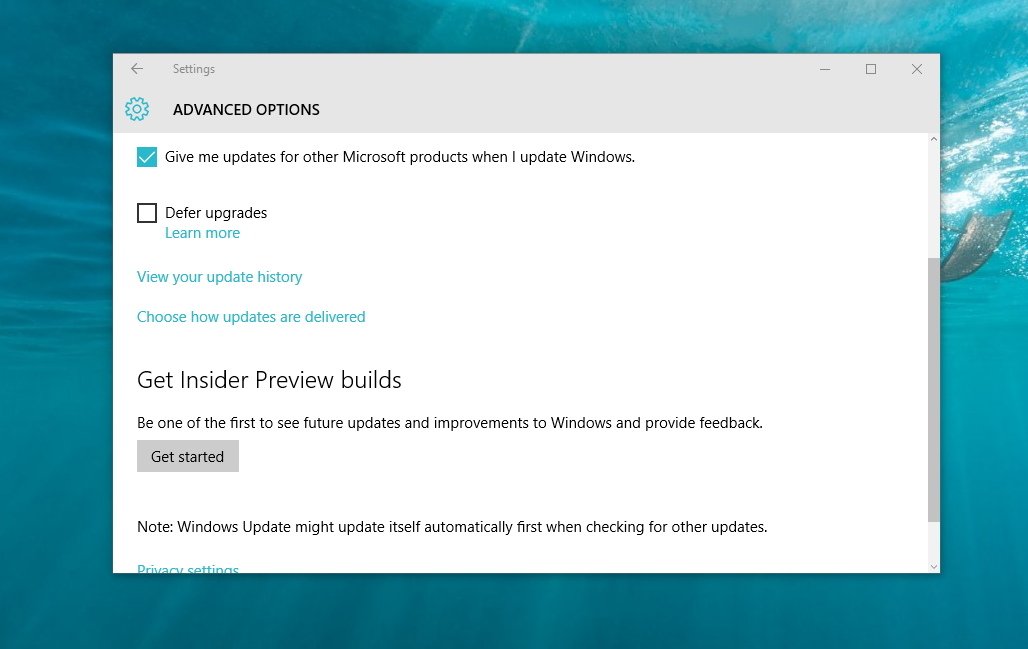
If you stopped the getting builds permanently, you could also come back at any time. Click the Get started button, sign-in with you Microsoft Account, and restart your computer. Of course, if you computer doesn’t have the latest build, it will automatically download and install.
It’s important to point out that Microsoft is making it straightforward to opt-in or opt-out of the program without your computer having to reset to factory defaults. Also, you will still be able to keep your computer up to date with Windows Update.
Are you going to stop getting Insider builds for a while or you’re already waiting for the next build? Tell us your plans in the comments below.
How to stop getting Insider builds of Windows 10 Mobile
All the latest news, reviews, and guides for Windows and Xbox diehards.
Mauro Huculak is technical writer for WindowsCentral.com. His primary focus is to write comprehensive how-tos to help users get the most out of Windows 10 and its many related technologies. He has an IT background with professional certifications from Microsoft, Cisco, and CompTIA, and he’s a recognized member of the Microsoft MVP community.