- Author
- Recent Posts
Josh’s primary focus is in Windows security and PowerShell automation. He is a GIAC Certified Windows Security Administrator (GCWN) and GIAC Certified Forensic Analyst (GCFA). You can reach Josh at MSAdministrator.com or on Twitter at @MS_dministrator.
A Dockerfile (no file extension) is a definition file that will build and run a container. That container can be a simple Microsoft IIS web application or Python/Flask application or a simple build/reporting service. A definition file helps us with our operational tasks, especially when we are building services or scripts for the repeatable tasks we face on a daily basis.
Here is an example of a Dockerfile that will set up an IIS web server with ASP.NET 4.5 on a Windows system:
FROM microsoft/iis

RUN mkdir c:\myapp
RUN powershell -NoProfile -Command \
    Install-WindowsFeature NET-Framework-45-ASPNET; \
    Install-WindowsFeature Web-Asp-Net45; \
    Import-Module IISAdministration; \
    New-IISSite -Name "MyApp" -PhysicalPath C:\myapp -BindingInformation "*:8000:"

EXPOSE 8000

ADD bin/ /myapp
Wow, I bet you didn’t think these few lines would set up an entire IIS web application with ASP.NET 4.5, did you? Well, they do! Let’s break this down a bit further.
As explained in my previous post, Docker images are prebuilt «prerequisites» we can install and use when creating and running our container. Within a Dockerfile we specify the base image we want to use by declaring FROM {image name}. In this case, we are using the Docker Hub image for an IIS server Microsoft has provided.
FROM microsoft/iis
The second statement you see uses the RUN command to tell the container, once it is running, to call mkdir c:\myapp. At this point, it creates a new directory inside our container itself called c:\myapp.
At this point Docker has downloaded and built a containerized application based of the Microsoft/iis image with all the base prerequisites needed for setting up an IIS server. In addition we are telling the container also to create a new «virtual» folder inside the container itself. You don’t really have access to this location, meaning you won’t see it on your local file system. At this point, you just need to trust Docker is doing what you specified (and it is).
Moving on, the next statement you see is another RUN command:
RUN powershell -NoProfile -Command \
    Install-WindowsFeature NET-Framework-45-ASPNET; \
    Install-WindowsFeature Web-Asp-Net45; \
    Import-Module IISAdministration; \
    New-IISSite -Name "MyApp" -PhysicalPath C:\myapp -BindingInformation "*:8000:"
This RUN command is a bit different but does essentially the same thing. This time we are now specifying that we should create a new PowerShell «shell» by calling:
powershell -NoProfile -Command
Next, we specify our standard PowerShell commands as normal. You may notice that each line has a «\» at the end of it. The backslash is to ensure line continuation within the Docker container.
Install-WindowsFeature NET-Framework-45-ASPNET; \
Install-WindowsFeature Web-Asp-NET45; \
Import-Module IISAdministration; \
New-IISSite -Name "MyApp" -PhysicalPath C:\myapp -BindingInformation "*:8000:"
We then install the NET-Framework-45-ASPNET and Web-Asp-Net45 Windows features, just like we would do on a normal IIS web server. We then import the IISAdministration PowerShell module and create a new IIS website called MyApp. The New-IISSite cmdlet also allows us to specify a PhysicalPath and a specific port to bind to. In our case, we are binding all requests to port 8000.
Next, we then run the EXPOSE networking option in our Dockerfile. This option is a bit confusing to some, but it allows the individual who is generating the Docker container to specify a network port the individual can use to interact with the container. EXPOSE does not actually expose the network port. To expose a port to the world (or our network), you would need to specify another option when you run your container. For example, you would do the following:
docker run {image} -p 80
This would actually expose the container to a network outside your local system.
Within our folder that contains our Dockerfile, we should also have a folder named bin. Within this folder, we should have a basic HTML file called index.html with the following content:
<!DOCTYPE html PUBLIC "-//IETF//DTD HTML 2.0//EN">
<HTML>
   <HEAD>
      <TITLE>
         Hello from my Docker for Windows Container!
      </TITLE>
   </HEAD>
<BODY>
   <H1>Hi</H1>
   <P>This is very minimal "hello world" HTML document, but it's running within Docker for Windows</P>
</BODY>
</HTML>
The last statement in our Dockerfile is the ADD command. This command will add files or scripts or whatever you have specified to the container.
ADD bin/ /myapp
How the ADD command works is that it takes the current directory holding your Dockerfile, and if you have specified a specific folder, like bin/, it would add this directory and all of its contents to /myapp within the Docker container. Here’s a visual representation of this:
Add files from local file system to your Docker container
Now that we have our Dockerfile and our bin/index.html in the same folder, we will now build and run our new container!
To run our new container, open up your PowerShell console. Next, change directories to the folder container for your Dockerfile and bin/index.html folder. For me, I have these located at C:\Docker For Windows Example:
[Open PowerShell Console]
cd 'C:\Docker For Windows Example'
docker build .
Please note that the full command is docker build . The period at the end is needed, and it references the location of our Dockerfile.
After we have pulled down our image from Docker Hub, we should now have a new IIS website set up and running our index.html page. You can view it by going to your browser and going to:
http://127.0.0.1/index.html
Besides the options I mentioned in our example, you have additional commands available that I believe you will find extremely useful. These additional commands are:
ENTRYPOINT/CMD: You may see this command as either ENTRYPOINT or CMD, but there are only minor differences between the two. An example of how to use CMD is as follows:
General Example: CMD ["executable","param1","param2"]
Python Example: CMD ["python", "/usr/src/app/setup.py"]
PowerShell Example: CMD [powershell.exe, -executionpolicy, bypass, c:\startup.ps1]
ENV: The ENV statement allows you to specify environmental variables within the container you are running. These can be great for a handful of variables, but this command does slow down your build process.
WORKDIR: WORKDIR allows you to set the working directory within a container. This is great if you want to use relative paths within your container. We’d typically use this before we call our RUN, CMD, ENTRYPOINT, etc. commands in our Dockerfile
You can find more information about all the commands available by visiting Docker’s official documentation. Please view this documentation here.
Now that we understand the basics on building containers, we should be familiar enough to start playing around with all the available images on Docker Hub and even starting to create our own.
In the next segment of this series, we will go a bit further and talk about using docker-compose. This amazing feature will allow you to create multiple containers simultaneously. Why is this useful? Imagine creating an application that has both a front-end UI and a back-end database. In the meantime, please check out more information about Docker Compose here.
Docker containers become unavoidable for infrastructure development as it provides, Isolation, Simplicity, Rapid Continuous Deployment, and Faster Configuration with Security. Earlier, Docker has only used for Linux based applications as it is using the Linux kernel baseline for creating Containers. But Windows applications are widely used in Software development and Hence, windows developers need Docker Containers for Windows. In this article, we will discuss How to Create Docker Windows Containers from Docker Desktop.
Table of Contents
Docker Desktop Installation
Requirement
- Minimum Windows 10 (Home and All other Editions)
- Hyper-V (In-Built and can be Enabled)
- Only 64bit Processor Architecture
- Virtualization Enablement from Bios Level
Installation
- Step-1: Download the “Docker Desktop for Windows” exe file from here (https://hub.docker.com/editions/community/docker-ce-desktop-windows/) and run it to install.
- Step-2: Enable Docker Running Environment 1. For Windows Home – Enable Windows Subsystem for Linux (Instructions Here: https://docs.microsoft.com/en-us/windows/wsl/install-win10). 2. For Windows Other Editions – Enable Hyper-V (Instructions Here: https://docs.microsoft.com/en-us/virtualization/hyper-v-on-windows/quick-start/enable-hyper-v)
- Step-3: Follow the instructions on the Installation process
- Step-4: If you are the Only user with Admin access, you can proceed. Else add the current user into a docker-users group (Instructions Here: https://www.tenforums.com/tutorials/88049-add-remove-users-groups-windows-10-a.html)
NOTE:
Docker Desktop Installed in the Windows Machine can run Linux Based Docker Containers and Windows-based Docker Container. But You cannot run Windows Based Docker Containers on Docker Engine installed in Linux. Refer the below image.

About Docker on Windows Machine
As we all know, the Docker Engine will run as a daemon that uses the Linux specific kernel features. So, running the Docker Engine on Windows directly is not possible. Hence, we must create a Linux based environment in Windows to run docker. In order to enable Linux environment on the windows, we have two options,
- Windows Subsystem for Linux (WSL) – is the compatibility layer to run Linux applications
- Hyper-V – Microsoft solution for virtualization.

Both these features are available from Windows 10. Running docker on windows will be ultimately using the Linux environment. But it is using some of the Host’s features. So, Docker Engine will sit on top of the Linux Kernel created by the Hyper-V/WSL. On top of the Docker Engine, Docker Containers can be created. All this is managed by the Docker Desktop. So, Application Program which will be written by the developers will sit on top of the Containers.
Simple Windows Container with Example
Let’s learn how to create the Docker Windows container using Docker Desktop. For that, first, we are going to create Dockerfile which is the simple text file with the instructions of the application and configurations.
Creating Dockerfile
Let’s run a simple application which will return the “hello world” print output from the Windows Docker Container. For the same, create a file called “Dockerfile” and put the bellow content.
# Base Image
FROM microsoft/nanoserver

# Copy powershell init-script from the host machine (windows) to the docker container.
COPY init-setup.ps1 c:\\workspace\application\init-setup.ps1

# Run the Powershell script in the Docker Container
CMD ["powershell.exe", "c:\\workspace\application\init-setup.ps1"]
- In this, Line number #2 is setting the container from the base image. Here it is “
microsoft/nanoserver”. - Inline Number #5 is giving
init-script.ps1from the host to the docker container. - Line Number #8 is to run the script in PowerShell executable.
And Create a script file called “init-setup.ps1” and put the below content inside the file
Building Docker Image
Once you have this file in your folder you can start building the Dockerfile as Docker image using the command.
$ docker build -t digitalvarys/print-hello-world .
where digitalvarys/print-hello-world is the tag name of the docker image.
Once the Docker image is been built, you can check the Image by passing the following commad
This will display the created image.
Running the Docker Container
Now, it is time to run the Docker image which we have created. Hence, run the following command
$ docker run digitalvarys/print-hello-world
This will print the string “hello world” as we provided.
If you run it with -it parameter, you can explore the Created Docker Container with Windows CMD.
ASP.net example of the Windows Docker Container.
The above sample application will tell you about the basic container feature. This one will tell you the real-time advantage of the Windows Docker Container.
Sample application
For this tutorial, we are going to use, cloud foundry’s sample Dotnet core hello world application (https://github.com/cloudfoundry-samples/dotnet-core-hello-world). Just clone it and keep it in your working directory
Dockerfile creation.
Now, we are going to create Dockerfile to create the image of the above application.
# Base Image
FROM microsoft/dotnet:nanoserver-core

# Copy entire application code folder dotnet-application to the working directory in Container.
COPY c:\\workspace\dotnet-application .

# Relax the firewall rule to expose port 5000
EXPOSE 5000

# Run the dotnet application
CMD ["dotnet", "run", "--server.urls", "http://0.0.0.0:5000"]
Just like the PowerShell example, we are going to take the base image and copy the application from the host to the container. Then, we are going to expose the port 5000 to run the dotnet application in this port. Then, we are going to run the application using the dotnet executable.
Building the Docker Image.
Once the Dockerfile is ready, we have to build the Docker container.
$ docker build -t digitalvarys/simple-dotnet-application .
Here, I am giving the image name as “digitalvarys/simple-dotnet-application”.
Running the Docker Container
Now, we have to run the application in background (detached mode),
$ docker run -d -p 5000:5000 digitalvarys/simple-dotnet-application
This will run the container and expose the container port to the host port 5000.
Getting the IP address of the Created Docker Container.
Now, Just inspect the Docker container and see the assigned IP address of the running container,
$ docker inspect [container-id]
This will show you the JSON response. In that, check for “networks” -> “nat” -> “IPAddress”. This will be your container IP address.
Now, Just enter the URL in the browser as https://[container-ip-address]:5000, then you will see the Hello world message in the browser. This means your application is running in a container.
Conclusion
As we already discussed, Docker is unavoidable for the application development or at least in the process of application development. But the Containerization of the Windows application like dotnet application needs extra lookup. Hope this article covers enough concepts and procedures for the Windows Docker Containers running on windows application. In our upcoming article, we will discuss more running a cluster of Microsoft Windows-based applications in Docker Swarm and Kubernetes. Stay tuned and subscribe DigitalVarys for more articles and study materials on DevOps, Agile, DevSecOps and App Development.
Experienced DevSecOps Practitioner, Tech Blogger, Expertise in Designing Solutions in Public and Private Cloud. Opensource Community Contributor.
Are you new to Docker Windows Images? Are you currently working in a Windows shop and curious to learn about Docker builds for container images? You have come to the right place. The best way to learn about new something is by doing with the docker build and docker build "tag" commands!
Not a reader? Watch this related video tutorial!
Not seeing the video? Make sure your ad blocker is disabled.
In this article, you are going to learn how to create your first Windows Docker image from a Dockerfile using the docker build command.
Let’s get started!
Understanding Docker Container Images
For years, the only way to test or perform development on multiple operating systems (OS) was to have several dedicated physical or virtual machines imaged with the OS version of your choice. This methodology required more hardware and overhead to provision new machines for each software and OS specification.
However, these days the usage of Docker container images has grown partly due to the popularity of micro-service architecture. In response to the rise in Docker’s popularity, Microsoft has started to publicly support Docker images for several flagship products on their Docker Hub page. They have even added native support for images for Windows as a product feature in Windows 10 and Windows Server 2016!
A Docker image is run on a container by using the Docker Engine. Docker images have many benefits such as portability (applicable to multiple environments and platforms), customizable, and highly scalable. As you can see below, unlike traditional virtual machines, the Docker engine runs on a layer between the host OS kernel and the isolated application services that are being containerized.
Understanding Docker Build and Images
The docker build command can be leveraged to automate container image creation, adopt a container-as-code DevOps practice, and integrate containerization into the development cycle of your projects. Dockerfiles are simply text files that contain build instructions used by Docker to create a new container image that is based on an existing image.
The user can specify the base image and list of commands to be run when a container image is deployed or startup for the first time. In this article, you will learn how to create a Windows-based docker image from Dockerfile using a Windows container.
This process has several benefits over using a pre-built container image:
- You are able to rebuild a container image for several versions of Windows – which is great for testing code changes on several platforms.
- You will have more control over what is installed in the container. This will allow you to keep your container size to a minimum.
- For security reasons, you might want to check the container for vulnerabilities and apply security hardening to the base image
Prerequisites/Requirements
This article is a walkthrough on learning about learning how to build a Docker image using a Dockerfile. If you’d like to follow along, ensure that you have the following prerequisites in place.
- Docker for Windows installed. I’ll be using the Docker Community Edition (CE) version 2.1.0.4 in my environment.
- Internet access is needed for downloading the Docker images
- Windows 10+ Operating System (version 1709 is being used for this tutorial)
- Nested virtualization enabled
- 5 GB of free diskspace on your local machine
- PowerShell 5.0+
- This tutorial uses the Visual Studio Code IDE. However feel free to use what ever IDE you’d prefer.
Note: Be sure to enable Windows Containers Configuration when installing Docker.
Getting Prepared
You’ll first need a folder to store all of the Docker images and containers you’ll be building from those images. To do so, open a Powershell or cmd terminal (you’ll be using PowerShell throughout this article) and create a new directory called C:\Containers.
Once the folder is created, change to that directory. This puts the console’s current working directory to C:\Containers to default all downloads to this directory.
PS51> mkdir C:\Containers
PS51> cd C:\Containers
In this article, you’ll get a headstart. Most of the files to work through this project are already available. Once the folder is created, perform a Git pull to copy over the files needed for this article from the TechSnips Github repository to the C:\Containers folder. Once complete, check to make sure that the C:\Containers folder looks like below.

Downloading the IIS Windows Docker Image
The first task to perform is to download a “template” or base image. You’ll be building your own Docker image later but first, you need an image to get started with. You’ll be downloading the latest IIS and Windows Server Core Images that are required for this tutorial. The updated list of images can be found on the official Microsoft Docker hub image page.
Reviewing the Current Docker Base Images
Before downloading the image from the image repository, let’s first review the current Docker base images that you currently have on your local system. To do so, run a PowerShell console as Administrator and then type docker images. This command returns all images on your local system.
As you can see below, the images available are initially empty.

Downloading the Base Image
Now it’s time to download the base IIS image from Docker Hub. To do so, run docker pull as shown below. This process can take some time to complete depending on your internet speeds.
PS51> docker pull mcr.microsoft.com/windows/servercore/iis
Now run docker images and you should have the latest Microsoft Windows Core IIS image available for this tutorial.

Inspecting the Dockerfile
In an earlier step, you had downloaded an existing Dockerfile for this tutorial. Let’s now take a look at exactly what that entails.
Open the C:\Containers\Container1\Dockerfile file in your favorite editor. The contents of this Dockerfile are used to define how the container image will be configured at build time.
You can see an explanation of what each piece of this file does in the in-line comments.
# Specifies that the latest microsoft/iis image will be used as the base image
# Used to specify which base container image will be used by the build process.

# Notice that the naming convention is "**owner/application name : tag name**"
# (shown as microsoft/iis:latest); so in our case the owner of the image is
# Microsoft and the application is IIS with the "latest" tag name being used
# to specify that you will pull the most recent image version available.
FROM microsoft/iis:latest

# Copies contents of the wwwroot folder to the inetpub/wwwroot folder in the new container image
# Used to specify that you want to copy the WWWroot folder to the IIS inetpub WWWroot
# folder in the container. You don't have to specify the full path to your local
# files because docker already has the logic built-in to reference files and folders
# relative to the docker file location on your system. Also, make note that that
# docker will only recognize forward slashes for file paths - since this is a
# Windows based container instead of Linux.
COPY wwwroot c:/inetpub/wwwroot

# Run some PowerShell commands within the new container to set up the image

# Run the PowerShell commands to remove the default IIS files and create a new
# application pool called TestPool
RUN powershell Remove-Item c:/inetpub/wwwroot/iisstart.htm -force
RUN powershell Remove-Item c:/inetpub/wwwroot/iisstart.png -force
RUN powershell Import-Module WebAdministration
RUN powershell New-WebAppPool -Name 'TestPool'

# Exposes port 80 on the new container image
# Used to open TCP port 80 for allowing an http connection to the website.
# However, this line is commented out, because the IIS container has this port
# already open by default.
#EXPOSE 80

# Sets the main command of the container image
# This tells the image to run a service monitor for the w3svc service.
# When this is specified the container will automatically stop running
# if the w3svc service stopped. This line is commented out because of the
# IIS container already has this entrypoint in place by default.
#ENTRYPOINT ["C:\\ServiceMonitor.exe", "w3svc"]
Building a New Docker Image
You’ve got the Dockerfile ready to go and a base IIS image downloaded. Now it’s time to build your new Docker image using the Dockerfile.
To build a new image, use the docker build "tag" command. This command creates the image. For this article, you can see below you’re also using the -t ** option which replaces the “tag” portion. This option allows you to give your new image a friendly tag name and also reference the Dockerfile by specifying the folder path where it resides.
Below you can see an example of ensuring the console is in the C:\Containers directory and then building a new image from the Dockerfile in the C:\Containers\Container1 directory.
PS51> cd C:\Containers
PS51> docker build -t container1 .\Container1
Once started, you can see the progress of the command as it traverses each instruction in the docker file line by line:
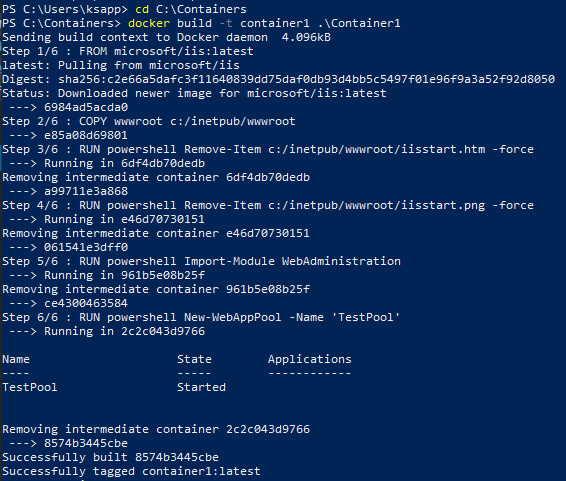
Once done, you should now have a new Docker image!
Now run the docker images command to view the images that are available. You can see below an example of the container1 image created.

Note: The
docker build —helpcommand is a useful parameter to display detailed information on the docker command being run.
Running the Docker Container
At this point, you should have a new image created. It’s time to spin up a container using that image. To bring up a new container, use the docker run command.
The docker run command will bring up a new Docker container based on the container1 image that you created earlier. You can see an example of this below.
Notice that the -d parameter is used. This tells the docker runtime to start the image in the detached mode and then exit when the root process used to run the container exits.
When docker run completes, it returns the ID of the container created. The example below is capturing this ID into a $containerID variable so we can easily reference it later.
PS51> $containerID = docker run -d container1
PS51> $containerID
Once the container is brought up, now run the docker ps command. This command allows you to see which containers are currently running using each image. Notice below that the running image is automatically generated a nickname (busy_habit in this case). This nickname is sometimes used instead of the container ID to manage the container.

Running Code Inside a Docker Container
A new container is built from a new image you just created. Let’s now start actually using that container to run code. Running code inside of a Docker container is done using the docker exec command.
In this example, run docker exec to view PowerShell output for the Get-ChildItem command in the container using the command syntax below. This will ensure the instructions in the Dockerfile to remove the default IIS files succeeded.
PS51> docker exec $containerID powershell Get-ChildItem c:\inetpub\wwwrootYou can see below that the only file that exists is index.html which means the default files were removed.

Now run the ipconfig command in the container to get the local IP address of the container image so that you can try to connect to the IIS website.
PS51> docker exec $containerID ipconfigYou can see below that ipconfig was run in the container just as if running on your local computer and has return all of the IP information.

ipconfig in a Docker containerInspecting the IIS Website
Now it’s time to reveal the fruits of your labor! It’s time to see if the IIS server running in the Docker container is properly serving up the index.html page.
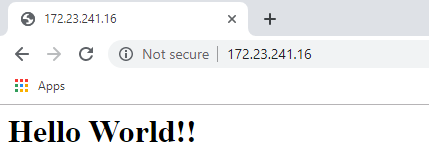
Open a browser and paste the IP4 Address found via ipconfig into the address bar. If all is well, you should see a Hello World!! message like below.
Reviewing Docker History
One useful command to use when working with Docker containers i the docker history command. Although not necessarily related to creating an image or container itself, the docker history command is a useful command that allows you to review changes made to the container image.
PS51> docker history container1You can see below, that docker history returns all of the Dockerfile and PowerShell activity performed on the container1 container you’ve been working with.

docker historyCleaning up the Running Docker Images
The steps below are used to cleanup all stopped containers running on your machine. This will free up diskspace and system resources.
Run the docker ps command to view a list of the containers running on your system:

Now stop the running containers using the docker stop command:
PS51> docker stop <image nick name: busy_haibt in my case>
PS51> docker stop <image nick name: unruffled_driscoll in my case>
Finally you can permanently remove the stopped containers using the docker system prune command.
PS51> docker system prune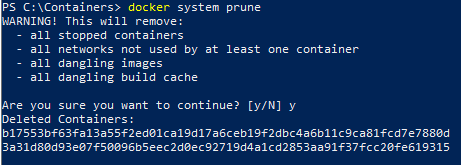
Further Reading
- Creating Your First Docker Windows Server Container
- How to Manage Docker Volumes on Windows
We will see here how to install Docker on Windows and how to create a Java hello world in Docker .
Download and install Docker
To install Docker on Windows you must first download Docker from this URL
https://docs.docker.com/compose/insta
Choosing the option Get Docker Desktop for Windows true the option to download
https://docs.docker.com/docker-for-windows/install/
It will ask you to register with your ID and password. If you don’t have one, you must create your account.
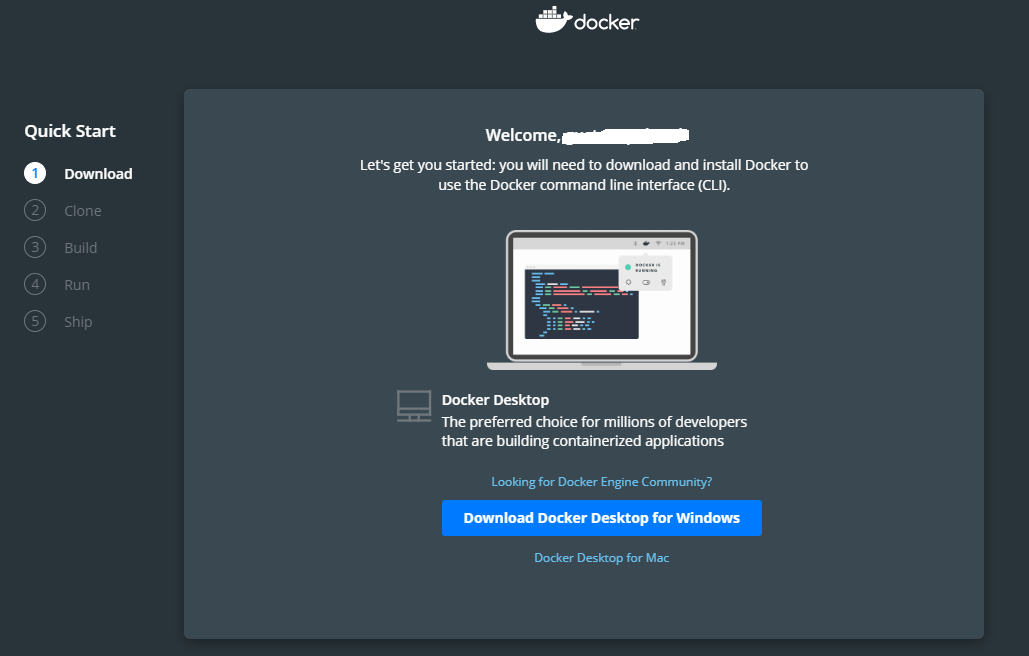
Once you have login you will see the button for downloading the installer.
After starting the downloaded file, the installer will ask you if you prefer to use Docker with a Windows or Linux software.
The best option is Linux. This can be changed later.
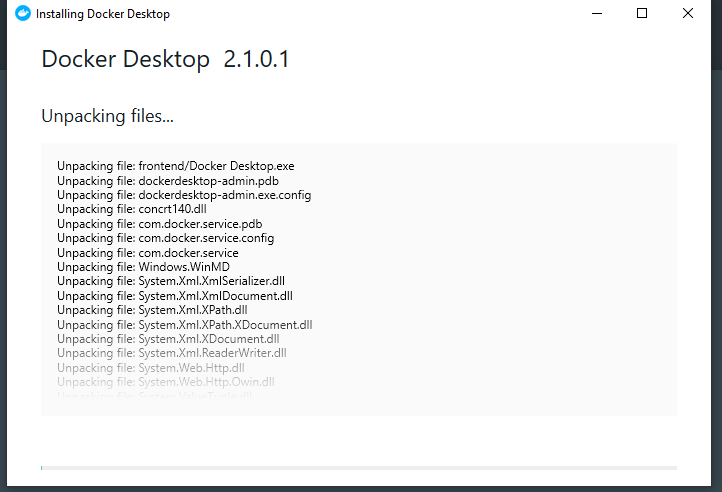
Chosen this will begin the unpacking of Docker
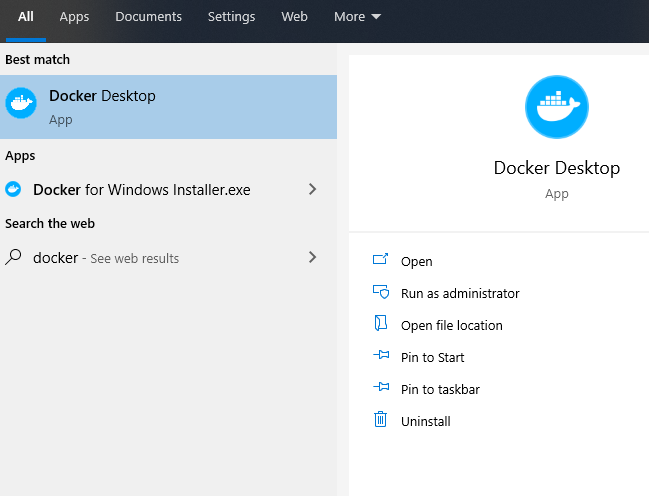
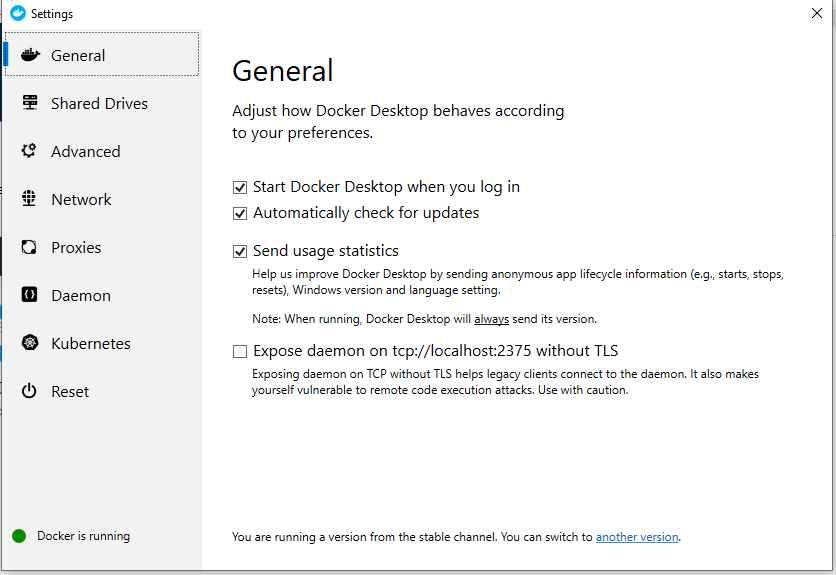
Once the installation is finished, open Docker Desktop to start docker and let it run.
You will see the docker icon in the notification area.
There you can enter with your ID and password and set general docker settings.
The default options are sufficient for this example.
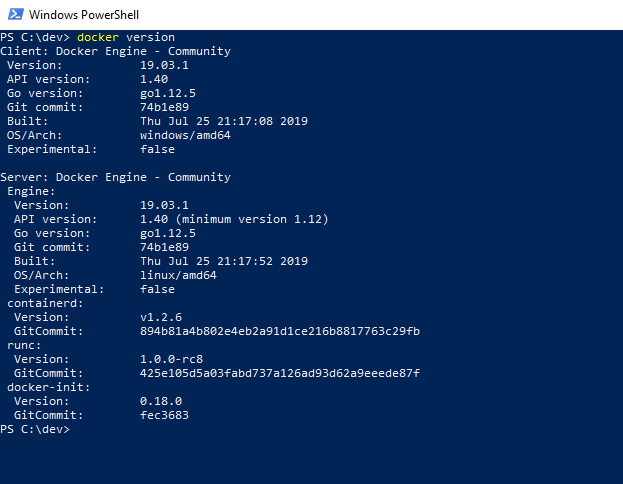
Now you can check your Docker installation.
Open a cmd terminal, PowerShell or CMD, and check typing:
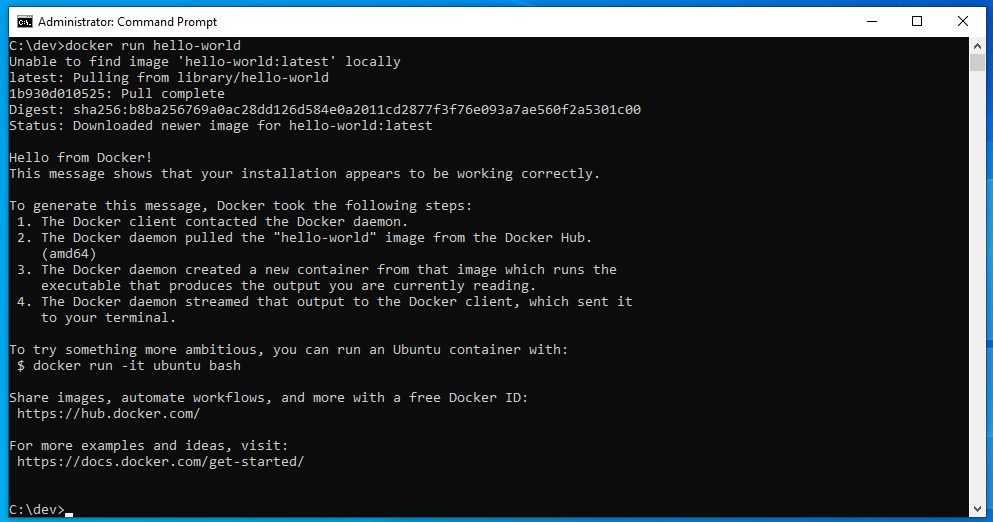
From Windows CMD terminal run this:
This will download a hello world sample container from the docker hub and execute it.
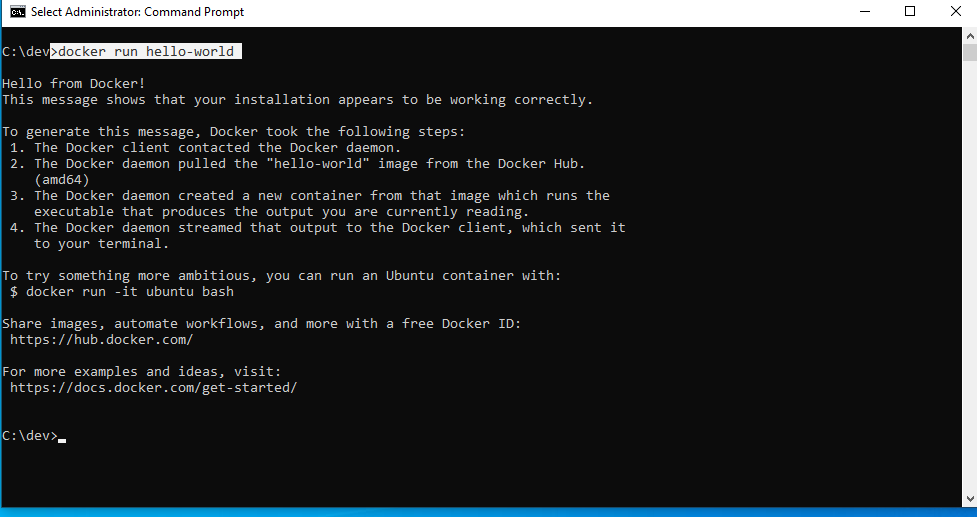
You can execute this container later like this:
docker run hello-world
How to create your first docker file
Let’s see now how to create your first dockerfile.
A dockerfile is a file with instructions for Docker to create a container that we can execute with the configuration and software we need.
We are going to create a docker with a Linux image and run a hello world in java.
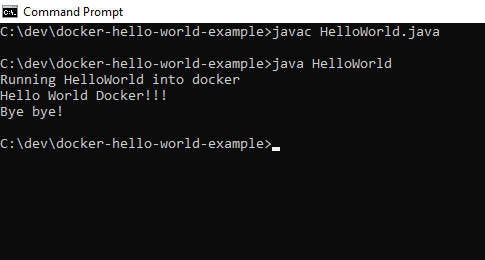
First create your HelloWorld in Java, compile and run it.
public class HelloWorld {
    public static void main(String[] args) {
        System.out.println("Running HelloWorld into docker");
        System.out.println("Hello World Docker!!!");
        System.out.println("Bye bye!");
    }
}
javac HelloWorld.java
java HelloWorld
Then create your dockerfile file with the following instructions
FROM alpine:latest
ADD HelloWorld.class HelloWorld.class
RUN apk --update add openjdk8-jre
ENTRYPOINT ["java", "-Djava.security.egd=file:/dev/./urandom", "HelloWorld"]
Let’s analyze this dockerfile file:
-
- FROM * alpine: latest — This instruction does add an Alpine linux to our docker. Alpine linux is a linux that weighs just about 5MB
-
- ADD * HelloWorld.class HelloWorld.class — We add the file HelloWorld.class to our image with the same original name.
-
- RUN * apk –update add openjdk8-jre — Install java *, specifically an openjdk to our docker image.
-
- ENTRYPOINT * [“java”, “-Djava.security.egd = file: / dev /./ urandom”, “HelloWorld”] — Will execute our HelloWorld code.
How to run your first dockerfile
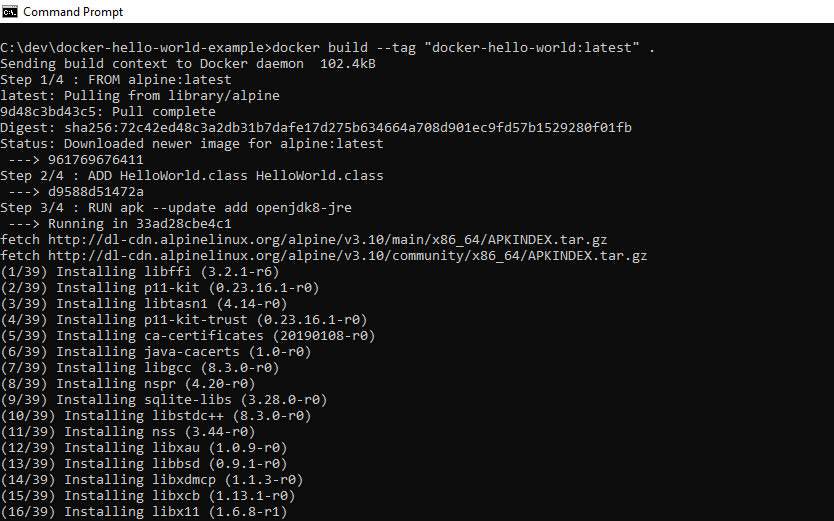
Now we build a dockerfile to create our image.
Here we say make a dockerfile build with the name docker-hello-world and the tag (tag) latest
docker build --tag "docker-hello-world:latest" .
Now execute:
We will see our image created and available to be used.
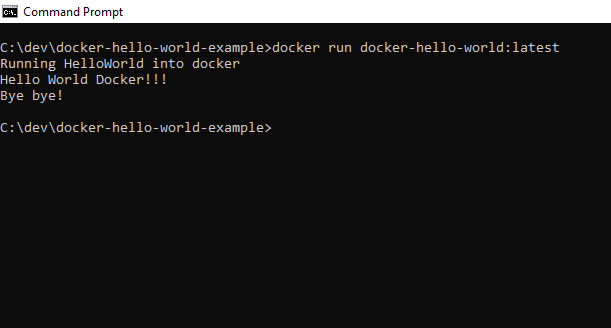
Now we can run docker with this image and see the result.
docker run docker-hello-world:latest
Conclusion
You have seen here how to install Docker and verify that it is correctly installed.
You have also created your first dockerfile to run a hello world made in Java inside the container.
We have seen some basic commands:
- docker build command: to create a docker image.
- docker run command: to execute a docker image.
- docker images command: to see the created docker images.
You can see this code in:
https://github.com/gustavopeiretti/docker-hello-world-java-example
https://gitlab.com/gustavopeiretti/docker-hello-world-java-example
Hi! If you find my posts helpful, please support me by inviting me for a coffee 
See also
- Spring Boot with PostgreSQL and Docker Compose
- How to create a microservice with Spring Boot and Docker
In this tutorial, I will demonstrate how to host an ASP.NET Core 2.2 application on Windows Containers by using a Docker image. A Docker image will be packaged with an ASP.NET Core application that will be run when a container is spun up.
Before we get started with creating a Docker image. Let’s make sure we have prerequisites done.
Prerequisites
- Installing docker-cli and other components to get started
- Visual Studio code.
- Docker extension for visual studio code.
Once you have the prerequisites, we will use a publicly available ASP.NET Core base image from Microsoft. Microsoft maintains their Docker images on Docker hub. Docker hub is a container registry to manage your Docker images either by exposing the image publicly or maintaining it privately. Private image responsibilities cost money. Visit Docker Hub website to learn more about image repository management.
Step 1: Open the PowerShell console as an administrator
Step 2: Let’s get started by pulling ASP.NET Core 2.2 Docker image from Docker hub by executing the below command.
docker pull mcr.microsoft.com/dotnet/core/aspnet:2.2Your output should look similar to what is shown below:

Step 3: Create a folder with your preference name whatever you prefer. I will use c:\docker\ for demonstration purposes.
Step 4: Download ASP.NET Core application package from this URL.
Invoke-WebRequest -UseBasicParsing -OutFile c:\docker\WebAppCore2.2.zip https://github.com/rahilmaknojia/WebAppCore2.2/archive/master.zipWhat we are doing in the above command is downloading packaged code that is already built to save time on building a package.
Step 5: Extract WebAppCore2.2.zip by using the PowerShell 5.0 native command. If you do not have PowerShell 5.0 and above, you will have to manually extract the package.
Expand-Archive c:\docker\WebAppCore2.2.zip -DestinationPath c:\docker\ -Force Step 6: Now let’s create a Docker file in c:\docker folder.
New-Item -Path C:\docker\Dockerfile -ItemType FileStep 7: Go ahead and open C:\docker folder path in Visual Studio Code.
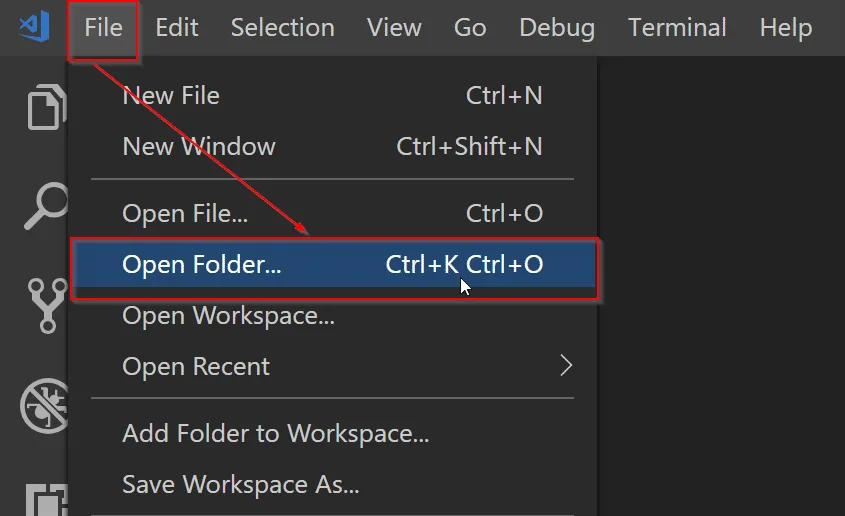
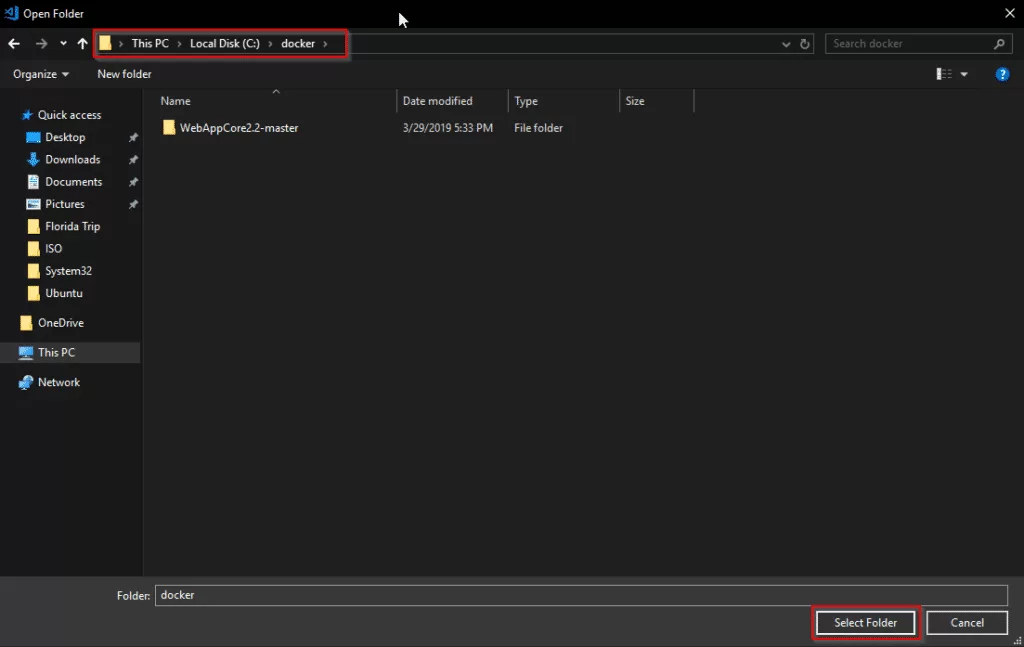
Step 8: Now we will open Dockerfile by double-clicking on the file in Visual Studio Code to start writing the required steps to build an image.
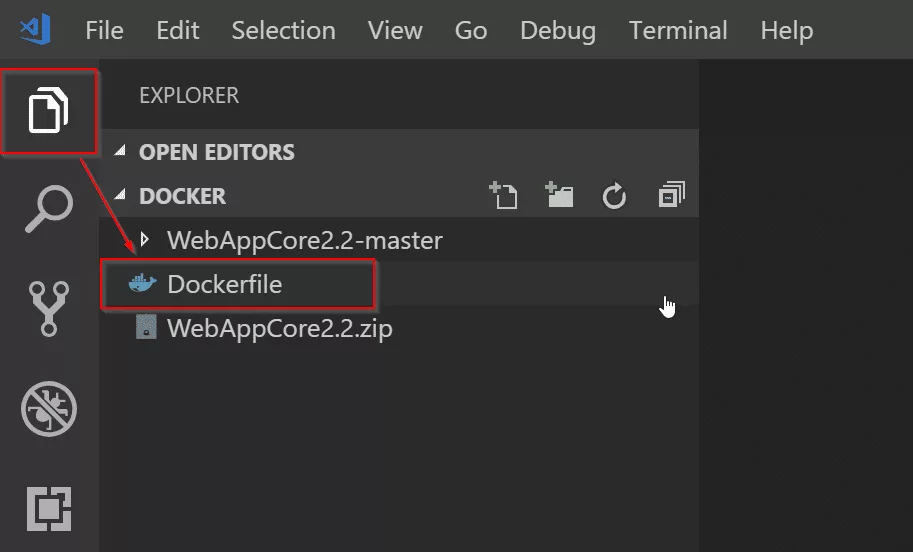
Copy and paste the code below into Dockerfile.
# Pull base image from Docker hub
FROM mcr.microsoft.com/dotnet/core/aspnet:2.2

# Create working directory
RUN mkdir C:\\app

# Set a working directory
WORKDIR c:\\app

# Copy package from your machine to the image. Also known as staging a package
COPY WebAppCore2.2-master/Package/* c:/app/

# Run the application
ENTRYPOINT ["dotnet", "WebAppCore2.2.dll"]
What we told the
Dockerfileis to pull an asp.net core base image from Docker hub. Then we ran a command to create a directory calledappinc:\apppath. We also told the container to setc:\appas a working directory. That way we can access binary directly when the container is spun up. We also added a step to copy all the binaries fromc:\docker\WebAppCore2.2-master\Package\to destination path in containerc:\app. Once we had the package staged in the container, we told it to run the application by executingdotnet WebAppCore2.2.dllso that the app would be accessible from outside the container. To learn more aboutDockerfilefor Windows, check out this Microsoft documentation.Now that you have the required steps to build an image, let’s go ahead with the below steps.
Step 9: Navigate to Dockerfile working directory from PowerShell console. If you are already in that path, you can ignore it.
Step 10: Execute the below command to build a container image.
docker build -t demo/webappcore:2.2.0The above command will create a Docker image under demo path. With the image name called as webappcore and version 2.2.0.
Your output should look like below once it is successful:
PS C:\docker> docker build -t demo/webappcore:2.2.0 .
Sending build context to Docker daemon  9.853MB
Step 1/5 : FROM mcr.microsoft.com/dotnet/core/aspnet:2.2
 ---> 36e5a01ef28f
Step 2/5 : RUN mkdir C:\\app
 ---> Using cache
 ---> 8f88e30dcdd0
Step 3/5 : WORKDIR c:\\app
 ---> Using cache
 ---> 829e48e68bda
Step 4/5 : COPY WebAppCore2.2-master/Package/* c:/app/
 ---> Using cache
 ---> 6bfd9ae4b731
Step 5/5 : ENTRYPOINT ["dotnet", "WebAppCore2.2.dll"]
 ---> Running in 4b5488d5ea5f
Removing intermediate container 4b5488d5ea5f
 ---> 9729270fe1ac
Successfully built 9729270fe1ac
Successfully tagged demo/webappcore:2.2.0
Step 11: Once the image has been built, you are now ready to run the container. Execute the below command.
docker run --name webappcore --rm -it -p 8000:80 demo/webappcore:2.2.0The above command will create a new container called webappcore with parameters.
--rmis used to automatically remove the container after it is shutdown.-itwill open a session into your container and output all the logs.-pis used for creating an external port and assigning it to the internal port of a container. Port 8000 is exposed to outside containers, and port 80 is used to access the app within the container.demo/webappcore:2.2.0is the path to the Docker image to run as a container.
Output of a running container

Step 12: Browsing your application from your local machine localhost:8000.

This is it! You ran your first Docker container in your local environment. Thank you for following the tutorial. Please comment below for any issue or feedback you would like to share.


