Compile and Use FFmpeg Libraries for Windows Runtime (Windows 10 or Windows 8.1 Apps)
- Compile and Use FFmpeg Libraries for Windows Runtime (Windows 10 or …
-
Prerequisites and First Time Setup Instructions
- Prerequisites
- Verifying your FFmpeg Environment Setup
-
Compiling for Windows 10
- Windows 10 x86
- Windows 10 x64
- Windows 10 ARM
-
Compiling for Windows 8.1
- Windows Store 8.1 x86 (Windows 8.1 Win32 in Visual Studio)
- Windows Store 8.1 x64 (Windows 8.1 x64 in Visual Studio)
- Windows Store 8.1 ARM (Windows 8.1 ARM in Visual Studio)
- Windows Phone 8.1 x86 (Windows Phone 8.1 Win32 Emulator in Visual Studio)
- Windows Phone 8.1 ARM (Windows Phone 8.1 ARM Device in Visual Studio)
- Troubleshooting
- Windows Store Certification, File I/O, and Other Details
- Verifying Built FFmpeg Libraries and Sample Applications
FFmpeg libraries can be built and used for Windows Apps development targeting Windows 10, Windows 8.1, and Windows Phone 8.1. The guide below provides build instruction for all supported target configurations (platform & architecture). Each configuration requires distinct set of tools, environment variables, and configure options outlined in each section below. It concludes with some practical and potentially non-obvious information for consuming the FFmpeg DLLs from your app.
Prerequisites and First Time Setup Instructions
Prerequisites
- For Windows 10: Microsoft Visual Studio 2015 (tested with Visual Studio 2015 RTM)
- For Windows 8.1: Microsoft Visual Studio 2013 (use MSVC 2013 Update 3 RTM or newer)
- MSYS2 (GNU Make environment)
- YASM (x86 assembly code compiler)
- gas-preprocessor.pl (ARM assembly pre-processor)
Windows 10 Setup
Download and install Microsoft Visual Studio 2015 on a Windows 10 machine.
Windows 8.1 Setup
Download and install Microsoft Visual Studio 2013 on a Windows 8.1 machine
MSYS2 Setup
Download the latest MSYS2 installer from http://msys2.github.io/ and follow the installation instruction closely from the installation webpage.
In order for the environment from the Windows side to be inherited on the MSYS2 side, uncomment the following line from msys2_shell.cmd if it is present:
replace rem set MSYS2_PATH_TYPE=inherit
with set MSYS2_PATH_TYPE=inherit this will allow the environment variables for Visual Studio to be transferred to the MSYS2 environment and back.
Once base MSYS2 is successfully installed, get the latest make package by invoking the following command in your MSYS2 shell
pacman -S make
Also get the latest gcc package
pacman -S gcc
Rename or remove link.exe in the MSYS2 usr bin folder (E.g. C:\msys64\usr\bin\link.exe) to prevent conflict with MSVC link.exe
Install perl as it will be needed to run ‘gas-preprocessor.pl’
pacman -S perl
Install also diffutils for configure script
pacman -S diffutils
YASM Setup
Download YASM executable from http://yasm.tortall.net/Download.html. You have to download the «general use» binaries and NOT the ones for VS2010. Either Win32 or Win64 binaries support outputting object files for both architectures so that should not matter. The last tested version was yasm-1.3.0-win64.exe.
Rename the downloaded executable to yasm.exe and place it in your MSYS2 path. E.g.C:\msys64\usr\bin\yasm.exe.
gas-preprocessor Setup
Download gas-preprocessor.pl Perl script from https://github.com/FFmpeg/gas-preprocessor
Place the downloaded Perl script in your MSYS2 path. E.g. C:\msys64\usr\bin\gas-preprocessor.pl
Verifying your FFmpeg Environment Setup
Launch Visual Studio ARM Cross Tools Command Prompt. E.g.
C:\ProgramData\Microsoft\Windows\Start Menu\Programs\Visual Studio 2015\Visual Studio Tools\Windows Desktop Command Prompts\VS2015 x86 ARM Cross Tools Command Prompt
Open MSYS2 Shell from the command prompt above (use the correct drive and location of your MSYS2 installation). Note that the command shell above will close and it may take a while for the MSYS2 shell to launch.
C:\msys64\msys2_shell.cmd
In the MSYS2 shell verify that all the tools below are setup properly by running the following commands
$ which cl
/c/Program Files (x86)/Microsoft Visual Studio 14.0/VC/BIN/x86_ARM/cl

$ which link
/c/Program Files (x86)/Microsoft Visual Studio 14.0/VC/BIN/x86_ARM/link

$ which armasm
/c/Program Files (x86)/Microsoft Visual Studio 14.0/VC/BIN/x86_ARM/armasm

$ which yasm
/usr/bin/yasm

$ which cpp
/usr/bin/cpp

$ which gas-preprocessor.pl
/usr/bin/gas-preprocessor.pl
Verify that the tools are in the path and point to the right location where MSYS2 and Visual Studio are installed
To keep the source tree clean and the platforms separated, we will have the intermediate files go to the Output\<Platform>\<Architecture> folder under the FFmpeg source tree. We will also have the install files (the files necessary to link and use FFmpeg in your application) go to the Build\<Platform>\<Architecture> folder under the FFmpeg source tree.
Compiling for Windows 10
Windows 10 x86
Launch VS2015 x86 Native Tools Command Prompt. E.g.
C:\ProgramData\Microsoft\Windows\Start Menu\Programs\Visual Studio 2015\Visual Studio Tools\Windows Desktop Command Prompts\VS2015 x86 Native Tools Command Prompt
Set the following environment variables in the launched command prompt above
SET LIB=%VSINSTALLDIR%VC\lib\store;%VSINSTALLDIR%VC\atlmfc\lib;%UniversalCRTSdkDir%lib\%UCRTVersion%\ucrt\x86;;%UniversalCRTSdkDir%lib\%UCRTVersion%\um\x86;C:\Program Files (x86)\Windows Kits\NETFXSDK\4.6\lib\um\x86;;C:\Program Files (x86)\Windows Kits\NETFXSDK\4.6\Lib\um\x86
SET LIBPATH=%VSINSTALLDIR%VC\atlmfc\lib;%VSINSTALLDIR%VC\lib;
SET INCLUDE=%VSINSTALLDIR%VC\include;%VSINSTALLDIR%VC\atlmfc\include;%UniversalCRTSdkDir%Include\%UCRTVersion%\ucrt;%UniversalCRTSdkDir%Include\%UCRTVersion%\um;%UniversalCRTSdkDir%Include\%UCRTVersion%\shared;%UniversalCRTSdkDir%Include\%UCRTVersion%\winrt;C:\Program Files (x86)\Windows Kits\NETFXSDK\4.6\Include\um;
Open MSYS2 Shell from the command prompt above (use the correct drive and location of your MSYS2 installation). Note that the command shell above will close and it may take a while for the MSYS2 shell to launch.
C:\msys64\msys2_shell.cmd
In your MSYS2 shell navigate to your cloned FFmpeg folder. E.g.
cd /c/ffmpeg
Invoke the following make commands
mkdir -p Output/Windows10/x86

cd Output/Windows10/x86

../../../configure \
--toolchain=msvc \
--disable-programs \
--disable-d3d11va \
--disable-dxva2 \
--arch=x86 \
--enable-shared \
--enable-cross-compile \
--target-os=win32 \
--extra-cflags="-MD -DWINAPI_FAMILY=WINAPI_FAMILY_APP -D_WIN32_WINNT=0x0A00" \
--extra-ldflags="-APPCONTAINER WindowsApp.lib" \
--prefix=../../../Build/Windows10/x86

make

make install
Generated libraries can be found in Build/Windows10/x86 folder specified in --prefix option above
Windows 10 x64
Launch VS2015 x86 x64 Cross Tools Command Prompt. E.g.
C:\ProgramData\Microsoft\Windows\Start Menu\Programs\Visual Studio 2015\Visual Studio Tools\Windows Desktop Command Prompts\VS2015 x86 x64 Cross Tools Command Prompt
Set the following environment variables in the launched command prompt above
SET LIB=%VSINSTALLDIR%VC\lib\store\amd64;%VSINSTALLDIR%VC\atlmfc\lib\amd64;%UniversalCRTSdkDir%lib\%UCRTVersion%\ucrt\x64;;%UniversalCRTSdkDir%lib\%UCRTVersion%\um\x64;C:\Program Files (x86)\Windows Kits\NETFXSDK\4.6\lib\um\x64;;C:\Program Files (x86)\Windows Kits\NETFXSDK\4.6\Lib\um\x64
SET LIBPATH=%VSINSTALLDIR%VC\atlmfc\lib\amd64;%VSINSTALLDIR%VC\lib\amd64;
SET INCLUDE=%VSINSTALLDIR%VC\include;%VSINSTALLDIR%VC\atlmfc\include;%UniversalCRTSdkDir%Include\%UCRTVersion%\ucrt;%UniversalCRTSdkDir%Include\%UCRTVersion%\um;%UniversalCRTSdkDir%Include\%UCRTVersion%\shared;%UniversalCRTSdkDir%Include\%UCRTVersion%\winrt;C:\Program Files (x86)\Windows Kits\NETFXSDK\4.6\Include\um;
Open MSYS2 Shell from the command prompt above (use the correct drive and location of your MSYS2 installation). Note that the command shell above will close and it may take a while for the MSYS2 shell to launch.
C:\msys64\msys2_shell.cmd
In your MSYS2 shell navigate to your cloned FFmpeg folder. E.g.
cd /c/ffmpeg
Invoke the following make commands
mkdir -p Output/Windows10/x64

cd Output/Windows10/x64

../../../configure \
--toolchain=msvc \
--disable-programs \
--disable-d3d11va \
--disable-dxva2 \
--arch=x86_64 \
--enable-shared \
--enable-cross-compile \
--target-os=win32 \
--extra-cflags="-MD -DWINAPI_FAMILY=WINAPI_FAMILY_APP -D_WIN32_WINNT=0x0A00" \
--extra-ldflags="-APPCONTAINER WindowsApp.lib" \
--prefix=../../../Build/Windows10/x64

make

make install
Generated libraries can be found in Build/Windows10/x64 folder specified in --prefix option above
If you encounter an error linking because link.exe complains that MSPDB140.dll has the wrong version installed. Run the following command from an administrative command-prompt and rebuild:
copy "C:\Program Files (x86)\Microsoft Visual Studio 14.0\VC\bin\mspdbsrv.exe" "C:\Program Files (x86)\Microsoft Visual Studio 14.0\Common7\IDE"
Windows 10 ARM
Launch VS2015 x86 ARM Cross Tools Command Prompt. E.g.
C:\ProgramData\Microsoft\Windows\Start Menu\Programs\Visual Studio 2015\Visual Studio Tools\Windows Desktop Command Prompts\VS2015 x86 ARM Cross Tools Command Prompt
Set the following environment variables in the launched command prompt above
SET LIB=%VSINSTALLDIR%VC\lib\store\ARM;%VSINSTALLDIR%VC\atlmfc\lib\ARM;%UniversalCRTSdkDir%lib\%UCRTVersion%\ucrt\arm;;%UniversalCRTSdkDir%lib\%UCRTVersion%\um\arm;C:\Program Files (x86)\Windows Kits\NETFXSDK\4.6\lib\um\arm;;C:\Program Files (x86)\Windows Kits\NETFXSDK\4.6\Lib\um\arm
SET LIBPATH=%VSINSTALLDIR%VC\atlmfc\lib\ARM;%VSINSTALLDIR%VC\lib\ARM;
SET INCLUDE=%VSINSTALLDIR%VC\include;%VSINSTALLDIR%VC\atlmfc\include;%UniversalCRTSdkDir%Include\%UCRTVersion%\ucrt;%UniversalCRTSdkDir%Include\%UCRTVersion%\um;%UniversalCRTSdkDir%Include\%UCRTVersion%\shared;%UniversalCRTSdkDir%Include\%UCRTVersion%\winrt;C:\Program Files (x86)\Windows Kits\NETFXSDK\4.6\Include\um;
Open MSYS2 Shell from the command prompt above (use the correct drive and location of your MSYS2 installation). Note that the command shell above will close and it may take a while for the MSYS2 shell to launch.
C:\msys64\msys2_shell.cmd
In your MSYS2 shell navigate to your cloned FFmpeg folder. E.g.
cd /c/ffmpeg
Invoke the following make commands
mkdir -p Output/Windows10/ARM

cd Output/Windows10/ARM

../../../configure \
--toolchain=msvc \
--disable-programs \
--disable-d3d11va \
--disable-dxva2 \
--arch=arm \
--as=armasm \
--cpu=armv7 \
--enable-thumb \
--enable-shared \
--enable-cross-compile \
--target-os=win32 \
--extra-cflags="-MD -DWINAPI_FAMILY=WINAPI_FAMILY_APP -D_WIN32_WINNT=0x0A00 -D__ARM_PCS_VFP" \
--extra-ldflags="-APPCONTAINER WindowsApp.lib" \
--prefix=../../../Build/Windows10/ARM

make

make install
Generated libraries can be found in Build/Windows10/ARM folder specified in --prefix option above
If you encounter an error linking because link.exe complains that MSPDB140.dll has the wrong version installed. Run the following command from an administrative command-prompt and rebuild:
copy "C:\Program Files (x86)\Microsoft Visual Studio 14.0\VC\bin\mspdbsrv.exe" "C:\Program Files (x86)\Microsoft Visual Studio 14.0\Common7\IDE"
Compiling for Windows 8.1
Windows Store 8.1 x86 (Windows 8.1 Win32 in Visual Studio)
Launch Developer Command Prompt for VS2013
Start Menu > Visual Studio 2013 (Start Menu Folder) > Visual Studio Tools > Developer Command Prompt for VS2013
Set the following environment variables in the launched command prompt above. These environment variables overwrite the default paths with correct target specific ones.
SET LIB=%VSINSTALLDIR%VC\lib\store;%VSINSTALLDIR%VC\atlmfc\lib;%WindowsSdkDir%lib\winv6.3\um\x86;;
SET LIBPATH=%WindowsSdkDir%References\CommonConfiguration\Neutral;;%VSINSTALLDIR%VC\atlmfc\lib;%VSINSTALLDIR%VC\lib;
SET INCLUDE=%VSINSTALLDIR%VC\include;%VSINSTALLDIR%VC\atlmfc\include;%WindowsSdkDir%Include\um;%WindowsSdkDir%Include\shared;%WindowsSdkDir%Include\winrt;;
Open MSYS2 Shell from the command prompt above (use the correct drive and location of your MSYS2 installation). Note that the command shell above will close and it may take a while for the MSYS2 shell to launch.
C:\msys64\msys2_shell.cmd
In your MSYS2 shell navigate to your cloned FFmpeg folder. E.g.
cd /c/ffmpeg
Invoke the following make commands
mkdir -p Output/Windows8.1/x86

cd Output/Windows8.1/x86

../../../configure \
--toolchain=msvc \
--disable-programs \
--disable-dxva2 \
--arch=x86 \
--enable-shared \
--enable-cross-compile \
--target-os=win32 \
--extra-cflags="-MD -DWINAPI_FAMILY=WINAPI_FAMILY_PC_APP -D_WIN32_WINNT=0x0603" \
--extra-ldflags="-APPCONTAINER" \
--prefix=../../../Build/Windows8.1/x86

make

make install
Generated libraries can be found in Build/Windows8.1/x86 folder specified in --prefix option above
Windows Store 8.1 x64 (Windows 8.1 x64 in Visual Studio)
Launch VS2013 x64 Cross Tools Command Prompt
Start Menu > Visual Studio 2013 (Start Menu Folder) > Visual Studio Tools > VS2013 x64 Cross Tools Command Prompt
Set the following environment variables in the launched command prompt above. These environment variables overwrite the default paths with correct target specific ones.
SET LIB=%VSINSTALLDIR%VC\lib\store\amd64;%VSINSTALLDIR%VC\atlmfc\lib\amd64;%WindowsSdkDir%lib\winv6.3\um\x64;;
SET LIBPATH=%WindowsSdkDir%References\CommonConfiguration\Neutral;;%VSINSTALLDIR%VC\atlmfc\lib\amd64;%VSINSTALLDIR%VC\lib\amd64;
SET INCLUDE=%VSINSTALLDIR%VC\include;%VSINSTALLDIR%VC\atlmfc\include;%WindowsSdkDir%Include\um;%WindowsSdkDir%Include\shared;%WindowsSdkDir%Include\winrt;;
Open MSYS2 Shell from the command prompt above (use the correct drive and location of your MSYS2 installation). Note that the command shell above will close and it may take a while for the MSYS2 shell to launch.
C:\msys64\msys2_shell.cmd
In your MSYS2 shell navigate to your cloned FFmpeg folder. E.g.
cd /c/ffmpeg
Invoke the following make commands
mkdir -p Output/Windows8.1/x64

cd Output/Windows8.1/x64

../../../configure \
--toolchain=msvc \
--disable-programs \
--disable-dxva2 \
--arch=x86_64 \
--enable-shared \
--enable-cross-compile \
--target-os=win32 \
--extra-cflags="-MD -DWINAPI_FAMILY=WINAPI_FAMILY_PC_APP -D_WIN32_WINNT=0x0603" \
--extra-ldflags="-APPCONTAINER" \
--prefix=../../../Build/Windows8.1/x64

make

make install
Generated libraries can be found in Build/Windows8.1/x64 folder specified in --prefix option above
Windows Store 8.1 ARM (Windows 8.1 ARM in Visual Studio)
Launch VS2013 ARM Cross Tools Command Prompt
Start Menu > Visual Studio 2013 (Start Menu Folder) > Visual Studio Tools > VS2013 ARM Cross Tools Command Prompt
Set the following environment variables in the launched command prompt above. These environment variables overwrite the default paths with correct target specific ones.
SET LIB=%VSINSTALLDIR%VC\lib\store\ARM;%VSINSTALLDIR%VC\atlmfc\lib\ARM;%WindowsSdkDir%lib\winv6.3\um\arm;;
SET LIBPATH=%WindowsSdkDir%References\CommonConfiguration\Neutral;;%VSINSTALLDIR%VC\atlmfc\lib\ARM;%VSINSTALLDIR%VC\lib\ARM;
SET INCLUDE=%VSINSTALLDIR%VC\include;%VSINSTALLDIR%VC\atlmfc\include;%WindowsSdkDir%Include\um;%WindowsSdkDir%Include\shared;%WindowsSdkDir%Include\winrt;;
Open MSYS2 Shell from the command prompt above (use the correct drive and location of your MSYS2 installation). Note that the command shell above will close and it may take a while for the MSYS2 shell to launch.
C:\msys64\msys2_shell.cmd
In your MSYS2 shell navigate to your cloned FFmpeg folder. E.g.
cd /c/ffmpeg
Invoke the following make commands
mkdir -p Output/Windows8.1/ARM

cd Output/Windows8.1/ARM

../../../configure \
--toolchain=msvc \
--disable-programs \
--disable-d3d11va \
--disable-dxva2 \
--arch=arm \
--as=armasm \
--cpu=armv7 \
--enable-thumb \
--enable-shared \
--enable-cross-compile \
--target-os=win32 \
--extra-cflags="-MD -DWINAPI_FAMILY=WINAPI_FAMILY_PC_APP -D_WIN32_WINNT=0x0603 -D__ARM_PCS_VFP" \
--extra-ldflags="-APPCONTAINER -MACHINE:ARM" \
--prefix=../../../Build/Windows8.1/ARM

make

make install
Generated libraries can be found in Build/Windows8.1/ARM folder specified in --prefix option above
Windows Phone 8.1 x86 (Windows Phone 8.1 Win32 Emulator in Visual Studio)
Launch Developer Command Prompt for VS2013
Start Menu > Visual Studio 2013 (Start Menu Folder) > Visual Studio Tools > Developer Command Prompt for VS2013
Set the following environment variables in the launched command prompt above. These environment variables overwrite the default paths with correct target specific ones.
SET LIB=%VSINSTALLDIR%VC\lib\store;%VSINSTALLDIR%VC\atlmfc\lib;%WindowsSdkDir%..\..\Windows Phone Kits\8.1\lib\x86;;
SET LIBPATH=%VSINSTALLDIR%VC\atlmfc\lib;%VSINSTALLDIR%VC\lib
SET INCLUDE=%VSINSTALLDIR%VC\INCLUDE;%VSINSTALLDIR%VC\ATLMFC\INCLUDE;%WindowsSdkDir%..\..\Windows Phone Kits\8.1\Include;%WindowsSdkDir%..\..\Windows Phone Kits\8.1\Include\abi;%WindowsSdkDir%..\..\Windows Phone Kits\8.1\Include\mincore;%WindowsSdkDir%..\..\Windows Phone Kits\8.1\Include\minwin;%WindowsSdkDir%..\..\Windows Phone Kits\8.1\Include\wrl;
Open MSYS2 Shell from the command prompt above (use the correct drive and location of your MSYS2 installation). Note that the command shell above will close and it may take a while for the MSYS2 shell to launch.
C:\msys64\msys2_shell.cmd
In your MSYS2 shell navigate to your cloned FFmpeg folder. E.g.
cd /c/ffmpeg
Invoke the following make commands
mkdir -p Output/WindowsPhone8.1/x86

cd Output/WindowsPhone8.1/x86

../../../configure \
--toolchain=msvc \
--disable-programs \
--disable-d3d11va \
--disable-dxva2 \
--arch=x86 \
--enable-shared \
--enable-cross-compile \
--target-os=win32 \
--extra-cflags="-MD -DWINAPI_FAMILY=WINAPI_FAMILY_PHONE_APP -D_WIN32_WINNT=0x0603" \
--extra-ldflags="-APPCONTAINER -subsystem:console -opt:ref WindowsPhoneCore.lib RuntimeObject.lib PhoneAppModelHost.lib -NODEFAULTLIB:kernel32.lib -NODEFAULTLIB:ole32.lib" \
--prefix=../../../Build/WindowsPhone8.1/x86

make

make install
Generated libraries can be found in Build/WindowsPhone8.1/x86 folder specified in --prefix option above
Windows Phone 8.1 ARM (Windows Phone 8.1 ARM Device in Visual Studio)
Launch VS2013 ARM Cross Tools Command Prompt
Start Menu > Visual Studio 2013 (Start Menu Folder) > Visual Studio Tools > VS2013 ARM Cross Tools Command Prompt
Set the following environment variables in the launched command prompt above. These environment variables overwrite the default paths with correct target specific ones.
SET LIB=%VSINSTALLDIR%VC\lib\store\ARM;%VSINSTALLDIR%VC\atlmfc\lib\ARM;%WindowsSdkDir%..\..\Windows Phone Kits\8.1\lib\arm;;
SET LIBPATH=%VSINSTALLDIR%VC\atlmfc\lib\ARM;%VSINSTALLDIR%VC\lib\ARM
SET INCLUDE=%VSINSTALLDIR%VC\include;%VSINSTALLDIR%VC\atlmfc\include;%WindowsSdkDir%..\..\Windows Phone Kits\8.1\Include;%WindowsSdkDir%..\..\Windows Phone Kits\8.1\Include\abi;%WindowsSdkDir%..\..\Windows Phone Kits\8.1\Include\mincore;%WindowsSdkDir%..\..\Windows Phone Kits\8.1\Include\minwin;%WindowsSdkDir%..\..\Windows Phone Kits\8.1\Include\wrl;
Open MSYS2 Shell from the command prompt above (use the correct drive and location of your MSYS2 installation). Note that the command shell above will close and it may take a while for the MSYS2 shell to launch.
C:\msys64\msys2_shell.cmd
In your MSYS2 shell navigate to your cloned FFmpeg folder. E.g.
cd /c/ffmpeg
Invoke the following make commands
mkdir -p Output/WindowsPhone8.1/ARM

cd Output/WindowsPhone8.1/ARM

../../../configure \
--toolchain=msvc \
--disable-programs \
--disable-d3d11va \
--disable-dxva2 \
--arch=arm \
--as=armasm \
--cpu=armv7 \
--enable-thumb \
--enable-shared \
--enable-cross-compile \
--target-os=win32 \
--extra-cflags="-MD -DWINAPI_FAMILY=WINAPI_FAMILY_PHONE_APP -D_WIN32_WINNT=0x0603 -D__ARM_PCS_VFP" \
--extra-ldflags="-APPCONTAINER -MACHINE:ARM -subsystem:console -opt:ref WindowsPhoneCore.lib RuntimeObject.lib PhoneAppModelHost.lib -NODEFAULTLIB:kernel32.lib -NODEFAULTLIB:ole32.lib" \
--prefix=../../../Build/WindowsPhone8.1/ARM

make

make install
Generated libraries can be found in Build/WindowsPhone8.1/ARM folder specified in --prefix option above
Troubleshooting
Building ARM libraries using Visual Studio armasm ARM assembler requires proper setup of gas-preprocessor.pl and Perl in your MSYS2 environment. Please follow the setup instruction closely.
Windows Store Certification, File I/O, and Other Details
FFmpeg is an excellent alternative to Windows Media Foundation, which supports a small fraction of the codecs that FFmpeg has. Fortunately,
FFmpeg does not use any prohibited Windows or CRT APIs, and apps linked to the DLLs built with this method pass the latest Windows App Certification Kit. However, there are important things to remember.
First, don’t forget to make sure your app package includes all the necessary FFmpeg DLLs in the root folder. In your Visual C++ project, you should include links to the FFmpeg DLLs in the root project folder, making sure to set «Build Action» to «Content» and «Copy to Output Directory» to «Copy Always». It is not enough just to link to the import libraries. You will fail certification if you require your users to install the FFmpeg DLLs separately.
You will also need to supply a custom file I/O context to any AVFormatContext rather than relying on avio_xxx functions, because the standard I/O functions utilize CRT I/O that is not supported in WinRT. (You won’t fail certification, but your app will be unable to access the file specified in the AVFormatContext.filename member, unless potentially it is located in the app’s local storage). The file I/O context needs to be initialized to point to your read, write, and seek functions, with the opaque member pointing to a struct containing an IRandomAccessStream^ that you obtain when opening a file using proper WinRT IO calls in the Windows::Storage namespace. (You need a struct to hold the IRandomAccessStream^, since you cannot cast a void* to a ref handle). Your read, write, and seek functions should cast the void* opaque argument to the struct* you define, and then use the IRandomAccessStream^ for all I/O.
Since FFmpeg I/O calls are synchronous, but the IRandomAccessStream members are all asynchronous, you will need to utilize create_task and wait() on all I/O calls in your IO context implementation functions. Note that this necessitates that any FFmpeg functions utilizing file I/O be executed on a WORKER thread, as WinRT will generate an exception if you use wait() in the UI thread. The best solution here is to create WinRT-friendly wrapper functions of the major FFmpeg functions you will utilize, by using the concurrency::create_async function, for example:
IAsyncOperation<int>^ av_read_frame_async(AVFormatContext* s, AVPacket* pkt)
{
	return create_async([s, pkt]()->int
	{
		return av_read_frame(s, pkt);
	});
}
Alternatively, if you don’t want to use Windows Runtime extensions, and don’t mind COM, you can use the Windows 8-API function CreateStreamOverRandomAccessStream, which gives you an IStream* COM interface from an IRandomAccessStream^, utilizes synchronous I/O, and can be passed as the void* opaque member of the IO context. The IStream I/O calls are easier to use with C++ since they support direct pointer buffer access (you don’t have to deal with IBuffer) and more closely correspond to the functions required in AVIOContext. However, you should still make sure to wrap any code that utilizes file I/O in a background thread, as excessive blocking of the UI does violate Windows Store guidelines and may cause your app to be terminated at runtime.
Verifying Built FFmpeg Libraries and Sample Applications
The generated FFmpeg libraries from the compilation above can be consumed by Windows Runtime Components or Apps. They can be tested against the interop component and sample media players in the following project:
https://github.com/Microsoft/FFmpegInterop
Prerequisites
- Windows 10 or greater
- Windows Terminal
- git
Installing Media Autobuild Suite
Open the Windows Terminal application, go to C:/, then run:
git clone https://github.com/m-ab-s/media-autobuild_suite
Since Windows has a strict filename length limit, we’ll need to shorten the directory name.
mv media-autobuild_suite ab-suite
then, we’ll cd into the directory.
The Questionnaire
Run ./media-autobuild_suite.bat, the script will prompt you questions which you will answer with typing a number, then pressing enter.
For a light-weight ffmpeg, I recommend saying no to including third-party libraries except libmp3lame, libopen264, and maybe rav1e and dav1d (The av1 encoder and decoder respectively).
Don’t worry about choosing an answer you’ll regret later. You can change your answers after by editing the ./build/media-autobuild_suite.ini file.
Compiling Options
Before installing all tools and compiling, the script will give you a chance to edit ./build/ffmpeg_options.txt. Delete everything in that file and put:
--disable-autodetect  # Don't automatically add libraries
--enable-small        # Reduce filesize in final binaries
--enable-version3     # Use the LGPLv3 License
--enable-libopenh264
--enable-librav1e
--disable-debug
--disable-doc
--disable-shared     # Keep everything self-contained
--disable-network    # Disables the ability to use http/other network protocols
--disable-indevs     # Disables ffmpeg's (rather sketchy) recording capabilities
--disable-outdevs    # Don't include any output devices
--disable-ffplay     # Also disables the sdl library
These are the most important options for building a light-weight, copyright-compliant ffmpeg and ffprobe binaries.
After you finish answering, the script will install all the compiling tools needed. It will take a while to install everything, but you’ll only need to do it once. You’ll find the output at ./local64/bin-video
Как собрать библиотеку с поддержкой кодека h264 на большинстве платформ.
Зачем?
Библиотеку ffmpeg я использую для воспроизведения потока с камер. Понадобилось сделать SIP телефонию с поддержкой h264. Для этого нужно было пересобрать все имеющиеся библиотеки. Все файлы для сборки либо потерялись, либо были нерабочими. Пришлось пройти этот ад снова.
Исходники
FFmpeg
Я использовал версию 2.8, которая лежала у меня с незапамятных времен. Можно использовать версию старше.
- http:
git clone -b release/2.8 https://github.com/FFmpeg/FFmpeg.git
x264
- ftp
git clone http://git.videolan.org/git/x264.git
Cборка x264
Первым делом собираем libx264. Если не требуется переходим сразу к сборке FFmpeg
Windows
- Ставим VS Studio 2015 или выше. Минимальная версия VS2013 u2.
- Ставим MSYS2.
- Открываем консоль разработчика. Пуск/Visual Studio (Version)/Developer Command Promt. В ней будут доступны пути до компилятора и компоновщика.
- Из открытой консоли открываем консоль MSYS2.
C:\msys64\msys2_shell.cmd -mingw64 -full-path- mingw32 или mingw64 в зависимости от архитектуры
- full-path — позволяет увидеть путь до компилятора (можно раскомментировать строчку set MSYS2_PATH_TYPE=inherit в msys2_shell.cmd)
- Переходим в папку с исходниками libx264.
-
CC=cl ./configure --enable-static --prefix=${PWD}/installed
make
make install
iOS
- Переходим в папку с исходниками libx264. Это будет корень LIBX264_ROOT.
- Сборка будет происходить в папке [LIBX264_ROOT]/Projects/iOS/. Создаем папку
mkdir -p Projects/iOS. - Переходим в папку проекта.
- Создаем build_x264.sh. Копируем в него скрипт.
- Запускаем сборку библиотек:
sh ./build_x264.sh. - Файлы будут лежать в [LIBX264_ROOT]/Projects/iOS/Temp.
- Запускаем сборку FAT-либок.
sh ./build_x264.sh lipo - FAT-либка будут лежать в [LIBX264_ROOT]/lib/ios.
build_x264.sh
#!/bin/sh

CONFIGURE_FLAGS="--enable-static --enable-pic --disable-cli"

ARCHS="arm64 armv7 armv7s" #x86_64 i386

# folders
CWD=$(pwd)
TEMP_DIR=$CWD/Temp
mkdir -p $TEMP_DIR
# Go to ROOT
cd ../..
WORK_DIR=$(pwd)
# output dir
FAT=$WORK_DIR/lib/ios
mkdir -p $FAT

COMPILE="y"
LIPO="y"

#echo "temp dir=$TEMP_DIR"
#echo "work dir=$WORK_DIR"

# make this files executable
chmod +x $WORK_DIR/version.sh
chmod +x $WORK_DIR/tools/gas-preprocessor.pl
chmod +x $WORK_DIR/config.sub
chmod +x $WORK_DIR/config.guess

if [ "$*" ]
then
    if [ "$*" = "lipo" ]
    then
        # skip compile
        COMPILE=
    else
        ARCHS="$*"
        if [ $# -eq 1 ]
        then
            # skip lipo
            LIPO=
        fi
    fi
fi

if [ "$COMPILE" ]
then
    #CWD=$PWD
    for ARCH in $ARCHS
    do
        echo "building $ARCH..."
        mkdir -p "$TEMP_DIR/$ARCH"

        CFLAGS="-arch $ARCH"
        ASFLAGS=

        if [ "$ARCH" = "i386" -o "$ARCH" = "x86_64" ]
        then
            PLATFORM="iPhoneSimulator"
            CPU=
            if [ "$ARCH" = "x86_64" ]
            then
                CFLAGS="$CFLAGS -mios-simulator-version-min=7.0"
                HOST=
            else
                CFLAGS="$CFLAGS -mios-simulator-version-min=5.0"
            HOST="--host=i386-apple-darwin"
            fi
        else
            PLATFORM="iPhoneOS"
            if [ $ARCH = "arm64" ]
            then
                HOST="--host=aarch64-apple-darwin"
            XARCH="-arch aarch64"
            else
                HOST="--host=arm-apple-darwin"
            XARCH="-arch arm"
            fi
            CFLAGS="$CFLAGS -fembed-bitcode -mios-version-min=7.0"
            ASFLAGS="$CFLAGS"
        fi

        XCRUN_SDK=`echo $PLATFORM | tr '[:upper:]' '[:lower:]'`
        CC="xcrun -sdk $XCRUN_SDK clang"
        if [ $PLATFORM = "iPhoneOS" ]
        then
            export AS="$WORK_DIR/tools/gas-preprocessor.pl $XARCH -- $CC"
        else
            export -n AS
        fi
        CXXFLAGS="$CFLAGS"
        LDFLAGS="$CFLAGS"

        CC=$CC ./configure \
            $CONFIGURE_FLAGS \
            $HOST \
            --extra-cflags="$CFLAGS" \
            --extra-asflags="$ASFLAGS" \
            --extra-ldflags="$LDFLAGS" \
            --prefix="$TEMP_DIR/$ARCH" || exit 1

        make clean
        make -j3 install || exit 1

    done
fi

if [ "$LIPO" ]
then
    echo "building fat binaries..."

    set - $ARCHS
    THIN=$TEMP_DIR
    echo "$THIN"

    cd $THIN/$1/lib
    for LIB in *.a
    do
        cd $WORK_DIR
        echo lipo -create `find $THIN -name $LIB` -output $FAT/$LIB 1>&2
        lipo -create `find $THIN -name $LIB` -output $FAT/$LIB
    done

    cd $WORK_DIR
    #cp -rf $THIN/$1/include $WORK_DIR
fi
OSX
- Алгоритм сборки для OSX совпадает с iOS. Немного отличается скрипт и рабочая папка [LIBX264_ROOT]/Projects/OSX/
- На моей машине для i386 сразу создавалась FAT-либка. Я просто копировал ее в [LIBX264_ROOT]/lib/osx/
build_x264.sh
#!/bin/sh

CONFIGURE_FLAGS="--enable-static --enable-pic --disable-cli --disable-asm"

ARCHS="x86_64 i386" #

# directiries
CWD=$(pwd)
TEMP_DIR=$CWD/Temp
mkdir -p $TEMP_DIR
cd ../..
WORK_DIR=$(pwd)
FAT=$WORK_DIR/lib/osx
mkdir -p $FAT

COMPILE="y"
LIPO="y"

echo "temp dir=$TEMP_DIR"
echo "work dir=$WORK_DIR"

chmod +x $WORK_DIR/version.sh
chmod +x $WORK_DIR/tools/gas-preprocessor.pl
chmod +x $WORK_DIR/config.sub
chmod +x $WORK_DIR/config.guess

if [ "$*" ]
then
    if [ "$*" = "lipo" ]
    then
        # skip compile
        COMPILE=
    else
        ARCHS="$*"
        if [ $# -eq 1 ]
        then
            # skip lipo
            LIPO=
        fi
    fi
fi

if [ "$COMPILE" ]
then
    #CWD=$PWD
    for ARCH in $ARCHS
    do
        echo "building $ARCH..."
        mkdir -p "$TEMP_DIR/$ARCH"

        CFLAGS="-arch $ARCH"
        ASFLAGS=

        PLATFORM="macosx"
        XCRUN_SDK=`echo $PLATFORM | tr '[:upper:]' '[:lower:]'`
        CC="xcrun -sdk $XCRUN_SDK clang"

        CXXFLAGS="$CFLAGS"
        LDFLAGS="$CFLAGS"

        CC=$CC ./configure \
            $CONFIGURE_FLAGS \
            $HOST \
            --extra-cflags="$CFLAGS" \
            --extra-asflags="$ASFLAGS" \
            --extra-ldflags="$LDFLAGS" \
            --prefix="$TEMP_DIR/$ARCH" || exit 1

        make clean
        make -j3 install || exit 1

    done
fi

# TODO i386 makes fat lib. need only cp Temp/i386/lib/*.a $WORK_DIR/lib/osx
if [ "$LIPO" ]
then
    echo "building fat binaries..."
    cp Temp/i386/lib/*.a $WORK_DIR/lib/osx

    #set - $ARCHS
    #THIN=$TEMP_DIR
    #echo "$THIN"

    #cd $THIN/$1/lib
    #for LIB in *.a
    #do
    #    cd $WORK_DIR
    #    echo lipo -create `find $THIN -name $LIB` -output $FAT/$LIB 1>&2
    #    lipo -create `find $THIN -name $LIB` -output $FAT/$LIB
    #done

    #cd $WORK_DIR
    #cp -rf $THIN/$1/include $WORK_DIR
fi
Android
- Ставим Cygwin (Mingw,MSYS2).
- Ставим Android NDK. Раньше качался отдельно, сейчас только через SDK Manager в Android Studio.
- Открываем консоль Cygwin.
- Переходим в папку с исходниками
cd /cygdrive/{disk letter}/{path to x264}/. - Создаем папку
mkdir -p Projects/Android. cd Projects/Android- Создаем build_x264.sh. Копируем в него скрипт.
- Правим переменные NDK, SYSROOT, TOOLCHAIN, ARCH.
- Запускаем сборку библиотек:
sh ./build_x264.sh.
build_x264.sh
#!/bin/sh

NDK=C:/Users/UserName/AppData/Local/Android/sdk/ndk-bundle
SYSROOT=$NDK/platforms/android-16/arch-arm/
TOOLCHAIN=$NDK/toolchains/arm-linux-androideabi-4.9/prebuilt/windows-x86_64

ARCH=armeabi-v7a
WORK_DIR=$(pwd)
TEMP_DIR=$WORK_DIR/temp
ROOT_DIR=$WORK_DIR/../..
PREFIX=$TEMP_DIR/$ARCH

delete()
{
   echo "================== Deleting libs"
   rm ./lib/android/*.a
}

copy_libs()
{
   echo "================== Copy libs"
   OUT_DIR=$ROOT_DIR/lib/android/$ARCH
   mkdir -p $OUT_DIR
   cp $PREFIX/lib/*.a $OUT_DIR
}

build_armv7()
{
   ./configure \
    --prefix=$PREFIX \
    --enable-static \
    --enable-pic \
    --host=arm-linux \
    --cross-prefix=$TOOLCHAIN/bin/arm-linux-androideabi- \
    --sysroot=$SYSROOT

    make clean
	make
	make install
}

cd ../..

echo $(pwd)

build_armv7
copy_libs
Cборка FFmpeg
Windows
- Ставим VS Studio 2015 или выше. Минимальная версия VS2013 u2.
- Ставим MSYS2.
- Открываем консоль разработчика. Пуск/Visual Studio (Version)/Developer Command Promt. В ней будут доступны пути до компилятора и компоновщика.
- Из открытой консоли открываем консоль MSYS2.
C:\msys64\msys2_shell.cmd -mingw64 -full-path- mingw32 или mingw64 в зависимости от архитектуры
- full-path — позволяет увидеть путь до компилятора (можно раскомментировать строчку set MSYS2_PATH_TYPE=inherit в msys2_shell.cmd)
- Переходим в папку с исходниками ffmpeg.
-
./configure --toolchain=msvc --disable-shared --disable-doc --disable-ffmpeg --disable-ffplay --disable-ffprobe --disable-ffserver --disable-avdevice --disable-symver --enable-libx264 --enable-gpl --prefix=${PWD}/installed --extra-cflags="-IC:\\x264\\installed\\include" --extra-ldflags="-LC:\\x264\\installed\\lib"- –disable-shared — статические библиотеки, –disable-static — динамические.
- –disable-asm — если будет ругаться на ассемблерные вставки. Я собирал без него на vs2015. Если использовать vs2010, то придется потанцевать с yasm(nasm), c99conv, c99wrap.
- –arch=x86_64 — если требуется собрать x64 архитектуру. Должен быть MSYS64 и libx264 с x64 архитектурой.
- –prefix — укажет папку куда выполнится make install.
- –extra-ldflags — не работает на win7. ругается на линковку libx264.a. Нужно перенести libx264 в корень ffmpeg, либо в temp папку, которую создает configure в корне при выполнении.
-
- если не использовать –prefix собраные либы будут лежать в подпапках рядом с исходниками.
iOS
- Переходим в папку с исходниками ffmpeg. Это будет корень FFMPEG_ROOT.
- Сборка будет происходить в папке [FFMPEG_ROOT]/Projects/iOS/. Создаем папку
mkdir -p Projects/iOS. - Переходим в папку проекта.
- Создаем build_ffmpeg.sh. Копируем в него скрипт.
- Правим пути до libx264 (если требуется).
- Запускаем сборку библиотек:
sh ./build_ffmpeg.sh. - Файлы будут лежать в [FFMPEG_ROOT]/Projects/iOS/Temp.
- Запускаем сборку FAT-либок.
sh ./build_ffmpeg.sh lipo - FAT-либка будут лежать в [build_ffmpeg]/lib/ios.
build_ffmpeg.sh
#!/bin/sh

# ffmpeg_build.sh

FFMPEG_SOURCE=ffmpeg-2.8
ARCHS="arm64 armv7s armv7" #x86_64 i386

CONFIGURE_FLAGS="--enable-cross-compile\
                 --disable-debug\
                 --disable-programs \
                 --disable-doc\
                 --disable-bzlib \
                 --enable-pic"

# folders
CWD=$(pwd)
TEMP_DIR=$CWD/Temp
mkdir -p $TEMP_DIR
cd ../..
WORK_DIR=$(pwd)
FAT=$WORK_DIR/lib/ios
mkdir -p $FAT

chmod +x ./configure
chmod +x ./version.sh

# absolute path to x264 library
X264="$WORK_DIR/../x264/Project/iOS/Temp"

echo "temp dir=$TEMP_DIR"
echo "work dir=$WORK_DIR"
echo "x264 dir=$X264"

if [ "$X264" ]
then
    CONFIGURE_FLAGS="$CONFIGURE_FLAGS --enable-gpl --enable-libx264"
fi

#echo "$CONFIGURE_FLAGS"

COMPILE="y"
LIPO="y"
DEPLOYMENT_TARGET="7.0"

if [ "$*" ]
then
    if [ "$*" = "lipo" ]
    then
        # skip compile
        COMPILE=
    else
        ARCHS="$*"
        if [ $# -eq 1 ]
        then
            # skip lipo
            LIPO=
        fi
    fi
fi

if [ "$COMPILE" ]
then
    # install dependences
    if [ ! `which yasm` ]
    then
        echo 'Yasm not found'
        if [ ! `which brew` ]
        then
            echo 'Homebrew not found. Trying to install...'
                        ruby -e "$(curl -fsSL https://raw.githubusercontent.com/Homebrew/install/master/install)" \
                || exit 1
        fi
        echo 'Trying to install Yasm...'
        brew install yasm || exit 1
    fi
    if [ ! `which gas-preprocessor.pl` ]
    then
        echo 'gas-preprocessor.pl not found. Trying to install...'
        (curl -L https://github.com/libav/gas-preprocessor/raw/master/gas-preprocessor.pl \
            -o /usr/local/bin/gas-preprocessor.pl \
            && chmod +x /usr/local/bin/gas-preprocessor.pl) \
            || exit 1
    fi

    # arch loop
    for ARCH in $ARCHS
    do
        echo "building $ARCH..."
        mkdir -p "$TEMP_DIR/$ARCH"
        #cd "$TEMP_DIR/$ARCH"

        CFLAGS="-arch $ARCH"
        if [ "$ARCH" = "i386" -o "$ARCH" = "x86_64" ]
        then
            PLATFORM="iPhoneSimulator"
            CFLAGS="$CFLAGS -mios-simulator-version-min=$DEPLOYMENT_TARGET"
        else
            PLATFORM="iPhoneOS"
            CFLAGS="$CFLAGS -mios-version-min=$DEPLOYMENT_TARGET -fembed-bitcode"
            if [ "$ARCH" = "arm64" ]
            then
                EXPORT="GASPP_FIX_XCODE5=1"
            fi
        fi

        XCRUN_SDK=`echo $PLATFORM | tr '[:upper:]' '[:lower:]'`
        CC="xcrun -sdk $XCRUN_SDK clang"

        # force "configure" to use "gas-preprocessor.pl" (FFmpeg 3.3)
        if [ "$ARCH" = "arm64" ]
        then
            AS="gas-preprocessor.pl -arch aarch64 -- $CC"
        else
            AS="$CC"
        fi

        CXXFLAGS="$CFLAGS"
        LDFLAGS="$CFLAGS"
        if [ "$X264" ]
        then
            CFLAGS="$CFLAGS -I$X264/$ARCH/include"
            LDFLAGS="$LDFLAGS -L$X264/$ARCH/lib"
        fi
        if [ "$FDK_AAC" ]
        then
            CFLAGS="$CFLAGS -I$FDK_AAC/include"
            LDFLAGS="$LDFLAGS -L$FDK_AAC/lib"
        fi

        # build
        ./configure \
            --target-os=darwin \
            --arch=$ARCH \
            --cc="$CC" \
            --as="$AS" \
            $CONFIGURE_FLAGS \
            --extra-cflags="$CFLAGS" \
            --extra-ldflags="$LDFLAGS" \
            --prefix="$TEMP_DIR/$ARCH" \
        || exit 1

        make clean
        make -j3 install || exit 1

    done
fi

if [ "$LIPO" ]
then
    echo "building fat binaries..."
    #mkdir -p $FAT
    set - $ARCHS
    #CWD=`pwd`
    #cd $THIN/$1/lib
    #echo "==== $1"
    THIN=$TEMP_DIR

    echo "$THIN"
    cd $THIN/$1/lib/
    for LIB in *.a
    do
        cd $WORK_DIR

        echo lipo -create `find $THIN -name $LIB` -output $FAT/$LIB 1>&2
        lipo -create `find $THIN -name $LIB` -output $FAT/$LIB || exit 1
    done

    cd $WORK_DIR
    cp -rf $THIN/$1/include $WORK_DIR
fi
OSX
- Переходим в папку с исходниками ffmpeg. Это будет корень FFMPEG_ROOT.
- Сборка будет происходить в папке [FFMPEG_ROOT]/Projects/OSX/. Создаем папку
mkdir -p Projects/OSX. - Переходим в папку проекта.
- Создаем build_ffmpeg.sh. Копируем в него скрипт.
- Правим пути до libx264 (если требуется).
- Запускаем сборку библиотек:
sh ./build_ffmpeg.sh. - Файлы будут лежать в [FFMPEG_ROOT]/Projects/OSX/Temp.
- Запускаем сборку FAT-либок.
sh ./build_ffmpeg.sh lipo - FAT-либка будут лежать в [build_ffmpeg]/lib/osx.
build_ffmpeg.sh
#!/bin/sh

FFMPEG_SOURCE=ffmpeg-2.8
ARCHS="x86_64 i386" #

CONFIGURE_FLAGS="--enable-cross-compile\
                 --disable-debug\
                 --disable-programs \
                 --disable-doc\
                 --disable-bzlib \
                 --disable-asm \
                 --disable-vda \
                 --enable-pic"

# folders
CWD=$(pwd)
TEMP_DIR=$CWD/Temp
mkdir -p $TEMP_DIR
cd ../..
WORK_DIR=$(pwd)
FAT=$WORK_DIR/lib/osx
mkdir -p $FAT

chmod +x ./configure
chmod +x ./version.sh

# absolute path to x264 library
X264="$WORK_DIR/../x264/Project/OSX/Temp"

echo "temp dir=$TEMP_DIR"
echo "work dir=$WORK_DIR"
echo "x264 dir=$X264"

if [ "$X264" ]
then
    CONFIGURE_FLAGS="$CONFIGURE_FLAGS --enable-gpl --enable-libx264"
fi

#echo "$CONFIGURE_FLAGS"

COMPILE="y"
LIPO="y"
DEPLOYMENT_TARGET="7.0"

if [ "$*" ]
then
    if [ "$*" = "lipo" ]
    then
        # skip compile
        COMPILE=
    else
        ARCHS="$*"
        if [ $# -eq 1 ]
        then
            # skip lipo
            LIPO=
        fi
    fi
fi

if [ "$COMPILE" ]
then
    # install dependences
    if [ ! `which yasm` ]
    then
        echo 'Yasm not found'
        if [ ! `which brew` ]
        then
            echo 'Homebrew not found. Trying to install...'
                        ruby -e "$(curl -fsSL https://raw.githubusercontent.com/Homebrew/install/master/install)" \
                || exit 1
        fi
        echo 'Trying to install Yasm...'
        brew install yasm || exit 1
    fi
    if [ ! `which gas-preprocessor.pl` ]
    then
        echo 'gas-preprocessor.pl not found. Trying to install...'
        (curl -L https://github.com/libav/gas-preprocessor/raw/master/gas-preprocessor.pl \
            -o /usr/local/bin/gas-preprocessor.pl \
            && chmod +x /usr/local/bin/gas-preprocessor.pl) \
            || exit 1
    fi

    # arch loop
    for ARCH in $ARCHS
    do
        echo "building $ARCH..."
        mkdir -p "$TEMP_DIR/$ARCH"

        CFLAGS="-arch $ARCH"
        PLATFORM="macosx"
        XCRUN_SDK=`echo $PLATFORM | tr '[:upper:]' '[:lower:]'`
        CC="xcrun -sdk $XCRUN_SDK clang"

        CXXFLAGS="$CFLAGS"
        LDFLAGS="$CFLAGS"
        if [ "$X264" ]
        then
            CFLAGS="$CFLAGS -I$X264/$ARCH/include"
            LDFLAGS="$LDFLAGS -L$X264/$ARCH/lib"
        fi
        if [ "$FDK_AAC" ]
        then
            CFLAGS="$CFLAGS -I$FDK_AAC/include"
            LDFLAGS="$LDFLAGS -L$FDK_AAC/lib"
        fi

        #
        ./configure \
            --target-os=darwin \
            --arch=$ARCH \
            --cc="$CC" \
            --as="$AS" \
            $CONFIGURE_FLAGS \
            --extra-cflags="$CFLAGS" \
            --extra-ldflags="$LDFLAGS" \
            --prefix="$TEMP_DIR/$ARCH" \
        || exit 1

        make clean
        make -j3 install || exit 1

    done
fi

if [ "$LIPO" ]
then
    echo "building fat binaries..."
    #mkdir -p $FAT
    set - $ARCHS
    THIN=$TEMP_DIR

    echo "$THIN"
    cd $THIN/$1/lib/
    for LIB in *.a
    do
        cd $WORK_DIR

        echo lipo -create `find $THIN -name $LIB` -output $FAT/$LIB 1>&2
        lipo -create `find $THIN -name $LIB` -output $FAT/$LIB || exit 1
    done

    cd $WORK_DIR
    cp -rf $THIN/$1/include $WORK_DIR
fi
Android
- Ставим Cygwin (Mingw,MSYS2).
- Ставим Android NDK. Раньше качался отдельно, сейчас только через SDK Manager в Android Studio.
- Открываем консоль Cygwin.
- Переходим в папку с исходниками
cd /cygdrive/{disk letter}/{path to ffmpeg}/. - Создаем папку
mkdir -p Projects/Android. cd Projects/Android- Создаем build_ffmpeg.sh. Копируем в него скрипт.
- Правим переменные NDK, SYSROOT, TOOLCHAIN, ARCH.
- Запускаем сборку библиотек:
sh ./build_ffmpeg.sh.
build_ffmpeg.sh
#!/bin/sh

FFMPEG_SOURCE=ffmpeg-2.8

# start cygwin
# cd /cygdrive/{disk letter}/{path to iridium}/libs/$FFMPEG_SOURCE/Projects/Android
# ./{this file}

NDK=C:/Users/UserName/AppData/Local/Android/sdk/ndk-bundle
SYSROOT=$NDK/platforms/android-16/arch-arm/
TOOLCHAIN=$NDK/toolchains/arm-linux-androideabi-4.9/prebuilt/windows-x86_64

ARCH=armv7-a
FARCH=armeabi-v7a
WORK_DIR=$(pwd)
#TEMP_DIR=$WORK_DIR/temp
TEMP_DIR=D:/Work/iridium/trunk/Android/libs/ffmpeg-2.8/Projects/Android/temp
ROOT_DIR=$WORK_DIR/../..
PREFIX=$TEMP_DIR/$FARCH

export TMPDIR=D:/tmp

X264_DIR=D:/Work/iridium/trunk/Android/libs/x264/Projects/Android/temp/armeabi-v7a
X264_CFLAGS="-I$X264_DIR/include"
X264_LDFLAGS="-L$X264_DIR/lib"

delete()
{
   echo "================== Deleting libs"
   rm ./lib/android/*.a
}

copy_libs()
{
   echo "================== Copy libs"
   #cp lib/osx/x86_32/usr/local/lib/*.a lib/android
   OUT_DIR=$ROOT_DIR/lib/android/$FARCH
   mkdir -p $OUT_DIR
   cp $PREFIX/lib/*.a $OUT_DIR
}

build_armv7()
{
   ./configure \
    --prefix=$PREFIX \
    --enable-static \
    --disable-shared \
    --disable-doc \
    --disable-programs \
    --disable-avdevice \
    --disable-bzlib \
    --disable-doc \
    --disable-symver \
    --cross-prefix=$TOOLCHAIN/bin/arm-linux-androideabi- \
    --target-os=linux \
    --arch=arm \
    --cpu=cortex-a8 \
    --enable-cross-compile \
    --sysroot=$SYSROOT \
    --enable-gpl \
    --enable-libx264 \
    --extra-cflags="-Os -fpic -march=$ARCH -mfloat-abi=softfp -mfpu=vfpv3 -marm $X264_CFLAGS" \
    --extra-ldflags="$X264_LDFLAGS" \
    $ADDITIONAL_CONFIGURE_FLAG || exit 1

    make clean
	make
	make install
}

cd ../..

build_armv7
Ссылки
- FFmpeg
- VS build FFmpeg
- build ios script
Оставить комментарий через Telegram
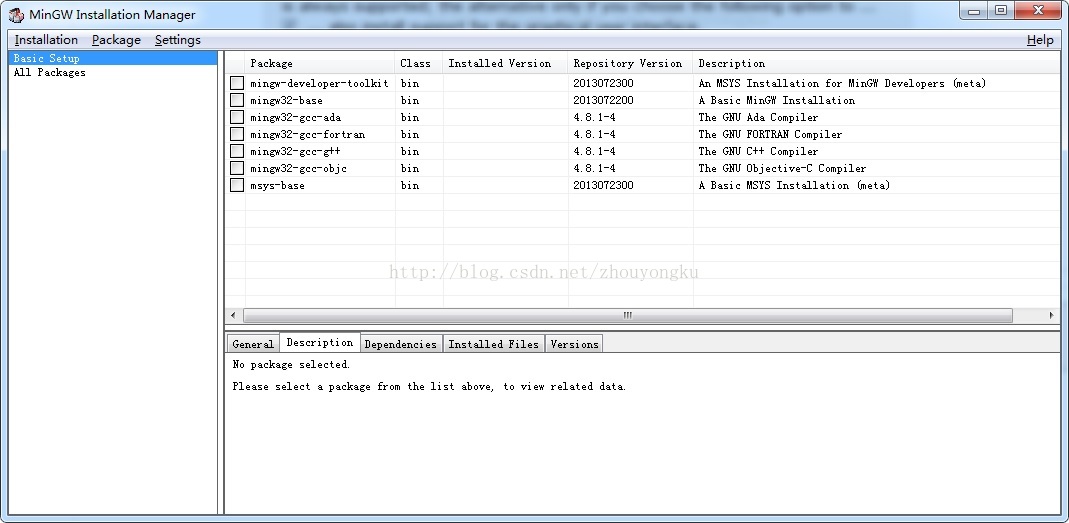
С помощью многих пользователей сети я наконец получил FFmpeg V2.6.1. Из-за разницы в среде компиляции и версии программы это вызвало много ненужной траты времени. Вот процесс компиляции и решения возникших проблем для вашего удобства. .
Среда компиляции: ПК Windows7 64bit, инструмент компиляции: MinGW + MSYS + yasm Программа для компиляции: ffmpeg-snapshot-git.tar.bz2
1. Загрузите FFmpeg
Официальный сайт FFMPEG:http://ffmpeg.org/download.html
FFmpeg SVN:svn://svn.mplayerhq.hu/ffmpeg/trunk
FFmpeg GIT: git://source.ffmpeg.org/ffmpeg.git ffmpeg
Поскольку SVN-код FFmpeg перестал обновляться, код, загруженный с svn: //svn.mplayerhq.hu/ffmpeg/trunk, не соответствует заголовочному файлу, загруженному на официальном сайте после компиляции! Таким образом, вы можете скачать или загрузить только сжатый пакет git из git!
Мои шаги загрузки: открытьhttp://ffmpeg.org/download.html

После скачивания ffmpeg-snapshot-git.tar.bz2 распакуйте его в D: \ work \ code \ FFmpeg Любой путь (желательно на английском, удобный для работы MinGW)
2. Загрузите MinGW + msys.
MinGW-Minimalist GNU for Windows — это набор библиотек и файлов заголовков, имитирующих Linux, работающий под Windows.
Msys-Minimal SYStem- это новейшая система, имитирующая Linux, работающую под Windows.Код может быть скомпилирован через окно командной строки, как в linux bash.
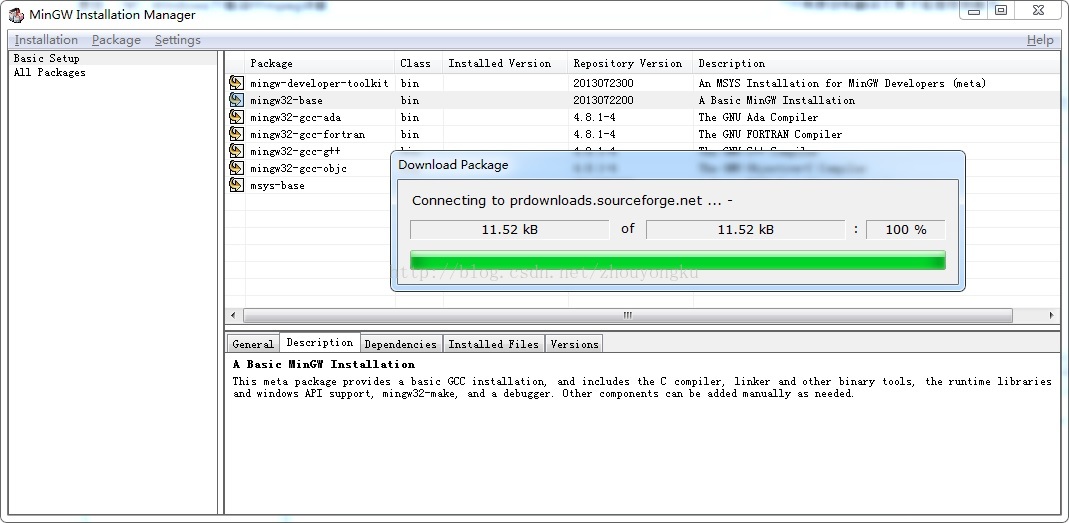
Посадкаhttp://sourceforge.net/projects/mingw/files/
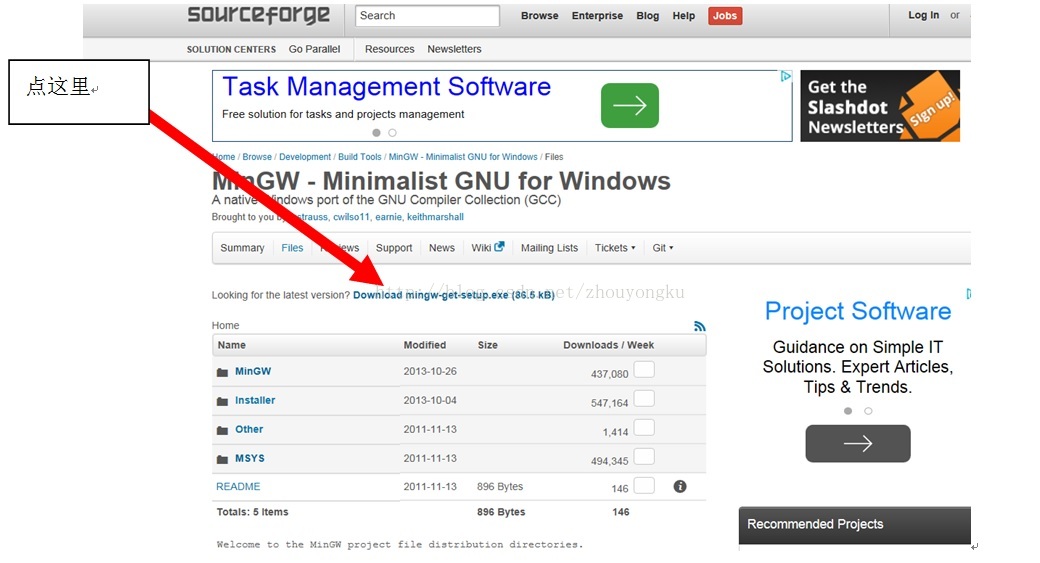

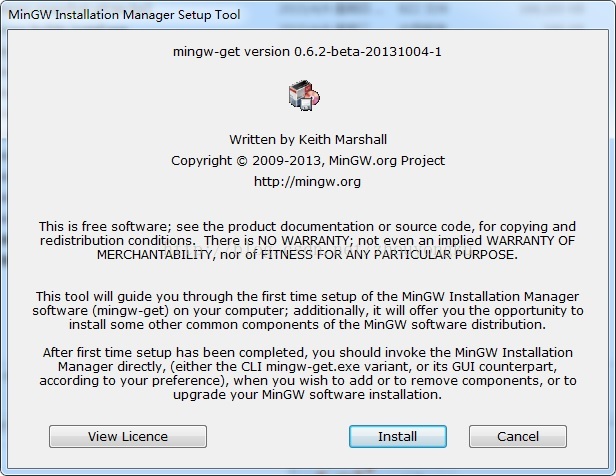
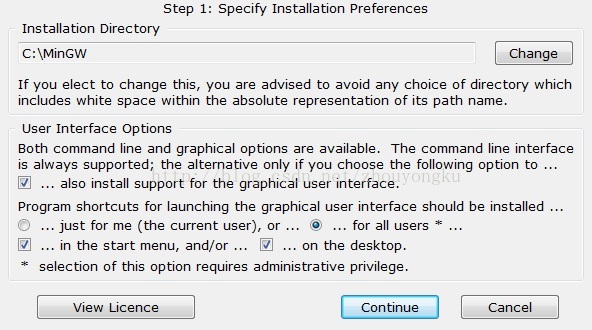
После завершения загрузки нажмите «Установить». Ключ должен выбрать путь C: \ MinGW в качестве пути установки, и вы можете сразу перейти к следующему шагу.
Наконец, нажмите «Продолжить», чтобы подтвердить завершение установки, и введите ссылку для загрузки.
Щелкните поле списка слева и выберите «Основные настройки». Некоторые необходимые элементы для загрузки появятся справа, просто выберите все.
После выбора нажмите меню Установка-> Применить изменения, чтобы начать загрузку.
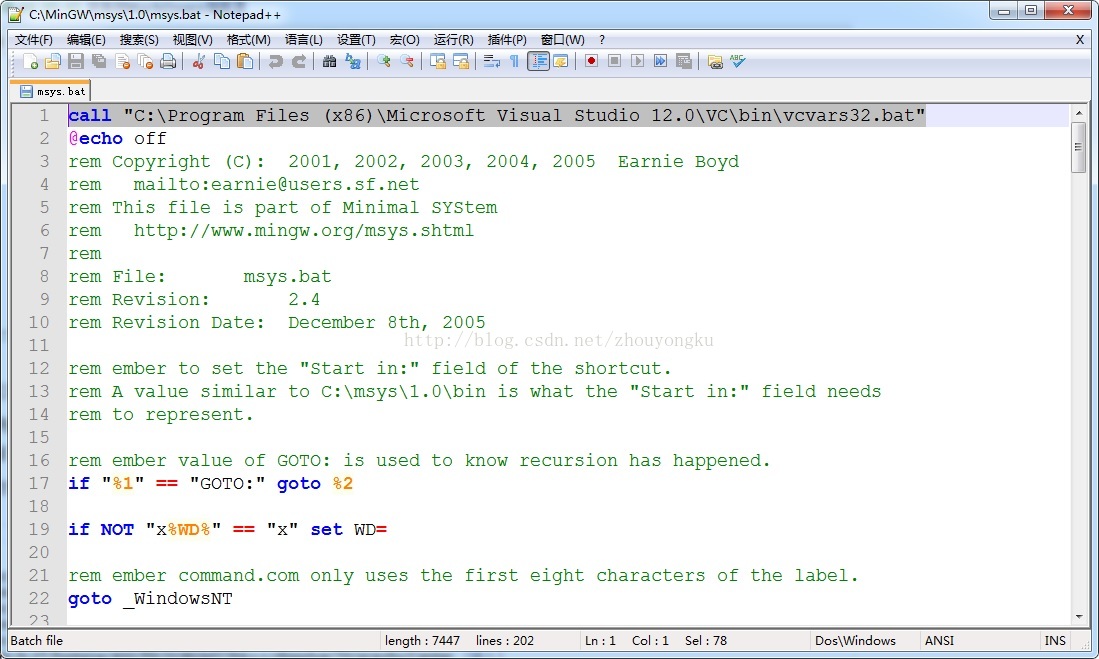
В-третьих, настройте MinGW
После завершения загрузки MinGW введите каталог установки, если это C: \ MinGW, каталог будет C: \ MinGW \ msys \ 1.0
Откройте файл msys.bat в Блокноте и добавьте в первую строку:
call «C:\Program Files (x86)\Microsoft Visual Studio 12.0\VC\bin\vcvars32.bat»
Каталог, соответствующий вызову, — это каталог, в котором находится ваша программа установки VC.
В-четвертых, скачать yasm
Yasm.exe необходимо открыть при компиляции ffmpeghttp://yasm.tortall.net/Download.htmlЗагрузите yasm, соответствующий вашей версии. Я использую биты win764, поэтому я скачалWin64 .exe(Для общего использования в 64-битной Windows) Если ваша 32-битная система, пожалуйста, загрузите 32-битную программу
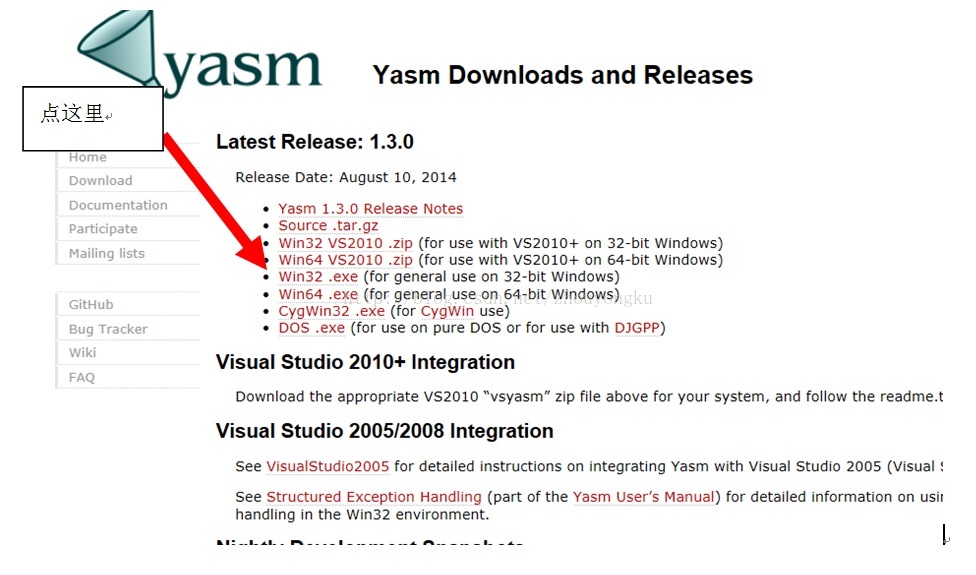
Пятый, настраиваем ясм
Измените загруженный yasm-1.3.0-win64.exe или yasm-1.3.0-win32.exe на yasm.exe и скопируйте его в папку c: \ windows \ system32 — это не требует слишком много среды Переменная конфигурация
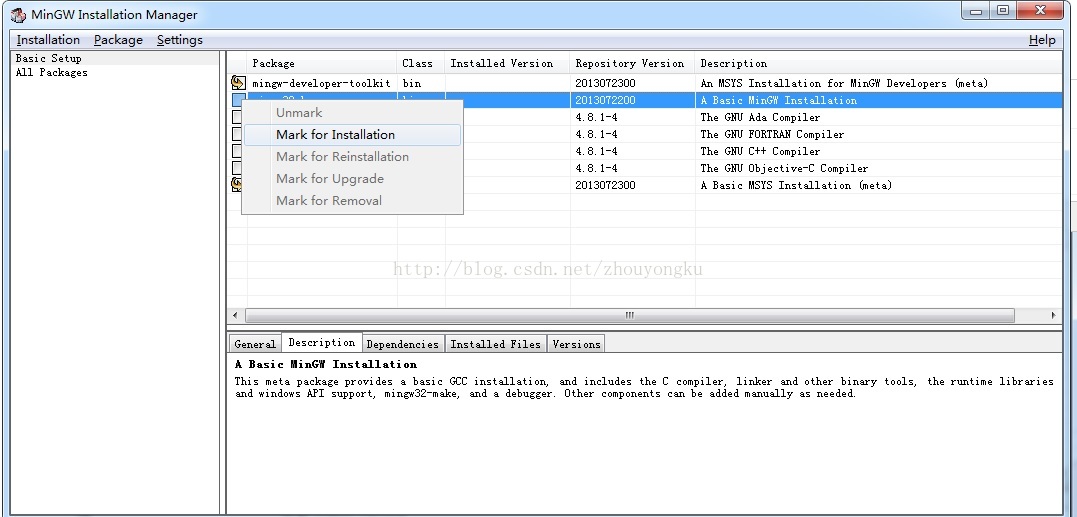
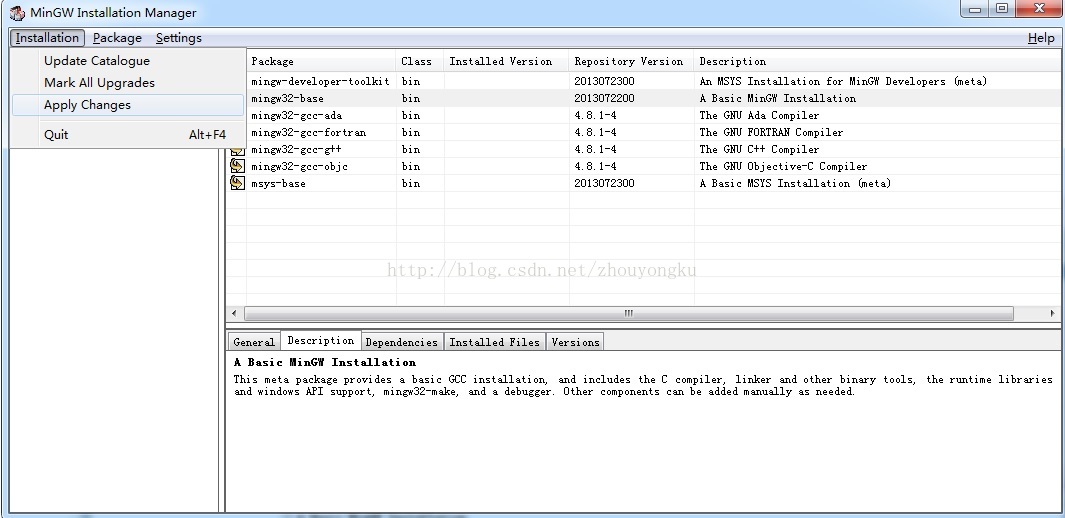
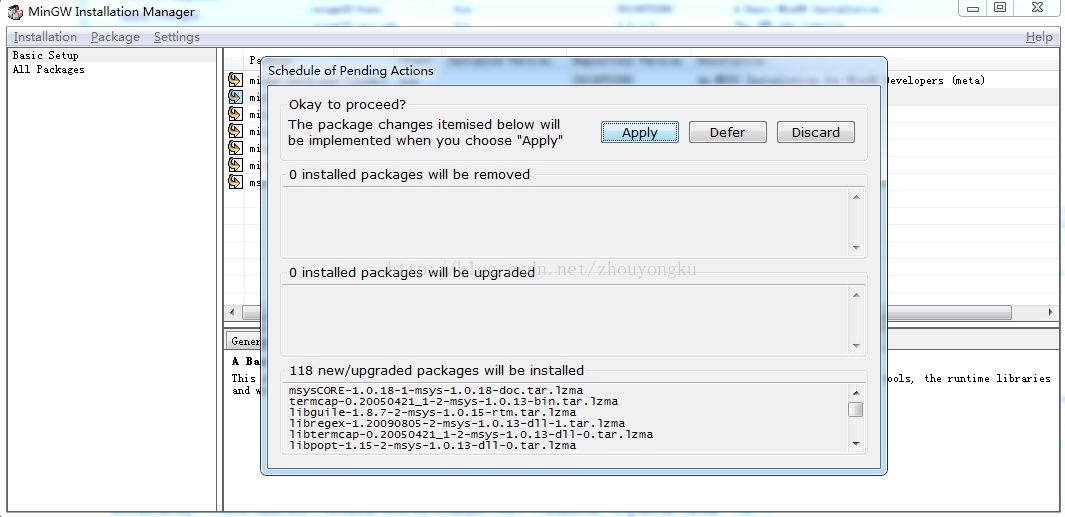
Шесть, скомпилируйте FFmpeg
1. Запустите программу.
Запустите C: \ MinGW \ msys \ 1.0 \ msys.bat и введите путь декомпрессии кода ffmpeg во всплывающем окне
cd D:\work\code\FFmpeg
2. Настройте make-файл FFmpeg.
Введите ./configure —enable-shared —disable-static —enable-memalign-hack.
3. Скомпилируйте FFmpeg.
make
Файлы, сгенерированные ffmpeg, находятся в соответствующих каталогах. Вы можете искать * .dll и * .lib для экспорта этих сгенерированных библиотек с помощью функции поиска файлов Windows.
Семь, проблемы со временем компиляции
Если вы скомпилируете старую версию FFmpeg, возникнут следующие проблемы
1、gcc is unable to create an executable file.
Это потому, что компилятор gcc не готов. В процессе установки должна быть ошибка. Переустановите его.
2、error: static declaration of ‘lrint’ follows non-static declaration
../libavutil/libm.h:62: error: static declaration of ‘lrint’ follows non-static declaration
../libavutil/libm.h:69: error: static declaration of ‘lrintf’ follows non-static declaration
../libavutil/libm.h:76: error: static declaration of ’round’ follows non-static declaration
../libavutil/libm.h:83: error: static declaration of ’roundf’ follows non-static declaration
Определите lrint, lrintf, round, roundf и т. Д. В config.h в пути кода ffmpeg как 1
3、implicit declaration of function ‘strcasecmp’
Эта проблема вызвана отсутствием функции strcasecmp в среде MinGW. Вы можете написать свой собственный код и добавить его в проект, или вы можете написать свой собственный код и сохранить его как файл и поместить его в каталог include MinGW.
Сохраните следующий код как strcasecmp.h в каталоге include mingw.
Включите этот файл в avstring.h и metadata.h, проблема решена.
-
#ifndef __STRCASECMP_H____ -
#define __STRCASECMP_H____ -
static inline char __hack_charget( char c ) -
{ -
if(c >= 'a' && c <= 'z') -
c += 'A' - 'a'; -
return c; -
} -
static inline int hack_strcasecmp( char const *a, char const *b ) -
{ -
char ac, bc; -
int r; -
for(;;) { -
ac = __hack_charget(*a++); -
bc = __hack_charget(*b++); -
r = (int)ac - (int)bc; -
if(r) -
return r; -
if(!ac) -
return 0; -
} -
} -
static inline int hack_strncasecmp( char const *a, char const *b, int n ) -
{ -
char ac, bc; -
int r, i; -
for(i = 0; i < n; ++i) { -
ac = __hack_charget(*a++); -
bc = __hack_charget(*b++); -
r = (int)ac - (int)bc; -
if(r) -
return r; -
if(!ac) -
return 0; -
} -
return 0; -
} -
#define strcasecmp hack_strcasecmp -
#define strncasecmp hack_strncasecmp -
#endif
4. -Werror = implicit- prompt
Это означает, что ошибка функции будет неявно объявлена.Вы можете изменить файл config.mak, созданный ./configure в каталоге FFmpeg, и удалить места, связанные с Werror. Такие как:
-Werror = безопасность формата -Werror = объявление-неявной-функции -Werror = пропавшие-прототипы -Werror = тип-возвращаемый -Werror = vla Затем удалить -Werror = объявление-неявной-функции
Цитата:http://blog.sina.com.cn/s/blog_4ae178ba01010353.html
http://blog.chinaunix.net/uid-20718335-id-2980793.html
http://www.xuebuyuan.com/1428648.html
I’m a big fan of the FFmpeg builds by Kyle Schwarz
though recently the website was down and I had to compile FFmpeg
manually. Although compiling FFmpg on Windows is simple, once
you’ve figured out the details, it will still take you some time
to get it right.
Therefore I’m providing these instructions that you can follow
step-by-step and will build a shared library for FFmpeg with X264.
Note that at the time of writing you can’t link
statically with X264, see the X264_API_IMPORTS define in
FFmpegs source. I’ve tried to keep things as short as possible.
Hit me up on Twitter when you have
any questions. Thanks Matthias C. M. Troffaes for
providing fixes that allow us to compile X264 with MSVC with MSYS2.
You can download the shell script containing all the steps
from this gist
1. Install MSYS2
- Download MSYS2, msys2-x86_64-{date}.exe
- Install into
c:/msys64 - Edit
c:/msys64/msys2_shell.cmdand removeremfrom the line withrem MSYS2_PATH_TYPE=inherit - Open a
x64 Native Tools Command Prompt for VS 2019 - Run
c:/msys64/msys2_shell.cmd - Use the
MSYS2 shell for the next stepsand enter:
pacman -Syu
pacman -S make
pacman -S diffutils
pacman -S yasm
pacman -S nasm

mv /usr/bin/link.exe /usr/bin/link.exe.bak
2. Get the sources for x264 and ffmpeg
mkdir tmp
cd tmp
mkdir sources
mkdir build
cd sources

git clone --depth 1 https://code.videolan.org/videolan/x264.git
git clone --depth 1 git://source.ffmpeg.org/ffmpeg.git
3. Fix the build scripts for x264
cd tmp/sources/x264
curl "http://git.savannah.gnu.org/gitweb/?p=config.git;a=blob_plain;f=config.guess;hb=HEAD" > config.guess
sed -i 's/host_os = mingw/host_os = msys/' configure
4. Compile X264
- Open
x64 Native Tools Command Prompt for VS2019 - Run
c:/msys64/msys2_shell.cmd - Use the
MSYS2 shell for the next steps
cd tmp/build
mkdir x264
cd x264

CC=cl ./../../sources/x264/configure --prefix=./../../installed --enable-shared
make -j 8
make install
mv ./../../installed/lib/libx264.dll.lib ./../../installed/lib/libx264.lib
5. Compile FFmpeg
- Open
x64 Native Tools Command Prompt for VS2019 - Run
c:/msys64/msys2_shell.cmd - Use the
MSYS2 shell for the next steps
cd tmp/build
mkdir ffmpeg
cd ffmpeg

export CC=cl

./../../sources/ffmpeg/configure \
             --prefix=./../../installed \
             --toolchain=msvc \
             --arch=x86_64 \
             --enable-yasm  \
             --enable-asm \
             --enable-shared \
             --disable-static \
             --disable-programs \
             --enable-avresample \
             --enable-libx264 \
             --enable-gpl \
             --extra-ldflags="-LIBPATH:./../../installed/lib/" \
             --extra-cflags="-I./../../installed/include/"

make V=1 -j 8

make install
..or as a oneliner
CC=cl ./../../sources/ffmpeg/configure --prefix=./../../installed --toolchain=msvc --arch=x86_64 --enable-yasm --enable-asm --enable-shared --disable-static --disable-programs --enable-avresample --enable-libx264 --enable-gpl --extra-ldflags="-LIBPATH:./../../installed/lib" --extra-cflags="-I./../../installed/include/"

NAT Types
This is so exciting, in this article I dive into some of the different ways a NAT device translates addresses which is important for peer-to-peer connections.
Building Cabinets
In this post I dive into the design and construction of a cabinet with an interact LED strip. I also explain how I dynamically change the colors of the LEDs over TCP/UDP.
Compiling GStreamer from source on Windows
How to compile GStreamer on Windows from Source using Visual Studio 2019 and the meson build system.

Debugging CMake Issues
In this post I explain a process you can follow to debug issues with CMake by focusing on a specific target and making the output verbose.
Dual Boot Arch Linux and Windows 10
How to install Arch Linux and Windows 10 Pro as dual boot. A step by step tutorial how to create bootable installers, partition and setup a dual boot menu.

Mindset Updated Edition, Carol S. Dweck (Book Notes)
Paragraphs I marked from the book «Mindset» from Carol S. Dweck.

How to setup a self-hosted Unifi NVR with Arch Linux
A step by step HOW-TO that explain show to setup a Unifi Video Controller with an NFS share with Arch Linux.

Blender 2.8 How to use Transparent Textures
Follow this node setup when you want to use an image with transparency as a «sticker».
Compiling FFmpeg with X264 on Windows 10 using MSVC
A couple of steps to compile FFmpeg on Windows using MSVC.
Blender 2.8 OpenGL Buffer Exporter
The following Blender script creates a [name].h and [name].cpp for the selected object and stores the positions, normals and UVs.

Blender 2.8 Baking lightmaps
Light maps are a cheap way to add a lot of realism to you static scenes and have been used forever.

Blender 2.8 Tips and Tricks
Use Environment Map only for reflections; create a floor plane for a Product Render, diffuse texture for roughness and more!

Setting up a Bluetooth Headset on Arch Linux
Learn how to setup a Sennheiser PXC 550 Bluetooth headset on Arch Linux.
Compiling x264 on Windows with MSVC
Compile the excellent x264 source on Windows using MSYS2 and MSVC.
C/C++ Snippets
Is a number divisible by four?

Reading Chunks from a Buffer
Some thoughts on reading bytes from a file; handy for reading NALs.
Handy Bash Commands
Bash scripts: removing white space, lowercase filenames, backup using tar, etc.

Building a zero copy parser
Simple solution to parse data in a pretty performant way. Used this for a RTSP protocol parser.

Kalman Filter
A very simple yet powerful filter which works great when you have to smooth noisy data. Used for the Nike Rise 2.0 project.

Saving pixel data using libpng
Do you have raw RGBA data that you want to save? Use this snippet to save it into a PNG file.
Compile Apache, PHP and MySQL on Mac 10.10
Setup you own PHP, MySQL and Apache and with virtual document roots.
Fast Pixel Transfers with Pixel Buffer Objects
Using Pixel Buffer Objects (PBO) for fast asynchronous data transfers and OpenGL.

High Resolution Timer function in C/C++
Wait…… wait.. fast high resolution timer funtions (Windows, Linux, Mac)

Rendering text with Pango, Cairo and Freetype
My never ending obsession with font rendering. A complex beast to do well. Use Pango and FreeType for the heavy lifting.
Fast OpenGL blur shader
Make things look blurry … and fast using this OpenGL blur shader.
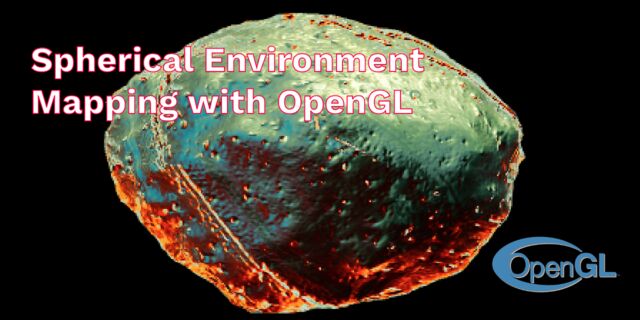
Spherical Environment Mapping with OpenGL
An old trick to get great lighting effects using Environment Maps and OpenGL.
Using OpenSSL with memory BIOs
OpenSSL is a great library with lots of abstractions. In this post I discuss how to break some of these abstractions and use your own memory buffers.
Attributeless Vertex Shader with OpenGL
A simple way to render a fullscreen quad without a vertex buffer with OpenGL.

Circular Image Selector
Some thoughts on a different way to select images from a huge collection in a compact UI.
Decoding H264 and YUV420P playback
Using libav to demux and playback with OpenGL.
Fast Fourier Transform
Analyse your audio using the Fastest Fourier Transform in the West.
OpenGL Rim Shader
Pretty glowy edges using a GLSL rim shader.
Rendering The Depth Buffer
Render the non-linear OpenGL Depth Buffer.
Delaunay Triangulation
Do you need to triangulate some shape: use the “Triangle” library.
RapidXML
RapidXML is a versatile and fast XML parser with a simple API. Check out these examples.
Git Snippets
Some simple GIT snippets; added here to remind myself.
Basic Shading With OpenGL
A couple of basic GLSL shaders with explanation.
Open Source Libraries For Creative Coding
Collection of great open source libraries for you creative programming projects.

Bouncing particle effect
Snippet that can be used to create a bouncy particle effect; basic, effective, simple but nice.
OpenGL Instanced Rendering
Want to render thousands and thousands of objects? Use OpenGL instanced rendering. The solution…the only solution.
Mapping a texture on a disc
Ever heard about projective interpolation related to texture mapping? Learn about this intertesting issue with OpenGL and texture mapping.

Download HTML page using CURL
When you want a quick solution to perform a HTTP(S) request CURL is always a quick an simple solution. Check out this example code.

Height Field Simulation on GPU
Although not a Navier-Stokes implementation … still a very nice and enjoyable effect.
OpenCV
Optical Flow: when doing anything with tracking you’ve probably heard of it. See this simple example code using OpenCV and OpenGL.
Some notes on OpenGL
FBOs and Depth Testing, using different Attachment Points, a YUV420p shader, …

Math
Meaning of the Dot Product in 3D graphics, calculating a perpendicular vector using Sam Hocevar’s solution, orientation matrix and more.

Gists to remember
Some gists that I want to remember, often use, etc…

Reverse SSH
Do you want to login, into a remote PC but the remote PC is behind a firewall? Then use this simple reverse SSH trick which doesn’t require changing your firewall rules.

Working Set
Having issues with your compiler? Or during linking? Check these common issues and their solutions. I also list several tools that you can use to get a some useful info.
Consumer + Producer model with libuv
Example of a common Multi Threaded Consumer/Producer Model using LibUV.
Parsing binary data
Learn about the basic of a binary protocol and how to create one easily yourself.
C++ file operation snippets
Reading a file into a string, vector, checking the file size, change to a position, etc. A collection of C++ file operation snippets.
Importance of blur with image gradients
Do you want to experiment with OpenGL and aligning Brush Strokes along Image Gradients? Then check out this post about the importance of blurring.
Real-time oil painting with openGL
Code snippet for fake «oil painting» effect with OpenGL using instanced rendering.
x264 encoder
Basic example on how to use libx264 to encode image data using libav

Generative helix with openGL
Screenshots of a project I worked on with that generates a DNA helix.
Mini test with vector field
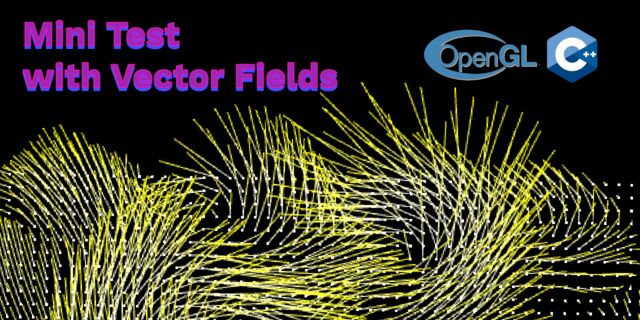
Screenshots while experimenting with a vector field; nothing much to see here.

Protractor gesture recognizer
Testing the amazing One Dollar $1 gesture recognizer. The simplest and very good gesture recognizer.

Hair simulation
Example code that implements the «Fast Simulation of Inextensible Hair and Fur» paper from M. Müller, T.Y. Kim and N.Chentanez.
Some glitch screenshots
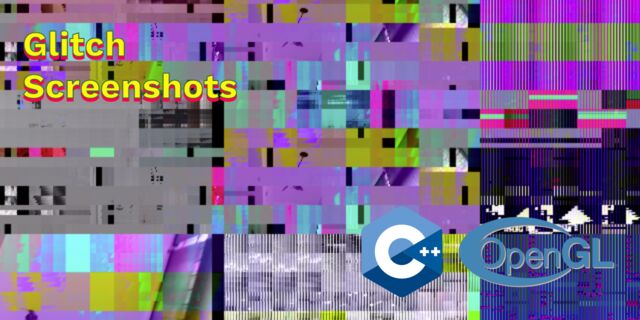
Glitch screenshots.
Working on video installation
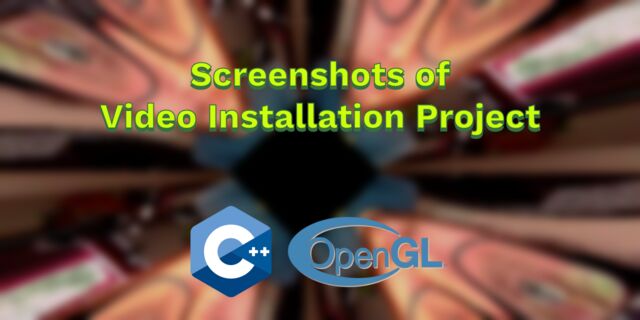
Screenshots of some experiments of a video installation.
Generative meshes
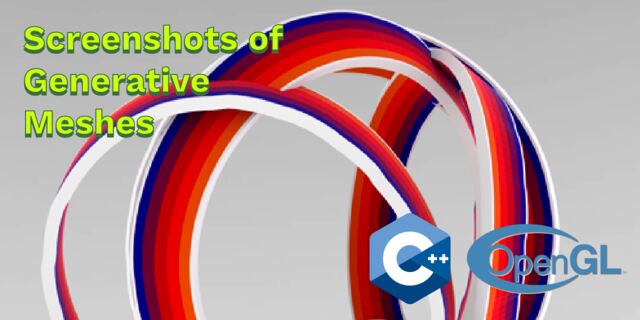
I enjoy creating physics based simulations and render them on high res. Here are some experiments I did a time ago.
Converting video/audio using avconv
Examples that show you how to use avconv to manipulate video and audio files.

Auto start terminal app on mac
Automatically start you application whe Mac boots and make sure that it restarts your app when it exists. Handy for interactive installations.
Export blender object to simple file format
Export the selected object in Blender into a .h and .cpp file that prepresents the buffer.