You can create a package for android using the python-for-android project. This page explains how
to download and use it directly on your own machine (see
Packaging your application into APK or AAB) or
use the Buildozer tool to automate the entire process. You can also see
Packaging your application for the Kivy Launcher to run kivy
programs without compiling them.
For new users, we recommend using Buildozer as the easiest way
to make a full APK or AAB. You can also run your Kivy app without a
compilation step with the Kivy Launcher app.
Kivy applications can be released on an Android market such as the Play store, with a few extra
steps to create a fully signed AAB (Android App Bundle).
The Kivy project includes tools for accessing Android APIs to
accomplish vibration, sensor access, texting etc. These, along with
information on debugging on the device, are documented at the
main Android page.
Buildozer
Buildozer is a tool that automates the entire build process. It
downloads and sets up all the prerequisites for python-for-android,
including the android SDK and NDK, then builds an apk that can be
automatically pushed to the device.
Buildozer currently works only in Linux and macOS (You can still use
it on Windows via WSL), and can significantly simplify the apk build.
Please find the installation instructions here
Including the “Targeting Android” section.
Afterwards, navigate to your project directory and run:
This creates a buildozer.spec file controlling your build
configuration. You should edit it appropriately with your app name
etc. You can set variables to control most or all of the parameters
passed to python-for-android.
Finally, plug in your android device and run:
buildozer android debug deploy run
to build, push and automatically run the apk on your device.
Buildozer has many available options and tools to help you, the steps
above are just the simplest way to build and run your
APK. The full documentation is available here. You can also check
the Buildozer README at https://github.com/kivy/buildozer.
Packaging with python-for-android
You can also package directly with python-for-android, which can give
you more control but requires you to manually download parts of the
Android toolchain.
See the python-for-android documentation
for full details.
Packaging your application for the Kivy Launcher
The Kivy launcher is an Android application that runs any Kivy examples
stored on your SD Card.
To install the Kivy launcher, you must:
-
Go on Google Play Store and search for Kivy Launcher from kivy org
-
Click on Install
-
Select your phone… And you’re done!
If you don’t have access to the Google Play Store on your phone/tablet,
you can download and install the APK manually from
https://github.com/kivy/kivy-launcher/releases
Once the Kivy launcher is installed, you can put your Kivy
applications in the Kivy directory in your external storage directory
(often available at /sdcard even in devices where this memory
is internal), e.g.
/sdcard/kivy/<yourapplication>
<yourapplication> should be a directory containing:
# Your main application file:
main.py
# Some info Kivy requires about your app on android:
android.txt
The file android.txt must contain:
title=<Application Title>
author=<Your Name>
orientation=<portrait|landscape>
These options are just a very basic configuration. If you create your
own APK using the tools above, you can choose many other settings.
Installation of Examples
Kivy comes with many examples, and these can be a great place to start
trying the Kivy launcher. You can run them as below:
#. Download the `Kivy demos for Android <https://storage.googleapis.com/google-code-archive-downloads/v2/code.google.com/kivy/kivydemo-for-android.zip>`_
#. Unzip the contents and go to the folder `kivydemo-for-android`
#. Copy all the the subfolders here to
/sdcard/kivy
-
Run the launcher and select one of the Pictures, Showcase, Touchtracer, Cymunk or other demos…
Release on the market
If you have built your own APK with Buildozer or with
python-for-android, you can create a release version that may be
released on the Play store or other Android markets.
To do this, you must run Buildozer with the release parameter
(e.g. buildozer android release), or if using
python-for-android use the --release option to build.py. This
creates a release AAB in the bin directory, which you must
properly sign and zipalign.
The procedure for doing this is described in the Android documentation
at https://developer.android.com/studio/publish/app-signing.html#signing-manually —
all the necessary tools come with the Android SDK.
Targeting Android
Kivy is designed to operate identically across platforms and as a result, makes
some clear design decisions. It includes its own set of widgets and by default,
builds an APK or AAB with all the required core dependencies and libraries.
It is possible to target specific Android features, both directly and
in a (somewhat) cross-platform way. See the Using Android APIs section
of the Kivy on Android documentation for more details.

![]()
Mehmet
Posted on
• Updated on
![]()
![]()
![]()
![]()
![]()
In this article, I will explain how we can convert a cross-platform application made using kivy/kivymd in python on Windows to an APK file without the need for a Linux machine. For this, I will use the online platform called Google Colab.
After logging into google colab, let’s prepare the environment for the conversion process. Do not forget to upload the project you are working on. Follow these commands step by step:
!sudo apt update
Enter fullscreen mode
Exit fullscreen mode
!sudo apt install -y git zip unzip openjdk-8-jdk python3-pip autoconf libtool pkg-config zlib1g-dev libncurses5-dev libncursesw5-dev libtinfo5 cmake libffi-dev libssl-dev
Enter fullscreen mode
Exit fullscreen mode
!pip3 install --upgrade Cython==0.29.19 virtualenv
Enter fullscreen mode
Exit fullscreen mode
!export PATH=$PATH:~/.local/bin/
Enter fullscreen mode
Exit fullscreen mode
!pip install buildozer
Enter fullscreen mode
Exit fullscreen mode
!sudo apt-get install -y \
    python3-pip \
    build-essential \
    git \
    python3 \
    python3-dev \
    ffmpeg \
    libsdl2-dev \
    libsdl2-image-dev \
    libsdl2-mixer-dev \
    libsdl2-ttf-dev \
    libportmidi-dev \
    libswscale-dev \
    libavformat-dev \
    libavcodec-dev \
    zlib1g-dev
Enter fullscreen mode
Exit fullscreen mode
!sudo apt-get install build-essential libsqlite3-dev sqlite3 bzip2 libbz2-dev zlib1g-dev libssl-dev openssl libgdbm-dev libgdbm-compat-dev liblzma-dev libreadline-dev libncursesw5-dev libffi-dev uuid-dev libffi6
Enter fullscreen mode
Exit fullscreen mode
!sudo apt-get install libffi-dev
Enter fullscreen mode
Exit fullscreen mode
Now our environment is ready. We can start the conversion process. We will use buildozer for this. Run this command to start Buildozer:
!buildozer init
Enter fullscreen mode
Exit fullscreen mode
This command will create a configuration file named buildozer.spec for us. Now it’s time to edit this file. At least you should change the;
title, package.name, package.domain.
After changing these, my suggestion is to make some more changes to avoid some problems. Let’s look at source.dir first, if your main.py file is in the same directory, there is no need to change it, but if not, you should write the path here.
Afterwards, if you have used separate files such as png, txt, csv in the program, you should add the extension to source.include_exts.
Now let’s change the most important, requirements. If you only used kivy, python3,kivy==2.0.0rc4 will be enough to do it this way.If you also used kivymd then you should add this https://github.com/kivymd/KivyMD/archive/master.zip. If you have used other libraries, run the pip install <library-name> command, and it will show the downloaded packages. You can add them without specifying the version.
If you want to use icon you can uncomment icon.filename and you can edit the path.
If you want your app to be fullscreen, you can make fullscreen 1.
We will need to clone python-for-android to avoid problems such as not showing some symbols.
!git clone <git-link-of-forked-repo>
Enter fullscreen mode
Exit fullscreen mode
Then we need to edit it in spec file.p4a.source_dir = /path/to/your/python-for-android and p4a.branch = develop.
Finally, if you need permissions on android you have to write them.We are done with spec file for now.
Now we can start the conversion process by this command:
!buildozer -v android debug
Enter fullscreen mode
Exit fullscreen mode
When you first run this process, it may take up to 15-20 minutes depending on your internet speed. When the process is finished, your bin/*.apk file is ready and you can download it to the phone.
If the application does not work, you can create a log file from the phone. For this, try to run the application after clicking on the settings / developer option / bug report. After waiting for a while, it will also show the process in the notification bar. You can now see the errors by sharing it to your computer.
You can also check out my project that I made using kivymd.
Mehmet Karagoz.
Resources
Buildozer Installation
Spec file
Running
p4a
in addition
Время на прочтение
8 мин
Количество просмотров 80K

Изучаю python kivy и для себя решил написал маленькое приложение, чтобы разнообразить свое питание. Решил поделиться. Статья рассчитана на новичков в kivy. Приложение занимает около 100 строк кода.
Цель создания велосипеда
приложения
:
- Избежать частых повторений в питании. Чтобы не употреблять одно и то же блюдо слишком часто.
- Не забывать блюда, которые ел, потом забыл и годами к ним не возвращался, потому что банально не помнил. У меня такое бывает.
Интро
Можно не читать, в интро всякая лирика.
Пришлось пожить в одной стране, в одной гостинице, где кормили ежедневно яйцами на завтрак и больше ничем, так через месяц начал чесаться. Обращался за медицинской помощью, хотя раньше никогда ничем подобным не страдал. Наученный горьким опытом после этого для себя решил допускать как можно меньше повторений в еде, чтобы ничего не успевало в организме накопиться. Это мой личный опыт, я просто рассказываю, без навязывания. Возможно, нет правил без исключения, наверное, овсянку можно есть и каждый день на протяжении десятков лет.
Скриншоты

Предположим мой рацион состоит из 50 блюд. Например, сегодня ел омлет. Нажимаю на кнопку, и омлет стал на 50 строку в очереди, а перед ним стоят 49 блюд, которые съем, чтобы опять добраться до омлета. Вот и вся логика приложения. (На скриншотах блюда нагенеренные, все совпадения случайны, к моему реальному рациону отношения не имеющие).
Исходный код и пояснения
main.py
from kivy.app import App
from kivy.uix.button import Button
from kivy.uix.boxlayout import BoxLayout
from kivy.uix.screenmanager import ScreenManager, Screen
from kivy.uix.recycleview import RecycleView
from kivy.uix.gridlayout import GridLayout
from kivy.core.window import Window
from kivy.config import ConfigParser
from kivy.uix.textinput import TextInput
from kivy.uix.label import Label
from kivy.metrics import dp
from datetime import datetime
import os
import ast
import time


class MenuScreen(Screen):
    def __init__(self, **kw):
        super(MenuScreen, self).__init__(**kw)
        box = BoxLayout(orientation='vertical')
        box.add_widget(Button(text='Дневник питания', on_press=lambda x:
                              set_screen('list_food')))
        box.add_widget(Button(text='Добавить блюдо в дневник питания',
                              on_press=lambda x: set_screen('add_food')))
        self.add_widget(box)


class SortedListFood(Screen):
    def __init__(self, **kw):
        super(SortedListFood, self).__init__(**kw)

    def on_enter(self):  # Будет вызвана в момент открытия экрана

        self.layout = GridLayout(cols=1, spacing=10, size_hint_y=None)
        self.layout.bind(minimum_height=self.layout.setter('height'))
        back_button = Button(text='< Назад в главное меню',
                             on_press=lambda x: set_screen('menu'),
                             size_hint_y=None, height=dp(40))
        self.layout.add_widget(back_button)
        root = RecycleView(size_hint=(1, None), size=(Window.width,
                                                      Window.height))
        root.add_widget(self.layout)
        self.add_widget(root)

        dic_foods = ast.literal_eval(
            App.get_running_app().config.get('General', 'user_data'))

        for f, d in sorted(dic_foods.items(), key=lambda x: x[1]):
            fd = f.decode('u8') + ' ' + (datetime.fromtimestamp(d).strftime('%Y-%m-%d'))
            btn = Button(text=fd, size_hint_y=None, height=dp(40))
            self.layout.add_widget(btn)

    def on_leave(self):  # Будет вызвана в момент закрытия экрана

        self.layout.clear_widgets()  # очищаем список


class AddFood(Screen):

    def buttonClicked(self, btn1):
        if not self.txt1.text:
            return
        self.app = App.get_running_app()
        self.app.user_data = ast.literal_eval(
            self.app.config.get('General', 'user_data'))
        self.app.user_data[self.txt1.text.encode('u8')] = int(time.time())

        self.app.config.set('General', 'user_data', self.app.user_data)
        self.app.config.write()

        text = "Последнее добавленное блюдо:  " + self.txt1.text
        self.result.text = text
        self.txt1.text = ''

    def __init__(self, **kw):
        super(AddFood, self).__init__(**kw)
        box = BoxLayout(orientation='vertical')
        back_button = Button(text='< Назад в главное меню', on_press=lambda x:
                             set_screen('menu'), size_hint_y=None, height=dp(40))
        box.add_widget(back_button)
        self.txt1 = TextInput(text='', multiline=False, height=dp(40),
                              size_hint_y=None, hint_text="Название блюда")
        box.add_widget(self.txt1)
        btn1 = Button(text="Добавить блюдо", size_hint_y=None, height=dp(40))
        btn1.bind(on_press=self.buttonClicked)
        box.add_widget(btn1)
        self.result = Label(text='')
        box.add_widget(self.result)
        self.add_widget(box)


def set_screen(name_screen):
    sm.current = name_screen


sm = ScreenManager()
sm.add_widget(MenuScreen(name='menu'))
sm.add_widget(SortedListFood(name='list_food'))
sm.add_widget(AddFood(name='add_food'))


class FoodOptionsApp(App):
    def __init__(self, **kvargs):
        super(FoodOptionsApp, self).__init__(**kvargs)
        self.config = ConfigParser()

    def build_config(self, config):
        config.adddefaultsection('General')
        config.setdefault('General', 'user_data', '{}')

    def set_value_from_config(self):
        self.config.read(os.path.join(self.directory, '%(appname)s.ini'))
        self.user_data = ast.literal_eval(self.config.get(
            'General', 'user_data'))

    def get_application_config(self):
        return super(FoodOptionsApp, self).get_application_config(
            '{}/%(appname)s.ini'.format(self.directory))

    def build(self):
        return sm


if __name__ == '__main__':
    FoodOptionsApp().run()
Я сознательно не использовал kv файлы, так как код дан в учебных целях, для людей, которые знакомы с python. Все написано на голом python. В пояснениях я не буду останавливаться на объяснении python кода, а сразу перейду к специфическим фишкам Kivy.
Поехали:
-
class MenuScreen(Screen):Класс отвечает за запуск стартовой странички приложения, его можно назвать как угодно, например StartScreen. И наследует kivy модуль Screen. Приложение состоит из 3-х окон, вот эти окошки и создаются с помощью этого модуля
-
box = BoxLayout(orientation='vertical')BoxLayout делит экран на равные части, по умолчанию горизонтально, я написал orientation=’vertical’, чтобы делить вертикально
-
Button(text='Дневник питания',
on_press=lambda x: set_screen('list_food'))
Button — создает кнопки, в on_press задается, какая функция будет запущена при нажатии.
-
.add_widget()— добавляет кнопки в слои и в окна
-
self.layout = GridLayout(cols=1, spacing=10, size_hint_y=None)Grid Layout чем-то напоминает тег table в html, указывается cols — кол-во колонок или rows — кол-во строк.
Можно указывать оба параметра или один параметр.
Экран будет разделен на нужное кол-во отсеков. -
root = RecycleView(size_hint=(1, None), size=(Window.width, Window.height))RecycleView — модуль, с помощью которого создается вертикальная прокрутка в моем приложении. Особенность RecycleView в том, что он строит скролы с элементами одинаковой ширины и высоты. И работает быстро. А есть модуль ScrollView, он может строить прокрутки с элементами разных размеров, но работает медленнее, чем RecycleView
-
config.get('General', 'user_data')— в коде часто встречаются такие строки. Я просто в качестве хранилища данных использовал родное хранилище Config kivy. Ну, пусть будет несколько тысяч блюд, нет смысла городить огород с sqlite и чем-то подобным. Все данные хранятся в одном файлике. Хранится этот файлик в той же папке, что и само приложение, если указать self.directory как в моем коде, но можно указать self.user_data_dir, чтобы этот файлик не уничтожался при перестановке или обновлениях.
Запуск на windows & linux & macos
Принцип для всех операционок одинаковый:
- Ставим python3
- Ставим kivy
- Создаем файл main.py и втыкаем в него целиком вышеуказанный код
- Запускаем командой
python3 main.py
Программа должна заработать.
Сборка apk файла и запуск на телефоне с андроид
Итак, у нас есть файл с кодом программы, написанный на python. Как теперь создать приложение, чтобы его можно было запустить на телефоне с андроидом? Раньше это был достаточно мудреный процесс, требующий навыков и танцев с бубном. Теперь это не проблема.
Вот пошаговая инструкция:
- Скачиваем готовую виртуальную машину от разработчиков kivy, в которой уже все настроено. https://github.com/Zen-CODE/kivybits/tree/master/KivyCompleteVM. Пароль: kivy
- Запускаем ее в Virtual Box.
- Открываем терминал и вводим следующие команды:
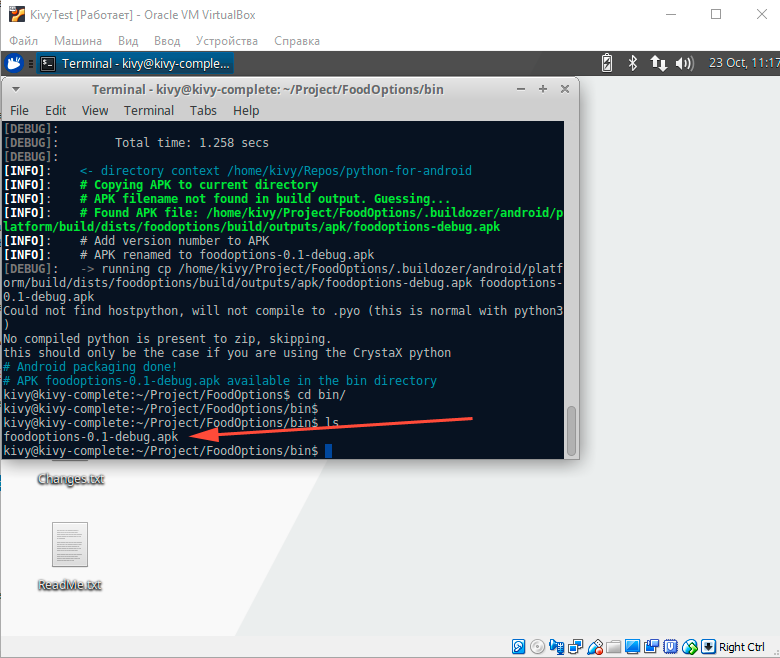
# Ставим последнюю версию python-for-android cd /home/kivy/Repos rm -fr python-for-android/ git clone https://github.com/kivy/python-for-android.git cd ~ mkdir Project cd Project git clone https://github.com/Alexmod/FoodOptions.git cd FoodOptions buildozer android debug # Первый раз эта команда будет долго тянуть 100500 всяких библиотек, # но в следующие разы выполняться за секунды. - Последняя команда создает папку bin в той же директории, в bin вы найдете файл foodoptions-0.1-debug.apk, который можно закинуть на телефон, установить и наслаждаться приложением
Как закинуть apk файл на телефон?
Можно, конечно, сделать это как угодно, отправить себе по почте, куда-нибудь выложить, закинуть в телеграмм и т.д., а потом скачать приложение на телефон.
Но существует специализированный инструмент для этого. Включаем на телефоне режим разработчика, подключаем USB-кабелем. Виртуалка должна увидеть, что вы подключили телефон. Дальше устанавливаем adb:
sudo apt install adbПосле установки заходим в папку bin и вводим команду
adb install -r foodoptions-0.1-debug.apk
И можно примерно через минутку увидеть на телефоне приложение после того, как увидим
Success в консоли.
kivy@kivy-complete:~/Project/FoodOptions/bin$ adb install -r foodoptions-0.1-debug.apk
342 KB/s (10083019 bytes in 28.730s)
Success
kivy@kivy-complete:~/Project/FoodOptions/bin$
Если вдруг приложение падает или ведет себя не так, как ожидалось, то есть вот такая команда для просмотра ошибок
adb logcat| grep pythonРусское имя приложения
Если вы захотите, чтобы ваше приложение называлось по-русски, например, «Дневник питания», то надо внести изменения в файл:
.buildozer/android/platform/build/dists/foodoptions/templates/strings.tmpl.xml
В тег appName прописывается русское название приложения, эта папка создается после первого запуска buildozer android debug. После того как файл отредактируете, вернитесь назад в папку FoodOptions и запустите buildozer android debug повторно. Файл соберется по-новой. После установки на телефон имя программы будет написано на русском.
О файле buildozer.spec
Вот мой файл с гитхаба: buildozer.spec
Именно этот файл указывает buildozer-у, как именно собрать пакет.
Там множество разных вариаций. Кому интересно, то введите внутри виртуалки команду:
cd /tmp
buildozer init
Будет создан дефолтный файл buildozer.spec с кучей комментариев и пояснений. Например, если вы хотите какую-нибудь свою иконку для приложения, то указываете в строке:
icon.filename = %(source.dir)s/data/icon.pngсвой файл с иконкой. И приложение соберется уже с вашей иконкой.
Если вам надо подгрузить какой-нибудь специфический модуль, который не входит в официальную библиотеку python, то это делается в строке requirements =. В общем, рассказ о файле buildozer.spec может занять целую статью, а то и две.
Загрузка приложения в Google Play
Надо зарегаться, пройти все процедуры, получить ключи. И дальше запускать:
sudo apt install zipalign
buildozer android release
jarsigner -verbose -sigalg SHA1withRSA -digestalg SHA1 -keystore /path/keystore bin/apk-unsigned.apk apkname
zipalign -v 4 bin/apk-apkname-unsigned.apk bin/apk-apkname-release.apk
Полученный файл apk-apkname-release.apk заливать в Google Play.
Ссылки
- Видео-уроки по kivy на русском языке. Лично мне понравились
- Статьи на хабре про kivy от HeaTTheatR (и спасибо ему за помощь!)
В принципе любой человек, который умеет программировать на python, сможет изменить приложение и легко добавить следующее:
- Добавить дизайн, чтобы приложение стало красивое
- Использовать kv-файлы, чтобы код стал более легким. Я бы привел такую аналогию: те кто знаком с веб-программированием, представьте себе код без html темплейтов и с html темплейтами. Вынос в kv-файлы кнопок, слоев и прочего — это что-то вроде jinja2 для веб-программиста. Логика остается в .py файлах, а фенечки — в kv-файлах.
- Добавить подсчет калорий, белка, углеводов, жиров (БЖУ)
- Добавить возможность фотографировать блюда
I’m using windows right now and I want to ask is there any good tools to package a kivy app for android in windows or I have t use Linux distributions?
Unfortunately the build tools don’t work on windows right now. I think there are technical barriers to do with cross compilation.
Have you seen the kivy virtual machine, available at http://kivy.org/#download ? This is an Ubuntu linux image that already has the tools installed and set up. You should be able to run it in virtualbox on any recentish machine.
There’s also an online interface to the android component of the buildozer tool (which can manage the entire android or ios build process, but I think doesn’t work on windows at the moment), available at http://android.kivy.org/ . You can upload your project there to have the apk built. I haven’t tried this service, but it should work.
And also is there anyway to use kivy for python 3.3.2?
The next release of kivy will support python 3, and the github master branch at https://github.com/kivy/kivy should be mostly (if not all) working.
2 minute read
Kivy and Buildozer together allow developers to create an Android application package (APK) from Python code. While working on a project with these libraries it has come to my attention that this process can however be troublesome and time-consuming. To spare others the hours of looking at rushed documentation (especially for Buildozer) I decided to merge some guides together of all the extra work that to be done to be able to make Buildozer compile your Python code on a Windows operating system.
Virtual Machine containing Kivy and Buildozer setup
- Download Kivy Buildozer VM and unzip the file.
- Download the version of VirtualBox for your machine from Oracle VirtualBox download area and install it.
- Download Oracle VM VirtualBox Extension Pack for all platforms and install it.
- Start VirtualBox, click on File » Import Appliance…
- Select the extracted directory, file named, Buildozer VM.ovf
- Click on Settings » General » Advanced and select Bidirectional in the drop-down list for Shared Clipboard:, and Drag’n’Drop:
- Click on Settings » Shared Folders and click Add new shared folder. e.g. Kivy Apps folder. Make sure Auto-mount has been selected.
- Click on Settings » USB, check Enable USB Controller, checkbox USB 2.0 (EHCI) Controller, and click Add new USB filters e.g. Samsung phone.
PyCharm IDE Setup
- Download PyCharm Community and install it.
- Install KV Lang Auto-completion and Highlighting
- Please refer to PyCharm Project Interpreter Setup
Setting up adb/USB drivers on your Virtual Machine
- Start VirtualBox, select Kivy/Buildozer VM and click Start
- Password is kivy
- Start your file manager on your Virtual Machine and Click on View » Show Hidden Files
- Navigate to /home/kivy/ and open .bashrc
- Add the following lines to the end of the file:
export PATH=${PATH}:~/.buildozer/android/platform/android-sdk/tools
export PATH=${PATH}:~/.buildozer/android/platform/android-sdk/platform-tools - Navigate to /etc/udev/rules.d/ and open a terminal here by right clicking and selecting Open Terminal here
- Enter sudo mousepad 80-android.rules into the terminal
- Add the following line to the file
SUBSYSTEM==”usb”, ATTR{idVendor}==”USB-VENDOR-ID”, MODE=”0666″
In which you replace USB-VENDOR-ID with the ID of your device in Table 1 - Give permission to all users to read and write by typing chmod 777 80-android.rules into the terminal
- Enter adb devices into the terminal to start detecting your phone or tablet
Create a package for Android
- Start VirtualBox, select Kivy/Buildozer VM and click Start
- Password is kivy
- Copy your Kivy App from local machine to a folder in Home folder.
- Double click Home folder
- Double click your Kivy App folder
- Right mouse click and select Open Terminal here
- At Terminal command prompt, type buildozer init to create buildozer.spec file.
- Double click buildozer.spec file to make changes (e.g. title, package.name, log_level = 2) and save changes.
- At Terminal command prompt, type buildozer android debug deploy run
- Wait a few minutes and you should be done!
