В этой статье показано, как установить VirtualBox в Windows 11 для установки гостевых виртуальных машин.
VirtualBox — это виртуальное программное обеспечение x64 или размещенный гипервизор, который позволяет опытным пользователям или продвинутым системным администраторам одновременно настраивать независимые виртуальные машины на одном физическом компьютере.
Когда вы устанавливаете VirtualBox в Windows, вы можете создать несколько независимых гостевых компьютеров, каждый из которых работает под управлением собственной операционной системы, без необходимости в дополнительном оборудовании или физической поддержке. Это отличная программа для системных администраторов и опытных пользователей, которые хотят запускать несколько гостевых операционных систем без необходимости добавлять новое оборудование.
Например, когда виртуализация VirtualBox установлена в Windows 11, опытные пользователи могут создавать дополнительные виртуальные компьютеры в VirtualBox для запуска Mac OS, Linux и других операционных систем. Windows 11 Без необходимости в трех отдельных компьютерах.
С выпуском Windows 11 в конце этого года VirtualBox будет готов к установке и беспрепятственному использованию. Windows 11 принесет много новых функций и улучшений, таких как переработанный рабочий стол пользователя, центральное меню «Пуск» и панель задач, окна со скругленными углами, темы и цвета и многое другое, что позволит пользователям интегрировать VirtualBox и использовать эти новые функции.
Когда вы будете готовы установить VirtualBox в Windows 11, выполните следующие действия:
Виртуализация VirtualBox требует, чтобы на хост-машине была включена аппаратная визуализация. На большинстве современных компьютеров эта функция есть, но она может быть отключена в BIOS. Возможно, вам придется перезагрузиться в BIOS системы и включить Технология виртуализации (VTx) В настройках BIOS системы.
После включения аппаратной виртуализации снова войдите в Windows и перейдите по ссылке ниже, чтобы загрузить последнюю версию VirtualBox для всех операционных систем.
Скачать Oracle VirtualBox
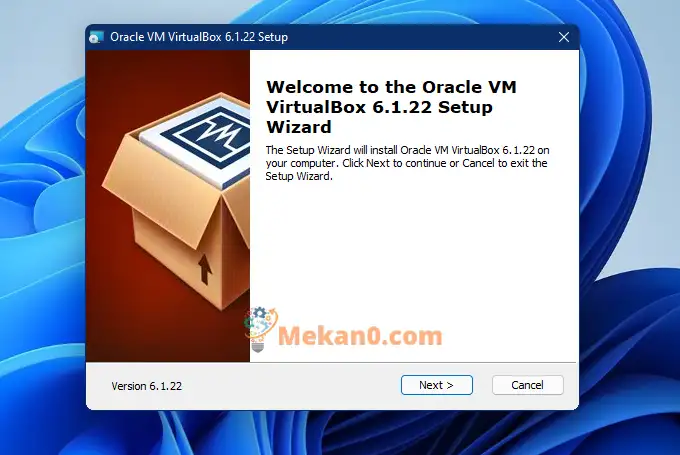
- Когда вы запустите установщик, вам будет предложено запустить мастер установки. На странице «Добро пожаловать в мастер установки» нажмите «Далее», чтобы запустить мастер установки.
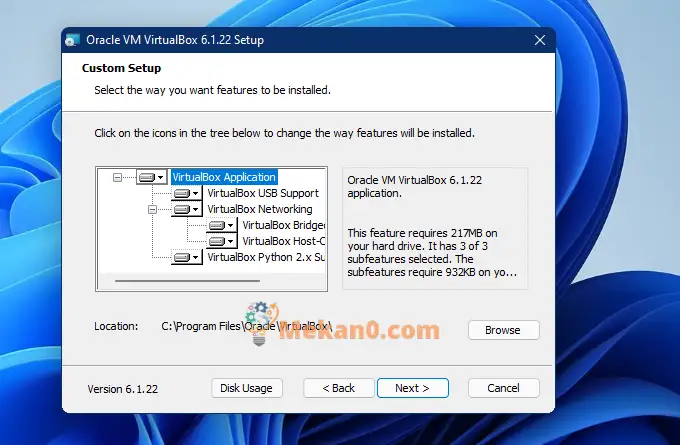
- На странице пользовательской настройки вам, вероятно, следует просто оставить все как есть и двигаться дальше. В большинстве случаев вы здесь ничего не меняете, кроме особых ситуаций.
- Когда будете готовы, нажмите «Далее», чтобы продолжить.
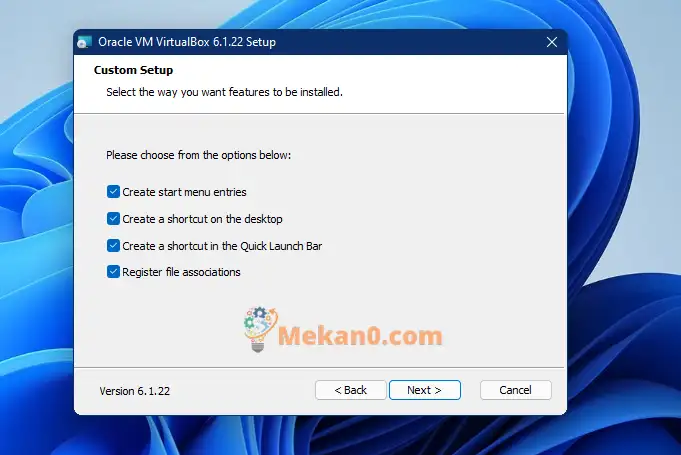
- На следующей странице выберите один из показанных вариантов. Это добавит ярлыки на ваш рабочий стол, добавит пункты меню и многое другое.
- Когда будете готовы, нажмите «Далее», чтобы продолжить настройку.
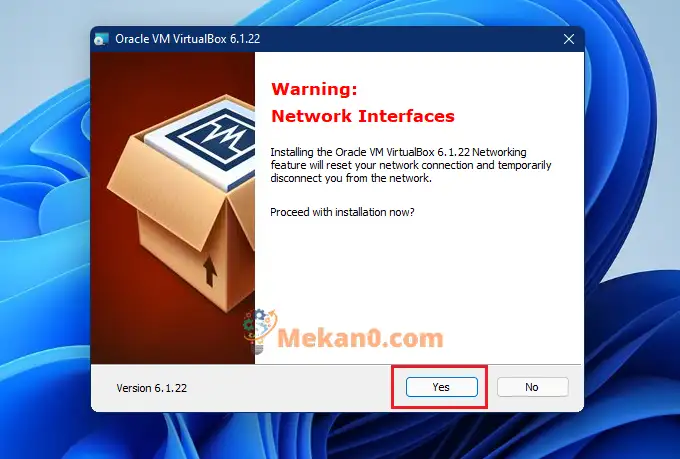
- На следующей странице, когда будет предложено установить сетевые функции VirtualBox, выберите Да. При выборе «Да» сетевые соединения на короткое время прерываются.
- Затем приступайте к настройке.
- На следующей странице при нажатии Установки » чтобы начать установку.
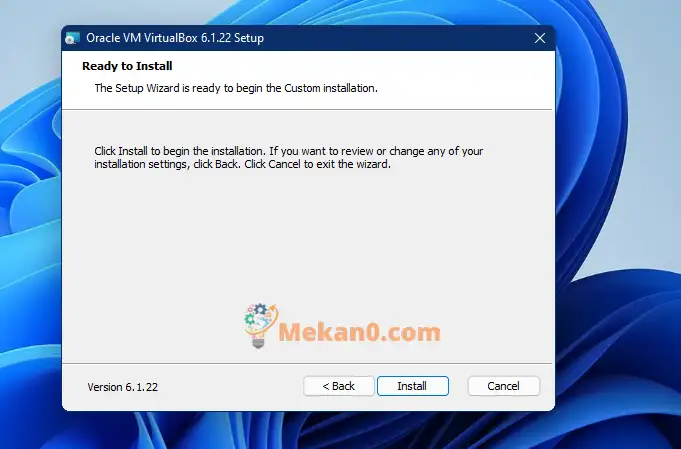
- Наконец, нажмите Готово, чтобы завершить настройку. Если установлен флажок «Запустить Oracle VM VirtualBox», то при нажатии кнопки «Готово» VirtualBox запустится и откроется.
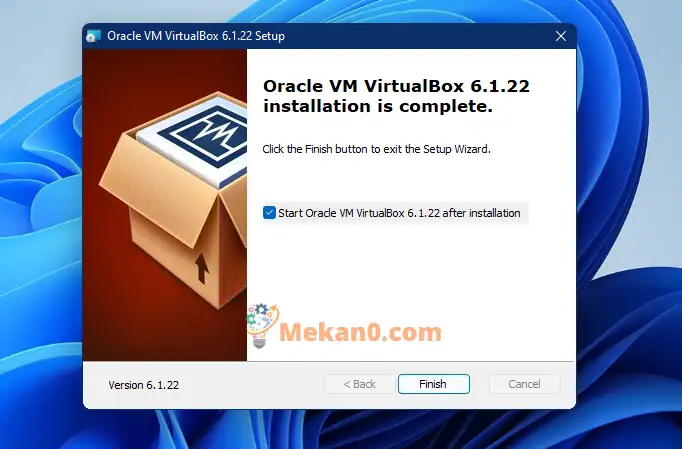
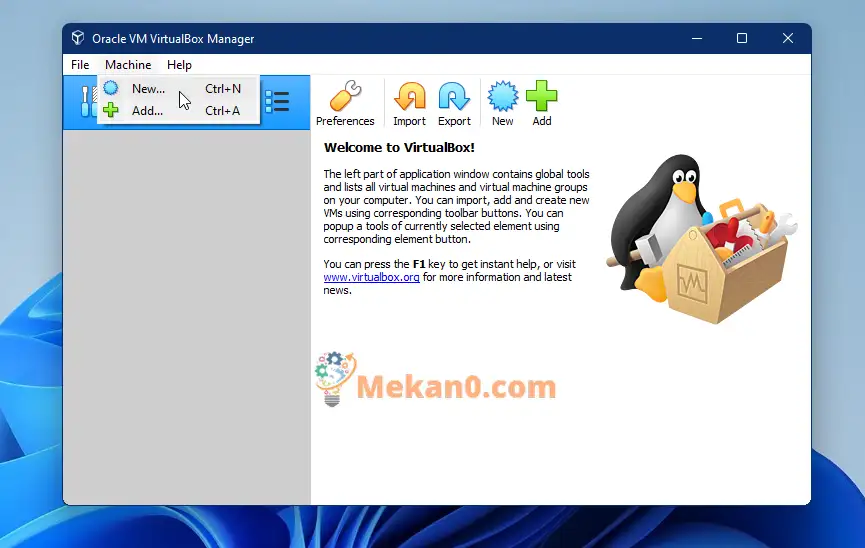
VirtualBox откроется и будет готов к использованию. Вы можете приступить к созданию виртуальных машин прямо сейчас.
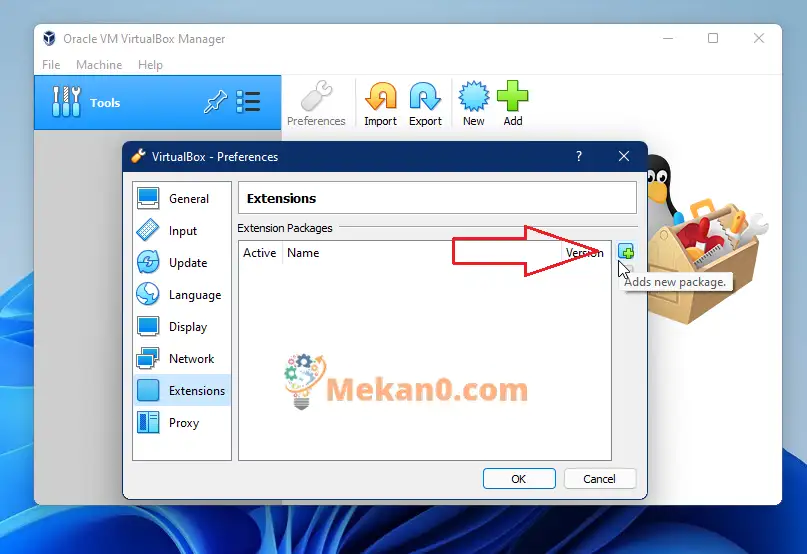
Установите пакет расширений VirtualBox
После установки вышеупомянутого VirtualBox вы захотите установить пакет расширения для VirtualBox. Вы можете скачать пакет расширения по этой ссылке
Загрузки - Oracle VM VirtualBox
Выберите ссылку Для всех платформ поддержки Как показано ниже.

Загрузите и сохраните на свой рабочий стол. Затем откройте VirtualBox и перейдите в Настройки ==> Расширение Картина
Или вы можете просто дважды щелкнуть загруженный пакет, и он должен начать установку пакетов расширений VirtualBox.
нажмите кнопку Установка установить его.
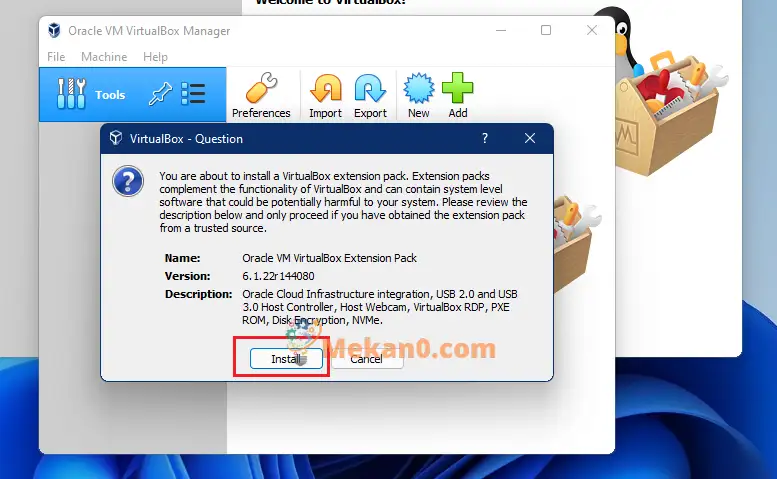
Пакет расширения расширяет базовую функциональность пакета VirtualBox. Обеспечивает следующие улучшения VirtualBox:
- Виртуальное устройство USB 2.0 (EHCI)
- Виртуальное устройство USB 3.0 (xHCI)
- Поддержка протокола удаленного рабочего стола VirtualBox (VRDP)
- веб-камера прохода хостинга
- Загрузочное ПЗУ Intel PXE.
- Экспериментальная поддержка обхода PCI на хостах Linux
- Шифрование образа диска с использованием алгоритма AES
Вот и все! Наконец-то вы готовы приступить к созданию виртуальных машин.
заключение:
В этом посте показано, как Скачать Oracle VirtualBox И установите его на Windows 11. Если вы обнаружите какую-либо ошибку выше, воспользуйтесь формой комментариев ниже.
Статьи по теме


Windows 11 has had its fair share of ups and downs since its release. The OS is now much more stable and features numerous changes that seem to accommodate most users. Windows as a platform have always been versatile with the ability to create virtual machines, drives, hardware devices, and more.
This helps with internal testing, coding in different environments, or just some good old tinkering. If you’ve been looking to emulate or virtualize platforms on Windows 11 then VirtualBox is a great option for you. Let’s find out more about it!
What is VirtualBox?
VirtualBox is long-standing virtualization software that has been preferred by most users since its release. Currently published and managed by Oracle, VirtualBox allows you to virtualize x86 environments on your PC.
The tool not only supports Windows but also has dedicated clients for other platforms including the likes of Linux and macOS. If you’ve been looking to test tools, platforms, or code in a virtual environment then VirtualBox is a great option for you. You can create multiple virtual machines and boot them at will with the ability to install a custom OS on them.
You even have access to all basic drivers and the ability to use your native keyboard in host and virtualized environments.
How to use install and use VirtualBox on Windows 11: Everything You Need to Know
Here’s how you can use VirtualBox on your Windows 11 PC. There are a few hardware requirements that your setup will need to meet so that VirtualBox can function as intended. Additionally, there are a few things that you should keep in mind before proceeding with this guide.
The same have been listed below. Once you’ve prepared your setup as intended, you can use the guide below to install and set up VirtualBox on your PC.
Requirements:
Here are the minimum system requirements to run VirtualBox on a Windows 11 PC.
- CPU: x86 compatible hardware (Most modern Intel and AMD CPUs supported)
- RAM: Minimum requirement of Host OS (Windows 11: 4GB) + Minimum requirement of OS you wish to virtualize
- DiskSpace: Minimum space requirement by virtualized OS + 50 MB maximum for VirtualBox installation
- Windows 7: 16GB for 32-bit or 20GB for 64-bit
- Windows 8 & 8.1: 16GB for 32-bit or 20GB for 64-bit
- Windows 10: 16GB for 32-bit or 20GB for 64-bit
- Windows 11: 64GB or higher
- A supported OS for your virtual machine: Popular supported Operating Systems have been listed below
- Windows 10
- Windows 7
- Windows 8 & 8.1
- Windows Vista
- Windows XP
- Windows 2000
- Windows Server 2003, 2008 & 2012 (including R2)
- Windows NT
- Ubuntu Desktop
- Debian 6.0 to 8.0, 5.0, 4.0 & 3.1
- Fedora Core 1, 4, 5, 6
- Solaris 11
- Solaris 10 (5.08 and higher)
You can find a complete list of supported Operating Systems at this link if your OS isn’t listed above.
Preparation:
There are a few ways you will need to prepare before you start using VirtualBox. You might need to enable a few settings on your system and download a few files to help you along the way. Use the sections below to help you along with the process.
1. Operating System (OS)
Firstly, you will need the OS you wish to install on your virtual machine. We recommend you download the same beforehand to help you along with the process. We have listed download links for popular operating systems below to get you started.
- Windows 7 | Download Link
Note: This is a web archive link that might stop working after some time.
- Windows 8.1 | Download Link
- Windows 10 | Download Link
- Ubuntu desktop | Download Link
Download and keep your OS ISO handy. We will require this during the initial VirtualBox setup to boot and install the OS from the same.
2. Free Space
You can run out of free space pretty easily when using VirtualBox. If you plan on virtualizing for a long time then it is recommended you create enough free space on your disk drive. While VirtualBox creates and manages its own virtual disk space depending on the size of your OS and contained files, you should create a separate partition if possible just to be safe.
Do keep in mind that Page files can also interfere with virtual folders used by VirtualBox as virtualized disk drives. If you’re running out of space then turning off the Page file for the current disk might be a good idea.
3. Drivers (optional)
VirtualBox is bundled with most generic drivers and the ability to install extension packs that offer additional choices and capabilities. While ideal for most systems, some proprietary hardware or components might need their drivers to be manually installed.
This includes custom monitors, USB hubs, unsupported iGPUs, and more. If you have any such components we recommend you keep their drivers handy. This way you can install them and get your setup up and running in case VirtualBox drivers do not support your components.
How to install and get started with VirtualBox
Now that you’re prepared and ready to virtualize, here’s how you can use VirtualBox on your PC. Follow the steps below to help you along with the process.
Step 1: Download and install VirtualBox
- VirtualBox | Download Link
Click the link above to visit the VirtualBox download page in your preferred browser. Now click Windows hosts to download the latest package of VirtualBox for Windows.

Save the setup in a convenient location on your local storage. Once downloaded, double click and launch the same on your PC.

Click Next to initiate the setup.

Click Browse and choose an installation directory for VirtualBox on your PC as needed.

Note: This will be the VirtualBox installation directory and not the space used by your virtual machine unless you specify the same.
Click Next once you’re done.

Check the following boxes depending on where you wish to place VirtualBox shortcuts and context menus. We recommend you leave these at their default values if you’re unsure of what to select.
- Create start menu entries
- Create a shortcut on the desktop
- Create a shortcut in the Quick Launch Bar
- Register file associations

Click Next.

You will now be notified that the internet will be disconnected for a while during the installation process. This might be a good time to pause any ongoing downloads in the background. Click Yes once you’re ready.

Click Install to confirm your choice.

Once the setup is completed, uncheck the box for Start Oracle VM VirtualBox n.n.nn after installation.

Click Finish.

And that’s it! VirtualBox has now been installed on your PC. You can now follow the next step to create a new virtual machine using VirtualBox on your PC.
Step 2: Create your Virtual Machine & install the extension pack
Here’s how you can create your first virtual machine in VirtualBox.
Start by launching VirtualBox using your desktop or start menu shortcut.

Click New.

Now enter a name for your new virtual machine at the top. We recommend using a name that helps you easily identify the machine as well as the OS installed on it. We will be using Windows 10 for this guide.

Now click the drop-down menu for Machine folder and select Other.

Choose a location where your virtual machine will be created. This space will be used by your virtual machine to install the OS as well as additional tools as needed. If you created a dedicated partition for the same, this is where you should select the same. Click Select Folder once done.

Click the drop-down menu for Type and select your OS. We will select Windows for this guide.

Subsequently, click the drop-down menu for Version and select the appropriate OS version you wish to install on the new Virtual Machine.

Click Next once you’re done.

You will now be shown the available RAM on your PC. This will be shared by your Virtual Machine whenever it is running. Use the slider to adjust the amount of RAM you wish to assign to your virtual machine. VirtualBox will have automatically selected the recommended amount of RAM needed by the selected OS.

Once you’re done, click Next.

You will now be asked if you wish to add a virtual hard drive. If you plan to use the OS as is, then it is a good idea to add a virtual hard drive. However, if you wish to split your storage or try a dual boot setup then you can choose to do so later on when installing your OS as needed. Choose one of the options below depending on your preferences.
- Do not add a virtual hard disk
- Create a virtual hard disk now
- Use an existing virtual hard disk file

Click Create.

You will now be asked the type of virtual hard drive you wish to create. You can use the VDI option if you wish to use the space only with VirtualBox. If you wish to use it with other emulators or virtualization software then you can select one of the following options depending on its support.
- Virtual Hard Disk (VHD)
- Virtual Machine Disk (VMDK)

Click Next once you’ve made your choice.

Now choose one of the following options depending on the type of disk you wish to create.
- Dynamically allocated: The virtual disk will use up space on your physical disk as it fills up.
Note: While space will be used as needed, space can not be reclaimed once freed up.
- Fixed-size: A fixed size will be assigned to your virtual drive. It won’t be able to grow or reduce in size later on.

Click Next once you’ve made your choice.

Click the folder icon on the next page.

Now choose a location for your virtual hard drive on your system. Click Save.

Note: Do not change the file extension for your virtual hard drive when choosing a location.
Now use the slider at the bottom to choose the initial space you wish to assign to your virtual hard drive if you chose Dynamically allocated earlier. This will be the fixed size of your virtual hard drive if you chose the same.

Once done, click Create.

You will now have created your new virtual machine. We will now install the extension pack. Start by downloading the extension pack on your PC using the link below.
- VirtualBox Extension Pack
Switch back to VirtualBox. Click Tools on your left and then Preferences at the top.

Now click Extensions on your left.

Click the Add extension icon.

Select the extension pack we downloaded earlier.

Click Install.

Scroll to the bottom of the license agreement and click I Agree once available.

Once installed successfully, click OK.

Click OK again.

You can now use the step below to install the OS on your new machine.
Step 3: Install your OS on your Virtual Machine
Installing an OS on your new Virtual Machine should be the same as installing one on any setup. We will be using Windows 10 as an example for this guide, but the steps below should help you configure other operating systems as well. Let’s get started.
Launch VirtualBox on your PC and click and select the desired machine from the left sidebar.

Click Settings.

Click Storage on your left.

Now click and select the Disk icon below your virtual drive.

Click the Disk icon beside the default SATA port on your right.

Click Choose a disk file.

Now select the operating system ISO you downloaded earlier from your local storage.

Once done, click OK.

You will now be taken back to the home page. Click Start at the top.

The virtual machine should now automatically boot on your system using the downloaded ISO. If not, use F12 to enter the boot menu and select the same.
Now that your virtual machine is set up in VirtualBox here’s how you can use and troubleshoot the same in case you face any issues.
1. Powering On & Off
You can Power On your virtual machine by selecting the same on the VirtualBox homepage and then clicking Start.
You can click the drop-down menu to access the following startup options for your virtual machine.
- Headless start
- Detachable start

To power off a machine, you can click File > Close.

You can now select one of the following options depending on your preferences.
- Save the machine state: This will simulate hibernation and start your machine from its current state once you power it on in the future.
- Send the shutdown signal: This will be the shutdown signal to the virtual machine. The OS can then respond based on its default power settings.
- Power off the machine: This will simulate a manual power off for your virtual machine.

Click OK once you’ve made your choice.

You can also use the Host + Q keyboard shortcut to access the Power Off options. The host key can be customized on your preferences. By default, Right Ctrl will be the host key for every virtual machine created in VirtualBox.
2. Managing the resources
Let’s see how to manage resources like RAM, Video Memory, Graphics controller, Storage devices, Displays, Audio Devices, Network Interfaces, and Serial Ports.
There might be times when you wish to assign more resources to your virtual machine. Here’s how you can do the same in VirtualBox.
Launch VirtualBox on your system and click the concerned virtual machine on your left.

Click Settings.

Click System.

Use the Base Memory slider to increase or decrease the amount of RAM assigned to your virtual machine.

Use the Boot Order section to manage your boot devices. Check the boxes for boot devices to include them or uncheck the same to exclude them.

You can also re-order your devices to change the boot order. Click and select a device.

Now use the Arrows on your right to move it up or down in the boot order as needed.

If your OS does not support touch input, you can select a mouse input using the drop-down menu for Pointing Device.

Click and switch to the Processor tab now.

Use the slider for Processor(s) to increase or decrease the number of CPU threads used by your virtual machine. If you have a muli-CPU setup then you should have different sliders for each of your CPUs in this section.

You can use the Execution cap slider to dictate the CPU cap on your assigned threads.

Click and switch to the Acceleration tab.

You can select your Paravirtualization Interface in this tab. This choice will help your Guest OS kernel work as intended with additional capabilities depending on your hardware. Here are the choices at your disposal and the recommended OS for each choice.
- Minimal: Required mostly by Mac OS X operating systems.
- KVM: Linux Hypervisor interface. Recommended choice for Linux operating systems.
- Hyper-V: Microsoft’s hypervisor interface, recommended for most Windows guest OS.
- None: Turns off the paravirtualization interface
- Default: This is the default option before you make your custom choice. It allows VirtualBox to select the appropriate paravirtualization interface depending on the OS you are using.
- Legacy: This option is applicable when you’re using older versions of VirtualBox to install and use deprecated operating systems.

Once done, click Display on your left.

You can adjust the amount of Video Memory used by your virtual machine by adjusting its slider at the top.

If you have a multi-monitor setup, you can increase or decrease the ones used by your virtual machine using the slider for Monitor Count.

If you’re having scaling issues with your monitor, you can increase or decrease the same using the Scale Factor slider.

The Graphics Controller option allows you to change the type of graphics controller used by your virtual machine. Here are all the options and their recommended uses.
- VBoxVGA: This is the older emulated graphics controller with inferior 3D capabilities. It is recommended for older versions of VirtualBox and older versions of Windows released before Windows 7.
- VMSVGA: This is the newer emulated graphics controller with VMware SVGA 3D acceleration. It is the recommended choice for Linux users.
- VBoxSVGA: This is the same emulated controller as VMSVGA. The only difference is that hardware wise it reports itself with the same PCI ID as the VBoxVGA controller. This is the recommended graphics controller for modern versions of Windows.
- None: This will force VirtualBox to discard an emulated graphics controller. This is the recommended choice if you do not need a GPU or are using a dedicated GPU with a PCI pass-through to your virtual machine.

Now let’s get familiar with Storage options for your virtual machine. Click Storage on your left.

You can add additional storage controllers to your virtual machine using the icon at the bottom as shown below.

You can use the icon beside it to remove the selected storage controller.

Now click and select a storage controller to view and add storage devices.

You can change the name as well as the ports offered by the controller on your right.

You can even change the type of storage controller detected by your virtual machine using the Type drop-down menu.

Similarly, click the Disk icon beside your storage controller as shown below to add a virtual disk to your machine.

You can now mount an ISO to the same as we did earlier by using the Disc icon beside the assigned SATA port. Click the Drive icon beside your storage controller to add a virtual drive to your virtual machine.

Click and select the same to view its customizable options.

You can choose a new virtual drive using the Drive icon beside the assigned SATA port. You can also create a new virtual drive for your machine in VirtualBox itself using the same option.

Check the following boxes depending on the type of Drive you wish to emulate in the environment.
- Solid-state Drive
- Hot-pluggable

We can now move on and customize your machine’s audio devices. Click Audio on your left.

Check or Uncheck the box for Enable audio depending on your preferences.

Click the drop-down menu for Host Audio Driver and select your audio driver.

Similarly, select your sound controller using the Audio Controller drop-down menu.

Check the following boxes under Extended features depending on your preferences.
- Enable Audio Output: This option will help enable audio output for your virtual machine through your default devices.
- Enable Audio Input: This will allow your virtual machine to access and use your audio input devices from your host machine.

Click and select Network on your left.

Check the box for Enable Network Adapter if you wish to use the selected adapter. You can enable multiple network adapters using the tabs at the top depending on your needs.

Now click the drop-down menu for Attached to and configure your virtualized network adapter as needed.

Click Advanced to configure additional settings for your network adapter.

Click Port Forwarding and configure the same depending on your preferences if needed.

Click USB on your left.

Check the box for Enable USB controller if you wish to use one with your virtual machine.

Now click the Add new USB icon on your right.

Select the desired USB device from the ones available on your host machine. Continue adding more USB devices as needed based on your current needs and the host machine’s setup.

Finally, click OK.

And that’s it! You will now have customized the resources for your new virtual machine in VirtualBox.
Troubleshooting: How to fix VirtualBox issues
Here are some common issues faced when setting up a new machine in VirtualBox. You can use the mentioned fixes to try and troubleshoot your issue accordingly.
Display issues
Display issues mainly occur due to incorrectly assigned Video Memory and Graphics controller. We recommend you verify and assign the correct ones based on your host machine and virtualized OS.
Storage issues
Storage issues occur due to incorrectly assigned storage controllers or an incorrect number of SATA ports. It could also be that your boot order is incorrectly assigned or missing the newer virtual drives and disks added by you. We recommend you verify the same in your virtual machine settings. Additionally, keep in mind that virtual disks might fail to show up depending on the OS if there is no ISO or disk image assigned to them.
Audio issues
Audio issues are a hit or miss when virtualizing depending on your hardware and its PIN configuration. We recommend you adjust your audio settings and add new devices based on availability. You can also try switching drivers or the audio controller.
USB 2.0 and 3.0 issues
USB support out of the box is limited when it comes to VirtualBox. USB 2.0 and 3.0 is unsupported unless you have installed the VirtualBox extension pack. Use the steps above to add the same to your setup. This will help introduce USB 2.0 and 3.0 support on your virtual machine along with the following features.
- Host webcam pass-through
- VirtualBox Remote Desktop protocol
- Disk Image encryption (AES)
- Intel PXE Boot ROM
FAQs
Here are some commonly asked questions about installing and setting up VirtualBox that should help you get up to date with the latest information. Let’s get started.
Can I transfer Virtual Machines?
Yes, VirtualBox easily allows you to export and import virtual machines between different hosts. Use File > Export Appliance or Ctrl + E keyboard shortcut to do the same.
What are snapshots in VirtualBox?
Snapshots are saved states of a VM that allow you to recover data or restore the machine to its Snapshot state. This can come in handy when making changes, testing code, or developing apps.
Can I use the same keyboard and mouse with my virtual machine?
Yes, you can use the same keyboard and mouse with your VM by default. Use the host key to switch between your host and the virtual machine easily. By default, Right Ctrl is your host key. You can easily customize this key using the VirtualBox preferences.
We hope this post helped you easily set up and use VirtualBox on your system. If you face any issues or have any questions, feel free to reach out using the comments below.
Oracle’s VirtualBox is a free virtualization application you can install on Windows 11 (or 10), Mac, and Linux to create and use virtual machines to run other versions of Windows or other platforms alongside the main operating system without the need to set up dual-boot or configure another computer.
Usually, you would use this virtualization technology to test pre-releases of Windows 11 available through the Windows Insider Program, run other operating systems like Ubuntu or Kali Linux, or create another virtual machine to test software without affecting your current setup.
VirtualBox has been designed to run on Intel as well as AMD hardware. While it is meant to be an enterprise product, it’s also available for home use with support for many guests operating systems, including Windows 11, Windows 10, Windows 8, Windows 7, Vista, and older versions, Linux (2.4, 2.6, 3.x and 4.x), Solaris and OpenSolaris, OS/2, OpenBSD, and many more.
In this guide, you will learn the steps to install and configure the basic settings to get started with VirtualBox on Windows 11 and Windows 10.
- Install VirtualBox on Windows 11
- Configure VirtualBox on Windows 11
- Install VirtualBox extension pack on Windows 11
To install VirtualBox on Windows 11, use these steps:
-
Open Oracle download page.
-
Under the “VirtualBox binaries” section, click the “Windows hosts” option and save the installers on the computer.

-
Double-click the VirtualBox-x.x.x-x-Win.exe file to launch the installer.
-
Click the Next button.
-
Click the Next button again.

Quick note: You don’t have to change the default setup settings unless you have specific requirements to install VirtualBox.
-
(Optional) Clear the options you do not want to use.
-
Click the Next button to continue with the VirtualBox installation.
-
Click the Yes button to confirm the virtual network adapter install warning on Windows 11.

-
Click the Yes button to install any missing dependencies (if applicable).
-
Click the Install button.
-
Click the Finish button.


Once you complete the steps, the software will finish the installation and launch automatically. You can also launch VirtualBox from the Start menu like any other application.
Installation with winget command
Alternatively, you can install VirtualBox using the Windows Package Manager (winget) in Command Prompt.
To install VirtualBox with the winget command, use these steps:
-
Open Start.
-
Search for Command Prompt, right-click the top result, and select the Run as administrator option.
-
(Optional) Type the following command to search for the name of the application and press Enter:
winget search virtualbox
Quick note: While the search command is not required, the install query must match the ID, name, or moniker of the package, which can change at any time. So, searching the application to execute the correct install command is a good practice.
-
Type the following command to install VirtualBox on Windows 11 (or 10) with winget and press Enter:
winget install Oracle.VirtualBox


After you complete the steps, the package manager will download and install the virtualization application without extra steps.
Configure VirtualBox on Windows 11
Although the default settings will suit more users, VirtualBox has many settings and features. In the steps below, we will outline some of the most basic ones everyone should consider changing when working with virtual machines.
To configure VirtualBox settings, use these steps:
-
Open VirtualBox.
-
Click the File menu and select the Preferences option.

-
Click on General.
-
In the Default Machine Folder option, specify the folder location to store the virtual machines on Windows 11. Usually, you want to use an external hard drive since using the primary drive can slow down the system.

-
Click on Update.
-
Select the Check for updates option.
-
Confirm the update settings and whether you want to use pre-releases of the software.
-
(Optional) Click on Display.
-
In the Maximum Guest Screen size option, specify the maximum screen resolution for virtual machines.
Quick tip: You can also select the “Hint” option to create a default maximum screen resolution. Usually, you want to leave the default settings and configure the resolution in the virtual machine settings.
-
In the Scale Factor option, select the scale virtual machines should use to make text and visual elements smaller or bigger.
-
Click the OK button.


After you complete the steps, the custom configuration will apply to the virtualization software.
Since the virtualization application configures NAT (Network Address Translation) automatically on each host you create, you do not need to configure the networking settings to get started. However, VirtualBox includes networking settings to create different host-only adapters and bridges, internal networks, and more.
Install VirtualBox extension pack on Windows 11
The extension pack is not a requirement, but it enables USB 2.0 and 3.0 devices, VirtualBox RDP, drive encryption, NVMe, and PXE boot for Intel Cards.
To install the extension pack for VirtualBox, use these steps:
-
Open Oracle download page.
-
Under the “VirtualBox Extension Pack” section, click the All supported platforms link to download the latest pack.

-
Open VirtualBox.
-
Click the File menu, select the Tools submenu, and choose the “Extension Pack Manager” option.

-
Click the Install button.
-
Select the “.vbox-extpack” file containing the extensions.
-
Click the Open button.
-
Click the Install button.

-
Scroll down the page.
-
Click the “I agree button to confirm the terms” option.
-
Click the OK button.
-
Click the OK button again.


Once you complete the steps, the Oracle VM VirtualBox Extension Pack will install on the device. Then you can proceed with the virtual machine creation and the Guest Additions installation.
If you want to remove it, select the package on the “Extensions” page, and click the Remove Selected Package button in the top-right.
- Нажмите для просмотра политики доступа
- Перейти к содержанию
Oracle VM VirtualBox Extension Pack
Free for personal, educational or evaluation use under the terms of the VirtualBox Personal Use and Evaluation License on Windows, Mac OS X, Linux and Solaris x-86 platforms:
Depending on your browser, you may need to right click and «Save As…» this file.
You might want to compare the SHA256 checksum or the MD5 checksum to verify the integrity of downloaded packages.
Source Code for Oracle VM VirtualBox Base Packages
Depending on your browser, you may need to right click and «Save As…» this file.
You might want to compare the SHA256 checksum or the MD5 checksum to verify the integrity of downloaded packages.
Note: older Oracle VM VirtualBox 6.1 release downloads are available here.
Давайте признаем это; нас всегда призывали запускать две или более операционных систем на наших компьютерах. Это возможно с двойной загрузкой, но вы не можете запускать две операционные системы одновременно при двойной загрузке.
Для запуска двух или более операционных систем на компьютере лучше всего полагаться на продукты виртуализации. Продукты виртуализации, такие как VirtualBox, позволяют создавать виртуальные компьютеры и запускать различные операционные системы.
Допустим, вы используете ПК с Windows, но хотите поэкспериментировать с Linux. В этом случае вы можете установить программное обеспечение для виртуализации на свой ПК с Windows и поэкспериментировать с Linux.
Что такое виртуальный бокс?
VirtualBox — очень популярная платформа с открытым исходным кодом. ПО для виртуализации вычислительная архитектура x86. Мы не будем обсуждать ничего технического, потому что вам может быть трудно это понять.
Проще говоря, вы можете использовать VirtualBox в качестве программного пакета, который позволяет вам использовать хранилище вашего ПК для создания виртуальной среды.
После создания виртуальной машины вы можете запустить в нее другую ОС. Допустим, вы используете ПК с Windows, но хотите попробовать Linux. С помощью виртуальной машины вы можете запускать Linux вместе с ПК с Windows.
Итак, это программное обеспечение с открытым исходным кодом, которое помогает запускать операционную систему в другой операционной системе.
Системные требования для VirtualBox
Хотя VirtualBox может показаться простым, у него огромный список требований. Не каждый компьютер может работать с Virtualbox. Вам нужен не только ПК среднего или высокого класса, но и совместимый процессор для запуска Virtualbox.
Ниже мы перечислили системные требования для запуска VirtualBox на ПК. Проверьте это.
- Процессор: Необходим ЦП с «технологией виртуализации». Вам также нужен многоядерный процессор с как минимум 4 ядрами, чтобы запустить его на устройстве.
- Хранилище: Минимум 20 ГБ для каждой виртуальной машины.
- БАРАН: Для виртуализации требуется минимум 4 ГБ. 8 ГБ рекомендуется для более плавной работы.
- ГП: Обязательно, если вы хотите запускать на виртуальной машине приложения с интенсивным использованием графики.
Итак, это те системные требования для запуска Virtualbox на ПК. Даже если ваш процессор поддерживает технологию виртуализации, возможно, вам придется включить ее на экране BIOS/UEFI.
Скачать последнюю версию VirtualBox для ПК
Теперь, когда вы знаете, что такое VirtualBox, вы можете загрузить VirtualBox на свой компьютер.
Поскольку VirtualBox — это программное обеспечение с открытым исходным кодом, оно бесплатное, и каждый может загрузить и установить его, ничего не тратя. Ниже мы поделились ссылками для скачивания VirtualBox.
Это прямые ссылки для скачивания с официального сайта VirtualBox. Все загрузки свободны от вирусов и вредоносных программ и полностью безопасны для загрузки и использования.
Шаги по установке VirtualBox на ПК
После загрузки VirtualBox вы можете установить его. Однако во время установки вы получите множество различных опций. Некоторые функции и опции сбивают вас с толку; поэтому мы придумали простой способ установить виртуал бокс на пк.
1. Прежде всего, загрузите и установите установщик VirtualBox на свой компьютер. Вы можете получить ссылки для скачивания из раздела выше.
2. После загрузки запустите программу установки Oracle VM Virtualbox и принять условия Лицензионного соглашения.
3. Выберите расположение чтобы установить VirtualBox и нажмите Следующий.
4. Теперь вы увидите предупреждение сетевых интерфейсов. Нажать на Да кнопка. Это временно отключит вас от Интернета.
5. На экране готовности к установке щелкните значок Установить кнопка.
6. Теперь вам нужно дождаться, пока VirtualBox установится на ваш компьютер.
7. После установки откройте Виртуальный бокс на вашем компьютере из меню «Пуск». Вы увидите похожий экран.
8. Чтобы добавить виртуальную машину, щелкните значок ‘Новыйзначок вверху.
9. Теперь назовите новая виртуальная машинавыберите папку установки виртуальной машины и ISO-файл операционной системы, которую вы хотите установить.
Важный: Вам будет предложено включить виртуализацию перед установкой виртуальной машины. Действия по включению виртуализации зависят от вашего процессора и материнской платы. Вы можете посмотреть видеоролики на YouTube, чтобы узнать, как включить виртуализацию или режим SVM на вашем процессоре.
Вот и все! В другой статье мы обсудим установку Windows, Linux, macOS и т. д. на VirtualBox. Это было все об установке VirtualBox на ПК.
Итак, это все о том, как загрузить и установить VirtualBox на ПК. Если вам нужна дополнительная помощь в установке VirtualBox на ПК, сообщите нам об этом в комментариях. Также, если статья вам помогла, поделитесь ею с друзьями.