В материале Вы узнаете, как производится установка и настройка Android Studio на операционных системах Windows 7 и 10 с подробным описанием имеющегося в программе функционала.

Установка Android Studio
Чтобы создавать приложения для Андроид стало проще, понятней и доступней — компания Гугл выпустила специальную программу «Android Studio». Краткий ответ на вопрос, что такое Android Studio, будет звучать так: это комплекс программных инструментов, который используется для разработки программного обеспечения. Эта IDE-среда нужна для создания приложений для устройств на платформе Андроид: часы, смартфоны, планшеты и т.д. Доступна для Windows, Linux, OS X.
Невозможна установка Android Studio без Java Development Kit (JDK). Не забудьте принять лицензионное соглашение.
Перед тем, как установить Android Studio, убедитесь, что ОС и ПК соответствуют следующим показателям:
- объем оперативной памяти не менее 2 ГБ (желательно 8 ГБ);
- на диске 2-4 ГБ свободного места;
- разрешение экрана как минимум 1280*800 пикселей;
- для ускорения работы эмулятора требуется ОС разрядностью 64 бита, процессор Intel, поддерживающий функции Intel VT-x, Intel 64, Execute.
Разработка Android ведется на Java, а т.к. JDK — это необходимый элемент для работы с Java, то загрузка JDK требуется и для Android. Затем загружаем Андроид Студио.

Для Windows 7, 8, 10
Программа будет скачана архивом. Перед тем, как установить Android Studio на Windows 7, 8 или 10, необходимо распаковать архив.
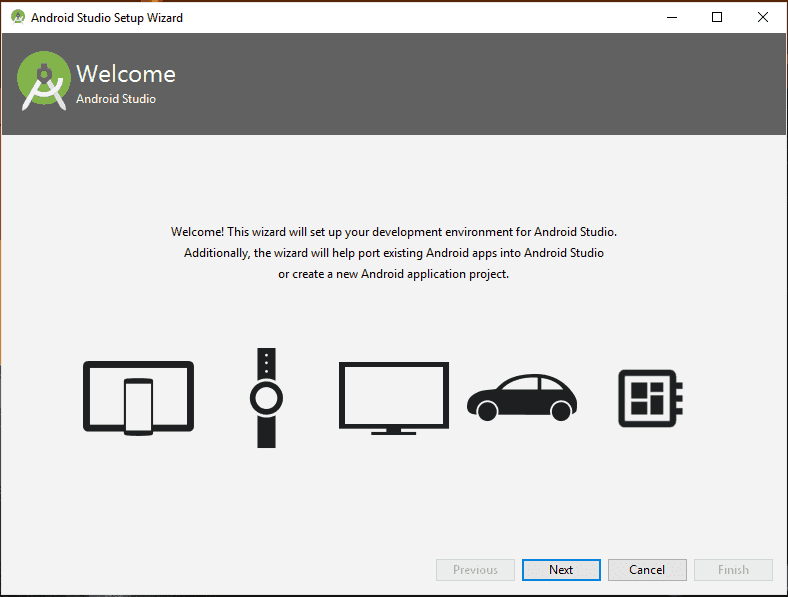
- После того, как распаковка закончена, находим ярлычок программы и кликаем на него. Появляется окошко с приветствием. Жмем на «next».
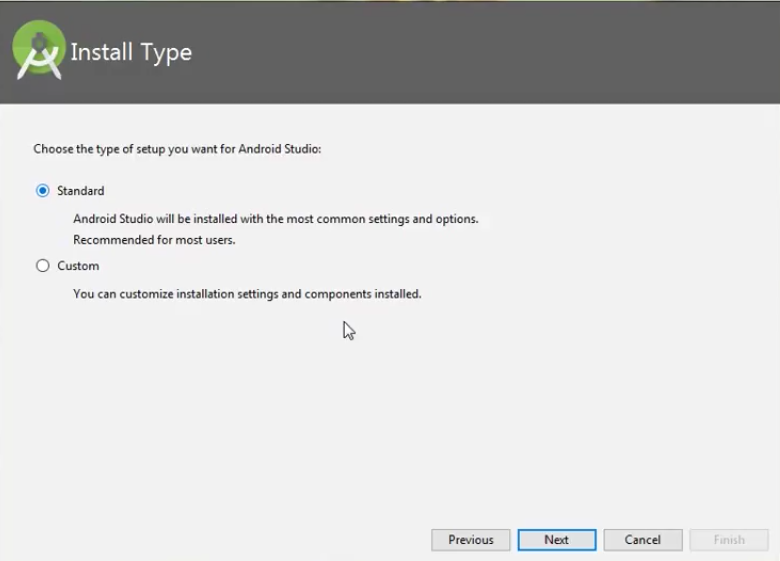
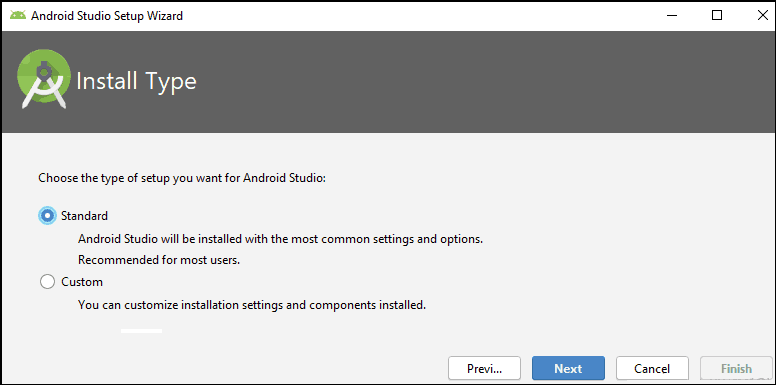
- В следующем окне предлагается выбрать тип настройки для Android Studio. Выбираем стандартную версию.
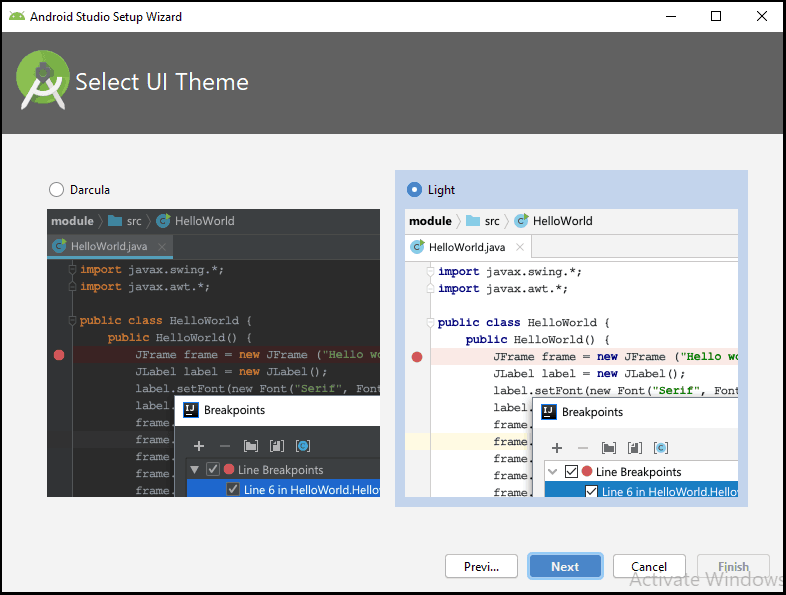
- Теперь предлагается выбрать тип дизайна страницы — темный или светлый. Выбираем, какой нравится больше и жмем «next».
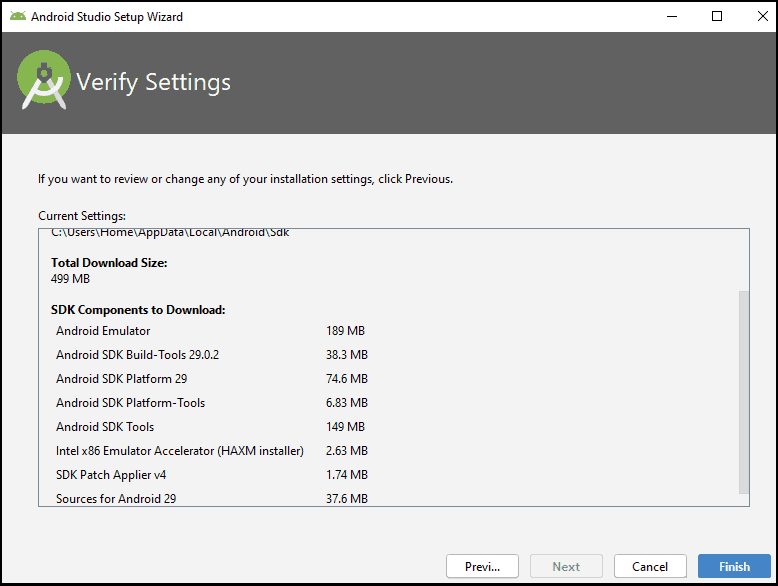
- Следом проверить, не требуется ли вносить изменения в уже установленные программы. Для первой загрузки ничего менять не нужно, поэтому нажимаем «финиш».
- После проверок и уточнений запускается процесс загрузки программы.
- Следом идет процесс распаковки.
- Дожидаемся завершения действия, и нажимаем «финиш».
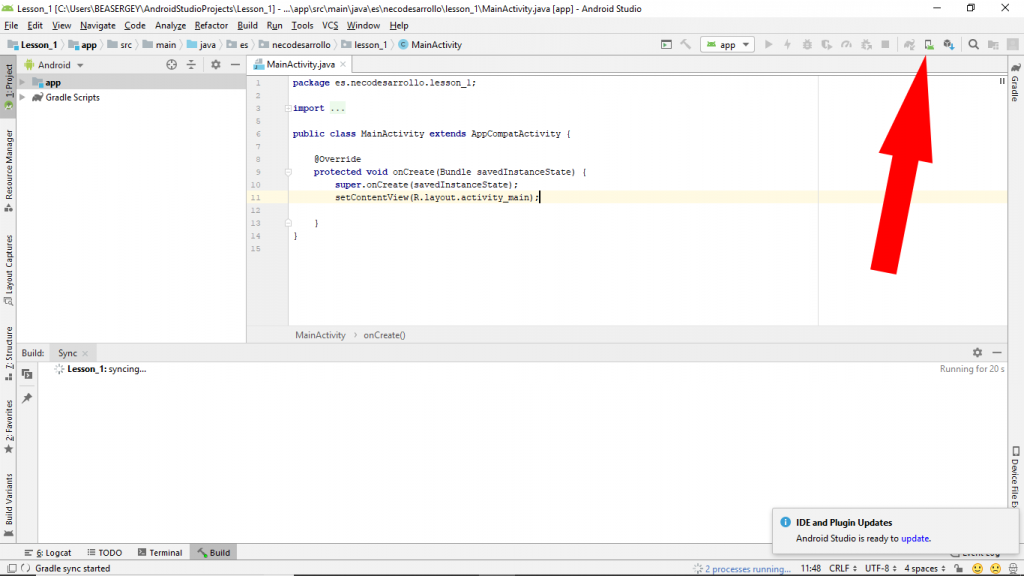
Открылся Welcome экран. Первый урок о том, как установить Андроид Студио на Виндовс 7, 8 или 10, закончен.

Как использовать
В открытом виде доступны для выбора следующие действия: создать новый проект, открыть существующий и т.п. Внизу кнопки «Настройки» и «Помощь».
Создание проекта
- Нажимаем кнопку «Начать новый проект Андроид Студио».
- Выбираем Empty Activity.
- В следующем окошке выбираем язык программирования, указать название проекта.

Работа с файлами проекта
В открытом окне видно меню, где предлагается выбрать действия с шрифтом и файлами.
Стоит указать разницу между обычным программированием и программированием на Андроид: здесь программа пишется не в одном файле. Здесь группа файлов, которые собираются в одну группу.
Программирование осуществляется при помощи файла xml, привязка действий для нее — файл java. В папке res хранятся дополнительные ресурсы (например, изображения), в папке values — файлы XML.

Работа с визуальным редактором XML
Чтобы XML функционировал, нужны файлы JAVA. Для этого открываем losst.ru и под строками «импорт» добавляем: import Android.webkit.WebView. В конец метода onCreate пишем:
WebView mywebview = (WebView) findViewById(R.id.webView);

mywebview.loadUrl("https://losst.ru")
Опция Gradle
Этот инструмент требуется для автоматизации сборки. С ним процесс превращения группы файлов в полноценный APK упрощается. Настройки опции расположены в файлах с аналогичным названием. Для исправления неисправности в работе системы нажимаем «build» и «clear project».

Отладка и сборка
Чтобы запустить приложение на устройстве Андроид — нужно разрешить устанавливать приложения из непроверенных источников и производить отладку через порт USB. После того, как смартфон соединен с ПК, нужно нажать «run» и «run app».
В появившемся окне отмечаем выбранное устройство, после произойдет запуск.
Чтобы отслеживать сообщения и контролировать работу приложения, нужно нажать в меню «Андроид монитор», вкладка «LogCat», рядом расположены логи Андроид Студио. Сведения об устройстве и показатели нагрузки видны на вкладке «Монитор».

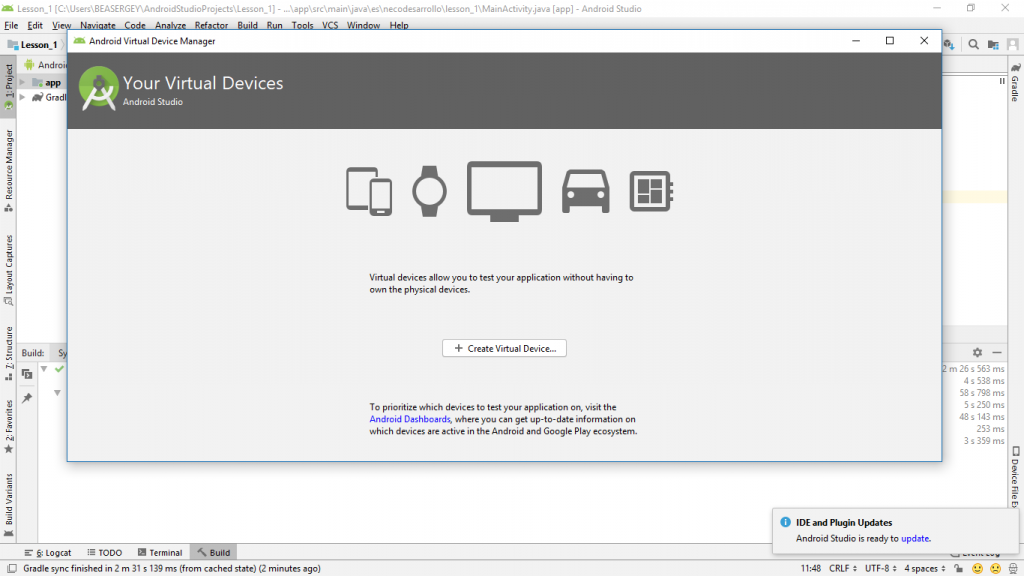
ADV Manager
Одна из главных функций этого приложения — обеспечение загрузки проектов на мобильные носители. Для скачивания менеджера нажимаем «Tools», затем «Android» и «ADV Manager».
Порядок действий следующий:
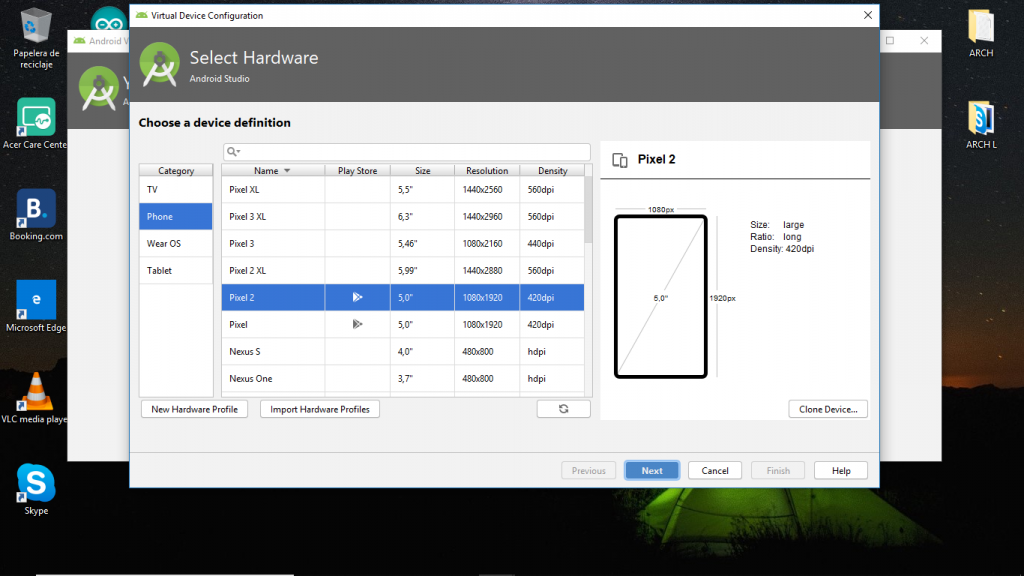
- Выбираем «Create Virtual Device».
- Потом отмечаем устройство, подлежащее эмулированию.
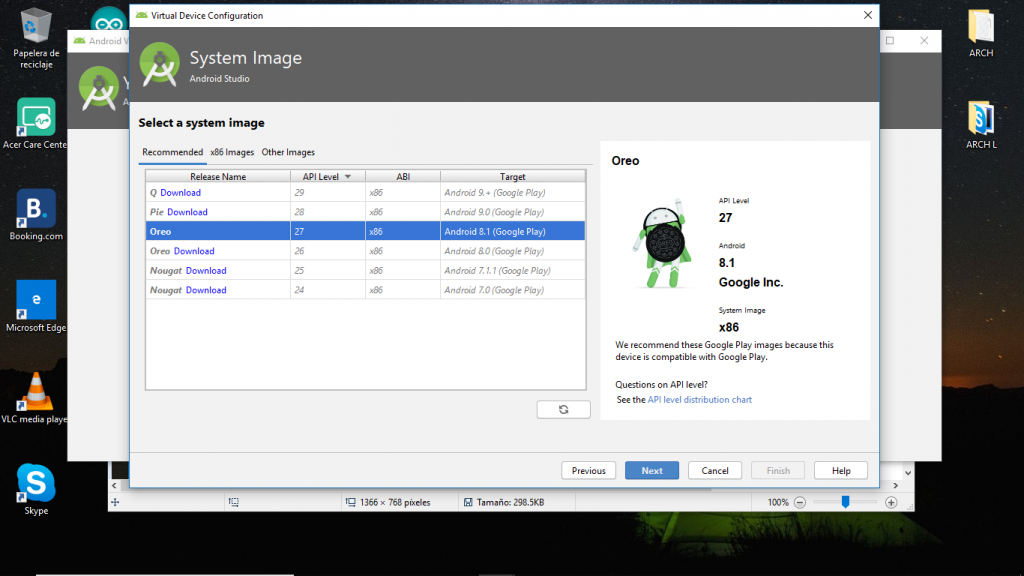
- Требуется скачать прошивку и согласится с условиями лицензионного договора.
Приложение устанавливается.

SDK Manager
Эта программа «дарит» проекту такие функции, как использование камеры, блютуз, и т.п. Найти ее можно в разделе «Tools».
Далее выбираем нужный компонент.

Создание APK
В «Tools» нужно выбрать «Create signed APK»:
- Теперь выбираем или создаем хранилище ключей, чтобы оформить приложение на себя и защитить от возможного взлома в Гугл Плей.
- Выбираем «Release» в пункте «тип сборки» и нажимаем «финиш».
Вступление
Всем привет! Начинаем первый урок по созданию приложений для оперативной системы Андроид. На этом уроке мы установим программу для создания приложений “Android Studio”. Это бесплатная программа и скачать ее вы сможете по ссылки ниже. А также мы создадим эмулятор для тестирования приложений на компьютере. Для тех кто не знает что такое эмулятор: эмулятор это виртуальный смартфон который в точности работает как и реальный смартфон, эмулятор нам помогает тестировать приложения без необходимости устанавливать приложения на наш смартфон. Еще достоинство данного эмулятора в том что мы можем создать виртуальный смартфон с нужными нам характеристиками, такими как: память, разрешение экрана и.т.д
Скачиваем «Android Studio»
Если у вас оперативная система на вашем компьютере Windows 10 то вам скорее всего не придется устанавливать Java JDK, лично мне не пришлось устанавливать не на одном из моих компьютеров с Windows 10. А вот на компьютере с Windows 7 пришлось установить. Java JDK. Java JDK нам нужно так как мы будем писать приложения на языке программирования Java. Ниже находиться ссылка на скачивание. После установки рекомендую перезагрузить компьютер, если ссылка не работает то гуглим “java sdk download“. Если уже установлено то переходим к скачиванию программы “Android Studio“, не забываем что нам понадобится место на жостком диске около 1Гб для скачивания “Android Studio“.
Установка «Android Studio»
Скачали exe-файл, жмем на него и начинается установка. В первом появившемся окне жмем “Next“.
В следующем окне убедитесь что “Android Virtual Device” отмечен и жмем “Next”.
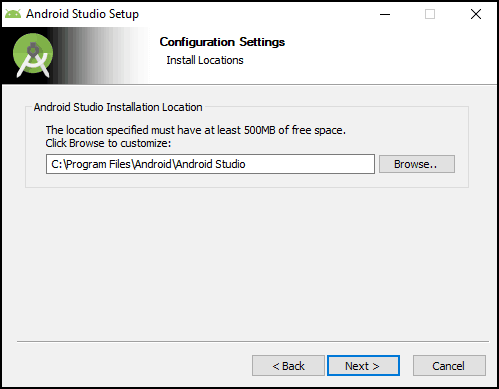
В следующем окне можно выбрать где установится программа. Можно оставить все как есть и жмем “Next“.
В следующем окне можно оставить все как есть и жмем “Install“.
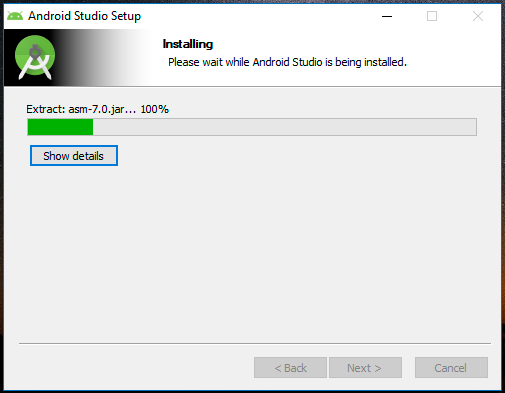
Начинается установка, ждем завершения установки и жмем “Next“.
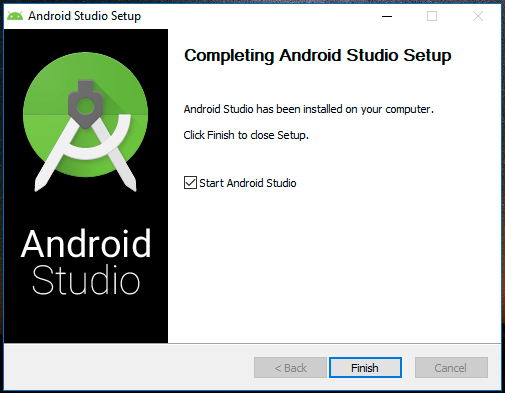
Установка завершена, жмем “Finish“.
Теперь нам нужно установить все что нам понадобится для работы. Идем в SDK manager.
В SDK manager устанавливаем пакеты которых не хватает. Сначала в SDK platform устанавливаем пакеты с версиями андроид устройств для которых будем писать приложения, можете установить как у меня, выбираем нужные пакеты и жмем “OK” и начнется скачивание и установка пакетов.
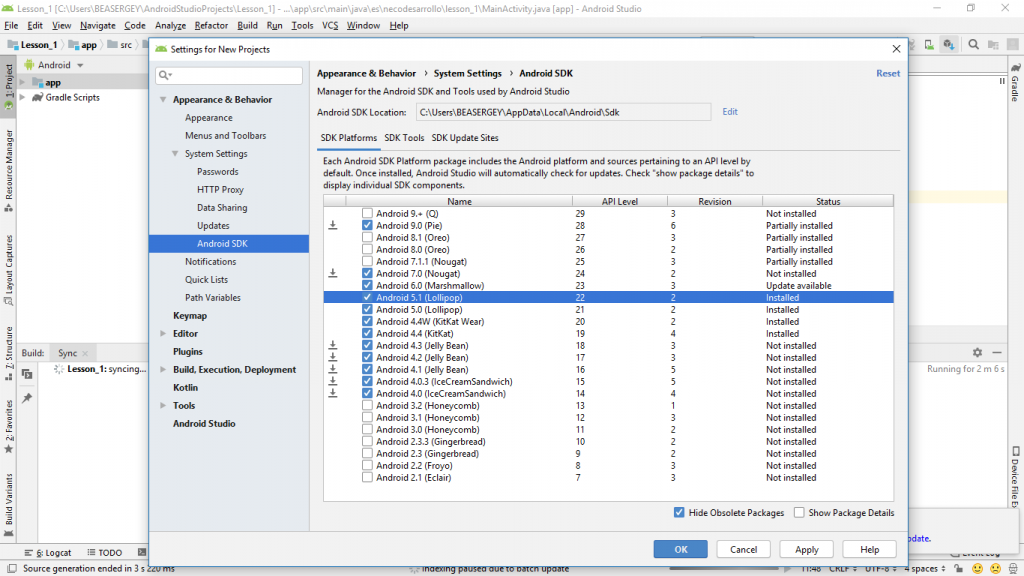
В SDK manager устанавливаем пакеты которых не хватает.Переходим в SDK tools и устанавливаем пакеты как у меня выбираем нужные пакеты и жмем “OK” и начнется скачивание и установка пакетов.

Все, теперь Android Studio готово к работе, давайте теперь создадим виртуальный смартфон “эмулятор” и запустим его. Жмем на кнопку AVD manager
В открывшемся окне жмем Create virtual device
Выбираем устройство с нужными нам характеристиками (разрешение экрана и.т.д) и жмем “Next“
Выбираем устройство с версией андроид которая нам интересна и жмем “Next“
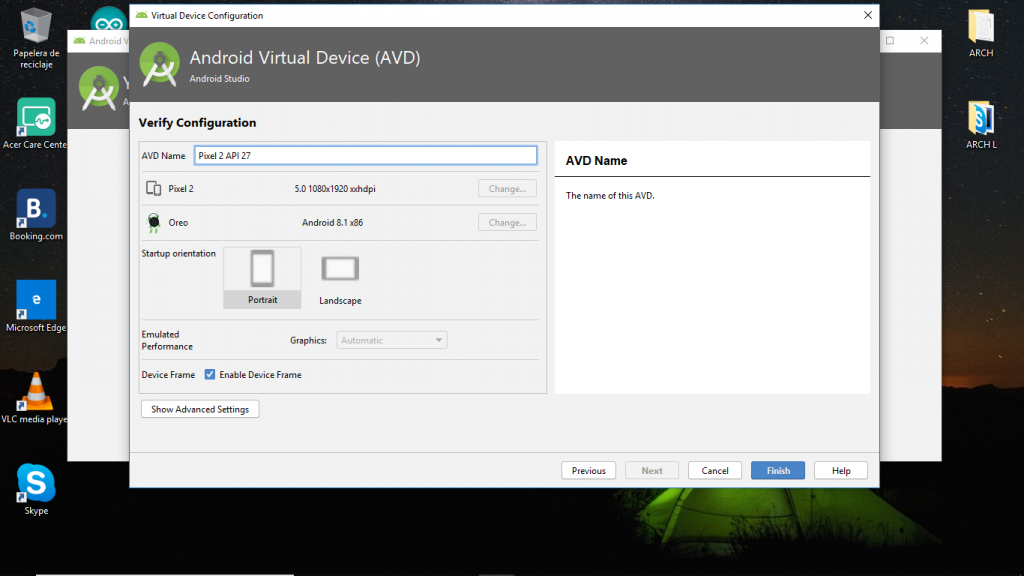
На следующем открывшемся окне мы можем дать свое имя данному устройству, на случай если у нас их будет несколько, будет легче распознать и жмем “Finish“
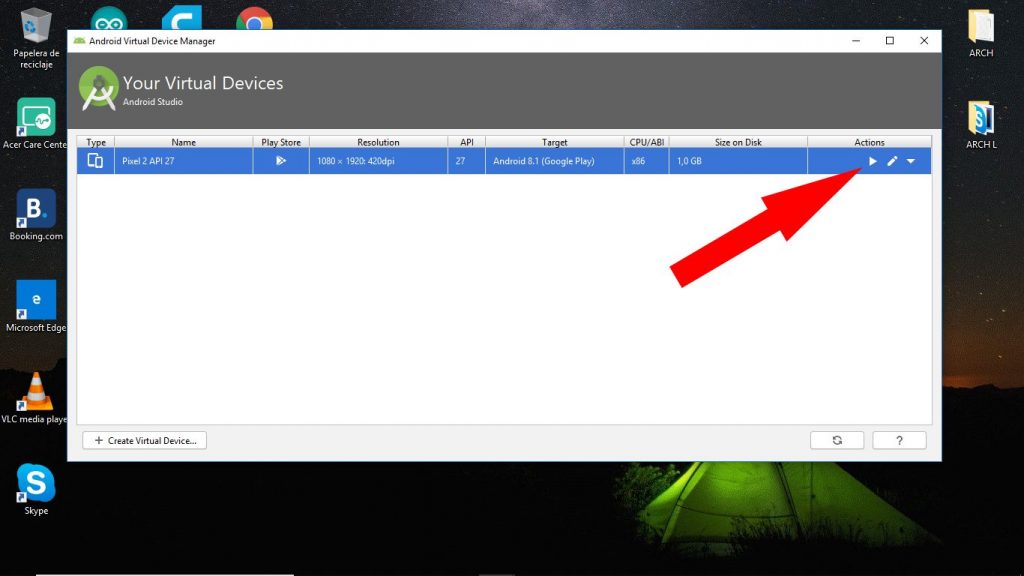
Теперь при открытии AVD manager появится наш эмулятор, жмем на кнопку запуска и эмулятор запустится на вашем компьютере
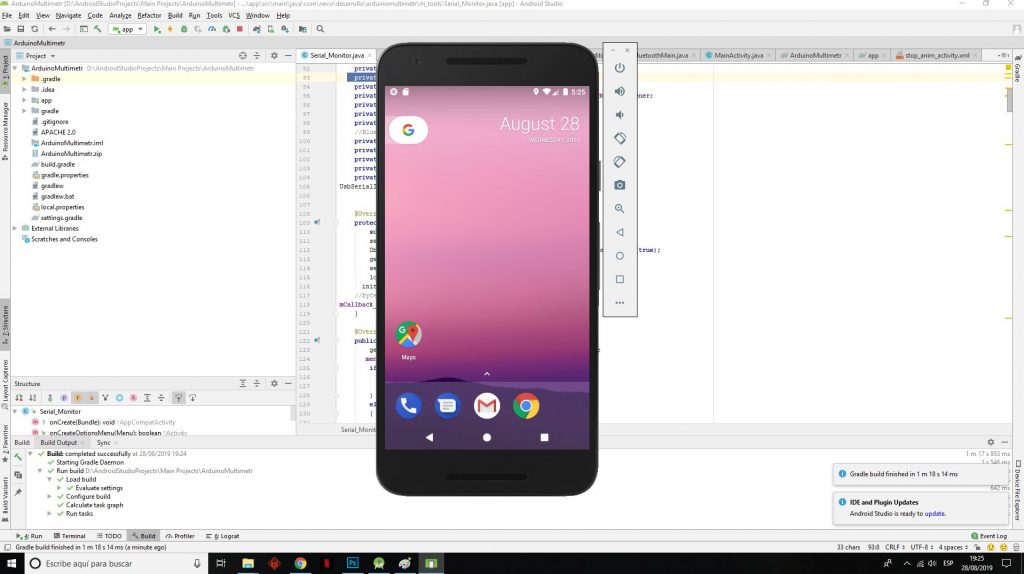
Ну вот и наш эмулятор! Теперь можем пользоваться им для тестирования наших приложений. Надеюсь что вам все понятно, если что не понятно оставляйте комментарий внизу. На следующем уроке начнем изучать создание приложений для оперативной системы андройд! Всего доброго и до встречи на следующем уроке!
Android Studio is the official IDE (Integrated Development Environment) for Android app development and it is based on JetBrains’ IntelliJ IDEA software. Android Studio provides many excellent features that enhance productivity when building Android apps, such as:
- A blended environment where one can develop for all Android devices
- Apply Changes to push code and resource changes to the running app without restarting the app
- A flexible Gradle-based build system
- A fast and feature-rich emulator
- GitHub and Code template integration to assist you to develop common app features and import sample code
- Extensive testing tools and frameworks
- C++ and NDK support
- Built-in support for Google Cloud Platform, making it easy to integrate Google Cloud Messaging and App Engine, and many more.
- Provides GUI tools that simplify the less interesting parts of app development.
- Easy integration with real time database ‘firebase’.
System Requirements
- Microsoft Windows 7/8/10 (32-bit or 64-bit)
- 4 GB RAM minimum, 8 GB RAM recommended (plus 1 GB for the Android Emulator)
- 2 GB of available disk space minimum, 4 GB recommended (500 MB for IDE plus 1.5 GB for Android SDK and emulator system image)
- 1280 x 800 minimum screen resolution
Installation Guide
Step 1: Head over to this link to get the Android Studio executable or zip file.
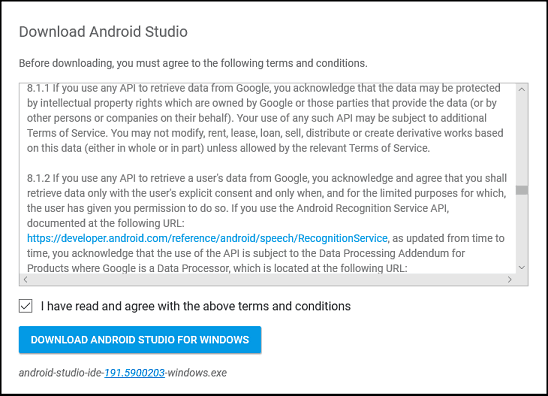
Step 2: Click on the Download Android Studio Button.
Click on the “I have read and agree with the above terms and conditions” checkbox followed by the download button.
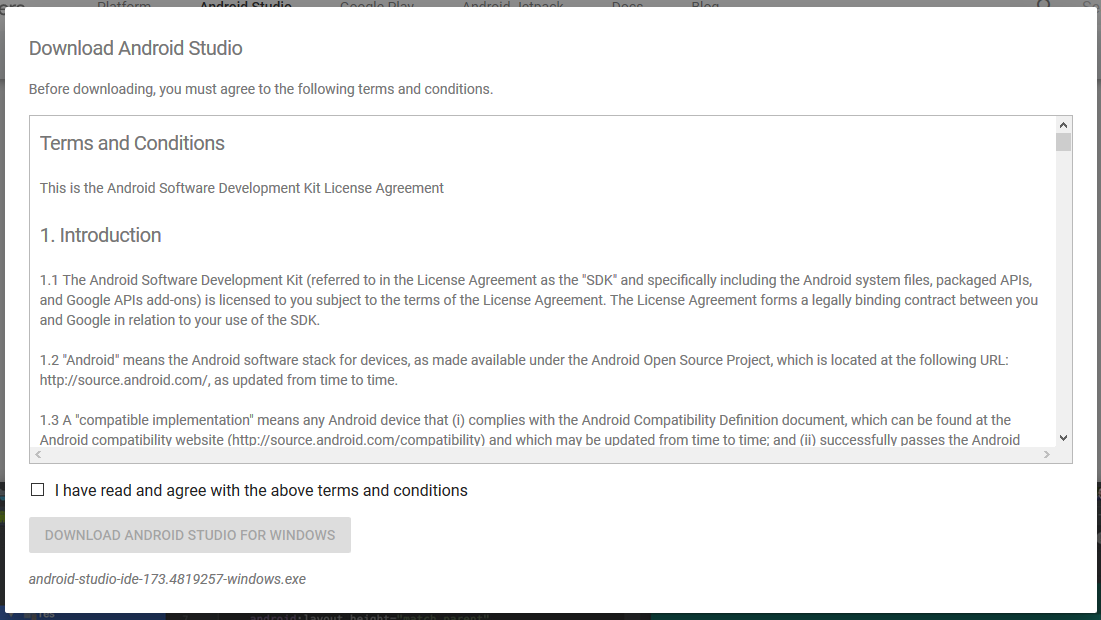
Click on the Save file button in the appeared prompt box and the file will start downloading.
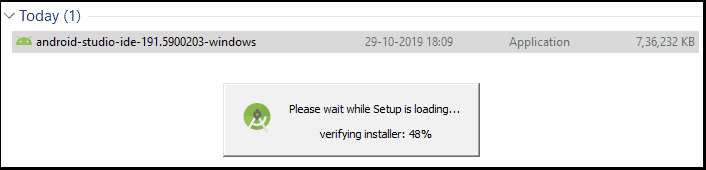
Step 3: After the downloading has finished, open the file from downloads and run it. It will prompt the following dialog box.
Click on next. In the next prompt, it’ll ask for a path for installation. Choose a path and hit next.
Step 4: It will start the installation, and once it is completed, it will be like the image shown below.
Click on next.
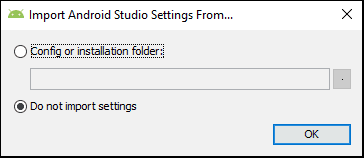
Step 5: Once “Finish” is clicked, it will ask whether the previous settings need to be imported [if the android studio had been installed earlier], or not. It is better to choose the ‘Don’t import Settings option’.
Click the OK button.
Step 6: This will start the Android Studio.
Meanwhile, it will be finding the available SDK components.

Step 7: After it has found the SDK components, it will redirect to the Welcome dialog box.
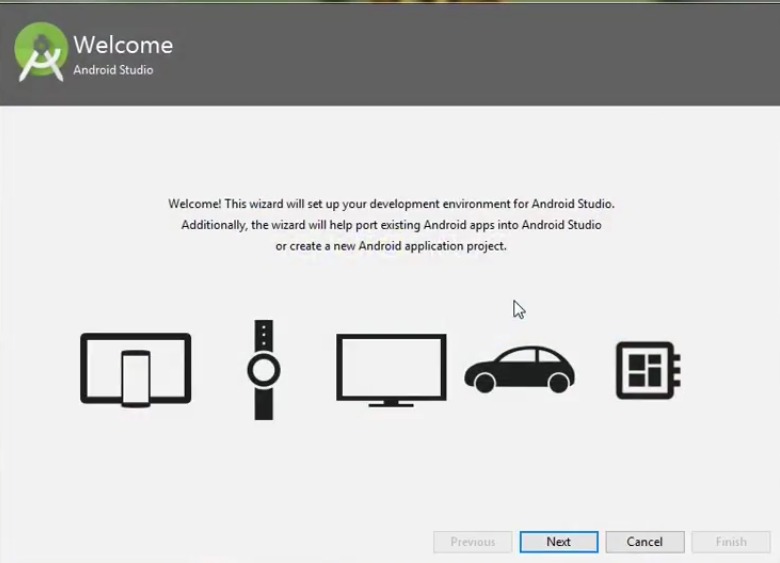
Click on Next.
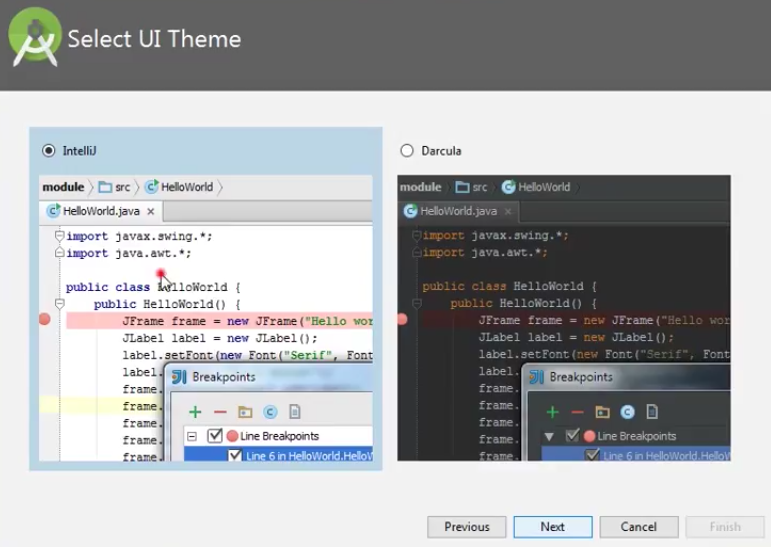
Choose Standard and click on Next. Now choose the theme, whether the Light theme or the Dark one. The light one is called the IntelliJ theme whereas the dark theme is called Dracula. Choose as required.
Click on the Next button.
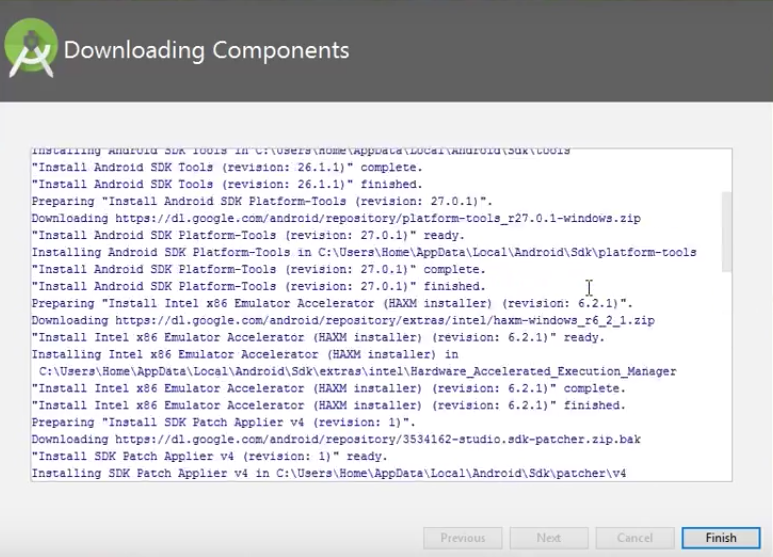
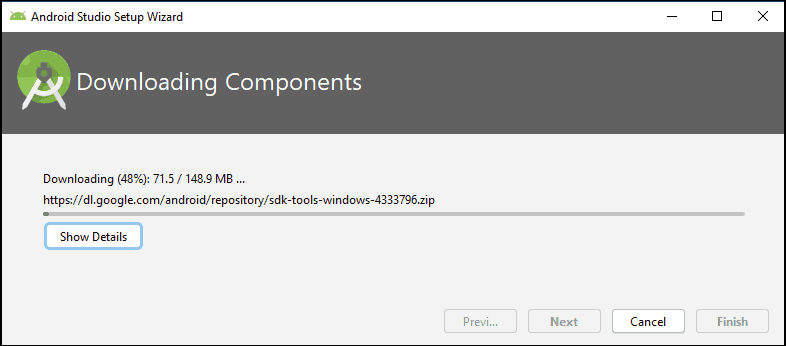
Step 8: Now it is time to download the SDK components.

Click on Finish. Components begin to download let it complete.
The Android Studio has been successfully configured. Now it’s time to launch and build apps. Click on the Finish button to launch it.
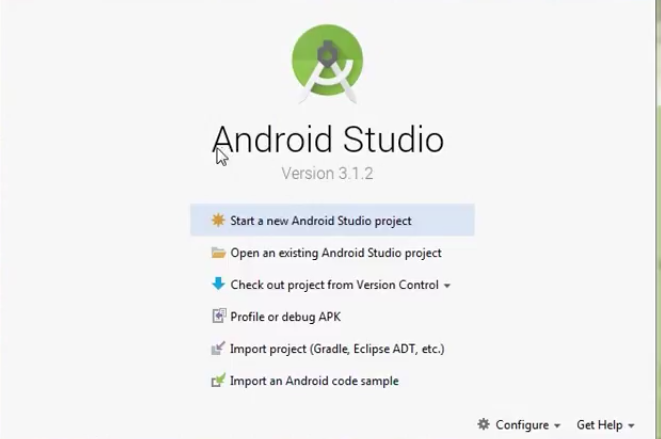
Step 9: Click on Start a new Android Studio project to build a new app.
To run your first android app in Android Studio you may refer to Running your first Android app.
Last Updated :
16 Nov, 2022
Like Article
Save Article
In this How to install Android Studio on Windows guide, we will show you how to download, install & setup Android Studio. This tutorial is installing the Android Studio Version 3.5.1 on the Windows 10 OS, but steps should work equally well with other flavors of windows like Windows 7 & Windows 8. First, we will check the Prerequisites required to install Android Studio. Next, we download the Android Studio. Finally, we will show you how to install Android Studio
Table of Contents
- What is Android Studio
- How to install Android Studio on Windows
- Prerequisites
- Downloading Android Studio
- Installing Android Studio
- Setup Android Studio
- Starting Android Studio
- Summary
What is Android Studio
Android Studio is an integrated development environment to build, develop, test and distribute Android-based applications. The IDE is developed & maintained by google. It is built on top of JetBrains IntelliJ IDEA software.
We can develop apps for android in many ways. For Example, you can use Ionic, React Native, NativeScript, Java, Kotlin and now the latest flutter. Each employs different techniques to build the App. Frameworks like Ionic uses the Hybrid model, where you can build apps using HTML & Javascript and runs inside a native app shell in the device. The Apps using Java or Kotlin can runs natively in the device. The frameworks like React Native & NativeScript, which allows us to write in Javascript but converts them to the native code.
The Android Studio is preferred IDE when you choose Java or Kotlin as the language. But, even if you choose any other tool like Nativescript or React Native, you still need to install & Manage Android SDK and Android Emulator. These tools are part of the Android Studio and are installed along with it. Hence It is necessary to install the Android Studio.
Prerequisites
OS & Hardware
- Microsoft® Windows® 7/8/10 (32- or 64-bit)The Android Emulator only supports 64-bit Windows (learn more).
- 4 GB RAM minimum, 8 GB RAM recommended
- 2 GB of available disk space minimum
- 4 GB Recommended (500 MB for IDE + 1.5 GB for Android SDK and emulator system image)
- 1280 x 800 minimum screen resolution
JDK
Android Studio since version 2.2 is comes bundled with OpenJDK 8. Hence there is no need to install the JDK separately. It is recommended to use the OpenJDK.
If you have an old Android project’s, which uses the JDK you can convert them to use the OpenJDK from the Android Studio menu, File > Project Structure -> SDK Location -> JDK location and check the Use embedded JDK
Downloading Android Studio
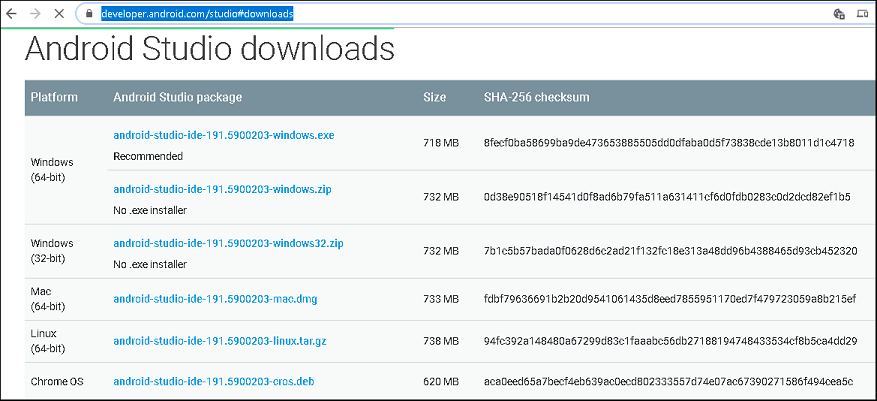
You can download it from the link https://developer.android.com/studio#downloads
Under downloads for windows, you can either download 64 bit or 32-bit versions. The 32-bit version can only be downloaded as a zip file, while 64 bit is available as exe installer.
The current version as of this writing this article is Android Studio 3.5.1
Next, accept the license agreement and click on “Download Android Studio for Windows” to begin download.
For 32 Bit Windows
1. Go to C:\Program Files.
2. Create a folder named Android.
3. Unzip the downloaded Zip file
4. Copy the folder Android-Studio from the unzipped file to the folder C:\Program files\Android.
5. Rename the folder from Android-Studio to Android Studio
6. Locate the Studio.exe and create a shortcut on the desktop
Installing Android Studio
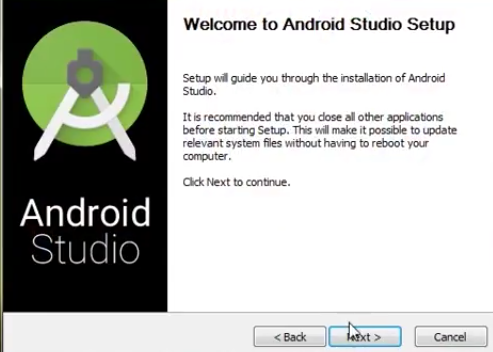
Double click on the downloaded installer to begin the Installation Process.
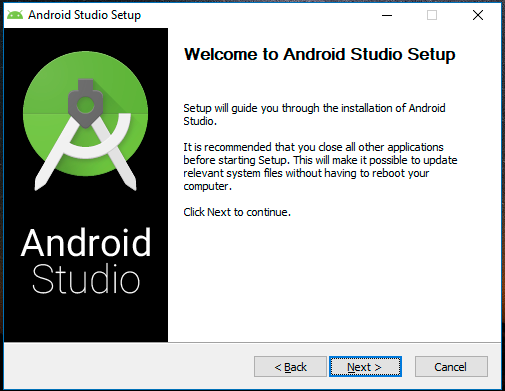
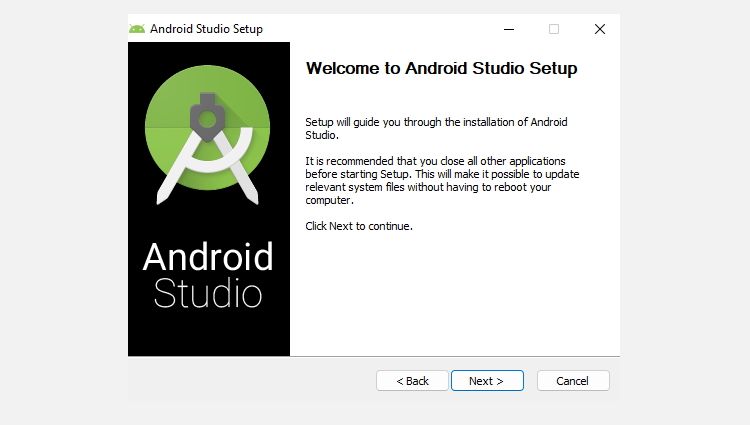
Click Next on Welcome to Android Studio Setup screen
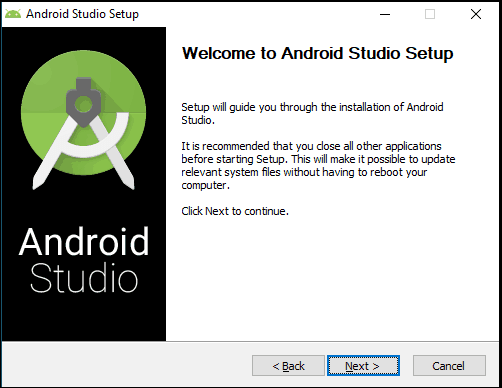
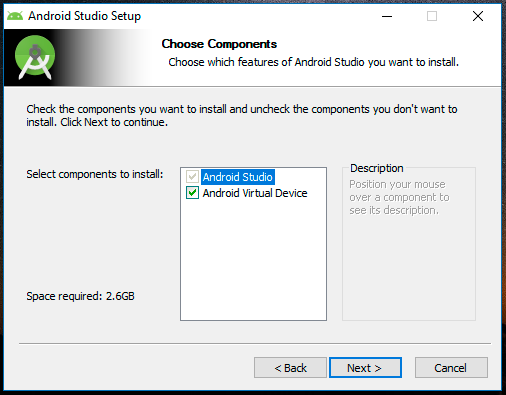
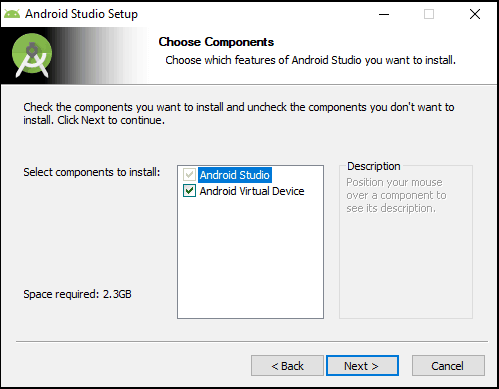
After the welcome screen, you will be presented with the option to choose the components. Select both the option and click on Next.
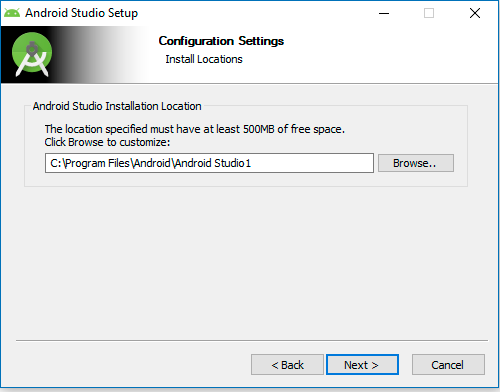
Next, choose the installation location. Accept the defaults and click on Next to continue.
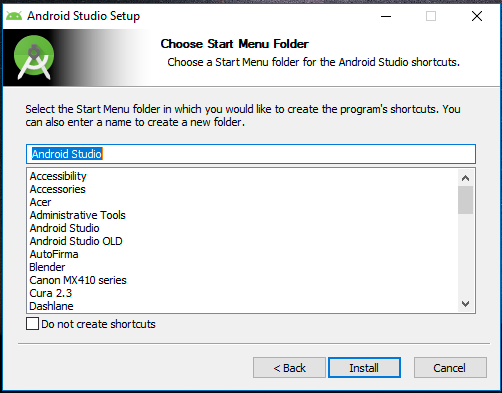
The next window is about selecting the start menu folder. Accept the defaults and click on Install to begin the installation.

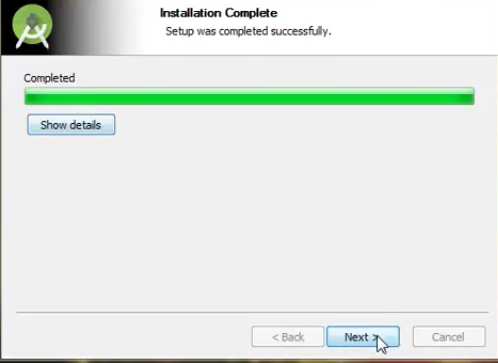
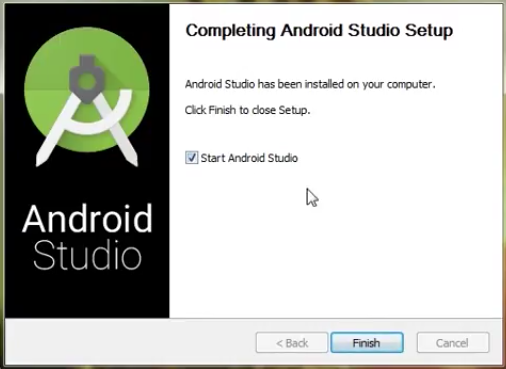
Completing the Android Studio setup screen appears once the installation completes.
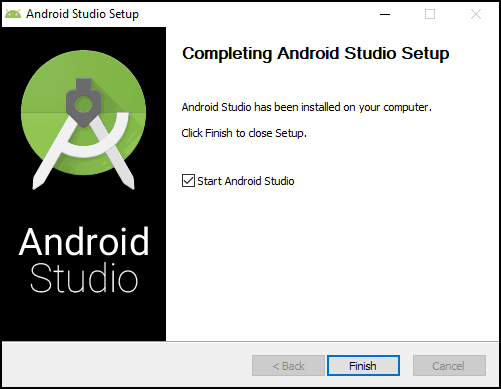
Select the Start Android Studio and Click on Finish. The Android Studio starts for the first time
Setup Android Studio
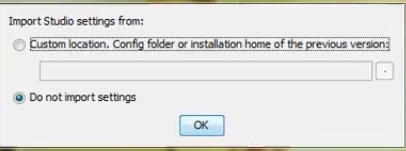
When you start Android Studio for the first time, it will ask you to Import the Studio settings. Since this is a fresh installation choose not to import settings and click on OK.
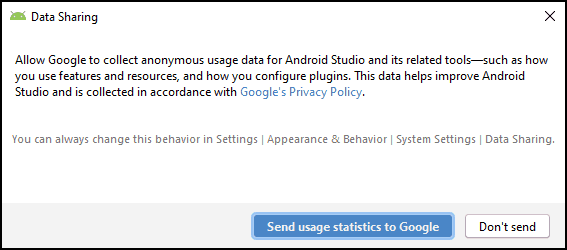
You may be asked to send the usage statistics to Google. choose accordingly.
The Android Studio will download a few components and then displays the Android Studio Setup Wizard dialogue box as shown below. Click Next to continue.
The second dialogue box asks for the install type. Select the default i.e. Standard and click on next to continue to next window.
The next up is the select UI Theme screen with two options Light & Darcula. Let us keep the default Light theme.
Finally, the Verify Settings dialogue appears, where you can verify the settings here. Click on Previous if you want to change any of the settings else click on finish to complete the installation.
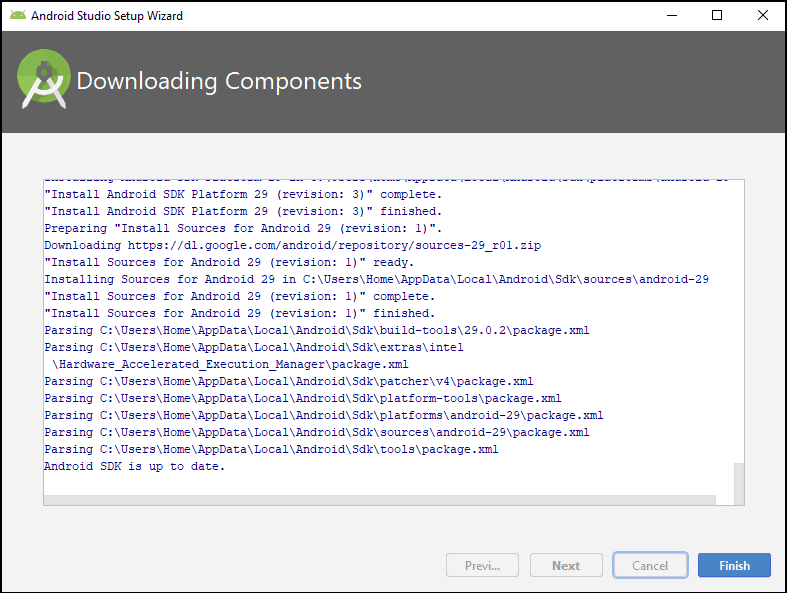
Now, the Android Studio setup wizard starts to download the various components and installs them in the system. This will take time depending on your internet connection.
You may see HAXM Installation Failed error here. It will happen under the following circumstances
- If the processor is non-intel based.
- If you have not disabled the Hyper-V Manager
Ignore them for now and continue.
If you are on intel based CPU, then HAXM is very important. without which Android Virtual Device (AVD) runs very very slowly.
The following screen appears once all the essential components are downloaded and installed. At this point the Android Studio installation is complete.
Starting Android Studio
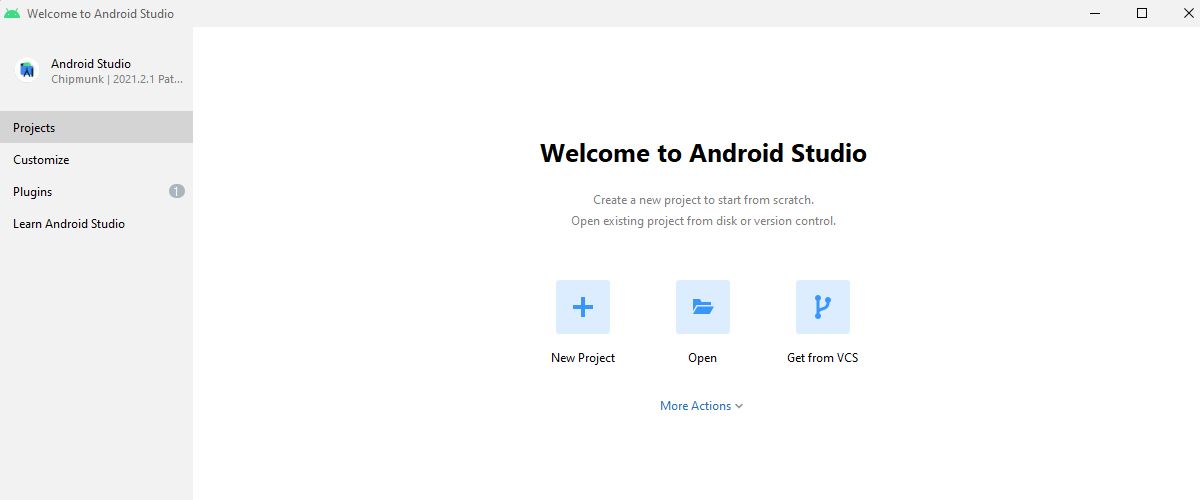
Once the installation and initial setup is complete, the Android Studio starts. Since it is the first time you are starting the Android Studio, it will be present you with the Welcome to Android Studio screen as shown below
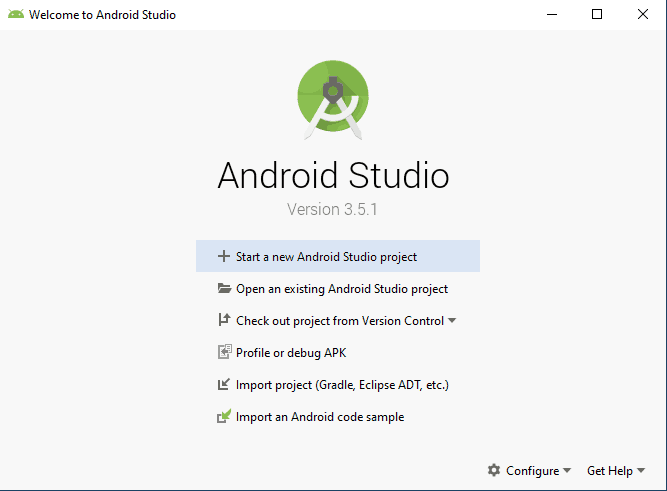
Usually, Android Studio automatically opens the last Opened Project. But since it is a new Android Studio installation it will not open until you create a new project or open an existing one. Hence we will create a new project. Click on Start a new Android Studio Project.
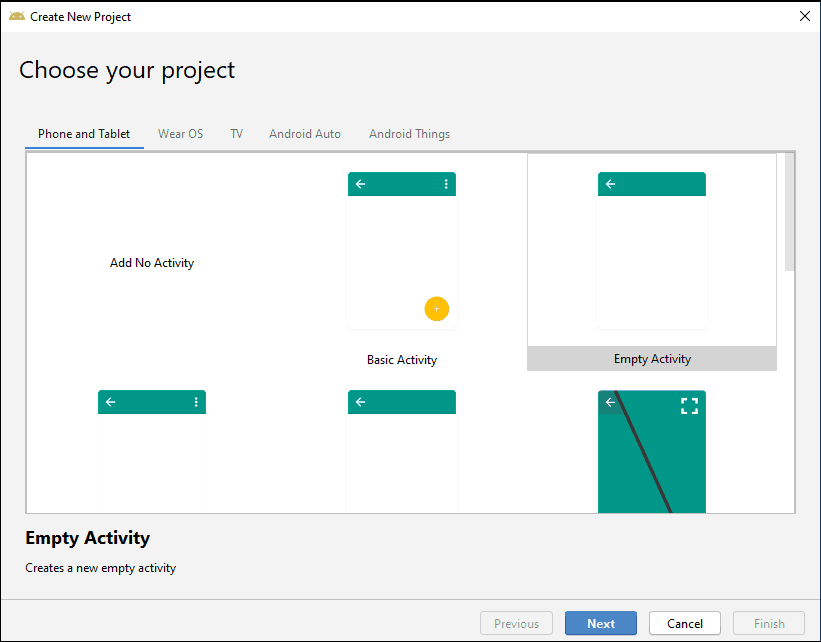
The Create New Project appears. The first option is to select the type of activity. Choose Empty, which is the default and click Next.
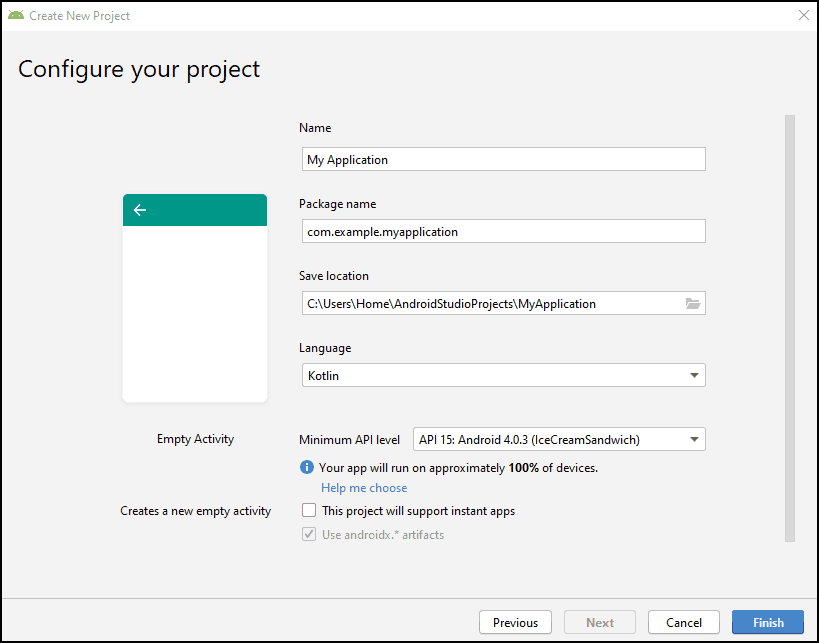
Configure your project is the next screen. It will ask for the name of the Application, Package Name, Project path, language, and API Level. Keep the defaults and click on Finish.
Android Studio may start a few more downloads. Wait for it to finish. Once everything is downloaded and installed, the new project is created and you are taken to the Android workspace.
Now, you have completed all the installation steps and Android Studio is now ready to use
But before starting to build the Android Apps, there a few more things to be taken care of like Installing & Setting SDK & Android Emulator. We have covered them in the following Tutorials.
Android SDK Tutorial
Summary
We learned how to download, install and setup Android Studio in a Windows OS. We used the Windows 10 OS, But it will work any other flavors of windows like Windows 7 or Windows 8.
Android Studio is fantastic, but it can be difficult to set up properly. Follow these steps and you’ll be good to go in no time.

Android Studio is one of the best programs for Android app development. It offers a plethora of features and integrated tools for creating professional Android apps.
The program includes a feature-rich Android emulator, testing tools, and a consistent development environment. In addition, it also features an intelligent code editor that provides you with advanced code suggestions.
Due to many configuration steps, Android Studio may be challenging to set up if you’re a novice developer. Here, we show how to install Android Studio on Windows and create a sample application.
How to Download and Install the Java JDK
Before installing Android Studio, you first need to install the Java JDK and set up the Java environment to start working on it.
The Java Development Kit (JDK) is a required development package for creating Java-based applications. Additionally, it also includes tools for developers for testing Java-coded applications.
Follow these steps to get the latest version of Java JDK for Windows and set it up:
- Go to the official Oracle Java Downloads page.
- Choose the most recent version of Java JDK and download the x64 MSI Installer under the Windows tab.

- Open the file you’ve just downloaded from the Downloads folder.
- Follow the on-screen instructions to install the latest Java JDK.

Now that you’ve successfully installed JDK, you need to set up a Java environment so that Android Studio can easily find the location of Java on your desktop.
Setting Up the Java Environment
Here are the steps you’ve to perform for setting up the Java environment:
- Open Windows search and type «Edit environment variables.»
- Hit the Enter key to open the Environment Variables window.
- Now, under the System variables section, click Path > Edit > New

- Copy the path of the folder where the JDK binaries are installed. For example, in our case, the path is C:\Program Files\Java\jdk-18.0.1.1\bin
- Switch to the Environment variables window and paste the path you’ve copied and save the changes.
- Next, under the User Variables section, click New.
- Add PATH_HOME in the variable name box and C:\Program Files\Java\jdk-18.0.1.1 in the variable value box.
- Finally, save the changes by clicking OK.
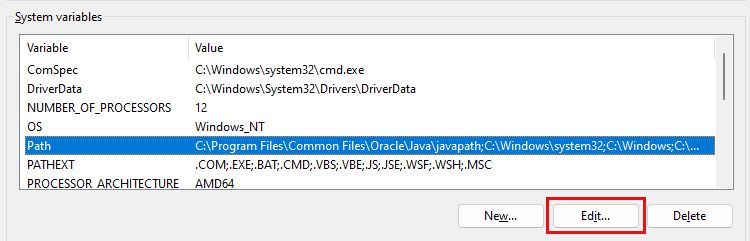
Don’t forget to replace the JDK version with the version you’re currently using. In our case, we’ve used the jdk-18.0.1.1 version.
In general, you do not need to reconfigure any environment variables if you have already done so. But if it’s your first time, setting the variables will help you reduce Java-based errors during compilation.
How to Install Android Studio on Windows
Follow these steps to download and install Android Studio for Windows:
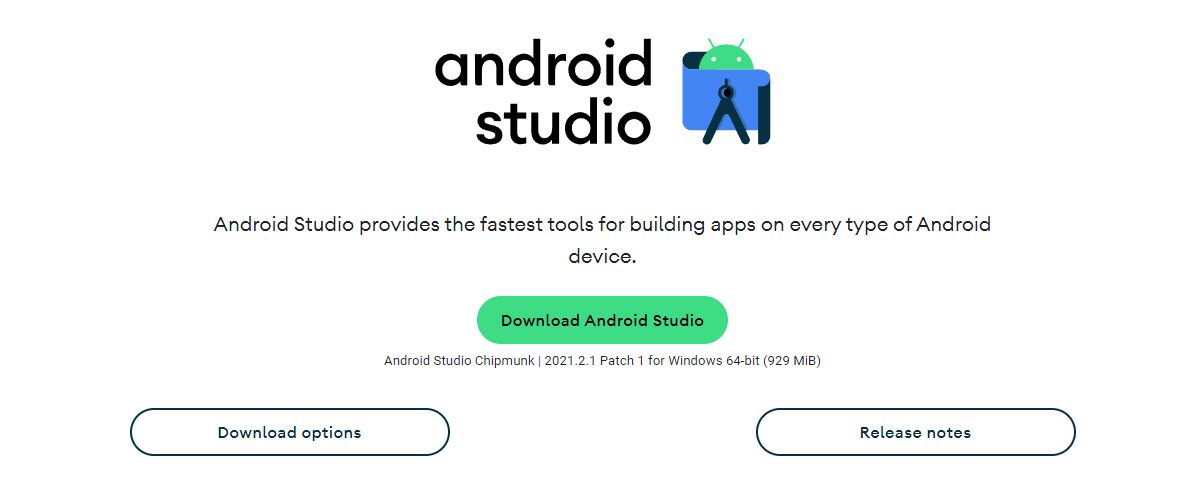
- Visit the Android Developers website and click on Download Android Studio.

- Now, open the downloaded file to install Android Studio.
- Click Next to continue installing Android Studio.

- Further, click Install and wait while Android Studio is being installed on your PC.
- Once done, click Finish to close the installer and start Android Studio.
- Android Studio will now ask you to import settings. Click OK to continue to set up Android Studio.
You should use SSD storage when working with Android Studio to get better performance and faster processing. Moreover, if you want to know more about the reasons, we’ve already explained why SSDs are better than HDDs.
If the installer crashes or closes with a random error code, the chances are that your PC doesn’t meet the minimum system requirements. For this, you must check the below-mentioned requirements once.
The System Requirements for Android Studio on Windows
Your PC must meet the following requirements to run Android Studio efficiently:
- 64-bit Microsoft Windows OS 8/10/11.
- 1280 x 800 minimum screen resolution.
- x86_64 CPU architecture; 2nd generation Intel Core or newer; or AMD CPU with Hypervisor support.
- 8GB of RAM or more.
- 12GB of available disc space is required (IDE + Android SDK + Android Emulator).
If you’re not sure about your PC’s specifications, do check out our guide on how to check a PC’s hardware specs.
If your PC is too old or fails to meet the above requirements, you won’t be able to install the program properly. And so, it’ll be a waste of time for you to continue any further with the steps.
How to Set Up Android Studio on Windows
While you’ve installed Android Studio on your Windows PC, to create a new project you’ll have to configure the Setup Wizard. The Setup Wizard will help you create a development environment for your future projects.
Follow these steps to set up Android Studio:
- In the Setup Wizard window, select the Standard option to apply the recommended settings and click Next.
- Next, select a theme you want and click Next again to verify the settings you’ve configured.
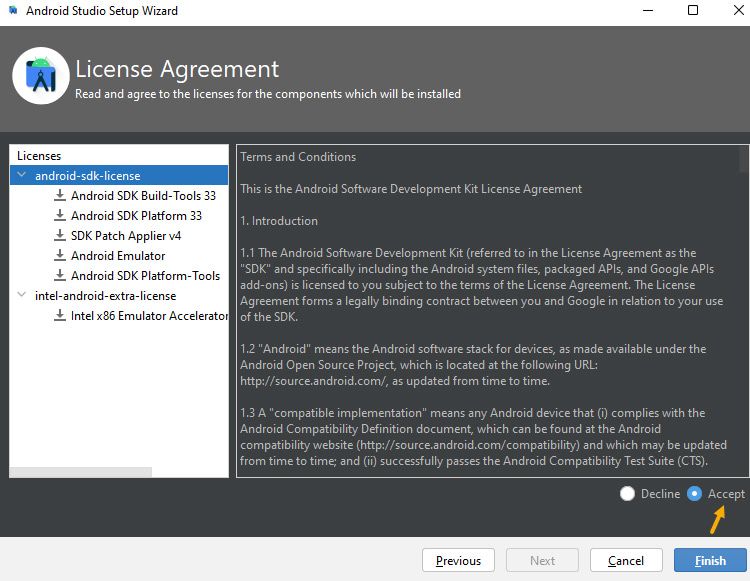
- On the following screen, select Accept and click Finish to apply the changes.

- Wait till the Setup Wizard downloads some required files. It may take somewhere around 15 to 30 minutes, depending on your network speed.
- Once the download is completed, click Finish to complete the setup process.
If it gets stuck while downloading, it’s because of either high CPU usage or interruption in downloading. This is why you must close all the programs that may consume the internet or are still running in the background.
To fix this issue, we recommend you read our article on how to fix the high CPU usage issue in Windows. In addition, if you’re facing slow downloading issues—have a look at some effective ways to check for internet throttling in Windows.
How to Create a New Test Project in Android Studio
Now, that you’ve set up and configured Android Studio, follow these steps to run a test project from scratch:
- Open Android Studio and click New Project.
- Select the Basic Activity option and click Next to proceed further.
- On the next screen, type in a name for your app, and select the language (for example, Java).
- Next, select the Minimum SDK for your app. The Minimum SDK defines the minimum Android version needed to run your test app.
- Once done, click Finish to generate a new test project.
- Finally, click Allow access on the next screen to allow ADB to access your public network.
- That’s it. Now, you can make changes to your test project and build your Android app.

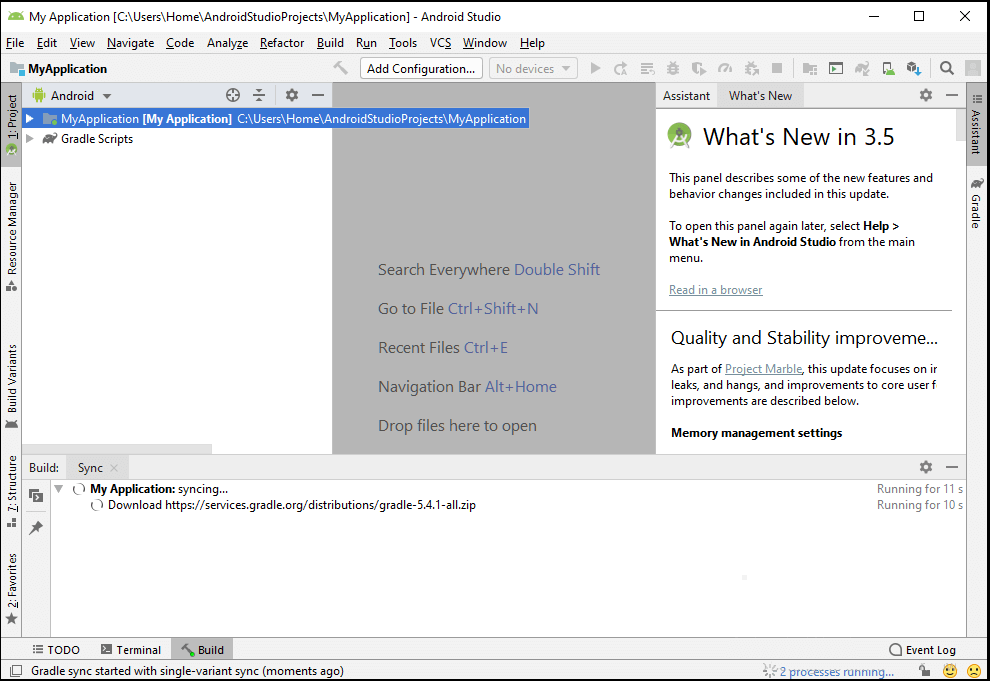
The first test project takes around 10-15 minutes to load all the files and sync the project using Gradle (a build automation tool). Once it is done, you can interact with your app’s project structure and view different activities in Android Studio.
After making the changes to your project, you have many different options to run your test app:
- Device Manager: You can create a new emulator from the device manager and run your app on it. However, the emulator consumes a large number of resources, so we don’t recommend using this option if you’re using a low-end PC.
- Pair Devices Using Wi-Fi: You can also run the test app on your Android smartphone. The only condition here is that your smartphone and your PC should be connected to the same Wi-Fi network.
- ADB Connection: Lastly, you can use a USB cable and turn on USB Debugging on your phone to run your app via an ADB connection.
App Development Made Easy With Android Studio
Without a doubt, Android Studio is a robust app development software. The best part is that you are not limited to Android apps only. With Android Studio, you can create apps for tablets, watch faces for Wear OS, and even apps for your Android TV.
Furthermore, Android apps are developed in Java (or Kotin) and rely on XML. So, if you’re just getting started with app development, you should enroll in some app development courses.