In the last article, we saw the various parts of GitLab, its architecture and how GitLab works. If you haven’t already, I suggest reading the previous article first before reading this one. Here is the link
GitLab, A Complete Beginner’s Guide!
In this article lets look at how to set it up locally on your Windows PC, so that you can have your very own GitLab setup running right at your home or organization!
If you are using Mac or Linux, you can follow the links below.
Complete Guide To Setting Up GitLab Locally On Mac.
Complete Guide To Setting Up GitLab Locally On Linux PC..!!
So let’s begin!
Things you will need
All you need are a computer running Windows OS with enough resources (CPU, memory, and disk space) for running the GitLab Server and GitLab Runner. How much resources is enough depends on how much performance you need, the more you have the better it is!
You can also set it up on the cloud over at Gitlab.com, but
- the free plans have some limitations in terms of processing power and hard disk space.
- Also doing it locally gives you more control over the setup and
- it will also be an opportunity to learn you more about GitLab
Hence I suggest taking this route of a local installation.
If you are part of a larger organization, and you wish to install it on the cloud, then you can always take a look at the paid plans of GitLab here link
Approach to install GitLab on Windows
Okay, let’s get back to the task in hand.
As we saw in the previous article GitLab consists of 2 parts.
- GitLab Server and
- GitLab Runner
Also, we have learned in the previous article that it is preferable to set the GitLab server and runners on separate computers. But I am going for a home set up, so I will be setting them both upon the same Windows computer.
The GitLab Server relies heavily on Linux technologies and hence it cannot be installed in our Windows PC natively. If you do some research, there are ways you can do it through the Linux subsystem in windows, but we are not going to take that approach.
The
problem with these workarounds are
- The installation process is a bit complicated and is not recommended for beginners.
- They are only guaranteed to work on a version to version basis. What I mean by that is you need to have a particular version of Windows and a particular version of GitLab for everything to run smoothly. If you update your Windows or if you wish to upgrade your GitLab then you might break your GtiLab set up. Since both Windows and GitLab updates come frequently, it is not such a good idea to waste time trying to fix things every few months.
- It is unofficial and hence support for future versions cannot be guaranteed.
- These unofficial methods will bring their own limitations as opposed to running natively on Linux
Due to these above reasons, we are going to go for a more stable approach of installing the GitLab server in a virtual environment. We will also see in this article the ways to make it run as smoothly and efficiently as possible while making sure it consumes as few resources as possible.
So this
is what we are going to do
- Install the GitLab Server on a Virtual Box running Ubuntu server
- Install GitLab runner natively on Windows.
This approach takes away the cons of using unofficial hacks, as it will work on all versions of you Windows and GitLab and you don’t need to worry too much while updating your software either!
By following the step by step guide shown below you should be able to set everything up and running in an hour or 2 (depending upon how good your internet connection is, it can take longer!)
GitLab Installation Process
STEP#1: Download and install VirtualBox
You can download and install VirtualBox from this link
Just click on the Windows hosts and the download should start automatically. The installation process is pretty straightforward, you can just accept the default options and click through to complete the process.
Once the installation is completed you can open VirtualBox from the Start menu in Windows.
STEP#2: Install Ubuntu Server as a Virtual Machine in your Windows PC.
The next step is to get a Linux distro to install our GitLab server. For this purpose, I recommend Ubuntu Server. I chose this particular distro for 2 reasons.
- Ubuntu is known for its stability.
- GitLab Server software has support for Ubuntu
- The server edition is chosen so that it will consume fewer resources on your computer.
For this first, you need the Ubuntu Server image. You can download it from this link.
Ubuntu usually offers 2 sets of packages for us to choose from.
- Long term support version: Has a support period of 5 years
- Latest Version: has all the latest features.
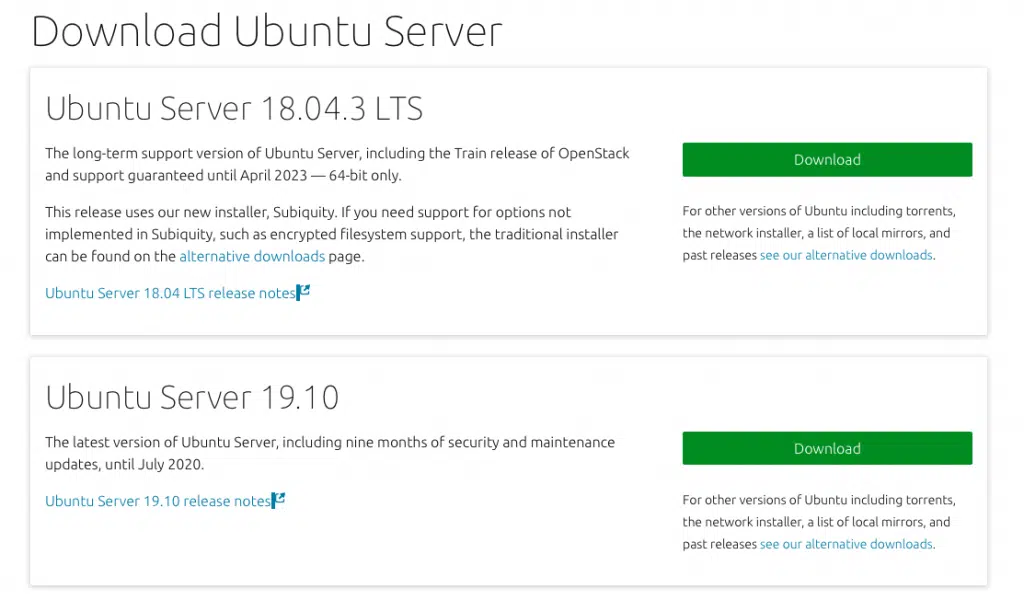
I suggest you go for the LTS one, but then the latest version should also work just fine. So click on a “Download” button and your download should start automatically. It will take some time to complete as the iso is around 900MB.
Once the download is complete you can proceed to the installation process on VirtualBox.
STEP#3: Install Ubuntu Server on VirtualBox
Open VirtualBox Application and click on the “New” button

A window like this should pop up
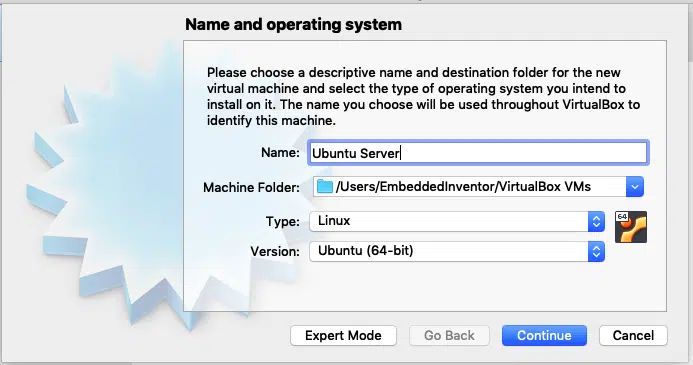
Give your virtual machine a name and choose Linux for type and ubuntu 64 bit for version and click “Continue”.
The next screen usually asks for RAM. GitLab recommends 8GB for a GitLab system with 100 users, I suggest a minimum of 2GB RAM for a home set up, you can give more if you can, just make sure you don’t allot more than 50% of your total available RAM.
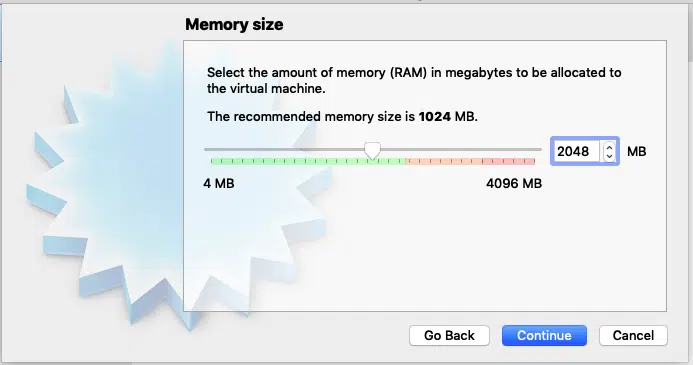
Once you have allocated RAM space, Click “Continue” to the next page.
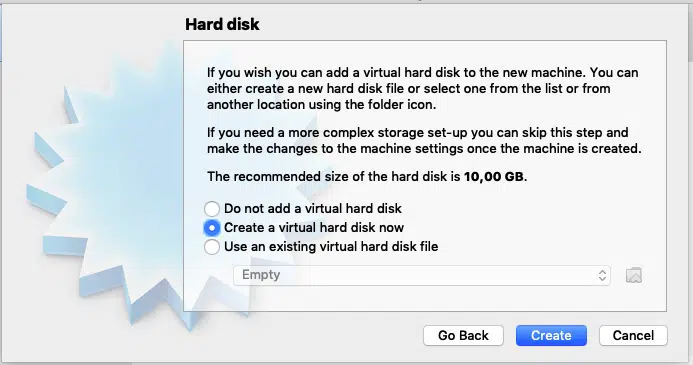
Next, you will be prompted for hard disk. Make sure “Create a virtual hard disk now” is selected and click “Create”
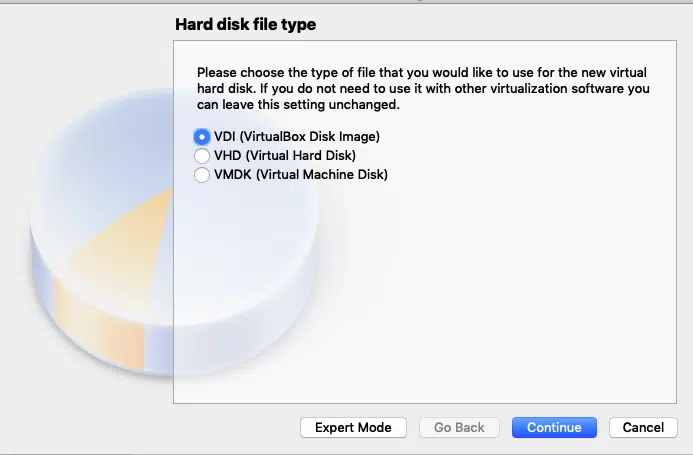
Accept
the default “VDI (VirtualBox Disk Image)” and click
“Continue”
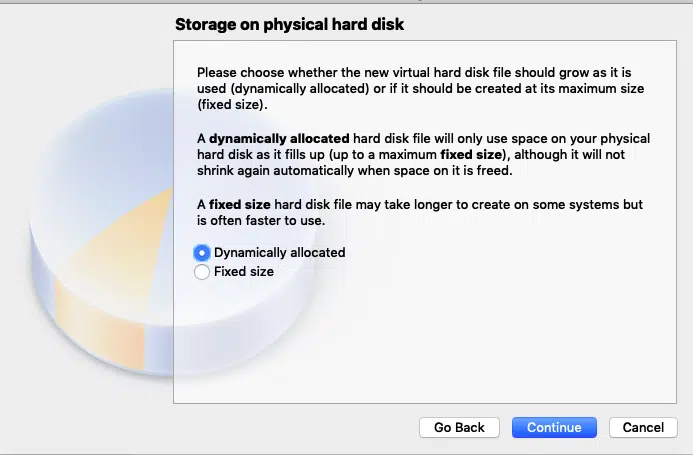
Accept “Dynamically Allocated” and Press continue. This option allocates hard disk space to the virtual machine on the run, so that as you use the more space, more will be allocated.
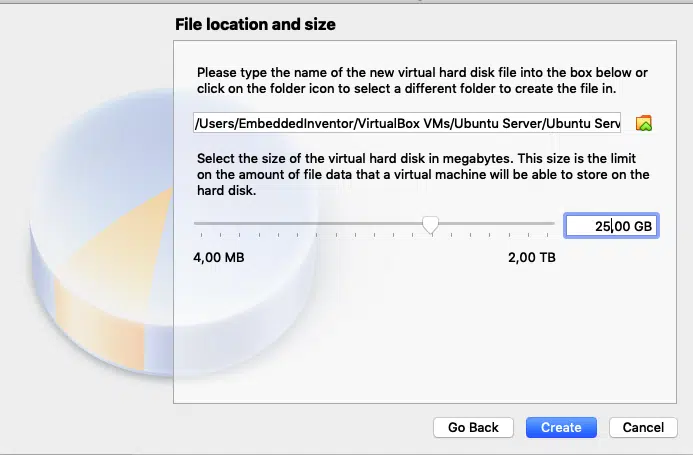
I suggest you allocate at least 25GB of space to the virtual machine, you can allot more if you can. Once you have chosen the disk space click create
Once you have done this, you should be taken back to the main window of VirtualBox and you should see the virtual machine you just created on the left pane of the window as shown in the screenshot below.

Next click on the “Settings”

And click on storage -> empty -> disk icon -> “Choose a disk file”

Select the ubuntu server iso image you have just downloaded and press ok. This is equivalent to inserting the Ubuntu disk in a real machine.

Next, go to settings->Network and choose “Bridged Adapter” in the “Attached to:” drop-down menu and press “OK”
I have explained the reason behind using these network settings in detail in this article, you can go ahead and read that if you are into computer networks.
The short explanation is, we will not be able to access the GitLab server from our other machines on the network unless we choose this option.
That’s it, the configuration is done!
You can now go ahead and click the start button!

Now the installation process will start. Since we have chosen to go with “Ubuntu server” in order to minimize the resource consumption (so that GitLab can take up as many resources as it needs) we don’t get a fancy Graphical UI, like in the desktop version of Ubuntu. You need to navigate the menus during installation only using Keyboard (tab, enter and arrow keys) since the Ubuntu server doesn’t come with mouse support. So go through the process and get it done.
STEP#4: Get the IP address of your ubuntu server
Okay now
once you got the Ubuntu server up and running, you need to find its IP address
and make a note of it.
To do that, use the “ifconfig” command on your Ubuntu server’s terminal

STEP#5: Download and install GitLab server
To download GitLab server, go to the official link on the Gitlab’s Website
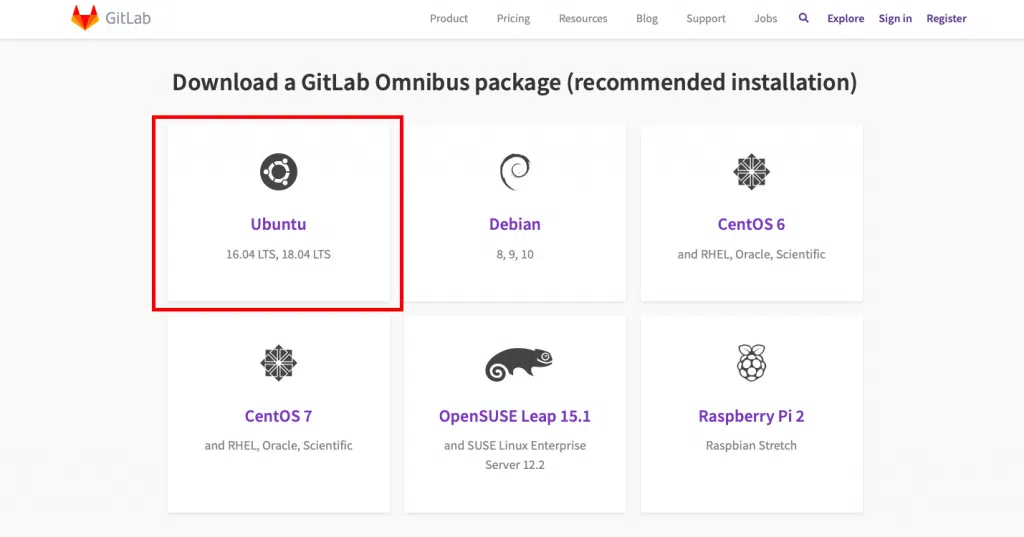
As you can see GitLab official supports several Linux distros, even a Raspberry Pi 2’s Raspbian! We are interested in Ubuntu, so click on the Omnibus Ubuntu Link on as shown in the screenshot above.
Once you click on Ubuntu, the commands you need to enter to install GitLab server will be shown to you.
I am not showing each instruction here since GitLab updates the information presented on their website all the time and that can make this section of the article outdated. Just follow the step by step instructions given in the link to install the GitLab Server on your VM.
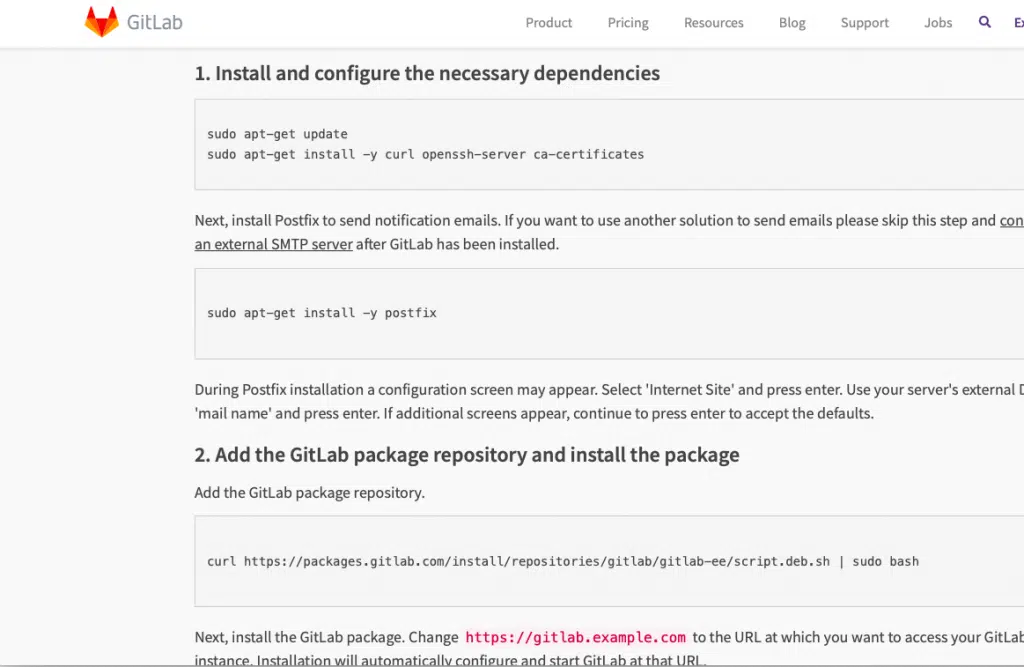
Just type in the commands shown there on you Ubuntu server’s terminal one by one to get GitLab Server installed.
A couple of tips on the GitLab installation instructions
Tip#1
In the postfix installation step (step 1 last command on the GitLab website)
sudo apt-get install -y postfix
you can skip the mail option by choosing the “no configuration” option as shown in the screenshot below.

Tip#2
In the last command of step 2 at GitLab website
sudo EXTERNAL_URL="https://gitlab.example.com" apt-get install gitlab-ee
Make sure you replace the URL with the IP address of the VM that we have made a note of in Step 5 above like this
sudo EXTERNAL_URL="192.168.0.116" apt-get install gitlab-ee
Or to be more precise just place the VM’s IP address that we obtained in Step#4 in its appropriate place
sudo EXTERNAL_URL=”<Your VM’s IP address>” apt-get install gitlab-ee
This step will take a while, so be patient. In my machine it took 4 minutes 48 seconds as shown in the screenshot below, yours can vary depending on the processing power it has.
Once done it will show u something like in the screenshot below.

Once it’s done, you can go ahead to your favorite browser and type in the IP address of your VM and check if the installation has succeeded.

And voila! GitLab server installation has succeeded!
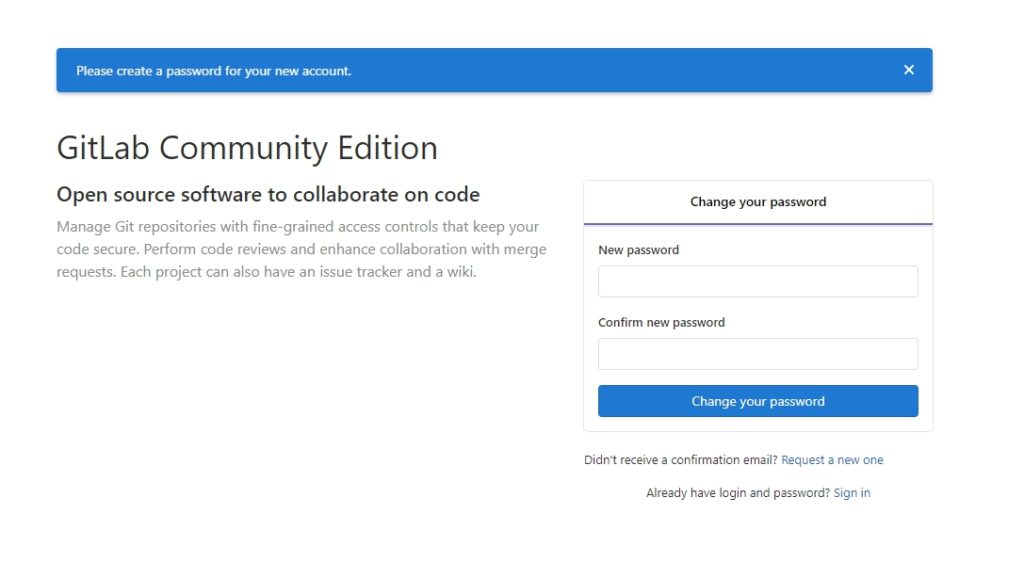
Go ahead and follow the onscreen instructions to set up your password, accounts and everything else!
STEP#6: Download GitLab runners
Before installing GitLab runners you need to install Git on your Windows PC. You can download the latest version of Git in this link.
Now that we have set up the Gitlab server and Git, the next step is to set up the GitLab runner!
At the time of writing this article, the installation process goes like this:
Make a folder on your computer and go to either this link for 32bit version or this link for 64bit version to download the binaries and put them in the folder you created
For getting the most up to date instruction, I am gonna ask you to follow the process given in the GitLab website
STEP#7: Connect the GitLab server to the GitLab runner
GitLab
calls this process of connecting the Server to Runner as “Registering the
GitLab Runner to the Server”
You can follow the instructions for Windows in this link to do the same.
Scroll down to the windows section and you will see something similar to this

Step# 7.1: Start the registration process
To enter these commands you need to open a command prompt with administrator privileges. For this just type cmd on the search menu, right-click on Command prompt and choose run as administrator

After that, just go to the folder to which you have downloaded the Gitlab Runner to and copy the path to that folder

Next, go back to the command line and give the following command
cd <path you copied>
Run the following command to start the registration process
gitlab-runner-windows-amd64.exe register

As shown in the screenshots above, enter your Virtual Machine’s IP address when prompted. Make sure you add “http://” before the IP address.
Once the IP address is entered, the next prompt appears asking you to enter a token, so let’s first go get a token from our GitLab server.
Step#7.2: Obtain token from GitLab Server
Go to your browser and enter the GitLab Server’s IP address. Once you have logged in you can create your first project by clicking on the respective pane as shown in the screenshot below.
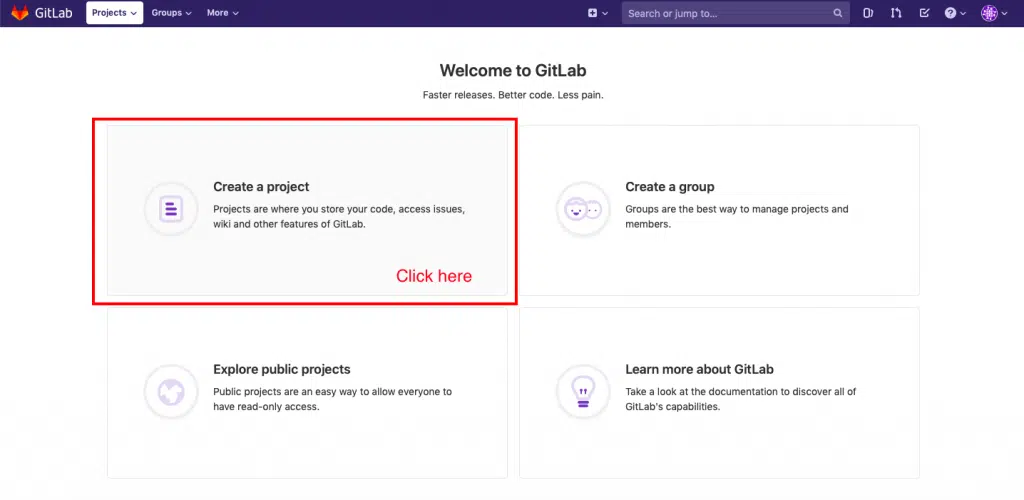
Just give the project a name and click on the create project button. The other field should get populated automatically.

Once you click the button as shown in the screenshot above, you will be taken to your project page.
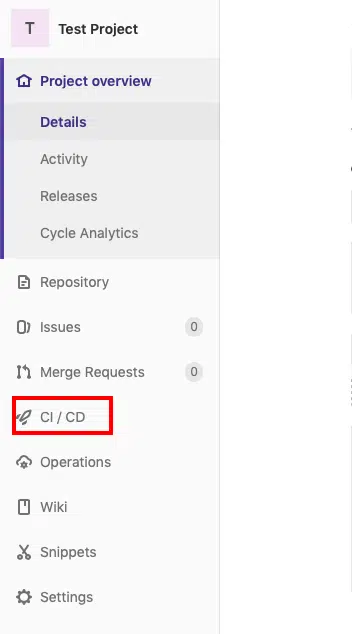
From there just click on Settings->CI/CD and scroll down a bit and click the “Expand” button next to “Runners” and you will find the token you need as shown in the screenshot below.

This token basically connects your project on the GitLab Server to the GitLab runner.
Step#7.3: Enter the token
Now that we have the token let’s enter it on the Command prompt

Once
entering the token, you will be prompted to give the runner a description, go
ahead and do that.
After that, you will be asked to enter some tags.
What are tags? Why are they needed for GitLab runners?
The
better term for tags can be capabilities.
Consider
this scenario.
Assume you are working in a large team of 1000 developers, who are doing say 50 different projects and your GitLab system has 100 different runners set up with several capabilities to do specific tasks. Some projects may need C compilers, while others may need python interpreters.
Now in order to connect a given project with a free-runner, we need some sort of parameter to tell the GitLab server that this particular free runner is capable of running the scripts needed for that particular job.
This is where tags come into the picture. By giving tags like “C” or “Python” a single runner can be connected to multiple projects and a single project can execute its jobs on several runners to ensure the best possible performance.
Using
these tags the Gitlab server can find a runner with the specific capability to
use for a given job. So give some suitable tags that will imply the
capabilities of your runner.
Once that is done, you will be prompted to enter “executor”.
Executors are programs that run our CI/CD scripts. Type shell and press enter

This will end the registration process the Runner to the server
Once registered you can start the GitLab runner as a Service (background task) by issuing the commands
gitlab-runner-windows-amd64.exe install
gitlab-runner-windows-amd64.exe start

As you can see in the screenshot below, in the task manager app we can see that our gitlab-runner service is running!

Test to see if everything works
By following the 7 steps above, you should have a set up with GitLab Server and Runner running on your system. Its time to test and see if everything works the way it is supposed to work!
First, let’s test the GitLab server by creating a repo and pushing it to the server.
Testing GitLab Server
STEP#1: Make a test git repo
Let’s make a simple git repo on a new folder on our Desktop and push it to the GitLab server.
So open your Git-Bash app, which got installed as you were installing git.

Once opened type in the following commands
cd
cd Desktop
mkdir test_project
cd test_project
touch test.c
The above lines of command are just the fancy way of creating a folder named test_project on your Desktop and a file named test.c inside it. You can also do it through the Graphical User Interface if you want to.
So next, please open the C file using your favorite text editor and type in a simple program for testing, something like the following.
#include <stdio.h>

int main()
{
	printf("Hello Embedded Inventors!");
	return 0;
}
Next, let’s initialize a git repository on our test_project folder. So go back to the terminal cd into the test_project folder and type in the following command
You should receive a reply saying “Initialized empty Git repository”
STEP#2: Push it to the server
Now that we have our git repo ready, let’s push it to our git server. To do that login to your GitLab and go to the project we created earlier. There GitLab shows us the commands needed to push our repo to the server.
First, let’s configure our name and email on the git repository to the ones set on the GitLab server
So enter
the following command.
git config --global user.name "<enter your name here>"
git config --global user.email "<enter your email here>"
Next, we need to connect our server and our repository. To do that just enter the following commands
git remote add origin <your project URL>.git
In my case it is
git remote add origin http://192.168.0.115/EI/test-project.git
To find your project URL, just copy the address bar of your browser while you are on your project’s page in GitLab
![]()
Then add our test.c file and commit the changes using the following commands
git add .
git commit -m"first commit"
Then push
your git repo onto the GitLab using the command
git push -u origin master
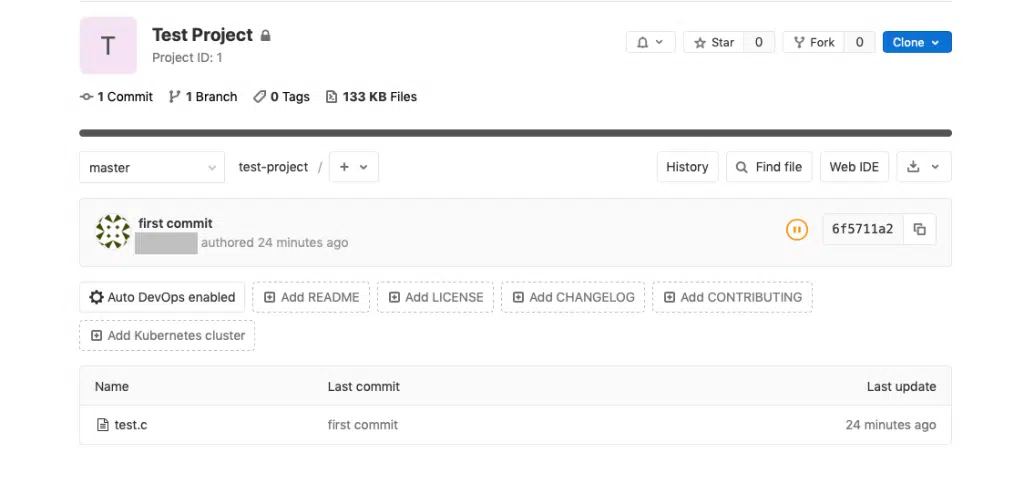
You will be prompted to enter the user name and password of your GitLab account, once done go to your browser and just refresh the page and you should be able to see your test project page in GitLab!
Testing GitLab Runner
STEP#3: Make a simple bash script to build the test.c
file
Create a bash script on your project folder
cd
cd Desktop/test_project
touch build.ps1
Edit it so that it looks something like this
gcc test.c -o test
echo "Build completed"
STEP#4: Create and edit .gitlab_ci.yml to run the
above script
What is .gitlab-ci.yml and why it is needed? This is the file that contains the instructions for the GitLab runners to execute the CI/CD tasks. It should be present in the project’s root folder. It can be used to test if a commit builds correctly, passes some unit tests and if it needs packaging and deployment.
You can
learn more about how to configure it from the official quick start tutorial
here
For the
purpose of testing our installation let’s create a file named .gitlab-ci.yml in
the test_project folder and put the following lines in there.
Make sure you are in the right directory
cd
cd Desktop/test_project
Create the file using the command
Open it with your favorite text editor and type the following lines into it.
build:
  script:
    - powershell -File build.ps1
  tags:
    - test
The last line tells the GitLab server to use the GitLab runner with the tag named “test”. If you gave your GitLab runner installation a different tag, make sure you make the appropriate change to the above lines.
Also,
make sure you use spaces instead of tabs at the beginning of the above lines.
Now add it to the git repository and push it to the Gitlab server
git add .
git commit -m"gitlab yml added"
git push
Now let’s get back to our GitLab server’s URL and see if it worked. Go to the project page and click on CI/CD
You will
be taken to the pipeline page which shows the result of your latest commit.

It will
take a minute or so before it completes the pipeline and as you can see in the
screenshot above, mine took 41 seconds to complete and the status is
“passed”
If you
click on “jobs” under the CI/CD menu, you will be taken to another
page which shows you more information about the execution of our yml file
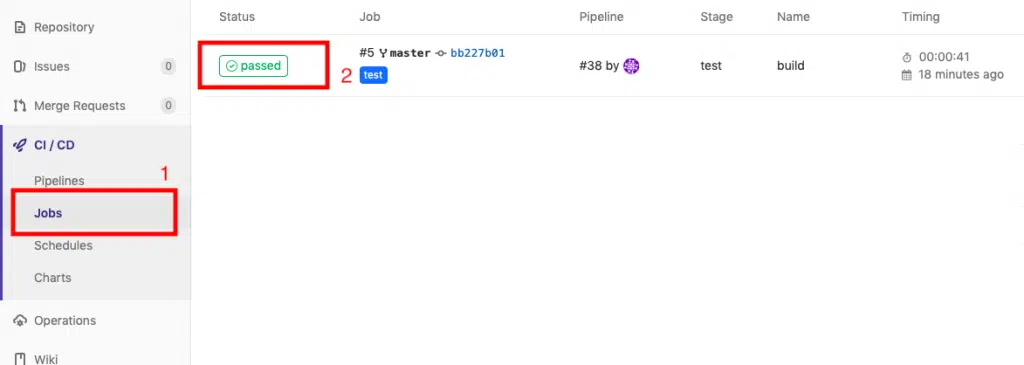
Next click on “passed” as shown in the screenshot above, this will take you to another page which will look something like this.

As you can see, our build.ps1 gets executed by the GitLab runner and it succeeds to compile our project.
And with that, I will conclude this tutorial!
I leave the rest to you to play, explore, experiment and learn GitLab!
I hope you guys enjoyed this article and learned something useful.
You can email us or contact us through this link if you have any questions or suggestions.
If you liked the post, feel free to share this post with your friends and colleagues!
Как установить Gitlab в Windows? Первая же ссылка в поисковике дала ответ: Самый легкий способ установить Gitlab в Windows-е — это установить виртуальную машину Linux и уже там установить Gitlab. Пост был опубликован на официальном форуме Гитлаба. Автор кажется не шутить? Хм… А есть ли все таки способ?
Обратимся к официальной документации. Раздел требования https://docs.gitlab.com/ee/install/requirements.html , где есть список поддерживаемых ОС.
- Ubuntu
- Debian
- CentOS
- openSUSE
- Red Hat Enterprise Linux (please use the CentOS packages and instructions)
- Scientific Linux (please use the CentOS packages and instructions)
- Oracle Linux (please use the CentOS packages and instructions)
Что там написано про Windows?
Microsoft Windows
GitLab is developed for Linux-based operating systems. It does not run on Microsoft Windows, and we have no plans to support it in the near future. For the latest development status view this issue. Please consider using a virtual machine to run GitLab.
То есть,
Gitlab разрабатывался для Linux-based ОС. Оно не запуститься на Windows и у нас нет планов на поддержку этой ОС в ближайшее время. Следить за ходом разработки можете по ссылке. Если хотите запустить на Windows используйте виртуальную машину.
Вот те на… Но постойте, есть же Докер, философия которой заключается как раз в кросс платформенной доставке продукта. Даже есть целый раздел посвязенной установке через Docker https://docs.gitlab.com/omnibus/docker/README.html
Вот только если попытаться запустить на Windows вот этот конфиг:
|
1 2 3 4 5 6 7 8 9 10 11 12 13 14 15 16 17 |
web: image: ‘gitlab/gitlab-ce:latest’ restart: always hostname: ‘gitlab.example.com’ environment: GITLAB_OMNIBUS_CONFIG: | external_url ‘http://gitlab.example.com:8929’ gitlab_rails[‘gitlab_shell_ssh_port’] = 2224 ports: — ‘8929:8929’ — ‘2224:22’ volumes: — ‘/srv/gitlab/config:/etc/gitlab’ — ‘/srv/gitlab/logs:/var/log/gitlab’ — ‘/srv/gitlab/data:/var/opt/gitlab’ |
получите ошибку
|
Error executing action `run` on resource ‘ruby_block[directory resource: /var/opt/gitlab/git-data]’ |
Эта ошибка не нова, обсуждение ее началось два года назад, а может и более. Есть большая дискуссия на эту тему по этой ссылке
https://gitlab.com/gitlab-org/omnibus-gitlab/issues/2280
Сотни людей столкнулись с одним и тем же.
В чем же проблема?
Суть проблемы в самом докере для Windows. Во время установки Gitlab-a Chef скрипт пытается удостовериться что каталог принадлежит пользователю git:git, вместо этого получает none. Потому что, после монтирования, каталогу присваивается UID 0 : GID 0 755 unix file permissions, который невозможно изменить внутри контейнера
Обсуждение данной проблемы можно прочитать по ссылке
https://github.com/docker/for-win/issues/2042
Корень проблемы заключается в архитектурных различиях ФС Windows и вряд ли решится в ближайшее время. Протокол SMB/CIFS не поддерживает расширенные права для файлов.
Значит пора ставить виртуальную машину?
Скорее всего, автор этого топика https://forum.gitlab.com/t/how-to-install-gitlab-on-windows/32 прав и самый легкий способ установки — это поставить виртуальную машину. Ведь недаром Windows официально даже не поддерживается.
Но! Если нужно, то можно взять вот такой конфиг и…
|
1 2 3 4 5 6 7 8 9 10 11 12 13 14 15 16 17 18 19 20 21 22 23 24 |
version: «3.2» services: web: image: ‘gitlab/gitlab-ce:latest’ hostname: ‘gitlab.example.com’ restart: always environment: GITLAB_OMNIBUS_CONFIG: | external_url ‘https://gitlab.example.com’ # Add any other gitlab.rb configuration here, each on its own line ports: — 80:80 — 443:443 — 22:22 volumes: — ./gitlab/config:/etc/gitlab — gitlab—logs:/var/log/gitlab — gitlab—opt:/var/opt/gitlab volumes: gitlab—opt: gitlab—logs: |
Предварительно создав volumes вручную, и …
|
docker volume create gitlab—opt docker volume create gitlab—logs |
И вуаля после всех операции видим приветственное сообщение от Gitlab
ошибка letsencrypt_certificate[gitlab.example.com] (letsencrypt::http_authorization) had an error. что делать?
Нужно отключить Lets Encrypt. Финальный конфиг будет выглядит так
|
1 2 3 4 5 6 7 8 9 10 11 12 13 14 15 16 17 18 19 20 21 22 23 24 25 |
version: «3.2» services: web: image: ‘gitlab/gitlab-ce:latest’ hostname: ‘gitlab.example.com’ restart: always environment: GITLAB_OMNIBUS_CONFIG: | external_url ‘http://gitlab.example.com’ # Add any other gitlab.rb configuration here, each on its own line letsencrypt[‘enabled’] = false ports: — 80:80 — 443:443 — 22:22 volumes: — ./gitlab/config:/etc/gitlab — gitlab—logs:/var/log/gitlab — gitlab—opt:/var/opt/gitlab volumes: gitlab—opt: gitlab—logs: |
Найдите два отличия 😉 Естественно не забудьте добавить домен gitlab.example.com в etc/hosts
Заключения
Как мы поняли установка Gitlab on Windows подходит только для экспериментальных целей или для тестирования новых фичей. Сами основатели предупреждают об отсутствии поддержки на Windows, поэтому использование в боевых целях не рекомендуется. Намного проще и дешевле будет поднять машину на Линуксе, хоть локально, хоть в облаке.
Кстатит, все работы проводились на версии Docker for Windows 18.06.1
-
- Why GitLab
- Pricing
- Contact Sales
- Explore
- Why GitLab
- Pricing
- Contact Sales
- Explore
- Sign in
-
Get free trial
- gitlab
- doc
- install
- installation.md
Find file
Blame
History
Permalink
-
 Update 2 files
·
cc336959
Christoph Klaffl authored- /doc/update/upgrading_from_source.md - /doc/install/installation.md
cc336959

Gitlab обрел большую популярность в последние годы, т.к. является коробочным решением, позволяющим не только использовать функционал системы хранения версий кода, но и хранить образы во встроенном registry, настраивать пайплайны для сборок, тестирования и доставки кода и множество других функций. Так же gitlab возможно установить непосредственно в контур предприятия, что является важной и удобной возможностью с точки зрения безопасности и ускорения процессов внутри компании.
Рассмотрим этапы установки локальной копии сервера gitlab с доступным для хранения образов registry и настроенным раннером для выполнения пайплайнов на базе gitlab-ci.
- Создаем в настройках доменной зоны соответствующие записи (в нашем примере gitlab.testefsol.space и registry.testefsol.space), которые будут ссылаться на внешний ip адрес сервера с nginx.
- Настраиваем виртуальную машину с сервером gitlab. В качестве операционной системы используется centos 7, выделяем 8 ГБ ОЗУ и 2 ядра CPU:
yum install curl policycoreutils-python postfix
 curl https://packages.gitlab.com/install/repositories/gitlab/gitlab-ee/script.rpm.sh | sudo bash
EXTERNAL_URL="https://gitlab.testefsol.space" yum install gitlab-ee
- Редактируем файл /etc/gitlab/gitlab.rb, доводим его до такой конфигурации:
letsencrypt['enable'] = false
external_url 'https://gitlab.testefsol.space'
letsencrypt['contact_emails'] = ['[email protected]']
registry_external_url 'https://registry.testefsol.space'
gitlab_rails['registry_enabled'] = true
registry['enable'] = true
registry_nginx['enable'] = true
registry_nginx['proxy_set_headers'] = {
 "Host" => "$http_host",
 "X-Real-IP" => "$remote_addr",
 "X-Forwarded-For" => "$proxy_add_x_forwarded_for",
 "X-Forwarded-Proto" => "https",
 "X-Forwarded-Ssl" => "on"
 }
registry_nginx['listen_port'] = 80
registry_nginx['listen_https'] = false
- Редактируем файл /etc/gitlab-runner/config.toml, доводим его до такой конфигурации:
concurrent = 1
check_interval = 0
[session_server]
  session_timeout = 1800
[[runners]]
  pre_build_script = "export DOCKER_HOST=tcp://docker:2375"
  environment = ["DOCKER_DRIVER=overlay2", "DOCKER_TLS_CERTDIR="]
  name = "docker"
  url = "https://gitlab.testefsol.space"
  token = "KhvKzR7jJcrqoyy9Q9Pa"
  executor = "docker"
  [runners.custom_build_dir]
  [runners.cache]
	[runners.cache.s3]
	[runners.cache.gcs]
	[runners.cache.azure]
  [runners.docker]
	tls_cert_path = ""
	tls_verify = false
	image = "docker:latest"
	privileged = true
	disable_entrypoint_overwrite = false
	oom_kill_disable = false
	disable_cache = false
	volumes = ["/cache"]
	shm_size = 0
Настраиваем второй сервер с nginx, который будет проксировать на наш gitlab трафик. В качестве операционной системы так же используем centos7, выделяемые ресурсы минимальны, 2 ядра и 512 МБ ОЗУ.
Устанавливаем nginx
yum install nginx
systemctl enable nginx
- Получаем сертификаты на наши доменные имена (в нашем примере с помощью сервиса letsencrypt для имен gitlab.testefsol.space и registry.testefsol.space).
yum install certbot
certbot certonly
- Редактируем файлы /etc/letsencrypt/renewal/registry.testefsol.space.conf и /etc/letsencrypt/renewal/gitlab.testefsol.space.conf, доведя их до такого вида:
# renew_before_expiry = 30 days
version = 1.10.1
archive_dir = /etc/letsencrypt/archive/registry.testefsol.space
cert = /etc/letsencrypt/live/registry.testefsol.space/cert.pem
privkey = /etc/letsencrypt/live/registry.testefsol.space/privkey.pem
chain = /etc/letsencrypt/live/registry.testefsol.space/chain.pem
fullchain = /etc/letsencrypt/live/registry.testefsol.space/fullchain.pem

# Options used in the renewal process
[renewalparams]
account = e7fdf98672819c725adb9ebffd6d144e
authenticator = webroot
installer = None
post_hook = nginx -s reload
[[webroot_map]]
www.registry.testefsol.space = /web/site/registry.testefsol.space/www
registry.testefsol.space = /web/sites/registry.testefsol.space/www
И
# renew_before_expiry = 30 days
version = 1.10.1
archive_dir = /etc/letsencrypt/archive/gitlab.testefsol.space
cert = /etc/letsencrypt/live/gitlab.testefsol.space/cert.pem
privkey = /etc/letsencrypt/live/gitlab.testefsol.space/privkey.pem
chain = /etc/letsencrypt/live/gitlab.testefsol.space/chain.pem
fullchain = /etc/letsencrypt/live/gitlab.testefsol.space/fullchain.pem

# Options used in the renewal process
[renewalparams]
#authenticator = standalone
account = e7fdf98672819c725adb9ebffd6d144e
#manual_public_ip_logging_ok = None
#server = https://acme-v02.api.letsencrypt.org/directory
authenticator = webroot
installer = None
#account = e9c86e6aa57b45f9614bc7c0015927a5
post_hook = nginx -s reload
[[webroot_map]]
www.gitlab.testefsol.space = /web/site/gitlab.testefsol.space/www
gitlab.testefsol.space = /web/sites/gitlab.testefsol.space/www
- Добавляем в крон ( необходимо для автообновления сертификатов):
# Cert Renewal
30 2 * * * root /usr/bin/certbot renew --post-hook "nginx -s reload" >> /var/log/le-renew.log
- В /etc/nginx/nginx.conf для корректной работы registry необходимо добавить строку client_max_body_size; в нашем примере установлено значение 200m:

Рисунок 1 — Конфигурация nginx
- Сервер с Gitlab имеет в локальной сети адрес 172.28.7.112. Редактируем файлы /etc/nginx/conf.d/gitlab.testefsol.space.conf и /etc/nginx/conf.d/registry.testefsol.space.conf , доведя их до приведенной ниже конфигурации:
server {
    	listen 443 ssl http2;
    	server_name gitlab.testefsol.space;
    	access_log /var/log/nginx/gitlab.testefsol.space-access.log;
    	error_log /var/log/nginx/gitlab.testefsol.space-error.log;

    	ssl on;
    	ssl_certificate /etc/letsencrypt/live/gitlab.testefsol.space/fullchain.pem;
    	ssl_certificate_key /etc/letsencrypt/live/gitlab.testefsol.space/privkey.pem;
    	ssl_session_timeout 5m;
    	ssl_protocols TLSv1 TLSv1.1 TLSv1.2;
    	ssl_ciphers 'EECDH+AESGCM:EDH+AESGCM:AES256+EECDH:AES256+EDH';
    	ssl_prefer_server_ciphers on;
    	ssl_session_cache shared:SSL:10m;

location /.well-known {
    	root /tmp;
    	}

location / {
    	proxy_pass https://172.28.7.112;
    	proxy_read_timeout  	300;
    	proxy_connect_timeout   300;
    	proxy_redirect      	off;
    	proxy_set_header    	X-Forwarded-Proto $scheme;
    	proxy_set_header    	Host          	$http_host;
    	proxy_set_header    	X-Real-IP     	$remote_addr;
    	proxy_set_header    	X-Forwarded-For   $proxy_add_x_forwarded_for;
    	proxy_set_header    	X-Frame-Options   SAMEORIGIN;
	}
И
server {
	listen 443 http2 ssl;
	server_name registry.testefsol.space;
	access_log /var/log/nginx/registry.testefsol.space-access.log;
	error_log /var/log/nginx/registry.testefsol.space-error.log;

	ssl_certificate /etc/letsencrypt/live/registry.testefsol.space/fullchain.pem;
	ssl_certificate_key /etc/letsencrypt/live/registry.testefsol.space/privkey.pem;

#	limit_conn perip 50;

	location /.well-known {
	root /tmp;
	}
	location / {
	proxy_pass http://172.28.7.112:80;
	proxy_read_timeout  	300;
	proxy_connect_timeout   300;
	proxy_redirect      	off;
	proxy_set_header    	X-Forwarded-Proto https;
	proxy_set_header    	Host          	$http_host;
	proxy_set_header    	X-Real-IP     	$remote_addr;
	proxy_set_header    	X-Forwarded-For   $proxy_add_x_forwarded_for;
	proxy_set_header    	X-Forwarded-Ssl   on;
	proxy_set_header    	X-Frame-Options   SAMEORIGIN;
	proxy_cache off;
	proxy_buffering off;
	proxy_request_buffering off;
	proxy_http_version 1.1;
	}
}

server {
	listen 80;
	server_name registry.testefsol.space;
	return 301 https://registry.testefsol.space$request_uri;
}
- Запускаем nginx.
Проверяем
Проверяем доступ к нашему gitlab с помощью браузера ( для доступа по доменному имени из локальной сети дополнительно требуется настройка так называемого hairpin nat на сетевом оборудовании, данная задача выходит за рамки данной инструкции):

Рисунок 2 — Проверка доступности веб-интерфейса сервера gitlab
Таким образом, получили готовую к использованию инсталляцию сервера gitlab с репозиторием для докер образов, раннером для выполнения CI/CD пайплайнов.
Есть DevOps-задачи? Мы можем предложить решение любых вопросов нашими специалистами DevOps-аутсорсинга.
Время на прочтение
7 мин
Количество просмотров 187K
Материал, перевод которого мы сегодня публикуем, посвящён настройке Git-серверов. Git — это система управления версиями, разработанная Линусом Торвальдсом. Git пользуются миллионы людей во всём мире. Компании, вроде GitHub, предлагают службы хостинга кода, основанные на Git. По информации, которую можно найти в различных публикациях, GitHub является крупнейшим сервисом для хостинга IT-проектов. В частности, в 2017-м году сообщество GitHub достигло 24 миллионов разработчиков, которые трудятся над 67 миллионами репозиториев. В наши дни GitHub пользуются абсолютно все — от программистов-одиночек, до крупных организаций. Надо сказать, что даже компания Google перешла на GitHub, закрыв собственный проект схожей направленности.

Зачем нужен собственный Git-сервер?
GitHub — это замечательный сервис, но, особенно если вы — индивидуальный разработчик или небольшая компания, вы, при работе с GitHub, столкнётесь с некоторыми ограничениями. Одно из них заключается в том, что в бесплатный пакет услуг не входит хостинг приватных репозиториев. За эту возможность придётся заплатить, как минимум, $7 в месяц.
В подобных ситуациях, для того, чтобы обойти ограничения, или если вам нужно контролировать то, что происходит с вашими репозиториями, лучше всего создать собственный Git-сервер. Это, с одной стороны, поможет сэкономить, а с другой — даст полный контроль над сервером. Среди продвинутых пользователей Linux весьма распространена практика использования собственных Git-серверов, размещаемых, можно сказать, бесплатно, на уже используемых ими серверах.
В этом руководстве мы поговорим о двух подходах к управлению кодовой базой с использованием собственного Git-сервера. Первый заключается в использовании обычного Git-сервера, а второй — в применении инструмента с графическим интерфейсом GitLab. В качестве платформы для экспериментов тут используется сервер на полностью пропатченной Ubuntu 14.04 LTS, развёрнутый на VPS.
Использование Git
Здесь мы рассматриваем сценарий, в соответствии с которым у нас имеется удалённый сервер и локальный сервер. Работаем мы периодически то с одним, то с другим.
Для начала установим Git на этих двух машинах. Git можно установить либо из пакета, доступного в репозитории используемого дистрибутива, либо вручную. Тут мы воспользуемся простейшим методом:
sudo apt-get install git-coreЗатем добавим пользователя для Git:
sudo useradd git
passwd git
Для того чтобы упростить доступ к удалённому серверу, настроим вход по ssh без пароля.
Создадим ssh-ключи на локальном компьютере:
ssh-keygen -t rsaСистема спросит у вас о том, куда нужно сохранить ключ. Если вас устраивает стандартное место хранения ключа, просто нажмите Enter. Далее вам предложат задать пароль, который будет нужен для доступа к удалённому серверу.
Вышеописанная команда генерирует два ключа — открытый и закрытый. Запишите или запомните расположение открытого ключа. Он понадобится нам на следующем шаге.
Теперь надо скопировать эти ключи на сервер, что даст возможность наладить канал связи между двумя машинами. На локальном компьютере выполните следующую команду:
cat ~/.ssh/id_rsa.pub | ssh git@remote-server "mkdir -p ~/.ssh && cat >> ~/.ssh/authorized_keys"Теперь подключитесь по ssh к серверу и создайте директорию проекта для Git. Для репозитория можно использовать любую папку, которая покажется вам подходящей:
git@server:~ $ mkdir -p /home/swapnil/project-1.gitЗатем перейдите в эту директорию:
cd /home/swapnil/project-1.gitСоздайте пустой репозиторий:
git init --bareЕсли команда успешно сработала, вы увидите сообщение, подобное следующему:
Initialized empty Git repository in /home/swapnil/project-1.gitТеперь нужно создать Git-репозиторий на локальной машине. Для этого создаём директорию:
mkdir -p /home/swapnil/git/projectПереходим в неё:
cd /home/swapnil/git/projectДалее, создаём в ней файлы проекта, и, оставаясь в ней, инициализируем репозиторий:
git initОб успешной инициализации репозитория можно судить по такому сообщению:
Initialized empty Git repository in /home/swapnil/git/projectТеперь добавим файлы проекта в репозиторий:
git add .
С этого момента, после добавления в проект новых файлов или после изменения существующих, нужно будет выполнять вышеописанную команду (git add .). Кроме того, нужно будет выполнять команду git commit, задавая сообщения, описывающие коммиты. Выглядит это примерно так:
git commit -m "message" -a
[master (root-commit) 57331ee] message
 2 files changed, 2 insertions(+)
 create mode 100644 GoT.txt
 create mode 100644 writing.txt
В нашем случае здесь имеется файл, который называется GoT (в нём лежит текст обзора Game of Thrones), в который внесены некоторые изменения. Изменения внесены и в другой файл. Поэтому при выполнении команды система сообщила о том, какие изменения были внесены в файлы. В вышеописанной команде опция -a означает обработку всех файлов репозитория. Если вы внесли изменения лишь в один файл, можно, вместо опции -a, указать имя этого файла.
Например:
git commit -m "message" GoT.txt
[master e517b10] message
 1 file changed, 1 insertion(+)
До сих пор мы работали на локальном сервере. Теперь нам нужно отправить локальные данные на удалённый сервер, что сделает их доступными через интернет и позволит организовать совместную деятельность нескольких разработчиков:
git remote add origin ssh://git@remote-server/repo-<wbr< a="">>path-on-server..git
Теперь можно отправлять изменения с локальной машины на сервер или загружать данные с сервера, используя, соответственно, опции push или pull:
git push origin masterЕсли над проектом намереваются работать и другие программисты, сначала им надо клонировать репозиторий с сервера на своих локальных компьютерах:
git clone git@remote-server:/home/swapnil/project.git
В данной команде /home/swapnil/project.git — это путь к папке проекта на удалённом сервере, в вашем случае тут будет другой путь.
Затем, после клонирования, надо перейти в директорию проекта:
cd /project
У вас, вместо project будет имя другой директории. Теперь можно приступать к работе над проектом, принимать изменения и отправлять их на сервер:
git commit -m 'corrections in GoT.txt story' -a
git push origin master
Мы полагаем, что вышеприведённых сведений достаточно для того, чтобы помочь тем, у кого не было опыта работы с Git, приступить к использованию собственного Git-сервера. Если вам нужен некий инструмент с графическим интерфейсом, позволяющий работать с проектом на локальной машине, можно воспользоваться чем-то вроде QGit или GitK для Linux.
QGit — графический инструмент для локальной работы с Git-репозиториями
Использование GitLab
Выше мы описали систему, позволяющую организовать совместную работу над проектами с помощью Git, полностью основанную на средствах командной строки. Работать в такой среде, конечно, сложнее, чем с GitHub. По иронии судьбы, хотя GitHub — это крупнейший в мире сервис для хостинга кода, его собственный код закрыт. Это — не опенсорсный проект, то есть, нельзя взять этот код и создать на его основе собственный GitHub. В отличие от чего-то вроде WordPress и Drupal, код GitHub нельзя загрузить и развернуть на собственном сервере.
Но, как это обычно бывает в мире опенсорса, проектам с закрытым кодом можно найти замену. В данном случае заменой GitHub может послужить весьма привлекательный опенсорсный проект GitLab. Он позволяет всем желающим разворачивать на собственных серверах нечто подобное GitHub. При этом GitLab можно использовать и для поддержки работы крупной компании или большой команды, и для организации собственного репозитория для небольшого проекта, который пока не готов к тому, чтобы представить его широкой общественности.
GitLab задействует бизнес-модель, характерную для опенсорсных проектов. А именно, имеется свободно распространяемая версия ПО, которую все желающие могут разворачивать на своих серверах, и хостинг кода, похожий на GitHub.
Свободно распространяемая версия GitLab имеет две редакции — бесплатную Community Edition (Core) и платную Enterprise Edition (существуют её варианты Starter, Premium и Ultimate). Последняя основана на Community Edition, которая отлично масштабируется, и, кроме того, включает в себя некоторые дополнительные возможности, ориентированные на организации. Это немного напоминает позиционирование WordPress.org и WordPress.com.
Среди возможностей GitLab можно отметить управление Git-репозиториями, средства обзора кода, наличие системы отслеживания ошибок, ленты активности, поддержку вики-страниц. Здесь имеется и GitLab CI — система непрерывной интеграции.
Многие VPS-провайдеры, вроде DigitalOcean, предлагают пользователям дроплеты GitLab. Если вы хотите развернуть GitLab на собственном сервере, вы можете установить эту систему вручную. GitLab предлагает пакет Omnibus для различных операционных систем. Прежде чем установить GitLab, может возникнуть необходимость в настройке почтового SMTP-сервера для того, чтобы система могла отправлять электронную почту. Рекомендовано для этих целей пользоваться Postfix. Поэтому, перед установкой GitLab, установим Postfix:
sudo apt-get install postfixВ процессе установки Postfix система задаст вам несколько вопросов. Не стоит пропускать ответы на них, но если ответы на них не даны, можно перенастроить систему, выполнив следующую команду:
sudo dpkg-reconfigure postfixПосле запуска этой команды нужно указать параметр Internet Site и задать почтовый идентификатор для домена, который будет использоваться GitLab. Далее, надо будет указать имя пользователя для Postfix и почтовый адрес. Значения остальных параметров можно не менять. После установки и настройки Postfix можно заняться GitLab.
Загрузим свежий пакет отсюда с помощью wget:
wget https://downloads-packages.s3.amazonaws.com/ubuntu-14.04/gitlab_7.9.4-omnibus.1-1_amd64.debТеперь установим его:
sudo dpkg -i gitlab_7.9.4-omnibus.1-1_amd64.debНастроим и запустим GitLab:
sudo gitlab-ctl reconfigureТеперь надо будет настроить доменное имя в конфигурационном файле, что даст возможность работать с GitLab. Откроем файл:
nano /etc/gitlab/gitlab.rb
В этом файле надо будет отредактировать параметр external_url, указав здесь доменное имя сервера. После редактирования файла его надо сохранить, после чего только что созданный GitLab-сайт можно открыть в браузере.
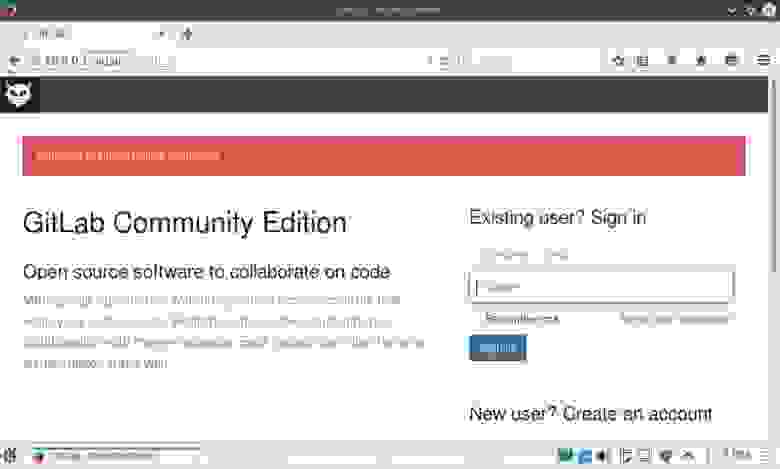
Сайт GitLab, открытый в браузере
По умолчанию система создаёт учётную запись администратора с именем root и паролем 5iveL!fe. Сразу после первого входа на сайт следует поменять пароль.
Смена пароля на сайте GitLab
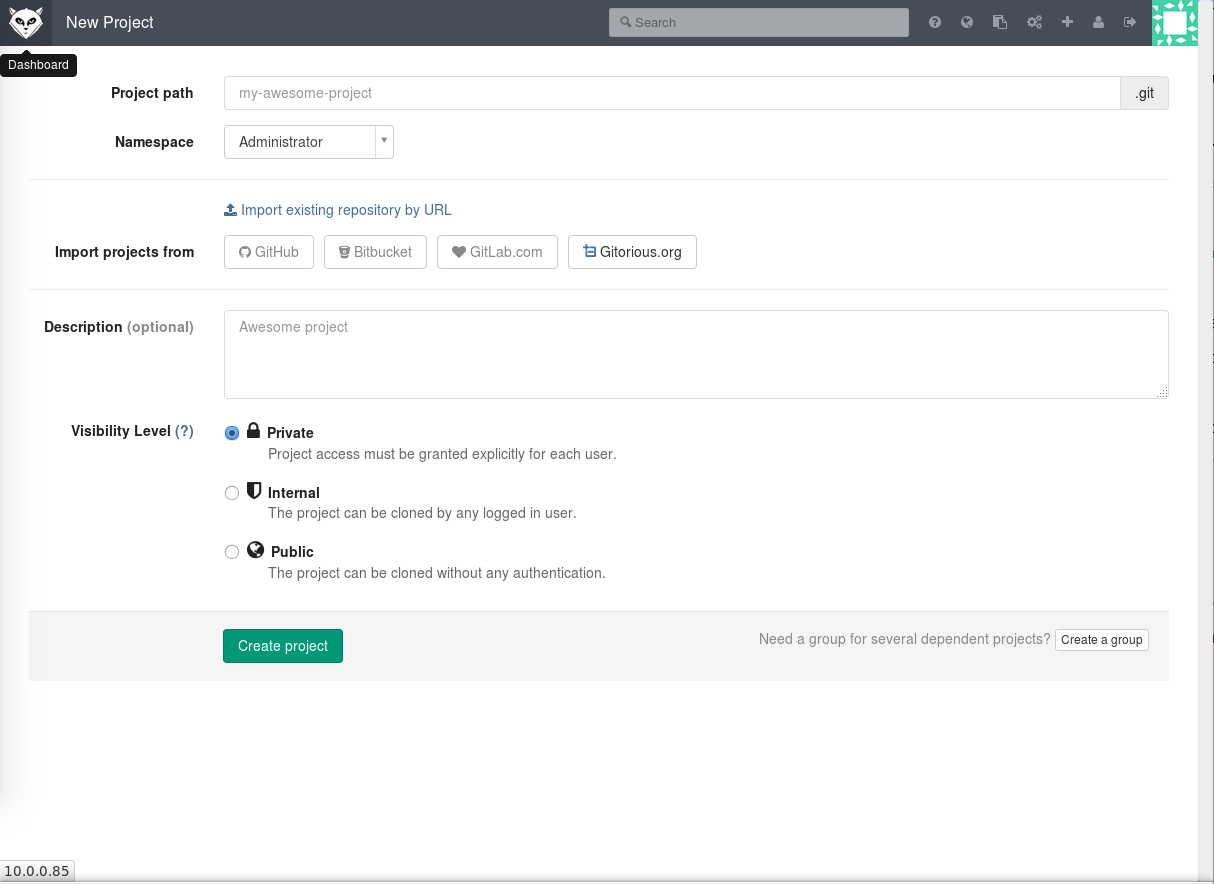
После того, как пароль изменён, можно войти на сайт и заняться работой с проектами.
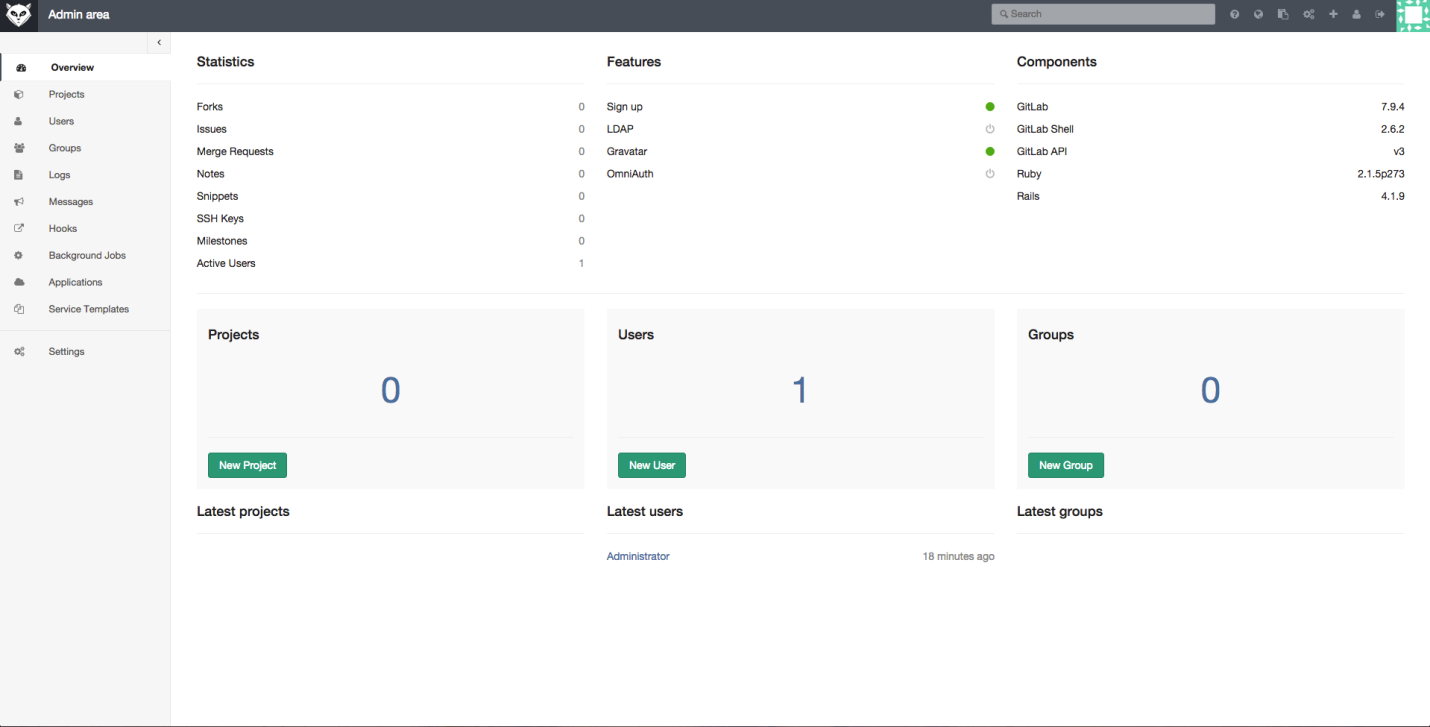
Работа с проектами в GitLab
GitLab — это серьёзная система, имеющая массу возможностей. Как в них разобраться? Позволим себе привести тут несколько изменённую цитату из фильма «Матрица»: «Увы, невозможно рассказать о том, что умеет GitLab. Вы должны увидеть это сами».
Уважаемые читатели! Пользуетесь ли вы собственными Git-серверами? Если да — просим рассказать о том, как вы их настраиваете и поддерживаете.
