You wanted to test something in the windows server operating system; maybe you want to create a domain controller, a DHCP server, or even a DNS server.
The best way to test the windows server configuration is to perform them on a LAB environment. And Some of you may not have lab access, so your available option would be to virtualize the windows server on a hypervisor.
That way, whatever you do on the machine will stay in a virtualized environment. There are multiple hypervisors you can use to spin up the Windows server. And in my last article, we had covered how you can install the windows server on a KVM host. And In this blog, we are going to install the windows server on a VirtualBox.
Can you run Windows Server in VirtualBox?
You can run most operating systems with VirtualBox, provided it should be bootable or a virtual hard disk. Most of the users out there will have Windows server ISO file, and it works perfectly fine. However, you have a choice from Microsoft to download the virtual hard disk in VHD format. You can use that as well to install the windows server on the VirtualBox. And the windows server works great with the VirtualBox.
To get better performance after the installation of the windows, you will also have to install the VirtualBox guest additions. We will cover that as well in this article.
How do I download windows server images for VirtualBox?
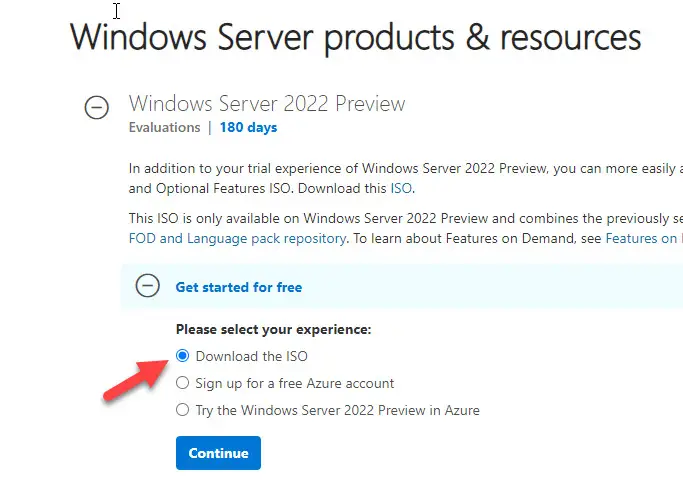
You can go to Microsoft windows server evaluation center and download the Version of your choice. When you choose the Version, you will have multiple options; you can either select ISO or VHD. After choosing the Version, you will have to submit the form and post which you will get a link to download the software.
When it comes to the installation, compared to the ISO installation, the VHD file is the easiest way; however, the VHD file size is about 8GB, so you need to be mindful of that.
We will see how we can install the windows server 2019 with both the ISO file and the Virtual hard disk file.
Though we are installing the windows server 2019 in a VirtualBox, the steps mentioned here are identical for other Version of windows as well, such as windows server 2016,2012 and so on.
Prerequisite.
- Download and install the VirtualBox.
- Download the windows server image (Either ISO or VHD)
- Installation using the ISO file.
- How to install windows server using virtual hard disk (VHD) in VirtualBox?
Installation using the ISO file.
1. Creation of Windows server VM in VirtualBox.
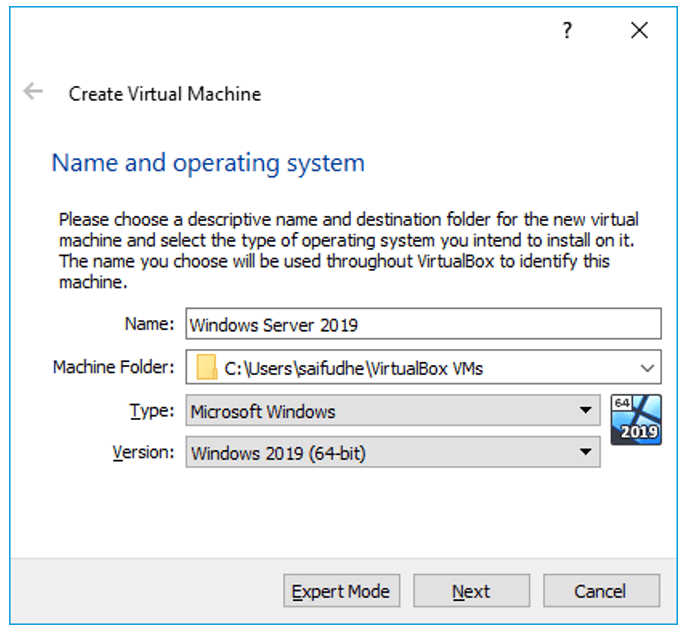
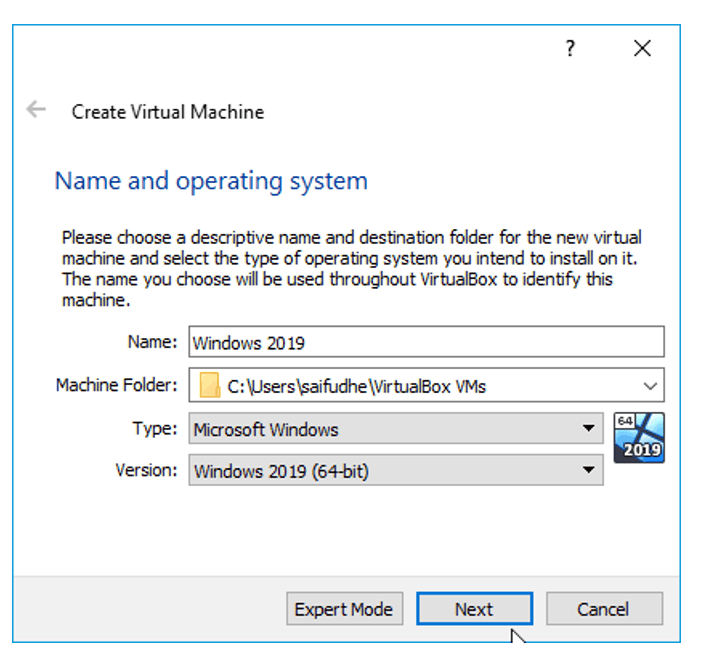
Open VirtualBox and click on New or CTRL+N to start the windows server VM installation.
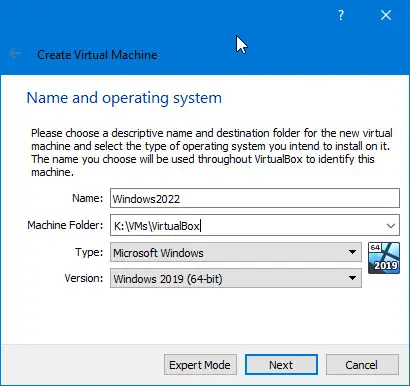
A new Create Virtual machine window will pop up; you can choose either Guided Mode or Expert Mode. We are using the Guided Mode for our lab.
- Enter the name of the VM.
- Select the folder where you want to keep the VM Hard disk files, I left as a default folder.
- Choose the Type as Microsoft Windows.
- Version as Windows 2019 (64bit), for other Version of windows server you may choose them here. For Example, Windows 2016 (64bit)
After specifying the above, you may Click on Next.
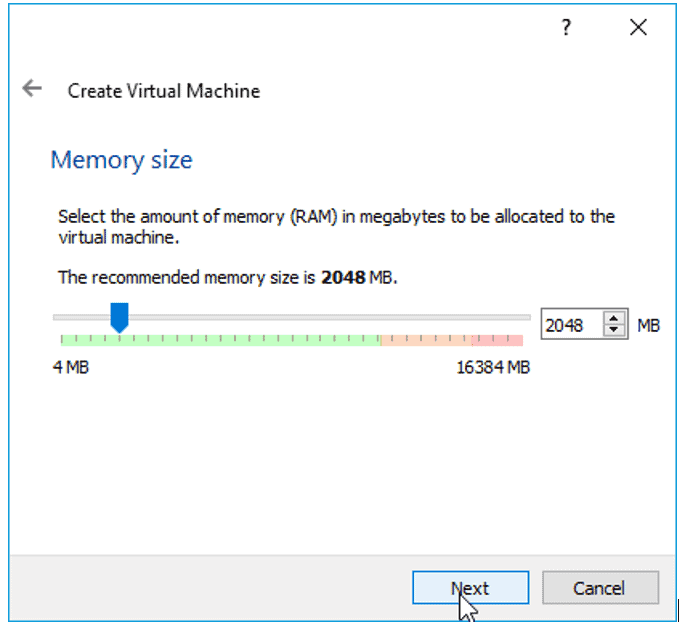
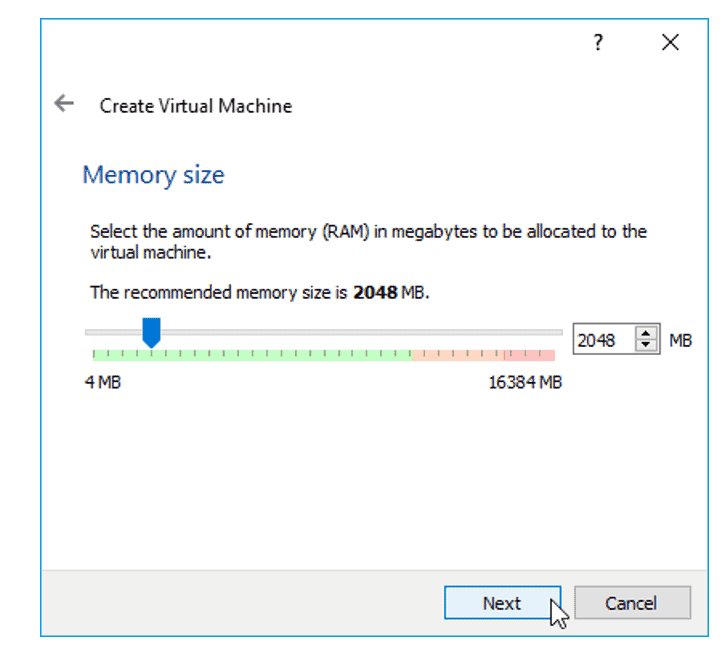
2. Specify the Memory.
You now have to define the Memory for the VM; since I most likely use it for a small Lab, I am fine with 2gigs of RAM. However, if you plan to do more stuff with it, you may need to increase the RAM accordingly.
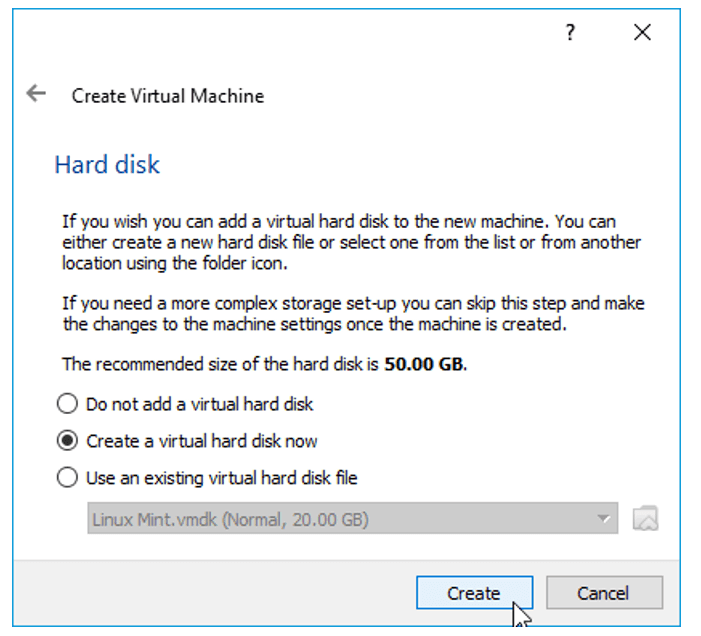
3. Create virtual Hard disk.
We will create a virtual hard disk for our VM; in the hard disk wizard. Select the option à Create a virtual hard disk now and Click on create.
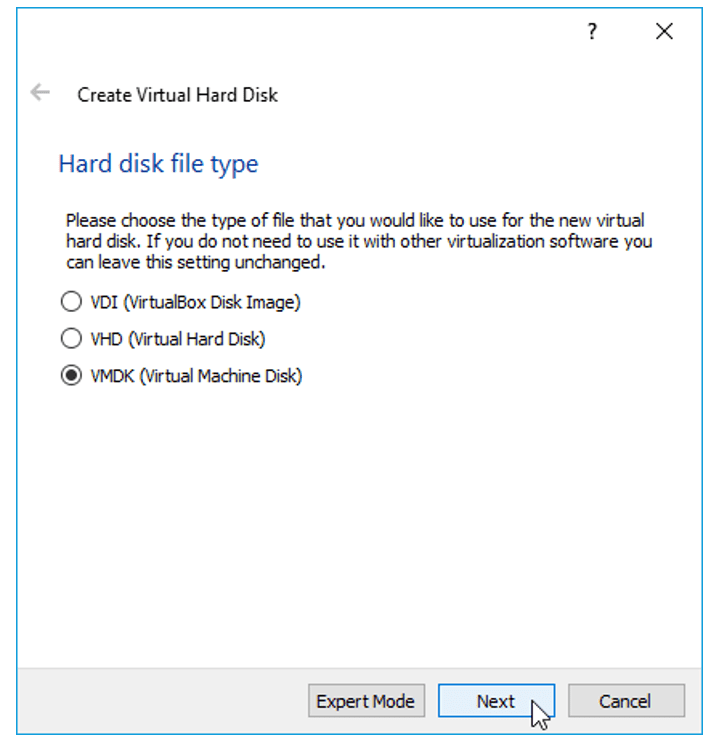
By default, the hard disk type would be VDI, and you may choose the default Value itself if you are planning to use the VirtualBox as your permanent hypervisor.
But I would recommend choosing VMDK so that you have an option to move from the VirtualBox to other hypervisors of your choice. Now Select VMDK and Click on the option Next.
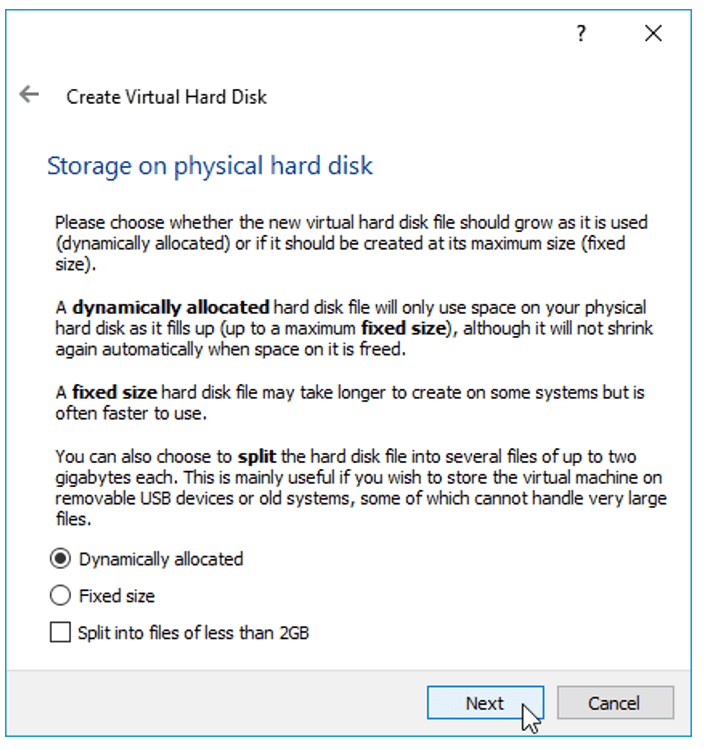
On Storage on Physical hard disk, Choose the default value Dynamically allocated and Click on Next.
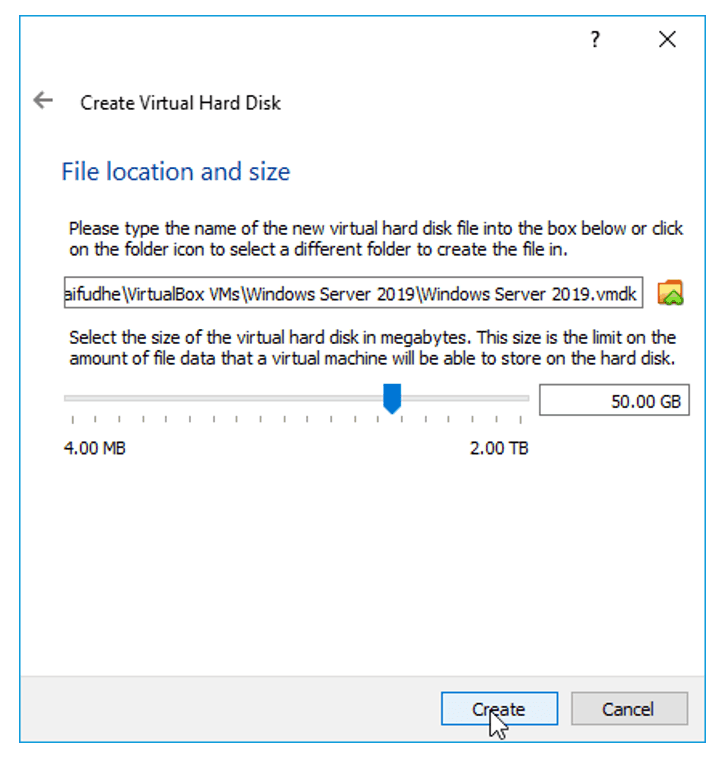
We will now define how much storage you want to provision for the windows server; I choose 50GB which is more than enough for me.
If you feel that you might need some extra space, you choose more based on your requirements and Click on Create.
You will be able to see the windows server VM instance is created.
4. Increase the CPU.
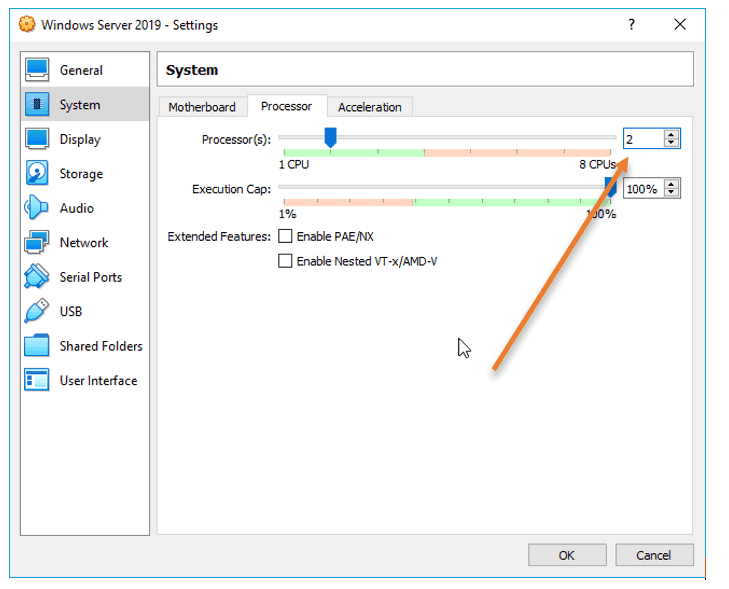
By default, the VirtualBox would assign only one processor to the VM, and I need to add one more processor. That way, then the performance would be good. If you do not need more CPU, you may skip this step.
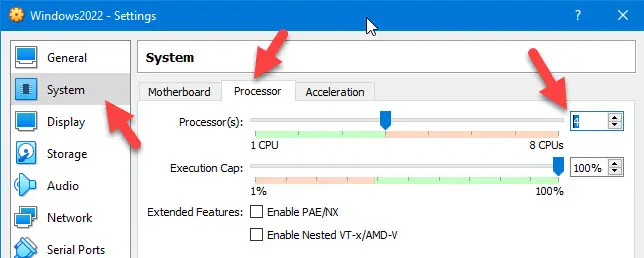
Right-Click on the VM and Click on settings.
Click on System and choose the Processor tab, and in the processor count, increase it to two.
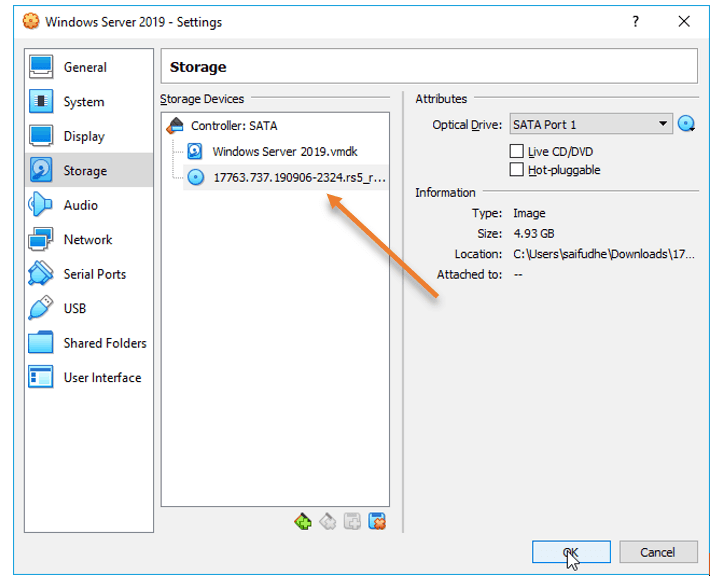
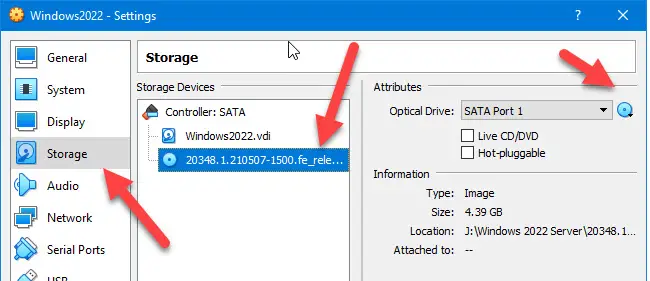
5. Attach the windows server image to the virtualbox.
On the same VirtualBox settings, Click on storage.
Under storage devices, Choose the Empty Disk.
In the attributes, Click on the Disk icon to choose a disk file.
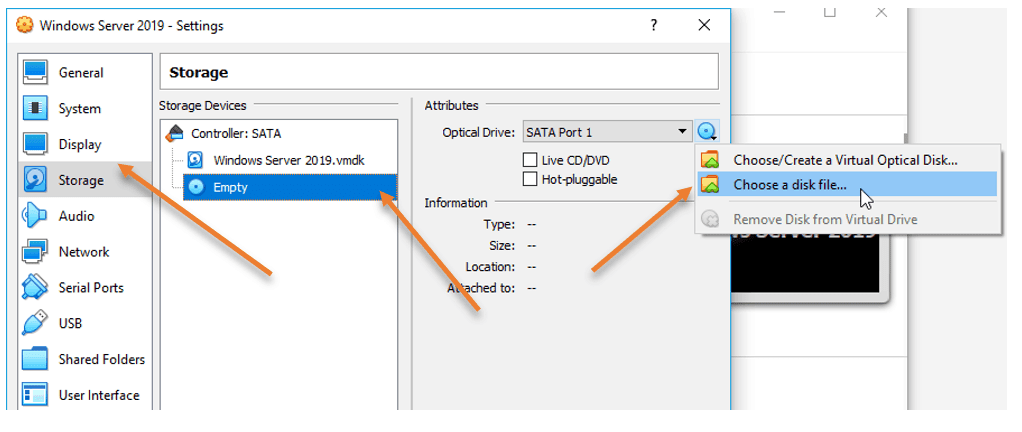
And attach the ISO that we have downloaded earlier and Click on Ok.
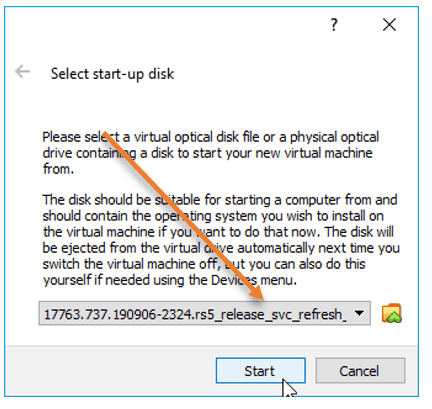
Right-Click on the VM and Click on start.
From the start-up disk, choose the ISO image that we have attached and click on start. The VirtualBox instance will boot the windows server image.
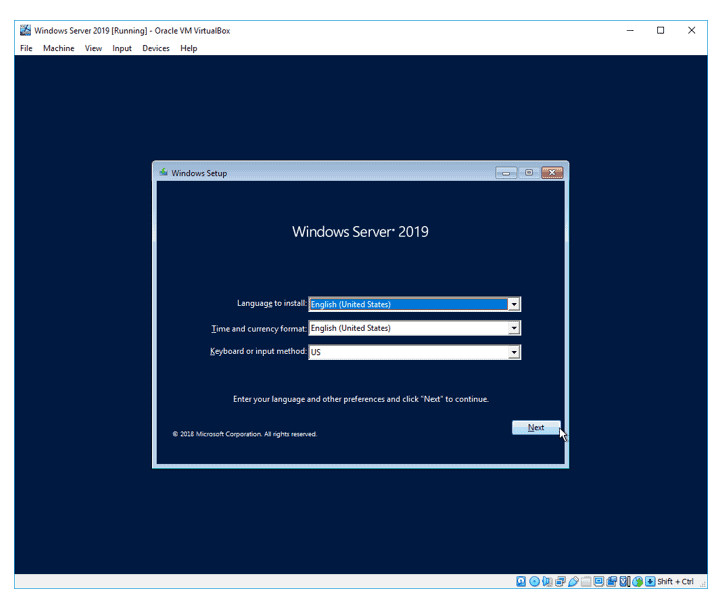
6. Begin the windows installation.
After a few seconds, you should see the windows installation screen, Choose the language, and Click on Next.
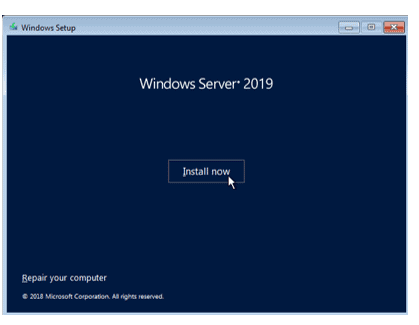
You can click on Install now.
7. Choose the Version – GUI or CLI.
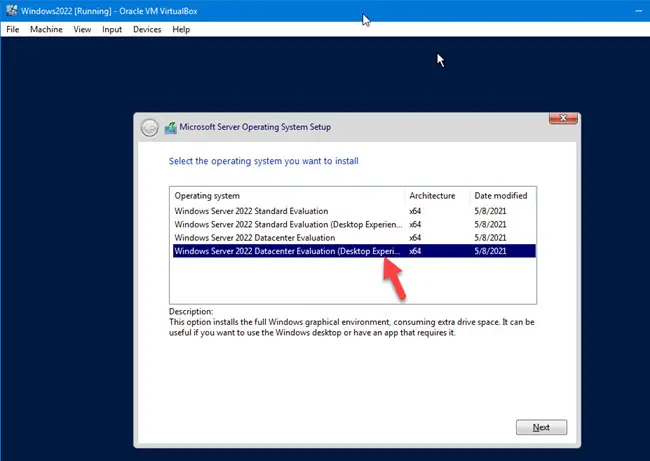
You will be presented with the different Versions of windows server 2019 on the screen. You must be a little careful here.
If you want to install the windows server with GUI, you may choose Desktop experience, or if you are ok with CLI, you may select the other options.
I need GUI access; hence I selected Windows server 2019 Datacenter evaluation (Desktop Experience)
After you decided on the versions, you may Click on Next.

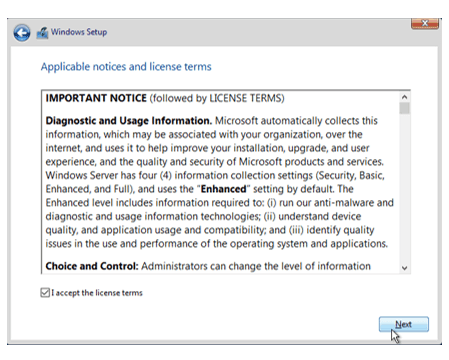
Accept the license agreement and Click on Next.
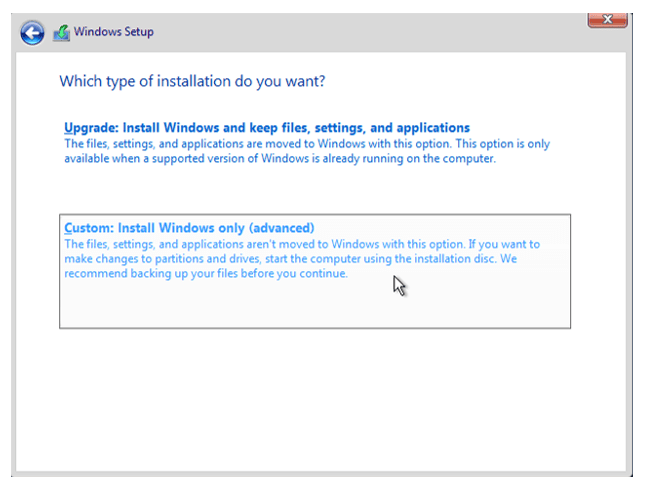
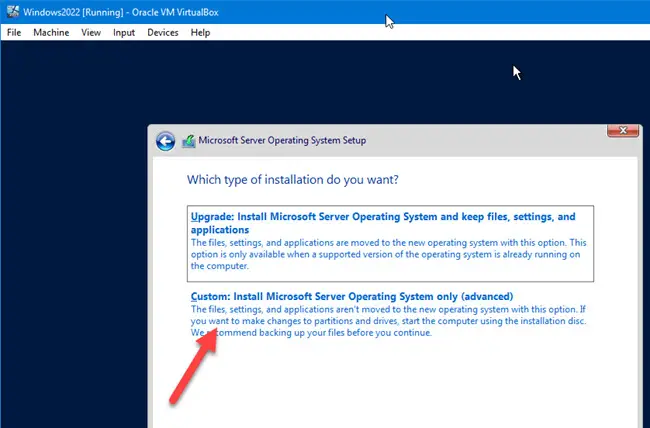
Choose the installation as Custom.
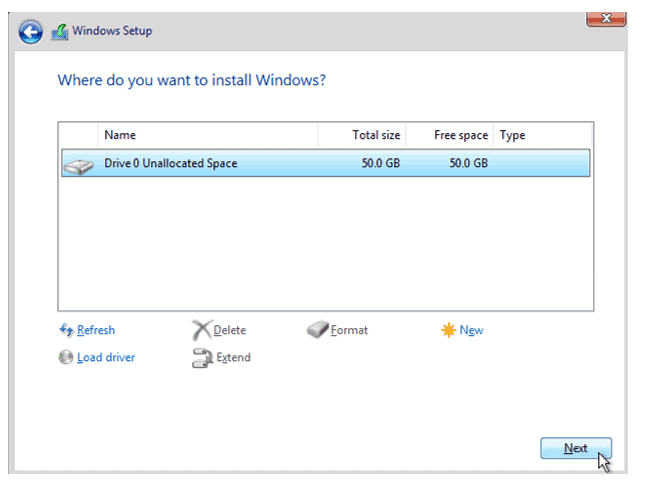
Choose hard disk that we have defined earlier, Click on Next.
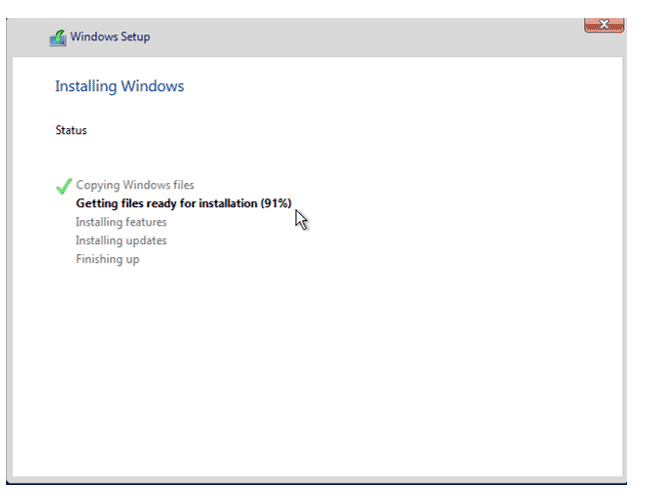
The windows server installation will now begin; this will take some time to finish.
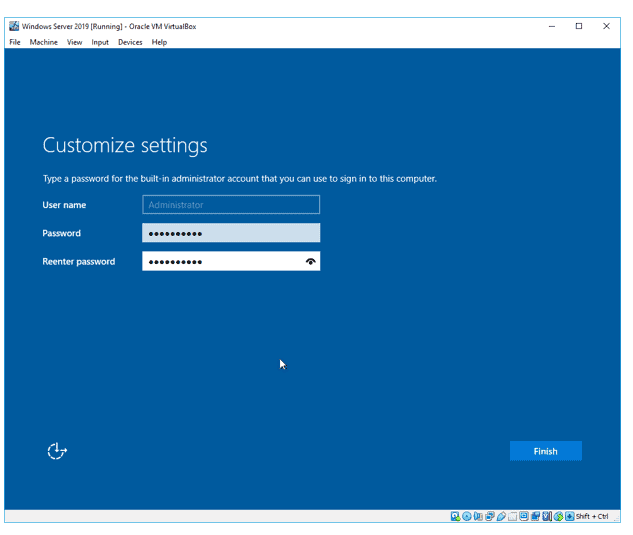
8. Setup the admin password.
After the installation, you will be prompted to enter the Administrator password. Set the administrator password and Click on Finish.
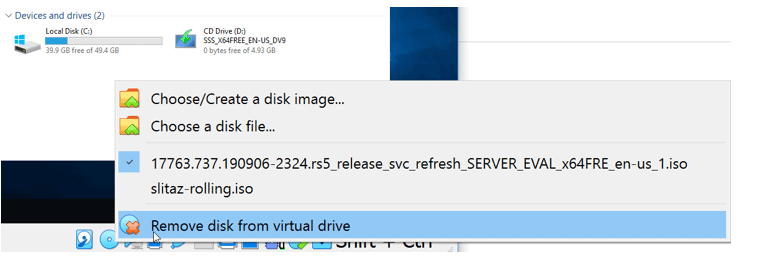
9. Remove the ISO file.
Installation of Windows server 2019 in Oracle VirtualBox is completed; you may now log in to the windows server.
Let’s remove the windows server ISO file that we had attached during the installation.
On the bottom corner of the VirtualBox window, right-click and click on the disk icon and click on Remove disk from virtual drive.
10. Installation of VirtualBox Guest additions.
Finally, we will have to install the VirtualBox guest addition, which will improve the performance of the windows server VM.
To install the VirtualBox guest additions, you may log in to the windows host.
Click on Input–> Keyboard–> Insert Ctrl+Alt+Del
You will be prompted to enter the admin password that we had set up earlier.
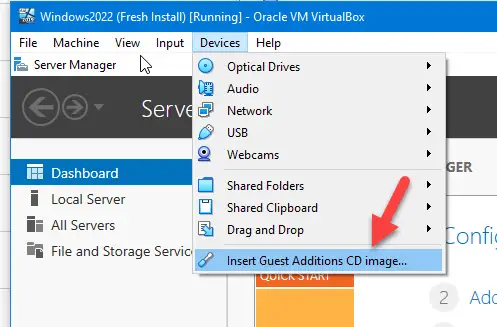
After logging in, Click on Devices > Insert Guest Additions CD image…
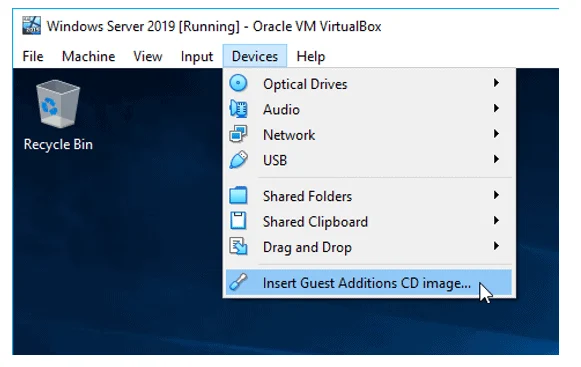
It will attach the Guest addition installation disk to the Windows server VM.
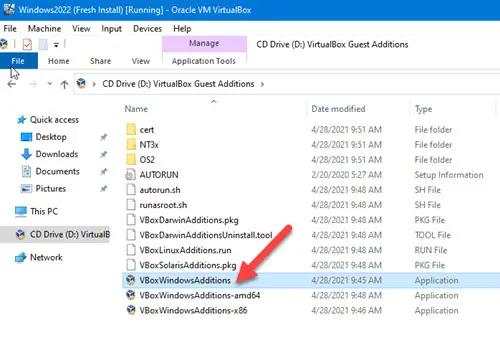
Open This PC, and you should see the VirtualBox Guest additions CD drive and double click on it.
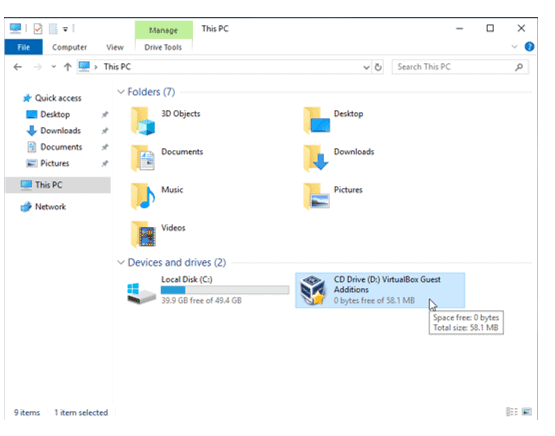
Double click on the Virtualbox Guest addition installation setup file to install the VirtualBox guest additions on your windows server machine.
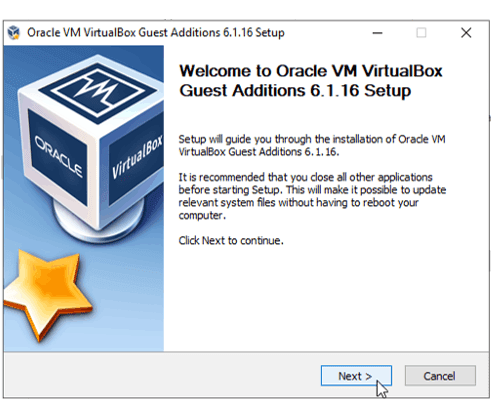
It is a typical software installation and nothing too complex here; you may click on next on all the drive installation prompt that you get.
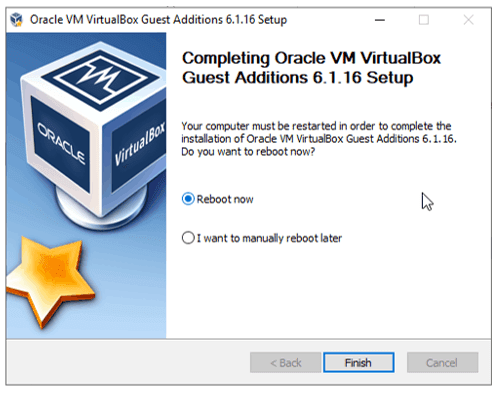
After the installation, you may now go ahead and reboot the VM, and you should be good to go.
How to install Windows Server using Virtual Hard Disk (VHD) in VirtualBox?
We have successfully installed the windows server 2019 on the VirtualBox hypervisor using ISO image. We now will go ahead and install the virtual machine using the virtual hard disk. We already have a VHD file downloaded from the Microsoft site.
1. Creation of the VM.
On the VirtualBox, Click on New.
- Name the VM and the location where you want to save the virtual machine.
- Type as Windows.
- Version: Windows 2019 (64bit)
2. Define the memory size.
We can provide a Memory of 2GB or more, and I am choosing 2GB for now.
3. Attach the Virtual Hard disk.
When we chose the ISO method of installation, we created a new hard disk in the VirtualBox.
But right now, we already have the virtual hard disk file, We need to attach that here.
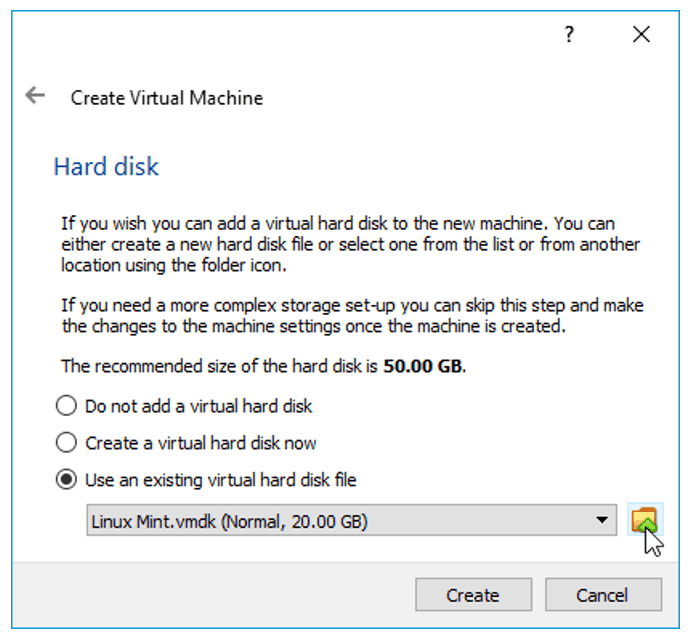
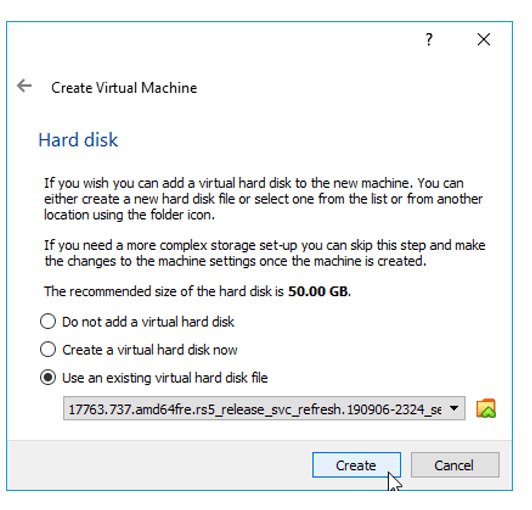
Select use existing virtual hard disk file and click on the browse button next to the drop-down.
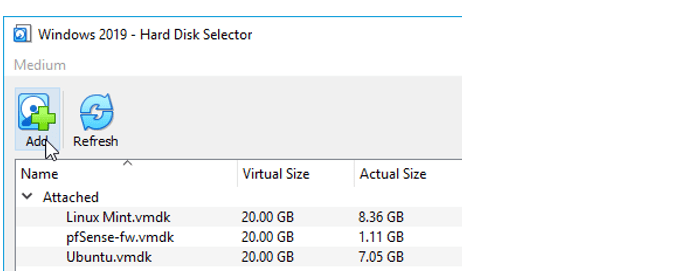
You will not see the virtual hard disk in the new pop up; Click on Add.
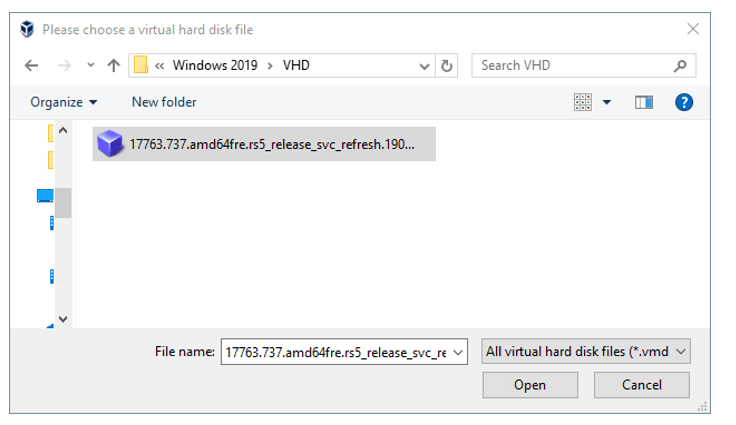
And Select the VHD file which we downloaded from Microsoft.
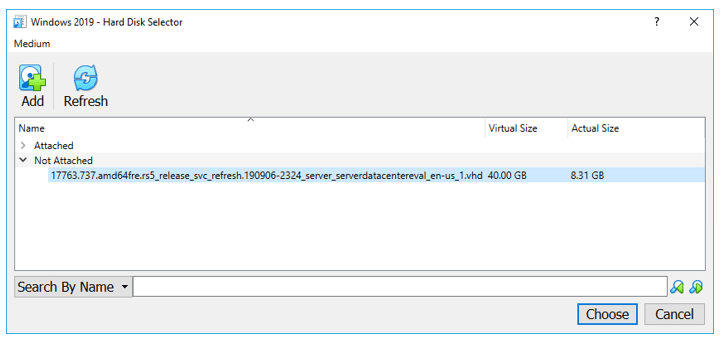
The new image is added under the not attached section.
Select the image and Click on Choose.
You need to make sure the new virtual hard disk is selected under ‘use existing hard disk file’
Click on Create.
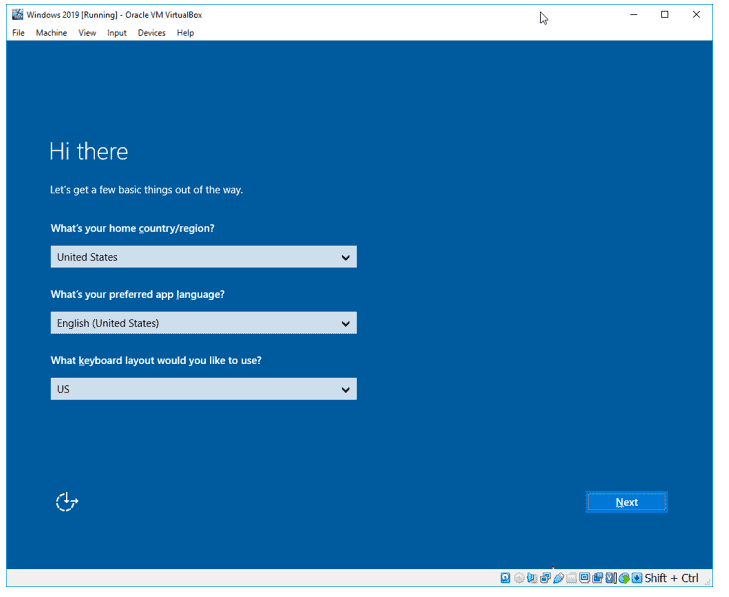
4. Choose the region and Accept the license.
Once you power on the machine, you will get an option to Choose the region, Language, Layout and Click on Next.
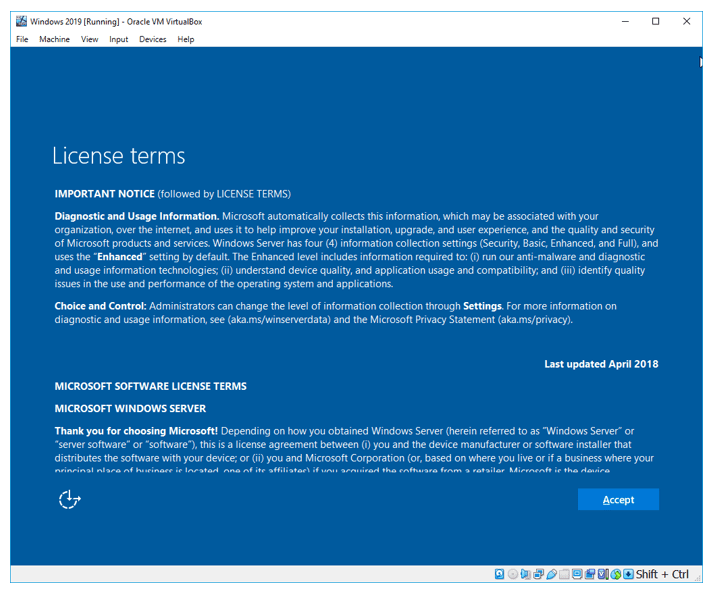
You have to accept the license before you continue.
Follow the Step 8 above to set the admin password. Enter the password and Click on Finish.
Your VirtualBox is ready to use, and you still need to install the VirtualBox guest additions following Step 10 above which is important.
Oracle VM VirtualBox is a free and open-source hosted hypervisor for x86 virtualization, developed by Oracle Corporation. You may want to run multiple VMs on your operating system, with the type 2 virtualization type, this is possible. To achieve this, the following steps below need to be performed. To proceed, ensure you have VirtualBox installed on your device. On how to perform Post OS Installation configuration of Windows Server 2019 Properties, how to install Windows Server 2016 Operating System. Also, you may be interested in my YouTube video on how to setup Windows Server 2019 on a VMware Workstation. On how to install and configure Ubuntu Linux, see the visit link.
Part A: Prepare the Virtualbox environment to hold the windows folders for the new VM. Click on “New” from the Oracle VM VirtualBox Manager. See this guide for how to install Windows Server 2022 on VMware Workstation.

Enter the name, version, desired path to host the VMs and click on continue

Select the memory size as shown below. You can type in the memory size or use the bar to increase it as well.

Click on “create a virtual hard disk now”

This will open the hard disk type window as shown below.
– I will select VDI (Virtual Disk image)

Choose if you wish the hard disk to dynamically increase or use a fixed hard disk file size. I will be using a fixed size which will be entered in the next page

Enter the Hard Disk size of your choice as shown below
– You can also change the file location if you wish from here.

Next, this will create the VM as shown below

Now the VM creation process is complate and VM successfull created.
Part B: To access and attached the Windows Server 2019 ISO file, the following steps should be followed.
Click on the Server and Click or settings or
– Right click on the server and select settings

Click on storage
– Click on Empty under the control IDE
– Select the Disk icon and choose the Operating system you wish to install as shown below

As you can see below, the ISO image has been selected. We can now proceed with our installation.

– Click on “ok”. Next, select the VM and click on start to continue the installation of Windows Server 2019.

This will load windows and prompt for the steps in Part C below.
Part C: This step is similar to installing Windows 10, Windows Server 2008, 2012, 2016 on Virtualbox. On the Windows Setup page,
– Select the language to install
– Time and currency format
– Keyboard or input method

Click on Next and Click on “Install now“

Note: Here you could click on repair your computer if this is the approach you need to take or use “Reset this PC”. See how to repair Windows 10 locally for similar steps. Select the operating system you wish to install and click on Next.

Accept the license agreement as shown below and click on next

Select custom install as shown below to install Windows
– Pick Custom: Install Windows only (advanced)

Select the Drive to install Windows and click on Next
Note: You can create an additional drive and install Windows on it. You can also format, delete and extend drives in this window.

After this step, Windows will be installed unto the system.

When this step complete, the the device will reboot after few seconds
– Note: You can restart immediately

This will prepare and get windows ready as shown below

the customise settings window will be displayed. Enter the Password and click on finish to complete Windows Server 2019 Installation.

The Windows Server 2019 setup is now complete as shown below.

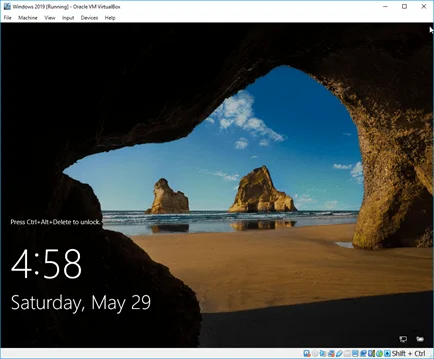
To access the login windows, use the Contl+Alt+Del and enter your password to access Windows. Refer to this guide for the Post OS Installation and configuration of Windows Server 2019 Properties (Configure TCP/IP Parameters).

I hope you found this blog post helpful. If you have any questions, please let me know in the comment session.
Windows 2022 is an upcoming server OS from Microsoft with new features and plenty of security enhancements. As Microsoft is pushing harder on security by utilizing hardware chips in Windows 11, the same technique continues in Windows 2022 servers also.
The next question that comes to our mind is installing and testing this new OS on our normal PCs. Thanks to virtualization technology. We can do that with the Windows built-in Hyper-V feature or VMware and VirtualBox. In this guide, let me show you where to download the Windows 2022 server ISO/VHDX file and install it on VirtualBox using your normal Windows 10 or 11 computer.
Some key security improvements include secure-Core servers, TPM 2.0, Virtualization-based security, and firmware protection. Also, Microsoft implements HTTPS, and TLS 1.3 enabled connectivity by default. Improvements in DNS resolution also can be seen in this new OS which can prevent DNS hacks and poisoning.
Other considerable enhancements in monitoring Azure, on-premise and hybrid environments, networking, and Hyper-V improvements are available in the new server OS. To find out more new features, do check the official feature list.
Also, note that when we install Windows 2022 on VirtualBox (or any virtualization environment), we can’t check the all-new features. Some of these features will only work when we install the server OS on the physical hardware.
1) Download the Windows 2022 server from the official site here. You may need to provide your details to download the file.
2) Download and install the latest Oracle VirtualBox software (if you don’t have it already on your host computer).
3) Make sure you have enough hardware resources to allocate. Minimum 2GB RAM, recommended is more than 4GB.
4) Create a new VM from the VirtualBox console. It is okay to select the Windows 2019 (64bit) server as the OS version since Server 2022 is not officially supported by VirtualBox (as of now)
5) Set the RAM size based on your physical computer RAM availability. I configured 8GB in this example.
6) Create a new virtual hard disk, VDI type, 50GB size (or more) and select a dynamically allocated type to save disk space.
7) Click next to create the virtual machine.
 Go to the settings of the newly created virtual machine and edit the processor settings. Increase the processor cores to 2 or more. By default, it will create the VM with a single-core, which may not be enough to install the desktop experience version of the Windows 2022 server.
You can check the hardware requirements for the Windows 2022 server here at the official site.
9) Open the Storage option and mount the downloaded 2022 ISO file to CD/DVD drive as shown below.
10) Power the virtual machine and select the mounted ISO file to boot the VM.
11) It is a normal Windows OS server installation process; nothing changed in this version. Select the Desktop Experience if you want to get the normal desktop and GUI interface. If you don’t select this option, you will get the Windows 2022 Server Core on the VirtualBox.
If you want to get experience on server core, you can install without Desktop Experience. You can always upgrade the server core to a Desktop experience or vice versa later.
In this example, I selected the desktop version.
12) Select the new Install option to do the fresh installation.
13) Select the hard disk you want to install and click Next. The installation process will create the required partitions and process to the next step.
14) After the installation is completed and VM is rebooted, you need to set up the Administrator password.
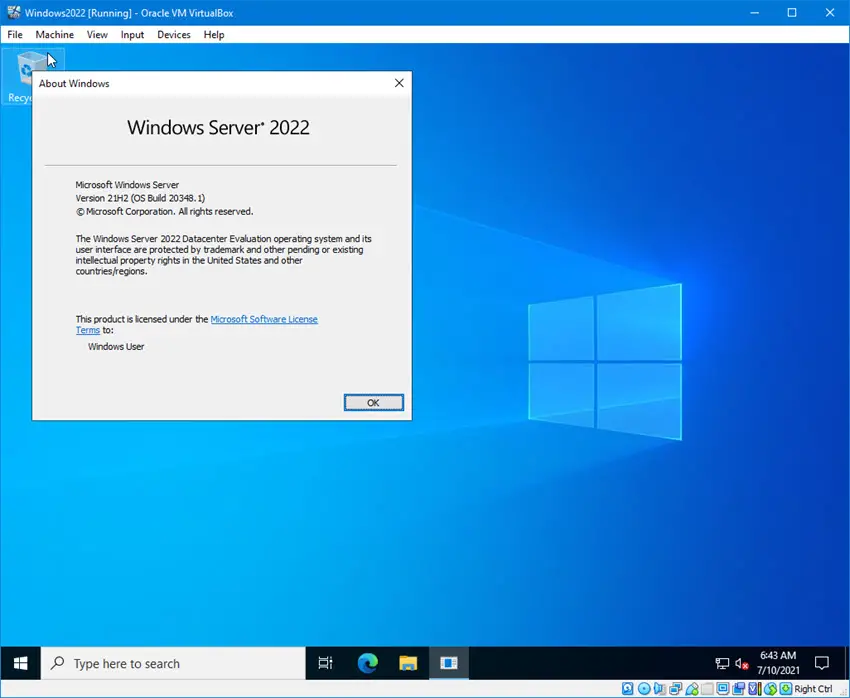
15) Here you go; you will land on the latest Windows 2022 server OS on VirtualBox as a virtual machine. It doesn’t matter which OS you have on your computer; it can be Windows 10, 11 or even the seven, Linux or macOS. As long as you have enough hardware resources on your physical computer with the latest VirtualBox, you can have Windows 2022 server as VM showed in these steps.
Read Also: Best Home Server OS you must know
What about VirtualBox Guest Additions for Windows 2022 Server?
As we mentioned earlier, Oracle VirtualBox doesn’t support Windows 2022 since this server version is still in preview mode (as of mid-July 2021). So, we do not have proper tested VirtualBox guest additions for server 2022.
But, we can try the available guest additions for Windows OS (Server 2019). Before proceeding to the next steps, I highly recommend taking a snapshot of the virtual machine.
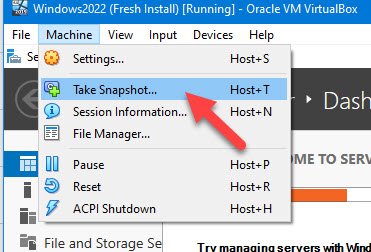
16) Click on Devices, and Insert Guest additions CD image of the virtual machine.
17) Once it is mounted successfully inside the VM, open the CD drive and execute the Windows version of guest additions.
18) Select Install for required drivers and continue the installation. You need to reboot the VM at the end.
19) This Windows 2022 server VM should perform well with proper working display, mouse movements, full-screen mode, and other additional VirtualBox guess addition features.
20) Take another snapshot before playing around with the new OS. Also, a full Windows update is highly recommended to get the latest updates and improvements.
Download Windows 2022 Server VHDX for VirtualBox or Hyper-V
Usually, Microsoft provides the preview and final versions of server Operating Systems in VHDX format, which natively supports Hyper-V. These pre-installed VHDX files can be easily imported to Hyper-V or VirtualBox to use the OS instantly.
You can download the Windows 2022 Server VHDX file from the Microsoft site here.
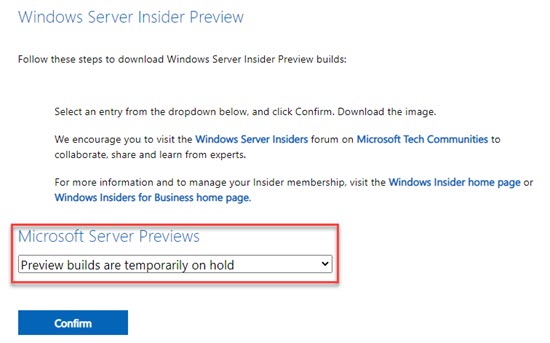
Unfortunately, at the moment, the preview builds are temporary on hold, and you can’t download them from the Microsoft site. When these images are available, you can download the VHDX file and simply import it to Oracle VirtualBox as described in our earlier guide on Windows 2012 R2 Server.
Add Windows Server on VirtualBox + DHCP, Active Directory and DNS Server
Installing Windows Server on VirtualBox, configuring it to work with DHCP Server, Active Directory and DNS Server
This project aims to demonstrate an installation of Windows Server on a virtual machine via VirtualBox (Oracle VM VirtualBox). Adding DHCP (+ share internet to local PCs), add Active Directory and DNS Server.
These are guidelines of the main setup key points and steps in the installation and configuration process.
If you need more detailed explanations, I will be glad for your feedback so I can prepare them.
This includes:
Step 1: Download and install VirtualBox;
Step 2: Creating a virtual machine for Server and Client’s PCs;
Step 3: Network setting of the virtual machines (to be on the same network);
Step 4: Windows Servers setup — Network Adapters Configuration
Step 5: Windows Server setup — Add DHCP, Active Directory (AD) + DNS
Step 6: Configure Windows Server DHCP
Step 7: Configure Windows Server AD DS
After these steps you have Windows Server installed, configured Active Directory and a DHCP server to which you can connect client machines.

Step 9: Configure Windows Client PC to join the Domain
I hope it was useful for you.

Here we are going to install Windows Server 2022 LTSC preview version on VirtualBox virtual machine to try its latest features…
As per the virtual Ignite 2021 conference announcement done by Microsoft, they are planning to release the final version of Windows server 2022, later this year. Whereas the Trial versions of Windows Server 2022 preview are already available for Windows Insiders.
The upcoming Windows Server’s Long Term Servicing Channel Release (LTSC) will receive security updates for ten years. The current version is Windows Server 2019 LTSC. The innovations of Windows Server 2022 include multi-layer protection against threats, which can be activated via Secured Core Server. Besides, the new version enables HTTPS via TLS 1.3 ex works to support secure connections for business-critical data.
Furthermore, the updated version of Windows Admin Center and the possibility to manage Windows Server in your own data center with Azure Arc. As per the official blog, now it becomes easier to manage virtual machines. Besides, the Storage Migration Service receives a new scenario for migrating file servers from its own data center to Azure. For more information, the user can refer to the official announcement.
Windows Server 2022 installation on VirtualBox Virtual machine
1. Download Windows Server 2022 ISO
To get the preview ISO file of the Server 2022, the user can visit the official Windows Insider page of Microsoft. Or else see our step by step article on this – How to get Server 2022 ISO or VHDX image
2. Install VirtualBox
Although if you are here for this tutorial then you would already have VirtualBox installed on your system, if not, then download it from virtualbox.org. It is available for all popular platforms. Where for Linux see our tutorials such as Redhat and Ubuntu
3. Create a Virtual machine for Windows Server 2022
Run the installed VirtualBox and follow the below steps to create Microsoft Server 2022 virtual machine.
- Click on the New button.
- Give some name to your VM, here we are installing the server version, thus, we name it the same i.e Windows Server 2022.
- Select Microsoft Windows as OS type and Windows 10 64-bit as version.
- If you want to use the Desktop GUI version then at least 2GB RAM should be assigned, however, we recommend 4GB or more depending upon what are you planning to install for better performance.
- Create a Virtual Hard disk. When it asks for file type go for VHD so that later you can use the same virtual disk image in Hyper-V as well.
- Select Dynamic Allocated, this will not allocate all the assigned VHD space at once, instead steadily as our virtual disk starts growing.
- In the next steps, use the slider bar and allocate the amount of space for the VHD file. Here we are stipulating 50 GB but you can more if you are planning to deploy some enterprise features/applications.
- Finally, finish and you will have your Server 2022 Virtual machine on VirtualBox.


4. Start Virtual Machine
Now, select the created VM from the left panel of VirtualBox and click on the Start button given in the Menu… after that the Vbox will ask you to select the startup disk. Here we have to choose the ISO file we have downloaded for Windows Server 2022 at the first step of this article.
⇒ Select the folder icon to open the File Explorer window of your respective OS.

⇒ Click on the Add button to select the downloaded Microsoft Server 2022 ISO image as bootable or Startup disk medium.

⇒ When the ISO image appears in the disk display area select it and then click on the Choose button.

⇒ Finally, hit the Start button to move forward for the installation of Microsoft Server 2022 on Virtualbox VM.

5. Install Microsoft Server 2022
Select “I don’t have license key” when the installation setup asks for it. Moving forward, you will see multiple setups to install, that are:
- Windows Server 2022 Standard
- Windows Server 2022 Standard (Desktop Experience)
- Windows Serbger 2022 Datacenter
- Windows Server 2022 Datacenter (Desktop Experience)
If you have some application that requires Graphical User Interface or you want to experience the Server with GUI, then select the Desktop Experience one. Whereas those who want to manage their server (without GUI) installation using Windows Admin Center can go for the Standard or DataCenter option.

As here we are not upgrading any previous Windows server installation, thus select the Custom Install.

Select the available hard drive, we have created on VirtualBox. If you want to create partitions then select the NEW option otherwise click on the NEXT to let the Server use the whole drive to install the OS.

6. Set Admin Password
Once the installation is complete, the setup will ask you to type a password to secure a built-in Administrator account.
Later press – Ctrl+Alt+Del to login.

