OpenVPN is a full-featured SSL VPN which implements OSI layer 2 or 3 secure network extension using the industry standard SSL/TLS protocol, supports flexible client authentication methods based on certificates, smart cards, and/or username/password credentials, and allows user or group-specific access control policies using firewall rules applied to the VPN virtual interface. OpenVPN is not a web application proxy and does not operate through a web browser.
OpenVPN 2.0 expands on the capabilities of OpenVPN 1.x by offering a scalable client/server mode, allowing multiple clients to connect to a single OpenVPN server process over a single TCP or UDP port. OpenVPN 2.3 includes a large number of improvements, including full IPv6 support and PolarSSL support.
This document provides step-by-step instructions for configuring an OpenVPN 2.x client/server VPN, including:
This HOWTO assumes that readers possess a prior understanding of basic networking concepts such as IP addresses, DNS names, netmasks, subnets, IP routing, routers, network interfaces, LANs, gateways, and firewall rules.
The original OpenVPN 1.x HOWTO is still available, and remains relevant for point-to-point or static-key configurations.
While this HOWTO will guide you in setting up a scalable client/server VPN using an X509 PKI (public key infrastruction using certificates and private keys), this might be overkill if you are only looking for a simple VPN setup with a server that can handle a single client.
If you would like to get a VPN running quickly with minimal configuration, you might check out the Static Key Mini-HOWTO.
OpenVPN source code and Windows installers can be downloaded here. Recent releases (2.2 and later) are also available as Debian and RPM packages; see the OpenVPN wiki for details.
The OpenVPN executable should be installed on both server and client machines, since the single executable provides both client and server functions.
If you are using a Linux distribution which supports RPM packages (SuSE, Fedora, Redhat, etc.), it’s best to install using this mechanism. The easiest method is to find an existing binary RPM file for your distribution. You can also build your own binary RPM file:
Furthermore, if you are building your own binary RPM package, there are several additional dependencies:
See the openvpn.spec file for additional notes on building an RPM package for Red Hat Linux 9 or building with reduced dependencies.
If you are using Debian, Gentoo, or a non-RPM-based Linux distribution, use your distro-specific packaging mechanism such as apt-get on Debian or emerge on Gentoo.
It is also possible to install OpenVPN on Linux using the universal ./configure method. First expand the .tar.gz file:
OpenVPN for Windows can be installed from the self-installing exe file on the OpenVPN download page. Remember that OpenVPN will only run on Windows XP or later. Also note that OpenVPN must be installed and run by a user who has administrative privileges (this restriction is imposed by Windows, not OpenVPN). The restriction can be sidestepped by running OpenVPN in the background as a service, in which case even non-admin users will be able to access the VPN, once it is installed. More discussion on OpenVPN + Windows privilege issues.
Official OpenVPN Windows installers include OpenVPN-GUI, which allows managing OpenVPN connections from a system tray applet. Other GUI applications are also available.
After you’ve run the Windows installer, OpenVPN is ready for use and will associate itself with files having the .ovpn extension. To run OpenVPN, you can:
method can be used, or you can search for an OpenVPN port or package which is specific to your OS/distribution.
See FAQ for an overview of Routing vs. Ethernet Bridging. See also the OpenVPN Ethernet Bridging page for more notes and details on bridging.
Overall, routing is probably a better choice for most people, as it is more efficient and easier to set up (as far as the OpenVPN configuration itself) than bridging. Routing also provides a greater ability to selectively control access rights on a client-specific basis.
I would recommend using routing unless you need a specific feature which requires bridging, such as:
Setting up a VPN often entails linking together private subnets from different locations.
The Internet Assigned Numbers Authority (IANA) has reserved the following three blocks of the IP address space for private internets (codified in RFC 1918):
While addresses from these netblocks should normally be used in VPN configurations, it’s important to select addresses that minimize the probability of IP address or subnet conflicts. The types of conflicts that need to be avoided are:
For example, suppose you use the popular 192.168.0.0/24 subnet as your private LAN subnet. Now you are trying to connect to the VPN from an internet cafe which is using the same subnet for its WiFi LAN. You will have a routing conflict because your machine won’t know if 192.168.0.1 refers to the local WiFi gateway or to the same address on the VPN.
As another example, suppose you want to link together multiple sites by VPN, but each site is using 192.168.0.0/24 as its LAN subnet. This won’t work without adding a complexifying layer of NAT translation, because the VPN won’t know how to route packets between multiple sites if those sites don’t use a subnet which uniquely identifies them.
The best solution is to avoid using 10.0.0.0/24 or 192.168.0.0/24 as private LAN network addresses. Instead, use something that has a lower probability of being used in a WiFi cafe, airport, or hotel where you might expect to connect from remotely. The best candidates are subnets in the middle of the vast 10.0.0.0/8 netblock (for example 10.66.77.0/24).
And to avoid cross-site IP numbering conflicts, always use unique numbering for your LAN subnets.
The first step in building an OpenVPN 2.x configuration is to establish a PKI (public key infrastructure). The PKI consists of:
OpenVPN supports bidirectional authentication based on certificates, meaning that the client must authenticate the server certificate and the server must authenticate the client certificate before mutual trust is established.
Both server and client will authenticate the other by first verifying that the presented certificate was signed by the master certificate authority (CA), and then by testing information in the now-authenticated certificate header, such as the certificate common name or certificate type (client or server).
Note that the server and client clocks need to be roughly in sync or certificates might not work properly.
In this section we will generate a master CA certificate/key, a server certificate/key, and certificates/keys for 3 separate clients.
For PKI management, we will use easy-rsa 2, a set of scripts which is bundled with OpenVPN 2.2.x and earlier. If you’re using OpenVPN 2.3.x, you need to download easy-rsa 2 separately from here.
For PKI management, we will use easy-rsa 2, a set of scripts which is bundled with OpenVPN 2.2.x and earlier. If you’re using OpenVPN 2.3.x, you may need to download easy-rsa 2 separately from the easy-rsa-old project page. On *NIX platforms you should look into using easy-rsa 3 instead; refer to its own documentation for details.
If you are using Linux, BSD, or a unix-like OS, open a shell and cd to the easy-rsa subdirectory. If you installed OpenVPN from an RPM or DEB file, the easy-rsa directory can usually be found in /usr/share/doc/packages/openvpn or /usr/share/doc/openvpn(it’s best to copy this directory to another location such as /etc/openvpn, before any edits, so that future OpenVPN package upgrades won’t overwrite your modifications). If you installed from a .tar.gz file, the easy-rsa directory will be in the top level directory of the expanded source tree.
If you are using Windows, open up a Command Prompt window and cd to \Program Files\OpenVPN\easy-rsa. Run the following batch file to copy configuration files into place (this will overwrite any preexisting vars.bat and openssl.cnf files):
Now edit the vars file (called vars.bat on Windows) and set the KEY_COUNTRY, KEY_PROVINCE, KEY_CITY, KEY_ORG, and KEY_EMAIL parameters. Don’t leave any of these parameters blank.
Next, initialize the PKI. On Linux/BSD/Unix:
The final command (build-ca) will build the certificate authority (CA) certificate and key by invoking the interactive opensslcommand:
Note that in the above sequence, most queried parameters were defaulted to the values set in the varsor vars.bat files. The only parameter which must be explicitly entered is the Common Name. In the example above, I used «OpenVPN-CA».
Next, we will generate a certificate and private key for the server. On Linux/BSD/Unix:
As in the previous step, most parameters can be defaulted. When the Common Name is queried, enter «server». Two other queries require positive responses, «Sign the certificate? [y/n]» and «1 out of 1 certificate requests certified, commit? [y/n]».
Generating client certificates is very similar to the previous step. On Linux/BSD/Unix:
If you would like to password-protect your client keys, substitute the build-key-pass script.
Remember that for each client, make sure to type the appropriate Common Name when prompted, i.e. «client1», «client2», or «client3». Always use a unique common name for each client.
Diffie Hellman parameters must be generated for the OpenVPN server. On Linux/BSD/Unix:
Now we will find our newly-generated keys and certificates in the keys subdirectory. Here is an explanation of the relevant files:
The final step in the key generation process is to copy all files to the machines which need them, taking care to copy secret files over a secure channel.
Now wait, you may say. Shouldn’t it be possible to set up the PKI without a pre-existing secure channel?
The answer is ostensibly yes. In the example above, for the sake of brevity, we generated all private keys in the same place. With a bit more effort, we could have done this differently. For example, instead of generating the client certificate and keys on the server, we could have had the client generate its own private key locally, and then submit a Certificate Signing Request (CSR) to the key-signing machine. In turn, the key-signing machine could have processed the CSR and returned a signed certificate to the client. This could have been done without ever requiring that a secret .key file leave the hard drive of the machine on which it was generated.
It’s best to use the OpenVPN sample configuration files as a starting point for your own configuration. These files can also be found in
Note that on Linux, BSD, or unix-like OSes, the sample configuration files are named server.conf and client.conf. On Windows they are named server.ovpn and client.ovpn.
The sample server configuration file is an ideal starting point for an OpenVPN server configuration. It will create a VPN using a virtual TUN network interface (for routing), will listen for client connections on UDP port 1194 (OpenVPN’s official port number), and distribute virtual addresses to connecting clients from the 10.8.0.0/24 subnet.
Before you use the sample configuration file, you should first edit the ca, cert, key, and dh parameters to point to the files you generated in the PKI section above.
At this point, the server configuration file is usable, however you still might want to customize it further:
If you want to run multiple OpenVPN instances on the same machine, each using a different configuration file, it is possible if you:
The sample client configuration file (client.conf on Linux/BSD/Unix or client.ovpn on Windows) mirrors the default directives set in the sample server configuration file.
First, make sure the OpenVPN server will be accessible from the internet. That means:
To simplify troubleshooting, it’s best to initially start the OpenVPN server from the command line (or right-click on the .ovpn file on Windows), rather than start it as a daemon or service:
A normal server startup should look like this (output will vary across platforms):
Starting the client
As in the server configuration, it’s best to initially start the OpenVPN server from the command line (or on Windows, by right-clicking on the client.ovpn file), rather than start it as a daemon or service:
openvpn [client config file]
A normal client startup on Windows will look similar to the server output above, and should end with the Initialization Sequence Completed message.
Now, try a ping across the VPN from the client. If you are using routing (i.e. dev tun in the server config file), try:
ping 10.8.0.1
If you are using bridging (i.e. dev tap in the server config file), try to ping the IP address of a machine on the server’s ethernet subnet.
If the ping succeeds, congratulations! You now have a functioning VPN.
Troubleshooting
If the ping failed or the OpenVPN client initialization failed to complete, here is a checklist of common symptoms and their solutions:
- You get the error message: TLS Error: TLS key negotiation failed to occur within 60 seconds (check your network connectivity). This error indicates that the client was unable to establish a network connection with the server.Solutions:
- Make sure the client is using the correct hostname/IP address and port number which will allow it to reach the OpenVPN server.
- If the OpenVPN server machine is a single-NIC box inside a protected LAN, make sure you are using a correct port forward rule on the server’s gateway firewall. For example, suppose your OpenVPN box is at 192.168.4.4 inside the firewall, listening for client connections on UDP port 1194. The NAT gateway servicing the 192.168.4.x subnet should have a port forward rule that says forward UDP port 1194 from my public IP address to 192.168.4.4.
- Open up the server’s firewall to allow incoming connections to UDP port 1194 (or whatever TCP/UDP port you have configured in the server config file).
- You get the error message: Initialization Sequence Completed with errors— This error can occur on Windows if (a) You don’t have the DHCP client service running, or (b) You are using certain third-party personal firewalls on XP SP2.Solution: Start the DHCP client server and make sure that you are using a personal firewall which is known to work correctly on XP SP2.
- You get the Initialization Sequence Completedmessage but the ping test fails — This usually indicates that a firewall on either server or client is blocking VPN network traffic by filtering on the TUN/TAP interface.Solution: Disable the client firewall (if one exists) from filtering the TUN/TAP interface on the client. For example on Windows XP SP2, you can do this by going to Windows Security Center -> Windows Firewall -> Advanced and unchecking the box which corresponds to the TAP-Windows adapter (disabling the client firewall from filtering the TUN/TAP adapter is generally reasonable from a security perspective, as you are essentially telling the firewall not to block authenticated VPN traffic). Also make sure that the TUN/TAP interface on the server is not being filtered by a firewall (having said that, note that selective firewalling of the TUN/TAP interface on the server side can confer certain security benefits. See the access policies section below).
- The connection stalls on startup when using a proto udpconfiguration, the server log file shows this line:
TLS: Initial packet from x.x.x.x:x, sid=xxxxxxxx xxxxxxxx
however the client log does not show an equivalent line.
Solution: You have a one-way connection from client to server. The server to client direction is blocked by a firewall, usually on the client side. The firewall can either be (a) a personal software firewall running on the client, or (b) the NAT router gateway for the client. Modify the firewall to allow returning UDP packets from the server to reach the client.
See the FAQ for additional troubleshooting information.
Configuring OpenVPN to run automatically on system startup
The lack of standards in this area means that most OSes have a different way of configuring daemons/services for autostart on boot. The best way to have this functionality configured by default is to install OpenVPN as a package, such as via RPM on Linux or using the Windows installer.
Linux
If you install OpenVPN via an RPM or DEB package on Linux, the installer will set up an initscript. When executed, the initscript will scan for .conf configuration files in /etc/openvpn, and if found, will start up a separate OpenVPN daemon for each file.
Windows
The Windows installer will set up a Service Wrapper, but leave it turned off by default. To activate it, go to Control Panel / Administrative Tools / Services, select the OpenVPN service, right-click on properties, and set the Startup Type to Automatic. This will configure the service for automatic start on the next reboot.
When started, the OpenVPN Service Wrapper will scan the \Program Files\OpenVPN\config folder for .ovpn configuration files, starting a separate OpenVPN process on each file.
Controlling a running OpenVPN process
Running on Linux/BSD/Unix
OpenVPN accepts several signals:
- SIGUSR1 — Conditional restart, designed to restart without root privileges
- SIGHUP — Hard restart
- SIGUSR2 — Output connection statistics to log file or syslog
- SIGTERM, SIGINT — Exit
Use the writepid directive to write the OpenVPN daemon’s PID to a file, so that you know where to send the signal (if you are starting openvpn with an initscript, the script may already be passing a —writepid directive on the openvpn command line).
Running on Windows as a GUI
See the OpenVPN GUI page.
Running in a Windows command prompt window
On Windows, you can start OpenVPN by right clicking on an OpenVPN configuration file (.ovpn file) and selecting «Start OpenVPN on this config file».
Once running in this fashion, several keyboard commands are available:
- F1 — Conditional restart (doesn’t close/reopen TAP adapter)
- F2 — Show connection statistics
- F3 — Hard restart
- F4 — Exit
Running as a Windows Service
When OpenVPN is started as a service on Windows, the only way to control it is:
- Via the service control manager (Control Panel / Administrative Tools / Services) which gives start/stop control.
- Via the management interface (see below).
Modifying a live server configuration
While most configuration changes require you to restart the server, there are two directives in particular which refer to files which can be dynamically updated on-the-fly, and which will take immediate effect on the server without needing to restart the server process.
client-config-dir — This directive sets a client configuration directory, which the OpenVPN server will scan on every incoming connection, searching for a client-specific configuration file (see the the manual page for more information). Files in this directory can be updated on-the-fly, without restarting the server. Note that changes in this directory will only take effect for new connections, not existing connections. If you would like a client-specific configuration file change to take immediate effect on a currently connected client (or one which has disconnected, but where the server has not timed-out its instance object), kill the client instance object by using the management interface (described below). This will cause the client to reconnect and use the new client-config-dir file.
crl-verify — This directive names a Certificate Revocation List file, described below in the Revoking Certificates section. The CRL file can be modified on the fly, and changes will take effect immediately for new connections, or existing connections which are renegotiating their SSL/TLS channel (occurs once per hour by default). If you would like to kill a currently connected client whose certificate has just been added to the CRL, use the management interface (described below).
Status File
The default server.conf file has a line
status openvpn-status.log
which will output a list of current client connections to the file openvpn-status.log once per minute.
Using the management interface
The OpenVPN management interface allows a great deal of control over a running OpenVPN process. You can use the management interface directly, by telneting to the management interface port, or indirectly by using an OpenVPN GUI which itself connects to the management interface.
To enable the management interface on either an OpenVPN server or client, add this to the configuration file:
management localhost 7505
This tells OpenVPN to listen on TCP port 7505 for management interface clients (port 7505 is an arbitrary choice — you can use any free port).
Once OpenVPN is running, you can connect to the management interface using a telnet client. For example:
ai:~ # telnet localhost 7505
Trying 127.0.0.1...
Connected to localhost.
Escape character is '^]'.
>INFO:OpenVPN Management Interface Version 1 -- type 'help' for more info
help
Management Interface for OpenVPN 2.0_rc14 i686-suse-linux [SSL] [LZO] [EPOLL] built on Feb 15 2005
Commands:
echo [on|off] [N|all]  : Like log, but only show messages in echo buffer.
exit|quit              : Close management session.
help                   : Print this message.
hold [on|off|release]  : Set/show hold flag to on/off state, or
                         release current hold and start tunnel.
kill cn                : Kill the client instance(s) having common name cn.
kill IP:port           : Kill the client instance connecting from IP:port.
log [on|off] [N|all]   : Turn on/off realtime log display
                         + show last N lines or 'all' for entire history.
mute [n]               : Set log mute level to n, or show level if n is absent.
net                    : (Windows only) Show network info and routing table.
password type p        : Enter password p for a queried OpenVPN password.
signal s               : Send signal s to daemon,
                         s = SIGHUP|SIGTERM|SIGUSR1|SIGUSR2.
state [on|off] [N|all] : Like log, but show state history.
status [n]             : Show current daemon status info using format #n.
test n                 : Produce n lines of output for testing/debugging.
username type u        : Enter username u for a queried OpenVPN username.
verb [n]               : Set log verbosity level to n, or show if n is absent.
version                : Show current version number.
END
exit
Connection closed by foreign host.
ai:~ #
For more information, see the OpenVPN Management Interface Documentation.
Expanding the scope of the VPN to include additional machines on either the client or server subnet.
Including multiple machines on the server side when using a routed VPN (dev tun)
Once the VPN is operational in a point-to-point capacity between client and server, it may be desirable to expand the scope of the VPN so that clients can reach multiple machines on the server network, rather than only the server machine itself.
For the purpose of this example, we will assume that the server-side LAN uses a subnet of 10.66.0.0/24and the VPN IP address pool uses 10.8.0.0/24 as cited in the server directive in the OpenVPN server configuration file.
First, you must advertise the 10.66.0.0/24 subnet to VPN clients as being accessible through the VPN. This can easily be done with the following server-side config file directive:
push "route 10.66.0.0 255.255.255.0"
Next, you must set up a route on the server-side LAN gateway to route the VPN client subnet (10.8.0.0/24) to the OpenVPN server (this is only necessary if the OpenVPN server and the LAN gateway are different machines).
Make sure that you’ve enabled IP and TUN/TAP forwarding on the OpenVPN server machine.
Including multiple machines on the server side when using a bridged VPN (dev tap)
One of the benefits of using ethernet bridging is that you get this for free without needing any additional configuration.
Including multiple machines on the client side when using a routed VPN (dev tun)
In a typical road-warrior or remote access scenario, the client machine connects to the VPN as a single machine. But suppose the client machine is a gateway for a local LAN (such as a home office), and you would like each machine on the client LAN to be able to route through the VPN.
For this example, we will assume that the client LAN is using the 192.168.4.0/24 subnet, and that the VPN client is using a certificate with a common name of client2. Our goal is to set up the VPN so that any machine on the client LAN can communicate with any machine on the server LAN through the VPN.
Before setup, there are some basic prerequisites which must be followed:
- The client LAN subnet (192.168.4.0/24 in our example) must not be exported to the VPN by the server or any other client sites which are using the same subnet. Every subnet which is joined to the VPN via routing must be unique.
- The client must have a unique Common Name in its certificate («client2» in our example), and the duplicate-cn flag must not be used in the OpenVPN server configuration file.
First, make sure that IP and TUN/TAP forwarding is enabled on the client machine.
Next, we will deal with the necessary configuration changes on the server side. If the server configuration file does not currently reference a client configuration directory, add one now:
client-config-dir ccd
In the above directive, ccd should be the name of a directory which has been pre-created in the default directory where the OpenVPN server daemon runs. On Linux this tends to be /etc/openvpn and on Windows it is usually \Program Files\OpenVPN\config. When a new client connects to the OpenVPN server, the daemon will check this directory for a file which matches the common name of the connecting client. If a matching file is found, it will be read and processed for additional configuration file directives to be applied to the named client.
The next step is to create a file called client2 in the ccd directory. This file should contain the line:
iroute 192.168.4.0 255.255.255.0
This will tell the OpenVPN server that the 192.168.4.0/24 subnet should be routed to client2.
Next, add the following line to the main server config file (not the ccd/client2 file):
route 192.168.4.0 255.255.255.0
Why the redundant route and iroute statements, you might ask? The reason is that route controls the routing from the kernel to the OpenVPN server (via the TUN interface) while iroute controls the routing from the OpenVPN server to the remote clients. Both are necessary.
Next, ask yourself if you would like to allow network traffic between client2’s subnet (192.168.4.0/24) and other clients of the OpenVPN server. If so, add the following to the server config file.
client-to-client
push "route 192.168.4.0 255.255.255.0"
This will cause the OpenVPN server to advertise client2’s subnet to other connecting clients.
The last step, and one that is often forgotten, is to add a route to the server’s LAN gateway which directs 192.168.4.0/24 to the OpenVPN server box (you won’t need this if the OpenVPN server box is the gateway for the server LAN). Suppose you were missing this step and you tried to ping a machine (not the OpenVPN server itself) on the server LAN from 192.168.4.8? The outgoing ping would probably reach the machine, but then it wouldn’t know how to route the ping reply, because it would have no idea how to reach 192.168.4.0/24. The rule of thumb to use is that when routing entire LANs through the VPN (when the VPN server is not the same machine as the LAN gateway), make sure that the gateway for the LAN routes all VPN subnets to the VPN server machine.
Similarly, if the client machine running OpenVPN is not also the gateway for the client LAN, then the gateway for the client LAN must have a route which directs all subnets which should be reachable through the VPN to the OpenVPN client machine.
Including multiple machines on the client side when using a bridged VPN (dev tap)
This requires a more complex setup (maybe not more complex in practice, but more complicated to explain in detail):
- You must bridge the client TAP interface with the LAN-connected NIC on the client.
- You must manually set the IP/netmask of the TAP interface on the client.
- You must configure client-side machines to use an IP/netmask that is inside of the bridged subnet, possibly by querying a DHCP server on the OpenVPN server side of the VPN.
Pushing DHCP options to clients
The OpenVPN server can push DHCP options such as DNS and WINS server addresses to clients (some caveats to be aware of). Windows clients can accept pushed DHCP options natively, while non-Windows clients can accept them by using a client-side up script which parses the foreign_option_nenvironmental variable list. See the man page for non-Windows foreign_option_n documentation and script examples.
For example, suppose you would like connecting clients to use an internal DNS server at 10.66.0.4 or 10.66.0.5 and a WINS server at 10.66.0.8. Add this to the OpenVPN server configuration:
push "dhcp-option DNS 10.66.0.4"
push "dhcp-option DNS 10.66.0.5"
push "dhcp-option WINS 10.66.0.8"
To test this feature on Windows, run the following from a command prompt window after the machine has connected to an OpenVPN server:
ipconfig /all
The entry for the TAP-Windows adapter should show the DHCP options which were pushed by the server.
Configuring client-specific rules and access policies
Suppose we are setting up a company VPN, and we would like to establish separate access policies for 3 different classes of users:
- System administrators — full access to all machines on the network
- Employees — access only to Samba/email server
- Contractors — access to a special server only
The basic approach we will take is (a) segregate each user class into its own virtual IP address range, and (b) control access to machines by setting up firewall rules which key off the client’s virtual IP address.
In our example, suppose that we have a variable number of employees, but only one system administrator, and two contractors. Our IP allocation approach will be to put all employees into an IP address pool, and then allocate fixed IP addresses for the system administrator and contractors.
Note that one of the prerequisites of this example is that you have a software firewall running on the OpenVPN server machine which gives you the ability to define specific firewall rules. For our example, we will assume the firewall is Linux iptables.
First, let’s create a virtual IP address map according to user class:
| Class | Virtual IP Range | Allowed LAN Access | Common Names |
| Employees | 10.8.0.0/24 | Samba/email server at 10.66.4.4 | [variable] |
| System Administrators | 10.8.1.0/24 | Entire 10.66.4.0/24 subnet | sysadmin1 |
| Contractors | 10.8.2.0/24 | Contractor server at 10.66.4.12 | contractor1, contracter2 |
Next, let’s translate this map into an OpenVPN server configuration. First of all, make sure you’ve followed the steps above for making the 10.66.4.0/24 subnet available to all clients (while we will configure routing to allow client access to the entire 10.66.4.0/24 subnet, we will then impose access restrictions using firewall rules to implement the above policy table).
First, define a static unit number for our tun interface, so that we will be able to refer to it later in our firewall rules:
dev tun0
In the server configuration file, define the Employee IP address pool:
server 10.8.0.0 255.255.255.0
Add routes for the System Administrator and Contractor IP ranges:
route 10.8.1.0 255.255.255.0
route 10.8.2.0 255.255.255.0
Because we will be assigning fixed IP addresses for specific System Administrators and Contractors, we will use a client configuration directory:
client-config-dir ccd
Now place special configuration files in the ccd subdirectory to define the fixed IP address for each non-Employee VPN client.
ccd/sysadmin1
ifconfig-push 10.8.1.1 10.8.1.2
ccd/contractor1
ifconfig-push 10.8.2.1 10.8.2.2
ccd/contractor2
ifconfig-push 10.8.2.5 10.8.2.6
Each pair of ifconfig-push addresses represent the virtual client and server IP endpoints. They must be taken from successive /30 subnets in order to be compatible with Windows clients and the TAP-Windows driver. Specifically, the last octet in the IP address of each endpoint pair must be taken from this set:
[  1,  2] [  5,  6] [  9, 10] [ 13, 14] [ 17, 18]
[ 21, 22] [ 25, 26] [ 29, 30] [ 33, 34] [ 37, 38]
[ 41, 42] [ 45, 46] [ 49, 50] [ 53, 54] [ 57, 58]
[ 61, 62] [ 65, 66] [ 69, 70] [ 73, 74] [ 77, 78]
[ 81, 82] [ 85, 86] [ 89, 90] [ 93, 94] [ 97, 98]
[101,102] [105,106] [109,110] [113,114] [117,118]
[121,122] [125,126] [129,130] [133,134] [137,138]
[141,142] [145,146] [149,150] [153,154] [157,158]
[161,162] [165,166] [169,170] [173,174] [177,178]
[181,182] [185,186] [189,190] [193,194] [197,198]
[201,202] [205,206] [209,210] [213,214] [217,218]
[221,222] [225,226] [229,230] [233,234] [237,238]
[241,242] [245,246] [249,250] [253,254]
This completes the OpenVPN configuration. The final step is to add firewall rules to finalize the access policy. For this example, we will use firewall rules in the Linux iptables syntax:
# Employee rule
iptables -A FORWARD -i tun0 -s 10.8.0.0/24 -d 10.66.4.4 -j ACCEPT

# Sysadmin rule
iptables -A FORWARD -i tun0 -s 10.8.1.0/24 -d 10.66.4.0/24 -j ACCEPT

# Contractor rule
iptables -A FORWARD -i tun0 -s 10.8.2.0/24 -d 10.66.4.12 -j ACCEPT
Using alternative authentication methods
OpenVPN 2.0 and later include a feature that allows the OpenVPN server to securely obtain a username and password from a connecting client, and to use that information as a basis for authenticating the client.
To use this authentication method, first add the auth-user-pass directive to the client configuration. It will direct the OpenVPN client to query the user for a username/password, passing it on to the server over the secure TLS channel.
Next, configure the server to use an authentication plugin, which may be a script, shared object, or DLL. The OpenVPN server will call the plugin every time a VPN client tries to connect, passing it the username/password entered on the client. The authentication plugin can control whether or not the OpenVPN server allows the client to connect by returning a failure (1) or success (0) value.
Using Script Plugins
Script plugins can be used by adding the auth-user-pass-verify directive to the server-side configuration file. For example:
auth-user-pass-verify auth-pam.pl via-file
will use the auth-pam.pl perl script to authenticate the username/password of connecting clients. See the description of auth-user-pass-verify in the manual page for more information.
The auth-pam.pl script is included in the OpenVPN source file distribution in the sample-scriptssubdirectory. It will authenticate users on a Linux server using a PAM authentication module, which could in turn implement shadow password, RADIUS, or LDAP authentication. auth-pam.pl is primarily intended for demonstration purposes. For real-world PAM authentication, use the openvpn-auth-pamshared object plugin described below.
Using Shared Object or DLL Plugins
Shared object or DLL plugins are usually compiled C modules which are loaded by the OpenVPN server at run time. For example if you are using an RPM-based OpenVPN package on Linux, the openvpn-auth-pam plugin should be already built. To use it, add this to the server-side config file:
plugin /usr/share/openvpn/plugin/lib/openvpn-auth-pam.so login
This will tell the OpenVPN server to validate the username/password entered by clients using the loginPAM module.
For real-world production use, it’s better to use the openvpn-auth-pam plugin, because it has several advantages over the auth-pam.pl script:
- The shared object openvpn-auth-pam plugin uses a split-privilege execution model for better security. This means that the OpenVPN server can run with reduced privileges by using the directives user nobody, group nobody, and chroot, and will still be able to authenticate against the root-readable-only shadow password file.
- OpenVPN can pass the username/password to a plugin via virtual memory, rather than via a file or the environment, which is better for local security on the server machine.
- C-compiled plugin modules generally run faster than scripts.
If you would like more information on developing your own plugins for use with OpenVPN, see the README files in the plugin subdirectory of the OpenVPN source distribution.
To build the openvpn-auth-pam plugin on Linux, cd to the plugin/auth-pam directory in the OpenVPN source distribution and run make.
Using username/password authentication as the only form of client authentication
By default, using auth-user-pass-verify or a username/password-checking plugin on the server will enable dual authentication, requiring that both client-certificate and username/password authentication succeed in order for the client to be authenticated.
While it is discouraged from a security perspective, it is also possible to disable the use of client certificates, and force username/password authentication only. On the server:
client-cert-not-required
Such configurations should usually also set:
username-as-common-name
which will tell the server to use the username for indexing purposes as it would use the Common Name of a client which was authenticating via a client certificate.
Note that client-cert-not-required will not obviate the need for a server certificate, so a client connecting to a server which uses client-cert-not-required may remove the cert and key directives from the client configuration file, but not the ca directive, because it is necessary for the client to verify the server certificate.
How to add dual-factor authentication to an OpenVPN configuration using client-side smart cards
- About dual-factor authentication
- What is PKCS#11?
- Finding PKCS#11 provider library.
- How to configure a cryptographic token
- How to modify an OpenVPN configuration to make use of cryptographic tokens
- Determine the correct object.
- Using OpenVPN with PKCS#11.
- PKCS#11 implementation considerations.
- OpenSC PKCS#11 provider.
- Difference between PKCS#11 and Microsoft Cryptographic API (CryptoAPI).
About dual-factor authentication
Dual-factor authentication is a method of authentication that combines two elements: something you have and something you know.
Something you have should be a device that cannot be duplicated; such a device can be a cryptographic token that contains a private secret key. This private key is generated inside the device and never leaves it. If a user possessing this token attempts to access protected services on a remote network, the authorization process which grants or denies network access can establish, with a high degree of certainty, that the user seeking access is in physical possession of a known, certified token.
Something you know can be a password presented to the cryptographic device. Without presenting the proper password you cannot access the private secret key. Another feature of cryptographic devices is to prohibit the use of the private secret key if the wrong password had been presented more than an allowed number of times. This behavior ensures that if a user lost his device, it would be infeasible for another person to use it.
Cryptographic devices are commonly called «smart cards» or «tokens», and are used in conjunction with a PKI (Public Key Infrastructure). The VPN server can examine a X.509 certificate and verify that the user holds the corresponding private secret key. Since the device cannot be duplicated and requires a valid password, the server is able to authenticate the user with a high degree of confidence.
Dual-factor authentication is much stronger than password-based authentication, because in the worst-case scenario, only one person at a time can use the cryptographic token. Passwords can be guessed and can be exposed to other users, so in the worst-case scenario an infinite number of people could attempt to gain unauthorized access when resources are protected using password-only authentication.
If you store the secret private key in a file, the key is usually encrypted by a password. The problem with this approach is that the encrypted key is exposed to decryption attacks or spyware/malware running on the client machine. Unlike when using a cryptographic device, the file cannot erase itself automatically after several failed decryption attempts.
What is PKCS#11?
This standard specifies an API, called Cryptoki, to devices which hold cryptographic information and perform cryptographic functions. Cryptoki, pronounced «crypto-key» and short for cryptographic token interface, follows a simple object-based approach, addressing the goals of technology independence (any kind of device) and resource sharing (multiple applications accessing multiple devices), presenting to applications a common, logical view of the device called a cryptographic token.
Source: RSA Security Inc. https://www.emc.com/emc-plus/rsa-labs/standards-initiatives/pkcs-11-cryptographic-token-interface-standard.htm.
To summarize, PKCS#11 is a standard that can be used by application software to access cryptographic tokens such as smart cards and other devices. Most device vendors provide a library that implements the PKCS#11 provider interface — this library can be used by applications in order to access these devices. PKCS#11 is a cross-platform, vendor-independent free standard.
Finding PKCS#11 provider library
The first thing you need to do is to find the provider library, it should be installed with the device drivers. Each vendor has its own library. For example, the OpenSC PKCS#11 provider is located at /usr/lib/pkcs11/opensc-pkcs11.so on Unix or at opensc-pkcs11.dll on Windows.
How to configure cryptographic token
You should follow an enrollment procedure:
- Initialize the PKCS#11 token.
- Generate RSA key pair on the PKCS#11 token.
- Create a certificate request based on the key pair, you can use OpenSC and OpenSSL in order to do that.
- Submit the certificate request to a certificate authority, and receive a certificate.
- Load the certificate onto the token, while noting that the id and label attributes of the certificate must match those of the private key.
A configured token is a token that has a private key object and a certificate object, where both share the same id and label attributes.
A simple enrollment utility is Easy-RSA 2.0 which is part of OpenVPN 2.1 series. Follow the instructions specified in the README file, and then use the pkitool in order to enroll.
Initialize a token using the following command:
$ ./pkitool --pkcs11-slots /usr/lib/pkcs11/
$ ./pkitool --pkcs11-init /usr/lib/pkcs11/
Enroll a certificate using the following command:
$ ./pkitool --pkcs11 /usr/lib/pkcs11/ client1
How to modify an OpenVPN configuration to make use of cryptographic tokens
You should have OpenVPN 2.1 or above in order to use the PKCS#11 features.
Determine the correct object
Each PKCS#11 provider can support multiple devices. In order to view the available object list you can use the following command:
$ openvpn --show-pkcs11-ids /usr/lib/pkcs11/

The following objects are available for use.
Each object shown below may be used as parameter to
--pkcs11-id option please remember to use single quote mark.

Certificate
       DN:             /CN=User1
       Serial:         490B82C4000000000075
       Serialized id:  aaaa/bbb/41545F5349474E415455524581D2A1A1B23C4AA4CB17FAF7A4600
Each certificate/private key pair have unique «Serialized id» string. The serialized id string of the requested certificate should be specified to the pkcs11-id option using single quote marks.
pkcs11-id 'aaaa/bbb/41545F5349474E415455524581D2A1A1B23C4AA4CB17FAF7A4600'
Using OpenVPN with PKCS#11
A typical set of OpenVPN options for PKCS#11
pkcs11-providers /usr/lib/pkcs11/
pkcs11-id 'aaaa/bbb/41545F5349474E415455524581D2A1A1B23C4AA4CB17FAF7A4600'
This will select the object which matches the pkcs11-id string.
Advanced OpenVPN options for PKCS#11
pkcs11-providers /usr/lib/pkcs11/provider1.so /usr/lib/pkcs11/provider2.so
pkcs11-id 'aaaa/bbb/41545F5349474E415455524581D2A1A1B23C4AA4CB17FAF7A4600'
pkcs11-pin-cache 300
daemon
auth-retry nointeract
management-hold
management-signal
management 127.0.0.1 8888
management-query-passwords
This will load two providers into OpenVPN, use the certificate specified on pkcs11-id option, and use the management interface in order to query passwords. The daemon will resume into hold state on the event when token cannot be accessed. The token will be used for 300 seconds after which the password will be re-queried, session will disconnect if management session disconnects.
PKCS#11 implementation considerations
Many PKCS#11 providers make use of threads, in order to avoid problems caused by implementation of LinuxThreads (setuid, chroot), it is highly recommend to upgrade to Native POSIX Thread Library (NPTL) enabled glibc if you intend to use PKCS#11.
OpenSC PKCS#11 provider
OpenSC PKCS#11 provider is located at /usr/lib/pkcs11/opensc-pkcs11.so on Unix or at opensc-pkcs11.dll on Windows.
Difference between PKCS#11 and Microsoft Cryptographic API (CryptoAPI)
PKCS#11 is a free, cross-platform vendor independent standard. CryptoAPI is a Microsoft specific API. Most smart card vendors provide support for both interfaces. In the Windows environment, the user should select which interface to use.
The current implementation of OpenVPN that uses the MS CryptoAPI (cryptoapicert option) works well as long as you don’t run OpenVPN as a service. If you wish to run OpenVPN in an administrative environment using a service, the implementation will not work with most smart cards because of the following reasons:
- Most smart card providers do not load certificates into the local machine store, so the implementation will be unable to access the user certificate.
- If the OpenVPN client is running as a service without direct interaction with the end-user, the service cannot query the user to provide a password for the smart card, causing the password-verification process on the smart card to fail.
Using the PKCS#11 interface, you can use smart cards with OpenVPN in any implementation, since PKCS#11 does not access Microsoft stores and does not necessarily require direct interaction with the end-user.
Routing all client traffic (including web-traffic) through the VPN
Overview
By default, when an OpenVPN client is active, only network traffic to and from the OpenVPN server site will pass over the VPN. General web browsing, for example, will be accomplished with direct connections that bypass the VPN.
In certain cases this behavior might not be desirable — you might want a VPN client to tunnel all network traffic through the VPN, including general internet web browsing. While this type of VPN configuration will exact a performance penalty on the client, it gives the VPN administrator more control over security policies when a client is simultaneously connected to both the public internet and the VPN at the same time.
Implementation
Add the following directive to the server configuration file:
push "redirect-gateway def1"
If your VPN setup is over a wireless network, where all clients and the server are on the same wireless subnet, add the local flag:
push "redirect-gateway local def1"
Pushing the redirect-gateway option to clients will cause all IP network traffic originating on client machines to pass through the OpenVPN server. The server will need to be configured to deal with this traffic somehow, such as by NATing it to the internet, or routing it through the server site’s HTTP proxy.
On Linux, you could use a command such as this to NAT the VPN client traffic to the internet:
iptables -t nat -A POSTROUTING -s 10.8.0.0/24 -o eth0 -j MASQUERADE
This command assumes that the VPN subnet is 10.8.0.0/24 (taken from the server directive in the OpenVPN server configuration) and that the local ethernet interface is eth0.
When redirect-gateway is used, OpenVPN clients will route DNS queries through the VPN, and the VPN server will need handle them. This can be accomplished by pushing a DNS server address to connecting clients which will replace their normal DNS server settings during the time that the VPN is active. For example:
push "dhcp-option DNS 10.8.0.1"
will configure Windows clients (or non-Windows clients with some extra server-side scripting) to use 10.8.0.1 as their DNS server. Any address which is reachable from clients may be used as the DNS server address.
Caveats
Redirecting all network traffic through the VPN is not entirely a problem-free proposition. Here are some typical gotchas to be aware of:
- Many OpenVPN client machines connecting to the internet will periodically interact with a DHCP server to renew their IP address leases. The redirect-gateway option might prevent the client from reaching the local DHCP server (because DHCP messages would be routed over the VPN), causing it to lose its IP address lease.
- Issues exist with respect to pushing DNS addresses to Windows clients.
- Web browsing performance on the client will be noticably slower.
For more information on the mechanics of the redirect-gateway directive, see the manual page.
Running an OpenVPN server on a dynamic IP address
While OpenVPN clients can easily access the server via a dynamic IP address without any special configuration, things get more interesting when the server itself is on a dynamic address. While OpenVPN has no trouble handling the situation of a dynamic server, some extra configuration is required.
The first step is to get a dynamic DNS address which can be configured to «follow» the server every time the server’s IP address changes. There are several dynamic DNS service providers available, such as dyndns.org.
The next step is to set up a mechanism so that every time the server’s IP address changes, the dynamic DNS name will be quickly updated with the new IP address, allowing clients to find the server at its new IP address. There are two basic ways to accomplish this:
- Use a NAT router appliance with dynamic DNS support (such as the Linksys BEFSR41). Most of the inexpensive NAT router appliances that are widely available have the capability to update a dynamic DNS name every time a new DHCP lease is obtained from the ISP. This setup is ideal when the OpenVPN server box is a single-NIC machine inside the firewall.
- Use a dynamic DNS client application such as ddclient to update the dynamic DNS address whenever the server IP address changes. This setup is ideal when the machine running OpenVPN has multiple NICs and is acting as a site-wide firewall/gateway. To implement this setup, you need to set up a script to be run by your DHCP client software every time an IP address change occurs. This script should (a) run ddclientto notify your dynamic DNS provider of your new IP address and (b) restart the OpenVPN server daemon.
The OpenVPN client by default will sense when the server’s IP address has changed, if the client configuration is using a remote directive which references a dynamic DNS name. The usual chain of events is that (a) the OpenVPN client fails to receive timely keepalive messages from the server’s old IP address, triggering a restart, and (b) the restart causes the DNS name in the remote directive to be re-resolved, allowing the client to reconnect to the server at its new IP address.
More information can be found in the FAQ.
Connecting to an OpenVPN server via an HTTP proxy.
OpenVPN supports connections through an HTTP proxy, with the following authentication modes:
- No proxy authentication
- Basic proxy authentication
- NTLM proxy authentication
First of all, HTTP proxy usage requires that you use TCP as the tunnel carrier protocol. So add the following to both client and server configurations:
proto tcp
Make sure that any proto udp lines in the config files are deleted.
Next, add the http-proxy directive to the client configuration file (see the manual page for a full description of this directive).
For example, suppose you have an HTTP proxy server on the client LAN at 192.168.4.1, which is listening for connections on port 1080. Add this to the client config:
http-proxy 192.168.4.1 1080
Suppose the HTTP proxy requires Basic authentication:
http-proxy 192.168.4.1 1080 stdin basic
Suppose the HTTP proxy requires NTLM authentication:
http-proxy 192.168.4.1 1080 stdin ntlm
The two authentication examples above will cause OpenVPN to prompt for a username/password from standard input. If you would instead like to place these credentials in a file, replace stdin with a filename, and place the username on line 1 of this file and the password on line 2.
This example is intended show how OpenVPN clients can connect to a Samba share over a routed dev tun tunnel. If you are ethernet bridging (dev tap), you probably don’t need to follow these instructions, as OpenVPN clients should see server-side machines in their network neighborhood.
For this example, we will assume that:
- the server-side LAN uses a subnet of 10.66.0.0/24,
- the VPN IP address pool uses 10.8.0.0/24 (as cited in the server directive in the OpenVPN server configuration file),
- the Samba server has an IP address of 10.66.0.4, and
- the Samba server has already been configured and is reachable from the local LAN.
If the Samba and OpenVPN servers are running on different machines, make sure you’ve followed the section on expanding the scope of the VPN to include additional machines.
Next, edit your Samba configuration file (smb.conf). Make sure the hosts allow directive will permit OpenVPN clients coming from the 10.8.0.0/24 subnet to connect. For example:
hosts allow = 10.66.0.0/24 10.8.0.0/24 127.0.0.1
If you are running the Samba and OpenVPN servers on the same machine, you may want to edit the interfaces directive in the smb.conf file to also listen on the TUN interface subnet of 10.8.0.0/24:
interfaces = 10.66.0.0/24 10.8.0.0/24
If you are running the Samba and OpenVPN servers on the same machine, connect from an OpenVPN client to a Samba share using the folder name:
\\10.8.0.1\\sharename
If the Samba and OpenVPN servers are on different machines, use folder name:
\\10.66.0.4\sharename
For example, from a command prompt window:
net use z: \\10.66.0.4\sharename /USER:myusername
Implementing a load-balancing/failover configuration
Client
The OpenVPN client configuration can refer to multiple servers for load balancing and failover. For example:
remote server1.mydomain
remote server2.mydomain
remote server3.mydomain
will direct the OpenVPN client to attempt a connection with server1, server2, and server3 in that order. If an existing connection is broken, the OpenVPN client will retry the most recently connected server, and if that fails, will move on to the next server in the list. You can also direct the OpenVPN client to randomize its server list on startup, so that the client load will be probabilistically spread across the server pool.
remote-random
If you would also like DNS resolution failures to cause the OpenVPN client to move to the next server in the list, add the following:
resolv-retry 60
The 60 parameter tells the OpenVPN client to try resolving each remote DNS name for 60 seconds before moving on to the next server in the list.
The server list can also refer to multiple OpenVPN server daemons running on the same machine, each listening for connections on a different port, for example:
remote smp-server1.mydomain 8000
remote smp-server1.mydomain 8001
remote smp-server2.mydomain 8000
remote smp-server2.mydomain 8001
If your servers are multi-processor machines, running multiple OpenVPN daemons on each server can be advantageous from a performance standpoint.
OpenVPN also supports the remote directive referring to a DNS name which has multiple A records in the zone configuration for the domain. In this case, the OpenVPN client will randomly choose one of the A records every time the domain is resolved.
Server
The simplest approach to a load-balanced/failover configuration on the server is to use equivalent configuration files on each server in the cluster, except use a different virtual IP address pool for each server. For example:
server1
server 10.8.0.0 255.255.255.0
server2
server 10.8.1.0 255.255.255.0
server3
server 10.8.2.0 255.255.255.0
Hardening OpenVPN Security
One of the often-repeated maxims of network security is that one should never place so much trust in a single security component that its failure causes a catastrophic security breach. OpenVPN provides several mechanisms to add additional security layers to hedge against such an outcome.
tls-auth
The tls-auth directive adds an additional HMAC signature to all SSL/TLS handshake packets for integrity verification. Any UDP packet not bearing the correct HMAC signature can be dropped without further processing. The tls-auth HMAC signature provides an additional level of security above and beyond that provided by SSL/TLS. It can protect against:
- DoS attacks or port flooding on the OpenVPN UDP port.
- Port scanning to determine which server UDP ports are in a listening state.
- Buffer overflow vulnerabilities in the SSL/TLS implementation.
- SSL/TLS handshake initiations from unauthorized machines (while such handshakes would ultimately fail to authenticate, tls-auth can cut them off at a much earlier point).
Using tls-auth requires that you generate a shared-secret key that is used in addition to the standard RSA certificate/key:
openvpn --genkey --secret ta.key
This command will generate an OpenVPN static key and write it to the file ta.key. This key should be copied over a pre-existing secure channel to the server and all client machines. It can be placed in the same directory as the RSA .key and .crt files.
In the server configuration, add:
tls-auth ta.key 0
In the client configuration, add:
tls-auth ta.key 1
proto udp
While OpenVPN allows either the TCP or UDP protocol to be used as the VPN carrier connection, the UDP protocol will provide better protection against DoS attacks and port scanning than TCP:
proto udp
user/group (non-Windows only)
OpenVPN has been very carefully designed to allow root privileges to be dropped after initialization, and this feature should always be used on Linux/BSD/Solaris. Without root privileges, a running OpenVPN server daemon provides a far less enticing target to an attacker.
user nobody
group nobody
Unprivileged mode (Linux only)
On Linux OpenVPN can be run completely unprivileged. This configuration is a little more complex, but provides best security.
In order to work with this configuration, OpenVPN must be configured to use iproute interface, this is done by specifying —enable-iproute2 to configure script. sudo package should also be available on your system.
This configuration uses the Linux ability to change the permission of a tun device, so that unprivileged user may access it. It also uses sudo in order to execute iproute so that interface properties and routing table may be modified.
OpenVPN configuration:
-
- Write the following script and place it at: /usr/local/sbin/unpriv-ip:
#!/bin/sh
sudo /sbin/ip $*
-
- Execute visudo, and add the followings to allow user ‘user1’ to execute /sbin/ip:
user1 ALL=(ALL) NOPASSWD: /sbin/ip
-
- You can also enable a group of users with the following command:
%users ALL=(ALL) NOPASSWD: /sbin/ip
-
- Add the following to your OpenVPN configuration:
dev tunX/tapX
iproute /usr/local/sbin/unpriv-ip
-
- Please note that you must select constant X and specify tun or tap not both.
- As root add persistant interface, and permit user and/or group to manage it, the following create tunX (replace with your own) and allow user1 and group users to access it.
openvpn --mktun --dev tunX --type tun --user user1 --group users
- Run OpenVPN in the context of the unprivileged user.
Further security constraints may be added by examining the parameters at the /usr/local/sbin/unpriv-ip script.
chroot (non-Windows only)
The chroot directive allows you to lock the OpenVPN daemon into a so-called chroot jail, where the daemon would not be able to access any part of the host system’s filesystem except for the specific directory given as a parameter to the directive. For example,
chroot jail
would cause the OpenVPN daemon to cd into the jail subdirectory on initialization, and would then reorient its root filesystem to this directory so that it would be impossible thereafter for the daemon to access any files outside of jail and its subdirectory tree. This is important from a security perspective, because even if an attacker were able to compromise the server with a code insertion exploit, the exploit would be locked out of most of the server’s filesystem.
Caveats: because chroot reorients the filesystem (from the perspective of the daemon only), it is necessary to place any files which OpenVPN might need after initialization in the jail directory, such as:
- the crl-verify file, or
- the client-config-dir directory.
Larger RSA keys
The RSA key size is controlled by the KEY_SIZE variable in the easy-rsa/vars file, which must be set before any keys are generated. Currently set to 1024 by default, this value can reasonably be increased to 2048 with no negative impact on VPN tunnel performance, except for a slightly slower SSL/TLS renegotiation handshake which occurs once per client per hour, and a much slower one-time Diffie Hellman parameters generation process using the easy-rsa/build-dh script.
Larger symmetric keys
By default OpenVPN uses Blowfish, a 128 bit symmetrical cipher.
OpenVPN automatically supports any cipher which is supported by the OpenSSL library, and as such can support ciphers which use large key sizes. For example, the 256-bit version of AES (Advanced Encryption Standard) can be used by adding the following to both server and client configuration files:
cipher AES-256-CBC
Keep the root key (ca.key) on a standalone machine without a network connection
One of the security benefits of using an X509 PKI (as OpenVPN does) is that the root CA key (ca.key) need not be present on the OpenVPN server machine. In a high security environment, you might want to specially designate a machine for key signing purposes, keep the machine well-protected physically, and disconnect it from all networks. Floppy disks can be used to move key files back and forth, as necessary. Such measures make it extremely difficult for an attacker to steal the root key, short of physical theft of the key signing machine.
Revoking Certificates
Revoking a certificate means to invalidate a previously signed certificate so that it can no longer be used for authentication purposes.
Typical reasons for wanting to revoke a certificate include:
- The private key associated with the certificate is compromised or stolen.
- The user of an encrypted private key forgets the password on the key.
- You want to terminate a VPN user’s access.
Example
As an example, we will revoke the client2 certificate, which we generated above in the «key generation» section of the HOWTO.
First open up a shell or command prompt window and cd to the easy-rsa directory as you did in the «key generation» section above. On Linux/BSD/Unix:
. ./vars
./revoke-full client2
On Windows:
vars
revoke-full client2
You should see output similar to this:
Using configuration from /root/openvpn/20/openvpn/tmp/easy-rsa/openssl.cnf
DEBUG[load_index]: unique_subject = "yes"
Revoking Certificate 04.
Data Base Updated
Using configuration from /root/openvpn/20/openvpn/tmp/easy-rsa/openssl.cnf
DEBUG[load_index]: unique_subject = "yes"
client2.crt: /C=KG/ST=NA/O=OpenVPN-TEST/CN=client2/emailAddress=me@myhost.mydomain
error 23 at 0 depth lookup:certificate revoked
Note the «error 23» in the last line. That is what you want to see, as it indicates that a certificate verification of the revoked certificate failed.
The revoke-full script will generate a CRL (certificate revocation list) file called crl.pem in the keyssubdirectory. The file should be copied to a directory where the OpenVPN server can access it, then CRL verification should be enabled in the server configuration:
crl-verify crl.pem
Now all connecting clients will have their client certificates verified against the CRL, and any positive match will result in the connection being dropped.
CRL Notes
- When the crl-verify option is used in OpenVPN, the CRL file will be re-read any time a new client connects or an existing client renegotiates the SSL/TLS connection (by default once per hour). This means that you can update the CRL file while the OpenVPN server daemon is running, and have the new CRL take effect immediately for newly connecting clients. If the client whose certificate you are revoking is already connected, you can restart the server via a signal (SIGUSR1 or SIGHUP) and flush all clients, or you can telnet to the management interfaceand explicitly kill the specific client instance object on the server without disturbing other clients.
- While the crl-verify directive can be used on both the OpenVPN server and clients, it is generally unnecessary to distribute a CRL file to clients unless a server certificate has been revoked. Clients don’t need to know about other client certificates which have been revoked because clients shouldn’t be accepting direct connections from other clientsin the first place.
- The CRL file is not secret, and should be made world-readable so that the OpenVPN daemon can read it after root privileges have been dropped.
- If you are using the chrootdirective, make sure to put a copy of the CRL file in the chroot directory, since unlike most other files which OpenVPN reads, the CRL file will be read after the chroot call is executed, not before.
- A common reason why certificates need to be revoked is that the user encrypts their private key with a password, then forgets the password. By revoking the original certificate, it is possible to generate a new certificate/key pair with the user’s original common name.
Important Note on possible «Man-in-the-Middle» attack if clients do not verify the certificate of the server they are connecting to.
To avoid a possible Man-in-the-Middle attack where an authorized client tries to connect to another client by impersonating the server, make sure to enforce some kind of server certificate verification by clients. There are currently five different ways of accomplishing this, listed in the order of preference:
- [OpenVPN 2.1 and above]Build your server certificates with specific key usage and extended key usage. The RFC3280 determine that the following attributes should be provided for TLS connections:
Mode Key usage Extended key usage Client digitalSignature TLS Web Client Authentication keyAgreement digitalSignature, keyAgreement Server digitalSignature, keyEncipherment TLS Web Server Authentication digitalSignature, keyAgreement You can build your server certificates with the build-key-server script (see the easy-rsadocumentation for more info). This will designate the certificate as a server-only certificate by setting the right attributes. Now add the following line to your client configuration:
remote-cert-tls server
- [OpenVPN 2.0 and below] Build your server certificates with the build-key-server script (see the easy-rsa documentation for more info). This will designate the certificate as a server-only certificate by setting nsCertType=server. Now add the following line to your client configuration:
ns-cert-type server
This will block clients from connecting to any server which lacks the nsCertType=server designation in its certificate, even if the certificate has been signed by the ca file in the OpenVPN configuration file.
- Use the tls-remotedirective on the client to accept/reject the server connection based on the common name of the server certificate.
- Use a tls-verifyscript or plugin to accept/reject the server connection based on a custom test of the server certificate’s embedded X509 subject details.
- Sign server certificates with one CA and client certificates with a different CA. The client configuration ca directive should reference the server-signing CA file, while the server configuration cadirective should reference the client-signing CA file.
 Обновлено:
Опубликовано:
OpenVPN позволяет настроить VPN-сервер как на платформе Windows Server, так и версии для рабочего компьютера (Windows 10, 8, 7).
Установка сервера
Создание сертификатов
Настройка OpenVPN
Настройка клиента
Доступ к локальной сети
Решение проблем
Установка OpenVPN Server
Переходим на официальный сайт OpenVPN и скачиваем последнюю версию программы для соответствующей версии Windows:

Запускаем скачанный файл — нажимаем Next — I Agree — и выставляем галочку EasyRSA 2/3 Certificate Management Scripts (нужен для возможности сгенерировать сертификаты):

* интерфейсы для старой версии OpenVPN и новой немного различаются. Нам нужно выбрать для установки все пункты.
… снова Next и Install — начнется установка. В процессе мастер может выдать запрос на подтверждение установки виртуального сетевого адаптера — соглашаемся (Install/Установить).
После завершения нажимаем Next — снимаем галочку Show Readme — Finish.
Создание сертификатов
Новая версия OpenVPN позволяет создавать сертификаты на основе Easy RSA 3, старая работает на базе 2-й версии. Наши действия будут различаться в зависимости от данной версии. Рассмотрим процесс формирования сертификата с использованием как RSA3, так и RSA2.
а) Создание сертификатов с RSA 3
1. Переходим в папку установки OpenVPN (по умолчанию, C:\Program Files\OpenVPN) и создаем каталог ssl.
2. После переходим в папку C:\Program Files\OpenVPN\easy-rsa, переименовываем файл vars.example в vars, открываем его на редактирование и правим одну строку:
set_var EASYRSA_TEMP_DIR «$EASYRSA_PKI/temp»
* мы снимаем комментарий и добавляем temp в конце $EASYRSA_PKI. Если это не сделать, то при попытке сформировать корневого сертификата мы получим ошибку Failed create CA private key.
3. Запускаем командную строку от имени администратора:

4. Переходим в каталог easy-rsa:
cd %ProgramFiles%\OpenVPN\easy-rsa
5. Запускаем команду:
EasyRSA-Start.bat
Мы окажемся в среде EasyRSA Shell.
6. Инициализируем PKI:
./easyrsa init-pki
Если система вернет ошибку, выходим из оболочки EasyRSA Shell:
exit
И заходим снова:
EasyRSA-Start.bat
Мы должны увидеть:
init-pki complete; you may now create a CA or requests.
Your newly created PKI dir is: C:/Program Files/OpenVPN/easy-rsa/pki
7. Генерируем корневой сертификат (CA):
./easyrsa build-ca
… после ввода Enter обязательно задаем пароль дважды. На запрос ввести Common Name можно просто нажать ввод или написать свое имя:
Common Name (eg: your user, host, or server name) [Easy-RSA CA]:
8. Создаем ключ Диффи-Хеллмана:
./easyrsa gen-dh
9. Для создания сертификата сервера необходимо сначала создать файл запроса:
./easyrsa gen-req cert nopass
* на запрос ввода Common Name просто вводим Enter.
… и на его основе — сам сертификат:
./easyrsa sign-req server cert
После ввода команды подтверждаем правильность данных, введя yes:
Confirm request details: yes
… и вводим пароль, который указывали при создании корневого сертификата.
10. Сертификаты сервера готовы и находятся в каталоге pki. Переносим в C:\Program Files\OpenVPN\ssl следующие файлы:
- ca.crt
- issued/cert.crt
- private/cert.key
- dh.pem
б) Создание сертификатов с RSA 2 (для старых версий OpenVPN)
1. Переходим в папку установки OpenVPN (по умолчанию, C:\Program Files\OpenVPN) и создаем каталог ssl.
2. После переходим в папку C:\Program Files\OpenVPN\easy-rsa, создаем файл vars.bat, открываем его на редактирование и приводим к следующему виду:
set «PATH=%PATH%;%ProgramFiles%\OpenVPN\bin»
set HOME=%ProgramFiles%\OpenVPN\easy-rsa
set KEY_CONFIG=openssl-1.0.0.cnf
set KEY_DIR=keys
set KEY_SIZE=2048
set KEY_COUNTRY=RU
set KEY_PROVINCE=Sankt-Petersburg
set KEY_CITY=Sankt-Petersburg
set KEY_ORG=Organization
set KEY_EMAIL=master@dmosk.ru
set KEY_CN=DMOSK
set KEY_OU=DMOSK
set KEY_NAME=server.domain.ru
set PKCS11_MODULE_PATH=DMOSK
set PKCS11_PIN=12345678
* в каталоге easy-rsa уже есть файл vars.bat.sample — можно переименовать и использовать его.
** значение HOME не меняем, если оставили путь установки программы по умолчанию; KEY_DIR — каталог, куда будут генерироваться сертификаты; KEY_CONFIG может быть разным — его лучше посмотреть в файле vars.bat.sample или по названию соответствующего файла в папке easy-rsa; KEY_NAME желательно, чтобы соответствовал полному имени VPN-сервера; остальные опции можно заполнить произвольно.
3. Запускаем командную строку от имени администратора:
4. Переходим в каталог easy-rsa:
cd %ProgramFiles%\OpenVPN\easy-rsa
4. Запускаем vars.bat:
vars.bat
5. Чистим каталоги от устаревшей информации:
clean-all.bat
* данная команда выполняется один раз, когда на сервере нет информации по ранее созданным сертификатам.
6. Снова запускаем vars.bat (после clean переопределяются некоторые переменные):
vars.bat
Переходим к созданию ключей.
7. Генерируем последовательность центра сертификации:
build-ca.bat
На все запросы нажимаем Enter.
8. Запускаем build-dh.bat (сертификат с использованием алгоритма Диффи-Хеллмана):
openssl dhparam -out keys\dh.pem 2048
* команда может выполняться долго — это нормально.
9. Генерируем сертификат для сервера:
build-key-server.bat cert
* где cert — имя сертификата; на все запросы нажимаем Enter. В конце подтверждаем два раза корректность информации вводом y.
10. После переносим из папки C:\Program Files\OpenVPN\easy-rsa\keys в C:\Program Files\OpenVPN\ssl следующие файлы:
- ca.crt
- cert.crt
- cert.key
- dh.pem
Настройка сервера
Переходим в папку C:\Program Files\OpenVPN\config-auto (или для старой версии C:\Program Files\OpenVPN\config) и создаем файл server.ovpn. Открываем его на редактирование и приводим к следующему виду:
port 443
proto udp
dev tun
dev-node «VPN Server»
dh «C:\\Program Files\\OpenVPN\\ssl\\dh.pem»
ca «C:\\Program Files\\OpenVPN\\ssl\\ca.crt»
cert «C:\\Program Files\\OpenVPN\\ssl\\cert.crt»
key «C:\\Program Files\\OpenVPN\\ssl\\cert.key»
server 172.16.10.0 255.255.255.0
max-clients 32
keepalive 10 120
client-to-client
compress
fast-io
cipher AES-256-GCM
persist-key
persist-tun
status «C:\\Program Files\\OpenVPN\\log\\status.log»
log «C:\\Program Files\\OpenVPN\\log\\openvpn.log»
verb 4
mute 20
* где port — сетевой порт (443 позволит избежать проблем при использовании Интернета в общественных местах, но может быть любым из свободных, например 1194, занятые порты в Windows можно посмотреть командой netstat -a); dev-node — название сетевого интерфейса; server — подсеть, в которой будут работать как сам сервер, так и подключенные к нему клиенты.
** так как в некоторых путях есть пробелы, параметр заносится в кавычках.
*** при использовании другого порта необходимо проверить, что он открыт в брандмауэре или на время тестирования отключить его.
В сетевых подключениях Windows открываем управление адаптерами — TAP-адаптер переименовываем в «VPN Server» (как у нас указано в конфигурационном файле, разделе dev-node):

Теперь открываем службы Windows и находим «OpenVpnService». Открываем ее, настраиваем на автозапуск и включаем:

Если служба в запущенном состоянии, то перезапускаем ее.
Ранее переименованный сетевой интерфейс должен включиться:

VPN-сервер работает. Проверьте, что сетевой адаптер VPN Server получил IP 172.16.10.1. Если он получает что-то, на подобие, 169.254…, выключаем сетевой адаптер — перезапускаем службу OpenVpnService и снова включаем сетевой адаптер.
Если в нашей системе включен брандмауэр, необходимо открыть порт для OpenVPN. Это быстрее всего сделать из командной строки — открываем ее от администратора и вводим:
netsh advfirewall firewall add rule name=»ALLOW OpenVPN» dir=in action=allow protocol=UDP localport=443
* где 443 — наш порт, который мы решили задействовать под OpenVPN; UDP — протокол, который мы настроили в конфигурационном файле сервера.
Настройка клиента
На сервере
На сервере генерируем сертификат для клиента. Для этого сначала чистим файл index.txt в папке C:\Program Files\OpenVPN\easy-rsa\keys.
Затем запускаем командную строку от имени администратора:
Переходим в каталог easy-rsa:
cd %ProgramFiles%\OpenVPN\easy-rsa
Далее наши действия зависят от версии RSA.
а) Создание сертификатов с RSA 3
Запускаем команду:
EasyRSA-Start.bat
Мы окажемся в среде EasyRSA Shell.
Создаем клиентский сертификат:
./easyrsa gen-req client1 nopass
./easyrsa sign-req client client1
Мы должны увидеть запрос на подтверждение намерения выпустить сертификат — вводим yes:
Confirm request details: yes
* в данном примере будет создан сертификат для client1.
После вводим пароль, который указывали при создании корневого сертификата.
Теперь из папки pki копируем файлы:
- issued/client1.crt
- private/client1.key
- ca.crt
- dh.pem
… и переносим их на клиентский компьютер.
б) Создание сертификатов с RSA 2 (для очень старых версий OpenVPN)
Запускаем vars.bat:
vars.bat
И генерируем сертификат первого пользователя:
build-key.bat client1
* на все запросы наживаем Enter, кроме Common Name — в данном поле вводим имя клиента (в нашем случае, просто client1). В конце подтверждаем введенную информацию — y.
** На каждого клиента нужно сгенерировать свой сертификат, в противном случае, им будет присваиваться один и тот же IP-адрес, что будет приводить к конфликту.
Получиться, что-то на подобие:
Country Name (2 letter code) [RU]:
State or Province Name (full name) [Sankt-Petersburg]:
Locality Name (eg, city) [Sankt-Petersburg]:
Organization Name (eg, company) [Organization]:
Organizational Unit Name (eg, section) [DMOSK]:
Common Name (eg, your name or your server’s hostname) [DMOSK]:client1
Name [server.domain.ru]:
Email Address [master@dmosk.ru]:
По умолчанию, для Common Name будет подставляться значение из vars.bat — но с ним сертификат не будет создаваться. Необходимо при создании каждого ключа подставлять значение, равное имени сертификата. Например, как выше — подставлено client1.
Теперь из папки keys копируем файлы:
- client1.crt
- client1.key
- ca.crt
- dh.pem
… и переносим их на клиентский компьютер.
На клиенте
Заходим на официальную страницу загрузки openvpn и скачиваем клиента для Windows:
* по сути, это тот же файл, который скачивался для сервера.
Запускаем скачанный файл и устанавливаем программу, нажимая «Далее».
Переходим в папку C:\Program Files\OpenVPN\config. И копируем в нее сертификаты, которые перенесли с сервера.
Теперь открываем блокнот от имени администратора и вставляем следующие строки:
client
resolv-retry infinite
nobind
remote 192.168.0.15 443
proto udp
dev tun
compress
fast-io
cipher AES-256-GCM
ca ca.crt
cert client1.crt
key client1.key
dh dh.pem
float
keepalive 10 120
persist-key
persist-tun
verb 0
* где 192.168.0.15 443 — IP-адрес OpenVPN-сервера и порт, на котором он принимает запросы. Для боевой среды это будет внешний адрес.
Сохраняем файл с именем config.ovpn в папке C:\Program Files\OpenVPN\config.
Запускаем с рабочего стола программу «OpenVPN GUI» от имени администратора (это важно).
Нажимаем правой кнопкой по появившемуся в трее значку и выбираем «Подключиться»:

Произойдет подключение и значок поменяет цвет с серого/желтого на зеленый.
Доступ к локальной сети
По инструкции выше мы сможем получить доступ только к серверу, на котором установлен OpenVPN. Для получения доступа ко всей внутренней сети, выполним следующие шаги.
1. Настройка реестра
Для включения IP маршрутизации в Windows необходимо в ветке реестра HKEY_LOCAL_MACHINE\SYSTEM\CurrentControlSet\Services\Tcpip\Parameters найти параметр IPEnableRouter и задать ему значение 1. Это можно сделать в утилите редактирования реестра (regedit) или командой:
reg add «HKLM\SYSTEM\CurrentControlSet\Services\Tcpip\Parameters» /v IPEnableRouter /t REG_DWORD /d 1 /f
* командную строку необходимо запускать от администратора.
2. Настройка OpenVPN Server
В конфигурационный файл OpenVPN добавим:
push «route 172.16.10.0 255.255.255.0»
push «route 192.168.2.0 255.255.255.0»
* где 172.16.10.0 — VPN сеть; 192.168.2.0 — локальная сеть, в которую необходимо «попасть» пользователям openvpn.
При необходимости использовать DNS внутренней сети также добавим:
push «dhcp-option DNS 192.168.0.15»
push «dhcp-option DNS 192.168.0.16»
push «dhcp-option DOMAIN dmosk.local»
* где 192.168.0.15 и 192.168.0.16 — внутренние DNS-серверы; dmosk.local — домен, который будет добавляться к узлам, обращение к которым идет по неполному имени.
Если нам нужно, чтобы все запросы клиента (в том числе, Интернет) ходили через сервер OpenVPN, добавляем:
push «redirect-gateway def1»
* в таком случае, нам не обязательно добавлять push route, который мы использовали выше.
Перезагружаем службу OpenVpnService.
3. Разрешаем доступ к локальной сети
Заходим в управление сетевыми подключениями (Панель управления\Сеть и Интернет\Сетевые подключения). Кликаем правой кнопкой мыши по адаптеру локальной сети — Свойства:

На вкладке Доступ ставим галочку Разрешить другим пользователям сети использовать подключение к Интернету данного компьютера:

… и сохраняем настройки.
Возможные проблемы
Большая часть проблем решается при помощи логов, которые находятся в папке C:\Program Files\OpenVPN\log. Уровень детализации лога контролируется параметром verb в конфигурационном файле сервера или клиента.
Также возможны следующие часто возникающие проблемы:
- Проблема: клиент постоянно пытается подключиться к серверу, но соединения не происходит или подключение зависает.
Причина: сервер блокирует подключения по настроенному порту VPN (в нашем примере, 443).
Решение: на сервере необходимо добавить 443 порт в исключения брандмауэра или отключить последний.
- Проблема: при попытке подключиться к серверу выскакивает ошибка «Не удалось подключиться к config».
Причина: ошибка в настройках.
Решение: перепроверьте каждую строчку файла конфигурации. Проверьте наличие всех файлов, на которые ссылаетесь в настройках.
- Проблема: клиенты получают одинаковые IP-адреса.
Причина: подключение выполняется под одним и тем же пользователем.
Решение: сервер выдает одинаковые адреса одинаковым клиентам. Необходимо настроить авторизацию на сервере и выдать каждому клиенту индивидуальные настройки.
- Проблема: соединение происходит, но через несколько минут связь прерывается.
Причина: дублирование IP-адресов.
Решение: данная проблема описана выше (пункт 3).
Возможно, Вы это тоже захотите попробовать
- Настройка OpenVPN-сервера с аутентификацией через LDAP (Active Directory) на Ubuntu Server
- Установка и настройка OpenVPN на Linux CentOS 7
OpenVPN – это набор open source программ, который заслуженно является одним из самых популярных и легких решений для реализации защищенной VPN сети. OpenVPN позволяет объединить в единую сеть сервер и клиентов (даже находящиеся за NAT или файерволами), или объединить сети удаленных офисов. Серверную часть OpenVPN можно развернуть практически на всех доступных операционных системах (пример настройки OpenVPN на Linux). Вы можете установить OpenVPN сервер даже на обычный компьютер с десктопной редакцией Windows 10.
В этой статье, мы покажем, как установить OpenVPN сервер на компьютер с Windows 10, настроить OpenVPN клиент на другом Windows хосте и установить защищенное VPN подключение.
Содержание:
- Установка службы OpenVPN сервера в Windows
- Создаем ключи шифрования и сертификаты для OpenVPN
- Конфигурационный файл OpenVPN сервера в Windows
- Настройка OpenVPN клиента в Windows
Установка службы OpenVPN сервера в Windows
Скачайте MSI установщик OpenVPN для вашей версии Windows с официального сайта (https://openvpn.net/community-downloads/). В нашем случае это OpenVPN-2.5.5-I602-amd64.msi (https://swupdate.openvpn.org/community/releases/OpenVPN-2.5.5-I602-amd64.msi).
Запустите установку.
Если вы планируете, OpenVPN сервер работал в автоматическом режиме, можно не устанавливать OpenVPN GUI. Обязательно установите OpenVPN Services.
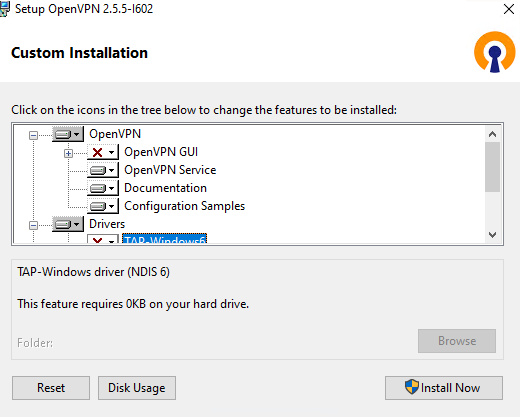
Начиная с версии OpenVPN 2.5, поддерживается драйвер WinTun от разработчиков WireGuard. Считается, что этот драйвер работает быстрее чем классический OpenVPN драйвер TAP. Установите драйвер Wintun, откажитесь от установки TAP-Windows6.
Установите OpenSSL утилиту EasyRSA Certificate Management Scripts.
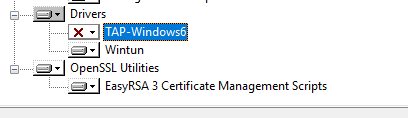
Запустите установку.
По умолчанию OpenVPN устаналивается в каталог C:\Program Files\OpenVPN.
После окончания установки появится новый сетевой адаптер типа Wintun Userspace Tunnel. Этот адаптер отключен, если служба OpenVPN не запущена.
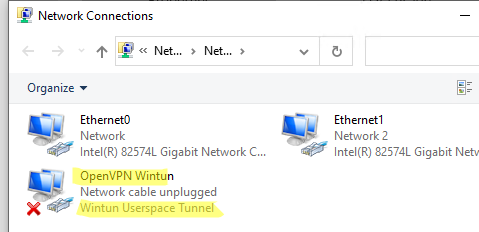
Создаем ключи шифрования и сертификаты для OpenVPN
OpenVPN основан на шифровании OpenSSL. Это означает, что для обмена трафиком между клиентом и серверов VPN нужно сгенерировать ключи и сертификаты с использованием RSA3.
Откройте командную строку и перейдите в каталог easy-rsa:
cd C:\Program Files\OpenVPN\easy-rsa
Создайте копию файла:
copy vars.example vars
Откройте файл vars с помощью любого текстового редактора. Проверьте пути к рабочим директориям.
Обязательно поправьте переменную EASYRSA_TEMP_DIR следующим образом:
set_var EASYRSA_TEMP_DIR "$EASYRSA_PKI/temp"

Можете заполнить поля для сертификатов (опционально)
set_var EASYRSA_REQ_COUNTRY "RU"
set_var EASYRSA_REQ_PROVINCE "MSK"
set_var EASYRSA_REQ_CITY "MSK"
set_var EASYRSA_REQ_ORG "IT-Company"
set_var EASYRSA_REQ_EMAIL " [email protected] "
set_var EASYRSA_REQ_OU " IT department "

Срок действия сертификатов задается с помощью:
#set_var EASYRSA_CA_EXPIRE 3650
#set_var EASYRSA_CERT_EXPIRE 825
Сохраните файл и выполните команду:
EasyRSA-Start.bat
Следующие команды выполняются в среде EasyRSA Shell:
Инициализация PKI:
./easyrsa init-pki
Должна появится надпись:
init-pki complete; you may now create a CA or requests.
Your newly created PKI dir is: C:/Program Files/OpenVPN/easy-rsa/pki
Теперь нужно сгенерировать корневой CA:
./easyrsa build-ca
Задайте дважды пароль для CA:
CA creation complete and you may now import and sign cert requests.
Данная команда сформировала:
- Корневой сертификат центра сертификации: «C:\Program Files\OpenVPN\easy-rsa\pki\ca.crt»
- Ключ центра сертификации «C:\Program Files\OpenVPN\easy-rsa\pki\private\ca.key»
Теперь нужно сгенерировать запрос сертификата и ключ для вашего сервера OpenVPN:
./easyrsa gen-req server nopass
Утилита сгенерирует два файла:
req: C:/Program Files/OpenVPN/easy-rsa/pki/reqs/server.req
key: C:/Program Files/OpenVPN/easy-rsa/pki/private/server.key
Подпишем запрос на выпуск сертификата сервера с помощью нашего CA:
./easyrsa sign-req server server
Подтвердите правильность данных, набрав yes.
Затем введите пароль CA от корневого CA.
В каталоге issued появится сертификат сервера («C:\Program Files\OpenVPN\easy-rsa\pki\issued\server.crt»)

Теперь можно создать ключи Диффи-Хеллмана (займет длительное время):
./easyrsa gen-dh
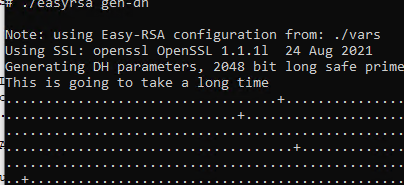
Для дополнительной защиты VPN сервера желательно включить tls-auth. Данная технология позволяет использовать подписи HMAC к handshake-пакетам SSL/TLS, инициируя дополнительную проверку целостности. Пакеты без такой подписи будут отбрасываться VPN сервером. Это защитит вас от сканирования порта VPN сервера, DoS атак, переполнения буфера SSL/TLS.
Сгенерируйте ключ tls-auth:
cd C:\Program Files\OpenVPN\bin
openvpn --genkey secret ta.key
Должен появиться файл «C:\Program Files\OpenVPN\bin\ta.key». Переместите его в каталог C:\Program Files\OpenVPN\easy-rsa\pki
Теперь можно сформировать ключи для клиентов OpenVPN. Для каждого клиента, который будет подключаться к вашему серверу нужно создать собственные ключи.
Есть несколько способов генерации ключей и передачи их клиентам. В следующем примере, мы создадим на сервере ключ клиента и защитим его паролем:
./easyrsa gen-req kbuldogov
./easyrsa sign-req client kbuldogov

Данный ключ («C:\Program Files\OpenVPN\easy-rsa\pki\private\kbuldogov.key») нужно передать клиенту и сообщить пароль. Клиент может снять защиту паролем для ключа:
openssl rsa -in "C:\Program Files\OpenVPN\easy-rsa\pki\private\kbuldogov.key"-out "C:\Program Files\OpenVPN\easy-rsa\pki\private\kbuldogov_use.key"

Если вы хотите сгенерировать ключ, не защищенный паролем, нужно выполнить команду:
./easyrsa gen-req имяклиента nopass
На сервере с OpenVPN вы можете создать неограниченное количество ключей и сертификатов для пользователей. Аналогичным образом сформируйте ключи и сертфикаты для других клиентов.
Вы можете отохвать скомпрометированные сертификаты клиентов:
cd C:\Program Files\OpenVPN\easy-rsa
EasyRSA-Start.bat
./easyrsa revoke kbuldogov
Итак, мы сгенерировали набор ключей и сертификатов для OpenVPN сервера. Теперь можно настроить и запустить службу OpenVPN.
Конфигурационный файл OpenVPN сервера в Windows
Скопируйте типовой конфигурационный файл OpenVPN сервера:
copy "C:\Program Files\OpenVPN\sample-config\server.ovpn" "C:\Program Files\OpenVPN\config-auto\server.ovpn"
Откройте файл server.ovpn в любом текстовом редакторе и внесите свои настройки. Я использую следующий конфиг для OpenVPN:
# Указываем порт, протокол и устройство
port 1194
proto udp
dev tun
# Указываем пути к сертификатам сервера
ca "C:\\Program Files\\OpenVPN\\easy-rsa\\pki\\ca.crt"
cert "C:\\Program Files\\OpenVPN\\easy-rsa\\pki\\issued\\server.crt"
key "C:\\Program Files\\OpenVPN\\easy-rsa\\pki\\private\\server.key"
dh "C:\\Program Files\\OpenVPN\\easy-rsa\\pki\\dh.pem"
# Указываем настройки IP сети, адреса из которой будет будут получать VPN клиенты
server 10.24.1.0 255.255.255.0
#если нужно разрешить клиентам подключаться под одним ключом, нужвно включить опцию duplicate-cn (не рекомендуется)
#duplicate-cn
# TLS защита
tls-auth "C:\\Program Files\\OpenVPN\\easy-rsa\\pki\\ta.key" 0
cipher AES-256-GCM
# Другая параметры
keepalive 20 60
persist-key
persist-tun
status "C:\\Program Files\\OpenVPN\\log\\status.log"
log "C:\\Program Files\\OpenVPN\\log\\openvpn.log"
verb 3
mute 20
windows-driver wintun
Сохраните файл.
OpenVPN позволяет использовать как TCP, так и UDP для подключения. В этом примере я запустил OpenVPN на 1194 UDP. Рекомендуется использовать протокол UDP, это оптимально как с точки зрения производительности, так и безопасности.
Не забудьте открыть на файерволе порты для указанного вами порта OpenVPN на клиенте и на сервере. Можно открыть порты в Windows Defender с помощью PowerShell.
Правило для сервера:
New-NetFirewallRule -DisplayName "AllowOpenVPN-In" -Direction Inbound -Protocol UDP –LocalPort 1194 -Action Allow
Правило для клиента:
New-NetFirewallRule -DisplayName "AllowOpenVPN-Out" -Direction Outbound -Protocol UDP –LocalPort 1194 -Action Allow
Теперь нужно запустить службу OpenVPN и изменить тип ее запуска на автоматический. Воспользуйтесь таким командами PowerShell, чтобы включить службу:
Set-Service OpenVPNService –startuptype automatic –passthru
Get-Service OpenVPNService| Start-Service
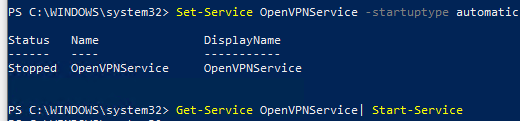
Откройте панель управления, и убедитесь, что виртуальный сетевой адаптер OpenVPN Wintun теперь активен. Если нет, смотрите лог «C:\Program Files\OpenVPN\log\server.log»
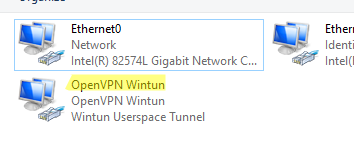
Если при запуске OpenVPN вы видите в логе ошибку:
Options error: In C:\Program Files\OpenVPN\config-auto\server.ovpn:1: Maximum option line length (256) exceeded, line starts with..
Смените в файле server.ovpn символы переноса строки на Windows CRLF (в notepad++ нужно выбрать Edit -> EOL Conversion -> Windows CR LF). Сохраните файл, перезапустите службу OpevVPNService.
Данный конфиг позволит удаленным клиентам получить доступ только к серверу, но другие компьютеры и сервисы в локальной сети сервера для них недоступны. Чтобы разрешить клиентам OpenVPN получить доступ к внутренней сети нужно:
Включить опцию IPEnableRouter в реестре (включает IP маршрутизацию в Windows, в том числе включает маршрутизацию меду сетями Hyper-V): reg add «HKLM\SYSTEM\CurrentControlSet\Services\Tcpip\Parameters» /v IPEnableRouter /t REG_DWORD /d 1 /f
Добавьте в конфгурационный файл сервера OpenVPN маршруты до внутренней IP сети:
push "route 10.24.1.0 255.255.255.0"
push "route 192.168.100.0 255.255.255.0"
Если нужно, назначьте клиенту адреса DNS серверов:
push "dhcp-option DNS 192.168.100.11"
push "dhcp-option DNS 192.168.100.12"
Если нужно завернуть все запросы клиента (в том числе Интернет трафик) на ваш OpenVPN сервер, добавьте опцию:
push "redirect-gateway def1"
Настройка OpenVPN клиента в Windows
Создайте на сервере шаблонный конфигурационный файла для клиента VPN (на базе iшаблона client.ovpn) со следующими параметрами (имя файла kbuldovov.ovpn)
client
dev tun
proto udp
remote your_vpn_server_address 1194
resolv-retry infinite
nobind
persist-key
persist-tun
ca ca.crt
cert kbuldogov.crt
key kbuldogov.key
remote-cert-tls server
tls-auth ta.key 1
cipher AES-256-GCM
connect-retry-max 25
verb 3
В директиве remote указывается публичный IP адрес или DNS имя вашего сервера OpenVPN.
Скачайте и установите клиент OpenVPN Connect для Windows (https://openvpn.net/downloads/openvpn-connect-v3-windows.msi).
Теперь на компьютер с клиентом OpenVPN нужно с сервера скопировать файлы:
- ca.crt
- kbuldogov.crt
- kbuldogov.key
- dh.pem
- ta.key
- kbuldogov.ovpn

Теперь импортируйте файл с профилем *.ovpn и попробуйте подключиться к вашему VPN серверу.
Если все настроено правильно, появится такая картинка. 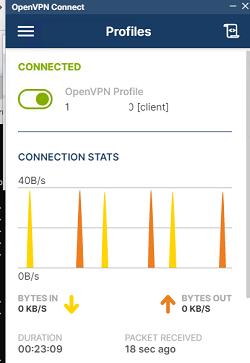
Проверьте теперь лог OpenVPN на клиенте «C:\Program Files\OpenVPN Connect\agent.log»
Mon Dec 27 08:09:30 2021 proxy_auto_config_url
Mon Dec 27 08:09:31 2021 TUN SETUP
TAP ADAPTERS:
guid='{25EE4A55-BE90-45A0-88A1-8FA8FEF24C42}' index=22 name='Local Area Connection'
Open TAP device "Local Area Connection" PATH="\\.\Global\{25EE4A55-BE90-45A0-88A1-8FA8FEF24C42}.tap" SUCCEEDED
TAP-Windows Driver Version 9.24
ActionDeleteAllRoutesOnInterface iface_index=22
netsh interface ip set interface 22 metric=1
Ok.
netsh interface ip set address 22 static 10.24.1.6 255.255.255.252 gateway=10.24.1.5 store=active
IPHelper: add route 10.24.1.1/32 22 10.24.1.5 metric=-1
Клиент успешно подключится к OpenVPN серверу и получил IP адрес 10.24.1.6.
Проверьте теперь лог на сервере («C:\Program Files\OpenVPN\log\openvpn.log»). Здесь также видно, что клиент с сертификатом kbuldogov успешно подключится к вашему серверу.
2021-12-27 08:09:35 192.168.13.202:55648 [kbuldogov] Peer Connection Initiated with [AF_INET6]::ffff:192.168.13.202:55648
2021-12-27 08:09:35 kbuldogov/192.168.13.202:55648 MULTI_sva: pool returned IPv4=10.24.1.6, IPv6=(Not enabled)
2021-12-27 08:09:35 kbuldogov/192.168.13.202:55648 MULTI: Learn: 10.24.1.6 -> kbuldogov/192.168.13.202:55648
2021-12-27 08:09:35 kbuldogov/192.168.13.202:55648 MULTI: primary virtual IP for kbuldogov/192.168.13.202:55648: 10.24.1.6
Время на прочтение
4 мин
Количество просмотров 461K
Openvpn — виртуальная частная сеть. С ее помощью мы можем:
- Создать защищенный канал свзяи, в то время, когда мы сидим с бесплатного Wi-Fi в кафе.
- Обмениваться файлами между участниками сети.
- Раздавать интернет испульзуя общий шлюз.
Основные преимущества:
- Простота настройки.
- Безопасность.
- Не требует дополнительного оборудования.
- Высокая скорость и стабильность.
Как и автор статьи об установке OpenVPN на Linux, я не нашел нормальной статьи, да еще и такой, чтоб описывалось все до мелочей. В этой статье на Хабрахабре я постараюсь максимально доступно все объяснить. Итак, поехали!
Скачиваем дистрибутив.
На момент написания статьи доступная версия 2.3.2. Качаем отсюда Windows installer 32-х или 64-х битную версию под разрядность вашей операционной системы.
Установка.
При установке обязательно отметьте все пункты птичками, на предложение установить драйвер отвечаем утвердительно. В системе появится новый виртуальный сетевой адаптер.
Создание сертификатов и ключей.
Когда-то этот пункт меня останавливал, мол ну их эти ключи, пойду поищу что попроще. Но, увы, ничего лучшего не нашел. Итак, переходим в C:\Program files\OpenVPN\easy-rsa, запускаем init-config.bat, появится vars.bat, открываем его в блокноте. Нас интересуют строчки в самом низу, их нужно заполнить как угодно. Например:
set KEY_COUNTRY=RU
set KEY_PROVINCE=Baldur
set KEY_CITY=Piter
set KEY_ORG=OpenVPN
set KEY_EMAIL=my@sobaka.ru
set KEY_CN=server
set KEY_NAME=server
set KEY_OU=ouou
Там где написано server не трогаем. Сохранили.
Теперь открываем openssl-1.0.0.cnf и ищем строчку default_days 365, ставим 3650. Это продлит жизнь наших сертификатов на 10 лет. Сохраняем. Далее открываем командную строку в пуск-стандартные-командная строка (на Windows Vista/7/8 от имени администратора), пишем последовательно:
cd C:\OpenVPN\easy-rsa
vars
clean-all
В ответ должно написать два раза «Скопировано файлов: 1». Значит, все окей. В этом же окне набираем:
build-dh
Создаст ключ Диффи-Хельмана.
build-ca
Создаст основной сертификат.
Будут заданы вопросы, просто нажимаем Enter пока не увидите путь C:\Program files\OpenVPN\easy-rsa. Далее набираем:
build-key-server server
На вопросы также жмем Enter, только не торопитесь! В конце будут два вопроса: «Sign the certificate?» и «1 out of 1 certificate requests certified, commit?», на оба вопроса отвечаем Y. Теперь создадим сертификат клиента:
build-key client
Тут нужно быть вниметельней, при вопросе Common Name (eg, your name or your server’s hostname) нужно ввести client. В конце также два раза Y. Для каждого клиента нужно создавать новый сертификат, только с другим именем, например, build-key client1 и также указывать его в common name. Если все сделали правильно, можете выдохнуть! Самое сложное позади. В папке C:\Program Files\OpenVPN\easy-rsa\keys забираем: ca.crt, dh1024.pem, server.crt, server.key и кладем их в C:\Program Files\OpenVPN\config.
Создаем конфиги.
Переходим в C:\Program Files\OpenVPN\config, создаем текстовой документ, вставляем:
# Поднимаем L3-туннель
dev tun
# Протокол
proto udp
# Порт который слушает впн
port 12345
# Ключи и сертификаты
ca ca.crt
cert server.crt
key server.key
dh dh1024.pem
# Грубо говоря экономим адреса
topology subnet
# Пул адресов
server 10.8.0.0 255.255.255.0
# Метод шифрования
cipher AES-128-CBC
# Сжатие
comp-lzo
# Немного улучшит пинг
mssfix
# Время жизни клиентов, если не откликнулся — отключает
keepalive 10 120
# Уровень отладки
verb 3
Сохраняем файл как server.ovpn. Это наш конфиг сервера. Теперь пробуем запустить сервер. На рабочем столе будет ярлык OpenVPN Gui. После запуска в трее появится красный значок. Кликаем по нему дважды, если загорелся зеленым, значит, все хорошо, если нет, тогда смотрим лог в папке log.
Теперь конфиг клиента:
client
dev tun
proto udp
# Адрес и порт сервера
remote адрес 12345
# Ключи должны лежать в папке с конфигом
ca ca.crt
cert client.crt
key client.key
cipher AES-128-CBC
nobind
comp-lzo
persist-key
persist-tun
verb 3
Сохраняем как client.ovpn. Создаем любую папку и кладем туда конфиг client.ovpn и сертификаты ca.crt, client.crt, client.key которые лежат в C:\Program files\OpenVPN\easy-rsa. Сам клиент для Windows качаем здесь. На клиентской машине устанавливаем, переносим папку с конфигом и сертификатом и запускаем client.ovpn. Если подключились, пробуем в командной строке набрать ping 10.8.0.1. Пакеты пошли? Поздравляю! Сервер готов! Теперь идем в панель управления-администрирование-службы, ищем там OpenVPN, дважды щелкаем и выставляем автоматически. Теперь сервер будет сам стартовать после перезагрузки.
Дорабатываем конфиг или каждому свое.
Теперь я расскажу как раздавать интернет и другие мелочи связанные с настройкой. Начнем с мелочей. Все манипуляции будем проводить с конфигом сервера.
Если хотите, чтобы клиенты «видели» друг друга т.е. могли обмениваться информацией, тогда в конфиг впишите
client-to-client.
Если нужно, чтобы клиентам выдавались статические адреса, тогда в папке config создайте файл ip.txt и впишите в конфиг
ifconfig-pool-persist ip.txt
Неохота создавать каждому сертификаты? Тогда пишем duplicate-cn, но учтите, с этой опцией не работает ifconfig-pool-persist.
Теперь о конфиге клиента. Можно не передавать файлы сертификатов, а вписать сразу в конфиг, только делать это лучше не с блокнота, а с AkelPad’а или Notepad++ например. Открываем ca.crt и выделяем от ——BEGIN CERTIFICATE—— до ——END CERTIFICATE——. В конфиге будет выглядеть так:
-----BEGIN CERTIFICATE-----

сертификат

-----END CERTIFICATE-----
-----BEGIN CERTIFICATE-----

сертификат

-----END CERTIFICATE-----
-----BEGIN PRIVATE KEY-----

ключ

-----END PRIVATE KEY-----
Раздаем интернет
Для этого в конфиг сервера вписываем:
push «redirect-gateway def1»
push «dhcp-option DNS 8.8.8.8»
push «dhcp-option DNS 8.8.4.4»
DNS-адреса подставляем те, что даны в настройках. Посмотреть можно зайдя в панель управления-сетевые подключения, дважды кликнув на адаптере который смотрит в интернет. Для Win7 Панель управления-Сеть и Интернет-Центр управления сетями и общим доступом-изменение параметров адаптера. Далее, заходим в свойства этого же адаптера, вкладка доступ, ставим птичку напротив «Разрешить другим пользователям сети…» и в выпадающем списке, если есть, выбираем виртуальный адаптер vpn. Затем заходим в свойства адаптера vpn, свойства ipv4 и выставляем получение ip и dns автоматически. Спасибо за внимание!
#статьи
-

0
Дешёвый и сердитый ответ блокировкам.
Изображение: mrsiraphol / freepik / rawpixel / Freepik / Mickey O`Neil / Hofmann Natalia / Unsplash / OpenVPN Inc/ Wikimedia Commons / Дима Руденок для Skillbox Media

Пишет о сетях, инструментах для разработчиков и языках программирования. Любит готовить, играть в инди‑игры и программировать на Python.
Пользоваться VPN несложно — на рынке есть много готовых решений, в том числе бесплатных. Но не все VPN одинаково надёжны. Некоторые из них могут просматривать ваш трафик и продавать его третьим лицам. Чтобы избежать этого, можно поднять VPN на своём собственном сервере.
В этой статье мы расскажем о том, как настроить свой VPN на базе OpenVPN. Это вполне по силам сделать даже начинающим, да и стоить будет дешевле, чем пользоваться платными сервисами. Ещё один плюс: ваш VPN будет почти неуязвим для блокировок, так как Роскомнадзору нет дела до частных сетей.
А если не хотите заморачиваться с настройкой своего сервера, в конце статьи есть список бесплатных серверов и инструкция, как к ним подключиться. Так у вас тоже получится свой рабочий VPN — но чуть менее быстрый и безопасный.
Содержание
- Почему OpenVPN
- Часть первая: настраиваем сервер
- Подключаемся к серверу: Windows
- Подключаемся к серверу: GNU/Linux
- Подключаемся к серверу: macOS
- Устанавливаем OpenVPN на сервер
- Создаём пользователей
- Часть вторая: устанавливаем клиент
- На компьютере (Windows, Linux, macOS)
- На Android-смартфоне
- На iPhone
- Список бесплатных VPN-серверов
- Настраиваем файл конфигурации
- Заключение
OpenVPN — это один из самых гибких и надёжных протоколов VPN. Его используют как обычные люди, так и сетевики и безопасники для настройки корпоративных сетей.
Вот его главные фишки:
Безопасность. OpenVPN обеспечивает высокий уровень безопасности благодаря шифрованию и аутентификации на основе сертификатов. Это защищает ваши данные от несанкционированного доступа и прочтения.
Кросс-платформенность. OpenVPN поддерживается на большом количестве платформ, включая Windows, macOS, Linux, Android и iOS. Это значит, что вы можете использовать его на разных устройствах и ОС.
Гибкость. OpenVPN настраивается для работы через различные порты и прокси-серверы. Это полезно, когда некоторые порты или протоколы блокируются вашим интернет-провайдером или сетью.
Открытый исходный код. Код OpenVPN доступен общественности для просмотра и аудита. Это делает проект прозрачнее и позволяет обнаруживать и исправлять уязвимости быстрее.
Стабильность. Долгая история разработки и широкое комьюнити — это плюсики к стабильности и надёжности. Ещё OpenVPN автоматически восстанавливает соединение при обрыве связи.
В целом OpenVPN предлагает сильную безопасность, широкую поддержку платформ, гибкость настройки, открытый исходный код и стабильность, что делает его привлекательным вариантом для использования в качестве протокола VPN.
Чтобы настроить серверную часть, нам потребуется собственно сервер. Он может быть физическим или облачным. Выбор за вами, но мы рекомендуем второй вариант — это дешевле и не так трудозатратно. Услуги аренды облачного сервера предлагает, например, Timeweb. На момент написания статьи там доступны серверы в России, Польше, Нидерландах и Казахстане.

На сайте вам предложат пройти регистрацию и выбрать следующие параметры сервера:
- операционную систему;
- страну, где сервер физически расположен;
- конфигурацию серверного железа;
- возможность бэкапа;
- SSH-ключ;
- тип сети — публичную или приватную.
Будем отталкиваться от того, что мы выбрали операционную систему Ubuntu версии 20.04. Если хотите пользоваться ресурсами, заблокированными в России, лучше выбирать страну за пределами СНГ.

Конфигурация подойдёт любая, поэтому берём самую дешевую — она будет верхней строчкой в списке. Тратить деньги на бэкап смысла нет, проще настроить VPN заново, если настройки слетят. SSH-ключи тоже излишни — они нужны, чтобы сервер и клиент убедились, что они те, за кого себя выдают. В нашем случае смысла в этом нет. Сеть оставляем публичной.

После настроек пополните счет в Timeweb (обычной банковской карты будет достаточно) и оплатите желаемый срок аренды сервера. Ваш сервер создан! Подождите несколько минут и обновите страницу — сервер запустится, и мы сможем двигаться дальше.
Теперь пришло время подключиться к серверу. Можно воспользоваться веб-консолью в панели управления вашим сервером на Timeweb. В этом случае подключаться к серверу не нужно, сразу переходите к настройкам.

Но если вы выбрали другого хостера — не проблема: сервер можно настроить и с компьютера.
Если вы используете Windows, то перед настройкой нужно будет установить SSH-терминал, так как встроенная командная строка Windows не обрабатывает SSH-команды. Мы будем использовать MobaXterm, но вы можете выбрать любой другой. Linux и macOS поддерживают SSH из собственной командной строки. В терминале MobaXterm:
- Выберите Session.
- Выберите SSH.
- Введите IP-адрес сервера в поле Remote Host.
- Отметьте чекбокс и введите имя пользователя в поле Specify username.
- Нажмите ОК.
- Появится запрос на ввод пароля — введите или вставьте его комбинацией Shift + Insert (пароль не будет отображаться в терминале — это нормально). Если вы пользуетесь ноутбуком, то загуглите комбинацию клавиш, которая заменяет Insert в вашей модели и зажмите её вместе с Shift.
Откройте терминал. В командной строке:
Шаг 1. Введите следующую команду:
ssh -l username XXX.XXX.XXX.XXX
Иксы замените на IP-адрес сервера, а username — на имя пользователя.
Шаг 2. Если будет предложено подтвердить подлинность сервера, введите yes.
Шаг 3. Введите пароль (вводимые символы не отображаются в терминале, это нормально).
Откройте терминал (нажмите значок Launchpad в панели Dock, введите слово Терминал в поле поиска и нажмите значок терминала). В командной строке:
Шаг 1. Введите:
ssh -l username XXX.XXX.XXX.XXX
Иксы замените на IP-адрес сервера, username — на имя пользователя.
Шаг 2. Если будет предложено подтвердить подлинность сервера, введите yes.
Шаг 3. Введите пароль (вводимые символы не отображаются в терминале, это нормально).
Теперь переходим на сайт openvpn.net, в раздел в раздел products → self-hosted solutions → software packages.
Далее кликаем на эмблему Ubuntu и в появившемся окне выбираем Ubuntu 20 для x86_64 или ARM64, в зависимости от конфигурации вашего сервера (Timeweb обычно предоставляет x86_64).
Далее последовательно введите команды из списка Option 1. После ввода последней команды скопируйте куда-нибудь значения следующих полей из вывода терминала:
Admin UI
Client UI
login
password

После того как мы подключились к серверу, мы сможем управлять им дистанционно. Для начала создадим первых пользователей.
Скопируйте данные строки Admin UI в строку браузера — вы окажетесь в админской панели сервера. Проигнорируйте предупреждение браузера о безопасности (Дополнительно → Принять риск → Продолжить). Ничего страшного не произойдёт — вы и так знаете, что это ваш сервер.
Введите логин и пароль (из вывода терминала). Вы попадёте в админскую панель своего сервера. Прочтите и примите лицензионное соглашение.
Далее заходите в Configuration → Network settings. Проверьте, правильно ли указан IP-адрес в соответствующем поле.
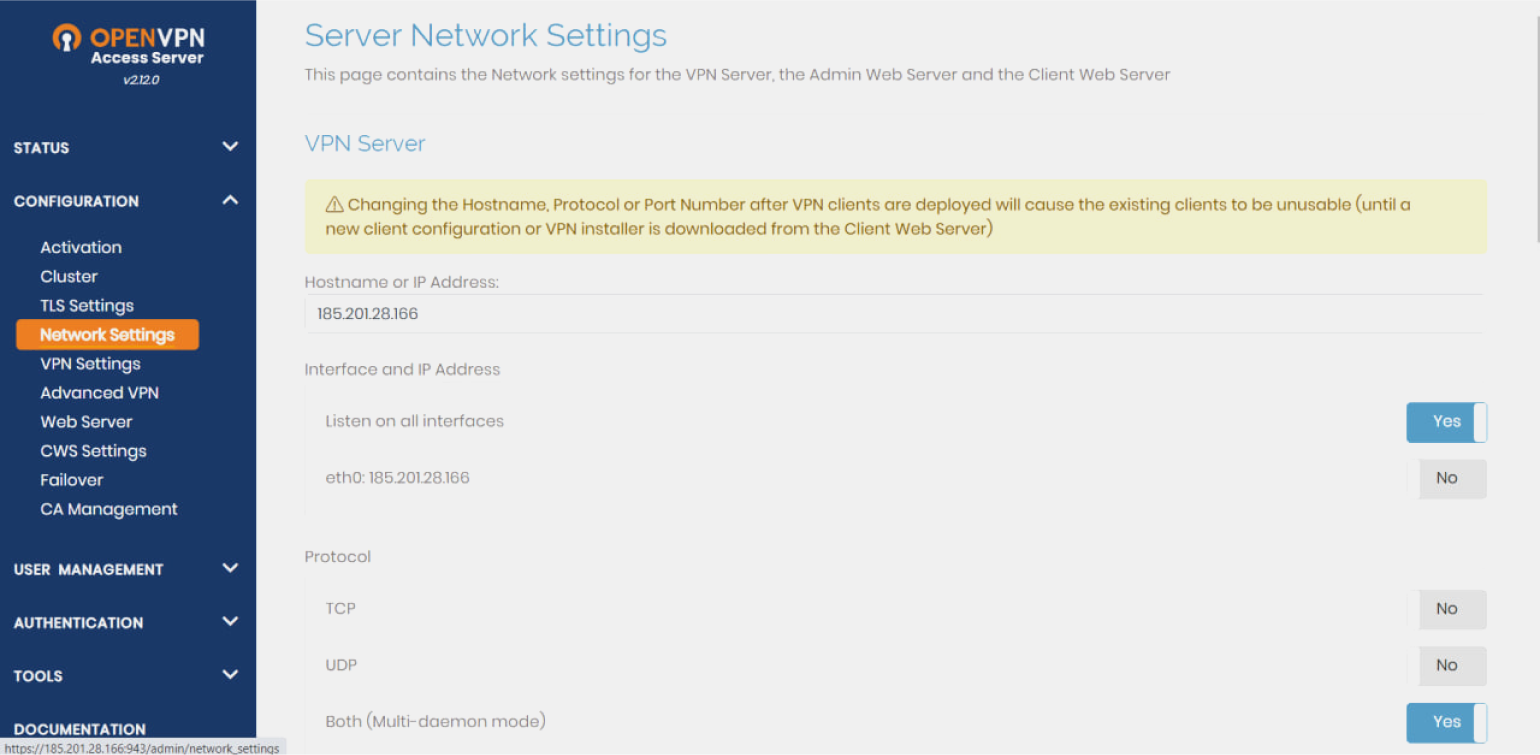
Теперь переходите в User management → User permissions. Здесь мы создаём пользователей. Одновременно только два пользователя могут работать с некоммерческой версией OpenVPN.
Введите имя пользователя в предложенном поле и нажмите на иконку в столбике More settings. Развернётся панель, где нужно будет назначить пароль для пользователя. После создания пароля сверните панель щелчком по той же иконке и нажмите Save settings. Если хотите пользоваться VPN и с мобильного устройства, то создайте ещё одного пользователя.
Далее вам предложат перезагрузить сервер. Нажимайте Update Running Server, и после перезагрузки изменения вступят в силу.

Самое сложное позади. Дальше нас ждёт, по сути, простая установка приложения.
Если вы перешли в эту часть статьи из оглавления и не настраивали собственный сервер, вам нужно будет скачать клиент с официального сайта — есть версии для Windows, Linux и macOS. А ещё — файл конфигурации стороннего сервера, который можно найти здесь.
Если вы были с нами всю первую часть статьи, выходите из админки и заходите в пользовательскую версию страницы по только что созданным логину и паролю. Для этого скопируйте строку вывода Client UI или просто удалите из строки браузера с админкой /admin.
Скачайте на открывшейся странице установщик клиента для своей операционной системы. Если у вас уже установлен клиент, то кликайте на Yourself (user-locked profile) — вы скачаете конфигурационный файл, который нужно будет открыть в клиенте.
Запустите установщик. Мы покажем установку в Windows, но в Linux и macOS процесс проходит идентично. Разве что в Windows система будет ругаться. Это не страшно — нажимайте Подробнее → Выполнить в любом случае.

Следуйте инструкциям из установщика.
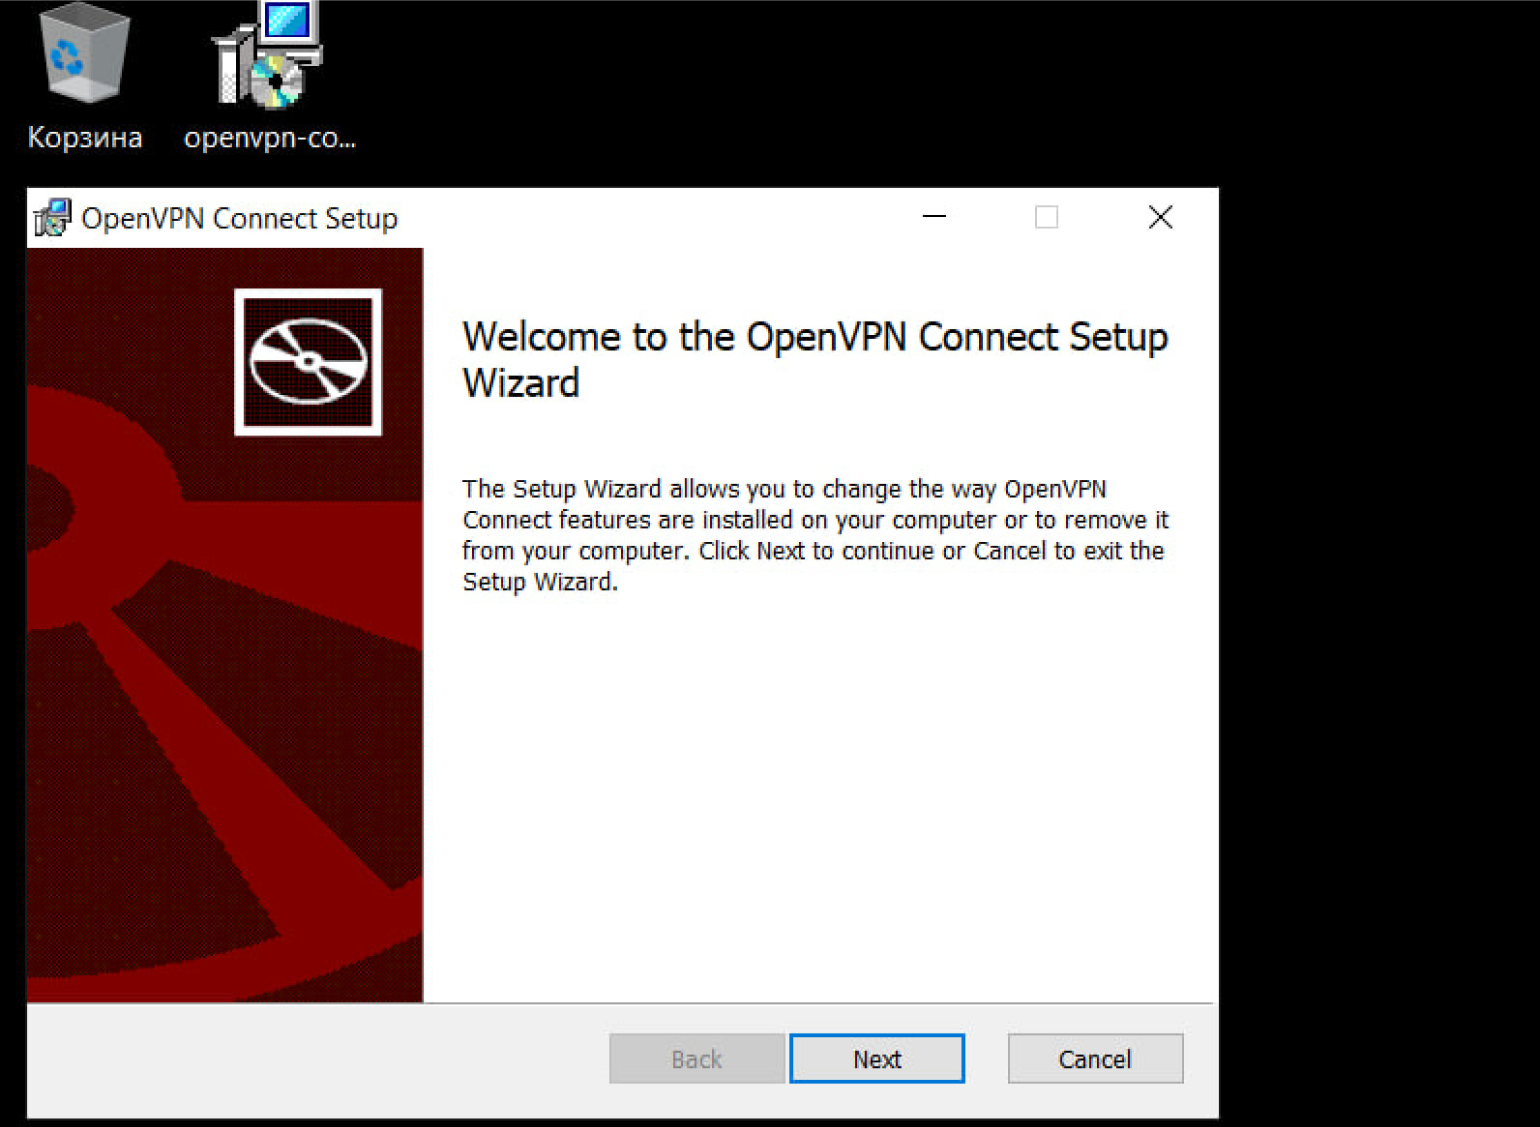
Поздравляем! Клиент установлен.

Если вы подняли свой сервер, то при запуске профиль пользователя уже будет добавлен в клиент. Кликайте на ползунок, вводите пароль, и вуаля — вы подключены к VPN через собственный сервер. С подключением!

Если вы решили использовать сторонний VPN-сервер и скачали файл конфигурации OpenVPN, то в меню клиента кликайте на плюсик, выбирайте вкладку File и перетаскивайте файл в поле для загрузки. Дальше подключайтесь так, как описывалось в предыдущем абзаце.
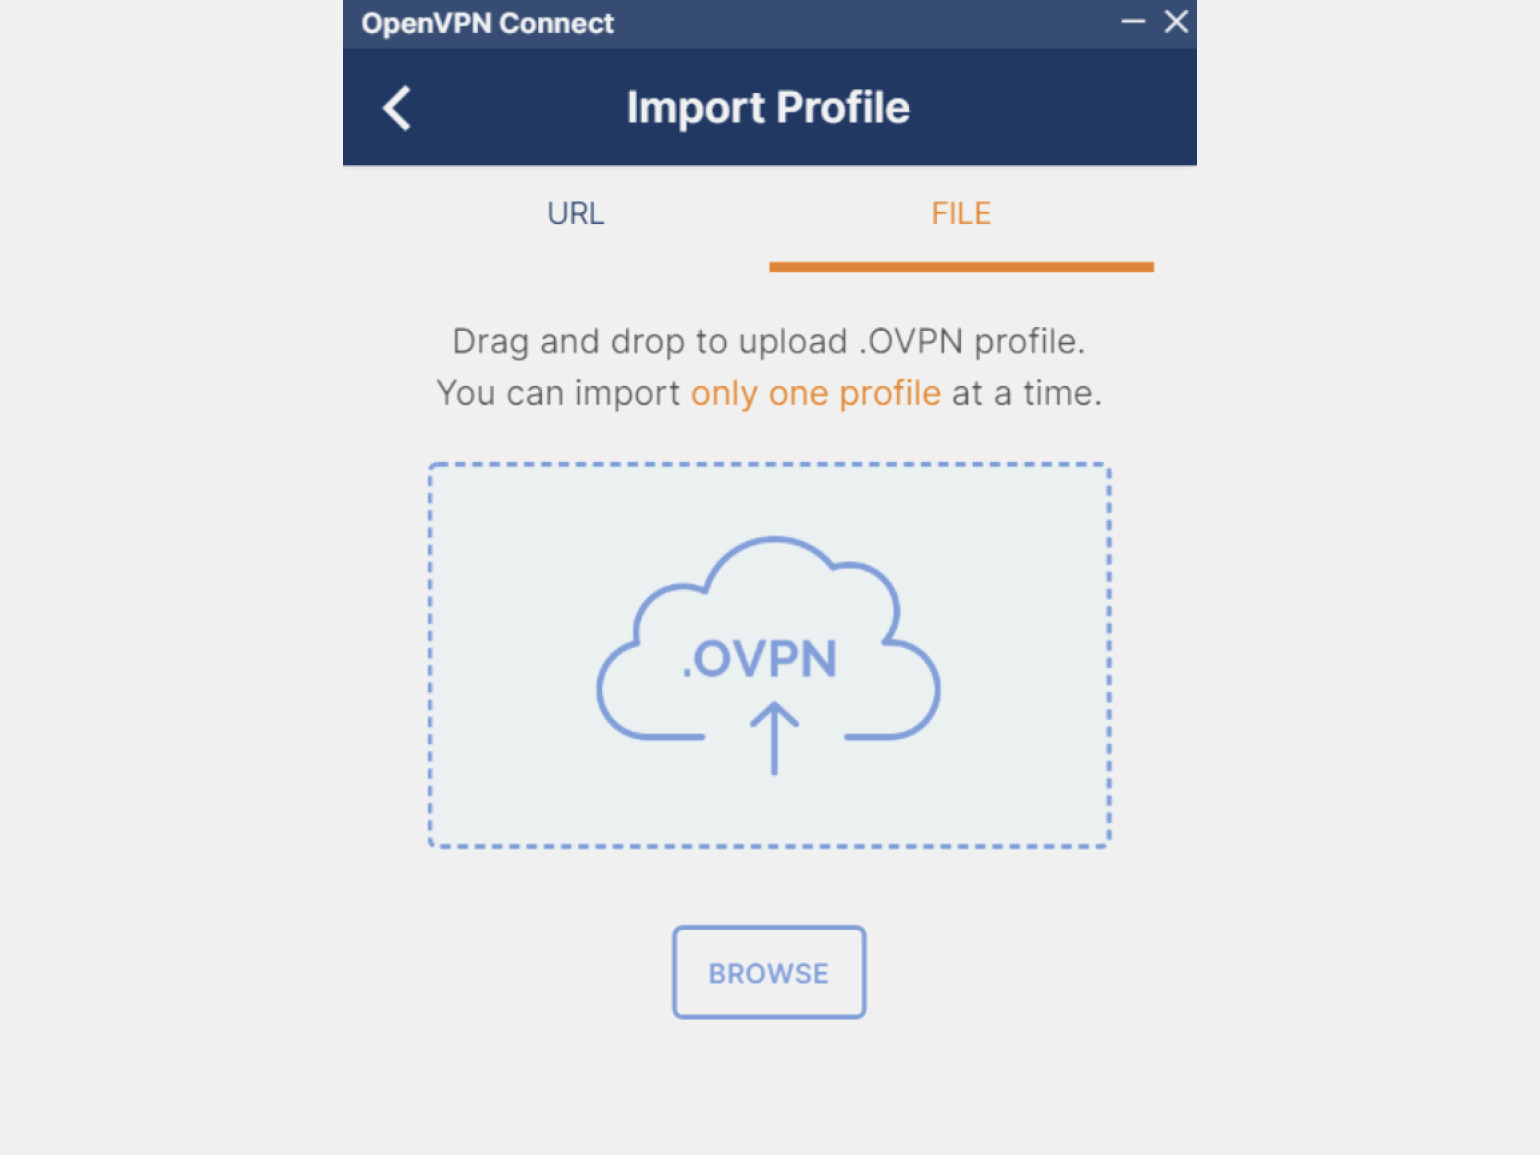
Шаг 1. Установите приложение OpenVPN Connect с Google Play.

Шаг 2. Сохраните файл конфигурации OpenVPN (.ovpn) своего сервера на мобильное устройство или скачайте бесплатный чуть ниже. Если вы создали разных пользователей на сервере — для десктопа и для мобильного, то заходите под пользователем для мобильного.

Шаг 3. Откройте приложение OpenVPN Connect. Нажмите на значок меню (обычно это три горизонтальные линии) в верхнем левом углу.

Шаг 4. Выберите вкладку File. Выберите скачанный с сервера файл конфигурации OpenVPN (.ovpn).
Шаг 5. Нажмите Выбрать или Импортировать для импорта конфигурации.
Шаг 6. Введите логин и пароль пользователя, которого вы создавали под мобильное устройство (если подключаетесь к своему серверу).
Шаг 7. Нажмите на импортированное подключение, чтобы подключиться к VPN-серверу.
Шаг 1. Установите приложение OpenVPN Connect из App Store.
Шаг 2. Скопируйте файл конфигурации OpenVPN (.ovpn) на ваше устройство, например через iCloud Drive, Telegram, WhatsApp или по email. Или скачайте бесплатный в разделе ниже.
Шаг 3. На вашем устройстве найдите файл конфигурации и нажмите на него.
Шаг 4. В меню файла нажмите на значок, как на картинке ниже, и выберите OpenVPN.

Шаг 5. Откроется приложение OpenVPN Connect с предложением импортировать конфигурацию. Нажмите Импортировать для импорта конфигурации в приложение OpenVPN Connect.
Шаг 6. Введите логин и пароль пользователя, которого вы создавали под мобильное устройство (если подключаетесь к своему серверу).
Шаг 7. Нажмите на импортированное подключение, чтобы подключиться к VPN-серверу.
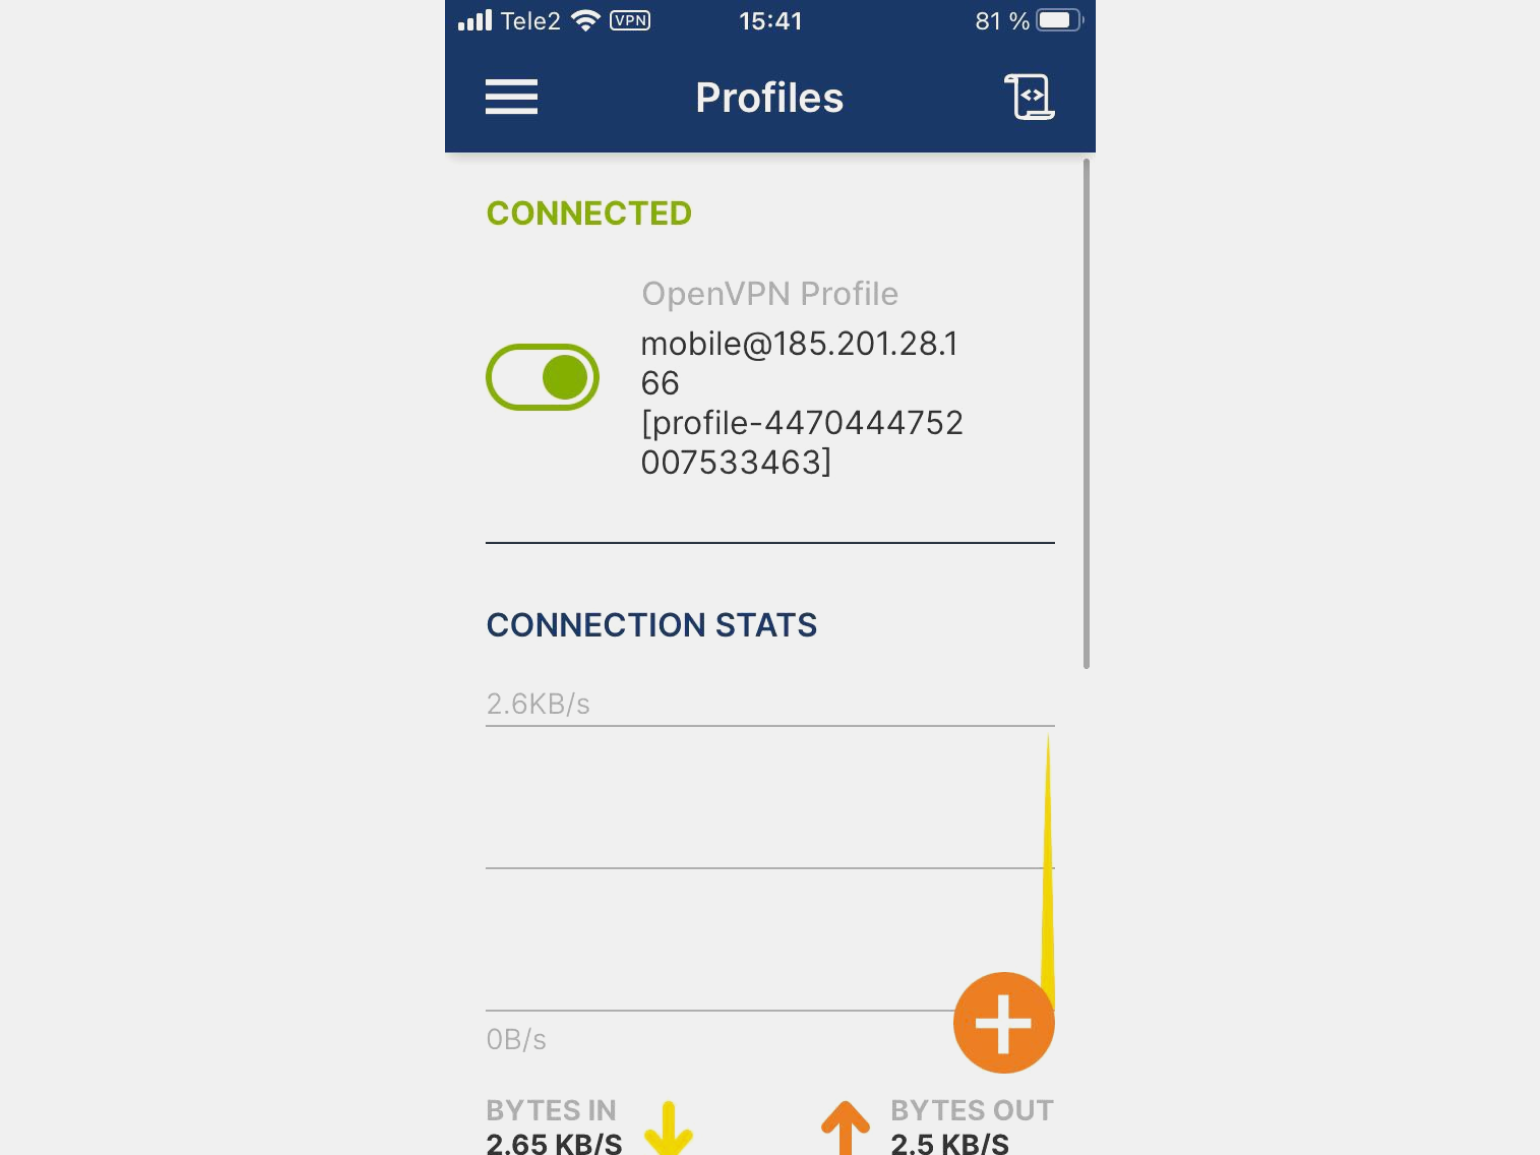
Существуют и бесплатные VPN-серверы. Главная их проблема — в скорости и качестве соединения, вряд ли получится комфортно сёрфить через такой сервер. Вторая проблема — конфиденциальность: непонятно, кто владеет сервером и кто имеет доступ к истории активности пользователей.
Если такие риски и неудобства вас не смущают, то заходите сюда. Прокрутите страницу немного вниз, пока не увидите список серверов.
Выбирайте сервер нужной вам страны и переходите по ссылке на скачивание конфигурационного файла OpenVPN. Что делать с этим файлом, написано выше, в разделе про установку клиента.
После перехода по ссылке скачайте один из четырёх файлов конфигурации. Мы рекомендуем тот, который указывается вместе с IP-адресом и работает через TCP — это самый последний вариант.
В любой момент сервер из этого списка может перестать работать или попасть под блокировку в вашей стране. Поэтому проверяйте актуальный список рабочих серверов.
Как видите, пользоваться OpenVPN для личного веб-сёрфинга просто и удобно. Однако на этом его преимущества не заканчиваются. При желании вы можете настроить соединение, используя файлы конфигурации OpenVPN — прописать маршруты, прокси-серверы для отдельных портов и так далее.
Если для личного использования заморачиваться с этим не имеет смысла, то при создании корпоративной сети это может пригодиться.
Вот некоторые основные параметры, которые могут быть указаны в файле конфигурации сервера OpenVPN:
port — порт, на котором сервер OpenVPN будет слушать входящие подключения.
proto — протокол, который будет использоваться сервером (TCP или UDP).
dev — виртуальное устройство сетевого интерфейса, которое будет использоваться сервером, например TUN или TAP.
ca, cert и key — пути к сертификатам и ключам, которые сервер OpenVPN будет использовать для аутентификации клиентов и установки безопасного соединения.
dh — путь к файлу с параметрами протокола Диффи — Хеллмана, используемыми для обмена ключами и установки шифрования.
server — внутренний IP-адрес и диапазон подсетей, которые сервер будет присваивать клиентам.
push позволяет серверу отправлять настройки клиентам, например маршруты, DNS-серверы или другие параметры сети.
keepalive указывает интервал проверки активности подключения между сервером и клиентом.
cipher и auth определяют алгоритмы шифрования и аутентификации, которые будут использоваться сервером.
log — путь к файлу журнала, где будут записываться события и сообщения сервера OpenVPN.
Продвинутая настройка выходит за рамки этого материала. Если вам нужно настроить корпоративное соединение с помощью OpenVPN, для этого есть отличный материал на «Хабре». Но, чтобы понимать, о чём идёт речь, вам нужно хотя бы базово разбираться в устройстве сетей и принципах кибербеза.
Если вам интересен этот путь, то начните с книги «Компьютерные сети: принципы, технологии, протоколы» авторства В. Олифер и Н. Олифер — это хороший выбор для новичков. А на YouTube есть простой и понятный курс по сетям от замдекана факультета ИТ МФТИ Андрея Созыкина.

Жизнь можно сделать лучше!
Освойте востребованную профессию, зарабатывайте больше и получайте от работы удовольствие. А мы поможем с трудоустройством и важными для работодателей навыками.
Посмотреть курсы