Вы хотите узнать, как просматривать кеш DNS в Windows 10? Если да, то это руководство для вас. На ПК с Windows 10 можно использовать несколько методов для отображения содержимого DNS. Во-первых, вот краткое изложение того, что означает кеш DNS.
Кэш DNS (системы доменных имен), иногда называемый кешем DNS-преобразователя, представляет собой временное хранилище информации. Он поддерживается вашим компьютером и содержит записи обо всех недавно посещенных веб-сайтах и их IP-адресах.
Он служит базой данных, в которой хранится копия результатов поиска DNS, локально хранящаяся в вашем браузере или операционной системе. Ваш компьютер может быстро обратиться к нему при попытке загрузить веб-сайт. Кэш DNS похож на телефонную книгу, в которой хранится индекс всех общедоступных веб-сайтов и их IP-адресов. Его основная цель — ускорить запрос на загрузку веб-сайта за счет обработки разрешения имен адресов, которые вы недавно посещали, прежде чем запрос будет отправлен на множество общедоступных DNS-серверов. Поскольку информация доступна локально, процесс происходит намного быстрее.
Как проверить кеш DNS в Windows 10
Как отмечалось ранее, существуют различные способы отображения кэша DNS в Windows 10. Это может быть полезно, если вы хотите диагностировать проблемы с DNS, например, когда кешируется недействительная или устаревшая запись DNS.
Через командную строку
Чтобы отобразить содержимое кеша DNS, вам необходимо выполнить следующую команду в командной строке с повышенными привилегиями:
- Нажмите сочетания клавиш Win + S и введите «cmd» (без кавычек).
- Щелкните Запуск от имени администратора на правой панели.
- В окне командной строки введите следующую команду и нажмите Enter:
ipconfig / displaydns
После выполнения команды будут отображены следующие результаты:
- Имя записи — это имя, которое вы запрашиваете в DNS, и записи, например адреса, которые принадлежат этому имени.
- Тип записи — это относится к типу записи, отображаемому в виде числа (хотя обычно они называются по именам). У каждого протокола DNS есть номер.
- Время жизни (TTL) — это значение, которое описывает, как долго запись в кеше является действительной, отображается в секундах.
- Длина данных — описывает длину в байтах. Например, адрес IPv4 составляет четыре байта, а адрес IPv6 — 16 байтов.
- Раздел — это ответ на запрос.
- Запись CNAME — это запись канонического имени.
Вы можете экспортировать результаты кеширования DNS с помощью этой команды:
ipconfig / displaydns> dnscachecontents.txt
Это сохранит вывод в текстовом документе dnscachecontents.txt.
Через PowerShell
Вы можете просмотреть кеш DNS с помощью Windows PowerShell. Как и в командной строке, вы также можете экспортировать или сохранить базу данных. Вот процедура:
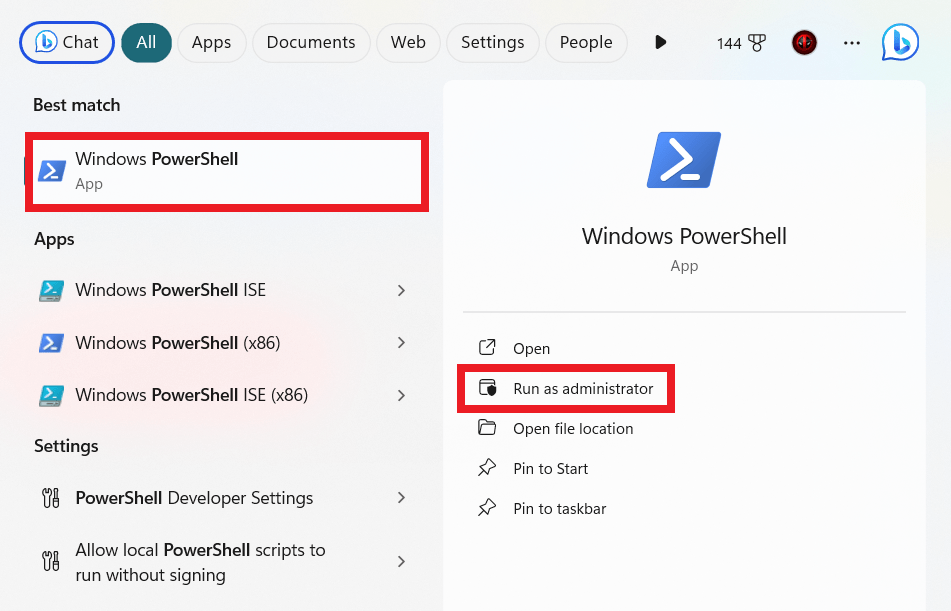
- Нажмите сочетание клавиш Win + X и выберите Администратор Windows PowerShell. Либо, если вы не можете найти эту опцию, нажмите сочетания клавиш Win + S, введите «PowerShell» (без кавычек) и выберите «Запуск от имени администратора» на правой панели.
- Затем введите команду «Get-DnsClientCache» (без кавычек) и нажмите Enter.
- Для получения дополнительных сведений используйте командлет Get-Help:
Help Get-DnsClientCache –full
Как очистить кеш DNS
Когда вы сталкиваетесь с проблемами подключения к Интернету, очистка кеша DNS обычно решает проблему.
Вы можете очистить кеш DNS по разным причинам, в том числе:
- При попытке устранить проблемы с подключением, когда у вас возникают трудности с доступом к веб-сайтам и приложениям: если доменное имя в кеше имеет неправильный или недействительный IP-адрес, веб-сайт не сможет вернуть правильную информацию. Даже если вы очистите историю браузера, кеш DNS все равно будет содержать старые поврежденные данные. Очистка помогает заставить DNS обновлять результаты.
- При попытке устранить неполадки или решить проблемы с подменой DNS или отравлением кеша DNS: киберпреступники могут попытаться получить доступ к кешу и вставить или изменить IP-адрес с намерением перенаправить вас на веб-сайт, предназначенный для сбора конфиденциальных данных, таких как пароли и банковские реквизиты. Очистка кеша DNS предотвращает это.
- Защита вашей конфиденциальности: хотя кеш DNS не содержит личных данных, таких как файлы cookie или JavaScript, он сохраняет историю адресов, которые вы недавно посещали, а также тех, которые вы часто посещаете. Такая информация может быть опасна в руках опытного хакера. Очищая кеш DNS, вы стираете свою историю адресов, что снижает вероятность отслеживания хакером вашего поведения в сети.
- Устранение устаревшей или устаревшей информации о посещенных сайтах. Примером может быть ситуация, когда на веб-сайте были перемещены серверы.
Безопасно ли очищать кеш DNS?
Важно отметить, что очистка кеша DNS не оказывает негативного воздействия на вашу систему. Кэш DNS обеспечивает быстрый доступ к веб-сайтам, и при его очистке при первом посещении веб-сайта загрузка может занять больше времени, чем обычно. Но потом результаты снова будут быстрее.
Чтобы очистить кеш DNS по какой-либо причине, вы можете использовать командную строку или Windows PowerShell.
Очистка кеша DNS с помощью командной строки
- Нажмите клавиши Windows + S и введите «CMD» (без кавычек).
- На правой панели выберите «Запуск от имени администратора».
- Введите в командной строке следующую команду и нажмите Enter:
ipconfig / flushdns
Это оно! Вы должны получить уведомление о том, что кеш был успешно очищен.
Если проблема связана с сервером, а не на локальном компьютере, вы все равно можете использовать командную строку для очистки кеша DNS, но с другой командой. В этом случае команда будет такой:
- dnscmd / clearcache
Очистка кеша DNS с помощью Windows PowerShell
Вы также можете очистить кеш DNS с помощью Windows PowerShell. В зависимости от типа кеша, который вы хотите очистить, у вас есть несколько вариантов для реализации:
- Чтобы очистить кеш локального DNS-сервера, используйте командную строку:
Clear-DnsServerCache
- Чтобы очистить кеш клиента, используйте эту команду:
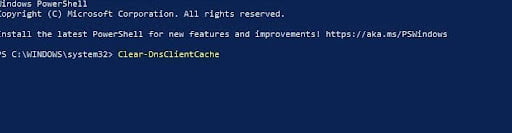
Clear-DnsClientCache
Как отключить кеш DNS в Windows 10
Если по какой-либо причине вы хотите отключить кеш DNS на своем ПК с Windows 10, вы можете использовать инструмент «Контроллер служб», чтобы остановить службу:
- Нажмите клавиши Win + R, введите «services.msc» (без кавычек) и нажмите Enter или нажмите OK.
- Найдите службу DNS-клиента (или Dnscache на некоторых компьютерах) и дважды щелкните ее, чтобы открыть ее свойства.
- Измените Тип запуска на Отключено.
- Чтобы повторно включить службу, повторите описанные выше шаги и измените Тип запуска на Автоматический.
Кроме того, вы можете отключить DNS-клиент с помощью конфигурации системы Windows:
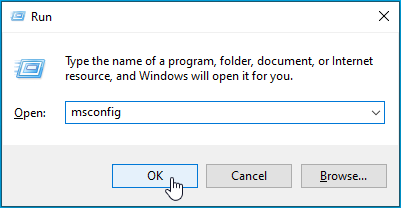
- Нажмите клавиши Win + R, введите «msconfig» (без кавычек) в диалоговом окне «Выполнить» и нажмите Enter или нажмите OK.
- Перейдите на вкладку Services и найдите DNS-клиент.
- Снимите флажок рядом с услугой и нажмите Применить> ОК.
- Чтобы снова включить службу, повторите описанные выше действия и снова установите флажок.
Имейте в виду, что отключение этой службы повлияет на общую производительность вашего компьютера, а сетевой трафик для DNS-запросов увеличится, что означает, что веб-сайты будут загружаться намного медленнее, чем обычно.
В заключение…
Как мы упоминали выше, кеш DNS позволяет избежать поиска DNS при каждом посещении веб-сайта. Все, что вам нужно сделать, это посетить сайт один раз, и при последующих запросах ваш браузер или операционная система будет использовать кэшированные данные DNS, чтобы гораздо быстрее возвращать запросы.
Хотя очистка кеша DNS важна для защиты вашей конфиденциальности и предотвращения взломов, она не удалит все следы конфиденциальной информации. Эти сведения включают историю активности, данные для входа в систему, данные профиля и следы посещений веб-сайтов для взрослых. Даже если вы не открывали их сознательно, вы могли быть перенаправлены без вашего ведома.
Чтобы эффективно удалить такие конфиденциальные данные и защитить вашу конфиденциальность, вам нужна надежная программа, такая как Auslogics BoostSpeed. Инструмент помогает очистить любую конфиденциальную информацию, которую вы бы не хотели, чтобы кто-либо нашел. BoostSpeed поставляется со всеми инструментами, которые могут вам понадобиться для поддержания оптимальной скорости работы вашего ПК, а также с защитой конфиденциальности.
Особенно полезными вы найдете функции на вкладке «Защита». Помимо удаления следов ваших действий в веб-браузерах, системных файлах и приложениях, существует также возможность защитить ваш DNS от несанкционированных изменений. Таким образом, вы не будете беспокоиться о спуфинге DNS, когда злоумышленники изменяют ваши записи DNS для перенаправления трафика на мошеннические веб-сайты.
Если вы включите Active Browser AntiTracker, ваши данные о просмотре будут очищаться после каждого сеанса просмотра, что еще больше защитит вашу конфиденциальность. Мы рекомендуем регулярно чистить ваш компьютер, в зависимости от вашего использования. Так как легко забыть запустить обслуживание, вы можете активировать автоматическое сканирование и выбрать, как часто вы хотите запускать сканирование.
ПОСМОТРЕТЬ DNS-КЭШ
1. Откройте командную строку от имени администратора.
2. Введите команду
ipconfig /displaydns >C:\dnscache.txt
и нажмите Enter. После выполнения команды на диске C: вы увидите файл dnscache.txt и сможете открыв его посмотреть IP адреса доменов, которые вы посещали.

ОЧИСТИТЬ DNS-КЭШ
1. Откройте командную строку от имени администратора.
2. Введите команду
ipconfig /flushdns
и нажмите Enter.

Нажмите на звезду, чтобы оценить!
Прочитали: 550
Contents
- What Is the DNS Cache?
- How to Check DNS Cache on Windows 10
- Via Command Prompt
- Via PowerShell
- Why Clear DNS Cache?
- Is It Safe to Flush DNS Cache?
- How to Clear DNS Cache
- Clearing DNS Cache Using Command Prompt
- Clearing DNS Cache Using Windows PowerShell
- How to Disable DNS Cache in Windows 10
- How to View DNS cache on Windows 11?
- Extra Tip: Always Protect Your Privacy
- Conclusion
- FAQ
- How to Check DNS Settings in Windows 10?
- Where Are the DNS Address Resolutions Stored?
- What Information Is Kept in the DNS Resolver Cache?
- How Long Does DNS Cache Last?
Do you want to learn how to view DNS cache in Windows 10? If so, this tutorial is for you. On a Windows 10 PC, there are several methods you can use to display the DNS contents. First, here’s a summary of what the DNS cache means.
What Is the DNS Cache?
DNS, (Domain Name System) cache, sometimes referred to as DNS Resolver Cache, is a temporary storage of information. It is maintained by your computer, and it contains records of all the recently visited websites and their IP addresses.
It serves as a database that keeps a copy of a DNS lookup, locally stored on your browser or operating system. Your computer can quickly refer to it whenever trying to load a website. The DNS cache is like a phonebook that stores an index of all public websites and their IP addresses. Its main purpose is to speed up a request to load a website by handling name resolution of addresses that you recently visited before the request is sent out to tons of public DNS servers. Since the information is available locally, the process is much quicker.
How to Check DNS Cache on Windows 10
As noted earlier, there are various ways to display DNS cache on Windows 10. This can be useful if you want to diagnose DNS issues, for example, where an invalid or out of date DNS record might be cached.
Also Read: [FIXED] Server DNS address could not be found on Windows 10/11
Via Command Prompt
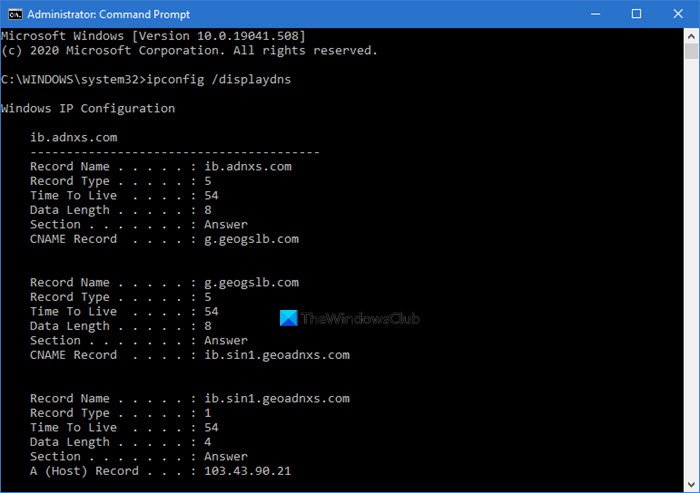
To display the contents of the DNS cache, you need to execute the following command in an elevated Command Prompt:
- Press the Win + S shortcut keys and type in “cmd” (without quotes).
- Click on Run as administrator on the right pane.

- On the Command Prompt window, type the following command and press Enter:
ipconfig /displaydns
Upon execution of the command, the following results will be displayed:
- Record Name – This is the name you query the DNS for, and the records, such as addresses that belong to that name.
- Record Type – This refers to the type of entry, displayed as a number (although they are commonly referred to by their names). Each DNS protocol has a number.
- Time to Live (TTL) – This is a value that describes how long a cache entry is valid, displayed in seconds.
- Data Length – This describes the length in bytes. For instance, the IPv4 address is four bytes, and the IPv6 address is 16 bytes.
- Section – This is the answer to the query.
- CNAME Record – This is the canonical name record.
You can export the results of the DNS cache using this command:
ipconfig /displaydns > dnscachecontents.txt
This will save the output in the text document, dnscachecontents.txt.
Via PowerShell
You can view the DNS cache using Windows PowerShell. And like in Command Prompt, you can also export or save the database. Here’s the procedure:
- Press the Win + X keyboard shortcut, and select Windows PowerShell Admin. Alternatively, if you can’t find that option, press the Win + S shortcut keys, type in “PowerShell” (no quotes) and select Run as Administrator on the right pane.
- Next, input the command “Get-DnsClientCache” (no quotes), and press Enter.
- Use the Get-Help cmdlet to get more information:
Help Get-DnsClientCache –full
Why Clear DNS Cache?
When you run into Internet connectivity issues, flushing or clearing the DNS cache usually resolves the problem.
You may want to clear your DNS cache for a varied number of reasons, including:
- When attempting to troubleshoot connectivity issues, where you have difficulty accessing websites and applications: If the domain name in the cache has an incorrect or invalid IP address, the website won’t be able to return the correct information. Even if you clear your browser history, the DNS cache will still contain the old corrupt details. Flushing helps to get the DNS to update the results.
Also Read: Boost Internet on Your PC: Tips on How to Speed Up Your Internet Connection
- When attempting to troubleshoot or resolve DNS spoofing or DNS cache poisoning issues: Cybercriminals may try to access the cache and insert or change the IP address, with the intention to redirect you to a website designed to gather sensitive data like passwords and banking details. Clearing the DNS cache prevents this.
- Protecting your privacy: Although the DNS cache does not contain personal data like cookies or JavaScript, it retains a history of addresses that you’ve visited recently, as well as those you visit frequently. Such kind of information can be dangerous in the hands of a skilled hacker. By clearing the DNS cache, you erase your address history, making it less likely for a hacker to track your online behavior.
- Resolving stale or outdated information about visited sites: An example here would be if a website has moved servers.
Is It Safe to Flush DNS Cache?
It is important to note that flushing the DNS cache doesn’t have any negative impacts on your system. DNS cache ensures quick access to websites, and when you clear it, the first time you visit a website, it may take longer than usual to load. But afterward, the results will be quicker again.
Related: How to Delete Temporary Internet Files?
How to Clear DNS Cache
To clear the DNS cache, for whatever reason, you can use a command line or Windows PowerShell.
Clearing DNS Cache Using Command Prompt
- Press the Windows Key + S, and type “CMD” (without quotes).
- Choose the “Run as administrator” option in the right pane.
- Type the following command in the prompt and hit Enter:
ipconfig/flushdns
That’s it! You should get a notification indicating the cache has been successfully flushed.
If the issue is on the server instead of the local machine, you can still use Command Prompt to clear the DNS cache, but with a different command. In that case, the command would be:
dnscmd /clearcache
Clearing DNS Cache Using Windows PowerShell
You can also flush the DNS cache using Windows PowerShell. Depending on the type of cache you want to clear, you have a few options to implement:
- To clear the local DNS server cache, use the command line:
Clear-DnsServerCache
- To clear the client cache, use this command:
Clear-DnsClientCache
How to Disable DNS Cache in Windows 10
If for any reason you wish to disable DNS cache on your Windows 10 PC, you can use the “Service Controller” tool to stop the service:
- Press the Win + R keys, type in “services.msc” (no quotes) and press Enter or click OK.

- Locate the DNS Client service (or Dnscache on some computers) and double-click it to open its Properties.
- Change the Startup Type to Disabled.
- To re-enable the service, repeat the steps above and change the Startup Type to Automatic.
Alternatively, you can deactivate the DNS Client using Windows System Configuration:
- Press the Win + R keys, type in “msconfig” (no quotes)in the Run dialog box, and hit Enter or click OK.
- Move to the Services tab and find DNS Client.
- Uncheck the box next to the service and click Apply > OK.
- To re-enable the service, repeat the steps above and tick the checkbox again.
Keep in mind that disabling this service will affect the overall performance of your computer and the network traffic for DNS queries will increase, which means websites will load much slower than normal.
How to View DNS cache on Windows 11?
Windows 11 comes with several substantial upgrades: performance optimization, bug fixes, new placements for the Taskbar and Start Menu — and more. However, when it comes to basic functionality, Windows 11 works in pretty much the same way as Windows 10.
If you are trying to view DNS cache on Windows 11, you can use the same methods we’ve mentioned above for Windows 10. Namely, you can view cache by running elevated Command Prompt or via Windows Powershell — simply go through the steps for both methods described above.
If you are looking to clear DNS cache on Windows 11, you can also follow the same steps as listed above for Windows 10. You can clear the cache by running a command in Command Prompt.

Or, you can do the same via Windows PowerShell.
Follow the steps above for Clearing DNS Cache on Windows 10. You can also follow the same steps for re-enabling the service as well.
Note that if you do decide to disable DNS cache on Windows 11, the overall performance of your system will be affected. The DNS queries traffic will substantially increase and you will notice that a lot of the websites you visit frequently take much longer to load. If you choose to disable DNS cache on your PC, you will also lose the option to view the cache if you need to diagnose an issue on your system.
In 2022, a staggering 493 million ransomware attacks were detected worldwide, with phishing attacks still remaining the most common type of a cyoersecurity threat. Globally, the average damages associated with data breaches amounted to $4.35 million in 2022.
Also Read: Digital Privacy: Tips on How to Protect Yourself on the Internet
These are scary facts – but they are a good illustration for why you should always protect your privacy.
While clearing the DNS cache is important for protecting your privacy and preventing instances of hacking, it won’t remove all traces of sensitive information. These details include activity history, login details, profile data, and traces of visits to adult websites. Even if you didn’t open them knowingly, you might have been redirected without your knowledge.
Also Read: How to Clear Your Search and Activity History: PC, iPhone and Android
To effectively remove such sensitive data and protect your privacy, you need a reliable program like Auslogics BoostSpeed. The tool helps to clear any kind of confidential information that you wouldn’t want anyone to find.
BoostSpeed comes with all the functionality you might need to keep your PC performing at optimal speeds as well as privacy protection.
Also Read: Speed Up Slow Computer as a Pro – Introducing Auslogics BoostSpeed 13
You will especially find the features under the “Browser Protect” tab quite useful.
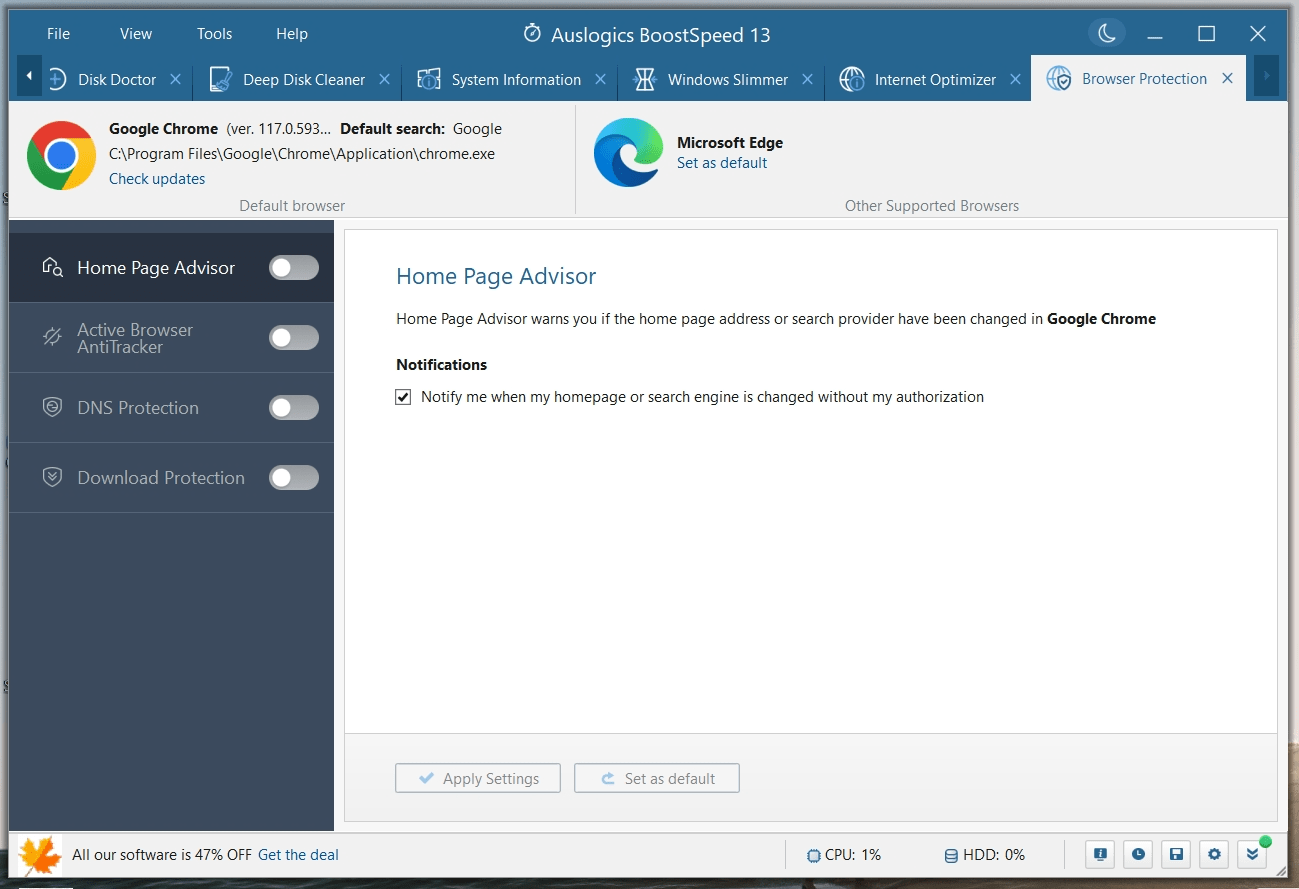
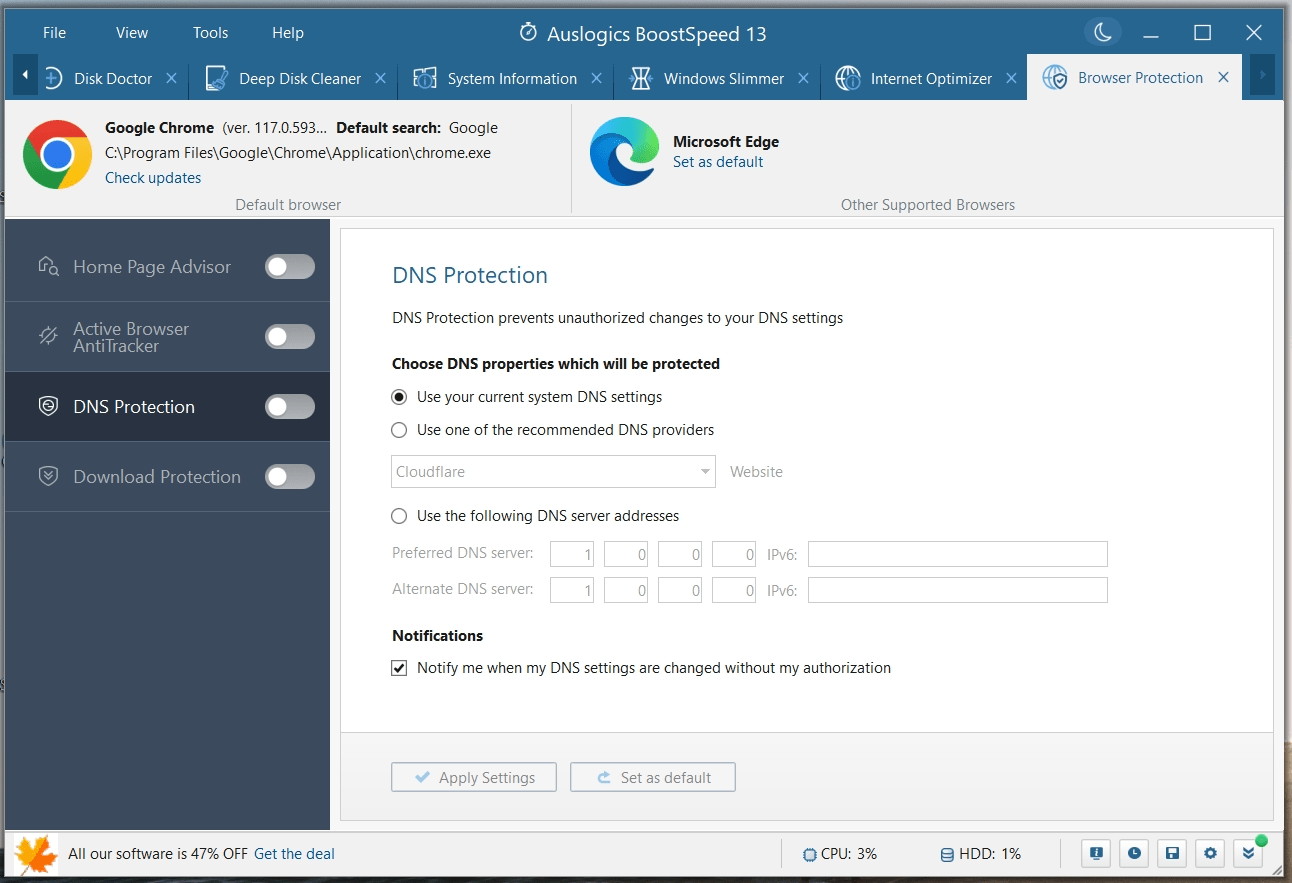
Apart from clearing traces of your activities in your web browsers, system files, and applications, there is also an option to protect your DNS from unauthorized changes. This way, you won’t be worried about DNS spoofing, where attackers alter your DNS records to redirect traffic to fraudulent websites.
If you enable Active Browser AntiTracker, your browsing data will be cleared after every browsing session, further safeguarding your privacy.
![]()
We recommend cleaning up your PC regularly, depending on your usage. Since it’s easy to forget to run maintenance, you can activate an automated scan and choose how often you want the scan to run.
Also Read: Tricks to Get the Most out of Auslogics BoostSpeed Free Trial
Conclusion
Managing your DNS cache on Windows 10/11 is a straightforward process that can improve your internet experience. Viewing the cache allows you to see which domain names have been resolved recently, while clearing it can help resolve connectivity issues, ensure privacy, and keep your system up-to-date. By following the simple steps outlined in this guide, you can easily view and clear your DNS cache, ensuring a smoother and more secure online experience.
FAQ
How to Check DNS Settings in Windows 10?
To check your DNS settings in Windows 10, follow these steps:
- Right-click on the Start button and select “Network Connections” or “Network & Internet Settings.”
- Click on “Change adapter options.”
- Right-click on your active network connection and choose “Properties.”
- Scroll down and find “Internet Protocol Version 4 (TCP/IPv4)” or “Internet Protocol Version 6 (TCP/IPv6)” depending on your network.
- Click “Properties” to view and edit your DNS settings.
Where Are the DNS Address Resolutions Stored?
DNS address resolutions are stored in the DNS cache of your operating system. In Windows, you can view and manage this cache using the Command Prompt or PowerShell with commands like “ipconfig /displaydns” or “Clear-DnsClientCache.”
What Information Is Kept in the DNS Resolver Cache?
The DNS Resolver Cache stores information related to domain name resolutions, including the domain names and their corresponding IP addresses. It may also contain information about recent network connections and domain-related settings.
How Long Does DNS Cache Last?
The duration for which DNS cache entries last can vary. DNS records have a time-to-live (TTL) value, set by the domain’s authoritative DNS server. Cache entries typically expire when the TTL value reaches zero, or when the cache is manually cleared. Common TTL values range from a few minutes to several days, depending on the domain and its configuration.
Download Windows Speedup Tool to fix errors and make PC run faster
In this post, we will show you how to view the DNS cache contents in Windows 11/10. DNS cache refers to the temporary storage of information about previous DNS lookups on a machine’s OS or web browser.
The DNS cache contains a list of remote server names and the IP addresses (if any) they correspond to. Entries in this cache come from DNS lookups that happen when attempting to visit Web sites, named FTP servers, and other remote hosts. Windows uses this cache to improve the performance of Web-based applications.
Using Command Prompt
To view the DNC cache contents, execute the following command in an elevated CMD:
ipconfig /displaydns
The results will be displayed.
- Record name is the name you query DNS for, and the records belong to that name.
- Record type is the type, displayed as a number or name. In the DNS protocol, each has a number.
- Time To Live is the time in seconds after which the cache entry must expire.
- Data Length is the length in bytes, eg- An IPv4 address is 4 bytes; IPv6 is 16 bytes.
- Section of a DNS reply is the actual answer to the query,
- Additional contains information that will likely be needed to find the actual answer.
- CNAME is the canonical name.
If you wish to export the results, you can use the command ipconfig /displaydns > dnscachecontents.txt to save the output in the text document dnscachecontents.txt.
Using PowerShell

If you wish to get you the same information as a collection of DNS record objects which can easily be exported or saved in a database, run the following cmdlet in PowerShell:
Get-DnsClientCache
This command will list the Help information:
Help Get-DnsClientCache -full
You can also use the following command to get better formatting:
Get-DnsClientCache | Format-Table -AutoSize
How to clear the DNS cache
You can use the command to flush DNS Cache in the command prompt:
ipconfig /flushdns
Our freeware FixWin for Windows, let you flush the DNS cache, etc., in a click.
Turn Off or Turn On DNS Cache
To turn off DNS caching for a particular session, type net stop dnscache and hit Enter.
To turn on DNS caching, type net start dnscache and hit Enter.
Of course, when you restart the computer, the DNC caching will, in any case, be turned on.
Disable DNS Cache
If for some reason you wish to disable DNS caching, type services in Start search and hit Enter to open the Services Manager. Here locate the DNS Client service.
The DNS Client service (dnscache) caches Domain Name System (DNS) names and registers the full computer name for this computer. If the service is stopped, DNS names will continue to be resolved. However, the results of DNS name queries will not be cached and the computer’s name will not be registered. If the service is disabled, any services that explicitly depend on it will fail to start.
Double-click on it to open its Properties box. Here change its startup type from Manual to Disabled. If you disable the DNS Client service, DNS Lookups may take longer.
These resources may also interest you:
- How to change DNS settings in Windows
- Manage web browsing speed by changing DNS settings
- Check if your DNS settings have been compromised.
Anand Khanse is the Admin of TheWindowsClub.com, a 10-year Microsoft MVP (2006-16) & a Windows Insider MVP (2016-2022). Please read the entire post & the comments first, create a System Restore Point before making any changes to your system & be careful about any 3rd-party offers while installing freeware.
Кэш DNS — это временная база данных, которая содержит записи обо всех последних посещениях и попытках посещений сайтов. Прямых вариантов просмотра DNS кэша нет, у нас можно воспользоваться бесплатным инструментом под названием DNS Cache Viewer.

Программа совместима с версиями Windows XP, 7, 8, 8.1, 10. В интерфейсе приложения можно увидеть все записи в DNS кэше. Помимо просмотра, его можно также очищать.
Скачать DNS Cache
Спасибо, что читаете! На данный момент большинство моих заметок, статей и подборок выходит в telegram канале «Левашов». Обязательно подписывайтесь, чтобы не пропустить новости мира ИТ, полезные инструкции и нужные сервисы.
Респект за пост! Спасибо за работу!
Хотите больше постов в блоге? Подборок софта и сервисов, а также обзоры на гаджеты? Сейчас, чтобы писать регулярно и радовать вас большими обзорами, мне требуется помощь. Чтобы поддерживать сайт на регулярной основе, вы можете оформить подписку на российском сервисе Boosty. Или воспользоваться ЮMoney (бывшие Яндекс Деньги) для разовой поддержки:
Заранее спасибо! Все собранные средства будут пущены на развитие сайта. Поддержка проекта является подарком владельцу сайта.