Download Windows Speedup Tool to fix errors and make PC run faster
If you have enabled Windows Sandbox on your Windows 11 or Windows 10 computer, you can configure & manage a sandbox on your device using the Sandbox Configuration Manager. In this post, we will show you how to transfer Files to Windows Sandbox in Windows 11/10.

To get the most out of the sandbox, with the Windows Sandbox running, you can easily transfer files. As a security precaution, you might want to transfer an application’s exe file from the host machine to Windows Sandbox to test that application. By copying or transferring, you can install and execute the application in the sandbox.
If you need to copy, move, or get files into Windows Sandbox on your Windows 11/10 machine, you can do so in either of two ways as follows:
- Copy and Paste into Windows Sandbox
- Map a shared folder to Windows Sandbox
Let’s see both of the aforementioned methods in detail.
1] Copy and Paste into Windows Sandbox

The good old copy and paste is the easiest and quickest way to transfer files to Windows Sandbox in Windows 11/10. To transfer a file from your main Windows operating system (the Host), simply right-click on a file you want to transfer and select Copy, then go into the Windows Sandbox (the Guest) and right-click on the desktop and click on Paste to transfer the file. Likewise, you can transfer files from the Sandbox to the main OS.
The drawback or disadvantage of this easy method is that the transferred files are deleted as soon as you close or shut down the Windows Sandbox.
2] Map a shared folder to Windows Sandbox
In contrast to the above, with this method, the transferred files are persistent – which means the files will be always available in the sandbox. For this method, you have to map a Shared folder with Windows Sandbox. Once done, you can then transfer the target file or folder to the shared folder, and you can access it from the Windows Sandbox.
To map a shared folder to Windows Sandbox on Windows 11/10, you simply need to create a Windows Sandbox configuration file – here’s how:
- On the host OS, press Windows key + E to open File Explorer.
- In File Explorer, in the root directory, create a new folder and name the folder WS Config Files.
- Next, double-click the new folder to open it.
- In the open folder, right-click and select New > Text Document and name the file, say, MappedFolders.wsb (or any preferred name but must have the .wsb extension).
- Next, right-click the WSB file and select Open with > Notepad or any Text Editor.
- Now, copy and paste the code below into the Notepad. Replace the C:\Path\to\Folder placeholder with the actual path of the folder you want to share or map.
<Configuration>
  <MappedFolders>
    <MappedFolder>
      <HostFolder>C:\Path\to\Folder</HostFolder>
      <ReadOnly>false</ReadOnly>
    </MappedFolder>
  </MappedFolders>
</Configuration>
- Finally, save the file and exit Notepad.
Now, double-click on the MappedFolders.wsb file to launch Windows Sandbox. In the sandbox, you will see the shared folder directly on the Desktop because Windows Sandbox mounts shared folders directly on the desktop and not in the Network node in File Explorer navigation pane.
On a final note, if you launch Windows Sandbox directly from the Start menu, you will not see the shared folders. So, to access the shared folders in Windows Sandbox, you have to launch the folder using the configuration file.
You can read more about the Windows Sandbox Config Files here on microsoft.com.
That’s it!
Where does Windows Sandbox store files?
Behind every Hyper-V based VM there is a VHDx file, a virtual disk that is used by the machine. The working folder of an actively running sandbox can be accessed in the following location %PROGRAMDATA%\Microsoft\Windows\Containers.
What can you do with Windows Sandbox?
In a nutshell, Windows Sandbox is a half app, half virtual machine. It lets PC users quickly create a live virtual clean OS imaged from your system’s current state so that you can test programs or files in a secure environment that’s isolated from your main system. When you close the sandbox, it destroys that state.
Can you get a virus in Windows Sandbox?
But while malware executed within the sandbox cannot directly access the drives of the primary operating system, it can still communicate with other devices on your network. Because of this, Windows Sandbox is unable to provide network-level isolation. Sandbox can prevent viruses/malware from escaping into your real computer. However, common sense dictates that it is preferable to prevent the virus from running in the first place.
Is Windows Sandbox completely isolated?
While fully isolated in terms of code execution, Windows Sandbox doesn’t provide network isolation. Malware can access and attack other devices accessible by the host, even if behind a Network Access Control (NAC). So, it’s imperative to point out that Windows Sandbox is not completely isolated. Windows Sandbox runs as a virtual machine and its contents are destroyed when you shut it down.
Obinna has completed B.Tech in Information & Communication Technology. He has worked as a System Support Engineer, primarily on User Endpoint Administration, as well as a Technical Analyst, primarily on Server/System Administration. He also has experience as a Network and Communications Officer. He has been a Windows Insider MVP (2020) and currently owns and runs a Computer Clinic.
Need to copy, move, or get files into Windows Sandbox? It is pretty straightforward. Here is how to transfer files to the Windows sandbox.
If there is one feature that I’m glad Microsoft added to Windows 10 and 11 is the Windows Sandbox. As the name implies, Windows Sandbox is a simple yet effective way to test Windows settings, configurations, and trusted or untrusted applications.
To get the most out of the sandbox, you should be able to transfer files to Windows Sandbox. For example, you might have to transfer an application’s exe file from the host machine to Windows Sandbox to test that application. Copying or transferring a file helps you install and execute the application in the sandbox.
However, to make Windows Sandbox as secure as possible, there are limited ways to transfer files to and from Windows Sandbox. The good thing is, if you want to move files to Windows Sandbox or get files into Windows Sandbox, it is pretty easy to do.
Let me show you how to transfer files to Windows Sandbox in simple and easy steps.
Table of contents:
- Copy and paste to transfer files
- Use a Windows Sandbox configuration file
- What is Windows Sandbox?
Note: The steps below will work in Windows 10 and 11.
Note: I assume you have already enabled Windows Sandbox. If not, enable Windows Sandbox and then follow the below steps.
Copy and paste to transfer files to Windows Sandbox
One of the easiest ways to transfer files to Windows Sandbox is copying and pasting. i.e., copy the file or folder you want to transfer and paste it into the sandbox. It is that simple. Of course, you can copy and paste multiple files at a time.
Here are the exact steps if you need more guidance.
First, open the Windows Sandbox. You can search for it in the Start menu.
After opening the Windows Sandbox, copy the file or folder you want to transfer with the “Ctrl + C” keyboard shortcut.
Next, go to the Windows Sandbox desktop and paste it with the “Ctrl + V” keyboard shortcut. Depending on the file or folder size, it can take a couple of seconds to transfer. Once done, you will see it on the sandbox desktop.

Remember that the transferred file or folder is deleted from the sandbox environment when you close the Windows Sandbox. This is because Windows will revert all changes made to the sandbox environment when you close it. This includes deleting files or folders you created or transferred. If you want the transferred files to be always available, follow the second method.
Note: You would think drag and drop would work in Windows Sandbox. However, as of writing this, Windows Sandbox doesn’t support drag and drop.
Use a Windows Sandbox configuration file to transfer files
The disadvantage of the first method, though easy, is that the transferred files are not persistent. The transferred files are deleted as soon as you close or shut down the Windows Sandbox.
If you want the files to be always available, you have to map a shared folder with Windows Sandbox. Once done, transfer the target file or folder to the shared folder, and you can access it from the Windows Sandbox.
The good thing is, it is pretty easy to do.
You need to create a Windows Sandbox configuration file called “MappedFolders.wsb” using Notepad, paste a configuration script, type the shared folder path in the added script, save it, and launch Windows Sandbox using that script. All this will show the mapped folder on the Windows Sandbox desktop.

You can access all the files and folders as and when needed, provided that you’ve first transferred them to the shared folder.
I’ve already written a detailed guide on mapping a shared folder to Windows Sandbox. Follow the linked guide, and you are good to go. You should be able to transfer files to Windows Sandbox in Windows 10 and 11 via the mapped shared folder.
What is Windows Sandbox?
If you don’t know, Windows Sandbox is a virtual OS environment within Windows 10 and 11. Windows Sandbox acts as a full-fledged OS with some minor limitations. However, it is still pretty lightweight compared to complete virtual machines created using VMware or VirtualBox. The good thing is that anything you do in Windows Sandbox stays inside the sandbox. That means you can safely test software and Windows settings without worrying about how it affects your main computer.
—
That is all. It is simple to copy, move, or transfer files to Windows Sandbox in Windows 10 and 11.
I hope this simple and easy Windows how-to guide helped you.
If you are stuck or need some help, comment below, and I will try to help as much as possible.
Если вы включили песочницу Windows на своем компьютере с Windows 11 или Windows 10, вы можете настраивать и управлять песочницей на своем устройстве с помощью диспетчера конфигурации песочницы. В этом посте мы покажем вам, как перенести файлы в песочницу Windows в Windows 11/10.

Чтобы получить максимальную отдачу от песочницы, с запущенной песочницей Windows вы можете легко передавать файлы. В качестве меры безопасности вы можете перенести исполняемый файл приложения с хост-компьютера в песочницу Windows, чтобы протестировать это приложение. Скопировав или перенеся, вы можете установить и запустить приложение в песочнице.
Если вам нужно скопировать, переместить или получить файлы в песочнице Windows на вашем компьютере с Windows 11/10, вы можете сделать это одним из двух следующих способов:
- Скопируйте и вставьте в песочницу Windows
- Сопоставьте общую папку с Windows Sandbox
Давайте подробно рассмотрим оба вышеупомянутых метода.
1]Скопируйте и вставьте в песочницу Windows
Старое доброе копирование и вставка — самый простой и быстрый способ перенести файлы в песочницу Windows в Windows 11/10. Чтобы передать файл из вашей основной операционной системы Windows (хост), просто щелкните правой кнопкой мыши файл, который вы хотите передать, и выберите «Копировать», затем войдите в «песочницу» Windows (гость), щелкните правой кнопкой мыши на рабочем столе и выберите «Копировать». Вставьте, чтобы передать файл. Точно так же вы можете передавать файлы из Песочницы в основную ОС.
Недостатком или недостатком этого простого метода является то, что переданные файлы удаляются, как только вы закрываете или завершаете работу Windows Sandbox.
2]Сопоставьте общую папку с песочницей Windows.
В отличие от вышеописанного, при этом методе передаваемые файлы являются постоянными — это означает, что файлы всегда будут доступны в песочнице. Для этого метода вам необходимо сопоставить общую папку с песочницей Windows. После этого вы можете перенести целевой файл или папку в общую папку и получить к ней доступ из песочницы Windows.
Чтобы сопоставить общую папку с Windows Sandbox в Windows 11/10, вам просто нужно создать файл конфигурации Windows Sandbox с именем MappedFolders.wsb — вот как это сделать:
- В хост-ОС нажмите клавишу Windows + E, чтобы открыть проводник.
- В проводнике в корневом каталоге создайте новую папку и назовите ее WS Config Files.
- Затем дважды щелкните новую папку, чтобы открыть ее.
- В открытой папке щелкните правой кнопкой мыши и выберите «Создать» > «Текстовый документ» и назовите файл MappedFolders.wsb (или любое предпочтительное имя, но оно должно иметь расширение .wsb).
- Затем щелкните правой кнопкой мыши файл WSB и выберите «Открыть с помощью»> «Блокнот» или любого текстового редактора.
- Теперь скопируйте и вставьте приведенный ниже код в Блокнот. Заменить C:\Путь\к\Папке заполнитель с фактическим путем к папке, которой вы хотите поделиться или сопоставить.
C:\Path\to\Folder false
- Наконец, сохраните файл и выйдите из Блокнота.
Теперь дважды щелкните по MappedFolders.wsb файл для запуска песочницы Windows. В песочнице вы увидите общую папку непосредственно на рабочем столе, поскольку Windows Sandbox монтирует общие папки непосредственно на рабочем столе, а не в узле «Сеть» в области навигации проводника.
И наконец, если вы запустите Windows Sandbox непосредственно из меню «Пуск», вы не увидите общие папки. Итак, чтобы получить доступ к общим папкам в Windows Sandbox, вам нужно запустить папку с помощью файла конфигурации.
Вот и все!
Где Windows Sandbox хранит файлы?
За каждой виртуальной машиной на основе Hyper-V находится файл VHDx, виртуальный диск, который используется машиной. Доступ к рабочей папке активно работающей песочницы можно получить следующим образом. %PROGRAMDATA%\Microsoft\Windows\Контейнеры.
Что вы можете делать с песочницей Windows?
Короче говоря, Windows Sandbox — это наполовину приложение, наполовину виртуальная машина. Это позволяет пользователям ПК быстро создавать живую виртуальную чистую ОС, созданную на основе текущего состояния вашей системы, чтобы вы могли тестировать программы или файлы в безопасной среде, изолированной от вашей основной системы. Когда вы закрываете песочницу, она уничтожает это состояние.
Можно ли заразиться вирусом в песочнице Windows?
Но хотя вредоносные программы, запущенные в песочнице, не могут получить прямой доступ к дискам основной операционной системы, они все же могут взаимодействовать с другими устройствами в вашей сети. Из-за этого Windows Sandbox не может обеспечить изоляцию на уровне сети. Песочница может предотвратить проникновение вирусов/вредоносных программ на ваш реальный компьютер. Однако здравый смысл подсказывает, что предпочтительнее предотвратить запуск вируса.
Является ли песочница Windows полностью изолированной?
Хотя Windows Sandbox полностью изолирована с точки зрения выполнения кода, она не обеспечивает изоляцию сети. Вредоносное ПО может получить доступ к другим устройствам, доступным хосту, и атаковать их, даже если они находятся за системой контроля доступа к сети (NAC). Поэтому необходимо отметить, что Windows Sandbox не полностью изолирована. Песочница Windows работает как виртуальная машина, и ее содержимое уничтожается при ее закрытии.
![]()
![]()
![]()
Windows Sandbox is a terrific feature introduced into Windows 10 and 11 (Pro versions only) which allows users to test software or surf around unknown sites in a safe/secure isolated environment.
- Please read: Surf & Test Software Safely in Windows Sandbox
But did you know you can easily share files and/or folders from the host system with the Windows Sandbox? Here’s how.
Believe it or not, this is achieved via a simple copy and paste.
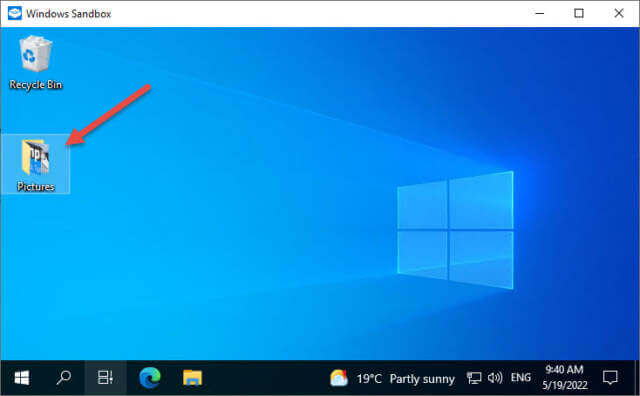
- Navigate to the file or folder in the host system that you want to share with Windows Sandbox
- Right-click the file/folder and select Copy
- Move your mouse cursor into the Windows Sandbox and right-click any blank space
- From the menu, select Paste
That’s all there is to it. Because you’re working with a “copy” the original file or folder remains secure and untouched.
There is another method for sharing folders from the host system with Windows Sandbox through mapping which is achieved via the Windows Sandbox Configuration file. However, this method is somewhat complex and, as such, more suited for advanced users. Plus, as far as I am aware, mapping “shares” a folder with the host system rather than “copying” the folder from the host system which, in my opinion, creates a security risk.
That said, if you want to know more about mapping a folder, here is a guide from Microsoft: Windows Sandbox Configuration
—
Нужно копировать, перемещать или помещать файлы в песочницу Windows? Это довольно просто. Вот как перенести файлы в песочницу Windows.
Если есть одна функция, которую Microsoft добавила в Windows 10 и 11, я рад, что это Windows Sandbox. Как следует из названия, Windows Sandbox — это простой, но эффективный способ проверить параметры, конфигурации и доверенные или ненадежные приложения Windows.
Чтобы получить максимальную отдачу от песочницы, вы должны иметь возможность передавать файлы в песочницу Windows. Например, вам может потребоваться перенести исполняемый файл приложения с хост-компьютера в песочницу Windows, чтобы протестировать это приложение. Копирование или передача файла помогает установить и запустить приложение в песочнице.
Однако, чтобы сделать Windows Sandbox максимально безопасной, существует ограниченное количество способов передачи файлов в Windows Sandbox и из нее. Хорошо, что если вы хотите переместить файлы в Песочницу Windows или получить файлы в Песочницу Windows, это довольно легко сделать.
Позвольте мне показать вам, как легко и просто перенести файлы в Windows Sandbox.
Оглавление:
Примечание. Следующие шаги будут работать в Windows 10 и 11.
Примечание. Я предполагаю, что вы уже включили песочницу Windows. Если нет, включите песочницу Windows, а затем выполните следующие шаги.
Один из самых простых способов переноса файлов в Windows Sandbox — копирование и вставка. т. е. скопируйте файл или папку, которые вы хотите передать, и вставьте их в песочницу. Это так просто. Конечно, вы можете копировать и вставлять несколько файлов одновременно.
Вот точные шаги, если вам нужно больше рекомендаций.
Сначала откройте песочницу Windows. Вы можете найти его в меню «Пуск».
После открытия «Песочницы» Windows скопируйте файл или папку, которые вы хотите перенести, с помощью сочетания клавиш «Ctrl + C».
Затем перейдите на рабочий стол Windows Sandbox и вставьте его с помощью сочетания клавиш «Ctrl + V». В зависимости от размера файла или папки передача может занять несколько секунд. После этого вы увидите его на рабочем столе песочницы.
Помните, что переданный файл или папка удаляются из среды песочницы, когда вы закрываете песочницу Windows. Это связано с тем, что Windows отменит все изменения, внесенные в среду песочницы, когда вы ее закроете. Это включает в себя удаление файлов или папок, которые вы создали или передали. Если вы хотите, чтобы переданные файлы всегда были доступны, следуйте второму способу.
Примечание. Можно подумать, что перетаскивание будет работать в песочнице Windows. Однако на момент написания этой статьи Windows Sandbox не поддерживает перетаскивание.
Используйте файл конфигурации Windows Sandbox для передачи файлов
Недостаток первого метода, хотя и простого, заключается в том, что передаваемые файлы не являются постоянными. Передаваемые файлы удаляются, как только вы закрываете или завершаете работу Windows Sandbox.
Если вы хотите, чтобы файлы всегда были доступны, вам необходимо сопоставить общую папку с песочницей Windows. После этого перенесите целевой файл или папку в общую папку, и вы сможете получить к ней доступ из песочницы Windows.
Хорошо, что это довольно легко сделать.
Вам необходимо создать файл конфигурации Windows Sandbox с именем «MappedFolders.wsb» с помощью Блокнота, вставить сценарий конфигурации, ввести путь к общей папке в добавленном сценарии, сохранить его и запустить Windows Sandbox с помощью этого сценария. Все это покажет сопоставленную папку на рабочем столе Windows Sandbox.
Вы можете получить доступ ко всем файлам и папкам по мере необходимости, при условии, что вы предварительно перенесли их в общую папку.
Я уже написал подробное руководство по сопоставлению общей папки с песочницей Windows. Следуйте связанному руководству, и все готово. Вы должны иметь возможность передавать файлы в Windows Sandbox в Windows 10 и 11 через сопоставленную общую папку.
Что такое песочница Windows?
Если вы не знаете, Windows Sandbox — это среда виртуальной ОС в Windows 10 и 11. Windows Sandbox действует как полноценная ОС с некоторыми незначительными ограничениями. Тем не менее, он все еще довольно легкий по сравнению с полными виртуальными машинами, созданными с помощью VMware или VirtualBox. Хорошо то, что все, что вы делаете в песочнице Windows, остается внутри песочницы. Это означает, что вы можете безопасно тестировать программное обеспечение и настройки Windows, не беспокоясь о том, как это повлияет на ваш основной компьютер.
—
Это все. Копировать, перемещать или передавать файлы в песочницу Windows в Windows 10 и 11 очень просто.
Я надеюсь, что это простое и понятное руководство по Windows помогло вам.
Если вы застряли или вам нужна помощь, оставьте комментарий ниже, и я постараюсь помочь как можно больше.