В этой статье я расскажу о способах, которыми можно подключить телевизор к Windows 11. Точнее к ноутбуку или компьютеру, который работает на этой операционной системе. Такое подключение чаще всего используют для трансляции экрана компьютера на телевизор. Задачи могут быть разные: использование телевизора в качестве монитора, просмотр фильмов, игры, вывод презентаций и т. д. Выполнить соединение Windows 11 и телевизора можно как с помощью HDMI кабеля, так и без проводов, по Wi-Fi. Больше всего возможностей у телевизоров со Smart TV. Но с помощью отдельных устройств, или кабеля, можно подключиться к телевизору без Smart TV.
Я подключал свой ноутбук на Windows 11 к телевизору наверное всеми возможными способами. В этой статье мы рассмотрим такие решения:
- Через HDMI кабель. Самый просто и надежный способ. HDMI-вход есть практически на всех телевизорах, а выход есть на всех ноутбуках (на некоторых моделях через переходник) и компьютерах. При таком подключении Windows 11 будет использовать телевизор как монитор. Нет задержки при выводе видео и звука.
- Без проводов, по Miracast. Технология Miracast поддерживается на большинстве ноутбуков с установленной Windows 11 и используется для беспроводной передачи изображения и звука на телевизоры с поддержкой Miracast. Можно полностью дублировать экран компьютера на телевизор и передавать звук буз проводов.
- Через Wi-Fi или LAN c помощью технологии DLNA. Все компьютеры, которые работают на Windows 11 поддерживают DLNA. Поддержка этой технологии есть на всех Smart TV телевизорах. С ее помощью можно транслировать отдельные видео, фото и аудио файлы. Полностью дублировать экран по DLNA нельзя. ПК и телевизор должны находиться в одной сети.
- Протокол Google Cast. Это технология от Google, которая позволяет транслировать потоковое видело и аудио на устройства, которые поддерживают Google Cast. В Windows 11 транслировать контент можно с браузера Google Chrome и других приложение с поддержкой Google Cast. Поддержка этой технологии есть на всех телевизорах и Smart TV приставках, которые работают на Android TV. Для других устройств придется покупать адаптер Chromecast. Я не буду подробно рассматривать этот способ в статье, так как уже писал о нем в отдельной статье: Google Cast на телевизоре с Android TV. Что это, как настроить и как пользоваться?
Если вы не знаете, есть ли в вашем телевизоре Smart TV, то смотрите эту статью: функция Smart TV в телевизоре: есть или нет, как проверить. Если есть, то скорее всего телевизор поддерживает Miracast, DLNA и Google Cast (только на Android TV).
Все эти способы я проверил на собственных устройствах. Выполнял подключение ноутбука к телевизору LG и Philips. Но на других телевизорах, например Samsung, Xiaomi, Sony, Ergo, Hisense и т. д. тоже все работает.
Через HDMI кабель
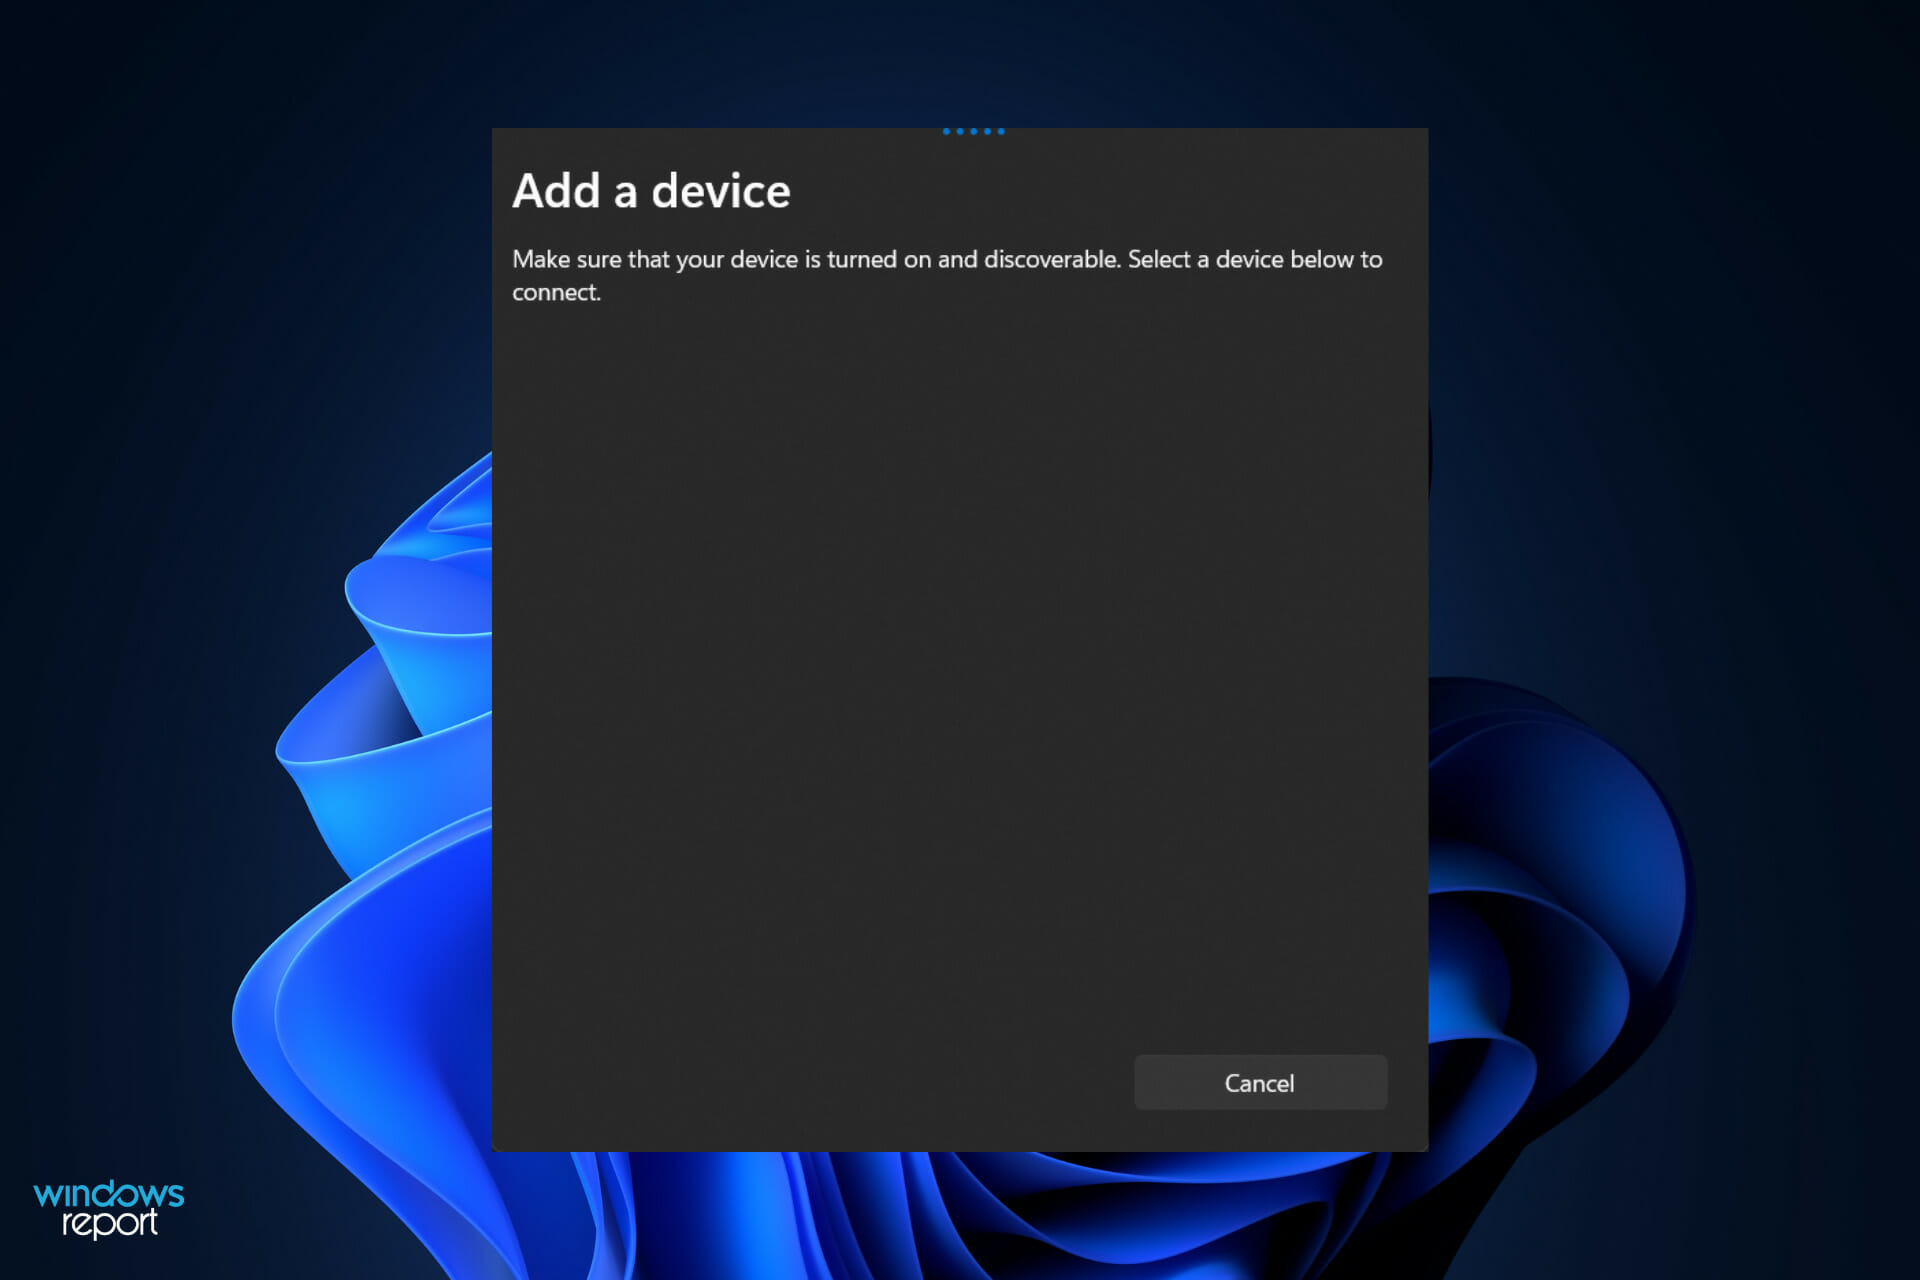
Подключение Windows 11 к телевизору без проводов
Miracast позволяет соединить Windows 11 с телевизором без проводов. Соединение происходит напрямую, через беспроводной адаптер компьютера (ноутбука) и телевизора. Это значит, что нам понадобится компьютер с Wi-Fi (в ПК встроенного Wi-Fi адаптера может не быть) и телевизор с Wi-Fi модулем. Соединение этим способом позволяет полностью транслировать экран (изображение) и звук. Но при таком соединении может быть задержка в передаче картинки и звука.
Более подробную инструкцию и решения самых популярных проблем с Miracast в Windows 11 вы можете посмотреть в отдельной статье: беспроводной дисплей в Windows 11: как включить Miracast и подключиться к телевизору.
Через Wi-Fi по технологии DLNA
Важно понимать, что по DLNA нет возможности полностью дублировать экран компьютера на телевизор, как через HDMI или Miracast. На телевизор можно отправлять (воспроизводить) отдельные видео, фото и аудио файлы. Можно запустить просмотр фильма, воспроизведение музыки, или вывести фото. При этом соединение происходит по локальной сети. Это значит, что компьютер и телевизор должны быть подключены к одной локальной сети (к одному роутеру). Подключение может быть по Wi-Fi, или с помощью кабеля.
Поддержка DLNA есть на всех компьютерах с Windows 11. Так же практически все телевизоры со Smart TV поддерживаю DLNA.
На сайте есть отдельная статья: настройка DLNA сервера в Windows 11. Как подключить телевизор и вывести на него видео, фото, музыку. В ней я показывал все более подробно. Можно настроить доступ с телевизора к определенным папкам на компьютере. Это позволит запускать воспроизведение файлов с телевизора. Нужно только включить потоковую передачу мультимедиа в Windows 11 и добавить папки с файлами в библиотеку.
by Loredana Harsana
Loredana is a passionate writer with a keen interest in PC software and technology. She started off writing about mobile phones back when Samsung Galaxy S II was… read more
Updated on
- Windows 11’s HDMI port not working is a common issue our users face and it seems to be due to dusty cables.
- Another cause is plugging the wire in the wrong port. To fix it, simply change the port.
- Otherwise, performing a Windows update will surely solve the internal bug in no time.
XINSTALL BY CLICKING THE DOWNLOAD
FILE
HDMI is often used to move your display from a computer to a second monitor or television, as well as from video game consoles to your television, among other things.
However, in order to ensure that this functions effectively, it is critical to ensure that the cables are properly configured otherwise you will get error messages and bugs such as Windows 11 HDMI to TV not working properly.
It is our goal in this article to show you how to quickly and easily resolve a variety of typical issues that you may have when utilizing HDMI connections on your Windows PC. This includes a lack of drivers, outdated OS, dusty cables, and others.
But first, let’s see what the cable’s nomenclature differentiates from one another. Follow along as later we will also talk about wire speeds. Keep up with us!
What do HDMI 1.4, 2.0, and 2.1 mean?
The 1.4 specification was published well than a decade ago, and all HDMI cables are made to at least that level of quality. It was developed to look ahead to 4K and set certain criteria to enable support for it in the future (from 2009) by providing enough bandwidth for 4K video at up to 24 FPS.
The HDMI 2.0 specification was first published in 2013, and later amended into 2.0a and 2.0b versions in 2015 and 2016, respectively. The maximum bandwidth of HDMI cables was increased from 10.2Gbps to 18Gbps as a result of this specification.
Having the capacity to handle 4K video at 60 frames per second with all sorts of high dynamic range helped to solidify 4K support even further, and also established the framework for 8K support as well.
As of 2018, HDMI 2.1 has been released, and it is designed to enable 8K and greater images while providing a maximum bandwidth of 48Gbps. The HDMI 2.1 protocol is capable of supporting 4K and 8K video at frame rates of up to 120 frames per second with plenty of headroom.
If you aren’t planning on purchasing an 8K television anytime soon, the 2.1 standard is mostly essential for high-end gaming, as gaming PCs and the latest game consoles have the capacity to deliver frame rates greater than 60 frames per second in 4K.
How we test, review and rate?
We have worked for the past 6 months on building a new review system on how we produce content. Using it, we have subsequently redone most of our articles to provide actual hands-on expertise on the guides we made.
For more details you can read how we test, review, and rate at WindowsReport.
These requirements are all crucial for ensuring that media streamers and other devices can transmit and that televisions can receive enough data to perform their functions, but they aren’t all that important for the cables themselves.
What can I do if HDMI port is not working in Windows 11?
1. Clean your HDMI port
Consider performing one of the most basic troubleshooting methods for HDMI issues on Windows 11 before becoming overly concerned: disconnecting and reconnecting the cable.
Before you connect it back in, make sure to manually or, better yet, with bottled air, blow out any dust that has accumulated in the port. In addition, you should visually verify the wire to ensure that it is not damaged.
If this is the case, you should replace the wire, since it is most likely the source of your difficulties. After you’ve completed this, you should reset the cable on both ends. Note that the solution also works for Windows 11 HDMI audio not working errors.
2. Try another HDMI port
When you try to connect your Windows 11 PC to HDMI, do you notice that there are two or more HDMI ports available? It’s most likely a sign that you’re using a graphics card and that your cable is plugged into the incorrect connector.
Some computers are equipped with integrated graphics, which contain an HDMI connector that is connected to the motherboard by a ribbon cable. If you have a graphics card, make sure the wire is plugged into the HDMI port on the graphics card rather than the port on the motherboard.
Hopefully, this will resolve the situation. Also, if your GPU has many HDMI ports, try a different one on each of your computers.
3. Update drivers
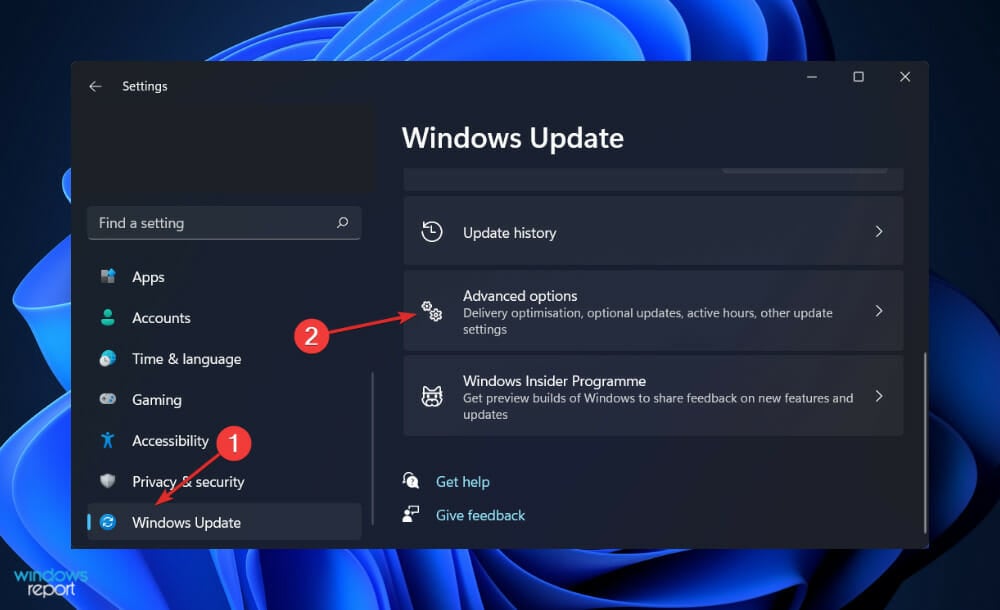
- Press the Windows key + I to open the Settings window then tap on Windows Update followed by Advanced options.

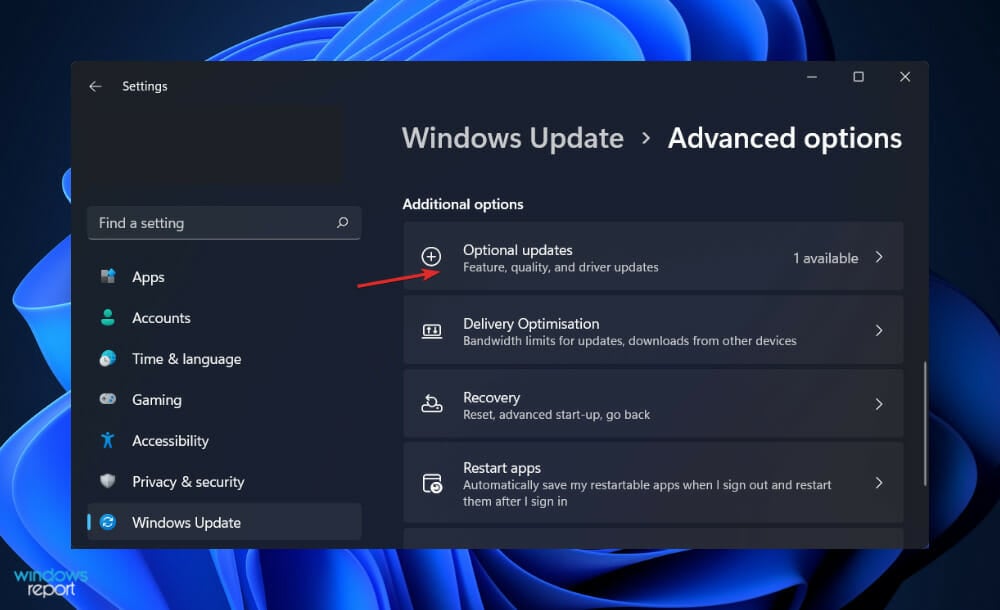
- Scroll down and navigate to Additional options section then tap on the Optional updates option.
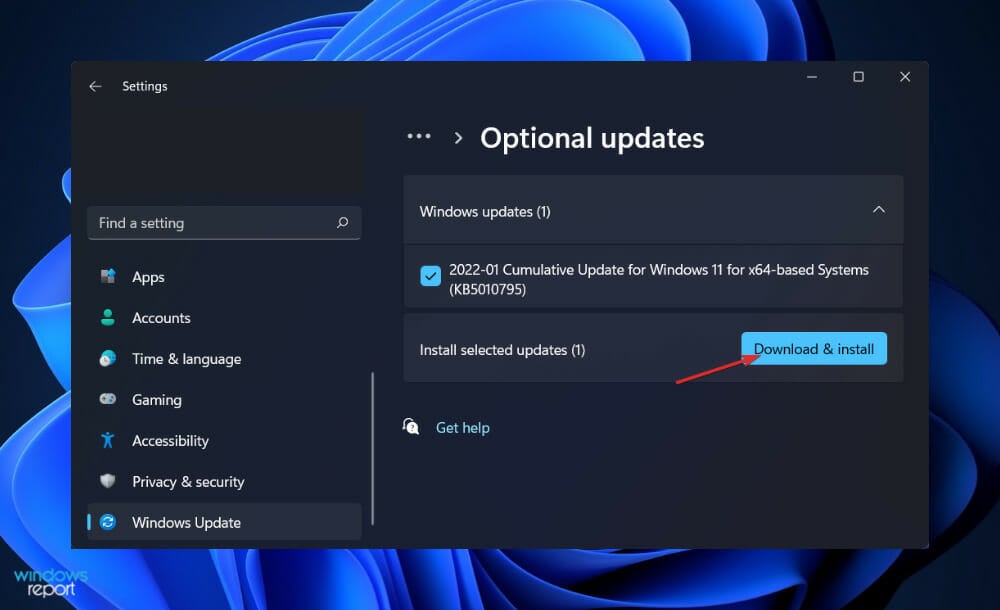
- Now click on the Driver Updates option then select all the updates you are presented with, and lastly, click on the Download & install button.
Although Windows is generally in charge of driver updates, if you encounter difficulty, you can manually check for updates. We strongly advise using a specialist program for automatic scans of outdated drivers such as Outbyte Driver Updater.
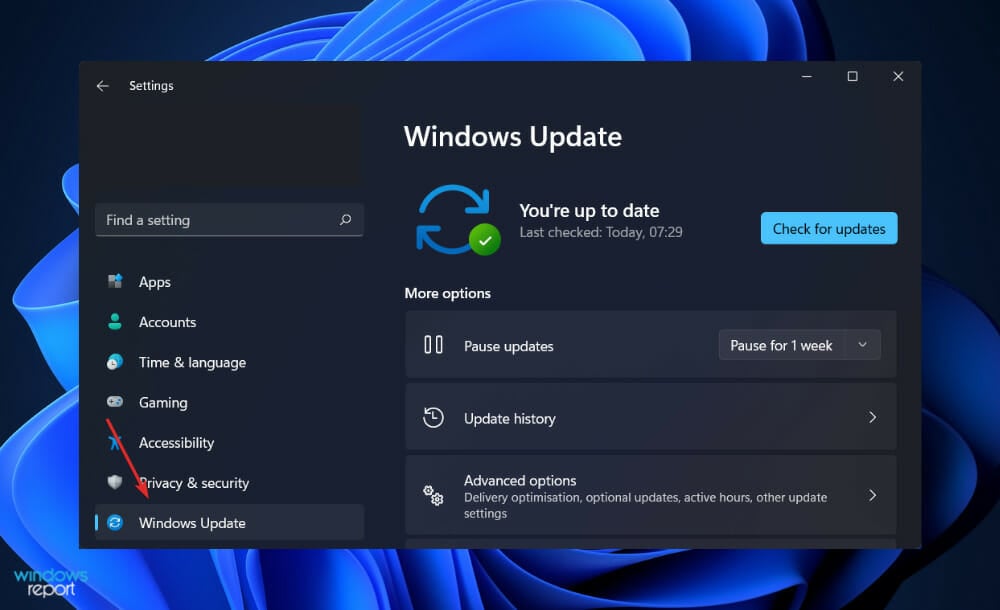
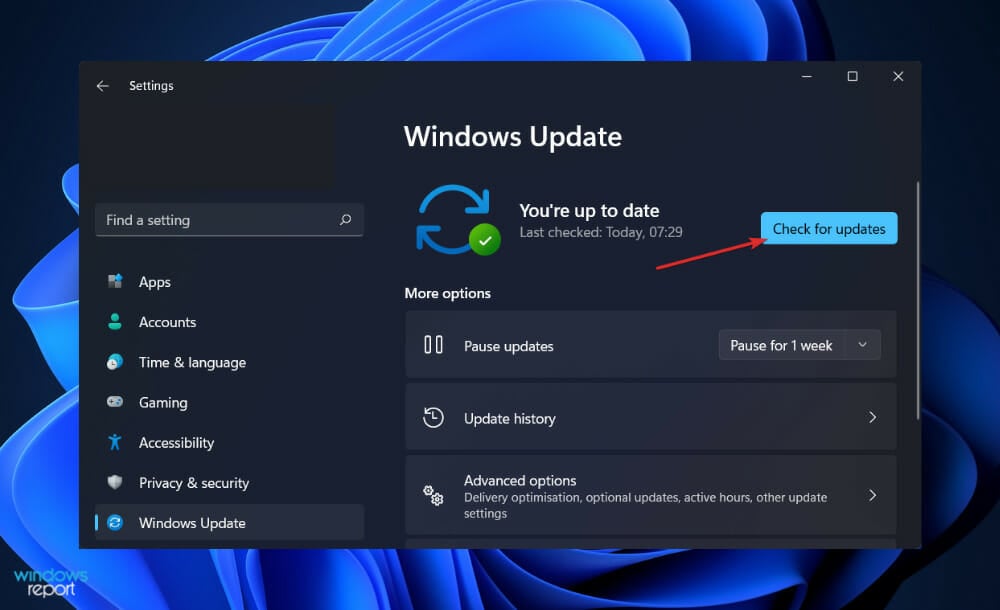
4. Update Windows
- Press the Windows key + I to open the Settings window, then click on Windows Update from the left menu presented to you.
- Now click on Check for updates of Install updates depending on what you get.
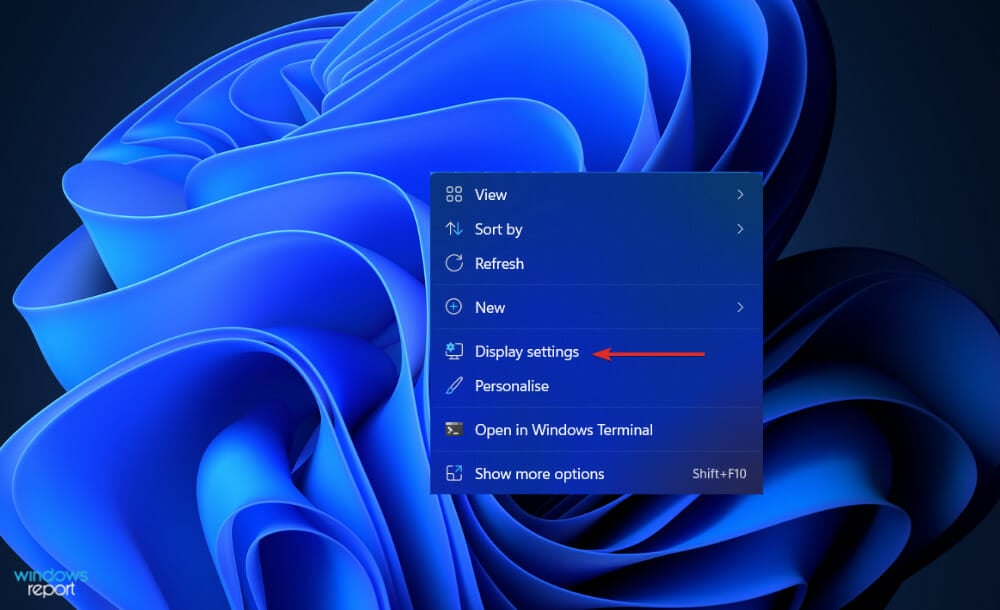
5. Reset your screen resolution
- Right-click on your Desktop then choose Display settings to open all the settings you have for your screens, including the ones connected through an HDMI cable.
- Now scroll down until you meet the Scale & layout section and select the recommended resolution from Display resolution. Here you can also find the Windows 11 HDMI settings once you connect your second monitor.
Which HDMI cable is the fastest?
When it comes to HDMI 1.4 and 2.0, its speed ratings, as specified by the HDMI Forum and the Licensing Administrator, are far more important to consider. They mention speeds in conjunction with their maximum bandwidths, but they do not specify which cables are to be used.
As a result, HDMI wires are classified into one of four speed categories: standard, high speed, premium high speed, and ultra-high speed. Standard HDMI cables are the most common type used.
Standard ones are the most basic and slowest of the cables available. A total of 4.95Gbps is available, which is sufficient to transmit a 1080p signal to your television, but not much more than that.
Even though Standard HDMI cables are hard to come by in stores, they can be found in a bucket somewhere or connected up to an old home entertainment system that hasn’t been updated in five years if you look hard enough. These devices are completely incapable of supporting 4K video.
When it comes to bandwidth, High Speed is more than twice as fast as Standard, with a minimum bandwidth of 10.2Gbps. The vast majority of new HDMI cables you purchase will be High Speed or higher, which means they will be capable of transmitting a 4K signal in most cases.
The problem is that the available bandwidth will only handle 4K24, which is 4K video at a frame rate of 24 frames per second. That’s OK if you only want to view movies on Ultra HD Blu-ray, but if you want to watch streaming TV episodes or play games in 4K at 30 or 60fps, your system won’t be able to keep up.
For further information and potential solutions to your issue, check out our article with a full fix for the HDMI port not working error.
Alternatively, users benefited from learning how to screen share Windows 11 to TV. Make sure not to miss out on it!
And lastly, Windows 10/11 PC doesn’t recognize the TV HDMI is another common error encountered by our clients. If you face it as well, bookmark the article linked to fix the problem.
Was this guide helpful for you? Do not hesitate to let us know in the comments section below.
![]()
We connect HDMI TV or monitor to Windows 11 computer. It may be for educational purposes, watching movies or connecting multiple monitors. The external monitor can also be set up using the HDMI port.
In all such cases, you need to make sure the screen settings are correct! Otherwise, the resolution and frequency may vary for that video or image. It looks awkward on a 4K or UHD display.
HDMI cable is used to connect the external monitor to the Windows 11 PC. Check for optional updates for HDMI devices and monitors.
The right display drivers need to be installed before you change the settings. Initially during setup, the computer will search automatically for the recommended windows 11 hdmi screen settings.
The graphics driver plays a major role in the color and brightness.
The TV HDMI screen settings may be correct. But to impose the image from a Windows 11 computer to the big screen, the display settings need to be compatible and right.
Check the HDMI connectivity before you change any settings. Video and audio should come out normal. Select the correct port and display unit.

- Why do you need to correct Windows 11 HDMI Settings ?
- Make HDMI monitor as default Display
- Different Windows 11 HDMI Screen Settings
- 1. Scale
- 2. Display Resolution
- 3. Display Orientation
- 4. Night light
- 5. Color Profile
- 6. HDR
- Conclusion
Why do you need to correct Windows 11 HDMI Settings ?
If you want to use a pc screen only, then not much changes are required to these settings. Windows updates to the drivers are to be done from time to time.
Multi monitor setup is also provided in the Windows 11 screen settings. If you are using the same computer, but different displays, then you can select the default one.
Otherwise, the display may not come from the required device. The HDMI device needs to be selected in these settings.
Change the screen brightness as to your requirement. If the color is too heavy or the contrast is too bright, you can change in the HDMI settings.
Display resolution and orientation are one of the important settings for your Windows 11 HDMI device. You can change them here.
Make HDMI monitor as default Display
- Press Win + I keys to open Settings app.
- Click System on the left and Display on the Right-hand side.
- Note: Windows 10 settings are a little different.
- HDMI screen settings are visible here.
- Click on Multiple displays under the Scale & layout section.
- Make this my main display option visible if there are multiple monitors.
- Check it and the HDMI screen becomes the default display device.
After making your monitor or 4K UHD Smart TV as the default screen, you can continue to change other HDMI screen settings. The following are available under the display setting.

- Scale
- Display Resolution
- Display orientation
- Night light
- Color Profile
- HDR
Let’s see the details of each Windows 11 HDMI setting.
1. Scale
You can change the size of text, apps and other items here. By default it will be 100%. But if the text is too small to see on the monitor, you can increase it to 125%. Other options are like 150%, 175%.
Click the arrow indicator for further customization. You can set custom scaling. But it should be done with caution. As this setting is irreversible, only do it if the Windows 11 screen doesn’t fit your monitor.

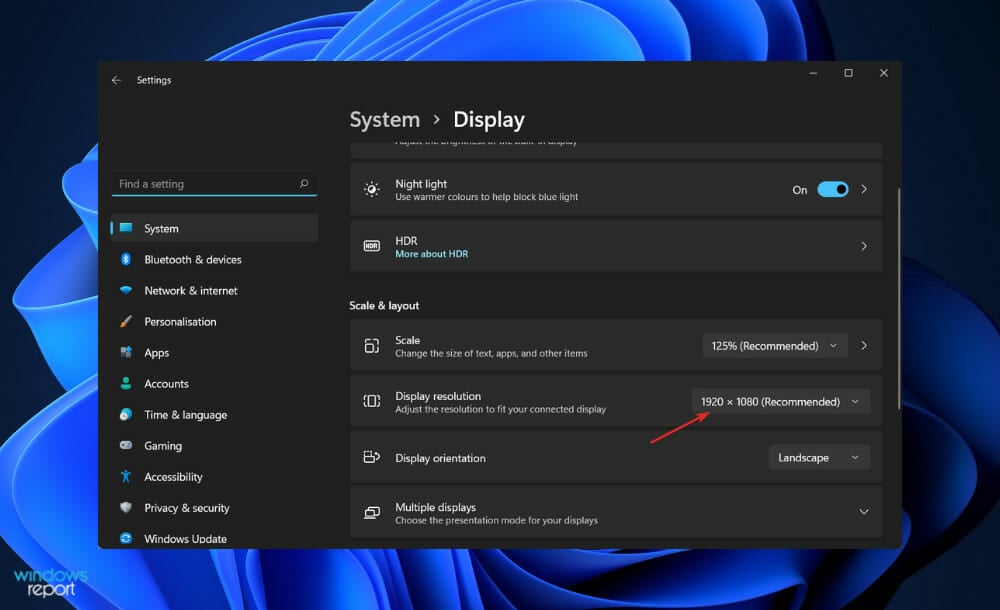
2. Display Resolution
It is one the most important HDMI settings of Windows 11. Based on TV or monitor these values are populated. The recommended screen resolution is taken as default.
But if you find that the current resolution is not displaying properly on your screen, then you can change the values here.

3. Display Orientation
Based upon the size of the TV screen or display, you can decide to keep Landscape or Portrait orientation.
In some cases the aspect ratio is 4:3, where you can set Portrait mode. If the screen size is 16:9, then you can choose Landscape. Flipped versions are also available.

4. Night light
Turn on this option if you want to use warmer colors to help block blue light on your monitor. You can also set the start and end hour:min timings.
More advanced settings like the strength of warmth can be set here.

5. Color Profile
If you are playing games and have a good graphics card, you can set the color profile. For a normal monitor, it will display its name.
But you can adjust the way colors appear on your screen by selecting the amount of RGB colors. You can set a color profile provided by your graphics card or create a new one.

6. HDR
Using this setting you can get a more brighter and vibrant picture for a high dynamic range of colors. It should be supported by your graphics card or motherboard and the monitor.
This HDMI setting is useful for games and motion pictures.

Conclusion
In addition to the above Windows 11 HDMI settings, you can set more advanced settings based on the number of monitors and color profiles.
You can get display information like the bit depth, color format, color space and display adapter properties for your screen.

Change the screen refresh rate if you have any problem with the current display.
Graphics setting allows different apps to set different display settings based on your motherboard and graphics card.

Palla Sridhar is the writer and admin for WindowsTechIt.com. His primary focus is to write comprehensive how-tos and solutions guides for Windows 11, 10, Skype, Outlook, HDMI, Redmi, Facebook, Google, Tech Apps and LinkedIn.
We can connect an HDMI TV or monitor to a Windows 11 computer for any number of reasons, such as educational purposes, watching movies or even just connecting multiple monitors. The external monitor can also be set up using the HDMI port.
In any case where you’re displaying a video or image, you need to make sure the screen settings are configured correctly. Otherwise, the resolution and frequency may not be optimal, which can result in a subpar visual experience. This is especially important to keep in mind when using a 4K or UHD display.
The HDMI cable is one way you can connect an external monitor to your Windows 11 PC. You can also check for optional updates for HDMI devices and monitors.
Before you change the settings, you’ll need to install the right display drivers. When you’re first setting up, the computer will automatically look for the recommended windows settings. If it doesn’t find them, you may need to adjust your HDMI screen settings.
If you’re trying to show your Windows 11 computer screen on your TV, there are a few things you need to check to make sure it’ll work. First, check that the HDMI connection is secure on both the TV and computer. Then, take a look at the display settings on your computer and make sure they’re compatible with your TV. Finally, adjust the image settings on your computer to fit your TV screen.
Before making any changes, double-check that your HDMI cable is plugged in securely to the right port. You should see and hear the video and audio just fine. If not, make sure you’re selecting the right port and display unit. If you faced issue with Fix Windows 10 HDMI Sound Not Working.
Why do you need to correct Windows 11 HDMI Settings?
If you’re someone who wants to keep their computer use limited to just their pc screen, then you won’t have to worry about making too many changes to your settings. The only thing you might have to do from time to time is update your Windows drivers.
Why do you need to correct Windows 11 HDMI Settings ?
Multi monitor setup is an interesting feature in the Windows 11 screen settings. If you have multiple displays connected to the same computer, you can choose which one is the default. This can come in handy if you are using different monitors for different purposes.
You can change the screen brightness in the HDMI settings to better suit your needs. If you find the color to be too heavy or the contrast to be too bright, you can adjust it accordingly.
Make HDMI monitor as default Display
- Press Win + I keys to open Settings app.
- Click System on the left and Display on the Right-hand side.
- Note: Windows 10 settings are a little different.
- HDMI screen settings are visible here.
- Click on Multiple displays under the Scale & layout section.
- Make this my main display option visible if there are multiple monitors.
- Check it and the HDMI screen becomes the default display device.
After making your monitor or 4K UHD Smart TV the primary display, you might want to explore the other HDMI settings. The options for those are found under the display setting.
- Scale
- Display Resolution
- Display orientation
- Night light
- Color Profile
- HDR
Let’s see the details of each Windows 11 HDMI setting.
1. Scale
You can change the size of text, apps and other items here. The default size is 100%, but you can increase it to 125% if the text is too small to see on the monitor. Other options are like 150% and 175%.
Click the arrow next to “Scaling” for further customization options. You can set custom scaling, but be warned that this is an irreversible setting. Only change the scaling if the Windows 11 screen doesn’t fit your monitor.
2. Display Resolution
Windows 11’s HDMI settings are important. Depending on your TV or monitor, different values will be populated. The recommended screen resolution is generally taken as the default.
3. Display Orientation
The orientation of your TV screen or display can be set to landscape or portrait depending on the size of the screen. The aspect ratio 4:3 is best for portrait mode, and 16:9 is best for landscape mode. Flipped versions are also available.
4. Night light
If you want to use warmer colors to help reduce blue light on your monitor, you can turn this option on. You can also set start and end times for when the filter should be applied.
5. Color Profile
If you’re playing video games, you might want to consider changing your color profile to get the most out of your graphics card. To do this, open the Color Management settings window and select your graphics card from the Device drop-down list. Then, click the Change button under Color Management Mode and select either RGB Full or RGB Limited.
6. HDR
If you want a brighter and more vibrant picture, you should use this setting. It takes advantage of your graphics card or motherboard’s support for a high dynamic range of colors. Note that not all monitors are compatible with this feature.
This HDMI setting adjusts the color in pixels to provide a more realistic image for games and movies.
Conclusion
Windows 11 HDMI settings are just the beginning. You can also set more advanced settings based on the number of monitors and color profiles.
To get started, open the Display tab in the Windows 11 Settings app. From there, you can view information about your display, like the bit depth, color format, color space and display adapter properties.
If you’re having any issues with the current display, try changing the screen refresh rate. This can be done through the graphics settings, which allows different apps to set different display settings based on your motherboard and graphics card.
Hello, My name is Shari & I am a writer for the ‘Outlook AppIns’ blog. I’m a CSIT graduate & I’ve been working in the IT industry for 3 years.
Введение
HDMI — это цифровой интерфейс, используемый для передачи видео- и аудио-сигналов. Многие компьютеры и мониторы выпускаются с HDMI-портами, что позволяет подключить их друг к другу для передачи сигнала. Однако, как переключиться на HDMI при работе с монитором, может стать непростой задачей для новичков в этой области. В этой статье мы рассмотрим несколько полезных советов и рекомендаций, которые помогут вам переключиться на HDMI и насладиться яркими красками и качественным звуком.
Шаг 1: Проверьте, подключен ли HDMI кабель
Первый и самый очевидный шаг — проверьте, что HDMI кабель подключен к монитору и компьютеру. Кажется, что это очень логичное действие, но в некоторых случаях может быть забыто.
Шаг 2: Проверьте вход HDMI
Убедитесь, что ваш монитор выбран в качестве источника ввода. Обычно на мониторах есть несколько разъемов, и чтобы переключиться на HDMI, вам нужно выбрать соответствующий разъем. Обычно это делается либо кнопкой на мониторе, либо через меню на мониторе.
Шаг 3: Проверьте настройки
Если вы уверены, что кабель HDMI подключен и выбран правильный вход, проверьте настройки на вашем компьютере. Вам нужно убедиться, что ваш компьютер настроен на передачу сигнала через HDMI.
Настройки могут меняться в зависимости от операционной системы, но в целом процедура выглядит так:
- Нажмите на кнопку «Пуск»;
- Выберите «Настройки»;
- Выберите «Система»;
- Выберите «Отображение»;
- Нажмите на «Расширенные настройки дисплея»;
- Выберите нужный монитор (если он не выбран автоматически);
- Выберите «HDMI» как источник ввода.
Разные производители и операционные системы могут использовать разные названия для этих параметров, но в целом процесс должен быть очень похожим на описанный выше.
Шаг 4: Убедитесь, что драйвера установлены правильно
Кроме того, может понадобиться установить драйвера HDMI на вашем компьютере. Некоторые производители выпускают свои драйвера, которые нужно установить, чтобы пользоваться HDMI. Это можно сделать, перейдя на официальный сайт производителя, и найти там подходящие драйверы.
Шаг 5: Проверьте качество
И напоследок — убедитесь, что все работает правильно и качество передачи данных достаточно хорошее. Если качество не соответствует ожиданиям, это может значить, что соединение между компьютером и монитором неправильно настроено или у вас проблемы с кабелем HDMI.
Выводы
Здесь мы рассмотрели несколько полезных шагов, которые помогут вам переключиться на HDMI, когда вы работаете с монитором. Если вы следуете этим простым советам, вы должны без проблем настроить передачу сигнала между компьютером и монитором, и наслаждаться красивым изображением и качественным звуком.