 В этой статье подробно об автозагрузке в Windows 10 — где может быть прописан автоматический запуск программ; как удалить, отключить или наоборот добавить программу в автозагрузку; о том, где находится папка автозагрузки в «десятке», а заодно о паре бесплатных утилит, позволяющих более удобно всем этим управлять.
Программы в автозагрузке — это то ПО, которое запускается при входе в систему и может служить для самых разных целей: это антивирус, мессенджеры, сервисы облачного хранения данных — для многих из них вы можете видеть значки в области уведомлений справа внизу. Однако, точно так же в автозагрузку могут добавляться и вредоносные программы. Более того, даже избыток «полезных» элементов, запускаемых автоматически, может приводить к тому, что компьютер работает медленнее, а вам, возможно, стоит удалить из автозагрузки какие-то необязательные из них.
- Автозагрузка приложений в параметрах Windows 10
- Просмотр и отключение программ автозагрузки в диспетчере задач
- Где находится папка Автозагрузка Windows 10
- Автозагрузка программ в реестре
- Планировщик заданий
- Sysinternals Autoruns и другие утилиты для управления автозагрузкой
- Видео инструкция
Внимание: в последних версиях Windows 10 программы, которые не были закрыты при завершении работы, автоматически запускаются при следующем входе в систему и это не автозагрузка. Подробнее: Как отключить перезапуск программ при входе в Windows 10.
Просмотр и отключение программ в автозагрузке в параметрах Windows 10
Один из самых простых способов просмотреть программы в автозагрузке Windows 10 — использовать соответствующих пункт в Параметрах:
- Откройте Параметры Windows 10 (клавиши Win+I или через меню Пуск).
- Перейдите в раздел Приложения — Автозагрузка.

- Ознакомьтесь со списком программ в автозагрузке, отключите ненужные.
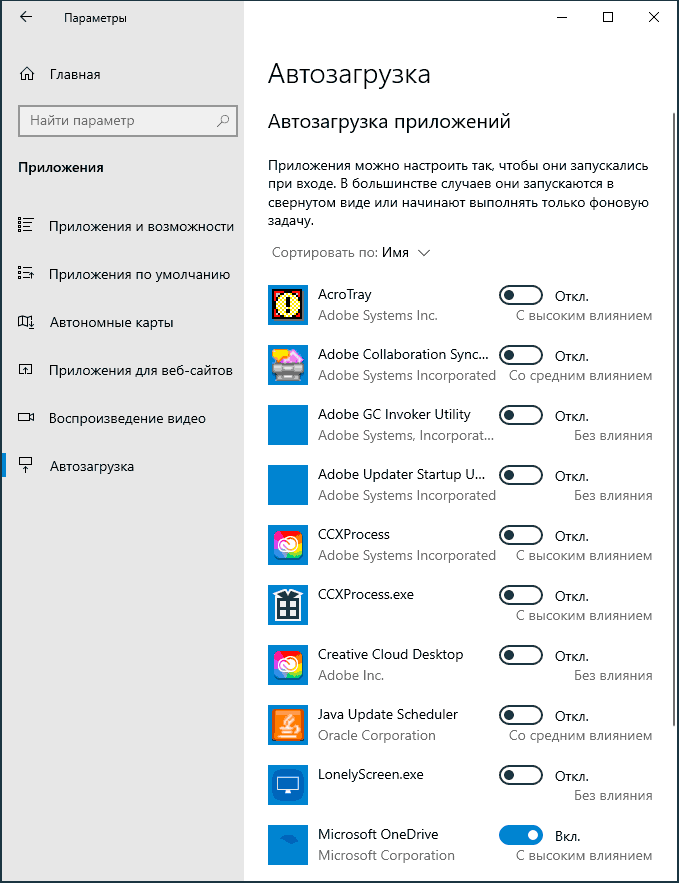
Если вы не знаете, что можно отключить, а чего лучше не отключать, в общих чертах ситуация следующая: даже отключив все элементы, вы не навредите системе, но может оказаться, что какие-то постоянно нужные программы (мессенджеры, антивирусы, программы облачных хранилищ) придется запускать вручную. В любом случае, можете смело экспериментировать.
Автозагрузка в диспетчере задач
Следующее расположение, где можно изучить программы в автозагрузке Windows 10 — диспетчер задач, который легко запустить через контекстное меню кнопки Пуск, открываемое по правому клику. В диспетчере задач нажмите кнопку «Подробнее» внизу (если такая там присутствует), а затем откройте вкладку «Автозагрузка».
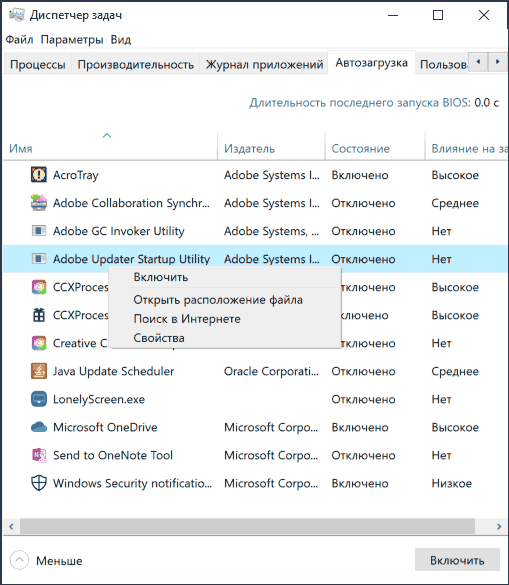
Вы увидите список программ в автозагрузке для текущего пользователя (в этот список они берутся из реестра и из системной папки «Автозагрузка»). Кликнув по любой из программ правой кнопкой мыши, вы можете отключить или включить ее запуск, открыть расположение исполняемого файла или, при необходимости, найти информацию об этой программе в Интернете. Также в колонке «Влияние на запуск» можно оценить, насколько указанная программа влияет на время загрузки системы. Правда здесь стоит отметить, что «Высокое» не обязательно означает, что запускаемая программа в действительности тормозит ваш компьютер.
Папка автозагрузки в Windows 10
Частый вопрос, который задавался и по поводу предыдущей версии ОС — где находится папка автозагрузки в новой системе. Находится она в следующем расположении:
%userprofile%\AppData\Roaming\Microsoft\Windows\Start Menu\Programs\Startup
Достаточно ввести указанный путь в адресную строку проводника и нажать Enter. Еще один простой способ открыть эту папку — нажать клавиши Win+R и ввести в окно «Выполнить» следующее: shell:startup после чего нажмите Ок, сразу откроется папка с ярлыками программ для автозапуска.
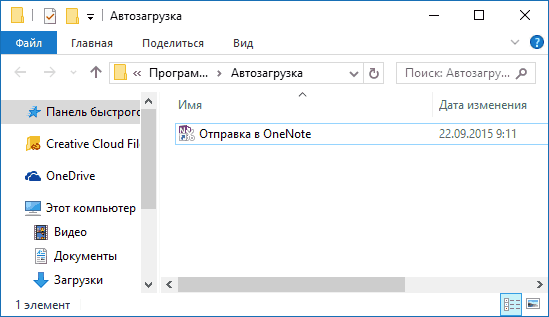
Чтобы добавить программу в автозагрузку, вы можете просто создать ярлык для этой программы в указанной папке. Примечание: по некоторым отзывам, это не всегда срабатывает — в этом случае помогает добавление программа в раздел автозагрузки в реестре Windows 10.
Автоматически запускаемые программы в реестре
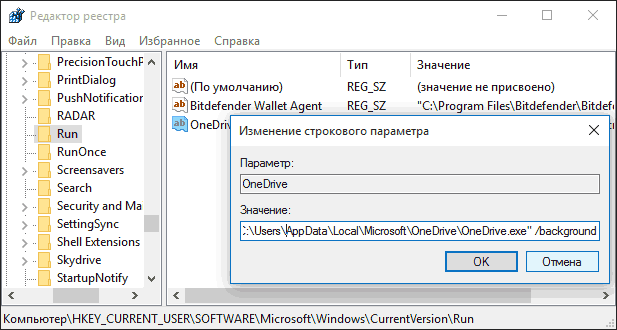
Запустите редактор реестра, нажав клавиши Win+R и введя regedit в поле «Выполнить». После этого перейдите к разделу (папке)
HKEY_CURRENT_USER\SOFTWARE\Microsoft\Windows\CurrentVersion\Run
В правой части редактора реестра вы увидите список программ, запускаемых для текущего пользователя при входе в систему. Вы можете удалить их, или добавить программу в автозагрузку, нажав по пустому месту в правой части редактора правой кнопкой мыши — создать — строковый параметр. Задайте параметру любое желаемое имя, после чего дважды кликните по нему и укажите путь к исполняемому файлу программы в качестве значения.
Это не единственный раздел, программы в автозагрузке могут также находиться в следующих разделах реестра Windows 10 (учитывайте, что последние два раздела могут отсутствовать на вашей системе):
HKEY_LOCAL_MACHINE\SOFTWARE\Microsoft\Windows\CurrentVersion\Run
HKEY_CURRENT_USER\SOFTWARE\Wow6432Node\Microsoft\Windows\CurrentVersion\Run
HKEY_LOCAL_MACHINE\SOFTWARE\Wow6432Node\Microsoft\Windows\CurrentVersion\Run
Изменять список можно аналогичным способом.
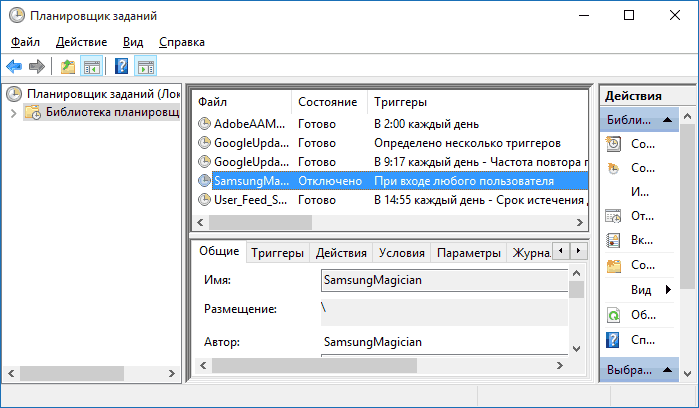
Планировщик заданий Windows 10
Следующее место, откуда может запускаться различное ПО — планировщик заданий, открыть который можно, нажав по кнопке поиска в панели задач и начав вводить название утилиты.
Обратите внимание на библиотеку планировщика заданий — в ней находятся программы и команды, автоматически выполняемые при определенных событиях, в том числе и при входе в систему. Вы можете изучить список, удалить какие-либо задания или добавить свои.
Более подробно об использовании инструмента вы можете прочитать в статье про использование планировщика заданий.
Sysinternals Autoruns и другие утилиты для контроля программ в автозагрузке
Существует множество различных бесплатных программ, позволяющих просматривать или удалять программы из автозагрузки, лучшая из них, на мой взгляд — Autoruns от Microsoft Sysinternals, доступная на официальном сайте https://docs.microsoft.com/en-us/sysinternals/downloads/autoruns
Программа не требует установки на компьютер и совместима со всеми последними версиями ОС, включая Windows 10. После запуска вы получите полный список всего, что запускается системой — программы, службы, библиотеки, задания планировщика и многое другое.

При этом, для элементов доступны такие функции как (неполный список):
- Проверка на вирусы с помощью VirusTotal
- Открытие места расположения программы (Jump to image)
- Открытие места, где программа прописана для автоматического запуска (пункт Jump to Entry)
- Поиск информации о процессе в Интернете
- Удаление программы из автозагрузки
Отдельно в Autoruns можно просмотреть и дополнительные элементы, такие как запускаемые службы, выполняемые при входе в систему задачи, элементы планировщика заданий и отключить их при необходимости.
Возможно, для начинающего пользователя программа может показаться сложной и не совсем понятной, но инструмент действительно мощный, рекомендую. Также управление программами в автозагрузке присутствует почти в любых утилитах для очистки и оптимизации системы, о которых подробнее в обзоре Лучшие программы для очистки Windows 10.
Видео инструкция
Если у вас остаются вопросы, имеющие отношение к затронутой теме — задавайте ниже в комментариях, а я постараюсь ответить на них.
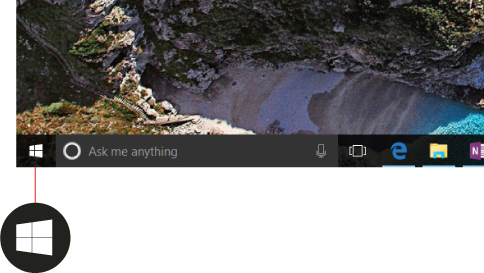
To open the Start menu—which contains all your apps, settings, and files—you can do any of the following:
-
On the center or left end of the taskbar, select the Start icon.
Note: Your taskbar settings determine where the taskbar is located.

-
Press the Windows logo key on your keyboard.
-
Swipe up from the bottom center or left of your screen.
Note: When using display languages that read right-to-left (RTL), you can swipe up from the bottom center or right of your screen.
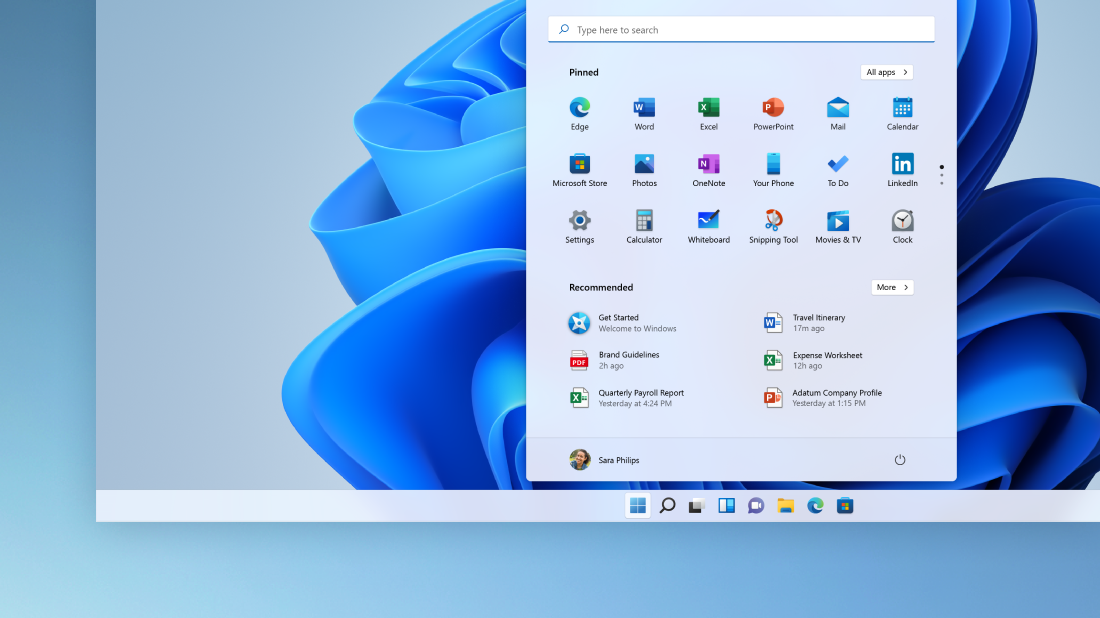
To open the Start menu—which contains all your apps, settings, and files—do either of the following:
-
On the left end of the taskbar, select the Start icon.
-
Press the Windows logo key on your keyboard.
![]()
Download Article
A quick guide to find the Boot menu on Windows to recover or repair
![]()
Download Article
- Using a Keyboard
- Using Windows 11, 10, and 8
- Using Windows 7 and Vista
- Using Windows XP
- Q&A
|
|
|
|
Are you trying to get to the Windows Boot menu through the menu or with a key? If you need to access the Boot menu, you can press the F8 key before the Windows starts. You can also open the Boot menu from the Start menu if you’re already logged into your device. Knowing how to access the Boot menu can help troubleshoot your computer if it’s experiencing issues. This wikiHow will show you how to get into the Boot menu on Windows 11, 10, 8, or 7.
Things You Should Know
- Turn on your computer and press the function key for your PC model.
- To reach the menu from Windows, click «Start» → Power button → hold «Shift» and click «Restart». Click «Troubleshoot» → «Advanced options».
- Use the Boot menu to find actions you can use to repair or troubleshoot issues with Windows.
-
1
Turn on your Windows computer. To access the Boot menu, you’ll need to press a key before the operating system fully loads.[1]
- If your computer is on, shut it down first. You can also restart it.
-
2
Press and hold the Boot menu key. This will vary depending on your device. Here’s a list of common BIOS keys by manufacturer:
- Acer: Del or F2
- Asus: F9
- Dell: F12
- HP: Esc or F10
- Lenovo: F1 or F2
- Samsung: F2
- You must press this key before the Windows logo appears. When done correctly, your computer will start in Safe mode.


Advertisement
-
1
Click the
button. It’s usually at the bottom-left corner of the screen.
- On Windows 11, this will be in the bottom center of the screen.
-
2
Click
. This will be underneath the cog icon.
- A pop-up menu will open.
-
3
Hold ⇧ Shift as you click Restart. You must hold Shift, otherwise your computer will perform a regular restart.
- The computer will power off and back on. Instead of booting to the desktop, you’ll see a blue menu titled “Choose an option.”
-
4
Click Troubleshoot. This will be underneath Continue.
-
5
Click Advanced Options. You can find this at the very bottom.
-
6
Click Startup Settings. You are now at the Windows boot (Startup Settings) menu.
- You can now use the Advanced Options menu to repair your device, or boot from another drive.


Advertisement
-
1
Press Alt+F4. This will open the Shut Down Windows menu.
-
2
Click the drop-down menu. The options will expand.
-
3
Select Restart. This will be next to Shut down.
-
4
Click OK. The computer will now shut down and restart. As soon as the computer restarts, you will need to act quickly—be ready.
-
5
Press and hold F8 as soon as the computer restarts. You’ll need to press it before the Windows logo appears. Continue holding this key until you see the Advanced Boot Options menu.
- If Windows boots to the desktop, repeat this process to try again.


Advertisement
-
1
Press Ctrl+Alt+Del. This will open the Windows Security menu.
-
2
Click Shut Down…. You can find this next to Log Off….
-
3
Click the drop-down menu. This will expand the options.
-
4
Click Restart. This will be next to Shut down.
-
5
Click OK. The computer will now restart. As soon as the computer restarts, you will need to act quickly—be ready.
-
6
Press F8 repeatedly as soon as the computer powers on. Continue tapping this key until you see the Advanced Boot Options menu—this is the Windows XP boot menu.
- If Windows boots to the desktop, repeat this process to try again.


Advertisement
Add New Question
-
Question
My Lenovo turbo boost laptop hangs by showing boot menu when switching on, what to do?

Amin Moghoomi
Community Answer
Try finding your hard drive in the list. And you can try a Windows installation disk to check your hard drive.
-
Question
I want to boot up using my old Windows XP Pro Disk and use it to format my hard drive, which doesn’t have windows XP on it. Can this be done?
Yes, it can. Insert Your disk. Press the bios key. This depends on your computer. Change the boot order. Save the changes. Reboot your computer. When you see «Press Any Key To Boot From CD», press a key. When you get to «Where Would You Like To Install Windows?», select the drive, press Enter, click «Format As Ntfs» Or «Format As Fat».
Ask a Question
200 characters left
Include your email address to get a message when this question is answered.
Submit
Advertisement
Thanks for submitting a tip for review!
About This Article
Thanks to all authors for creating a page that has been read 249,332 times.
Is this article up to date?
Windows 10 Start menu is one of the most important features that come with the device. It helps you to access your system settings and applications quickly, making it a crucial part of your daily computing experience. But while the Start menu is quite handy, many Windows 10 users may find it difficult to customize the look and feel of their own menu. In this blog post, we will discuss what the Windows 10 Startup menu looks like and how you can customize it to make it more efficient and personalized. We’ll also provide some examples of customized Startup menus that you can use as inspiration for your own. Let’s get started!
What is the startup menu?
The startup menu is a feature in Windows that allows you to choose which programs and files will be automatically loaded when your computer starts up. This can be helpful if you want to start up your computer with a specific program or file, or if you want to prevent certain programs from loading at start up. To access the startup menu, click on the Start button, then click on All Programs. The startup menu is located in the first column on the left-hand side of the All Programs window.
How to find the startup menu in Windows 10?
Startup menus in Windows 10 can be found in a few different places. The most common place to find the startup menu is in the Start Menu. To access the Start Menu, click the Start Button in the lower left-hand corner of your screen.
Once you have accessed the Start Menu, there are a few different ways that you can find the startup menu. One way is to simply scroll through the list of programs until you see the startup menu. Another way is to type “startup” into the search bar at the top of the Start Menu and then click on the “Startup” option that appears in the search results.
If you are still having trouble finding the startup menu, you can also access it by going to your computer’s “Control Panel.” To do this, click on the “Start Button” and then type “Control Panel” into the search bar. Once you are in the Control Panel, click on “System and Security,” and then select “Administrative Tools.” Finally, double-click on “System Configuration.” This will open up a window with various tabs; one of these tabs is labeled “Startup.” Click on this tab and you will be able to view and modify your computer’s startup settings.
How to access the startup menu in Windows 10?
In Windows 10, the startup menu is accessed by clicking on the “Start” button in the lower left-hand corner of the screen. This will bring up a menu with a variety of options, including the “Shutdown” option that will allow you to restart your computer.
How to manage startup programs in Windows 10?
Assuming you’re referring to startup programs and not apps:
- Right-click on the Start button and click on Task Manager.
- Click on the Startup tab.
- Select the program you want to remove from startup and click Disable.
The different types of startup menus
There are three different types of startup menus in Windows: the initial startup menu, the Advanced Options menu, and the Recovery Environment menu.
The initial startup menu is the first screen you see when you turn on your computer. It displays basic information about your computer, such as the manufacturer and model, and gives you the option to enter the BIOS Setup Utility or boot into Safe Mode.
The Advanced Options menu is a list of advanced options that you can use to troubleshoot your computer. To access this menu, you must press F8 before Windows starts to load. This menu includes options such as disabling driver signature enforcement, starting Windows in Last Known Good Configuration mode, and accessing the Recovery Console.
The Recovery Environment menu is a set of tools that can be used to recover your system if it doesn’t start properly. To access this menu, you must boot from your Windows installation disc or recovery partition. This menu includes options such as repairing your installation, restoring your system from a backup, and System Restore.
Pros and cons of using a startup menu
The Windows Start-up Menu is a great way to get quick access to your most used programs. However, there are some pros and cons to using it. Here are some things to consider:
PROS
- You can get to your programs faster
- Can be customized to your liking
- Allows you to pin frequently used programs
CONS
- May take up valuable screen real estate
- Can be difficult to organize
- Too many shortcuts can make it cluttered
How to customize the startup menu in Windows 10?
Assuming you would like a step-by-step guide on how to customize the startup menu in Windows 10:
- Click the Start button, then click the Settings icon.
- In the Settings window, click Personalization.
- On the left side of the Personalization window, click Start.
- On the right side of the Start section, click the Customize button under Choose which folders appear on Start.
- In the Customize window, you can choose which folders and shortcuts appear on your Start menu by checking or unchecking the boxes next to them. You can also change where these shortcuts and folders are located on your Start menu by clicking and dragging them up or down in the list.
- When you’re finished customizing your Start menu, close the Customize window and you’ll see your changes reflected on your Start menu immediately.
What are some example programs that can be found in the startup menu?
- Some example programs that can be found in the startup menu are web browsers, email clients, word processors, and media players.
- To access the startup menu, press the Windows key + R on your keyboard. This will open the Run dialog box.
- Type “msconfig” into the Run dialog box and press Enter. This will open the System Configuration window.
- Click on the “Startup” tab. This will show you a list of all the programs that are set to start up automatically when your computer boots up.
- You can choose to enable or disable any of these programs by clicking on the checkbox next to them. Be careful not to disable any critical system files!
How can changing the programs in the startup menu improve my computer’s speed?
If your computer is running slowly, one of the first things you can do to speed it up is to take a look at the programs that are set to run automatically when your computer starts up. Many programs are designed to start automatically so that they’re always available when you need them. However, some programs don’t need to start automatically, and can actually slow down your computer if they’re set to start up without being used.
To change which programs start automatically when your computer starts up:
- Click the Start button, then click All Programs.
- Right-click the Startup folder, then click Open.
- Find the program or programs you want to stop from starting automatically, then right-click each one and select Delete.
- Close the Startup folder when you’re finished making changes.
Making these changes should help speed up your computer’s startup time.
Conclusion
We hope this guide has helped you understand the Windows 10 startup menu and how to customize it. With a few simple steps, you can easily personalize your computer’s boot up options and make sure that only essential programs are loading when you turn on your machine. Additionally, if an unwanted program is making its way into the startup folder, you now know where to find it and delete it from launching every time. Give these tips a try today and get more control over your PC’s boot-up process!
Папка автозагрузки Windows 10 добавлена для удобства пользователей, она позволяет получать мгновенный доступ к набору часто используемых программ и приложений, автоматически запускаемых системой при каждой загрузке компьютера. Первая её реализация состоялась в Windows 95.
Любые элементы, которые должны запускаться автоматически при загрузке, хранятся как ярлык в директории автозагрузки.
В автозагрузку может быть добавлен любой тип исполняемого файла, например, приложение для обработки текста, почтовый клиент, веб-браузер или даже определенные файлы или документы, которые будут открываться при каждом запуске системы. Также может быть полезно: «Где хранятся записи автозагрузки в реестре», «Где находится автозагрузка Виндовс 10».
Содержание
- Где находится?
- Как открыть?
- В проводнике
- В диалоговом окне
- Заключение
Где находится?
Во-первых, важно отметить, что на самом деле в Виндовс 10 находятся фактически две папки автозагрузки, одна из которых находится на системном уровне и применяется ко всем учетным записям пользователей, а вторая уникальна только для той которая используется в текущее время.
В качестве примера рассмотрим ПК с двумя учетными записями пользователей, где одна используется Машей, а вторая Алексеем. Поместим ярлык Google Chrome в папку для всех пользователей, а ярлык Microsoft Edge помещаем в личную папку Марии. Когда Маша зайдет в систему, запустятся Google Chrome и Microsoft Edge, но, когда воспользуется своей учетной записью Алексей, запустится только Chrome.
Папка «Все пользователи» находится по следующему пути:
C:\ProgramData\Microsoft\Windows\Start Menu\Programs\StartUp
Текущая папка пользователя находится здесь:
C:\Users\Username\AppData\Roaming\Microsoft\Windows\Start Menu\Programs\Startup
Копируя данный путь для вставки в адресную строку проводника, не забудьте заменить имя Username своим именем, перейдите в C:\Users, чтобы найти свое имя.
Как открыть?
Давайте рассмотрим, как найти папку автозагрузки, все думают, что она присутствует в меню «Пуск». Но это не так! Директория не доступна в «Пуске» начиная с версии Windows 8 с конца 2012 года.
В проводнике
Обратите внимание! Если вы решите использовать проводник, вам нужно включить параметр «Показать скрытые файлы».
Скопируйте один из адресов к нужной вам папке приведённых выше в тексте.
1. Нажмите Win + E, чтобы открыть проводник Виндовс 10.
2. Вставьте его в адресную строку.

3. Далее нажмите Enter/Ввод.
В диалоговом окне
Для более быстрого доступа к директории автозагрузки, можно воспользоваться диалоговым окном.
Нажмите Win + R, чтобы открыть окно «Выполнить»
Введите нужную вам команду:
- shell:common startup — доступ к общей папке;
- shell:startup — доступ к папке текущего пользователя.

После нажмите Enter.
Заключение
В качестве заключения важно отметить, что элементы, которые вы размещаете в папках «Все пользователи» или «Пользовательские автозагрузки», не будут загружаться сразу после входа в Windows 10.
Сначала загрузятся необходимые системные процессы и элементы отображенные в диспетчере задач, только после этого запустятся добавленные вами программы и приложения. Теперь вы знаете, как получить доступ к папке автозагрузки. Если вам известны другие действенные методы, поделитесь ими ниже в комментариях.