Windows Updates can be run from PowerShell and Command Prompt in Windows 11/10. In this article, we will be checking out how to do it. Windows Update is one of the most highlighted features of Windows 10. Because with the release of Windows 10, Windows was offered to the customers as a service rather than a product. Under the scenario of Software as a Service, this led to the Windows Updates on Windows 10 being on by default and without an option for anyone to disable it.
Now, while some criticized this move by Microsoft, ultimately this is a step towards the customer’s greater good. Because Windows Update helps the users stay secured against all kinds of threats and provide them with the latest and the greatest from Microsoft. So, for those who appreciate this service, today we are going to talk about another way to run these updates.
The following methods will be carried out to run Windows Update from Command Line on Windows 11/10-
- Using Windows Powershell.
- Using Command Prompt.
1] Run Windows Update using Windows Powershell
Running Windows Updates on Windows Powershell will require you to manually Install the Windows Update module, Get Windows Updates downloaded and Install Windows Updates. And for this, open Windows Powershell by searching for Powershell in the Cortana search box and run it with Administrator level privileges.
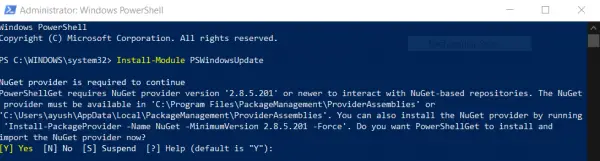
Install the PSWindowsUpdate Module
Type in,
Install-Module PSWindowsUpdate
to install the Windows Update module for Windows Powershell.
Check for Updates
After that,
Get-WindowsUpdate
to connect to the Windows Update servers and download the updates if found.
Install Updates
Finally, type in,
Install-WindowsUpdate
to install the Windows Updates downloaded on your computer.
Check for Microsoft Updates
Add-WUServiceManager -MicrosoftUpdate
Install specific updates only
Get-WindowsUpdate -KBArticleID "KB1234567" -Install
Hide specific Update
Install-WindowsUpdate -NotKBArticle "KB1234567" -AcceptAll
Skip Updates belonging to specific categories
Install-WindowsUpdate -NotCategory "Drivers","FeaturePacks" -AcceptAll
Related: Command-line switches to deploy Microsoft software Update packages
2] Run Windows Update using Command Prompt
Command Prompt on Windows Operating Systems exists since a very long time whereas Windows Powershell is comparatively new. Hence, it has similar capabilities to run Windows Updates, but the highlighting point here is that you do not need to download any module for Windows Updates.
First, open Command Prompt by searching for cmd in the Cortana search box and run it with Administrator level privileges.
Click on Yes for the UAC Prompt that you get.
Finally, type in the following commands and hit the Enter key in order to perform the respective operations,

Start checking for updates:
UsoClient StartScan
Start downloading Updates:
UsoClient StartDownload
Start installing the downloaded updates:
UsoClient StartInstall
Restart your device after installing the updates:
UsoClient RestartDevice
Check, Download and Install Updates:
UsoClient ScanInstallWait
It is worth noting that, the Command Prompt commands mentioned above are just meant for Windows 11/10 only.
How to enable the Windows Update service in Windows 11/10?
If the Windows Update service is disabled or is set to run manually, then you can enable the Windows Update service in Windows 11/10 using the following steps:
- Type services in the Search box and use Enter key
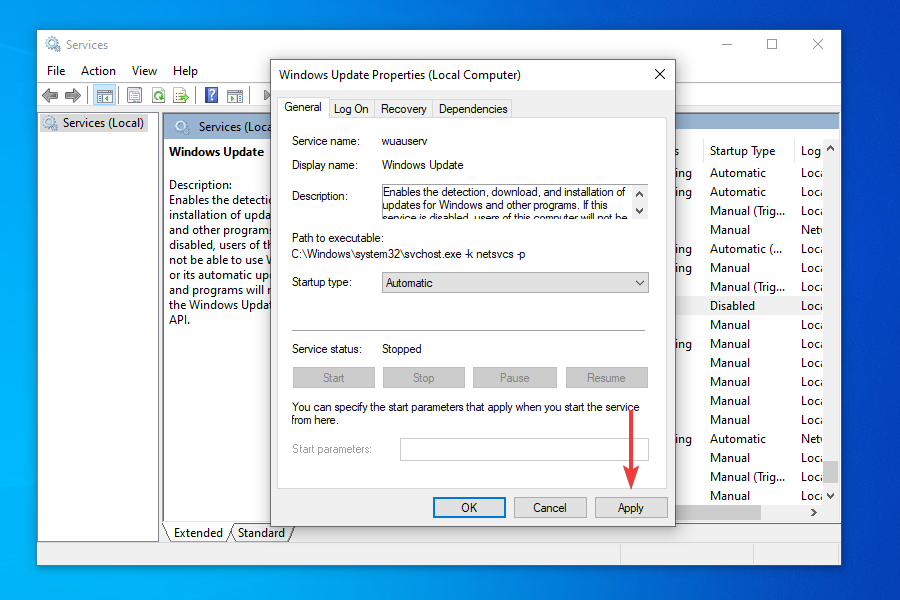
- In the Services window, double-click on Windows Update service to open its Properties
- In the Properties window, set the Startup type to Automatic
- Press the Start button to run the service
- Press Apply button and OK button to save the changes.
How do I know if Windows Update is installed in Command Prompt?
If you want to check the history of installed security updates or critical updates in Command Prompt on Windows 11/10, then first open the elevated Command Prompt window and execute wmic qfe list command. This will show the update description, update ID (or Hotfix ID), Installed by, Installed On, etc., information. Here, do note that not all Windows Updates are visible. So, it is better to access the Update history section in the Settings app of Windows 11/10 to see all the installed updates.
Related read: How to Update Drivers using Command Prompt.
Hope you find this post useful.
Содержание
- Открываем Центр обновления Windows 11 через командную строк
- Открываем Центр обновления Windows 11
- Подготовка к открытию Центра обновления
- Открываем командную строку
- Ввод команды для открытия Центра обновления
- Шаг за шагом: открытие Центра обновления Windows 11
- Результат: успешное открытие Центра обновления
Открываем Центр обновления Windows 11 через командную строк
Центр обновления Windows 11 — это важная часть операционной системы, которая позволяет пользователям получать последние обновления и исправления от Microsoft. Это гарантирует безопасность и стабильность вашей системы, а также предоставляет новые функции и возможности.
Однако, Центр обновления Windows 11 может быть доступен не только через графический интерфейс пользователя. Если вы предпочитаете работать с командной строкой, есть способ открыть Центр обновления Windows 11, используя команды. Это может быть полезно, например, для автоматического открытия Центра обновления или интеграции с другими программами.
Для открытия Центра обновления Windows 11 через командную строку, вы можете использовать команду «ms-settings:windowsupdate». Эта команда откроет Центр обновления Windows 11 сразу после ее выполнения. Вы можете выполнить эту команду прямо в командной строке или в файле пакетного скрипта для автоматизации.
Теперь вы знаете, как открыть Центр обновления Windows 11 через командную строку. Это может быть полезно для автоматизации процесса обновления или интеграции с другими программами. Не забудьте выполнять обновления системы регулярно, чтобы быть уверенными в ее безопасности и функциональности.
Открываем Центр обновления Windows 11
Центр обновления Windows 11 предоставляет возможность управлять обновлениями операционной системы, а также устанавливать последние исправления и новые функции. Открыть Центр обновления можно несколькими способами, включая использование командной строки. В этом руководстве показано, как открыть Центр обновления Windows 11 через командную строку.
Шаг 1: Откройте командную строку, нажав сочетание клавиш Windows + R на клавиатуре. В появившемся окне «Выполнить» введите «cmd» и нажмите клавишу «Enter».
Шаг 2: После того, как командная строка откроется, введите следующую команду:
start ms-settings:windowsupdate
Нажмите клавишу «Enter». Команда «start» открывает указанный ресурс, а «ms-settings:windowsupdate» является путем к Центру обновления Windows 11.
Шаг 3: После выполнения команды Центр обновления Windows 11 откроется. Здесь вы сможете проверить наличие доступных обновлений и установить их на свой компьютер.
Открытие Центра обновления Windows 11 через командную строку может быть полезно, если вы столкнулись с проблемами в интерфейсе пользователя или предпочитаете использовать командную строку для выполнения операций.
Теперь вы знаете, как открыть Центр обновления Windows 11 через командную строку. Пользуйтесь этой информацией для управления обновлениями вашей операционной системы.
Подготовка к открытию Центра обновления
Перед тем, как открыть Центр обновления Windows 11 через командную строку, необходимо выполнить несколько подготовительных шагов. Эти шаги помогут убедиться, что ваш компьютер готов к обновлениям и что вы имеете необходимые права доступа.
Вот некоторые важные действия, которые нужно выполнить перед открытием Центра обновления:
- Убедитесь, что вы подключены к интернету. Центр обновления требует интернет-соединения для загрузки и установки обновлений.
- Войдите в систему с учетной записью администратора. Для открытия Центра обновления вам потребуются права администратора.
- Сохраните все открытые файлы и программы и закройте их. Во время обновления компьютер может требовать перезагрузку, поэтому важно сохранить все ваши данные.
- Убедитесь, что у вас достаточно свободного места на жестком диске. Обновления могут требовать дополнительное место на диске, поэтому перед открытием Центра обновления проверьте доступное пространство на вашем компьютере.
После выполнения всех этих действий вы будете готовы открыть Центр обновления Windows 11 и установить все доступные обновления для вашей операционной системы.
Открываем командную строку
Чтобы открыть командную строку, выполните следующие шаги:
- Нажмите комбинацию клавиш Windows + R. Откроется окно «Выполнить».
- Введите команду
cmdи нажмите клавишу Enter. Откроется командная строка.
Теперь вы можете использовать командную строку для выполнения различных команд, в том числе для открытия Центра обновления Windows 11.
Ввод команды для открытия Центра обновления
1. Нажмите Win + R, чтобы открыть окно «Выполнить».
2. Введите команду ms-settings:windowsupdate и нажмите Enter.
3. Откроется Центр обновления Windows 11, где вы сможете проверить наличие новых обновлений и установить их.
Шаг за шагом: открытие Центра обновления Windows 11
В данной статье мы рассмотрим шаги, необходимые для открытия Центра обновления Windows 11 через командную строку.
- Откройте командную строку в Windows 11. Для этого нажмите сочетание клавиш Win + R, введите cmd и нажмите Enter.
- В открывшемся окне командной строки введите команду
wuappи нажмите Enter.
После выполнения этих шагов должно открыться окно Центра обновления Windows 11. В нем вы можете проверить наличие доступных обновлений, установить их и настроить параметры обновления вашей системы.
Теперь, когда вы знаете, как открыть Центр обновления Windows 11 через командную строку, вы можете легко управлять обновлениями и наслаждаться всеми новыми функциями и улучшениями, которые Windows 11 предлагает.
Результат: успешное открытие Центра обновления
После выполнения всех указанных шагов, Центр обновления Windows 11 будет успешно открыт через командную строку. Вы сможете увидеть все доступные обновления для вашей системы и установить их по необходимости.
Открытие Центра обновления через командную строку предоставляет удобный способ проверки и управления обновлениями вашей операционной системы. Вы можете использовать этот метод, если имеете определенные причины для этого или предпочитаете работать с командной строкой.
Не забывайте, что регулярные обновления помогают поддерживать вашу систему безопасной и защищенной. Рекомендуется регулярно проверять наличие обновлений и устанавливать их при наличии новых версий.
На чтение 2 мин Опубликовано Обновлено
Центр обновления Windows 11 — это полезный инструмент, позволяющий управлять обновлениями операционной системы и установленного программного обеспечения. Однако, в некоторых случаях, доступ к центру обновления может быть ограничен или недоступен через стандартный интерфейс.
В таких ситуациях командная строка может стать полезным инструментом для открытия центра обновления Windows 11. С помощью командной строки вы можете выполнить определенные команды, чтобы открыть центр обновления и получить полный доступ ко всем его функциям.
В этой пошаговой инструкции мы рассмотрим, как открыть центр обновления Windows 11 через командную строку. Следуйте этим простым шагам, чтобы получить полный контроль над обновлениями вашей операционной системы.
Шаг 1: Откройте командную строку. Нажмите клавишу Win + R на клавиатуре, чтобы открыть окно «Выполнить». Введите «cmd» и нажмите клавишу Enter.
Шаг 2: Введите следующую команду в командной строке: wuapp.exe. Нажмите клавишу Enter, чтобы запустить эту команду.
Шаг 3: Центр обновления Windows 11 будет открыт. Теперь вы можете использовать все его функции и управлять обновлениями вашей операционной системы.
С помощью этой пошаговой инструкции вы сможете легко открыть центр обновления Windows 11 через командную строку и получить полный доступ ко всем его функциям. Этот метод особенно полезен, если вы столкнулись с ограничениями доступа или недоступностью центра обновления через стандартный интерфейс. Удачного обновления!
Основы открытия центра обновления Windows 11 через командную строку
Центр обновления Windows 11 представляет собой основной инструмент для установки и настройки обновлений операционной системы. В большинстве случаев центр обновления открывается через графический интерфейс пользователя, однако существует возможность открыть его и при помощи командной строки.
Чтобы открыть центр обновления Windows 11 через командную строку, следуйте следующим шагам:
- Откройте командную строку. Для этого нажмите клавиши
Win + R, введитеcmdи нажмите клавишуEnter. - В командной строке введите команду
control /name Microsoft.WindowsUpdateи нажмите клавишуEnter. Это откроет центр обновления Windows 11.
После выполнения этих шагов вы увидите окно центра обновления Windows 11. Здесь вы сможете просмотреть, загрузить и установить доступные обновления операционной системы.
Открытие центра обновления Windows 11 через командную строку может быть полезно, если вы предпочитаете работать с командной строкой или если у вас возникли проблемы с открытием его через графический интерфейс.
Windows Update allows users to keep Windows OS up to date with the latest security patches, new features and bug fixes from Microsoft. You can access Windows Update from the Settings app on your PC.
Windows Update runs automatically in the background and installs new updates when they are available. However, you can also manually check for updates at any time. This will help you get the latest features and improvements faster.
By checking regularly for new Windows updates, you can ensure your PC is running smoothly and securely, ensuring you are safe from viruses, malware and other threats.
On this page, you will find several methods to force run Windows Update. Let’s start:
Quick Summary
Force Windows Update from CMD
Check for updates on all Windows versions
If you want to run Windows Update from Command Prompt, you can use the wuauclt.exe utility. This utility allows you to check for updates, download updates, and install updates from the command line. The only limitation of running Windows Update through the CMD is that it won’t show any progress. Only results are shown when the process is complete. Here is how to run Windows Update from CMD:
-
Open Command Prompt with administrative privileges
-
Run wuauclt /detectnow to check for new updates and download them
wuauclt /detectnow -
Run wuauclt /updatenow to install updates
wuauclt /updatenow -
(Optional) Run wuauclt /reportnow to report back to WSUS server (if available)
wuauclt.exe /reportnow
You can also use multiple switches in the same command:
wuauclt /detectnow /updatenowIf you want to disregard the already detected updates and force Windows Update to check for updates again immediately, you may run the following command:
wuauclt /resetauthorization /detectnowSince the command prompt does not show any progress, a better approach would be to check and install updates simultaneously. Here’s the command for this:
wuauclt /detectnow /updatenowCheck for Windows updates in Windows 11, 10
The above-mentioned command will work in all versions of Windows, including Windows 7 and Windows Server 2008 R2. But if you are using Windows 11, Windows 10 or Windows Server 2016, you can use the “UsoClient” command, which has more options than “wuauclt.” You can run UsoClient with the following switches:
-
Start checking for new updates
UsoClient /StartScan -
Start downloading updates
UsoClient /StartDownload -
Start installing updates
UsoClient /StartInstall
Force Windows Update Check using Run Command Box
I found out that the easiest way to force a Windows update check is to use a command in the Run dialog box. There are other commands from CMD and PowerShell as well, but let’s start with the easiest way to do it.
-
Open the Run Command box (Windows key + R).
-
Run the following command:
control update 1")
Check Windows update from the Run Command box
 1")
This will trigger the Windows Update graphical user interface which will start checking for new updates. This method works on all versions of Windows including Windows 10 and Windows 11.
There is another command that will trigger the same effect but only works in Windows 10 and 11:
ms-settings:windowsupdate 2")
Run Windows Update from PowerShell
There is no official Windows Update module for PowerShell. However, you can use “PSWindowsUpdate.” PSWindowsUpdate is a third-party module that can be used to configure Windows updates in Windows.
This module is not installed in Windows by default but you can download it from the PowerShell gallery and install and run the module to check for new updates.
Here are the three steps to run Windows Update through PowerShell:
-
Run the following command to install PSWindowsUpdate:
Install-Module PSWindowsUpdate 3")
Install PSWindowsUpdate module -
Check for available updates by running this cmdlet:
Get-WindowsUpdate 4")
Check for available Windows updates -
Now install these updates using this cmdlet:
Install-WindowsUpdate 5")
Install available Windows updates
 3")
 4")
 5")
The above-mentioned commands will only install Windows updates. If you want to update other Microsoft products, you’ll also need to enable the Microsoft Update Service. It’s pretty easy to enable it using PowerShell:
Add-WUServiceManager -MicrosoftUpdateIf you want to automatically restart your computer after installing all the updates, you can run the following command instead:
Install-WindowsUpdate -MicrosoftUpdate -AcceptAll -AutoRebootIf you don’t want to install a separate module, you can run the following command to force start Windows Update using PowerShell:
Start-Process -FilePath 'ms-settings:windowsupdate'Deploy Updates on Remote Computers
The PSWindowsUpdate PowerShell module can also be used to deploy Windows updates on remote computers. There are two commands involved in this process:
-
Create a list of computers and pass the list as a variable string using the computer names:
$computer = "comp1, comp2, comp3"You can add more computers to the string separated by commas. Replace “compX” with the name of each computer.
-
Run the following command to start checking for Windows updates on remote computers:
Invoke-WUJob -ComputerName $computer -Script {ipmo PSWindowsUpdate; Install-WindowsUpdate -MicrosoftUpdate -AcceptAll -AutoReboot} -RunNow -Confirm:$false | Out-File "\server\share\logs\$computer-$(Get-Date -f yyyy-MM-dd)-MSUpdates.log" -Force
Install Specific Updates Only
If you already know the article KB no. of the specific update you want to install, you can run the following command to install that particular update(s) only:
Get-WindowsUpdate - KBArticleID "KB5002324", "KB5002325" -InstallReplace the KB number with the one you want to install.
Prevent Specific Windows Updates from Installing
You can prevent specific updates from installing on your computer by replacing the KB numbers in the following command in PowerShell:
Install-WindowsUpdate -NotKBArticle "KB5002324, KB5002325" -AcceptAllCheck for Windows Updates using Windows Settings
To check for new updates and configure your Windows Update settings, follow the steps below:
-
Navigate to:
-
In Windows 11:
Settings app >> Windows Update
-
In Windows 10:
Settings app >> Update & Security >> Windows Update
-
-
Click “Check for updates.”
 6")
Check for pending updates
 6")
Force Windows Update to Download Already Downloaded Updates
There will be times when the updates become corrupted or for other reasons, you just don’t want to install the downloaded updates. In that situation, you can easily delete the already-downloaded updates, which will force Windows Update to run again and check for and download the updates again.
The only caveat in this situation is that the update must not have been installed on your computer. If the update is already installed, Windows will detect it as installed and will not download it again. In that case, you will need to uninstall the update first and then force Windows Update to run again.
If you want to force Windows Update to re-download all the updates again, you can do this using the steps below.
-
Navigate to the following directory using File Explorer:
C:\Windows\SoftwareDistribution\Download
This folder contains all the Windows update files that Windows OS is currently downloading or recently downloaded and installed.
-
Select and delete all the files from the “Download” folder.
 7")
Delete all files in the “Download” folder -
Run Windows Update again using the above-mentioned methods.
This will force Windows Update to check for the same updates and download them again. The download and install process for new updates is completely automated. You don’t need to do anything during the download and installation process.
 7")
Manage Windows Updates using Wuinstall
Using WuInstall, IT Administrators can automate Windows updates. Wuinstall can be used to enforce Windows Updates inquiries, downloads, and installations at times when they deem them appropriate, enabling them to make the entire update process more controlled and user-friendly.
WuInstall is a strong and flexible system management tool that can be used in a WSUS-based or standalone environment. To download the latest updates using Wuinstall, you will need to download and install Wuinstall first. Follow the steps below:
-
Go to http://www.wuinstall.com/ and install the latest free version of Wuinstall on your computer.
-
Open an elevated Command Prompt.
-
Run the following cmdlet to search for the latest available Windows updates:
wuinstall /searchThis will not only look for new updates but will also list them in the command window.
-
To download the updates, run the following command:
wuinstall /downloadThis will download all the available updates from Microsoft servers.
-
To install the updates, run the following command:
wuinstall /install
There are a few more switches that you can use with the install command:
- /quiet – will install updates without showing anything.
- /disableprompt – Disable any input from Windows.
- /autoaccepteula – Auto-accept any agreement during the update installation.
- /rebootcycle – Install updates on the next computer reboot.
Fix Corrupted Windows Updates
Sometimes Windows Update files get corrupted and the user is not able to download the files again or install the corrupted update files. In that case, we need to run a DISM command to fix the corrupted Windows Update. Here are the steps:
-
Launch the Command Prompt.
-
Run the following cmdlet:
dism.exe /Online /Cleanup-image /Restorehealth
After successfully running this command, try force downloading the updates again, and the Windows Update should start working again.
Hopefully, this will be useful in situations where you want to automate certain Windows functions. What other purposes do you want to use command line options to run Windows Update?
Run Windows Update FAQs
What is Windows Update?
Windows Update is a free Microsoft service that provides bug
fixes, security patches, and performance enhancements for Microsoft Windows operating systems. By installing these updates, users can ensure they have the latest features and security available for their operating system.
Can I use the command line to run Windows Update?
Yes, you can use Windows’ command line to run Windows Update.
What is the benefit of running Windows Update from the command line?
Running Windows Update from the command line offers flexibility,
automation, and convenience. For example, by using the command line, you can schedule updates to occur at a specific time or be triggered by an event, and even control which updates are installed.
How can I run Windows Update from the command line in Windows 10?
Follow the steps below to force Windows update with the command line:
Type cmd in the search box, choose Run as administrator, and click Yes to continue.
Type wuauclt.exe /updatenow and hit Enter.
This command will force Windows Update to check for updates and start downloading.
What is the command to run Windows Update from PowerShell?
To run Windows Update via PowerShell, enter the following command:
Start-Process -FilePath ‘ms-settings:windowsupdate’
What is “usoclient.exe” and how does it relate to Windows Update?
“Usoclient.exe” is a built-in command line tool for Windows Update that can be used to scan for updates, start updates, and even uninstall updates. It provides an alternative to Windows Update’s graphical user interface. This tool can be especially useful for IT administrators who need to run Windows Update simultaneously on multiple machines. It can be run from the command line and provides options for updating in managed environments. It also allows for more detailed control over the update process, such as setting which updates to install or uninstall.
Can Windows Update be automated using the command line?
Yes, Windows Update can be automated using the command line. This can be done by creating scripts that automatically execute Windows Update commands.
Центр обновления Windows гарантирует, что на вашем ПК установлена обновленная версия микропрограммы, в которой отсутствуют ошибки, проблемы и лазейки. Обновления обычно выявляют и устраняют проблемы, связанные с безопасностью ПК. Поэтому крайне важно, чтобы он регулярно обновлялся.
Однако в неудачном случае, когда вы не можете загружать обновления обычным способом и автоматические обновления Windows не работают, просто используйте методы, перечисленные ниже, для решения проблемы.
Просто осторожно напомните, прежде чем приступить к решению проблемы, убедитесь, что вы проверили, может ли ваш компьютер подключаться к Интернету.
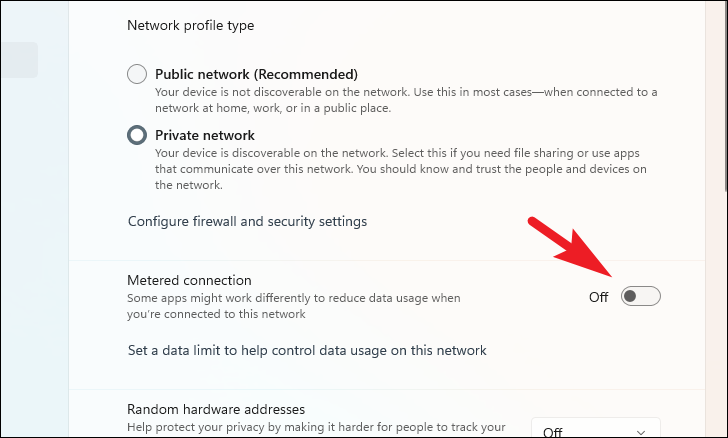
1. Снимите отметку «Сеть как лимитное соединение»
Windows позволяет помечать сетевые подключения как лимитные, чтобы уменьшить использование данных, не загружая обновления приложений вместе с обновлениями Windows.
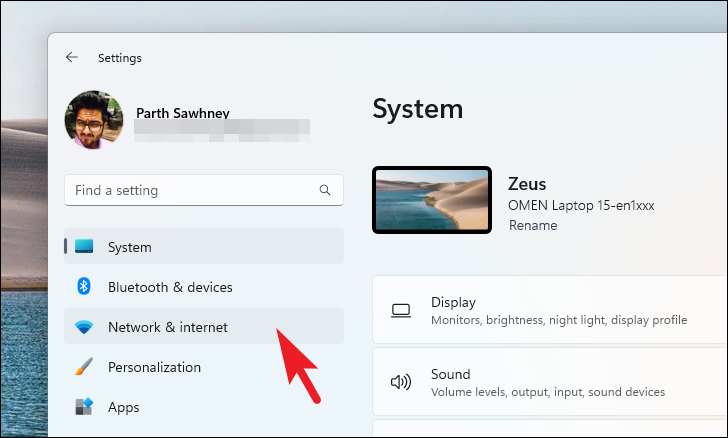
Сначала перейдите в меню «Пуск» и нажмите на плитку «Настройки», чтобы продолжить. Либо нажмите клавиши Windows+ I, чтобы открыть приложение.

После этого нажмите на вкладку «Сеть и Интернет» на левой боковой панели.
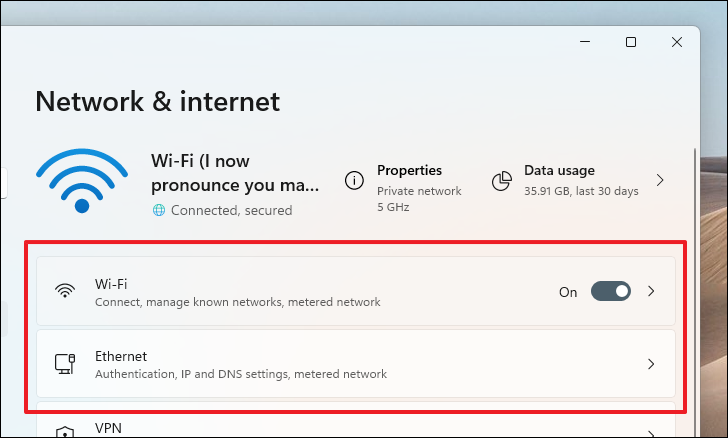
Затем щелкните плитку «Wi-Fi» или «Ethernet» в зависимости от того, какой канал вы используете для подключения к Интернету.
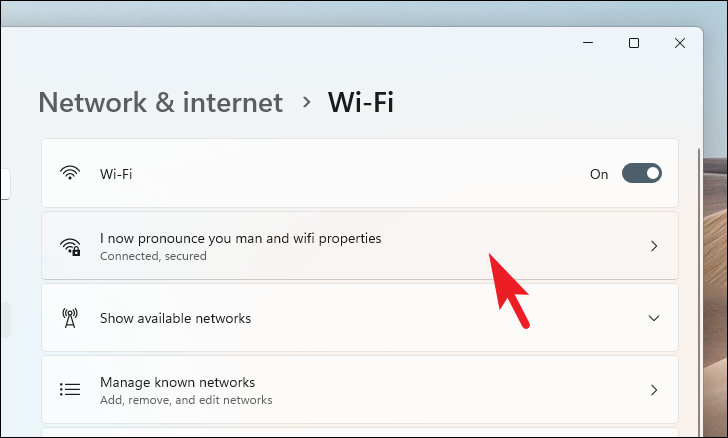
Далее нажмите на сетевую плитку, к которой вы подключены.
На следующей странице щелкните переключатель рядом с параметром «Лимитное соединение», чтобы перевести его в положение «Выкл.».
2. Запустите средство устранения неполадок обновления
Если вы уверены, что ваш компьютер может подключиться к Интернету, но по-прежнему не можете установить обновление, запуск средства устранения неполадок — самый элементарный и основной шаг к решению проблемы.
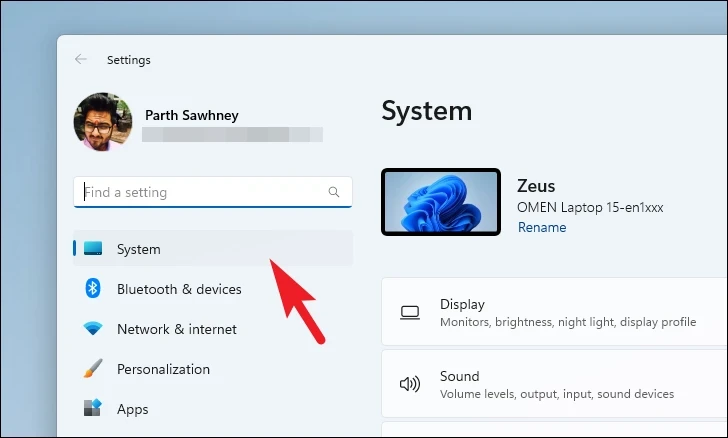
Сначала перейдите в меню «Пуск» и нажмите на плитку «Настройки», чтобы продолжить. Либо нажмите клавиши Windows+ Iна клавиатуре, чтобы открыть приложение.

После этого убедитесь, что вы находитесь на вкладке «Система» на боковой панели слева.
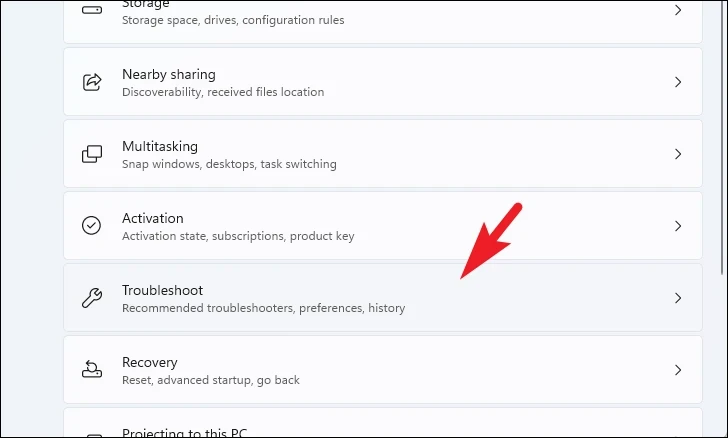
Затем нажмите плитку «Устранение неполадок» в правой части окна.
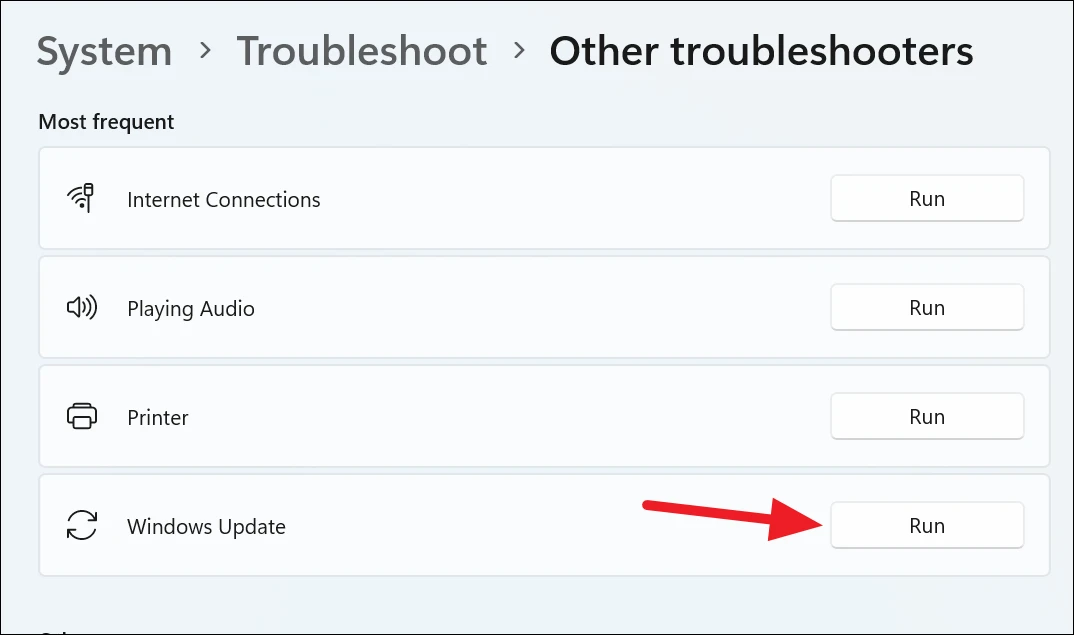
Теперь нажмите на плитку «Другие средства устранения неполадок», чтобы продолжить.
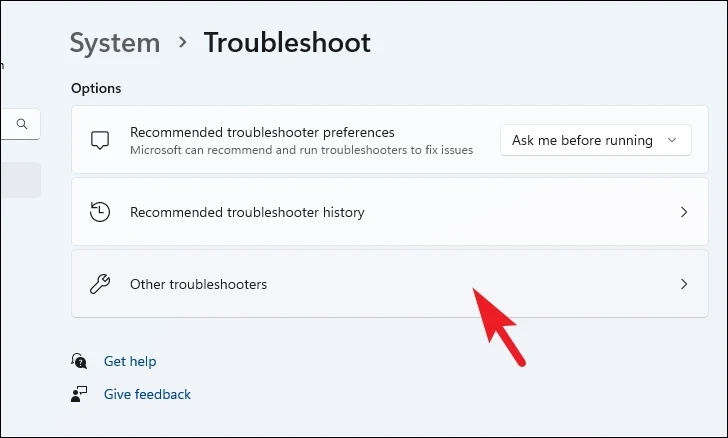
Наконец, щелкните параметр «Выполнить» справа от плитки «Центр обновления Windows».
Запустите средство устранения неполадок, и если оно обнаружит проблему, оно проведет вас через шаги по ее устранению. После выполнения этих шагов попробуйте снова обновить систему. Если средство устранения неполадок ничего не нашло, перейдите к другим исправлениям в этом списке.
3. Проверьте, запущены ли службы Windows Update.
Есть несколько служб, связанных с Центром обновления Windows, которые необходимо включить и запустить, чтобы он работал как часы. Они могут быть причиной всех ваших бед; к счастью, их легко проверить.
Сначала нажмите клавиши Windows+ на клавиатуре, чтобы открыть утилиту «Выполнить команду», введите и нажмите.Rservices.mscEnter
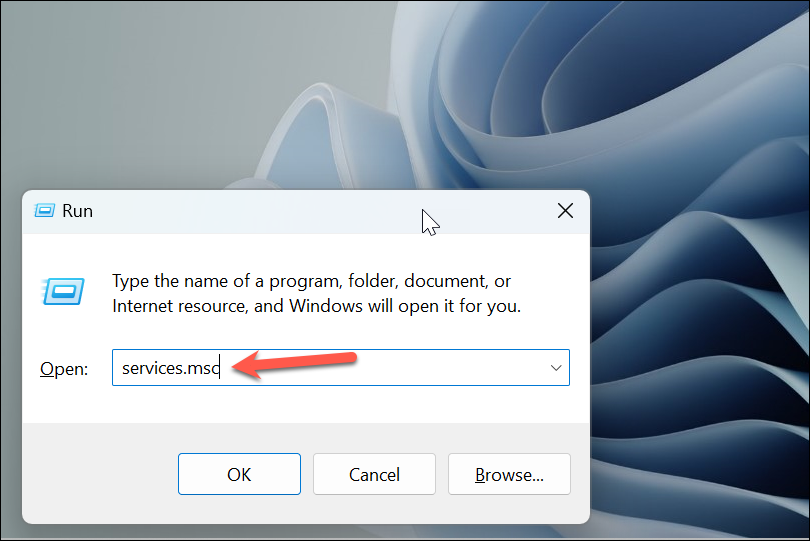
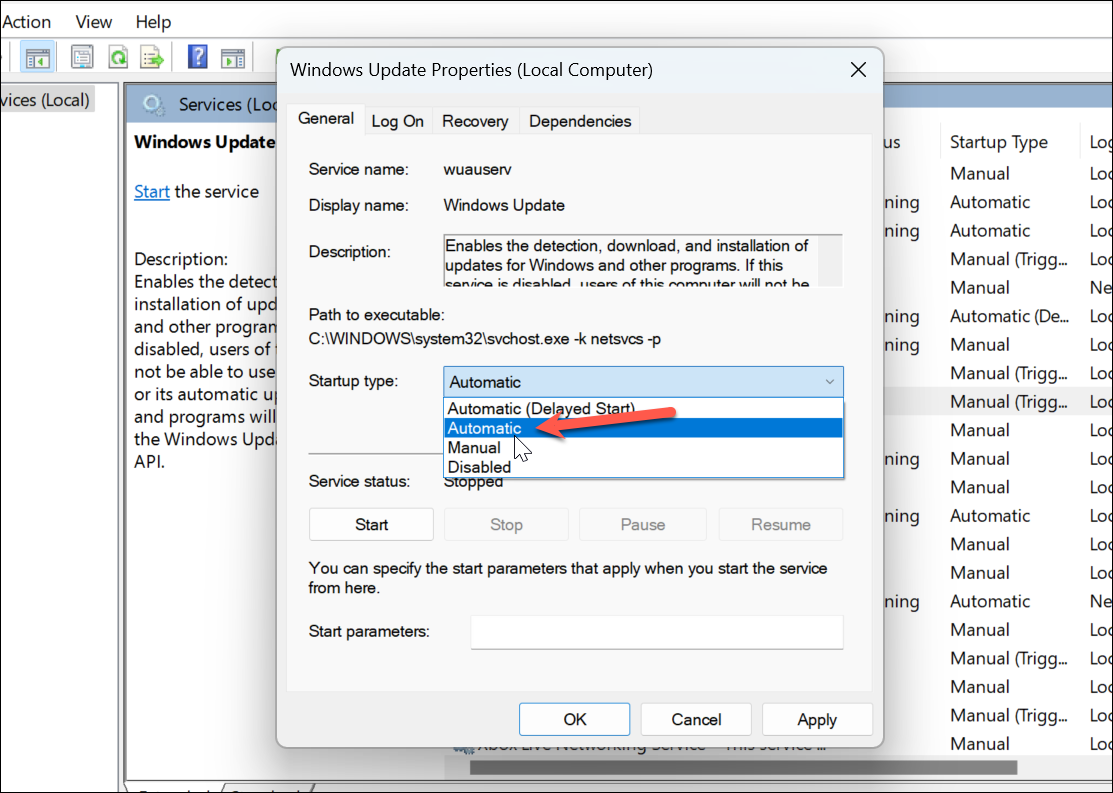
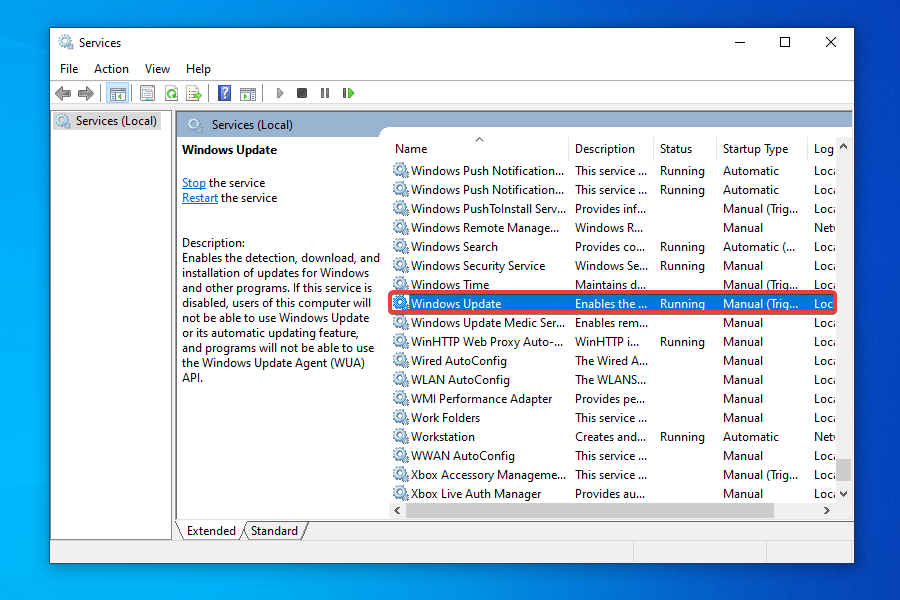
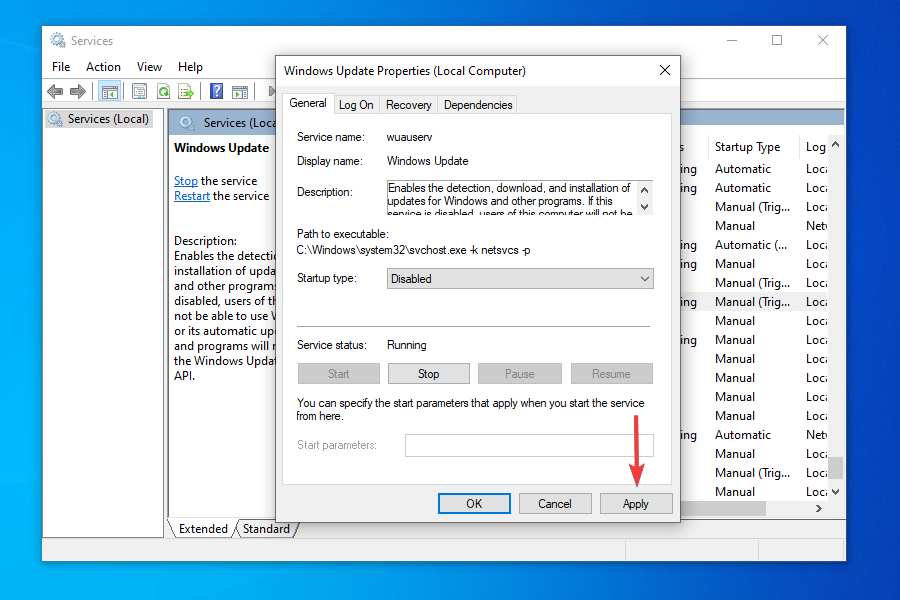
Откроется окно Службы. Прокрутите вниз, найдите службу «Центр обновления Windows» и дважды щелкните по ней.

Откроется диалоговое окно свойств. Выберите «Автоматически» в раскрывающемся меню рядом с «Тип запуска» и нажмите кнопки «Применить» и «ОК».
Теперь повторите эти шаги для каждой из этих служб:
- Идентификатор приложения
- Фоновая интеллектуальная служба передачи (BITS)
- Криптографические услуги
Перезагрузите компьютер и посмотрите, решена ли проблема.
4. Освободите место, используя рекомендации по очистке
Рекомендации по очистке помогут вам удалить ненужные файлы из вашей системы. Часто обновление не загружается из-за нехватки места в вашей системе. Если у вас мало места, очистка беспорядка определенно поможет решить проблему.
Сначала перейдите в меню «Пуск» и нажмите на плитку «Настройки», чтобы продолжить. Либо нажмите вместе клавиши Windows+ Iна клавиатуре, чтобы открыть приложение.
Теперь в окне «Настройки» убедитесь, что вы выбрали вкладку «Система» на левой боковой панели.
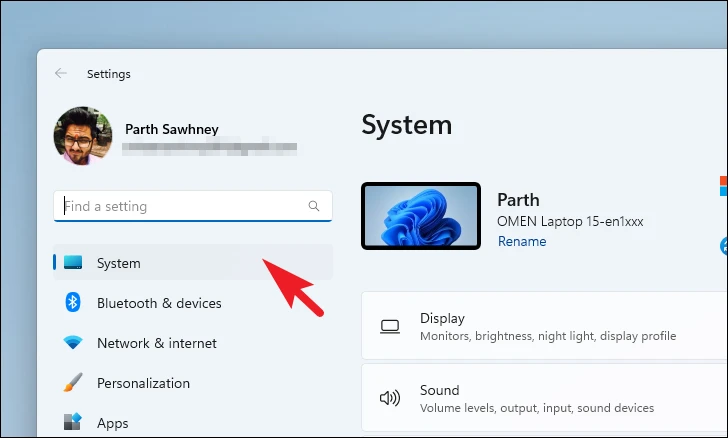
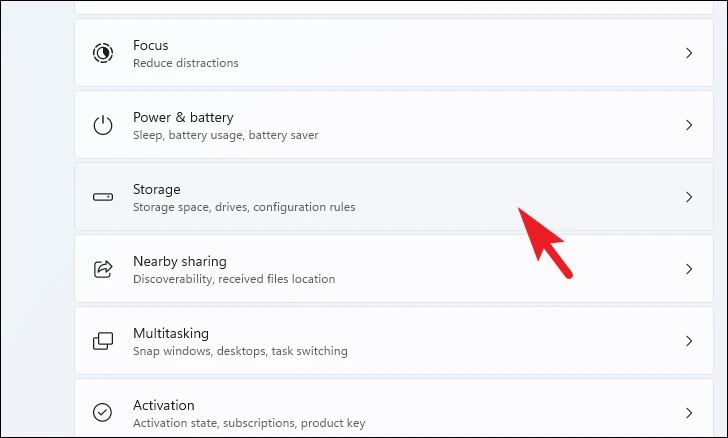
Затем в правой части окна прокрутите вниз, чтобы найти и щелкнуть плитку «Хранилище».
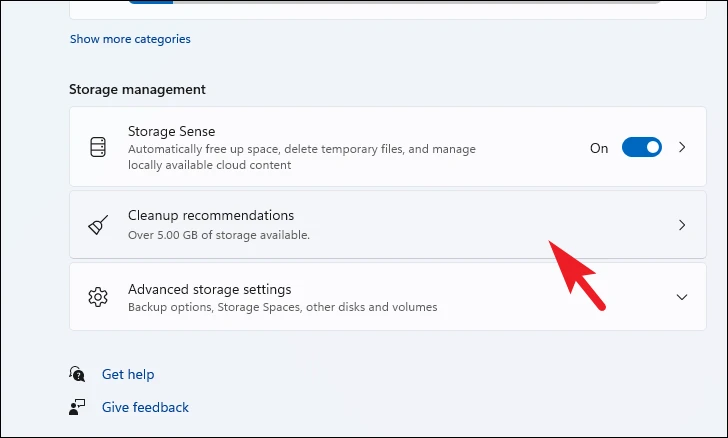
После этого на странице настроек «Хранилище» прокрутите вниз, чтобы найти и щелкнуть плитку «Рекомендации по очистке».
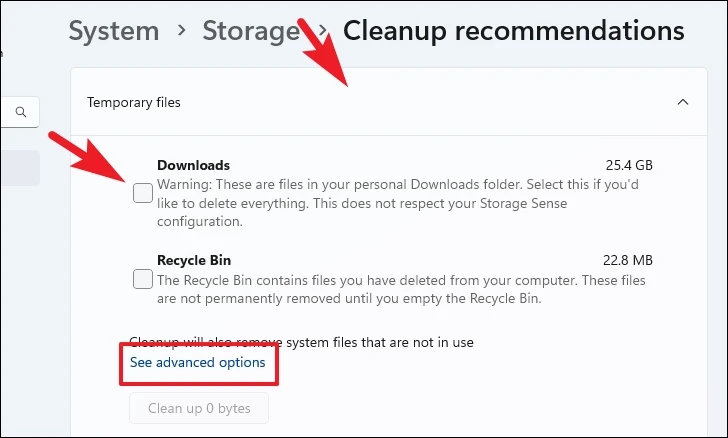
Теперь на странице «Рекомендации по очистке» сначала щелкните плитку «Временные файлы», чтобы развернуть раздел. Затем выберите категории файлов, установив флажок перед каждым списком. Если вы хотите выбрать дополнительные категории временных файлов, нажмите кнопку «Просмотреть дополнительные параметры». После того, как вы выбрали предпочитаемые категории, нажмите кнопку «Очистить» в конце раздела, чтобы очистить выбранные файлы и освободить память на вашем устройстве с Windows 11.
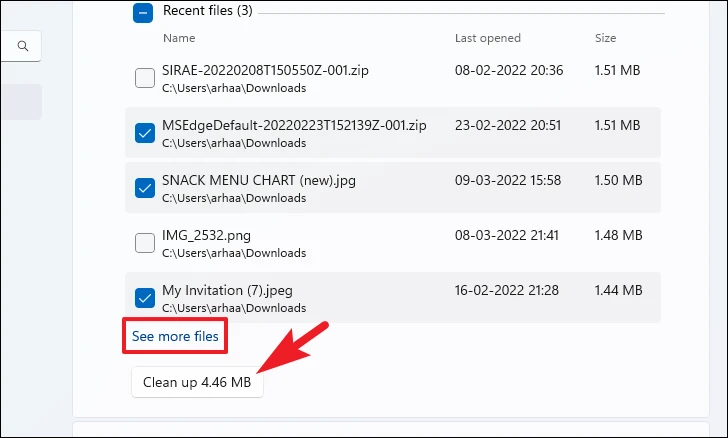
Точно так же щелкните плитку «Большие и неиспользуемые файлы», чтобы развернуть раздел. Все ваши неиспользуемые и очень большие файлы будут перечислены в этом разделе. Просмотрите каждую папку и выберите ее, установив флажок перед каждым элементом списка.
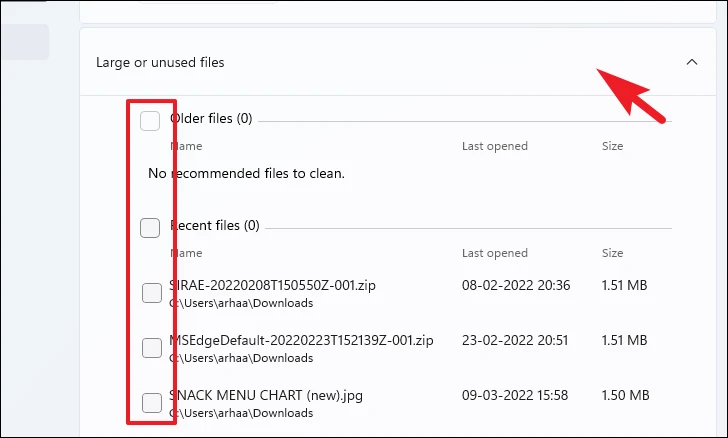
Если вы хотите расширить список файлов, которые вы можете удалить, чтобы освободить место на вашем компьютере, нажмите «Показать больше файлов». После того, как вы выбрали необходимые файлы, нажмите кнопку «Очистить», чтобы навсегда удалить эти файлы из вашей системы.
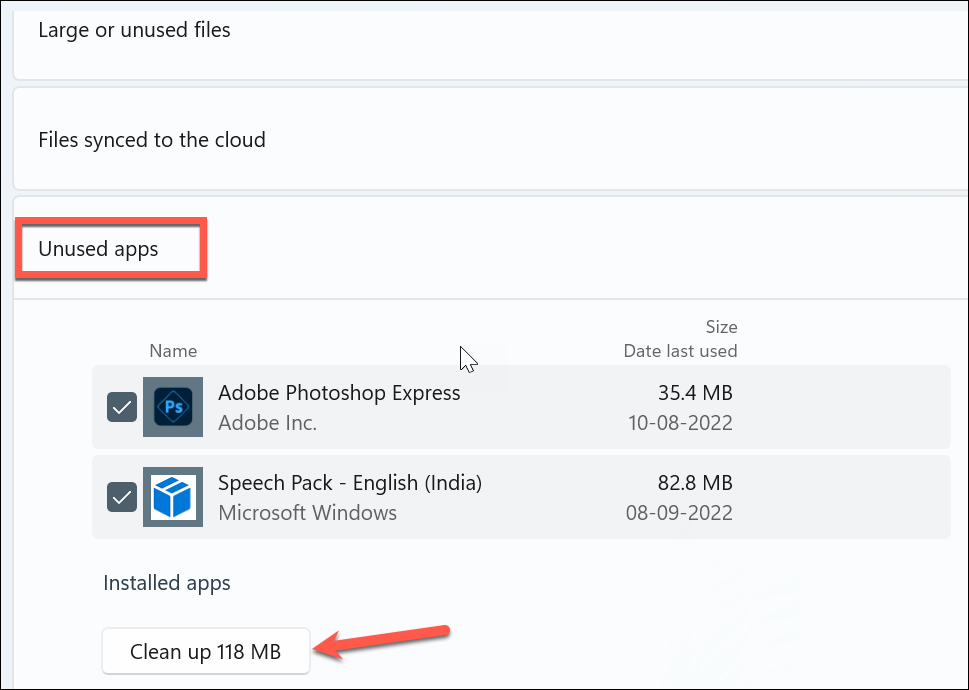
После этого щелкните плитку «Неиспользуемые приложения», чтобы развернуть раздел. Затем, если в списке есть какие-либо приложения, выберите их, установив флажок перед каждым элементом, а затем нажмите кнопку «Очистить», чтобы удалить эти приложения и их данные из вашей системы.
5. Отключите стороннее антивирусное программное обеспечение.
Если в вашей системе установлено стороннее антивирусное программное обеспечение, временно отключите его. Стороннее антивирусное программное обеспечение часто может блокировать обновления Windows, и именно они могут вызывать весь хаос.
Пока вы это делаете, временно отключите другие службы, такие как VPN и брандмауэр, а также ваш антивирус, чтобы ничто не могло помешать работе службы Центра обновления Windows.
Попробуйте обновить систему после отключения всего перечисленного выше. Если обновление прошло успешно, вы можете включить все ранее отключенные службы. В противном случае включите эти службы и перейдите к следующему способу.
6. Запустите DISM и сканирование SFC
Сканирование Deployment Image Servicing and Management проверит и восстановит существующие файлы операционной системы, установленные на вашем устройстве, а также другие системные файлы, которые в настоящее время находятся на вашем ПК.
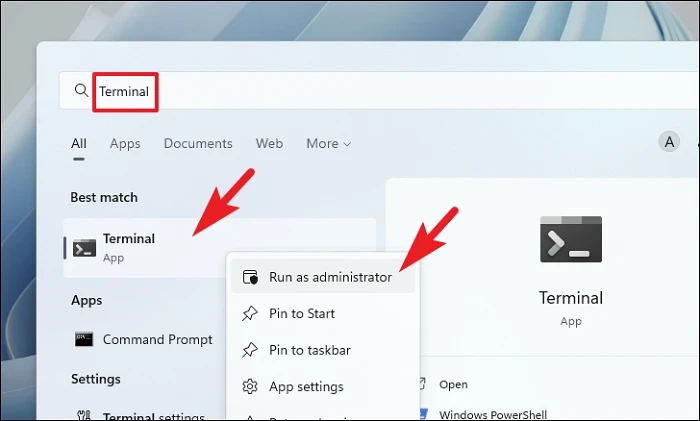
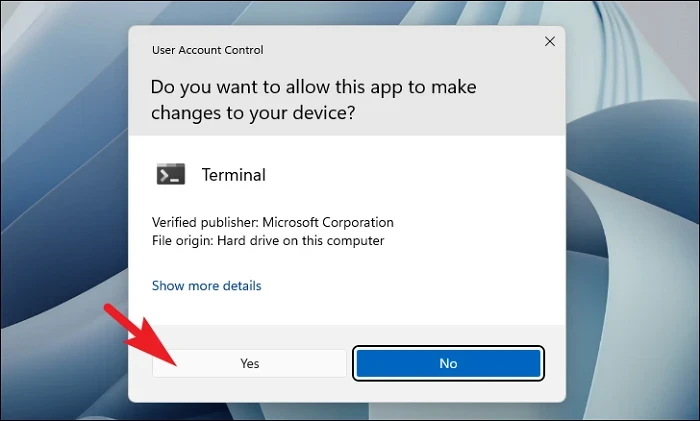
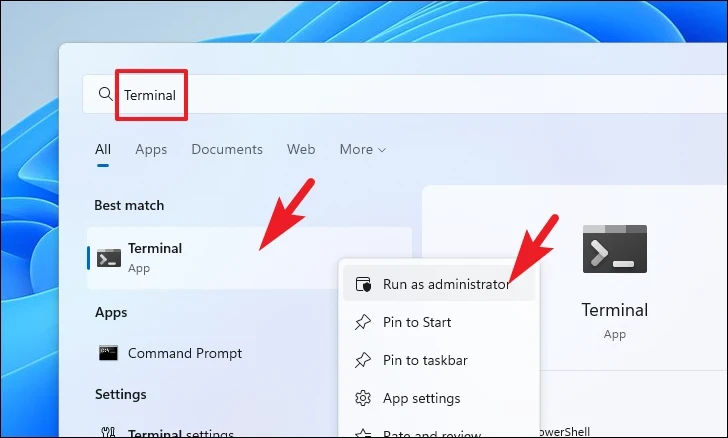
Перейдите в меню «Пуск» и введите Terminalего для поиска. Затем щелкните правой кнопкой мыши плитку «Терминал» и выберите параметр «Запуск от имени администратора» в контекстном меню, чтобы продолжить.
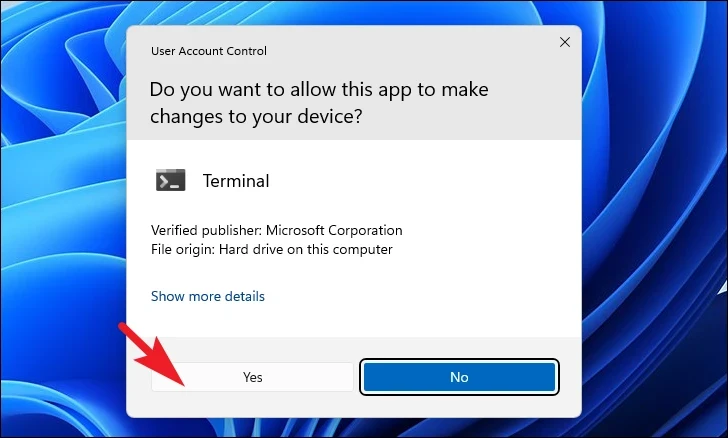
Затем, если вы не вошли в систему с учетной записью администратора, введите учетные данные для нее. В противном случае нажмите кнопку «Да», чтобы продолжить.
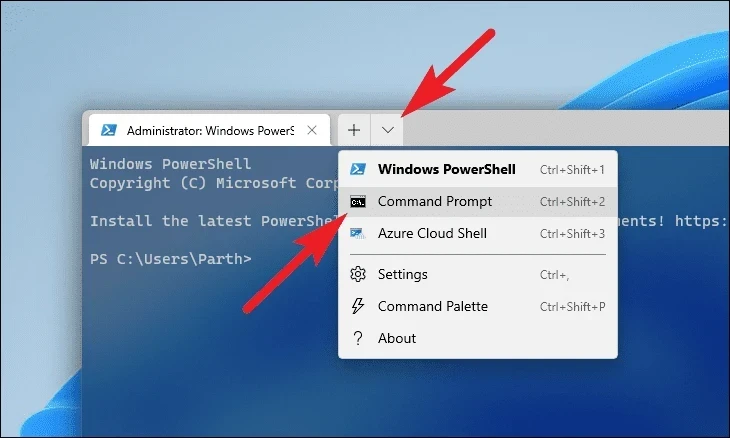
После этого щелкните значок «шеврон» (стрелка вниз) и выберите параметр «Командная строка».
Затем введите или скопируйте+вставьте указанную ниже команду и нажмите Enterна клавиатуре. Это восстановит текущий установленный образ ОС на вашем устройстве.
DISM/ Online/Cleanup-Image/RestoreHealth 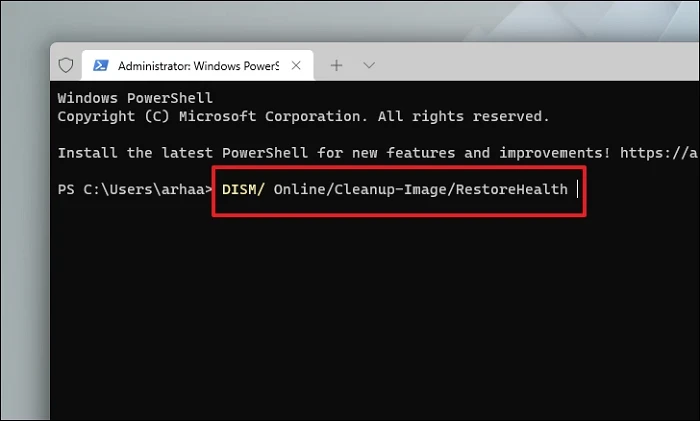
После завершения введите или скопируйте и вставьте следующую команду, чтобы проверить и восстановить системные файлы на вашем ПК.
SFC /scannow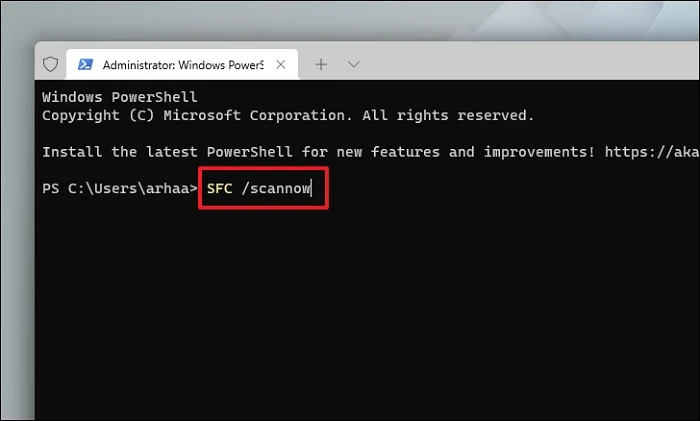
Если после сканирования вы получите сообщение о том, что сканирование прошло успешно, попробуйте обновить Windows еще раз. Если при сканировании были обнаружены поврежденные файлы, удалите эти файлы, а затем обновите свой компьютер. На этот раз должно сработать.
7. Очистите папку распространения программного обеспечения
Во многих случаях поврежденная или испорченная копия обновления Windows может помешать обновлению вашего устройства. Таким образом, очистка папки обновлений может помочь вам.
Сначала перейдите в проводник, дважды щелкнув значок «Этот компьютер» или одновременно нажав клавиши Windows+ Eна клавиатуре.

Затем введите или скопируйте+вставьте указанный ниже адрес в адресную строку окна и нажмите Enter, чтобы перейти в каталог.
C:WindowsSoftwareDistributionDownload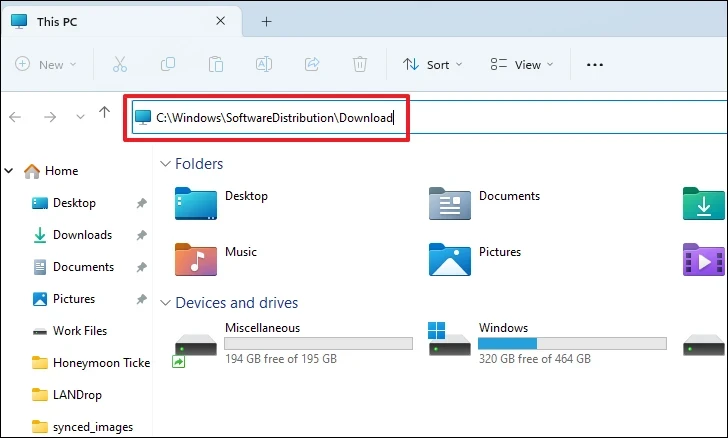
После этого нажмите Ctrl+A, чтобы выбрать все файлы, и нажмите клавиши Shift+ Delete, чтобы безвозвратно удалить все файлы из каталога. Вам потребуются права администратора, чтобы удалить содержимое этой папки.

После удаления перезагрузите компьютер и попробуйте обновить компьютер еще раз, чтобы увидеть, устранена ли проблема.
Если простая очистка папки обновления Windows не решит проблему для вас, просто перезапустите службы Центра обновления Windows вместе с очисткой журналов.
Сначала перейдите в меню «Пуск» и введите Terminalменю, чтобы выполнить его поиск. Затем в результатах поиска щелкните правой кнопкой мыши плитку «Терминал» и выберите «Запуск от имени администратора», чтобы продолжить.
На экране появится окно UAC (Контроль учетных записей пользователей); если вы не вошли в систему с учетной записью администратора, введите учетные данные для нее. В противном случае нажмите кнопку «Да», чтобы продолжить.
Затем щелкните значок «шеврон» (стрелка вниз), а затем выберите значок «Командная строка», чтобы продолжить. Это откроет командную строку на отдельной вкладке.

Теперь введите или скопируйте и вставьте приведенные ниже команды, чтобы остановить текущие службы обновления. Убедитесь, что вы нажимаете Enterпосле каждой команды, чтобы выполнить их по отдельности.
net stop bitsnet stop wuauservnet stop cryptsvc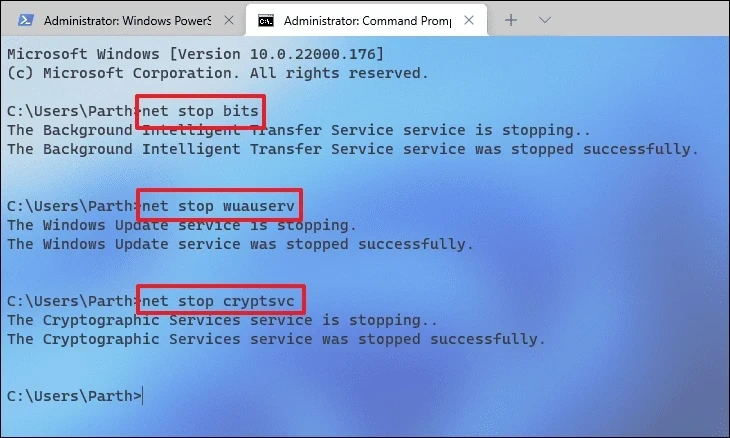
После этого нажмите вместе клавиши Windows+ Rна клавиатуре, чтобы открыть утилиту «Выполнить команду». Затем введите или скопируйте+вставьте указанную ниже утилиту адресного пути.
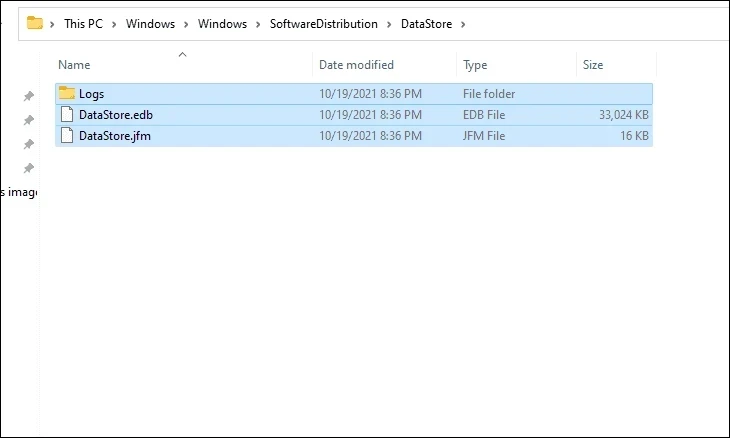
C:WindowsSoftwareDistributionDataStore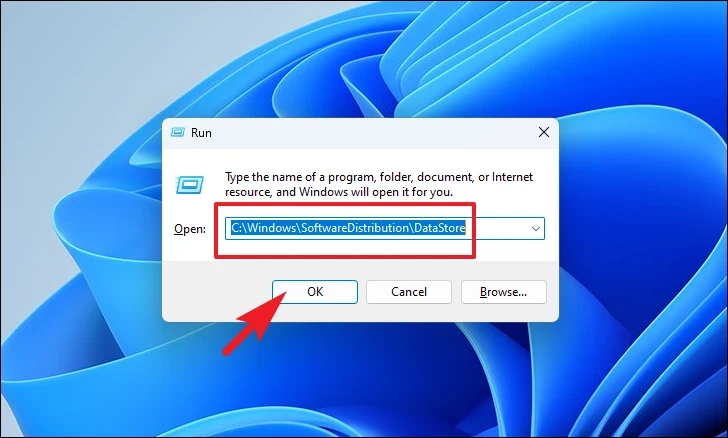
Затем нажмите клавиши Ctrl+ A, чтобы выбрать все файлы и папки, а затем нажмите клавиши Shift+ Delete, чтобы навсегда удалить все файлы.
Наконец, вернитесь в окно командной строки с повышенными правами, введите или скопируйте+вставьте следующие команды одну за другой и нажимайте Enterпосле каждой, чтобы запустить службы, которые вы отключили ранее.
net start bitsnet start wuaservnet start cryptsvc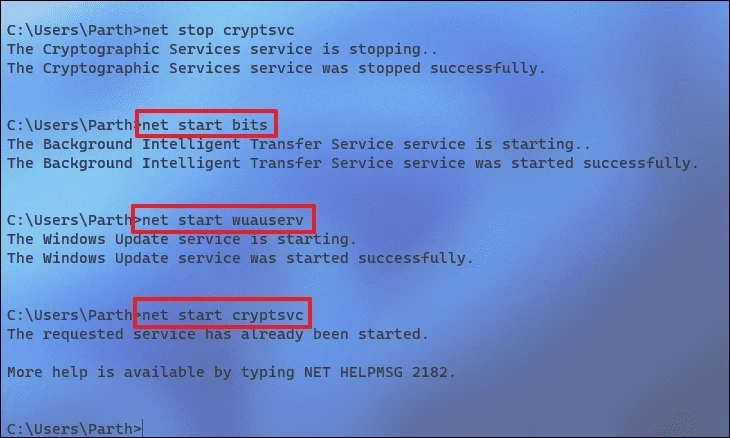
После завершения процесса перезагрузите компьютер с Windows и проверьте, сохраняется ли проблема.
9. Выполните чистую загрузку
Часто стороннее программное обеспечение или служба также могут мешать системным настройкам и вызывать ошибку в вашей системе.
Сначала нажмите клавиши Windows+ Rна клавиатуре, чтобы открыть утилиту «Выполнить команду». После этого введите msconfigи нажмите Enter, чтобы продолжить.

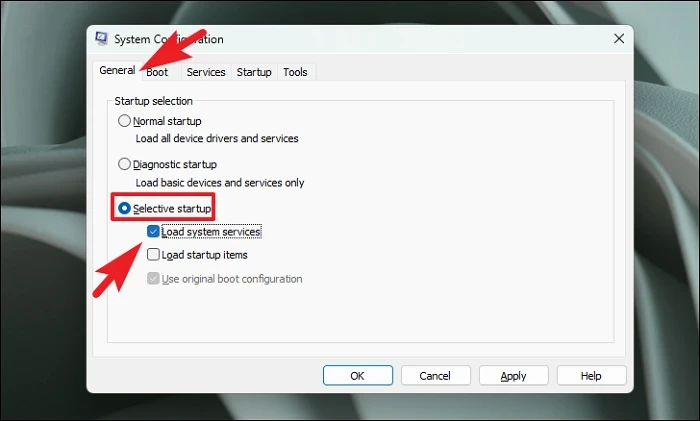
Затем нажмите кнопку «Общие». В общих настройках щелкните переключатель перед параметром «Выборочный запуск» и выберите параметр «Загрузить системные службы».
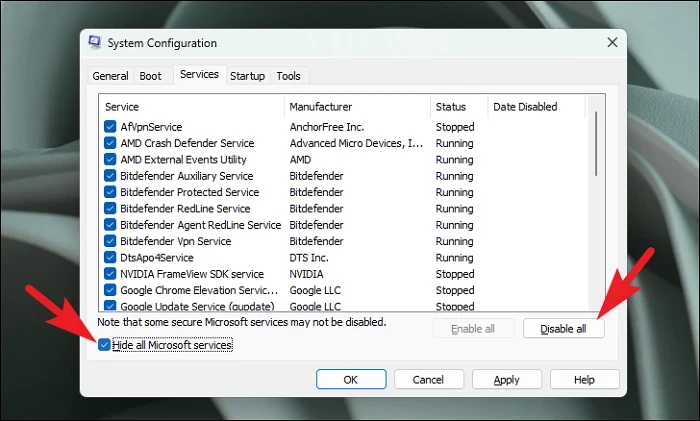
Затем перейдите на вкладку «Службы» и установите флажок перед параметром «Скрыть все службы Microsoft». Затем нажмите «Отключить все».
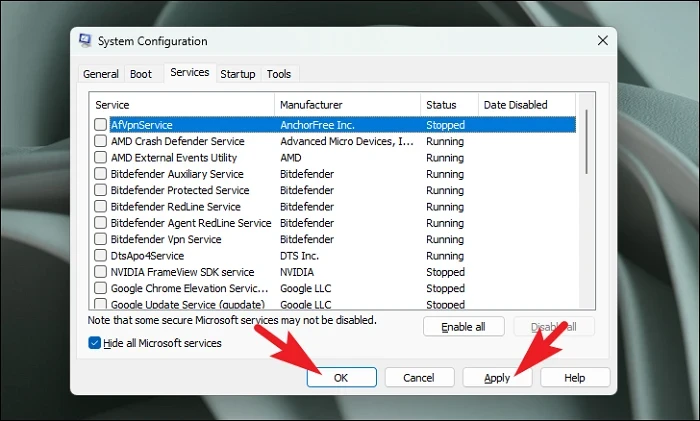
Наконец, нажмите на кнопки «Применить» и «ОК», чтобы продолжить.
Наконец, перезагрузите компьютер из меню «Пуск», и система запустится в чистой загрузочной среде. Проверьте, сохраняется ли проблема. Как только проблема будет решена, снова включите все сторонние службы, чтобы загрузить все ваши программы при следующей загрузке.
10. Откат к точке восстановления системы
Если у вас есть основания полагать, что причиной проблемы может быть недавнее обновление программного обеспечения или установка стороннего программного обеспечения, вы также можете вернуться к точке восстановления системы.
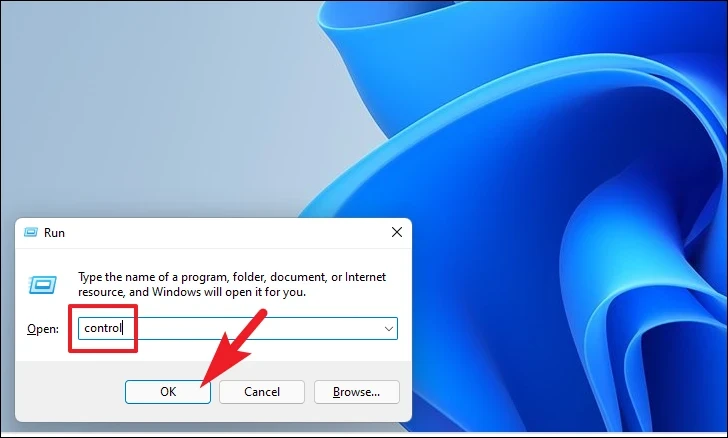
Нажмите сочетание клавиш Windows+ Rна клавиатуре, чтобы вызвать утилиту «Выполнить команду». Затем введите Control и нажмите Enterна клавиатуре.
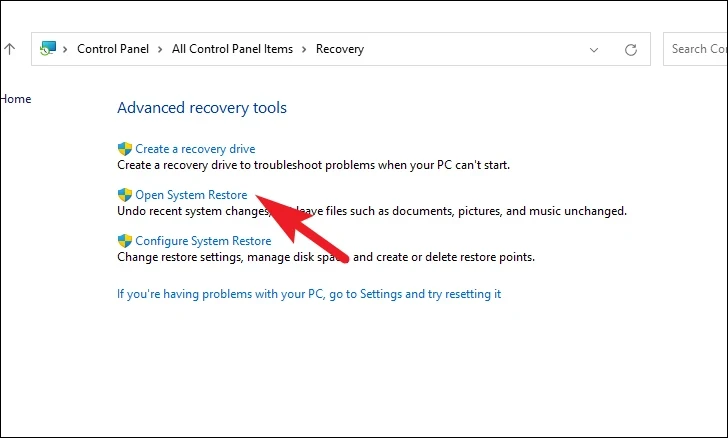
После этого найдите и щелкните плитку «Восстановление» в сетке значков.
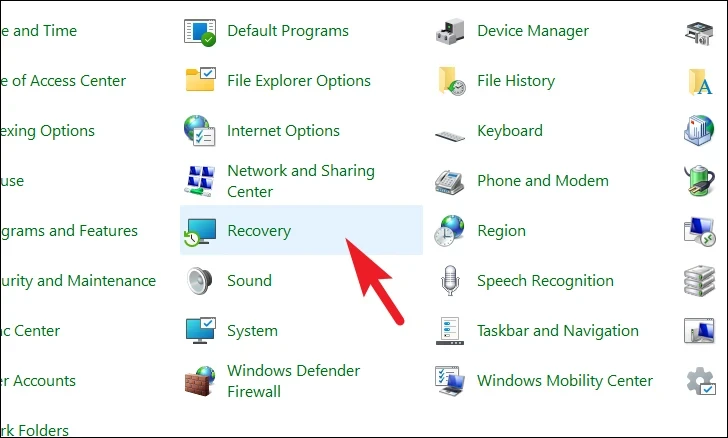
Затем нажмите на опцию «Открыть восстановление системы» из списка. Это откроет отдельное окно на вашем экране.
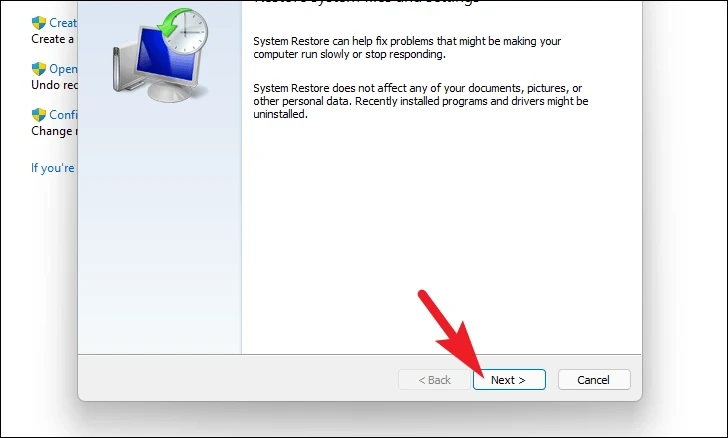
В отдельно открывшемся окне нажмите на кнопку «Далее».
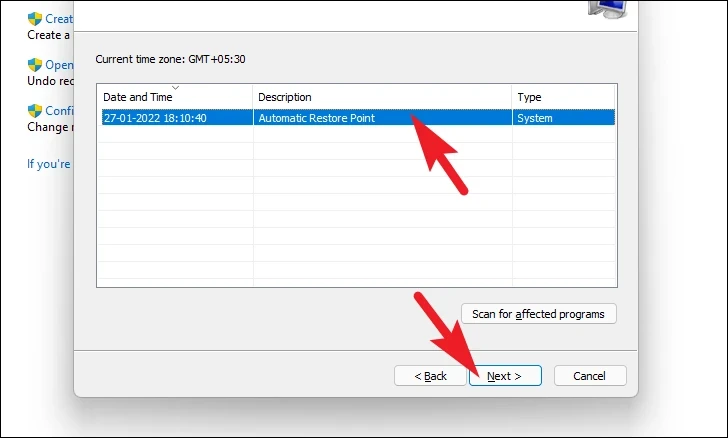
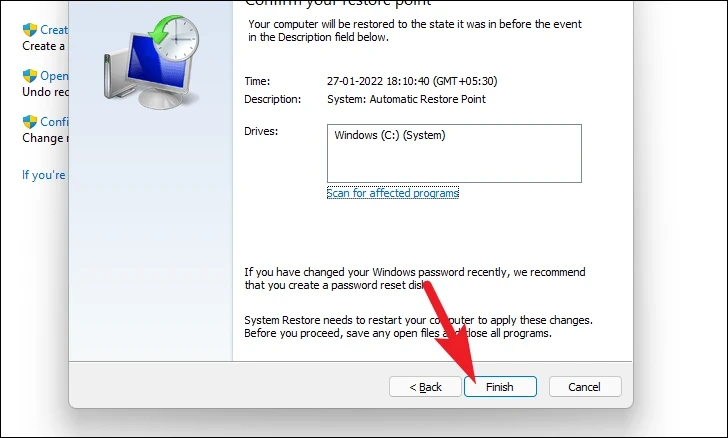
Затем вы увидите список точек восстановления системы, к которым вы можете вернуться. Нажмите, чтобы выбрать из списка и нажмите кнопку «Далее».
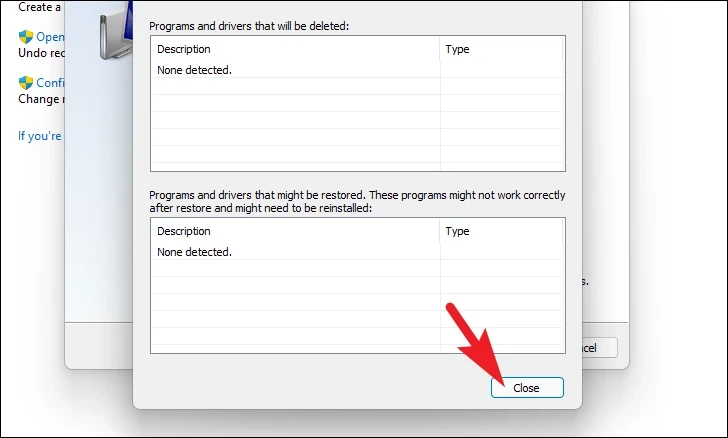
Теперь вы увидите диски, для которых будет выполнен откат с использованием выбранных точек восстановления из раздела «Диски». Если вы также хотите просмотреть файлы и программы, которые будут затронуты, нажмите «Сканировать на наличие затронутых программ». Это откроет отдельное окно.
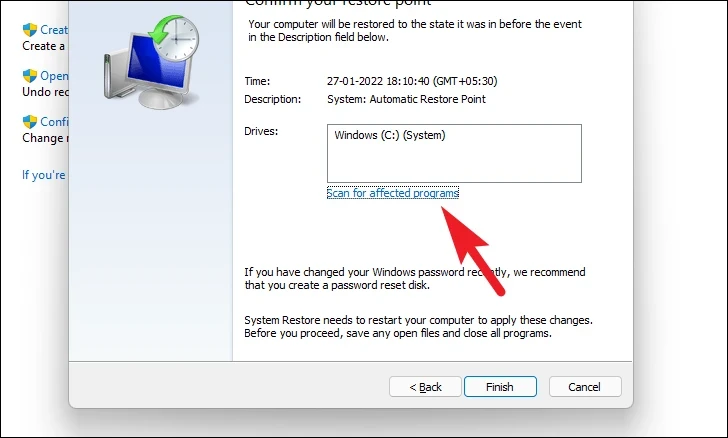
В новом окне вы можете просмотреть программы, которые будут удалены, и те, которые будут восстановлены (на тестовом ПК никакие программы не будут затронуты, поэтому список на скриншоте ниже пуст). Нажмите на кнопку «Закрыть», чтобы закрыть окно.
Наконец, нажмите кнопку «Готово», чтобы начать процесс восстановления системы на ПК с Windows 11.
Если проблема возникла из-за недавнего обновления или установки стороннего программного обеспечения, вы больше не должны сталкиваться с проблемой. Однако, если вы все еще сталкиваетесь с ошибкой, перейдите к следующему решению.
Если ни один метод не смог решить проблему на вашем ПК, в крайнем случае можно перезагрузить компьютер. К счастью, вы не потеряете свои личные файлы и папки. Однако сброс вашего ПК удалит все установленные вами программы, а также вернет все настройки к их конфигурациям по умолчанию.
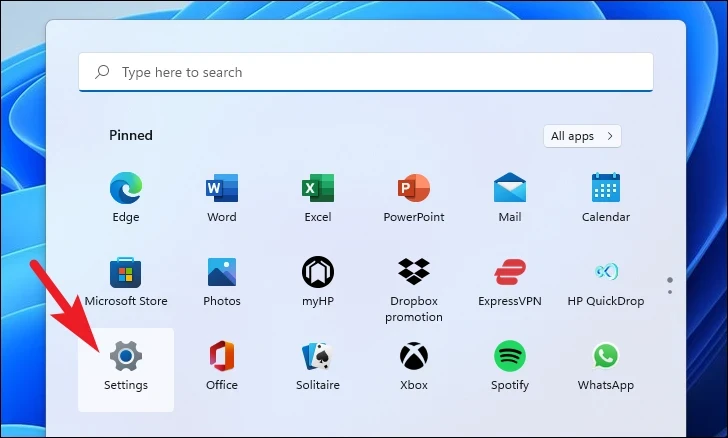
Чтобы перезагрузить компьютер, перейдите в меню «Пуск» и щелкните плитку «Настройки» в разделе «Закрепленные приложения». Либо введите Settingsменю, чтобы выполнить поиск.
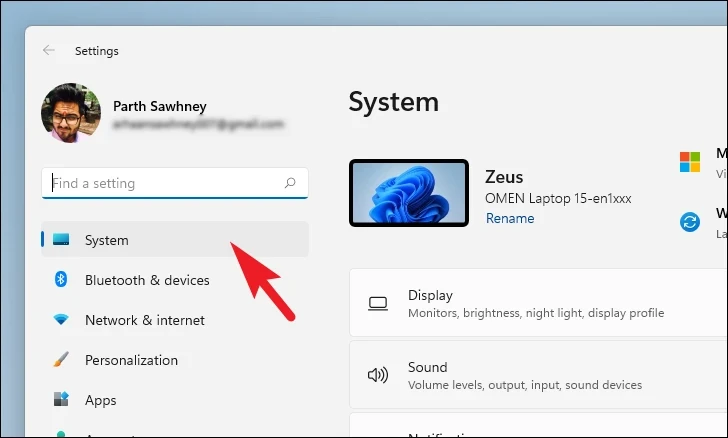
После этого в окне «Настройки» убедитесь, что вы выбрали вкладку «Система» на левой боковой панели.
Затем в правой части окна прокрутите вниз, чтобы найти и щелкнуть плитку «Восстановление», чтобы продолжить.

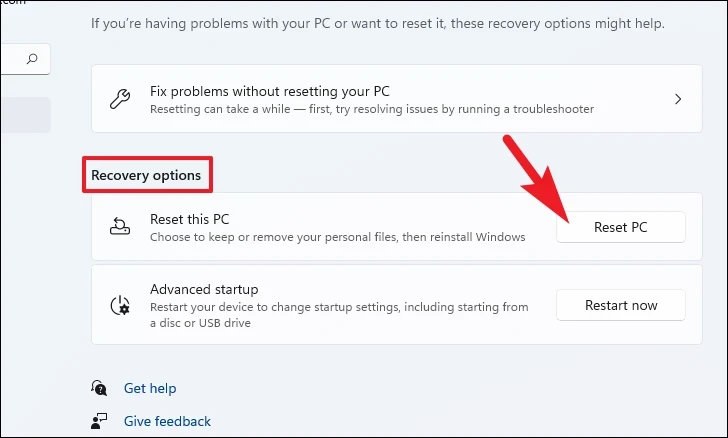
Затем на экране настроек «Восстановление» найдите плитку «Сбросить этот компьютер» и нажмите кнопку «Сбросить компьютер» в дальнем правом краю плитки, чтобы продолжить. Это откроет отдельное окно на вашем экране.
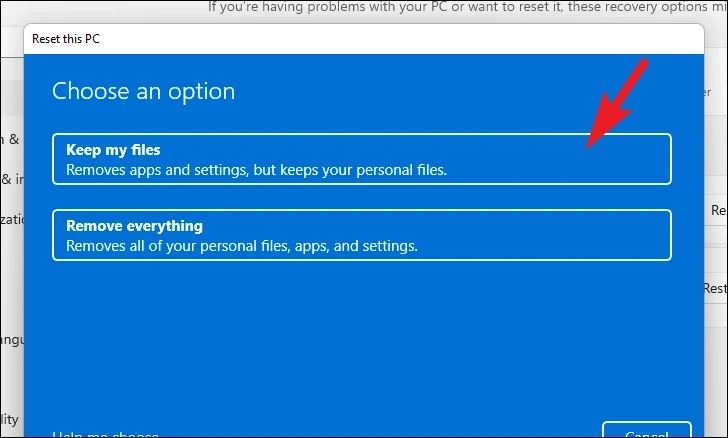
Теперь в отдельно открытом окне нажмите на плитку «Сохранить мои файлы», чтобы продолжить. Если вы хотите удалить все свои личные файлы при сбросе, нажмите «Удалить все».
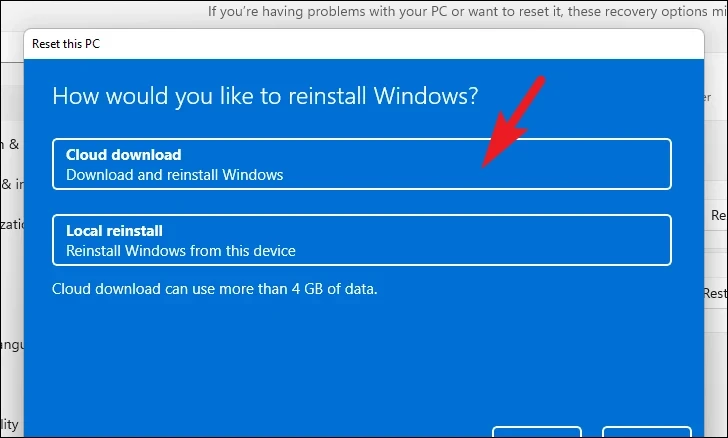
На следующем экране вам нужно будет выбрать способ переустановки операционной системы на вашем компьютере. Поскольку может возникнуть проблема с копией, уже присутствующей в вашей системе, рекомендуется выбрать опцию «Загрузка из облака».
Примечание. «Облачная загрузка» требует активного подключения к Интернету и потребляет более 4 ГБ данных.
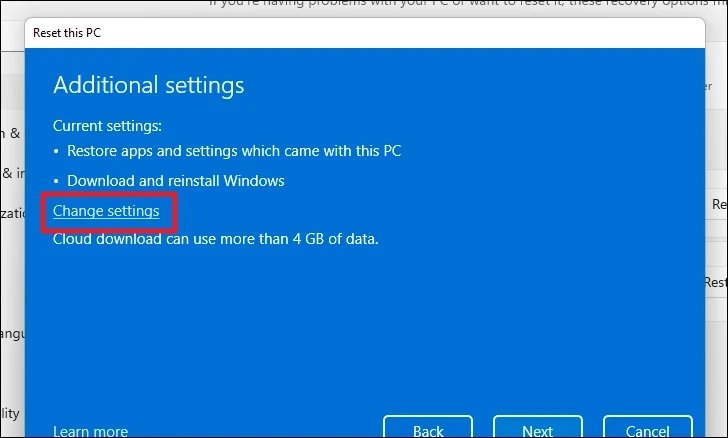
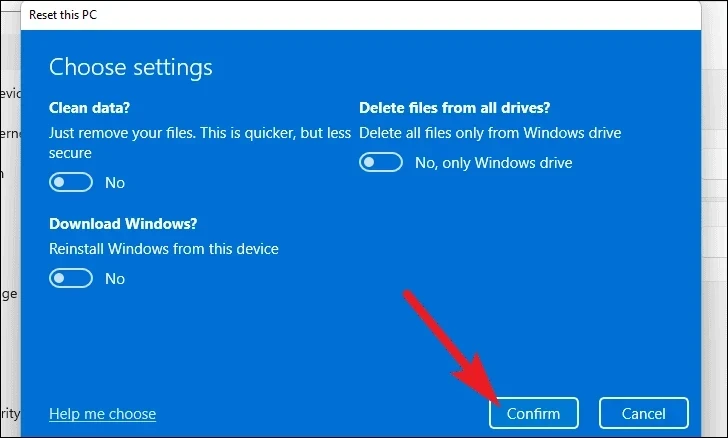
После этого Windows отобразит выбранные вами параметры. Если вы хотите что-то изменить, нажмите «Изменить настройки», чтобы продолжить.
Если вы решили изменить настройки, вы можете настроить следующие параметры на следующем экране. Вы можете не восстанавливать приложения и настройки, щелкнув тумблер в разделе «Восстановить предустановленные приложения?». вариант и приведение его в положение «Нет». Вы даже можете переключиться с облачной загрузки на локальную установку, щелкнув тумблер в разделе «Загрузить Windows?». возможность изменить способ установки. После настройки в соответствии с вашими предпочтениями нажмите кнопку «Подтвердить», чтобы продолжить.
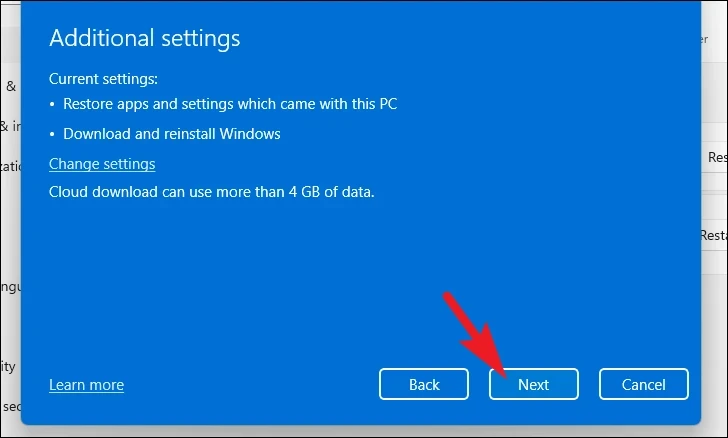
После этого в главном окне нажмите кнопку «Далее», чтобы продолжить.
Если ваш компьютер был недавно обновлен, вы получите сообщение на экране о том, что вы не сможете выполнить откат после перезагрузки компьютера. Чтобы продолжить, нажмите кнопку «Далее».

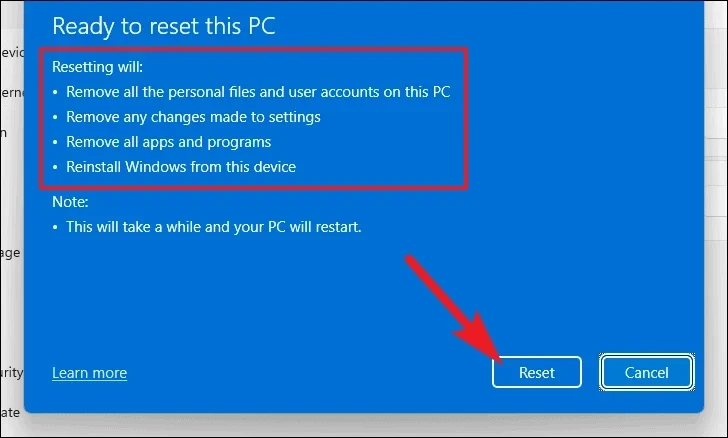
После этого Windows перечислит все последствия перезагрузки компьютера для вашей системы. Внимательно прочитайте их и нажмите «Сброс», чтобы начать процесс сброса.
12. Загрузите и установите обновления вручную
Загрузка пакетов обновлений Windows 11 вручную настолько проста, насколько это возможно, если вы знаете, где их искать.
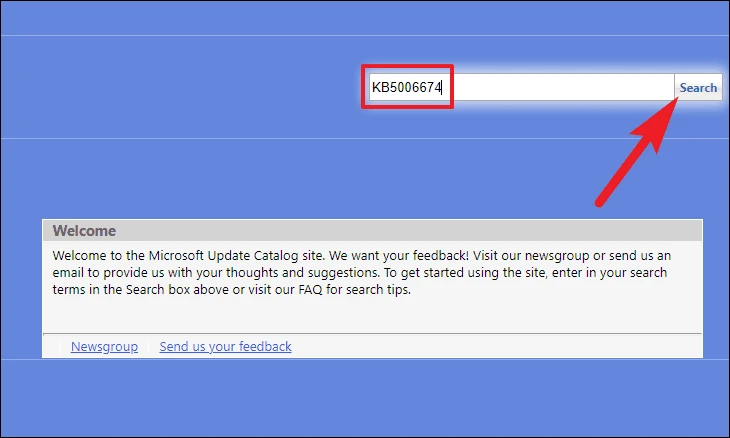
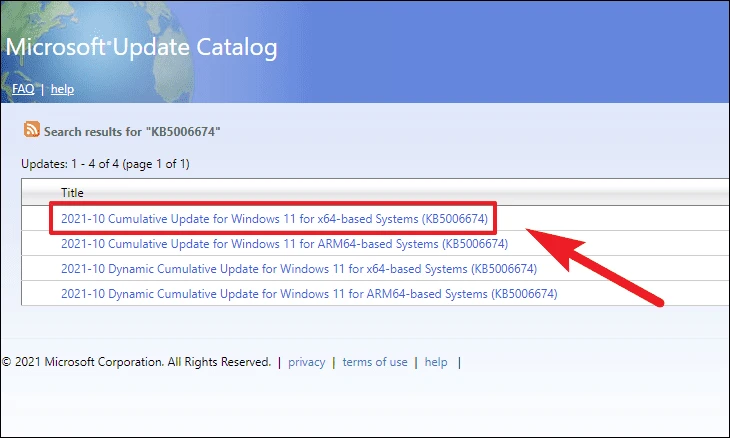
Для этого перейдите на официальный веб-сайт каталога Microsoft catalog.update.microsoft.com. Затем введите номер KB (базы знаний) обновления Windows, которое вы хотите загрузить, в строке «Поиск» на странице и нажмите «Ввод» на клавиатуре или нажмите кнопку «Поиск».
Все доступные загрузки для искомого номера базы знаний будут представлены в списке в Интернете. Чтобы получить дополнительную информацию о конкретном пакете обновлений, нажмите на его название. Это откроет отдельное окно браузера на вашем экране.
Вы также можете получить информацию о «Ресурсах установки», «Подробных сведениях о пакете» и языках, поддерживаемых пакетом, щелкнув соответствующие вкладки на вашем экране.

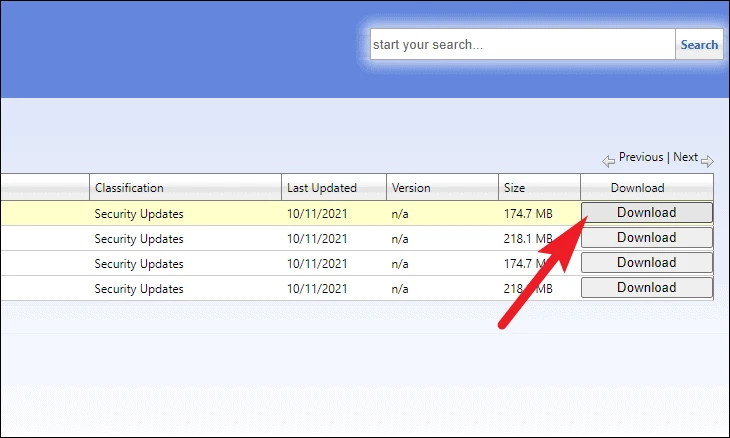
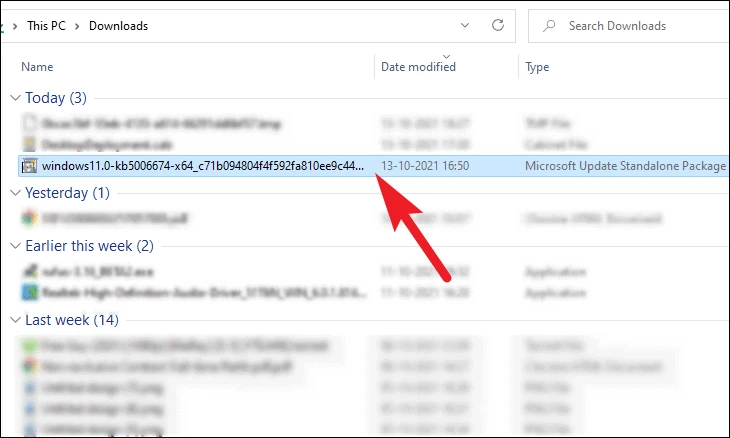
После того, как вы определили, какой пакет вы хотите загрузить, нажмите кнопку «Загрузить», расположенную в дальнем правом углу отдельной строки пакета. Это откроет отдельное окно на вашем экране.
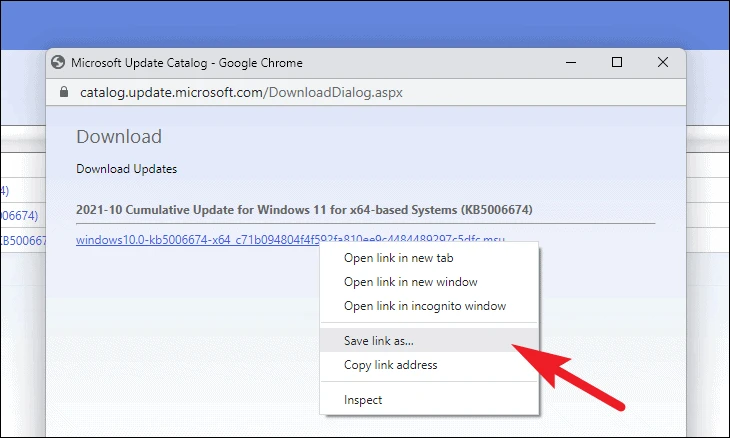
После этого щелкните правой кнопкой мыши ссылку под заголовком пакета обновления и выберите параметр «Сохранить ссылку как» в контекстном меню.
Затем выберите нужный каталог в системе и нажмите кнопку «Сохранить».
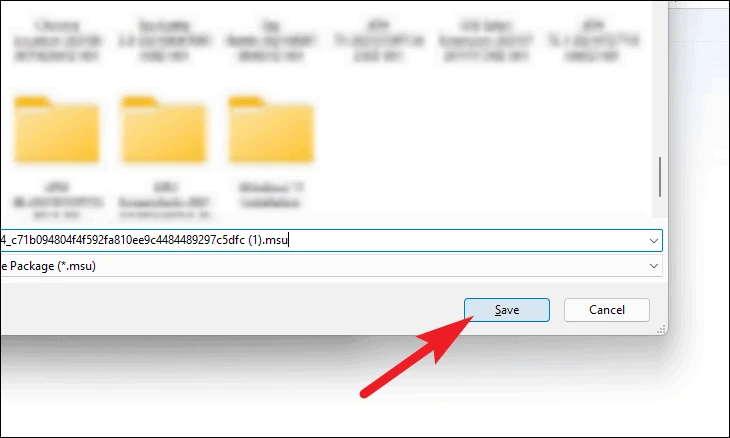
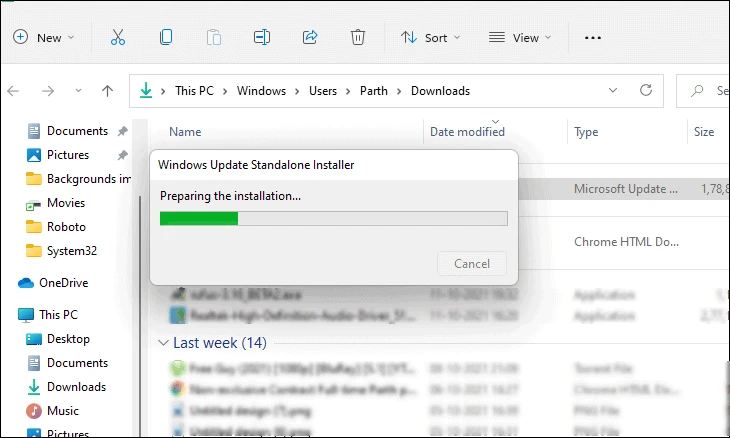
Чтобы установить загруженный пакет, дважды щелкните его, чтобы запустить программу установки.
Автономный установщик Центра обновления Windows подготовит систему к установке, что может занять несколько минут или около того.
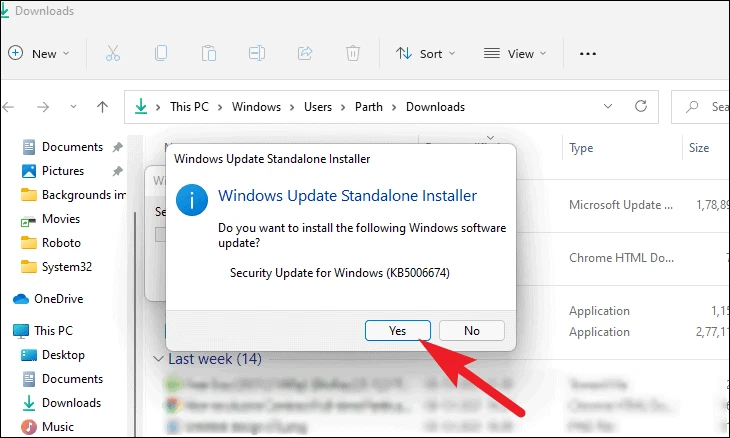
Когда обновление будет готово к установке, на экране появится запрос на подтверждение установки. Нажмите на кнопку «Да», чтобы начать установку.
Теперь вы должны увидеть, что пакет обновления устанавливается в вашей системе, установка может занять несколько минут.
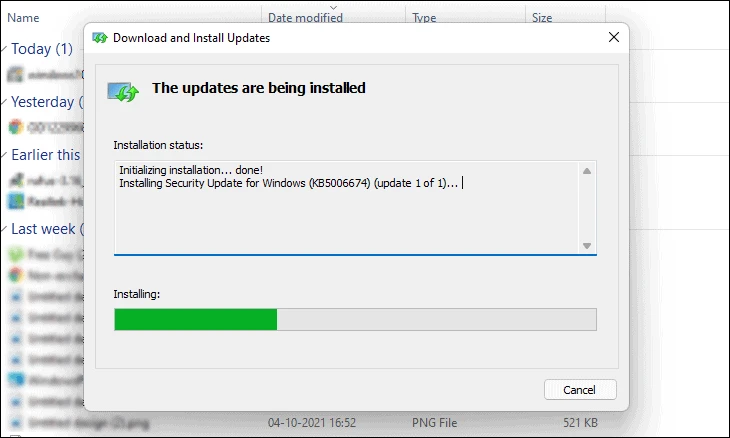
После установки вы увидите сообщение об этом в окне. В зависимости от типа обновления вам может быть предложено перезагрузить компьютер.
Ну вот, ребята. Надеемся, что с помощью упомянутых выше методов вы сможете решить проблему с отсутствием обновления Windows 11 на вашем компьютере.
This issue prevents the installation of the new OS
by Kazim Ali Alvi
Kazim has always been fond of technology, be it scrolling through the settings on his iPhone, Android device, or Windows. And at times, unscrewing the device to take… read more
Published on November 28, 2022
Reviewed by
Vlad Turiceanu

Passionate about technology, Windows, and everything that has a power button, he spent most of his time developing new skills and learning more about the tech world. Coming… read more
- A lot of users have reported being the Windows 11 update not showing in Windows 10 on the Windows Update tool.
- If you using a PC that meets that minimum requirement, you should receive the update in a while since the roll-out is in a phased manner. However, there are ways to make the jump even sooner.
- Check for any issues with the Windows Update, namely, if they are paused, stuck, or the presence of conflicting programs.
- Also, learn how to install Windows 11 on unsupported PCs.
XINSTALL BY CLICKING THE DOWNLOAD FILE
- Download Restoro PC Repair Tool that comes with Patented Technologies (patent available here).
- Click Start Scan to find broken files that are causing the problems.
- Click Repair All to fix issues affecting your computer’s security and performance
- Restoro has been downloaded by 0 readers this month.
Windows 11 has been rolled out for users, though in a phased manner. PCs that are compatible should receive an update in the days to follow. However, many users have reported Windows 11 not showing up in Windows Update.
The Windows 11 update not showing up issue could be due to a bunch of reasons, some related to your computer’s compatibility while others to the phased rollout. Whatever the case, there are ways you can get your hands on the latest Windows iteration from Microsoft.
If you have been checking the Windows Update section time and again to upgrade but to no avail, read ahead to find out the various ways you can install Windows 11 on your computer.
Why don’t I see the Windows 11 update?
A large number of computers wouldn’t be able to upgrade to Windows 11 owing to the strict system requirements. And Microsoft has its reasoning for that.
Can my PC run Windows 11?
To check whether a computer can run Windows 11, Microsoft has released the PC Health Check app. Just download and install the app, run it, and you will find out whether or not your system is compatible.
If you get the message This PC meets Windows 11 requirements, your computer is compatible. Head over to the next section to find out ways to make the upgrade even if Windows 11 is not showing up in Windows Update.
For those of you who see This PC doesn’t currently meet the Windows 11 system requirements, you wouldn’t be receiving the upgrade via Windows Update. Head over to the end to find out how you can install Windows 11 on an unsupported PC.
What can I do if the Windows 11 update is not showing up?
- Why don’t I see the Windows 11 update?
- Can my PC run Windows 11?
- What can I do if the Windows 11 update is not showing up?
- 1. Resume Windows Update
- 2. Reboot the computer
- 3. Run the Windows Update troubleshooter
- 4. Repair Windows Update components
- 5. Restart the Windows 11 update
- 6. Disable or uninstall conflicting apps
- 7. Use the Installation Media
- Can I use the Windows 11 Installation Assistant to upgrade?
- What do I do if my PC doesn’t meet the system requirements for Windows 11?
1. Resume Windows Update
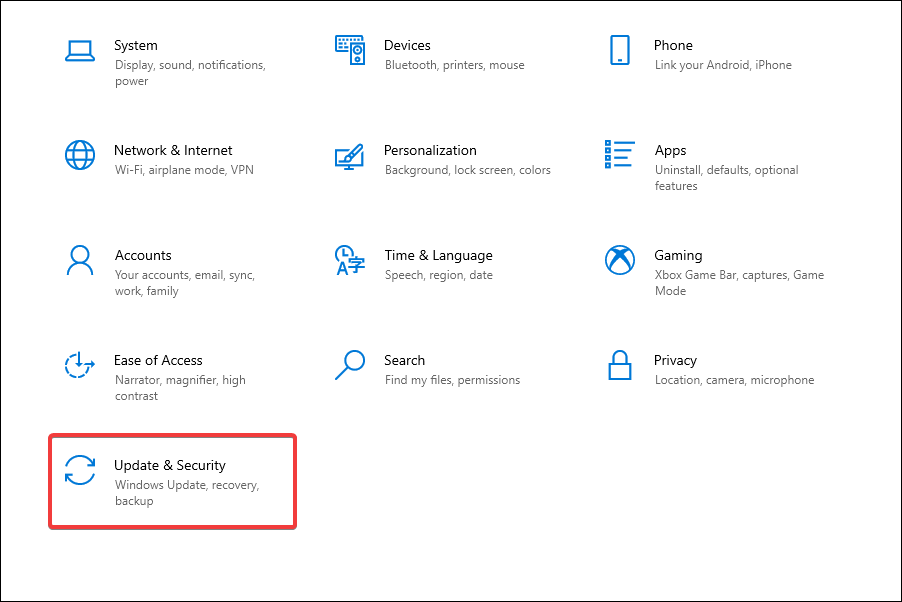
- Press Windows + I to launch the Settings app.
- Select Update & Security from the various options listed here.

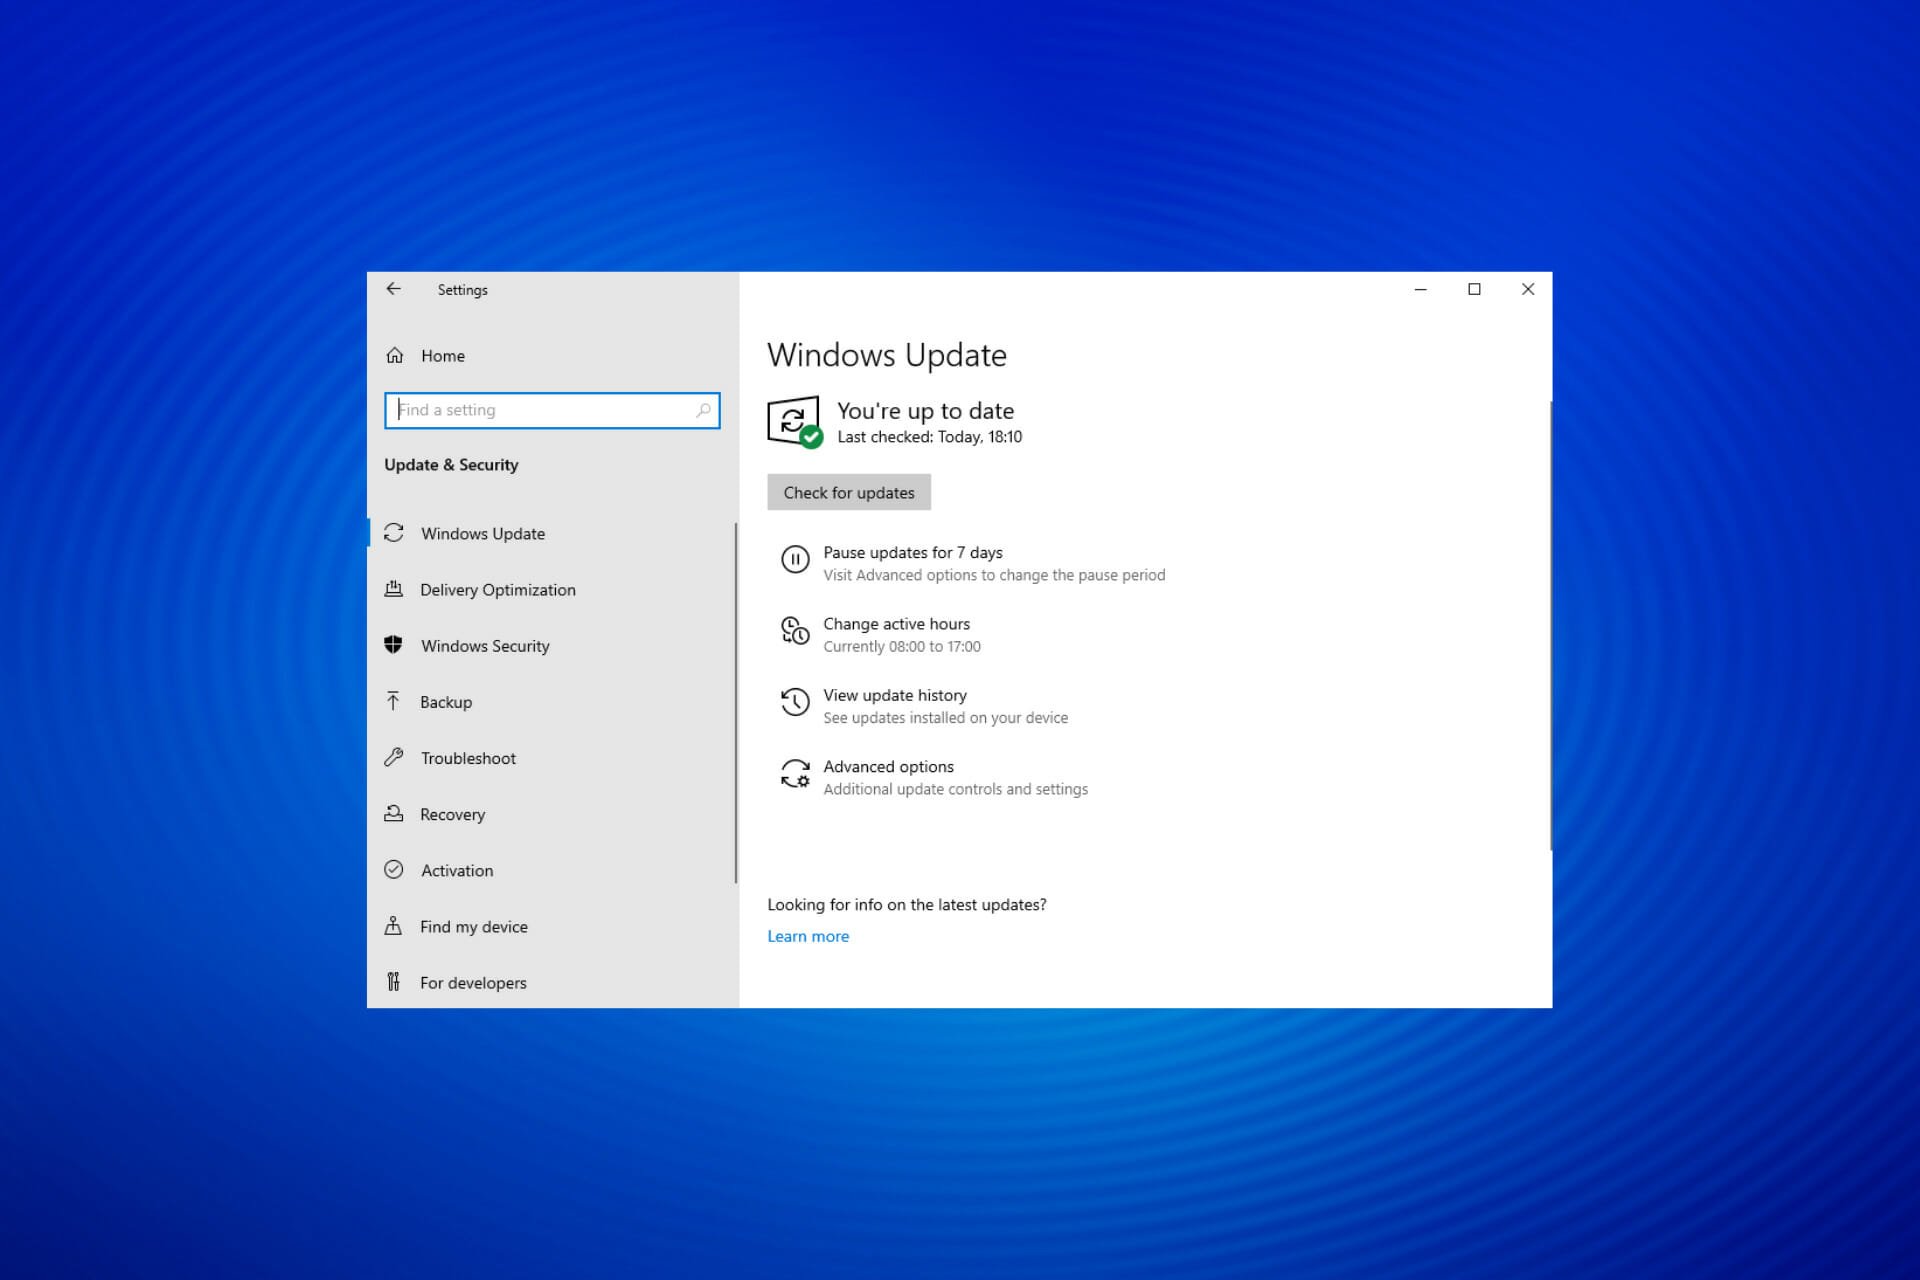
- In the Windows Update tab that opens by default, check if there is a Resume Updates button on the right. If there’s one, click on it to start receiving updates.

- Your system will now automatically start scanning for any available update including those for Windows 11.

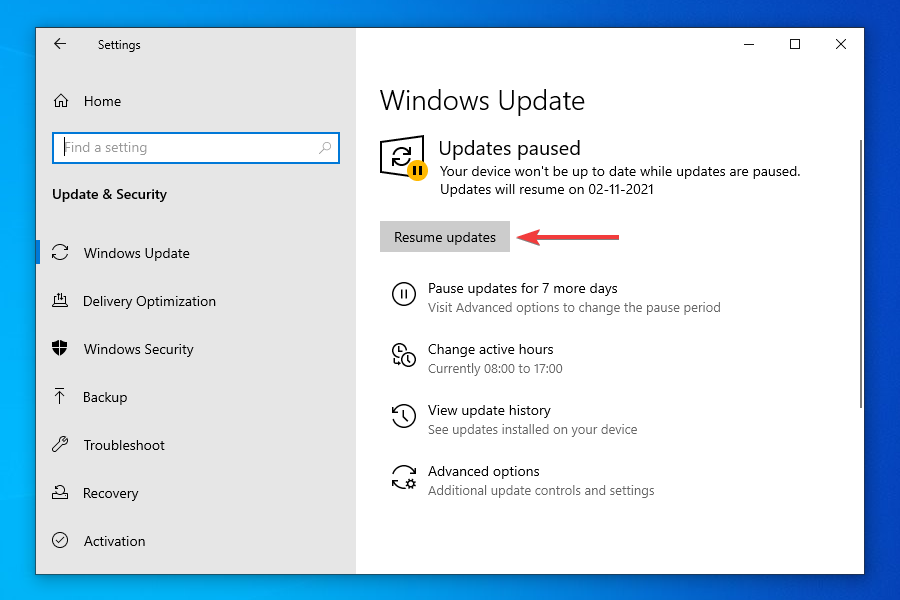
If you have paused updates, you wouldn’t be receiving any, including the one for Windows 11. Even if you don’t remember doing it, there’s no harm in cross-checking before we proceed further.
After you enable updates, if an upgrade for Windows 11 is available, it would be shown in Windows Update, and subsequently, downloaded and installed on your computer.
2. Reboot the computer
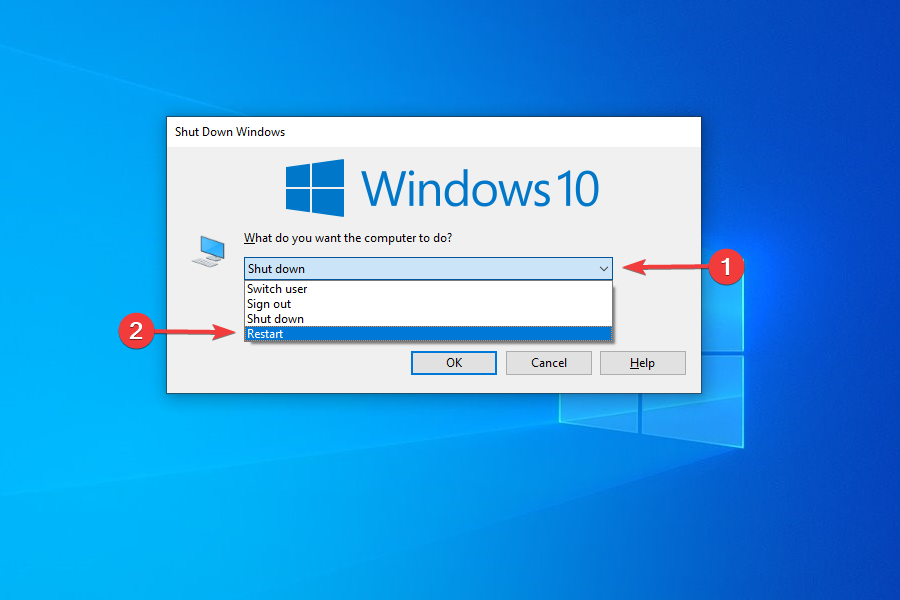
- Navigate to the desktop and press Alt + F4 to launch the Shut Down Windows box.
- Click on the dropdown menu and select Restart from the list of options.
- Click on OK to restart the computer.
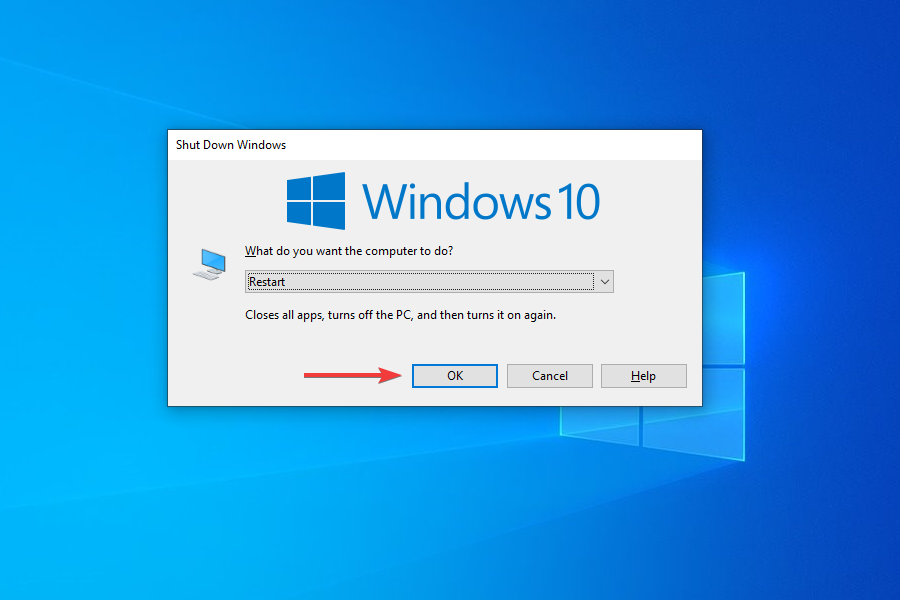
Before restarting, make sure to save any open files to avoid data loss. Rebooting the computer restarts the OS and fixes any trivial bugs that may be interfering with the Windows 11 update.
3. Run the Windows Update troubleshooter
- Press Windows + I to launch the Settings app.
- Select Update & Security from the list of options listed in the Settings.
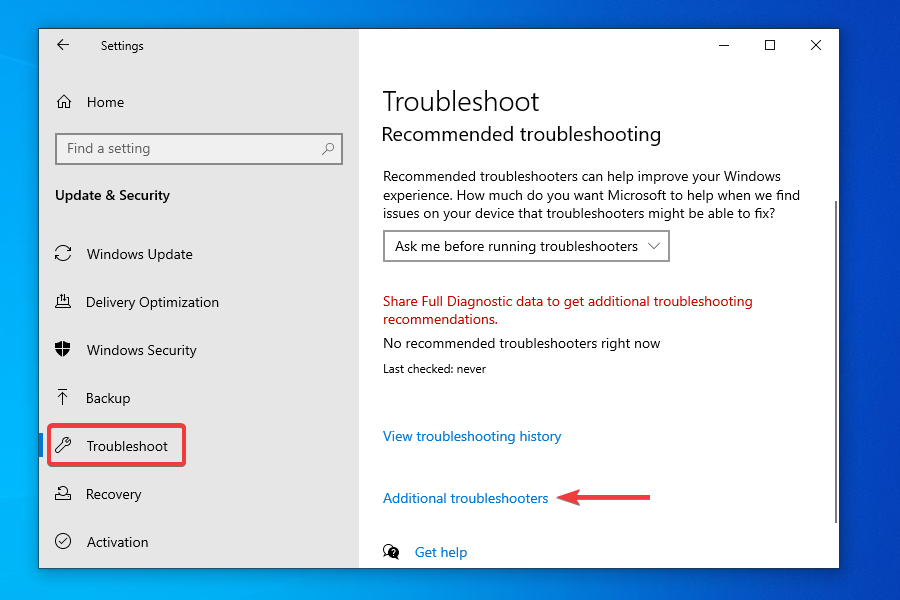
- Select Troubleshoot from the tabs listed in the navigation pane and click Additional troubleshooters on the right.
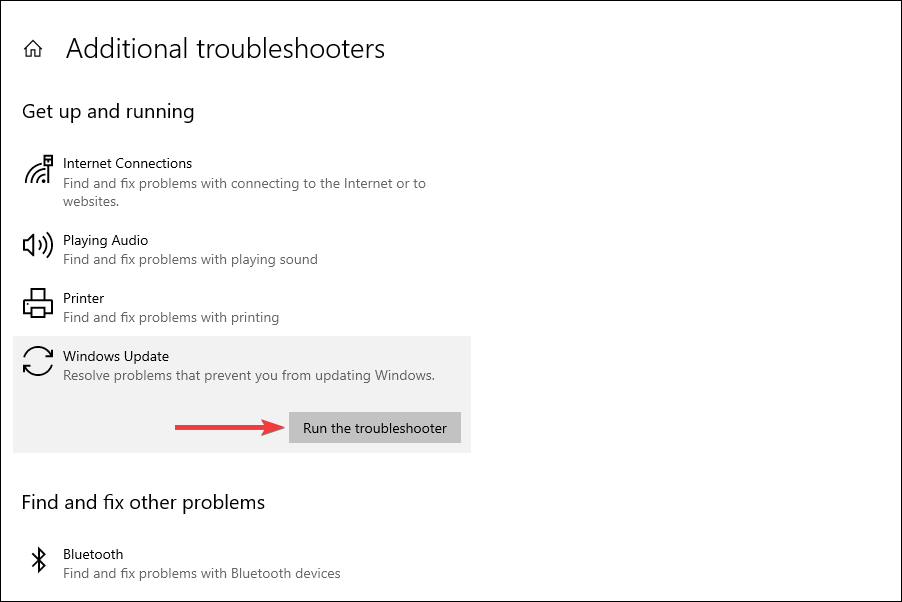
- Click on Windows Update.
- Click Run troubleshooter to diagnose and fix issues preventing your PC from receiving the update for Windows 11.
- The troubleshooter will now start running. Follow the instructions and choose the appropriate response, if and when prompted, to complete the process.

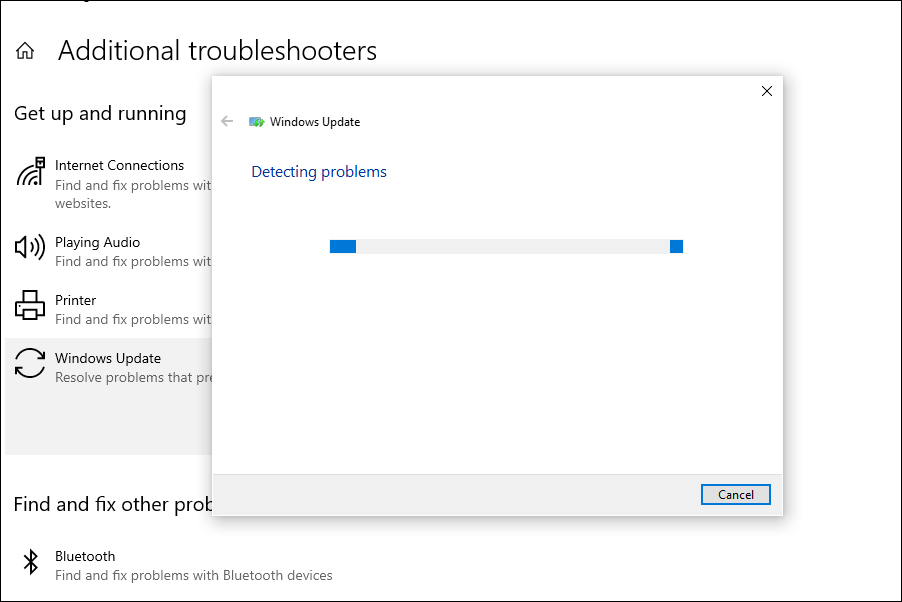
The built-in troubleshooters offered by Microsoft are excellent in identifying and fixing small bugs, misconfigured settings, and other issues. After the troubleshooter is done running, check if Windows 11 is now showing up in Windows Update.
4. Repair Windows Update components
Although you are required to repair or reset Windows Update components when encountering an error, it may also help you get the Windows 11 update in this case.
If they have become corrupt or have run into a bug that is leading to the Windows 11 not showing up in Windows update issue, repairing or resetting them should come in handy.
5. Restart the Windows 11 update
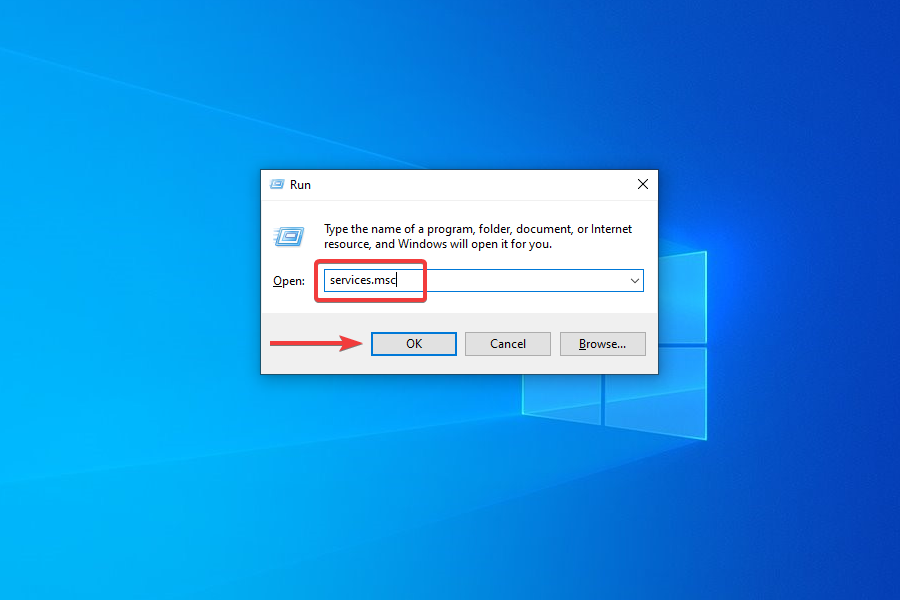
- Press Windows + R to launch the Run command.
- Type services.msc in the text field, and either click on OK or press Enter to launch the Services app.
- Locate and double-click on the Windows Update service.
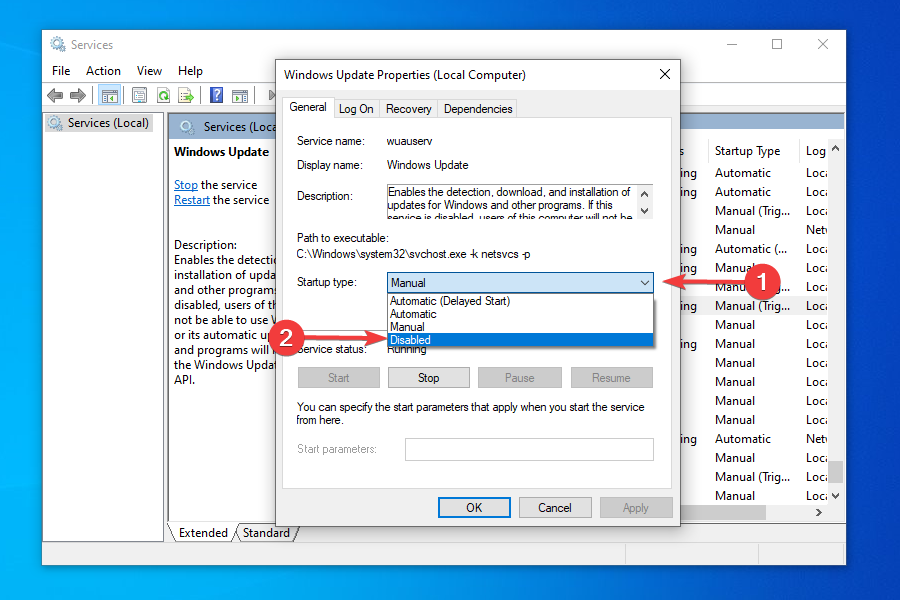
- Click on the Startup type dropdown menu and select Disabled from the list of options that appear.
- Click on Apply to save the changes.
- Next, click OK to close the properties window.
- Close the Services app.
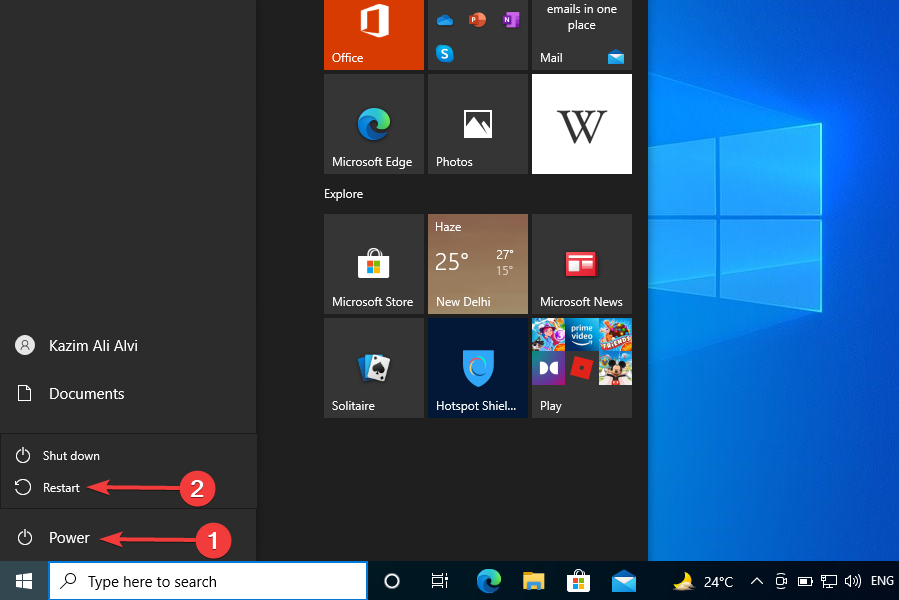
- Now, you need to reboot the computer. To do that, press the Windows key, click on the Power button, and select Restart from the menu that appears.

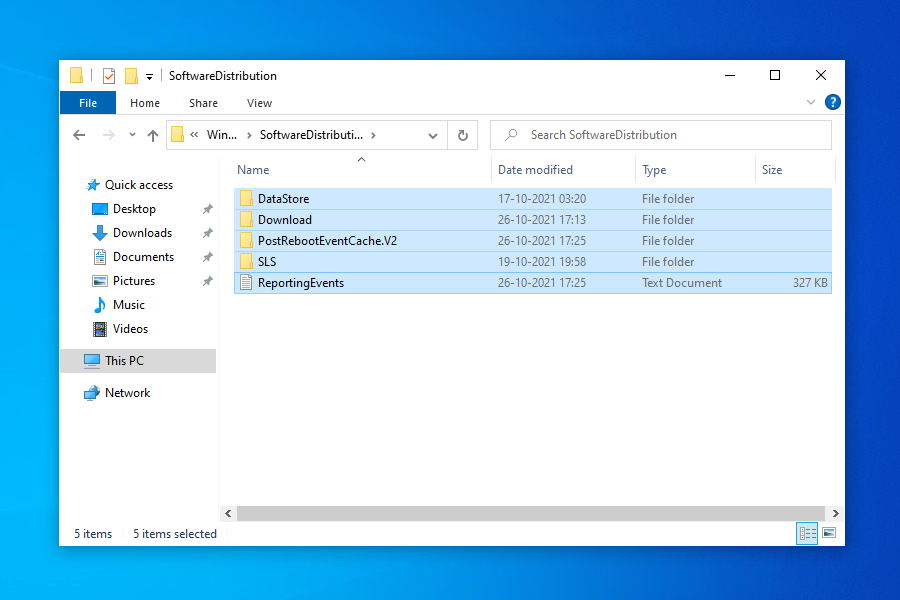
- Press Windows + E to launch the File Explorer, and navigate to the following path or paste it in the addressbar at the top and hit Enter.
C:WindowsSoftwareDistribution - Press Ctrl + A to select all the files saved here, and hit the Del key to delete them.
- Choose the appropriate response in case a confirmation box pops up.
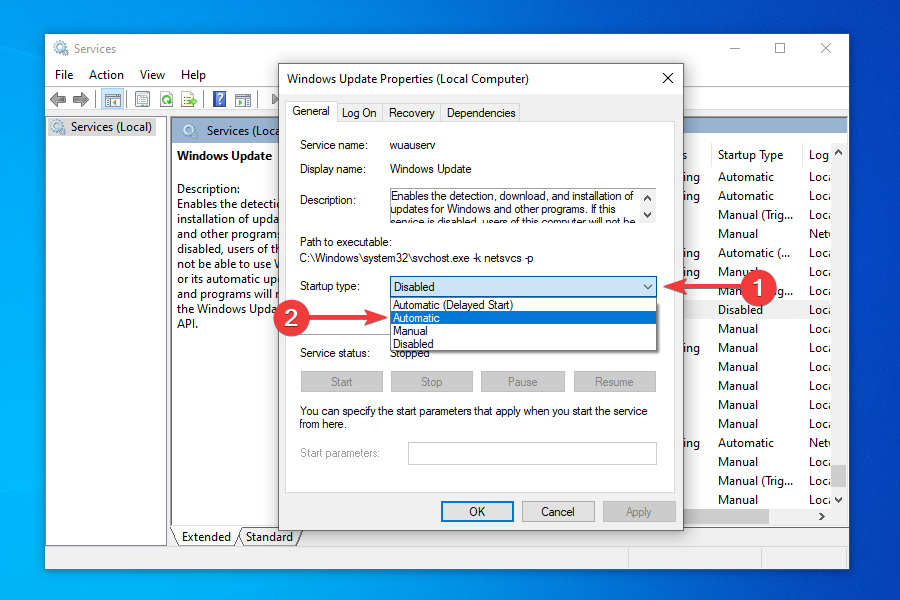
- Now, again launch the Services app as you did earlier, and double-click on the Windows Update service.
- Select Automatic from the Startup type dropdown menu this time.
- Click on Apply to save the changes.
- Click on Start under Service status to run the service, and then click on OK at the bottom.
- Go to the Windows Update section in Settings and check if you can now install Windows 11.

In some cases, the update for Windows 11 may seem stuck at 100% for hours without any progress. In such cases, following the steps mentioned here will get things up and running and allow you to upgrade.
6. Disable or uninstall conflicting apps
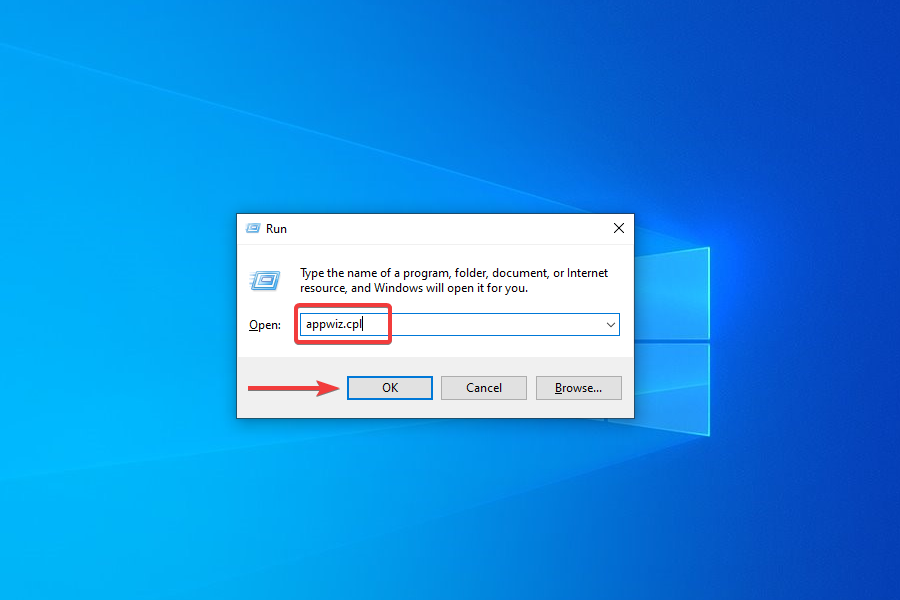
- Press Windows + R to launch the Run command.
- Enter appwiz.cpl in the text field and click on OK or hit Enter to launch the Programs and Features window.
- Locate and select the app you want to remove, and click on Uninstall at the top.
- Choose the appropriate response in case a confirmation box pops up.

To disable an app, you can go to its built-in Settings and turn on/off the required toggle or choose the appropriate response.
The method to disable each app is different and there should be an option for it somewhere in the app’s built-in Settings. Search the FAQ section on the official website for the program to find out the exact steps.
Some PC issues are hard to tackle, especially when it comes to corrupted repositories or missing Windows files. If you are having troubles fixing an error, your system may be partially broken.
We recommend installing Restoro, a tool that will scan your machine and identify what the fault is.
Click here to download and start repairing.
If disabling the app didn’t work or you couldn’t find the option for it, follow the steps above to uninstall the app.
Certain programs are known to block the Windows Updates, thus leading to the current issue.
You should look out for third-party firewalls and disable or uninstall them. Also, apps like Pi-hole or other similar ones, have been found to be the culprit, and uninstalling them fixed the problem.
Once you are done disabling or uninstalling the problematic apps, check if you are able to find and install Windows 11 from Windows Update.
7. Use the Installation Media

NOTE
For this method, you will require a USB flash drive with more than 8 GB of storage to create a bootable USB for installing Windows 11.
- Plug in the flash drive to your sytem.
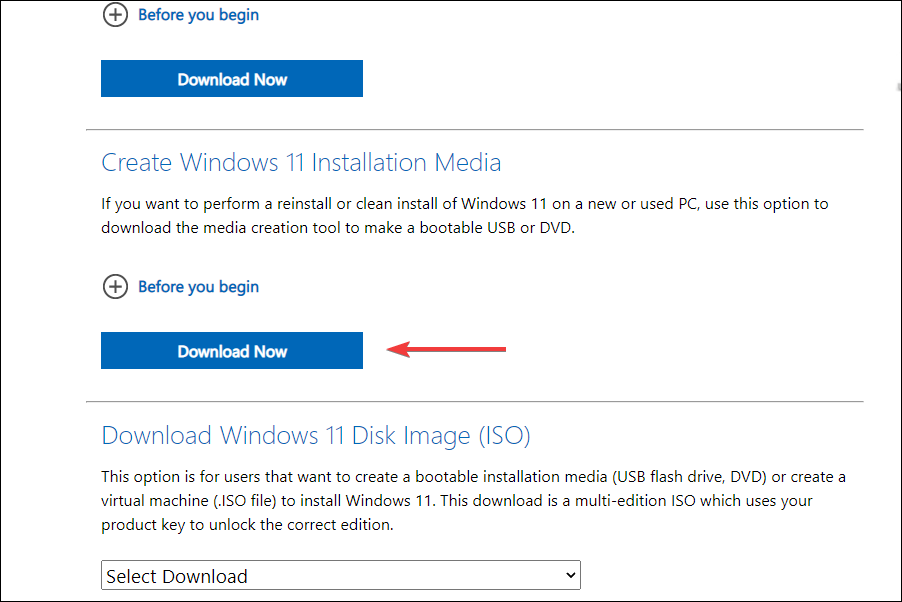
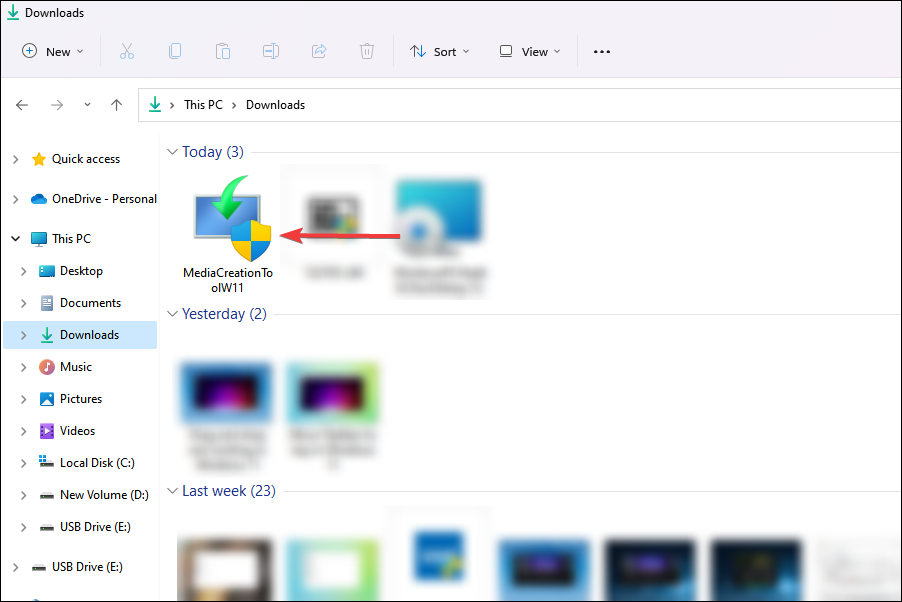
- Go to the download page for Windows 11 and click on Download Now under Create Windows 11 Installation Media.
- Navigate to the location where the downloaded file is saved and double-click on it.
- Click Yes on the UAC prompt that appears.
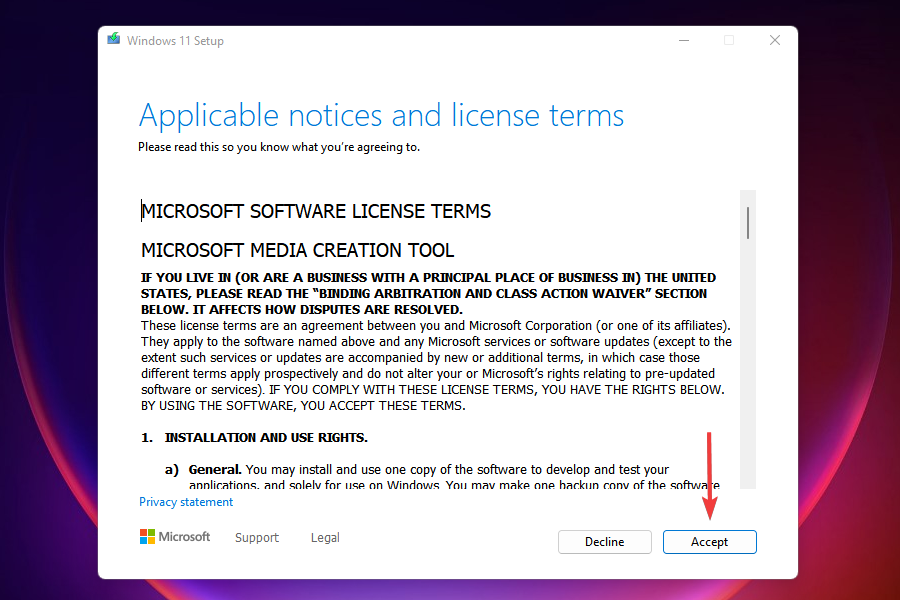
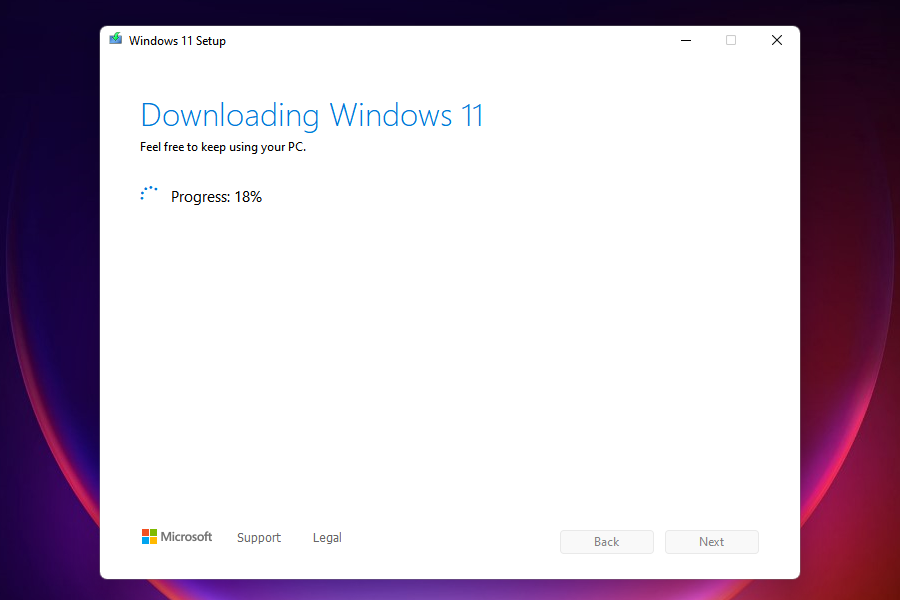
- The setup will take a few moments to get things ready.
- Click on Accept to agree to the license terms.
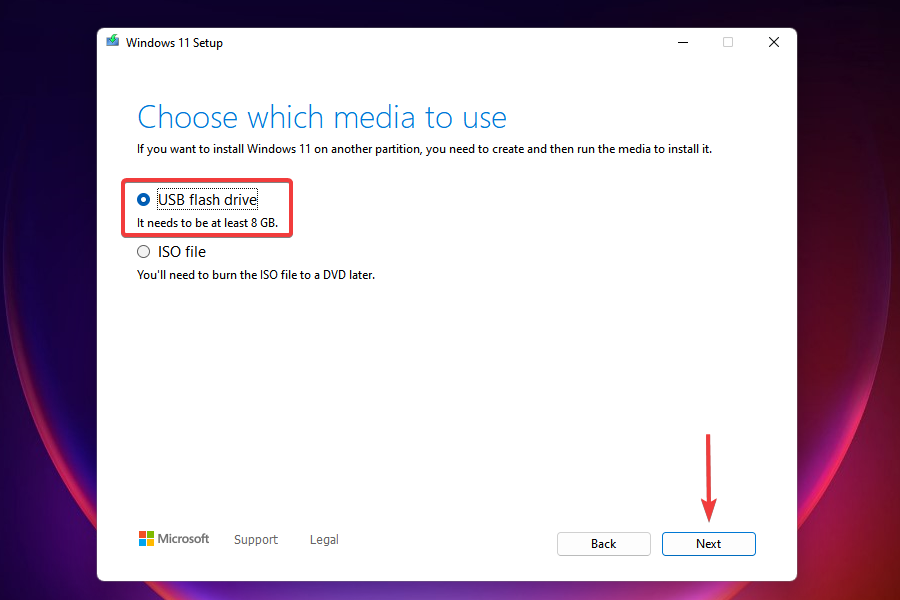
- Now, you will find the recommended language and edition already selected. In case you want to make any changes, untick the checkbox for Use the recommended options for this PC and choose the appropriate settings. Finally, click on Next.
- Choose the USB flash drive option and click Next.
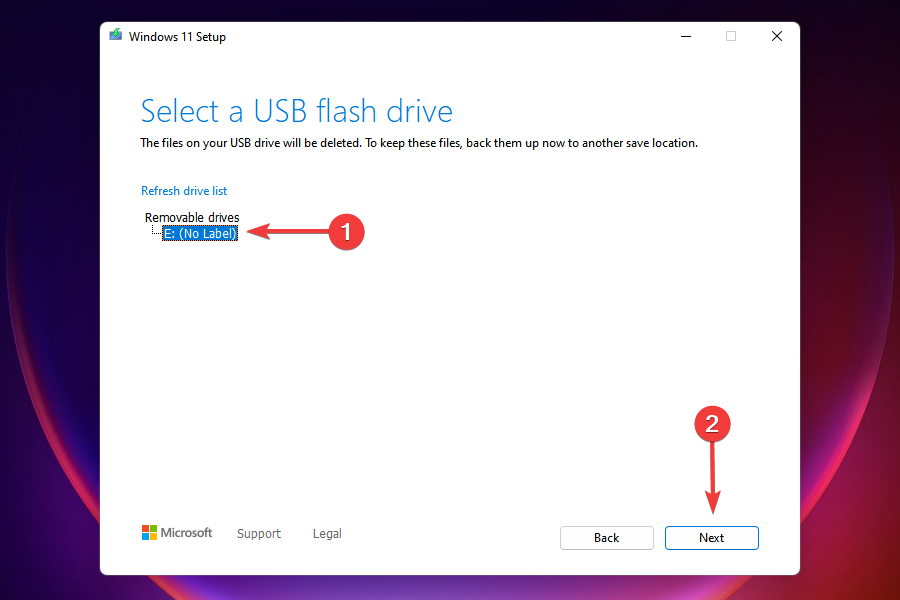
- Select the removable drive that you earlier plugged in from the list and click on Next.
- Wait for the setup to create a bootable USB drive. You can monitor the progress in this window.
- After the bootable flash drive is created, click on Finish to close the setup.

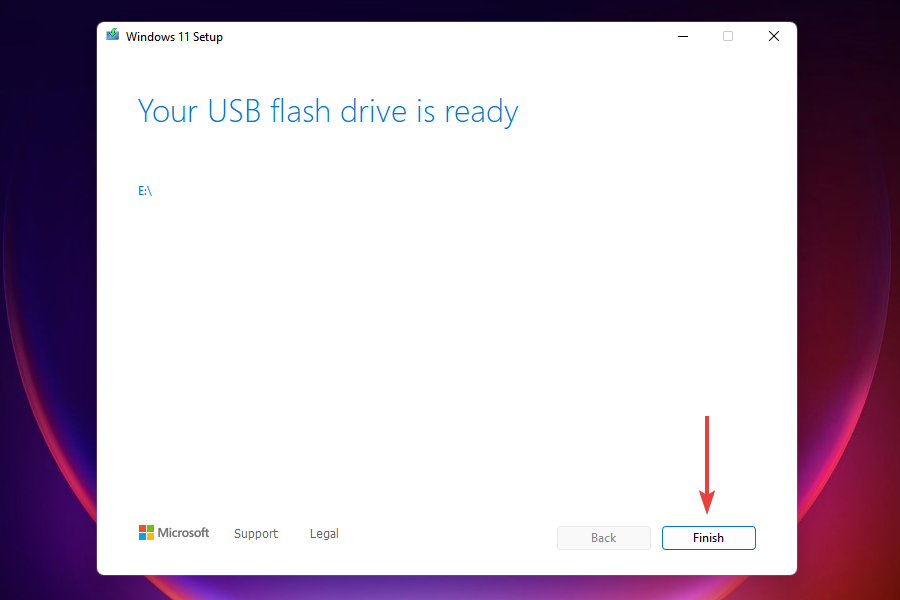
Once done, you can now easily install the OS from the bootable USB drive. Although the guide is for Windows 10, it would assist you when installing Windows 11 as well, since the process remains the same.
After the flash drive is booted, follow the on-screen instructions to complete the installation process.
A major advantage of this method is that you will always have a bootable USB at your disposal, which would make things a lot easier in case you have to reinstall Windows 11.
We’ve written extensively around the issue of people either not being able to complete the upgrade process to Windows 11 or not seeing the option, at all. Here are some resources we’re suggesting for you to check out:
- How to fix Windows 11 Windows Update errors
- How to fix Windows 11 errors after update from Windows 10
- How to make Windows 11 update after restart
- How to fix Windows Update troubleshooter in Windows 11
- How to fix a stuck Windows 11 download
- How to solve Windows 11 installation woes
Can I use the Windows 11 Installation Assistant to upgrade?
Yes, the Windows 11 Installation Assistant is another tool at your disposal to upgrade to the latest iteration. However, you cannot use it if the PC doesn’t meet the minimum system requirements, since the Installation Assistant wouldn’t run.
You can download and use the Windows 11 Installation Assistant with the help of our guide. Simply, go to the How to use the Windows 11 Installation Assistant? heading and follow the steps listed there.
What do I do if my PC doesn’t meet the system requirements for Windows 11?
As promised earlier, we would now list out the ways you can install Windows 11 on an unsupported PC. However, Microsoft has stated that such PCs may have compatibility issues and might not receive updates, including those for security. You will thus be exposing the system to a major risk.
Though if you have made up your mind, you can install Windows 11 after bypassing SecureBoot and TPM checks. This would require making some minor changes to the Registry.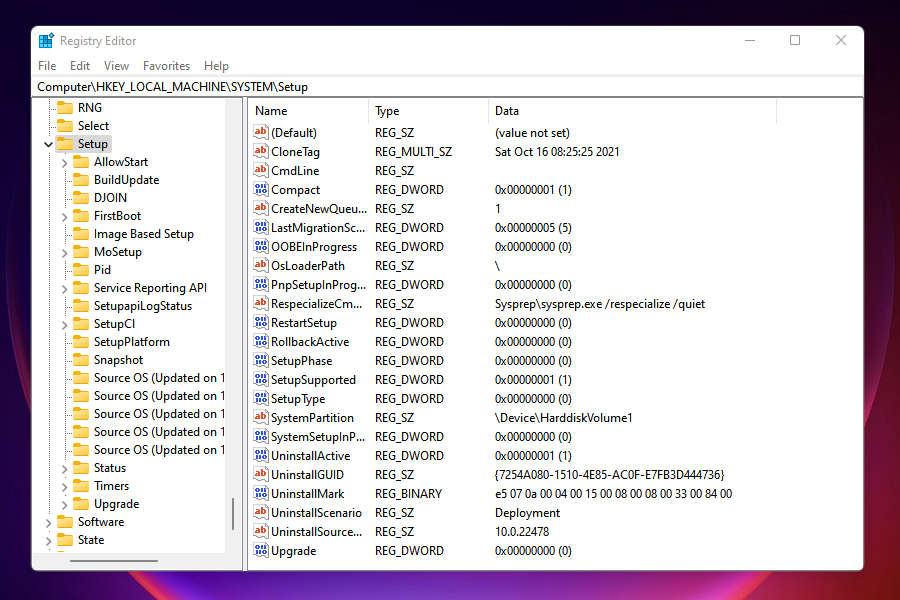
It’s also possible to install Windows 11 without TPM, another workaround users had been looking for due to the TPM 2.0 requirement.
If you are still unsure, learn how to install Windows 11 on a Virtual Machine, try it out and then make the upgrade. Nevertheless, if you have already made the jump, it’s easy to roll back from Windows 11 to Windows 10.
By the time you reach the end of this article, you know a bunch of ways to install the latest iteration from Microsoft on both supported and unsupported PCS. Also, the Windows 11 not showing up in Windows Update issue would be fixed.
Let’s know which method worked for you and your experience thus far with Windows 11.
![]()
Newsletter
This issue prevents the installation of the new OS
by Kazim Ali Alvi
Kazim has always been fond of technology, be it scrolling through the settings on his iPhone, Android device, or Windows. And at times, unscrewing the device to take… read more
Published on November 28, 2022
Reviewed by
Vlad Turiceanu
Passionate about technology, Windows, and everything that has a power button, he spent most of his time developing new skills and learning more about the tech world. Coming… read more
- A lot of users have reported being the Windows 11 update not showing in Windows 10 on the Windows Update tool.
- If you using a PC that meets that minimum requirement, you should receive the update in a while since the roll-out is in a phased manner. However, there are ways to make the jump even sooner.
- Check for any issues with the Windows Update, namely, if they are paused, stuck, or the presence of conflicting programs.
- Also, learn how to install Windows 11 on unsupported PCs.
XINSTALL BY CLICKING THE DOWNLOAD FILE
- Download Restoro PC Repair Tool that comes with Patented Technologies (patent available here).
- Click Start Scan to find broken files that are causing the problems.
- Click Repair All to fix issues affecting your computer’s security and performance
- Restoro has been downloaded by 0 readers this month.
Windows 11 has been rolled out for users, though in a phased manner. PCs that are compatible should receive an update in the days to follow. However, many users have reported Windows 11 not showing up in Windows Update.
The Windows 11 update not showing up issue could be due to a bunch of reasons, some related to your computer’s compatibility while others to the phased rollout. Whatever the case, there are ways you can get your hands on the latest Windows iteration from Microsoft.
If you have been checking the Windows Update section time and again to upgrade but to no avail, read ahead to find out the various ways you can install Windows 11 on your computer.
Why don’t I see the Windows 11 update?
A large number of computers wouldn’t be able to upgrade to Windows 11 owing to the strict system requirements. And Microsoft has its reasoning for that.
Can my PC run Windows 11?
To check whether a computer can run Windows 11, Microsoft has released the PC Health Check app. Just download and install the app, run it, and you will find out whether or not your system is compatible.
If you get the message This PC meets Windows 11 requirements, your computer is compatible. Head over to the next section to find out ways to make the upgrade even if Windows 11 is not showing up in Windows Update.
For those of you who see This PC doesn’t currently meet the Windows 11 system requirements, you wouldn’t be receiving the upgrade via Windows Update. Head over to the end to find out how you can install Windows 11 on an unsupported PC.
What can I do if the Windows 11 update is not showing up?
- Why don’t I see the Windows 11 update?
- Can my PC run Windows 11?
- What can I do if the Windows 11 update is not showing up?
- 1. Resume Windows Update
- 2. Reboot the computer
- 3. Run the Windows Update troubleshooter
- 4. Repair Windows Update components
- 5. Restart the Windows 11 update
- 6. Disable or uninstall conflicting apps
- 7. Use the Installation Media
- Can I use the Windows 11 Installation Assistant to upgrade?
- What do I do if my PC doesn’t meet the system requirements for Windows 11?
1. Resume Windows Update
- Press Windows + I to launch the Settings app.
- Select Update & Security from the various options listed here.
- In the Windows Update tab that opens by default, check if there is a Resume Updates button on the right. If there’s one, click on it to start receiving updates.
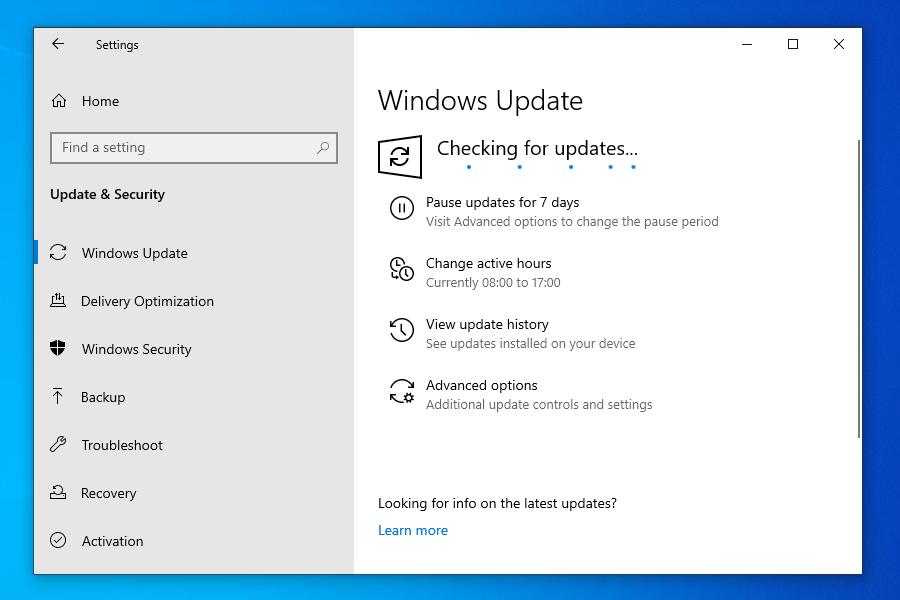
- Your system will now automatically start scanning for any available update including those for Windows 11.
If you have paused updates, you wouldn’t be receiving any, including the one for Windows 11. Even if you don’t remember doing it, there’s no harm in cross-checking before we proceed further.
After you enable updates, if an upgrade for Windows 11 is available, it would be shown in Windows Update, and subsequently, downloaded and installed on your computer.
2. Reboot the computer
- Navigate to the desktop and press Alt + F4 to launch the Shut Down Windows box.
- Click on the dropdown menu and select Restart from the list of options.
- Click on OK to restart the computer.
Before restarting, make sure to save any open files to avoid data loss. Rebooting the computer restarts the OS and fixes any trivial bugs that may be interfering with the Windows 11 update.
3. Run the Windows Update troubleshooter
- Press Windows + I to launch the Settings app.
- Select Update & Security from the list of options listed in the Settings.
- Select Troubleshoot from the tabs listed in the navigation pane and click Additional troubleshooters on the right.
- Click on Windows Update.
- Click Run troubleshooter to diagnose and fix issues preventing your PC from receiving the update for Windows 11.
- The troubleshooter will now start running. Follow the instructions and choose the appropriate response, if and when prompted, to complete the process.
The built-in troubleshooters offered by Microsoft are excellent in identifying and fixing small bugs, misconfigured settings, and other issues. After the troubleshooter is done running, check if Windows 11 is now showing up in Windows Update.
4. Repair Windows Update components
Although you are required to repair or reset Windows Update components when encountering an error, it may also help you get the Windows 11 update in this case.
If they have become corrupt or have run into a bug that is leading to the Windows 11 not showing up in Windows update issue, repairing or resetting them should come in handy.
5. Restart the Windows 11 update
- Press Windows + R to launch the Run command.
- Type services.msc in the text field, and either click on OK or press Enter to launch the Services app.
- Locate and double-click on the Windows Update service.
- Click on the Startup type dropdown menu and select Disabled from the list of options that appear.
- Click on Apply to save the changes.
- Next, click OK to close the properties window.
- Close the Services app.
- Now, you need to reboot the computer. To do that, press the Windows key, click on the Power button, and select Restart from the menu that appears.
- Press Windows + E to launch the File Explorer, and navigate to the following path or paste it in the addressbar at the top and hit Enter.
C:WindowsSoftwareDistribution - Press Ctrl + A to select all the files saved here, and hit the Del key to delete them.
- Choose the appropriate response in case a confirmation box pops up.
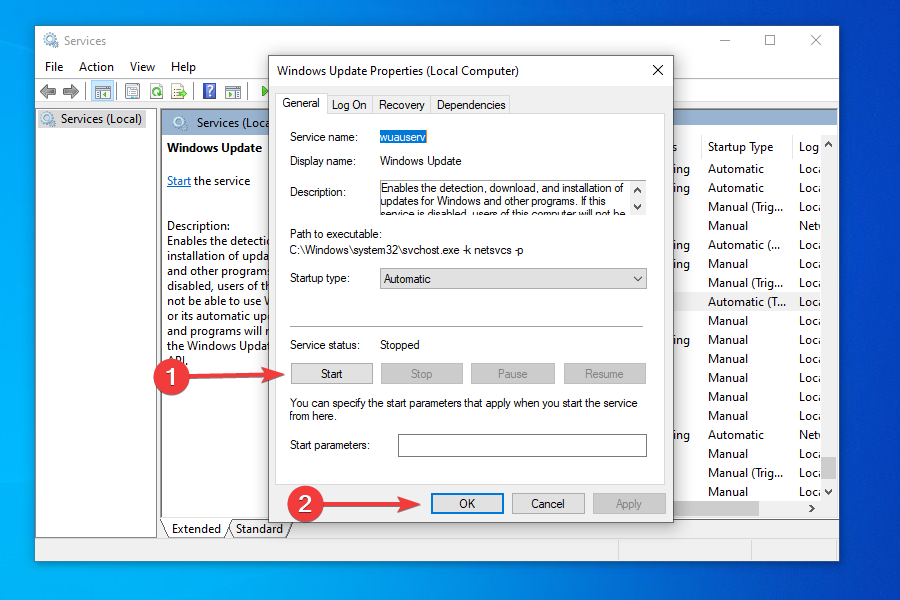
- Now, again launch the Services app as you did earlier, and double-click on the Windows Update service.
- Select Automatic from the Startup type dropdown menu this time.
- Click on Apply to save the changes.
- Click on Start under Service status to run the service, and then click on OK at the bottom.
- Go to the Windows Update section in Settings and check if you can now install Windows 11.
In some cases, the update for Windows 11 may seem stuck at 100% for hours without any progress. In such cases, following the steps mentioned here will get things up and running and allow you to upgrade.
6. Disable or uninstall conflicting apps
- Press Windows + R to launch the Run command.
- Enter appwiz.cpl in the text field and click on OK or hit Enter to launch the Programs and Features window.
- Locate and select the app you want to remove, and click on Uninstall at the top.
- Choose the appropriate response in case a confirmation box pops up.
To disable an app, you can go to its built-in Settings and turn on/off the required toggle or choose the appropriate response.
The method to disable each app is different and there should be an option for it somewhere in the app’s built-in Settings. Search the FAQ section on the official website for the program to find out the exact steps.
Some PC issues are hard to tackle, especially when it comes to corrupted repositories or missing Windows files. If you are having troubles fixing an error, your system may be partially broken.
We recommend installing Restoro, a tool that will scan your machine and identify what the fault is.
Click here to download and start repairing.
If disabling the app didn’t work or you couldn’t find the option for it, follow the steps above to uninstall the app.
Certain programs are known to block the Windows Updates, thus leading to the current issue.
You should look out for third-party firewalls and disable or uninstall them. Also, apps like Pi-hole or other similar ones, have been found to be the culprit, and uninstalling them fixed the problem.
Once you are done disabling or uninstalling the problematic apps, check if you are able to find and install Windows 11 from Windows Update.
7. Use the Installation Media
NOTE
For this method, you will require a USB flash drive with more than 8 GB of storage to create a bootable USB for installing Windows 11.
- Plug in the flash drive to your sytem.
- Go to the download page for Windows 11 and click on Download Now under Create Windows 11 Installation Media.
- Navigate to the location where the downloaded file is saved and double-click on it.
- Click Yes on the UAC prompt that appears.
- The setup will take a few moments to get things ready.
- Click on Accept to agree to the license terms.
- Now, you will find the recommended language and edition already selected. In case you want to make any changes, untick the checkbox for Use the recommended options for this PC and choose the appropriate settings. Finally, click on Next.
- Choose the USB flash drive option and click Next.
- Select the removable drive that you earlier plugged in from the list and click on Next.
- Wait for the setup to create a bootable USB drive. You can monitor the progress in this window.
- After the bootable flash drive is created, click on Finish to close the setup.
Once done, you can now easily install the OS from the bootable USB drive. Although the guide is for Windows 10, it would assist you when installing Windows 11 as well, since the process remains the same.
After the flash drive is booted, follow the on-screen instructions to complete the installation process.
A major advantage of this method is that you will always have a bootable USB at your disposal, which would make things a lot easier in case you have to reinstall Windows 11.
We’ve written extensively around the issue of people either not being able to complete the upgrade process to Windows 11 or not seeing the option, at all. Here are some resources we’re suggesting for you to check out:
- How to fix Windows 11 Windows Update errors
- How to fix Windows 11 errors after update from Windows 10
- How to make Windows 11 update after restart
- How to fix Windows Update troubleshooter in Windows 11
- How to fix a stuck Windows 11 download
- How to solve Windows 11 installation woes
Can I use the Windows 11 Installation Assistant to upgrade?
Yes, the Windows 11 Installation Assistant is another tool at your disposal to upgrade to the latest iteration. However, you cannot use it if the PC doesn’t meet the minimum system requirements, since the Installation Assistant wouldn’t run.
You can download and use the Windows 11 Installation Assistant with the help of our guide. Simply, go to the How to use the Windows 11 Installation Assistant? heading and follow the steps listed there.
What do I do if my PC doesn’t meet the system requirements for Windows 11?
As promised earlier, we would now list out the ways you can install Windows 11 on an unsupported PC. However, Microsoft has stated that such PCs may have compatibility issues and might not receive updates, including those for security. You will thus be exposing the system to a major risk.
Though if you have made up your mind, you can install Windows 11 after bypassing SecureBoot and TPM checks. This would require making some minor changes to the Registry.
It’s also possible to install Windows 11 without TPM, another workaround users had been looking for due to the TPM 2.0 requirement.
If you are still unsure, learn how to install Windows 11 on a Virtual Machine, try it out and then make the upgrade. Nevertheless, if you have already made the jump, it’s easy to roll back from Windows 11 to Windows 10.
By the time you reach the end of this article, you know a bunch of ways to install the latest iteration from Microsoft on both supported and unsupported PCS. Also, the Windows 11 not showing up in Windows Update issue would be fixed.
Let’s know which method worked for you and your experience thus far with Windows 11.
![]()
Newsletter
- Что такое и зачем нужен «Центр обновления Windows 11»?
- Настройки «Центра обновления Windows»
- Можно ли отключить обновления Windows 11 навсегда и как это сделать?
В рамках данной информационно-обучающей статьи мы рассмотрим, что такое, для чего нужен и как настроить «Центр обновления Windows 11», а также некоторые связанные с ним вопросы, которые чаще всего возникают у пользователей операционной системы Windows 11.
Что такое и зачем нужен «Центр обновления Windows 11»?
Технически, «Центр обновления Windows» (любой версии ОС) — это набор системных программ и служб, которые в совокупности представляют собой один из ключевых модулей операционной системы. Забегая чуть вперед, скажем, что если остановить работу этого центра, то система от этого не пострадает — она продолжит свою работу, только не сможет скачивать обновления. И здесь мы подошли к предназначению «Центра обновления Windows». Скачивание упомянутых обновлений — основная, но не единственная задача данного модуля. Но что конкретно он обновляет и как?
 1
1
Тысячи разработчиков из Microsoft ежедневно трудятся над тем, чтобы улучшить работоспособность своего программного продукта. Делают они путем выпуска, т.н. патчей или заплаток — программные средства, служащие для добавления новых или изменения имеющихся функций и/или исправления обнаруженных в работе операционной системы проблем. Эти патчи загружаются на сервер, а затем скачиваются и устанавливаются «Центром обновления Windows» в автоматическом режиме. Отсюда вывод — для автоматической загрузки обновлений требуется подключение к интернету.
Однако некоторые обновления/исправления можно скачать и самостоятельно в виде, например, MSI-файлов. Как правило, в их названии присутствует буквы «KB» и набор чисел, к примеру — «KB4023057.msi». Несмотря на то, что патчи эти являются, по сути, самораспаковывающимися архивами (официально — «Автономными установщиками обновлений Windows»), зачастую их нельзя просто взять и распаковать/установить. Для этого могут потребоваться «услуги» «Центра обновления Windows». При запуске пользователем автономных установщиков обновлений автоматически запускается нужная системная служба, которая считывает информацию о том, что и куда установить/распаковать, ну а затем делает это. Да, для этого не всегда требуется «Центр обновления», но все же это одно из его предназначений.
Еще одно предназначение «Центра обновления Windows 11», имеющее большое значение для простых пользователей — установка приложений из Microsoft Store и их последующее обновление. Распространяемые через этот цифровой магазин программы тоже не получится установить привычным способом, запустив файл «Install.exe» или «Setup.exe», т.к. подобных установочных файлов у таких приложений вообще нет. Если модуль «Центр обновления Windows» дал сбой, то при попытке скачать или обновить программу из Microsoft Store на экране появится ошибка:
То же самое можно будет наблюдать и при попытке скачивания обновлений из самой, скажем так, панели настроек «Центра обновления», что находится в окне «Параметры»:
![]()
Итак, теперь у нас есть примерное представление о том, что такое, для чего нужен и как работает «Центр обновления Windows». Далее рассмотрим имеющиеся у него настройки.
Настройки «Центра обновления Windows»
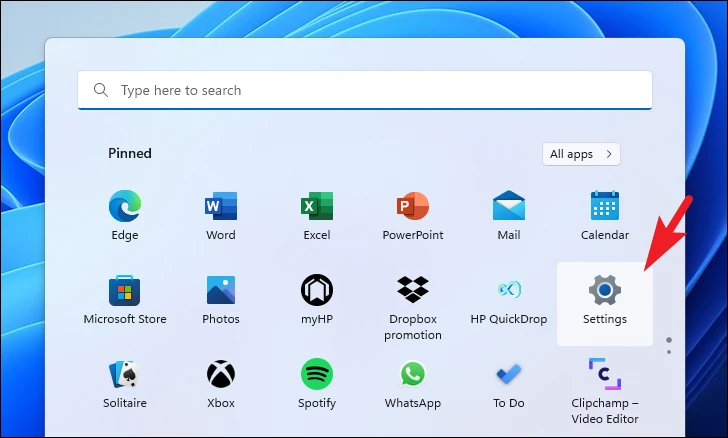
Для наглядности откройте упомянутую ранее панель настроек «Центра обновления Windows», которая находится в окне «Параметры». Чтобы открыть это окно, воспользуйтесь комбинацией клавиш «Win + I» или откройте меню «Пуск», затем кликните по значку «Параметры»:
В окне «Параметры» откройте слева раздел «Центр обновления Windows» — все, мы на месте:
Пройдемся по всем настройкам и информационным подразделам «Центра обновления»:
Приостановка обновлений
Иногда может понадобиться отключить скачивание обновлений. Чтобы сделать это, но только временно (к сожалению, отключить их навсегда нельзя стандартными способами не выйдет), просто раскрываем список напротив данной опции и выбираем один из 4-х вариантов — «Продлить на 1/2/3/4 недели».
Просмотр журнала обновлений и их удаление
По названию раздела понятно, что здесь можно посмотреть, какие обновления и когда были установлены, но не только. Как можно видеть из нижеследующего изображения, через «Центр обновления Windows» также скачиваются, устанавливаются и обновляются некоторые драйверы устройств. В нашем случае — это видеокарта:
Заметим, что в данном разделе приведен далеко не полный список установленных обновлений. Чтобы увидеть его, кликнем по элементу «Удалить обновления». Это действие приведет к открытию нового окна:
![]()
Тут мы подошли к следующему важному вопросу — удалению обновлений. В случае с операционными системами Windows довольно часто возникают ситуации, когда та начинает «тупить», «тормозить» и по-разному сбоить сразу после установки обновления. Зная примерную дату его установки, мы всегда можем его удалить. Достаточно в открытом на последнем шаге окне кликнуть по названию патча правой кнопкой мыши, затем выбрать пункт «Удалить» (можно также выделить обновление и нажать сверху кнопку «Удалить») и следовать инструкциям на экране:
К сожалению, не все установленные обновления могут быть удалены. Некоторые из них являются «обязательными» (обычно те, что связаны с безопасностью, но не только). Эти обновления система просто не позволит деинсталлировать. При клике по ним правой кнопкой мыши контекстное меню не отображается. Если выделить одно из «обязательных» обновления, то в верхней части окна исчезнет кнопка «Удалить»:
Дополнительные параметры «Центра обновления Windows»
Вернемся в основной раздел настроек «Центра обновления», а затем перейдем оттуда в подраздел «Дополнительные параметры». Все доступные опции рассматривать не будем — под ними и так присутствуют описания. Однако предназначение одной из них — «Скачивать обновление через лимитные подключения» — не сразу понятно.
Данная опция появилась в Windows 11, наряду с функцией ограничения сетевого трафика. Если ее отключить, то обновления не будут скачиваться при активном сетевом соединении, помеченном как «Сеть с лимитным тарифным планом». Это очень полезная опция для пользователей, пользующихся тарифным планом с ограниченным трафиком. Ввиду того, что некоторые патчи Windows имеют довольно внушительный размер, одно единственное обновление может моментально исчерпать весь месячный объем трафика. Но чтобы эта опция работала, требуется сначала сделать сетевое подключение лимитным. Это просто:
- Откроем слева вкладку «Сеть и интернет», затем перейдем в подраздел, название которого соответствует типу сетевого подключения — «Ethernet» (проводное подключение) или «Wi-Fi» (беспроводное):
- Останется установить переключатель «Лимитное подключение» в положение «Вкл.».
Теперь Windows не будет скачивать обновления, если доступ в интернет осуществляется посредством сетевого подключения, которое мы только что сделали «Лимитным».
И последний интересный момент, он же — нововведение «Центра обновления Windows 11». Вернемся в раздел «Дополнительные параметры», а оттуда перейдет в подраздел «Оптимизация доставки»:
В самом верху окна мы видим опцию «Разрешить загрузки с других компьютеров». Зачем она нужна? А затем, чтобы система могла скачивать обновления не только с серверов Microsoft, но и с компьютеров других пользователей через интернет или локальную сеть.
![]()
Если активировать эту функцию, то «Центр обновления» начнет работать как торрент-клиент. А это также означает, что пользователи, активировавшие данную опцию, также дают разрешение на скачивание обновлений с их компьютера. Но никто не запрещает сильно ограничить скорость выгрузки данных, чтобы экономить выходную пропускную способность канала сетевого подключения. Ограничения можно наложить и на скачивание обновлений. Сделать это можно в подразделе «Дополнительные параметры»:
- «Параметры загрузки» определяют ограничение скорости скачивания обновлений:
![]()
- А в «Параметрах передачи» задаются ограничения на выгрузку обновления для других пользователей Windows 11:
Вообще, опция «Разрешить загрузки с других компьютеров» имеет еще два предназначения. Во-первых, с ее помощью можно обходить блокировку со стороны интернет-провайдера или офисного системного администратора на скачивание обновлений Windows 11 (вряд ли им удастся заблокировать все IP-адреса, с которых система сможет скачивать обновления). Во-вторых, эта опция позволяет экономить внешний трафик и/или пропускную способность канала связи при необходимости обновления Windows 11 на нескольких компьютерах, объединенных в локальную сеть (достаточно будет скачать обновления на один компьютер, а дальше они будут переданы на все остальные).
На этом с настройками «Центра обновления Windows» можно заканчивать. Перейдем к частым вопросам по теме.
Можно ли отключить обновления Windows 11 навсегда и как это сделать?
Можно, но только при использовании сторонних утилит. Что касается работоспособности системы при отключенной функции скачивания обновлений, то, как отмечалось вначале, с ней ничего страшного не случится. Однако про скачивание приложений из Microsoft Store можно будет забыть. Впрочем, любая утилита для отключения обновлений Windows 11 позволяет включить их обратно.
Приведем простейший способ отключения обновлений при помощи программы Windows Update Blocker, который можно скачать с нашего сайта:
- Запускаем Windows Update Blocker от имени администратора. Если необходимо включить перевод интерфейса на русский язык, кликаем по кнопке «Menu» и в пункте «Languages» выбираем «Russian/Русский»
- Выбираем опцию «Отключить обновления» (галочку снизу рекомендуется оставить как есть) и жмем кнопку «Применить»:
- Готово. Чтобы проверить результат, открываем в окне «Параметры» вкладку «Центр обновления Windows» и читаем, что «Что-то пошло не так»:
Если программа Windows Update Blocker не справляется со своей задачей (а такое вполне реально), можно воспользоваться какой-нибудь другой. Их много. Описание и краткие инструкции по использованию популярных утилит для отключения обновлений Windows 11 можно почитать в этой нашей статье. Не обращайте внимания, что статья посвящена программам для Windows 10 — они все прекрасно работают в Windows 11 (проверено).