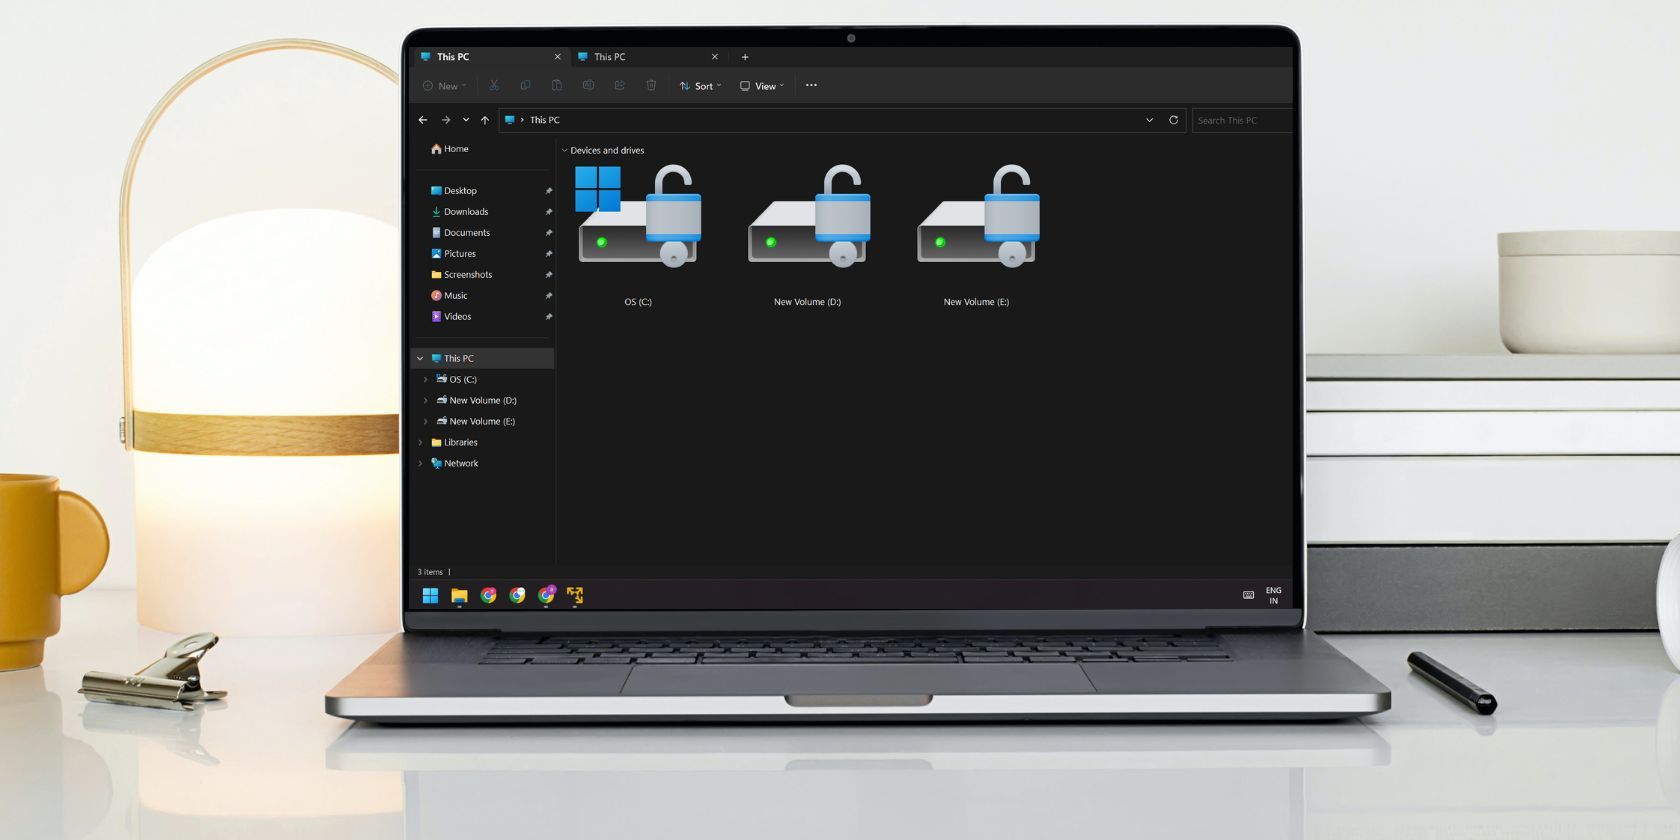
The File Explorer tabs on Windows 11 are helpful, but they can get in the way for some people. Get them disabled with this guide.
Microsoft was hoping to launch the tabs feature in the File Explorer app for Windows 10. But it scrapped the idea later on. However, with the Windows 11 22H2 update, users can now try out the tabs feature in File Explorer. The participants of the Windows Insider Program got early access to the feature and Microsoft could soon apply the tabs idea to Windows Notepad as well.
But what if you want to turn the File Explorer Tabs feature off? An immediate idea would be to uninstall the update, but that is a temporary workaround. You can use ViVeTool to enable or disable the tabs feature or any other new feature of Windows 11.
ViVeTool is an open-source command line tool that can enable or disable Windows operating system features. Microsoft continuously works on many experimental features and does a lot of testing before rolling out a stable version of a feature. But if you are impatient, you can use ViVeTool to enable an otherwise hidden feature. It is free and the developers recently launched a GUI version of the tool as well.
How to Disable File Explorer Tabs In Windows 11
You can disable the File Explorer Tabs by either using the ViVeTool or the ViVeTool GUI version. The latter is much simpler to use because you can search for a feature and activate or deactivate it in one click. But before doing that, download and install both of these tools on your system. Also, create a system restore point for added precaution, in case the tool wrecks something on your Windows 11 computer.
Download: ViVeTool
Download: ViVeTool GUI
1. Disable File Explorer Tabs Using the ViVeTool
Since it is a command line tool, you can access it from a terminal window. Here’s how to do it:
- Press Win + R to launch the Run command box.
- Type CMD in the text input area and press Ctrl + Shift + Enter key to launch the command prompt with administrator privileges.
- Type cd Drive Name:\path. Here, you need to enter the exact location where you extracted the tool after downloading it. For example, we extracted it to a folder name Vive in C drive. So, our command is cd C:\Vive.
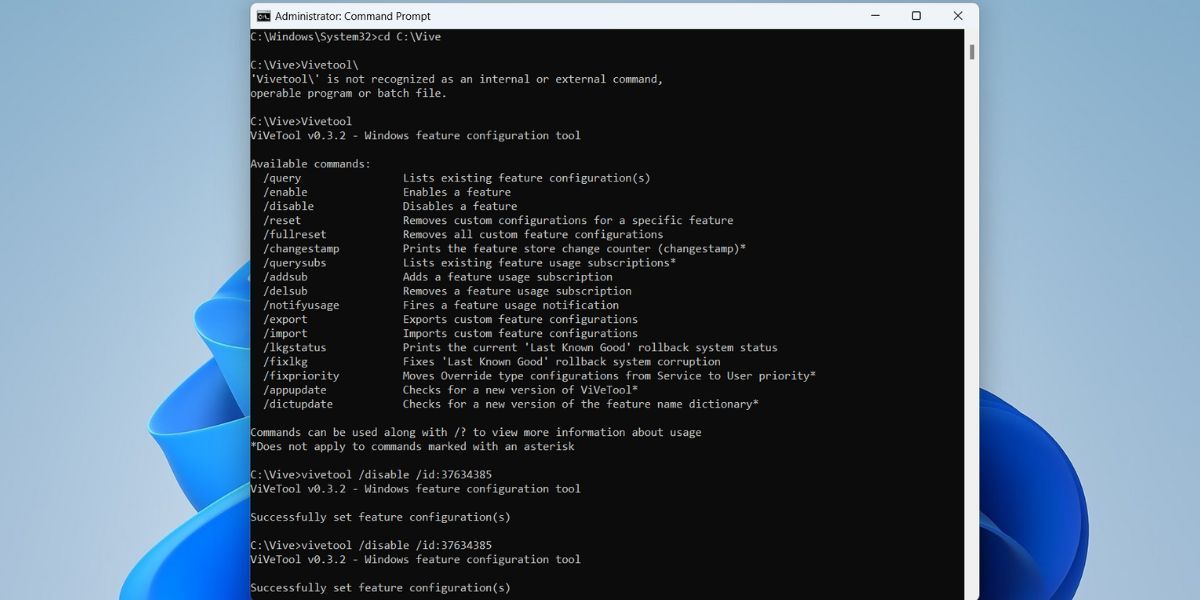
- Now, you will be in the directory where ViVeTool exists. Type vivetool and press the Enter key. You will see a bunch of parameters you can use with the tool.

- Type the following two commands, one by one in the CMD and press the Enter key.
vivetool /disable /id:37634385
vivetool /disable /id:36354489
- You will see the “Successfully set feature configuration(s)” if the command executes successfully.
- Now, restart your system for the changes to take effect. The File Explorer Tabs feature will no longer be active on your system.
2. Disable File Explorer Tabs Using the ViVeTool GUI version
The GUI version of ViVeTool works similarly. You can manually enter the feature ID or use the search function to find a feature in the list. Repeat the following steps to disable File Explorer Tabs using the ViVeTool GUI.
- Launch the ViVeTool GUI with admin privileges.
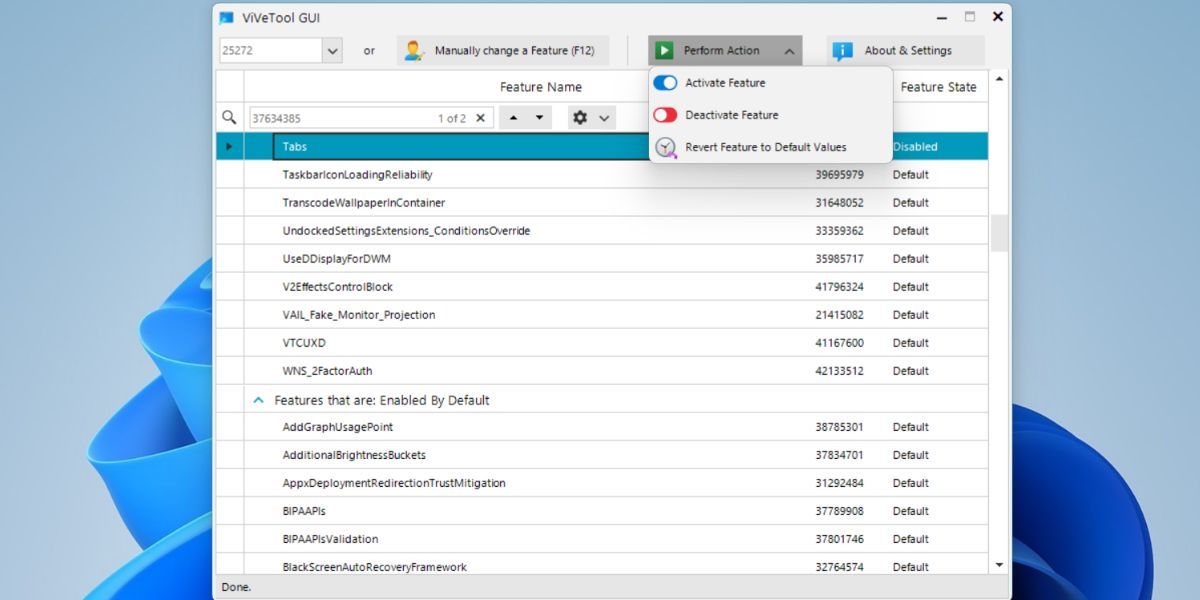
- Click on the drop-down list and select the latest Windows build number. Wait for the tool to list all the feature IDs available for the Windows build.
- Type 37634385 in the search bar. Select the highlighted feature and click on the Perform Action button.
- Select the Deactivate Feature option. Similarly, find the feature ID 36354489 and deactivate it.
- Now, close the ViVeTool GUI and restart your system.
- Open the File Explorer and you won’t see the tabs feature anymore.
File Explorer tabs are more useful than you think. But if you use another File Explorer program or can make do without it, ViVeTool is a great utility to disable/enable it. Moreover, it is completely free, and you can even enable other experimental features of Windows 11.
Эта статья поможет вам получить новый Проводник с вкладками в Windows 11.
Windows 11 Insider Build 25136, выпущенная Microsoft, как и Dev Channel, добавляет вкладки в проводник. Однако вкладка все еще находится на стадии бета-тестирования и в будущем будет доступна большему количеству пользователей. Функция вкладок File Explorer позволяет пользователям открывать разные папки и диски на разных вкладках в одном окне File Explorer, аналогично открытию разных веб-страниц в браузере.

В дополнение к вкладкам в Windows 11 Insider Build 25136 также был изменен макет левой панели навигации в проводнике с вкладками. Новый макет упрощает доступ к фиксированным папкам библиотеки («Документы», «Загрузки», «Музыка», «Изображения» и т. д.) и к общим папкам. Хотя папка «Библиотеки Windows» была удалена с ПК, в сборке 25136 «Библиотеки Windows» и «Общие папки» имеют отдельные разделы на левой панели навигации.
Вкладки проводника доступны только в Windows 11 Insider Preview build 25136 и более поздних версиях. Но если вы хотите использовать проводник с вкладками сейчас, вы можете включить его с помощью стороннего инструмента под названием ViveTool. Далее в этой статье будет показано, как включить вкладки в проводнике в Windows 11.
Включить вкладки проводника в Windows 11 Build 25136
Убедитесь, что ваш компьютер обновлен до Windows 11 сборки 25136 или более поздней версии.
Откройте страницу ViveTool на GitHub: github.com/thebookisclosed/ViVe/releases и щелкните ссылку «ViveTool-vx.xxzip», чтобы загрузить zip-файл.

Щелкните правой кнопкой мыши zip-файл и выберите «Извлечь все…».
В окне «Извлечь» выберите папку назначения и нажмите кнопку «Извлечь».

Щелкните правой кнопкой мыши извлеченную папку и выберите параметр «Копировать как путь».

Найдите «cmd» в поиске Windows и выберите «Запуск от имени администратора».
Пожалуйста, введите cd, пробел, вставьте скопированный путь к извлеченной папке.

Выполните следующую команду, чтобы включить вкладки для проводника:
виветул аддконфиг 37634385 2

После успешного выполнения команды перезагрузите компьютер, и в проводнике появятся вкладки и новая левая панель навигации.
Как упоминалось выше, вкладки File Explorer работают как браузер, открывая любую папку в новой вкладке в том же окне. Используйте некоторые сочетания клавиш, которые вы можете использовать в новом проводнике:
- Ctrl+T — открыть новую вкладку
- Ctrl+W — закрыть текущую вкладку
- Ctrl+Tab / Ctrl+Shift+Tab — переключение между вкладками.
Вы также можете отключить функцию вкладок File Explorer, если не хотите ее использовать.
Откройте и запустите командную строку от имени администратора, введите и выполните следующую команду:
vivetool.exe delconfig 37634385

Если ваша версия ниже 25136, введите это, чтобы выполнить следующую команду, чтобы отключить вкладки проводника:
виветул делконфиг 34370472
Включить или отключить Проводник с вкладками в Windows 11 сборки 25136 легко с помощью vivetool. Если вы хотите попробовать новый проводник с вкладками, вы можете включить его, прочитав подробные инструкции выше.
Download Windows Speedup Tool to fix errors and make PC run faster
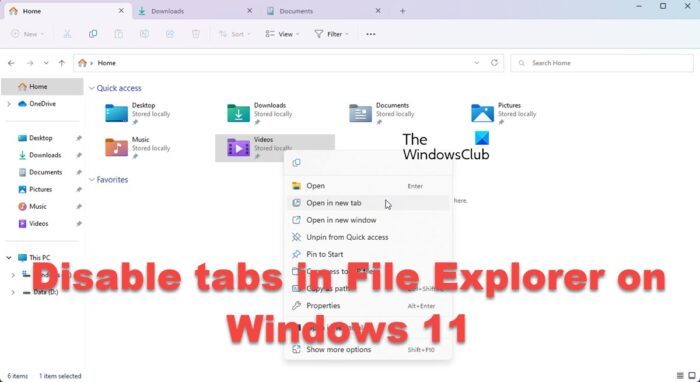
Today, we will be discussing how you can disable tabs from File Explorer on Windows 11. Windows 11 2022 is a small overhaul and brought to Windows PCs a new File Explorer. The new File Explorer allows you to view folders and drive locations as Tabs, the same way we open browser tabs on the internet. If for some reason you want to disable Tabs in File Explorer, follow this tutorial.
For this tutorial, we will be using an open-source tool on GitHub called ViveTool, since there are no dedicated settings offered by Microsoft to disable Explorer tabs. ViveTool is a command-line-based utility that is often used to get a preview of experimental features on Windows. Here’s how you can use it to get rid of the tabbed File Explorer.
- Open the ViveTool app’s official page on Github.com
- Download ViveTool latest version
- Extract it in File Explorer to get the ViVeTool.exe file. Double-tap on it to install it
- Since the app is from an unrecognized publisher, Windows confirms if you want to run this app. Click on ‘Run anyway’ to proceed
- Now, search for the Command Prompt and click to run it as administrator
- Copy the location/path where you have saved the extracted ViveTool app file and enter it using the Command Prompt. Type ‘cd’ followed by the File Explorer path. For example:
cd C:\Users\<username>\Downloads\ViVeTool-v0.3.2
- Copy and paste the following commands one after the other and run them
vivetool /disable /id:37634385 vivetool /disable /id:36354489
- Once they’ve run successfully, close the Command Prompt window and restart your computer.

After the PC has booted up, you should see that the tabs on your File Explorer have been disabled. If these settings changes don’t sit right with you and you want to go back to how the File Explorer looked, you can just run the same commands as mentioned after step 7, and replace ‘/disable’ with ‘/enable’.
Read: File Explorer not highlighting selected files and folders
Does Windows 11 Explorer have tabs?
With the new 22H2 version update rolled out to Windows 11 PCs globally, we saw modifications to the Taskbar, File Explorer and several other areas. Very notable was the addition of Tabs to the File Explorer window. These tabs are meant to help users organize files properly and switch among folders with ease. These tabs are the equivalent of browser tabs for your File Explorer. With them, you can easily open multiple folders and switch between them as you do with accounts on a browser.
How do I control tabs in Windows 11?
The newly introduced File Explorer tabs are a way to improve the overall experience of using File Explorer. Since they’re the equivalent of browser tabs for File Explorer, the process of rearranging File Explorer tabs is the same as it is with browser tabs. All you have to do is right-click on the tabs at the top and drag them to the side you want to place them in.
We hope that you find this helpful.
An undergraduate student of Business Economics at Delhi University, Divyansh loves Cricket, Formula 1, Television and dabbles his interest in Tech on the side. Writing about the Windows ecosystem is what excites him.

Finally, File Explorer on Windows 11 received the much-awaited Tabbed mode. Microsoft has rolled out it with a first Moment update for Windows 11 22H2. So everyone has it right now, for some reason, if you don’t like Tabs in File Explorer, you can disable it, here is how.
Contents
- 1 Tabbed File Explorer in Windows
- 2 Disable Tabs in File Explorer on Windows 11
There has been a huge request for File Explorer Tabs in Windows. Sure, you can add Tabs to Windows Explorer using third-party apps, but features come integrated with makes more usable.
Microsoft tried Sets in the past for Explorer, now they’ve eventually brought tabs.
As you surf the web in a browser with tabs and a lot of apps now support a tabbed interface, why not for File Explorer? Which is the users’ Home to access files and folders on their computer.
In case you don’t know, you can utilize the following keyboard shortcuts for faster managing tabs in Explorer
With File Explorer in Focus,
- Ctrl+T opens a new tab
- Ctrl+ W closes the active tab.
- There are context menu options to “close tabs to right” and “close other tabs”. So transitioning to tabbed File Explorer is much easier.

Keep in mind there is no UI or option or Setting available in Windows 11 Settings or File Explorer options to disable tabs. We’re not sure Micorsoft will add one for the same in the future.
But, you can turn off File Explorer tabs by using a third-party utility, Vivetool.
The tool is most popular among Windows insiders and Windows 11 users for enabling hidden new features and options in insider builds as well as public stable builds.
Disable Tabs in File Explorer on Windows 11
- Download ViveTool from Github
- Extract files to C:/Vivetool
- Click Start and type cmd,
- Select run as administrator
- Type Cd C:/Vivetool
- Execute the following commands and press enter for each.
vivetool /disable /id:37634385
vivetool /disable /id:39145991
You can able to disable File Explorer’s new navigation pane also by running the below command
vivetool /disable /id:36354489 - Close the command Prompt and restart windows once done.
After the system restart, when you open File Explorer (Win+E) there will be no + option to open a new tab. That’s it Tabs integration has been disabled.

If you want to restore Tabs in File Explorer
Run the following commands in the Terminal with vivetool
vivetool /enable /id:37634385
vivetool /enable /id:39145991
To restore the new navigation pane
Enter this vivetool /enable /id:36354489
Final words: File Explorer in Windows 11 recently received Tabs, if you don’t like it, you can disable Tabs in File Explorer by using the Vive tool, here is how that can be done.
Do you want to use Explorer with or without Tabs? Let us know in the comments below.
Вкладки в проводнике в Windows 11 очень долгожданное дополнение, которое ожидает просто колоссальное количество пользователей одиннадцатой версии операционной системы. Конечно, без данного дополнение вполне нормально можно использовать системы, но так уж исторически сложилось, что компания разработчик – Майкрософт постоянно рассказывает в своих анонсах, как круто и практично будет использовать вкладки и как итог, большинство людей все больше и больше хотят в живую посмотреть на данное новшество и конечно же, имеют желание его полноценно использовать. До недавнего времени такой возможности у пользователей не было, но с недавно вышедшим обновление для инсайдеров — сборка 25136 в Dev Сhannel, она появилась.
Очень важно указать, что практически все инсайдеры, скачавшие обновление, имеют беспроблемный доступ к опции «Вкладки», но есть и те, кому дополнительно придется скачать приложение «Vivetool», которое позволит активировать «Вкладки».
Как включить Вкладки в проводнике в Windows 11?
На самом деле сложностей тут не каких не имеется, единственное, что нужно сделать, так это обновить Windows 11 до сборки Windows 11 Build 25136 в Dev Channel. Отметим, что в ранее вышедших сборка (не во всех, а в некоторых), уже была активна опция «Вкладки», но в данный момент ее отключили и теперь, в обязательном порядке нужно скачивать Build 25136 в Dev Channel.
Теперь, вы должны выполнить несколько шагов: скачайте «Vivetool» расположенный в репозитории на «Github» → воспользуйтесь горячими клавишами «Win+R» и введите команду → «cmd» → далее, нужно нажать на сочетание клавиш «Ctrl+Shift+Enter», что позволит запустить «Командную строку» от имени Администратора → введите CD, где имеется путь к недавно скаченной папке «Vivetool» → нажмите на «Enter» — данном случае, путь должен выглядеть приблизительно так — «CD C:\Vivetool», но может и быть немного иным, все зависит от расположения папки «Vivetool» на вашем компьютере. Остается выполнить ввод «vivetool addconfig 37634385 2» → нажимаем на «Enter» → остается выполнить перезагрузку устройства → проверяем работоспособность «Вкладок».

Для того, чтоб проверить удалось ли вам активировать Вкладки в проводникев Виндовс 11, необходимо после запуска устройства запустить проводник и убедиться в появлении вкладок.
Как отключить Вкладки в проводнике в Windows 11?
Если вам по каким-то причинам «Вкладки» не нужны или не понравятся, а быть может с их появлением, ваша система начнет давать очень часто сбои, то в такой ситуации необходимо выполнить все вышеописанные шаги, но только одним из последних действий должен быть ввод команды «delconfig 37634385» → после чего так же нужно нажать на «Enter» → выполнить перезагрузку устройства.
P.S. Все вышеописанные действия вы выполняете на свой страх и риск, так как официально опция «Вкладки» еще не должна функционировать в обширных массах, так как она до сих пор тестируется и проверяется для того, чтоб появиться в Windows 11 в одном из ближайших обновлений совершенно без каких-то программных сбоев.