Для дополнительной защиты Windows 10 позволяет включить BitLocker для фиксированных дисков (разделов дисков и внутренних устройств хранения). Он поддерживает защиту с помощью смарт-карты или пароля. Есть также возможность автоматической разблокировки дисков при входе в учетную запись.
BitLocker был впервые представлен в Windows Vista и до сих пор существует в Windows 10. Он был реализован исключительно для Windows и не имеет официальной поддержки в альтернативных операционных системах. BitLocker может использовать доверенный платформенный модуль (TPM) вашего ПК для хранения секретных ключей шифрования.
РЕКОМЕНДУЕМ:
Как посмотреть информацию о шифровании диска BitLocker в Windows 10
В современных версиях Windows, таких как Windows 8.1 и Windows 10, BitLocker поддерживает аппаратно-ускоренное шифрование, если выполняются определенные требования (диск должен поддерживать его, должна быть включена безопасная загрузка и многие другие требования).
Без аппаратного шифрования BitLocker переключается на программное шифрование, что снижает производительность вашего диска. BitLocker в Windows 10 поддерживает ряд методов шифрования и поддерживает изменение силы шифрования.
Содержание
- Шифрование диска Butlocker
- Отключить BitLocker из командной строки
- Отключить BitLocker с помощью PowerShell
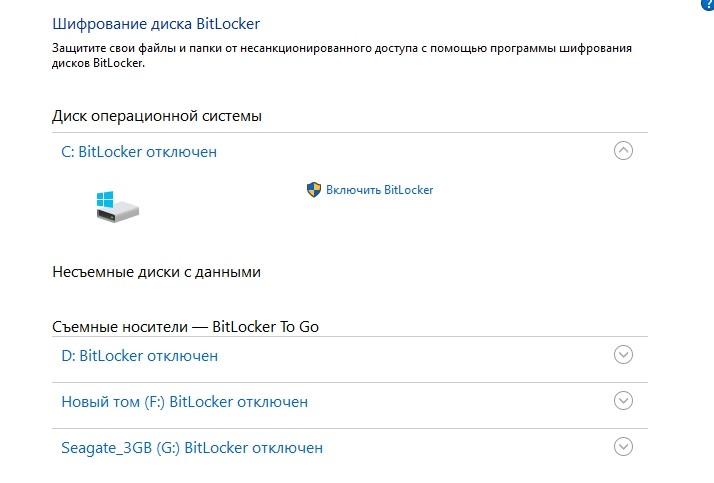
Шифрование диска Butlocker
В Windows 10 шифрование диска BitLocker доступно только в выпусках Pro, Enterprise и Education. BitLocker может зашифровать системный диск (на котором установлена ОС Windows) и внутренние жесткие диски. Функция
BitLocker To Go позволяет защитить файлы, хранящиеся на съемных дисках, таких как флэш-накопитель USB.
Существует разные способы отключения BitLocker жестких и твердотельных дисков.
Шаг 1: Откройте командную строку от имени администратора. Для этого, на панели задач нажмите иконку поиска, введите «cmd» и нажмите «Запуска от имени администратора».
Шаг 2: Введите и выполните следующую команду:
|
manage—bde —off <букву диска>: |
Шаг 3: Замените
<букву диска> фактической буквой диска, который вы хотите расшифровать.
Например отключим BitLocker на диске D:

Отключить BitLocker с помощью PowerShell
Шаг 1: Откройте новую командную строку от имени администратора. Для этого, на панели задач нажмите иконку поиска, введите «powershell» и нажмите «Запуска от имени администратора».
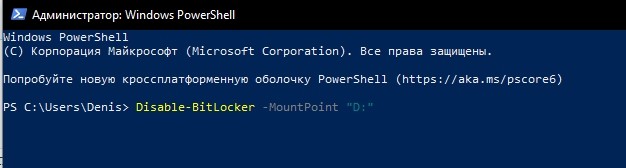
Шаг 2: Введите и выполните следующую команду:
|
Disable—BitLocker —MountPoint «<drive letter>:» |
Шаг 3: Замените <букву диска> фактической буквой диска, который вы хотите расшифровать.
Например отключим шифрования BitLocker диска D:
|
Disable—BitLocker —MountPoint «D:» |

РЕКОМЕНДУЕМ:
Лучшие аналоги Bitlocker
На этом все. Теперь вы знаете, как отключить BitLocker из командной строки и с помощью PowerShell.

ОС Windows 10 оснащена различными функциями защиты персональных данных пользователя. Причем система безопасности заключается далеко не только в установке пароля или регистрации отпечатка пальца для входа. Также существует защита жесткого диска, которая доставляет пользователям множество неудобств. А потому, когда речь заходит о BitLocker, приходится искать способ, как отключить функцию.
Как отключить функцию
Если ранее вы зашифровали накопитель, но в определенный момент передумали, то отменить блокировку можно будет встроенными средствами Windows 10. Существует несколько вариантов отключения Битлокера, каждый из которых обладает отличительными особенностями.
Важно. Для разблокировки жесткого диска может потребоваться ввод пароля, который присваивался в процессе активации BitLocker. Поэтому перед выполнением операции обязательно проверьте наличие ключа.
Из Командной строки
Самый простой способ убрать шифрование дисков – обратиться к помощи Командной строки. Это специальный интерфейс, созданный для обработки пользовательских запросов. При вводе команды отключения Битлокера компьютер и сам накопитель перестает требовать ввод пароля:
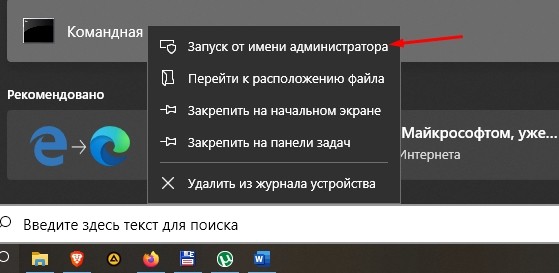
- Щелкните ПКМ по иконке «Пуск».
- Выберите запуск Командной строки от имени Администратора.
- Введите запрос «manage-bde -off D:», где вместо «D» может быть указана буква любого другого раздела накопителя.
- Нажмите на клавишу «Enter».
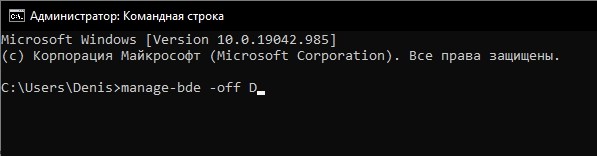
После выполнения последнего шага проследите, как на это действие отреагирует Командная строка. Она должна подтвердить отключение функции.
Панель управления
Еще один доступный вариант отключения блокировки накопителя. В этот раз не придется запоминать сложную команду. Достаточно будет выполнить несколько простых шагов:
- Используя поисковую строку Windows 10, найдите и запустите «Панель управления».
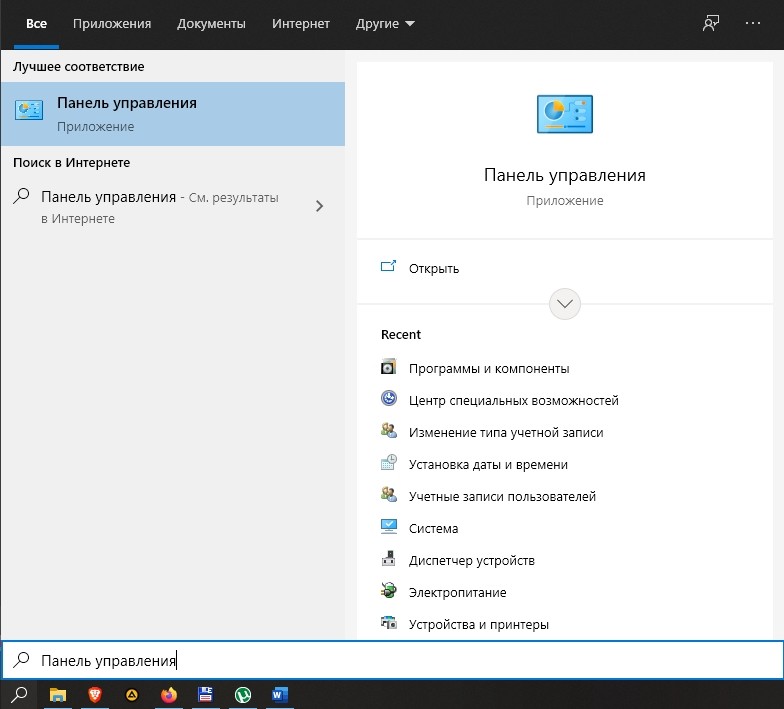
- Перейдите в раздел «Система и безопасность».

- Кликните по надписи «Шифрование диска BitLocker», а затем нажмите на кнопку «Отключить».
Если один из указанных пунктов не отображается в «Панели управления», то в пункте «Просмотр» установите значение «Категория». Так вам удастся включить показ дополнительных инструментов, среди которых будет функция деактивации Битлокера.
Редактор групповой политики
Альтернативный вариант разблокировки, задействующий другой интерфейс Windows 10. Чтобы не допустить ошибку, нужно действовать в строгом соответствии с инструкцией:
- Зажмите клавиши «Win» + «R» для запуска окна «Выполнить».

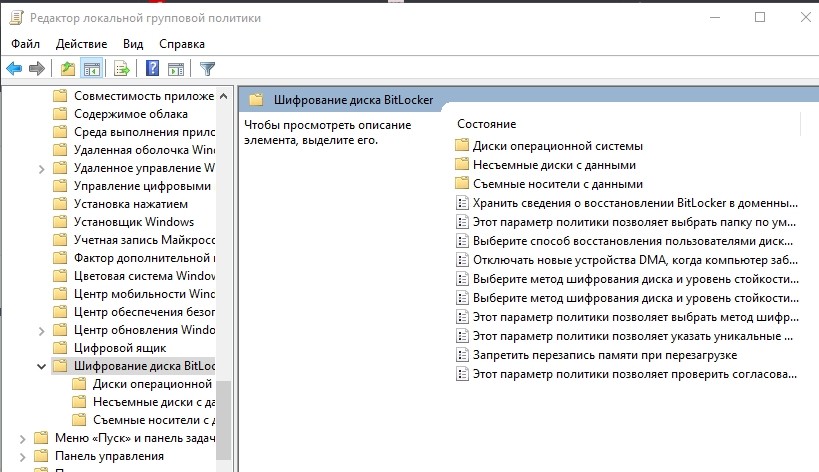
- Введите запрос «gpedit.msc» и нажмите на кнопку «ОК». Это позволит открыть Редактор групповой политики.

- Перейдите в директорию, расположенную по пути: «Конфигурация компьютера/Административные шаблоны/Компоненты Windows/Шифрование диска BitLocker/Диски операционной системы».
- Двойным щелчком ЛКМ откройте настройки параметра «Этот параметр политики позволяет настроить требование дополнительной проверки подлинности при запуске».
- Установите значение «Отключено».
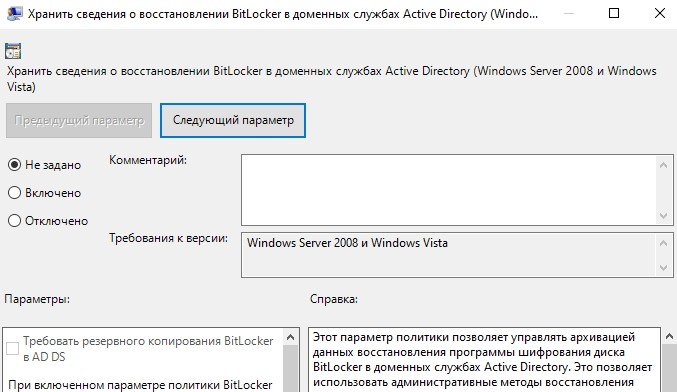
После сохранения изменений накопитель перестанет требовать ввод ключа при запуске компьютера или при подключении к другому устройству. Для обратной блокировки потребуется выставить значение параметра «Включено».
Отключение службы
За работу BitLocker на компьютере с операционной системой Windows 10 отвечает соответствующая служба. Следовательно, если выключить службу, то устройство больше не будет требовать ввод ключа. Снимается блокировка следующим образом:
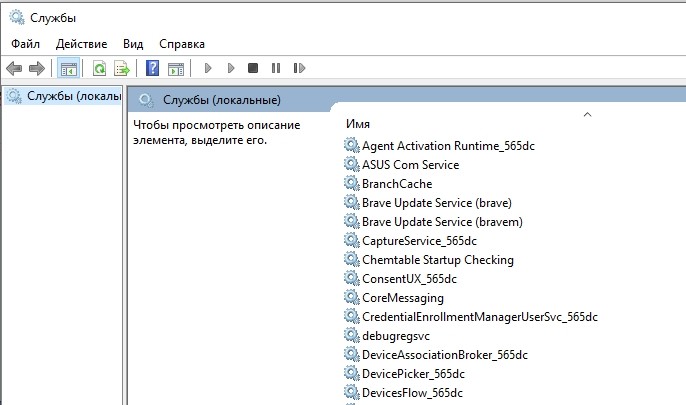
- Откройте окно «Выполнить», используя комбинацию клавиш «Win» + «R».

- Введите запрос «services.msc» и нажмите на кнопку «ОК», чтобы запустить служебное меню.
- Найдите в списке пункт «Служба шифрования диска BitLocker», а затем дважды кликните по ней ЛКМ.
- В пункте «Тип запуска» установите значение «Отключено».

- Нажмите на кнопку «Применить» для сохранения настроек.

Теперь перезагрузите компьютер. Это даст понять, вступили ли изменения в силу. При входе в систему может потребоваться ввод пароля, но это уже будет не ключ Битлокера, а код доступа к учетной записи.
Приложение «Настройки»
На Windows 10 есть удобная утилита «Параметры», позволяющая менять любые настройки компьютера. В частности, допускается принудительное отключение BitLocker. Для осуществления задуманного обратитесь к инструкции:
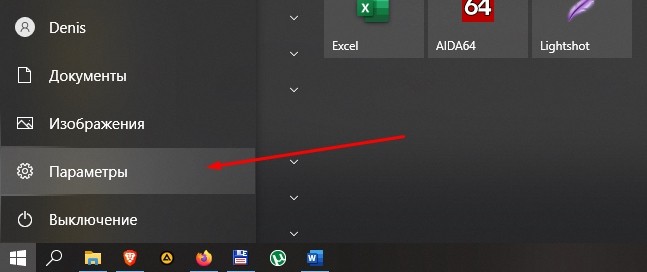
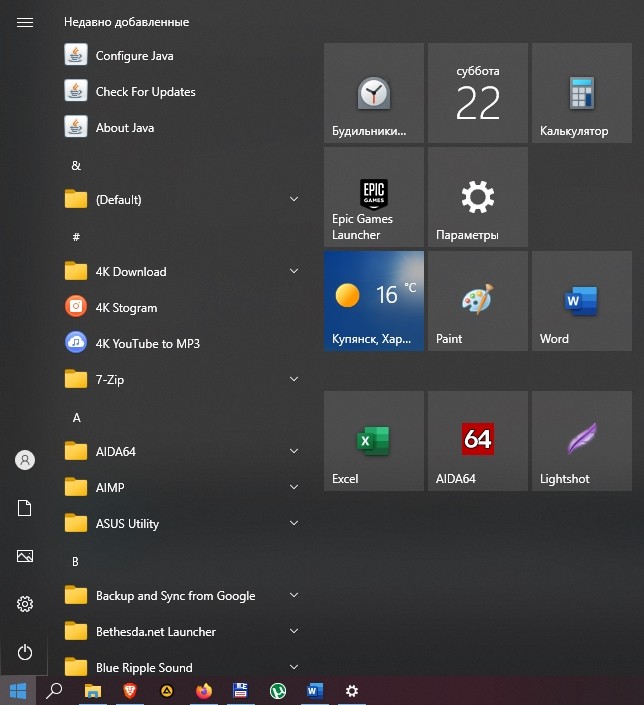
- Кликните ЛКМ по значку «Пуск».
- Нажмите на иконку в виде шестеренки для перехода в «Параметры».
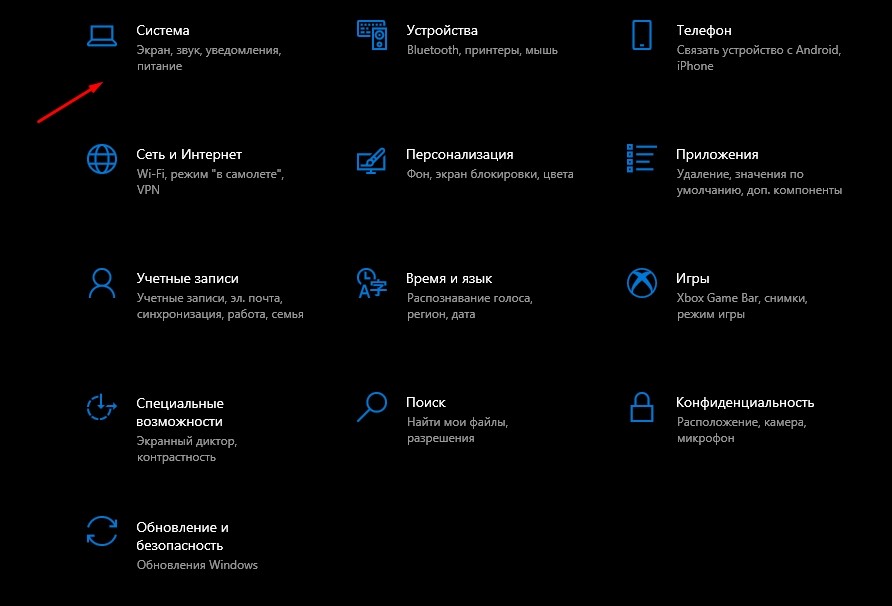
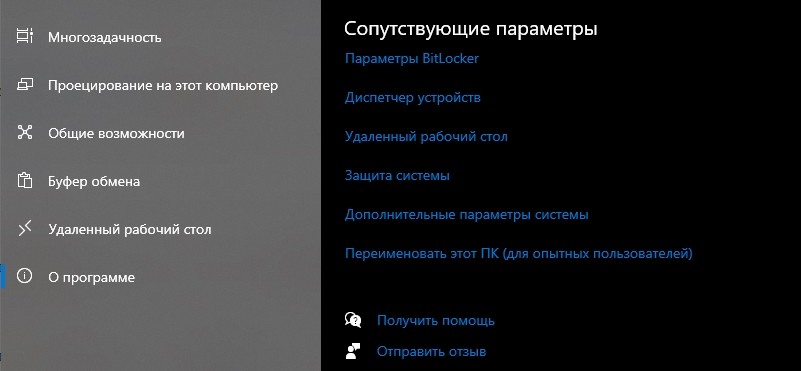
- Перейдите в раздел «Система», а затем откройте вкладку «О программе».
- Под заголовком «Шифрование устройства» нажмите на кнопку «Отключить».
Деактивация шифрования автоматически приведет к отключению функцию Битлокера. Если этот вариант не помог – обратите внимание на заключительный способ.
PowerShell
Удалить шифрование диска помогает еще один инструмент, внешне очень напоминающий Командную строку. Это консоль PowerShell, которая также призвана обрабатывать пользовательские запросы:
- Щелкните ПКМ по иконке «Пуск».
- Выберите запуск PowerShell с административными правами.
- Введите запрос «Disable-BitLocker -MountPoint «D:»», где вместо «D» укажите букву заблокированного раздела диска.
- Нажмите на клавишу «Enter».
Таким образом, инструкция по отключению Битлокера в PowerShell аналогична варианту деактивации через Командную строку. Единственное отличие – формулировка запроса, которая здесь выглядит иначе.
Особенности Bitlocker в Windows 10
Если вам вдруг потребуется снова активировать функцию, то рекомендуется принять во внимание ее особенности. Так вы получите полное представление относительно того, как работает Битлокер.
BitLocker – это встроенная функция шифрования жестких дисков, твердотельных и флеш-накопителей. В отличие от защиты учетной записи, Битлокер позволяет защитить не сам компьютер, а его содержимое. Ведь злоумышленнику не составит труда извлечь HDD или SSD, а затем подключить его к своему устройству. Но в данном случае он не сможет снять блокировку.
На заметку. Функция BitLocker не доступна в Windows 10 Home. Она работает только в профессиональной и корпоративной версиях ОС.
Вероятность взлома накопителя, защищенного Битлокером, очень мала. Но она существует. Для разблокировки злоумышленник должен подобрать ключ, а на это может уйти несколько дней или месяцев, при условии постоянных попыток ввода пароля.
![]()
Download Article
Quickly disable BitLocker using the Control Panel, Command Prompt, or Powershell
![]()
Download Article
- Using Control Panel
- Using the Command Prompt
- Using PowerShell
- Unlocking BitLocker
- Video
- Q&A
- Tips
- Warnings
|
|
|
|
|
|
|
Do you need to disable BitLocker? BitLocker is a data encryption feature that is built into Windows that allows you to encrypt data on your PC in order to protect it. BitLocker is a feature of Windows Pro, Windows Enterprise, and Windows Education editions. When a drive is encrypted through BitLocker, it can make the data hard to access from a different computer. This wikiHow teaches you how to turn off your Windows computer’s BitLocker encryption.
Things You Should Know
- Open the Start menu and type «manage BitLocker.» Open the «Manage BitLocker» option and expand the drive you want to decrypt. Click «Turn off BitLocker.»
- Open the Command Prompt as an Administrator and type «manage-bde -off <drive letter>:» and press Enter.
- Open Powershell as an administrator and type «Disable-BitLocker -MountPoint «<drive letter>:» and press Enter
-

1
Open Start
. Click the Windows logo in the bottom-left corner of the screen. The Start menu will pop up.
-
2
Type in manage BitLocker. This will display the «manage Bitlocker» Control Panel option in the Windows Start menu.
Advertisement
-
3
Click Manage BitLocker. It should be at the top of the Start menu. It has an icon that resembles a hard drive with a set of keys over the top. Clicking this option opens the BitLocker Control Panel page.
-
4
Click
to expand the correct hard drive. Scroll down until you find the drive for which you want to disable BitLocker. Click the icon that resembles a bracket pointing down to expand the drive you want to decrypt.
- Skip this step if BitLocker is only encrypting one hard drive.
- You can use BitLocker to encrypt and decrypt internal hard drives and removable USB drives.
-
5
Click Turn Off BitLocker. It’s a link below and to the right of the BitLocker heading.
-
6
Click Turn Off BitLocker when prompted. Doing so causes BitLocker to begin decrypting your drive. This can take several hours to complete.
- You may be asked to enter your Administrator password or PIN before BitLocker will begin turning off.
- It may take a while for Windows to completely decrypt the drive you want to decrypt. You can continue to use your computer in the meantime.


Advertisement
-
1
Click the Windows Start menu
. It’s the button with the Windows logo in the taskbar at the bottom of the screen. This displays the Windows Start menu.
-
2
Type CMD. This displays the Command Prompt in the Windows Start menu.
-
3
Right-click the Command Prompt icon
and click {{MacButton|Run as Administrator. This opens the Command Prompt with administrative privileges.
- If you are not signed in to an administrative account, you may be asked to enter an administrative password.
-
4
Type manage-bde -off <drive letter>: and press ↵ Enter. Replace «<drive letter>» with the drive letter that you want to decrypt. This will decrypt that drive.[1]
- For example, if you want to decrypt your C: drive, you would type manage-bde -off C: and press Enter.
- To check the status of BitLocker in the Command Prompt, type manage-bde -status and press Enter.


Advertisement
-
1
Right-click the Windows Start menu
. Right-clicking the Windows Start menu displays a context menu with a variety of system applications.
-
2
Click Windows Powershell (admin). This opens Powershell with administrative privileges.
- If you are not signed in to an administrative account, you may be asked to enter an administrative password.
-
3
Type Disable-BitLocker -MountPoint "<drive letter>:" and press ↵ Enter. Replace «<drive letter>» with the letter of the drive you want to decrypt. This will decrypt the drive.
- For example, if you want to decrypt your C: drive, you would type Disable-BitLocker -MountPoint "C:" and press Enter.
- If you want to check the status of BitLocker, type Get-BitLockerVolume and press Enter.[2]
- To decrypt all drives, type Disable-BitLocker -MountPoint $BLV and press Enter.[3]


Advertisement
-
1
Find your recovery key. When you set up BitLocker on your computer, you were given a 48-digit recovery key to use when you forget your BitLocker password. You’ll need to find this key before you can unlock BitLocker:[4]
- If you printed out your recovery key, look for it in any location in which you keep important documents.
- If you saved your recovery key as a text file on a USB drive, plug the USB drive into a different Windows computer to open the text file and view the key.
- If your system administrator or IT professional set up BitLocker for you, contact them for specific instructions on getting back your key.
-
2
Start your computer if necessary. If your computer isn’t already turned on to the BitLocker screen, turn on your computer.
- If your computer is turned on to the BitLocker screen, skip this step and the next one.
-
3
Wait for the BitLocker screen to load. It can take several minutes for the BitLocker login screen to open.
-
4
Press Esc. Doing so indicates that you want to enter the recovery key instead of your BitLocker password.[5]
-
5
Enter your BitLocker recovery key. Type the 48-digit recovery key into the provided text box at the top of the screen.
-
6
Press ↵ Enter. This will submit your key.
-
7
Follow the on-screen prompts. Depending on your computer, you may have additional options after submitting your key. Once you’ve navigated through any extra prompts, you’re free to turn off BitLocker from within Settings.


Advertisement
Add New Question
-
Question
What if this device can’t use a Trusted Platform Module?

If your device does not have a TPM, you still can use BitLocker. It is just not possible to use Trusted Boot, meaning the TPM verifies the boot loader before booting. Secure Boot still works, but it is not as good as Trusted Boot.

Ask a Question
200 characters left
Include your email address to get a message when this question is answered.
Submit
Advertisement
Video
-
If you aren’t asked to enter a BitLocker password when booting up your computer, BitLocker probably isn’t enabled.
Thanks for submitting a tip for review!
Advertisement
-
BitLocker is not available for Windows 10 Home edition users, and some Windows 10 and 11computers may not have the proper hardware settings enabled to support BitLocker in the first place.
Advertisement
About This Article
Article SummaryX
1. Open your PC’s Settings.
2. Click System.
3. Click the Device encryption tab.
4. Click Turn off, then click Turn off when prompted.
Did this summary help you?
Thanks to all authors for creating a page that has been read 277,516 times.
Is this article up to date?
 Если вам потребовалось отключить BitLocker для диска (HDD и SSD) или флешки в Windows 10 — сделать это очень просто, при условии, что вы можете получить доступ к нему, можете открыть содержимое — знаете пароль или имеете другой путь способ разблокировки.
В этой инструкции подробно о методах снять шифрование BitLocker с диска Windows 10. В случае, если открыть содержимое диска нет возможности, доступ отсутствует, ключей восстановления тоже нет, к сожалению, единственный метод отключение BitLocker — форматирование этого диска с потерей данных.
Снятие шифрования BitLocker с диска или флешки
Сначала про отдельный момент, касающийся некоторых ноутбуков и ПК с предустановленной Windows 10. На них может быть по умолчанию включена функция «Шифрование устройства», которая отключается не так же, как включенное вами вручную шифрование BitLocker. Если системный диск был зашифрован при покупке, то для отключения шифрования выполните следующие шаги (не на любом компьютере с Windows 10 есть такие пункты):
- Зайдите в Параметры — Обновление и безопасность.
- В меню слева выберите «Шифрование устройства» и отключите шифрование устройства.
- Также пункт «Шифрование устройства» можно найти в Параметры — Система — О системе.
В случае, если требуется отключить BitLocker для диска или флешки, шаги будут следующими:
- В проводнике нажмите правой кнопкой мыши по зашифрованному и разблокированному диску, выберите пункт «Управление BitLocker». Также в параметры BitLocker можно попасть через Панель управления — Шифрование BitLocker.

- Найдите ваш диск в списке и нажмите «Отключить BitLocker» (требуются права администратора на компьютере).

- Подтвердите отключение BitLocker.


Учитывайте, что процесс расшифровки диска и снятия BitLocker может занять продолжительное время, вплоть до нескольких часов, особенно для медленных и заполненных HDD — не запускайте процесс на ноутбуке от батареи или на ПК, если его в ближайшее время потребуется выключить.
Отключение BitLocker — видео инструкция
Надеюсь, материал был полезен. Если же остались вопросы — задавайте в комментариях, я постараюсь помочь.
BitLocker is a built-in tool in Windows used to encrypt your data and keep it secure. We have already discussed how to enable, disable, and manage BitLocker using the Graphical User Interface (GUI) in Windows. In this post, we shall be discussing how you can achieve the same using just the Command Line Interface (CLI).
Table of contents
- How to Check BitLocker Encryption Status using Command Line
- How to Enable BitLocker using Command Line
- Enable BitLocker with Only Recovery Key
- Enable BitLocker with PIN Authentication and Recovery Key
- How to Enable BitLocker Auto-Unlock Feature using Command Line
- How to Disable BitLocker Auto-Unlock Feature using Command Line
- Unlock BitLocker Drive using Command Line
- Disable BitLocker Auto-Unlock using Command Line
- How to Turn Off BitLocker using Command Line
- Manage-bde Syntax, Switches, and Parameters
- Final Thoughts
There are many options that the command line offers while managing BitLocker which the BitLocker Drive Encryption manager (in the Control Panel) does not offer. Therefore, managing BitLocker using Command Prompt can prove useful, especially for system administrators.
This post discusses how you can enable and disable BitLocker encryption on the operating system (boot) drives as well as fixed drives, set passwords, and create a USB Recovery Key for unlocking. All this is done using the manage-bde.exe command-line tool designed to manage BitLocker on the local machine.
Note that all commands in this post are executed in Command Prompt with elevated privileges, unless told otherwise.
How to Check BitLocker Encryption Status using Command Line
We will start by checking the current status of BitLocker, where we will get its version, encryption state, percentage of the partition encrypted (if any), and whether the volume is currently locked or unlocked.
To know the current encryption status for all volumes on the device, paste the following command in Command Prompt:
manage-bde -status
You will now see the status of each volume on your computer, as in the image below.
 1")
You can now continue to the steps below to enable and manage your BitLocker encryption.
How to Enable BitLocker using Command Line
There are 2 types of volume partition on a computer: a volume that contains the operating system (usually labeled C:) and the non-boot drives/volumes. When configuring BitLocker on a boot drive, you do not need to enable the auto-unlocking feature as it unlocks automatically using either the Recovery Key or the pre-boot password.
Whereas in the case of a non-boot drive, the auto-unlocking feature can be enabled (but is not mandatory) so you do not have to unlock it separately after you have logged into your system. This is discussed in detail further down the article.
Furthermore, you can choose whether to unlock BitLocker encryption using just the Recovery Key (can also be saved on a USB flash drive to be used as a key), or configure a PIN/password, or use both.
Enable BitLocker with Only Recovery Key
If you want to use only the Recovery Key, you need a secondary partition (which is not locked) where you can store the Recovery Key having the .bek file extension. You can also use a USB flash drive to store that key, which will then act as the unlocking key for your PC.
The complete syntax for enabling BitLocker is as follows:
manage-bde -on c:
In the command above, we have enabled BitLocker on volume label C.
However, this can be combined with certain parameters that will generate a random 48-digit Recovery Key and store it to a location of our choice. In the example below, the command will enable BitLocker on the C drive, create a random Recovery Key, and save it to the D drive:
manage-bde -on c: -recoverykey d: -recoverypassword
 2")
Since the Recovery Key is a hidden file, you will not be able to see it using the default File Explorer settings. So do not worry if you are unable to find the Recovery Key in the USB drive or any volume for that matter.
The system now needs to run a hardware test to start the encryption process. Restart the computer using the following command:
shutdown /r /t 1
This will reboot your computer after one second. When it boots up again, keep the USB/volume connected to your system to unlock the OS drive. When you log in, you can see that your OS drive is being encrypted.
 3")
Enable BitLocker with PIN Authentication and Recovery Key
You can also set a PIN or a password on your drive to unlock it with or without a Recovery Key. We must warn you that in case you lose or forget your PIN/password and do not create a Recovery Key, accessing/recovering the encrypted data would be very difficult.
Before we proceed with configuring BitLocker with a PIN or a password, we must enable pre-boot password and Personal Identification Number (PIN) support for BitLocker.
The process of enabling PIN authentication requires the configuration of a Group Policy which we have discussed here. You may click this link to learn how to configure it using the Windows GUI.
Alternatively, you may download and execute the Windows Registry file (valid for Windows 10 and Windows 11) to automate the process for you given below. Here is how to run the .reg file successfully:
Wrongful manipulation of the Windows Registry can cause harm to your operating system. Therefore, we recommend that you create a system restore point before proceeding forward.
- Download the compressed file by clicking on the given link:
Enable Pin for Bitlocker (Registry) (unknown, 1,036 hits)
- Right-click on the downloaded file and extract it.
 5")
- Now navigate to the extracted folder and double-click the EnablePinForBitLocker file to run it.
- On the UAC prompt, click Yes.
 6")
- On the confirmation dialog box, click Yes again.
 7")
- On the next popup, click Ok.
 8")
- Now restart your computer for the changes to take effect.
 5")
 6")
 7")
 8")
After the computer reboots, you may proceed to configure BitLocker with only a PIN or password authentication. Enter the following command while replacing “C:” with the letter of the drive that you want to encrypt.
manage-bde -protectors -add C: -pw
 9")
You will now need to enter the password that you want to set and then reconfirm it. Press Enter each time after entering the password. If added successfully, you will see the message “Key protectors added.”
 10")
Now use the following command to enable BitLocker on the drive while saving the Recovery Key in another volume, just as we did in the previous section of this article:
manage-bde -on c: -recoverykey d: -recoverypassword
 11")
Note: You can also use only the first half of the command above (manage-bde -on c:) to enable BitLocker but not create a Recovery Key.
Now restart your computer using the command below.
shutdown /r /t 1
As the computer reboots, you will be asked to enter the PIN/password (if the OS drive has been encrypted). Enter your credentials to unlock the drive and boot in.
 12")
When you log in, you can see that the remainder of your volume is being encrypted. Allow the process to be completed.
 13")
How to Enable BitLocker Auto-Unlock Feature using Command Line
If you have enabled BitLocker on non-OS volume(s), then those will need to be unlocked manually after you have logged into your system, unless the auto-unlock feature is enabled. If not, you will see the volume locked, as in the image below, and will need to either provide the Recovery Key or enter the PIN/Password when trying to access it.
 14")
The auto-unlock feature will only unlock the non-OS drives automatically if the OS drive is initially unlocked using the BitLocker PIN/password or the Recovery Key.
Follow the steps below to enable BitLocker while configuring the auto-unlock feature on a volume:
Note that this feature does not need to be enabled on boot drives as they are automatically unlocked when the credentials are provided as the system is booting.
- Start by downloading the .reg file, extract it, and then run it.
Enable Pin for Bitlocker (Registry) (unknown, 1,036 hits)
- Now open Command Prompt with administrative privileges and use the following command to configure a PIN or a password. Replace “D:” with the drive letter of the volume that you want to encrypt:
manage-bde -protectors -add D: pw 16")
- Then enter your password and reconfirm it. Hit Enter each time. You will see the message “Key Protectors Added” if the password has been configured successfully.
- Now enter the following command to enable the auto-unlock feature while replacing “D:” with the same drive letter:
manage-bde -autounock -enable D: 18")
- Now enable BitLocker on the same drive by using the command below. You can add to the command to also create a Recovery Key, the same as we did in the previous section of this post.
manage-bde -on D: 19")
 16")
 17")
 18")
 19")
The volume will now begin encryption. Using this technique, the non-OS volume(s) will automatically be accessible without any special authentication as soon as you log in using the Recovery Key or PIN/password for the boot drive upon startup.
How to Disable BitLocker Auto-Unlock Feature using Command Line
If you want to disable a drive’s auto-unlock feature, it needs to be first unlocked. Only then will you be able to remove the feature. If your drive is already unlocked, continue down to the next section.
Unlock BitLocker Drive using Command Line
- In the Command Prompt, enter the following command while replacing “D:” with the drive letter of the volume that you want to unlock:
manage-bde -unlock D: -pw 20")
- Now enter the PIN/password for the drive and hit Enter.
 21")
 20")
 21")
Alternatively, you can also use the command below to provide the Recovery Key instead of the password to unlock the drive:
manage-bde -unlock D: -recoverykey "PathToRecoveryKey"
Your drive will now be unlocked. You may now move onto the next section to disable the auto-unlocking feature.
Disable BitLocker Auto-Unlock using Command Line
Once you have ensured that the drive is unlocked, use the given command while replacing “D:” with the drive letter that you want to disable the feature on:
manage-bde -autounlock -disable D:
 22")
Automatic unlocking of the drive will now be disabled.
How to Turn Off BitLocker using Command Line
To turn off the BitLocker encryption on your drive, you first need to ensure that it is unlocked using the steps given above. You may then proceed to enter the following command in Command Prompt to disable BitLocker while replacing “D:” with your respective drive letter.
manage-bde -off D:
 23")
Manage-bde Syntax, Switches, and Parameters
As we mentioned before, manage-bde.exe provides a lot of other features to BitLocker which are not accessible through the GUI. Below is a list of the parameters of manage-bde and what they do:
| Parameter | Description |
|---|---|
| manage-bde -status | Provides information about all drives on the computer, whether or not they are BitLocker-protected. |
| manage-bde -on | Encrypts the drive and turns on BitLocker. |
| manage-bde -off | Decrypts the drive and turns off BitLocker. All key protectors are removed when decryption is complete. |
| manage-bde -pause | Pauses encryption or decryption. |
| manage-bde -resume | Resumes encryption or decryption. |
| manage-bde -lock | Prevents access to BitLocker-protected data. |
| manage-bde -unlock | Allows access to BitLocker-protected data with a recovery password or a recovery key. |
| manage-bde -autounlock | Manages automatic unlocking of data drives. |
| manage-bde -protectors | Manages protection methods for the encryption key. |
| manage-bde -tpm | Configures the computer’s Trusted Platform Module (TPM). This command isn’t supported on computers running Windows 8 or win8_server_2. To manage the TPM on these computers, use either the TPM Management MMC snap-in or the TPM Management cmdlets for Windows PowerShell. |
| manage-bde -setidentifier | Sets the drive identifier field on the drive to the value specified in the Provide the unique identifiers for your organization Group Policy setting. |
| manage-bde -ForceRecovery | Forces a BitLocker-protected drive into recovery mode on restart. This command deletes all TPM-related key protectors from the drive. When the computer restarts, only a recovery password or recovery key can be used to unlock the drive. |
| manage-bde -changepassword | Modifies the password for a data drive. |
| manage-bde -changepin | Modifies the PIN for an operating system drive. |
| manage-bde -changekey | Modifies the startup key for an operating system drive. |
| manage-bde -KeyPackage | Generates a key package for a drive. |
| manage-bde -upgrade | Upgrades the BitLocker version. |
| manage-bde -WipeFreeSpace | Wipes the free space on a drive. |
If stuck with these parameters, concatenate “/?” in front of the command and parameters in the Command Prompt to get more help. To learn more about these parameters, read Microsoft’s support page.
Similarly, the manage-bde protectors also have quite a few switches. Here’s a list:
| Parameter | Description |
|---|---|
| -get | Displays all the key protection methods enabled on the drive and provides their type and identifier (ID). |
| -add | Adds key protection methods as specified by using additional -add parameters. |
| -delete | Deletes key protection methods used by BitLocker. All key protectors will be removed from a drive unless the optional -delete parameters are used to specify which protectors to delete. When the last protector on a drive is deleted, BitLocker protection of the drive is disabled to ensure that access to data is not lost inadvertently. |
| -disable | Disables protection, which will allow anyone to access encrypted data by making the encryption key available unsecured on the drive. No key protectors are removed. Protection will be resumed the next time Windows is booted unless the optional -disable parameters are used to specify the reboot count. |
| -enable | Enables protection by removing the unsecured encryption key from the drive. All configured key protectors on the drive will be enforced. |
| -adbackup | Backs up recovery information for the drive specified to Active Directory Domain Services (AD DS). Append the -id parameter and specify the ID of a specific recovery key to back up. -id parameter is required. |
| -aadbackup | Backs up all recovery information for the drive specified to Azure Active Directory (Azure AD). Append the -id parameter and specify the ID of a specific recovery key to back up. -id parameter is required. |
<drive> |
Represents a drive letter followed by a colon. |
| -computername | Specifies that manage-bde.exe will be used to modify BitLocker protection on a different computer. You can also use -cn as an abbreviated version of this command. |
<name> |
Represents the name of the computer on which to modify BitLocker protection. Accepted values include the computer’s NetBIOS name and the computer’s IP address. |
Final Thoughts
There are quite a few things you can do just from the Command Prompt alone for BitLocker. We started this post with the most basic commands and what they do, then worked our way up so that it is easier for you to understand BitLocker through the command line.
There are similar tools also available in Windows to manage-bde, such as repair-bde, which you can use to recover lost encrypted data due to damaged hard disks.
If you are using an operating system that does not have BitLocker, you can try out these alternatives to keep your data safe.