В этой заметке показано обновление MySQL Community Server — свободно распространяемой версии MySQL.
При этом подразумевается, что установка и обновление делается без Installer MSI — то есть без автоматического установщика. Дело в том, что ручная установка не только более быстрая и более гибкая, но и она, на самом деле, проще чем использование установщика. Если задействовать установщик MySQL, то в конце его работы будет запущен мастер настройки, который будет задавать много вопросов, некоторые из которых новичкам непонятны. В результате ответов на эти вопросы будет создан конфигурационны файл. И это при том, что на самом деле в конфигурационном файле нужны всего несколько строчек, которые намного быстрее добавить напрямую, чем отвечать на не всегда понятные вопросы мастера настройки.
Последнюю версию MySQL с официального сайта можно скачать по ссылке: https://dev.mysql.com/downloads/mysql/.
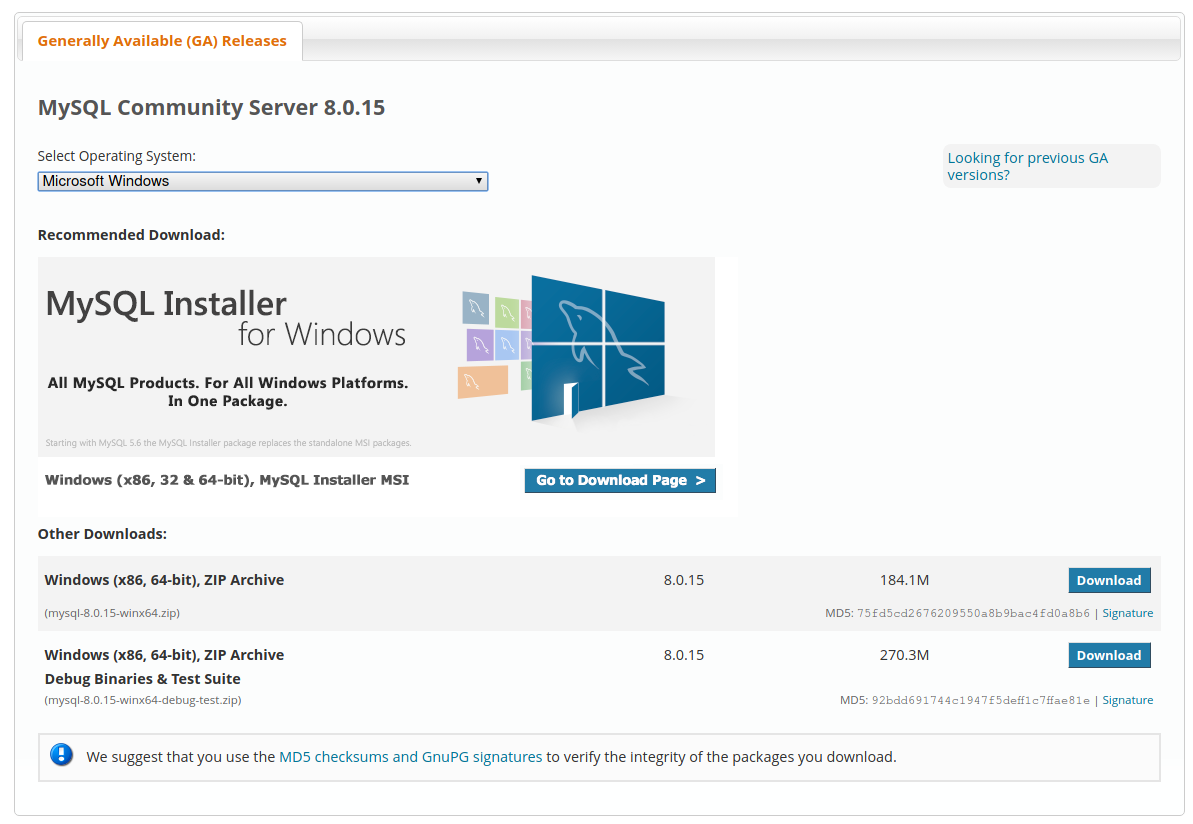
Как можно увидеть, вначале идёт большая кнопка для скачивания установщика — причём установщик поддерживает и 32-битную и 64-битные версии.
В разделе Other Downloads (другие загрузки) имеется два варианта:
- Windows (x86, 64-bit), ZIP Archive
- Windows (x86, 64-bit), ZIP Archive. Debug Binaries & Test Suite
Нужно скачать именно первый вариант, то есть Windows (x86, 64-bit), ZIP Archive. Второй вариант содержит бинарники отладчика и набор для тестов. Любая из этих версий для 64-битных систем — 32-битного архива для самостоятельной установки нет.
Для скачивания нажимаем кнопку Download. Открывается страница:

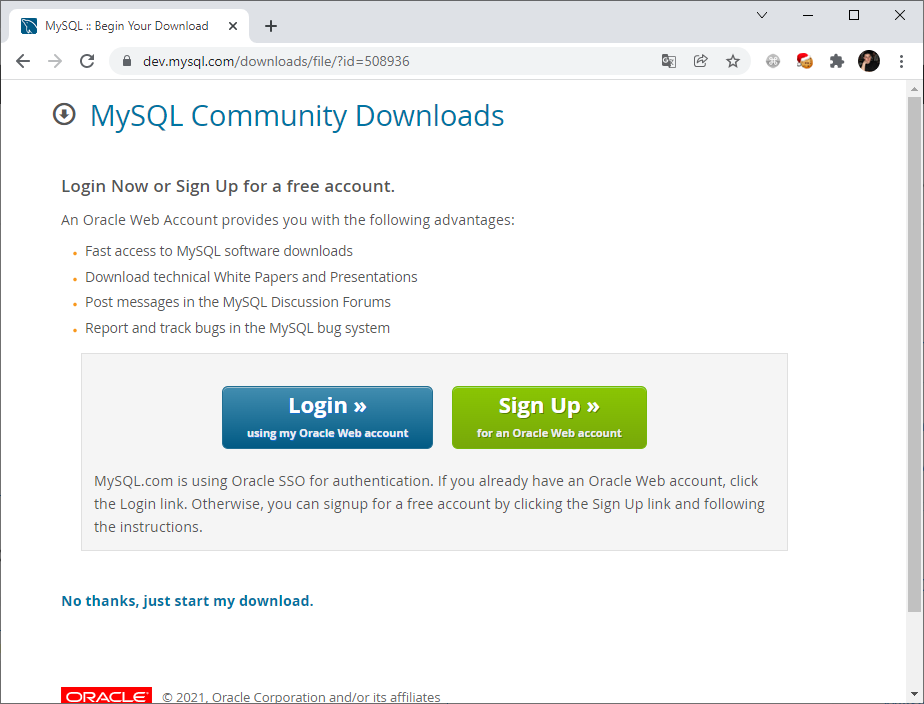
На ней нам обещают разные преференции если мы зарегистрируемся или выполним вход, но, на самом деле, для скачивания достаточно просто нажать «No thanks, just start my download».
Если вы используете MySQL вместе с Apache и PHP, то в этих программах вам не нужно делать какие-либо настройки, поскольку связь с MySQL выполняется через сетевое соединение. То есть после установки и запуска новой версии MySQL, Apache и PHP будут как обычно подключаться к MySQL, дополнительная настройка в них для связи с MySQL не нужна.
Резервное копирование базы данных
В первую очередь сделайте резервную копию файлов баз данных, поскольку если после обновления вы обнаружите, что вместе с исполнимыми файлами СУБД вы удалили ещё и файлы баз данных, то это будет очень грустно. Это особенно актуально, поскольку в Windows MySQL и MariaDB держат файлы баз данных в своей папке с исполнимыми файлами.
Если у вас базы данных в другой папке, не внутри установочной директории, то вам беспокоиться не о чем. В противном случае начните с создания их резервной копии. Если вы не знаете где они расположены, то обратитесь к статье «Как узнать путь до файлов базы данных MySQL/MariaDB в Linux и Windows».
Далее остановите MySQL/MariaDB, поскольку в противном случае файлы баз данных скопируются некорректно:
net stop mysql
Теперь скопируйте папку data в безопасное место.
Как узнать версию MySQL
Кстати, прежде чем начать делать обновление вы можете захотеть проверить, какая версия у вас установлена. Для этого перейдите в папку с исполнимыми файлами (у меня это C:\Server\bin\mysql-8.0\) и выполните там команду для проверки версии:
cd C:\Server\bin\mysql-8.0\
.\mysql.exe -V
Обновление MySQL
Приступаем к самому обновлению.
Внимание: при обновлении с MySQL 5 до MySQL 8 требуются дополнительные действия. Смотрите подробности в статье: «Как обновиться с MySQL 5 до MySQL 8».
Подразумевается, что MySQL установлена в папку c:\Server\bin\mysql-8.0 — если у вас другой путь, то используйте последующие инструкции в соответствии с вашими условиями.
Последовательность действий:
- Скачайте архив с новой версией MySQL.
- Скопируйте в безопасное место файл c:\Server\bin\mysql-8.0\my.ini.
- Остановите и удалите службу MySQL:
net stop mysql
c:\Server\bin\mysql-8.0\bin\mysqld --remove
- Удалите папку C:\Server\bin\mysql-8.0\.
- Распакуйте новый архив в C:\Server\bin\. Переименуйте папку в mysql-8.0.
- Скопируйте сохранённый ранее файл my.ini в c:\Server\bin\mysql-8.0\my.ini.
- Запустите службу MySQL:
C:\Server\bin\mysql-8.0\bin\mysqld --install
net start mysql
Связанные статьи:
- Как обновить MariaDB в Windows (100%)
- MariaDB для Windows (75.5%)
- Как сделать резервную копию баз данных MySQL (MariaDB) в Windows без phpMyAdmin (75.5%)
- Как сбросить пароль root MySQL или MariaDB в Windows (75.5%)
- Как в phpMyAdmin поменять настройки экспорта по умолчанию (75.5%)
- Apache log (логи): как настроить и анализировать журналы веб-сервера (RANDOM — 50%)
Your database more than likely runs on MySQL or its fully open-source fork MariaDB. These popular database management software power 90% of websites, so your server host has probably installed either of them for you.
But not all hosts will continue to keep it up to date, so it’s often up to you to check your MySQL version and keep it upgraded. Outdated software on your server is never good and can also be harmful.
Let’s learn how to check if your MySQL version is up to date, and upgrade it if it isn’t.
Watch Our Video Guide to Checking and Upgrading Your MySQL Version
Why Keep MySQL Up to Date?
Manual server maintenance is not a fun task, especially if you’re not very familiar with your webserver’s inner workings. As long as your server and database are working fine, it may be tempting to ignore an outdated piece of software. But there are quite a few reasons why this is a bad idea.
It’s never good to have outdated software on your server. Even the tiniest hole in your security could be a vector for attackers to slip through and take over.
They may even be able to mess with your database. All sorts of important info are stored there, such as your WordPress posts and all other kinds of sensitive bits. You don’t want anyone unwanted to be able to modify that.
Besides that, a new version means new features and general improvements for what’s already there. Even if these extra features don’t affect you, more recent MySQL versions are more secure, better optimized, and faster.
And with every update of MySQL comes a whole slew of bug fixes, patching up errors that could be an annoyance at best or cause you serious trouble at worst.
When it comes to any software on your website, it’s almost always best to keep it at the latest version.
MySQL runs in the background of 90% of websites 😲… but not all hosts will continue to keep it updated. Learn how to check for yourself right here ⬇️Click to Tweet
Which Version of MySQL is the Best?
Many servers these days are still running on MySQL 5.7 (the latest version before the jump to 8.0), even though a newer and better version exists. Why is this? And which is best, MySQL 5.7 or 8.0?
Most people don’t upgrade because either they don’t know about the latest MySQL version, or they don’t want to take the time to update it. In addition, 5.7 has not been deprecated and will not be until 2023.
But while MySQL 5.7 is still supported, making the switch to the latest version is definitely worth your time. It’s faster and more secure — changes can be observed instantly upon activating it. And for developers who can make use of the new functions, the benefits are more numerous than can be quickly listed.
There are some upgrade considerations and backward incompatibilities you’ll need to know about, but for a majority of sites, they won’t cause issues.
It’s almost always best to keep up with the latest stable version of MySQL. Even minor updates are worth the trouble, though the new built-in auto-updater will likely handle those for you. As for major updates, it’s worth it unless crucial parts of your server are incompatible.
While WordPress supports MySQL versions all the way back to 5.6, 8.0 works perfectly with it. And as 5.6 is no longer supported and is susceptible to bugs and security risks, you should at least update to 5.7.
How to Check MySQL Version
It’s crucial to keep MySQL up to date, but you need to know its version before upgrading. Chances are, you’re already using the latest version and don’t need to do anything at all. There are several ways to check; these are just a handful of the easiest ones.
Check MySQL Version with MyKinsta
Accessing your database and checking your MySQL version with MyKinsta is very easy. There are several ways to do so, as detailed above, but the easiest two are using phpMyAdmin or connecting with the command line.
You can find phpMyAdmin after logging into MyKinsta. Just go to Sites > Info, and under the Database access section, click Open phpMyAdmin. The credentials you need to log in are right there.
You can also connect with the command line with SSH. With Kinsta, we set up everything for you to allow SSH access. Just find your credentials in Sites > Info in the SFTP/SSH section. Then follow the steps below to log in and put in the proper commands.
Use the Command Line
The easiest way to obtain your MySQL version is with a simple code submitted through the command line. It takes mere seconds and answers your question instantly. Getting at your server’s command line shouldn’t be too difficult unless you’re using minimal hosting.
There are a variety of ways to access your server’s command line. For example, your web host may provide a way to submit commands through their back end, such as with cPanel. Or you may be able to use the built-in Terminal or Command Prompt to connect to your server. Tools like PuTTY also exist to help you log in and are usually required for Windows users to connect with SSH.
Either way, you’ll need some SSH login credentials. You can usually find them in your web hosting dashboard, or you can email them and ask for help.
Once you know how you’re going to connect to your server’s command line, follow these steps.
Step 1: Launch the Terminal (Linux, macOS) or Command Prompt/PuTTY (Windows) on your computer. In cPanel, you can find it under Advanced > Terminal.
Step 2: Provide your SSH credentials to connect and log in to the server.
Step 3: Input the following command:
mysql -VIf you have the MySQL Shell installed, you can also use the simple command “mysql” to show your version information.
Either way, the version number should be output on the screen.
Check MySQL Version with phpMyAdmin
There’s another straightforward way to check your MySQL version, and that’s with phpMyAdmin. This software is also ubiquitous and present on most servers, so you have a good shot at finding your MySQL version.
Find your phpMyAdmin credentials by checking your web hosting dashboard. There may even be a direct link to log in there. Email your host if you can’t find them.
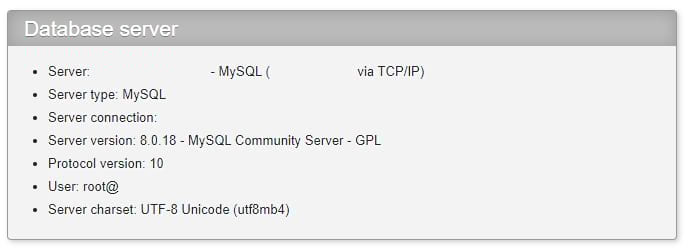
Log in to phpMyAdmin once you find your credentials. As soon as you’re in, you’ll see a Database server box on the right side of the screen. There, under the Software version section, is your MySQL version. Easy as that!
Through WordPress Dashboard
A final easy way to find your MySQL version is through your site’s WordPress admin dashboard.
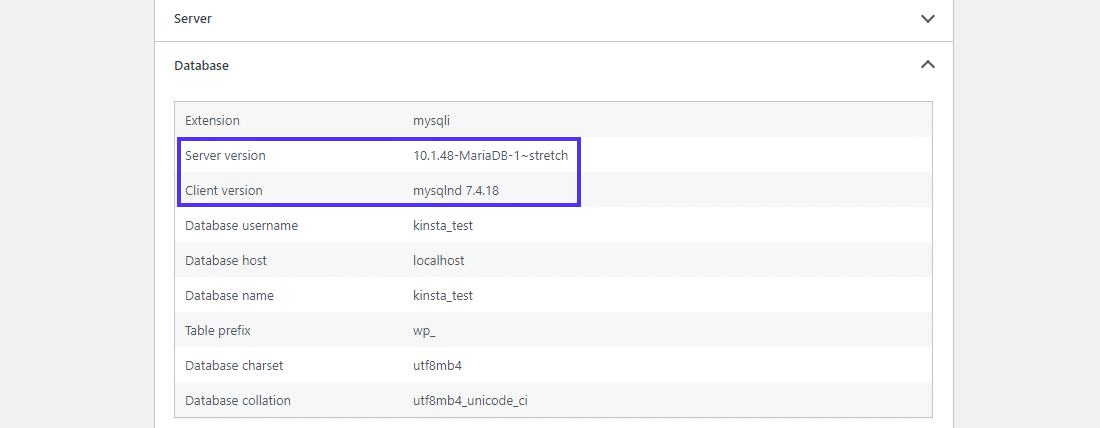
To do that, visit your WordPress dashboard, and go to Tools > Site Health. Under here, first, go to the Info tab, and then to the Database section below.
You can find your server’s current MySQL version listed here beside the Server version label.
How to Upgrade MySQL Version
If you’ve determined your MySQL is out of date, you should rectify that as soon as possible. There are multiple ways to update MySQL to the latest versions; it all depends on what tools and operating systems you’re using.
It’s worth noting that later versions of MySQL will attempt to auto-update if the script notices that your installation is out of date. You may not need to do anything at all. If you’ve determined that MySQL is out of date and needs to be manually updated, follow these steps.
Like checking your MySQL version with the command line, you’ll need to obtain your SSH login credentials from your web host to access the terminal on your server. And, of course, you’ll need the IP address of your server.
This backup contains both your database (an SQL file) and your entire site, so you’ll be extra safe if something goes wrong.
Upgrade MySQL Using cPanel
If your host offers cPanel, it’s probably the easiest way to do an upgrade since you can use the interface provided. But since cPanel defaults to MySQL 5.7 by default, you may want to do an upgrade.
As cPanel doesn’t allow you to downgrade, you should back up your database before proceeding.
Most cPanel installations come with Web Host Manager, WHM, which gives you deeper root access.
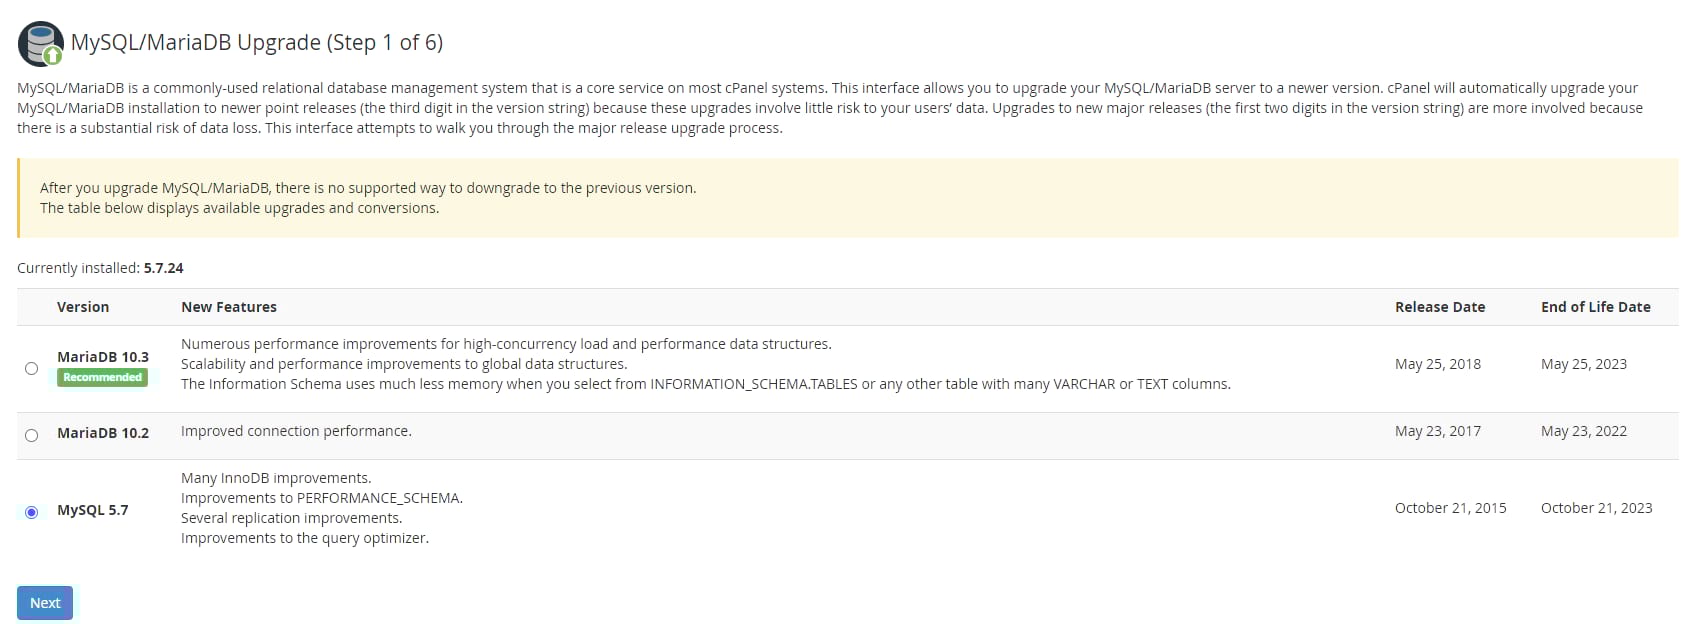
Step 1: Log in to WHM by visiting either “example-site.com:2087” or “example-site.com/whm.” You can also ask your web host how to access WHM.
Step 2: Navigate to Software > MySQL Upgrade or type “MySQL” into the search bar. You may also find it under SQL Services > MySQL/MariaDB Upgrade.
Step 3: Select the version of MySQL you want to upgrade to and click Next. Now follow the upgrade steps, and it’ll take care of everything for you.
This method is by far the simplest way to do a MySQL upgrade, but if your host doesn’t offer cPanel or WHM, you may need to do it manually.
Upgrade MySQL in Linux/Ubuntu
There are a variety of Linux distributions, but Ubuntu is by far the most common. These instructions should work for any operating system that uses the apt/apt-get function to install the software.
Linux can easily SSH connect without any additional software requirements. So, you can get right into your server.
Step 1: Launch the Terminal. Obtain your SSH credentials and use the ssh command to log in.
Step 2: You should have the MySQL apt Repository installed since MySQL is already on your server. Update your package list with the following command:
sudo apt-get updateStep 3: Now upgrade MySQL.
sudo apt-get upgrade mysql-serverYou can also try this command if the above doesn’t work:
sudo apt-get install mysql-serverIt’ll prompt you to choose a version; select 5.7 or 8.0. If you’re upgrading from 5.6, you should update to 5.7 first, rather than going straight to 8.0.
Upgrade MySQL on macOS
While macOS comes with its own version of MySQL, you can’t upgrade it through the usual methods. And most likely, your server is using a separate instance.
Many of these steps are very similar to updating MySQL on Linux. macOS similarly has SSH built into the operating system, so all you need to do is run the commands.
We’ll assume you’re using Homebrew as a package manager as it’s the simplest way to install and update MySQL on Mac. You shouldn’t attempt to upgrade MySQL with Homebrew if you didn’t use it to install it initially.
Step 1: Launch the Terminal program and log in with the ssh command.
Step 2: Run these commands using Homebrew.
brew update
brew install mysql
This command should automatically install 8.0 and upgrade any existing versions.
Are you running into trouble? Try uninstalling the current version of MySQL first. Use these commands:
brew remove mysql
brew cleanup
Then you can again attempt to run the update and install commands again.
Step 3: Make sure you start the MySQL server again manually:
mysql.server startUpgrade MySQL in Windows
Unlike Mac and Linux, Windows can’t use SSH by default. Instead, you’ll need to install a separate client, and then you can connect to your server.
Step 1: Download PuTTY and install it on your system. Launch it and input your SSH credentials to connect to the server. 3306 is the default port number. Ignore any security alerts; these are normal.
Step 2: Assuming you’re connecting to a Linux terminal, you can use the Linux commands in the Linux/Ubuntu section above to perform the upgrade.
You can also use the MySQL installer to download MySQL onto the system directly. This process skips the SSH connection entirely.
Keeping your MySQL version up to date is crucial for site security 🔒 See how to upgrade your version here ⬇️Click to Tweet
Summary
With any software, it’s crucial to keep it up to date. And with MySQL being so integral to your website and its database, it’s even more imperative. Unfortunately, too many web admins choose to let their MySQL version fall behind, to the detriment of their website’s speed and security.
Luckily, checking your MySQL version and upgrading it is almost always a smooth process. While you should definitely back up your website and database for emergencies, you aren’t likely to experience any issues.
With just a tiny command in your web server’s terminal, your database will be well optimized and faster than ever.
Salman Ravoof
Salman Ravoof is a Technical Editor at Kinsta. He’s a self-taught web developer, writer, creator, and a huge admirer of Free and Open Source Software (FOSS). Besides tech, he’s excited by science, philosophy, photography, arts, cats, and food. Learn more about him on his website, and connect with Salman on Twitter.
-
Website
-
LinkedIn
-
Twitter
Юным DBA администраторам в помощь, дабы не гадали как правильно обновить MySQL 8 на сервере Windows Server 2016.
У нас уже есть установленный MySQL 8 сервер:
Установка MySQL 8 на Windows Server 2016
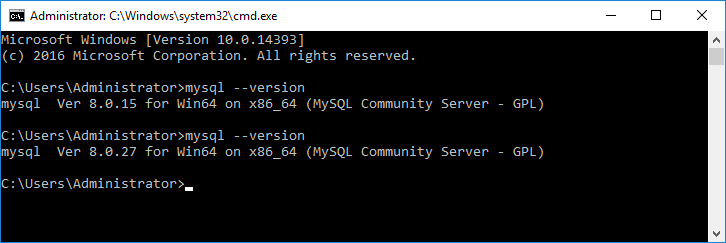
Текущая версия сервера 8.0.15, её можно посмотреть в командной строке:
mysql --versionБудем обновлять MySQL 8 до последней текущей версии. Заодно обновим MySQL Workbench.
Для чего нужно обновлять MySQL?
Разработка MySQL сервере ведётся постоянно, несмотря на то, что MySQL теперь принадлежит Oracle. Просто так обновлять MySQL не имеет смысла. Не все обновления одинаково полезны. Обновляться следует в двух случаях, когда ПО, которое использует MySQL требует обновлённую версию СУБД. И когда в MySQL вносят исправления, которые было бы неплохо применить в вашем проекте.
Естественно, перед обновлением сделайте резервную копию ваших данных. Вдруг, придётся выполнить откат.
Дистрибутив
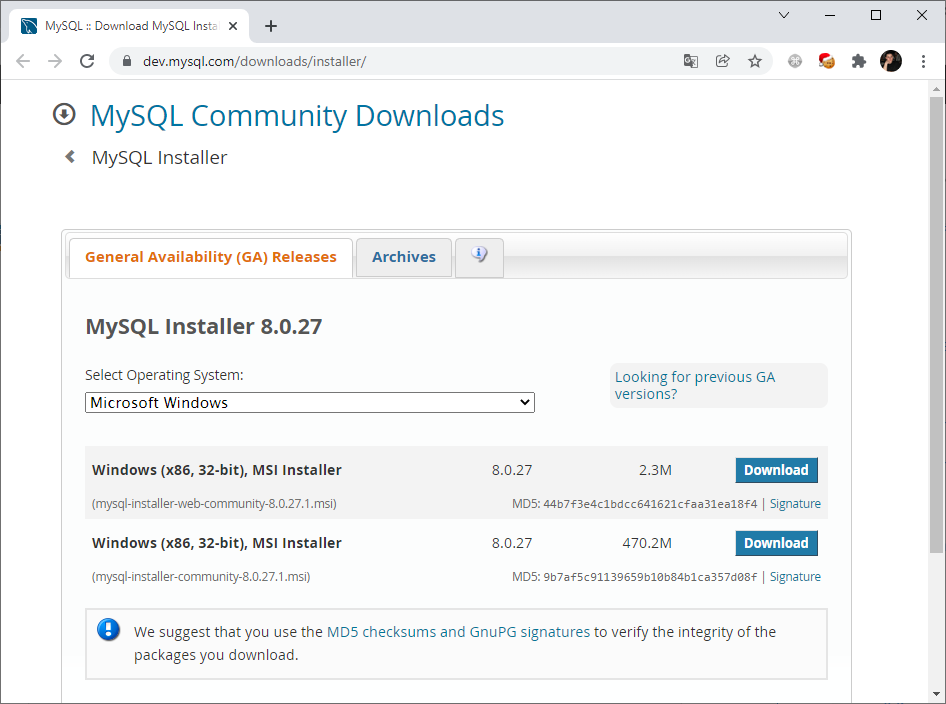
Заходим на сайт https://dev.mysql.com/downloads/installer/.
Есть два варианта инсталлятора с последней версией 8.0.27:
- mysql-installer-web-community-8.0.27.1.msi
- mysql-installer-community-8.0.27.1.msi
Судя по размеру, web-версия будет выкачивать нужные модули при установке, а в целом, отличий нет. Качаю mysql-installer-community-8.0.27.1.msi.
Просят зарегистрироваться. Это, конечно, самое нужное действие, когда срочно нужно обновиться… Хорошо есть ссылка «No thanks, just start my download».
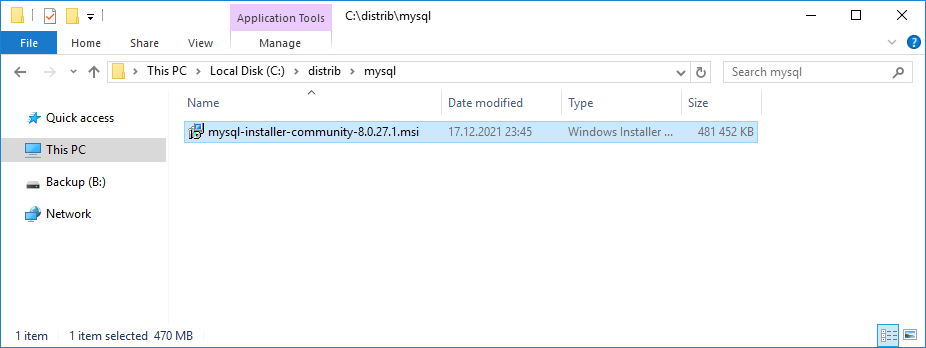
Дистрибутив скачивается.
Установка
Перед началом обновления останавливаем все сервисы, которые обращаются к БД.
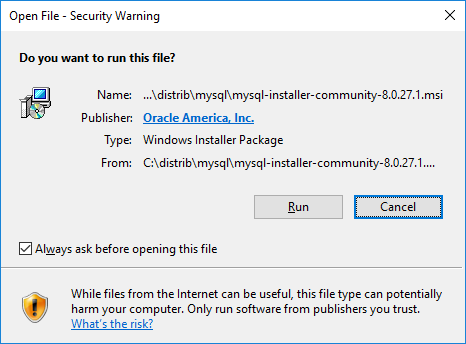
Запускаем скачанный дистрибутив.
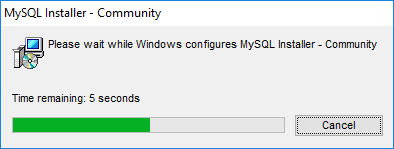
Начинается установка.
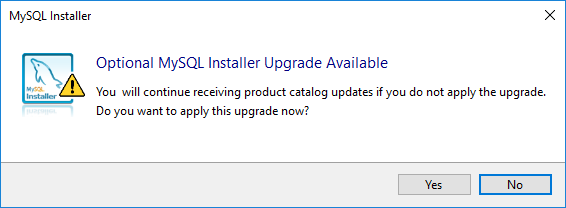
Появляется очень странное невнятное окошко, которое говорит, что доступно обновление инсталлятора. Это, на самом деле, туфта. Или инсталлятор по Интернету узнал о том, что вышли обновления, или просто он выстреливает такое окошко если предыдущая установка была давно. В нашем случае это именно то, что нам нужно. А именно нам нужно получить обновления MySQL. Нажимаем Yes.
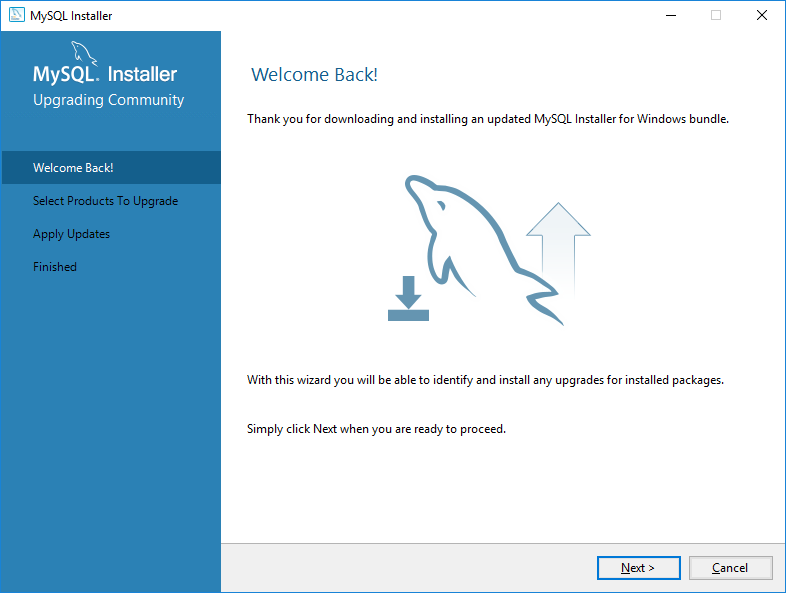
Открывается мастер. Попадаем в раздел Welcome Back! Этот мастер предлагает провести поиск доступных обновлений для продуктов MySQL. Next.
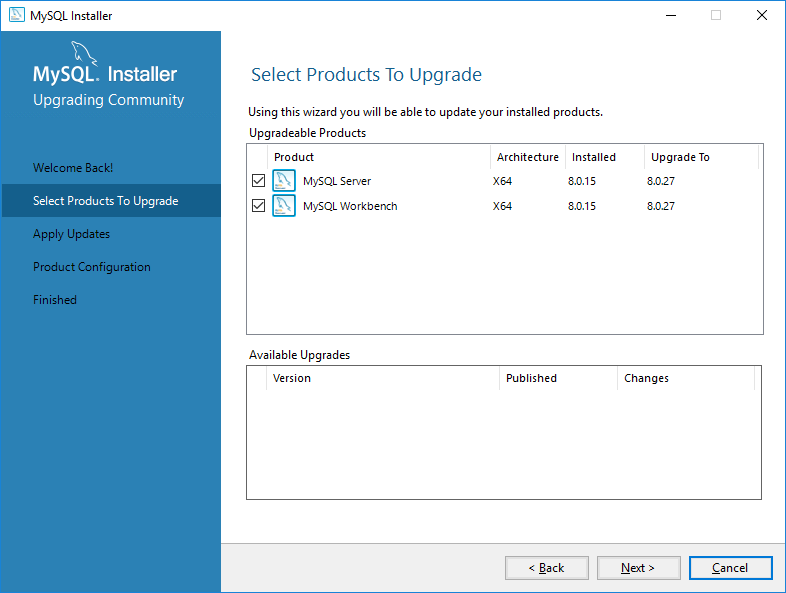
Попадаем в раздел Select Products To Upgrade. Найдено два продукта, для которых можно установить обновление. MySQL Server и MySQL Workbench. Отображаются версии продуктов, текущая и доступная. Выделяем галками оба продукта. Next.
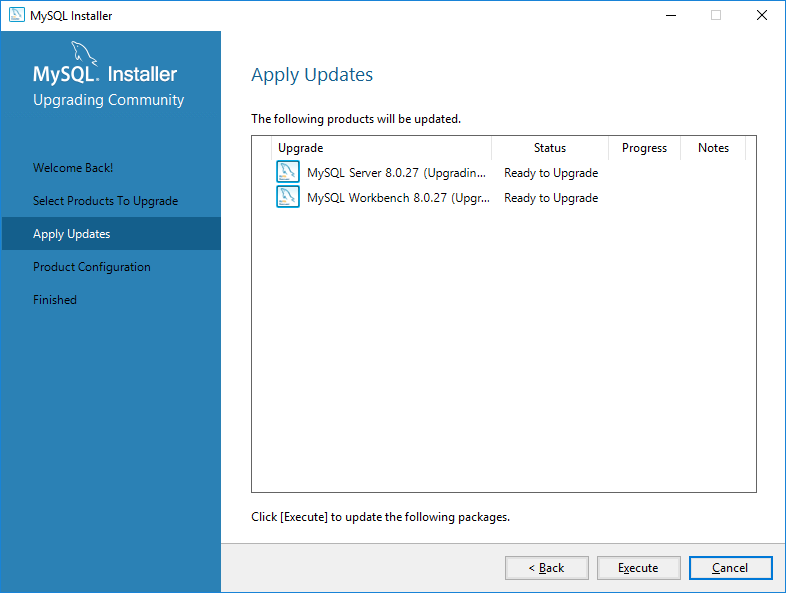
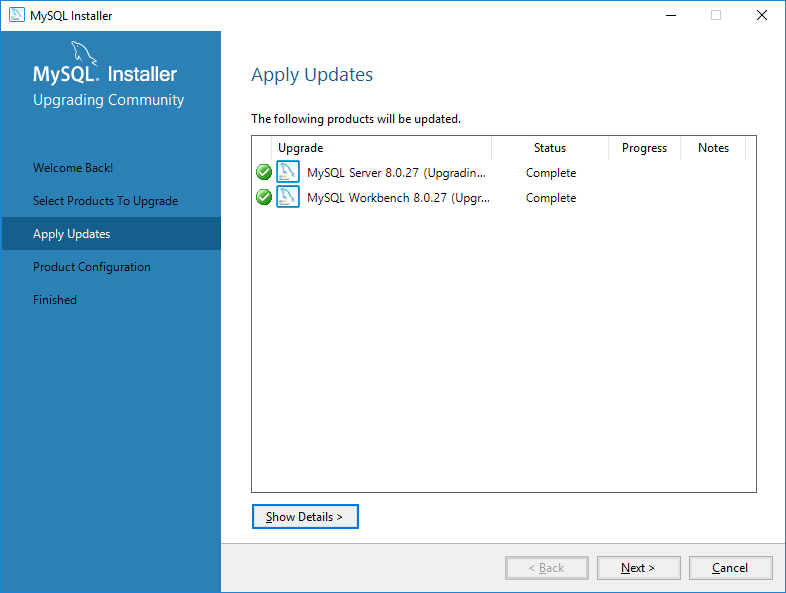
Попадаем в раздел Apply Updates. Execute.
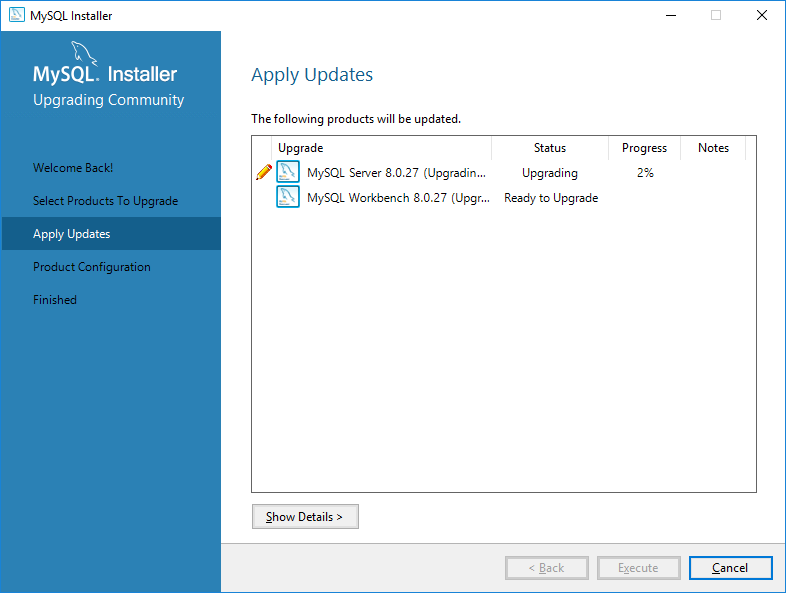
По очереди начинают обновляться продукты. Сначала MySQL Server.
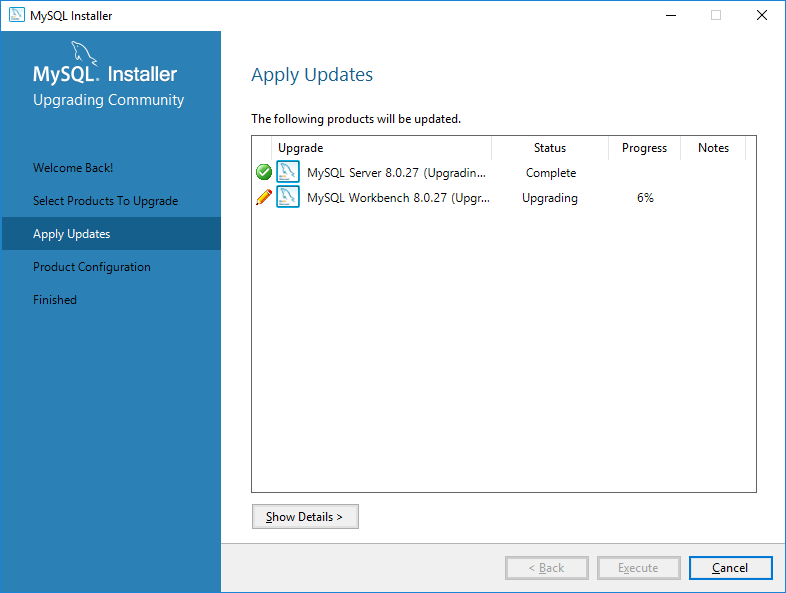
За ним MySQL Workbench.
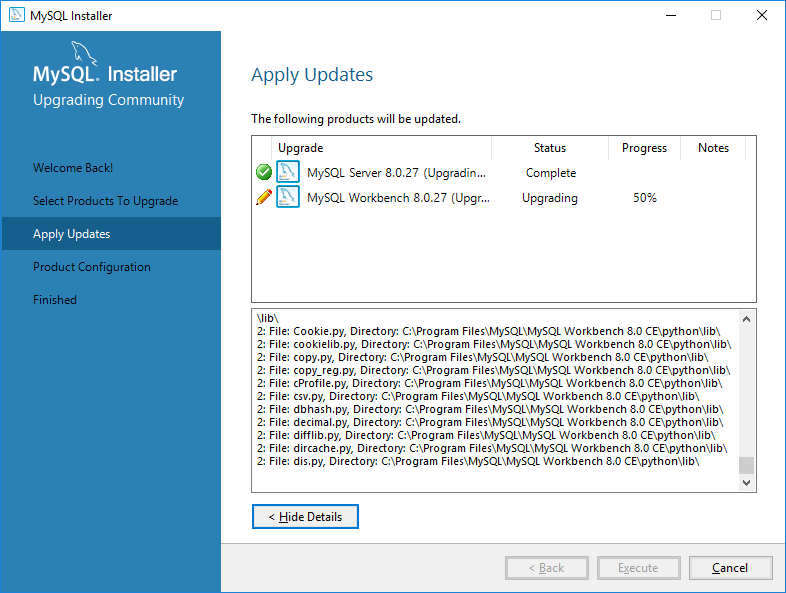
Если нажать на кнопку Show Detail, то нам покажут лог обновления.
Обновление выполнено. Next.
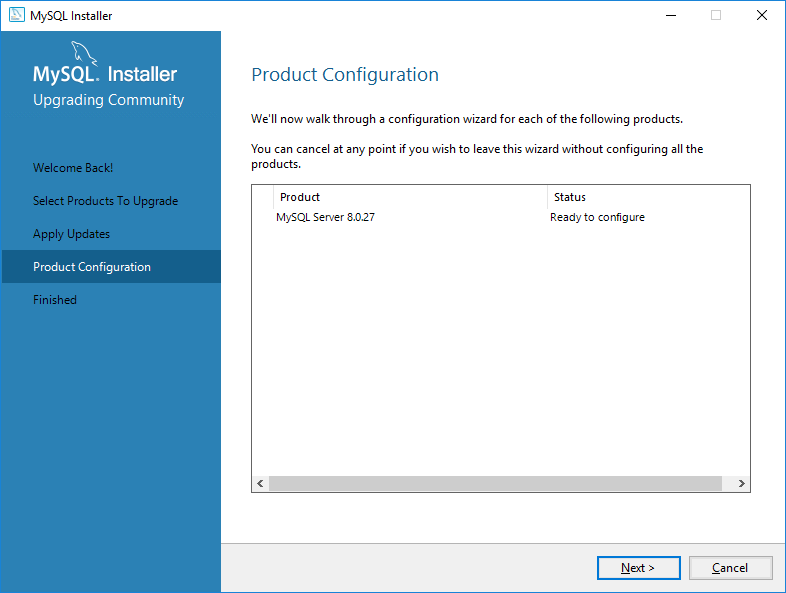
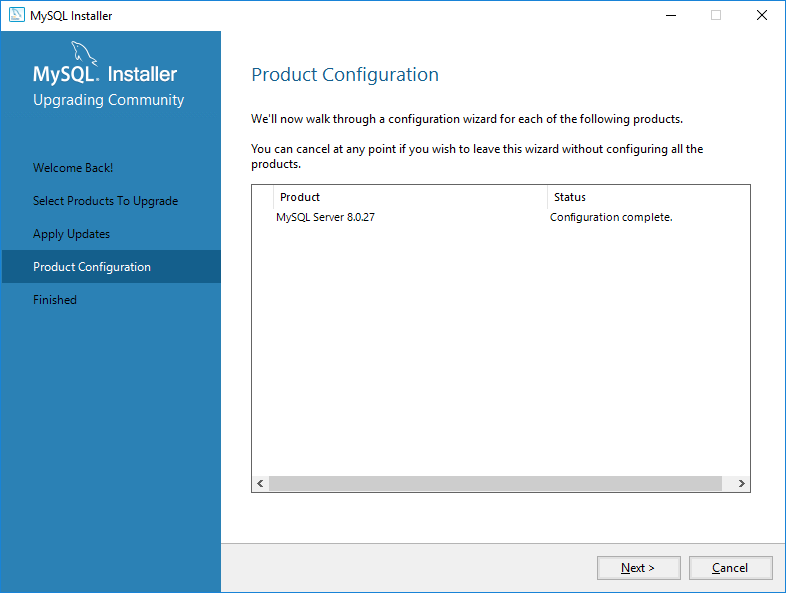
Попадаем в раздел Product Configuration. Next.
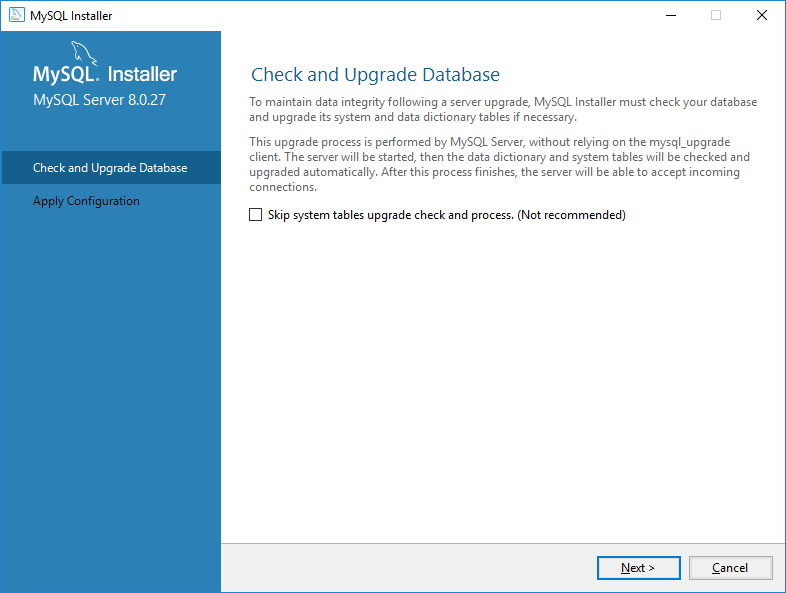
После обновления структура данных системных таблиц может измениться, необходимо применить изменения. Next.
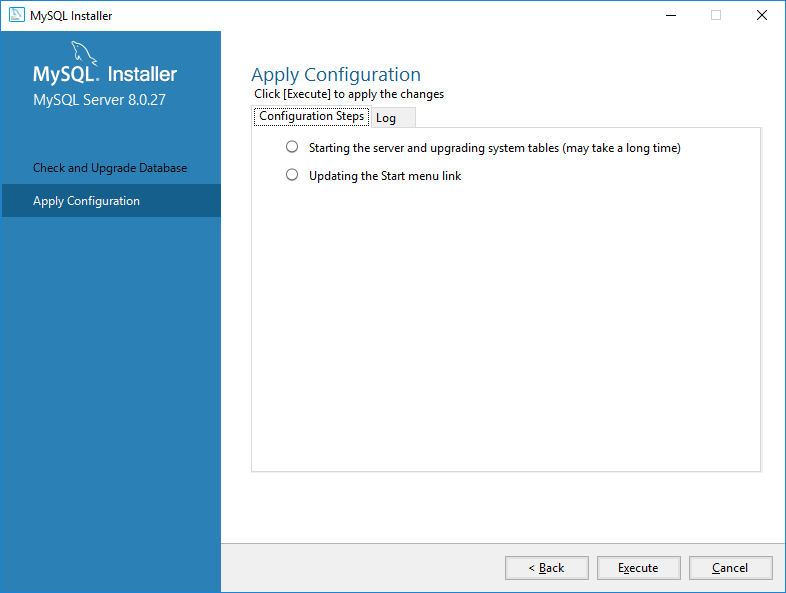
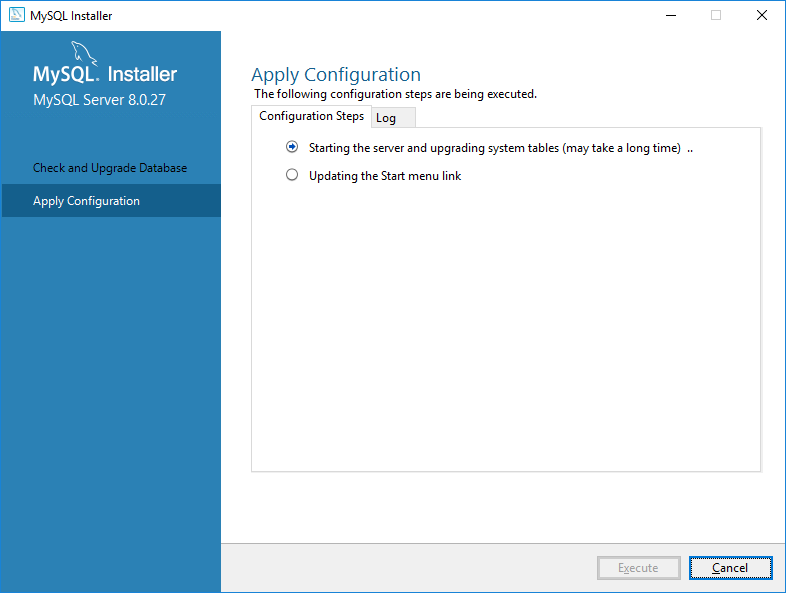
Попадаем в раздел Apply Configuration. Нам предлагают выполнить шаги:
- Starting the server and upgrading system tables (may take a long time)
- Updating the Start menu link
Execute.
Выполняется обновление конфигурации.
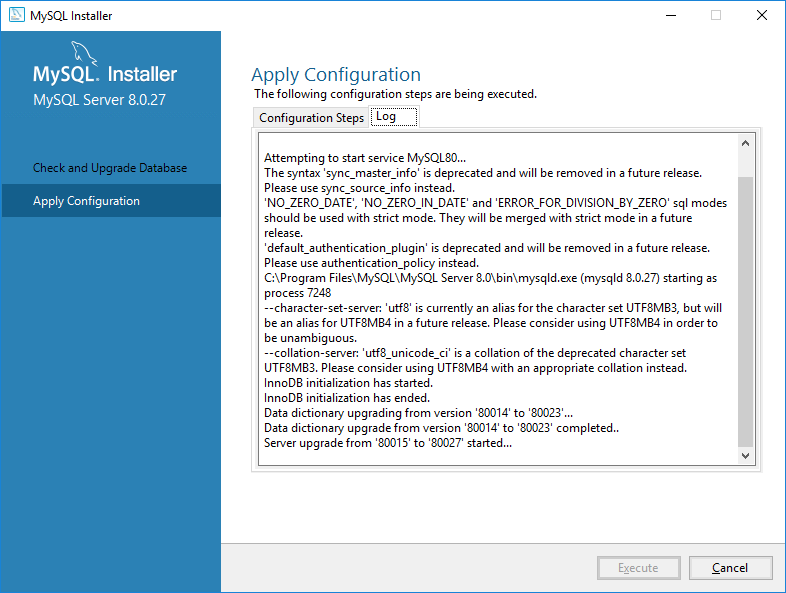
Во вкладке Log можно посмотреть лог обновления.
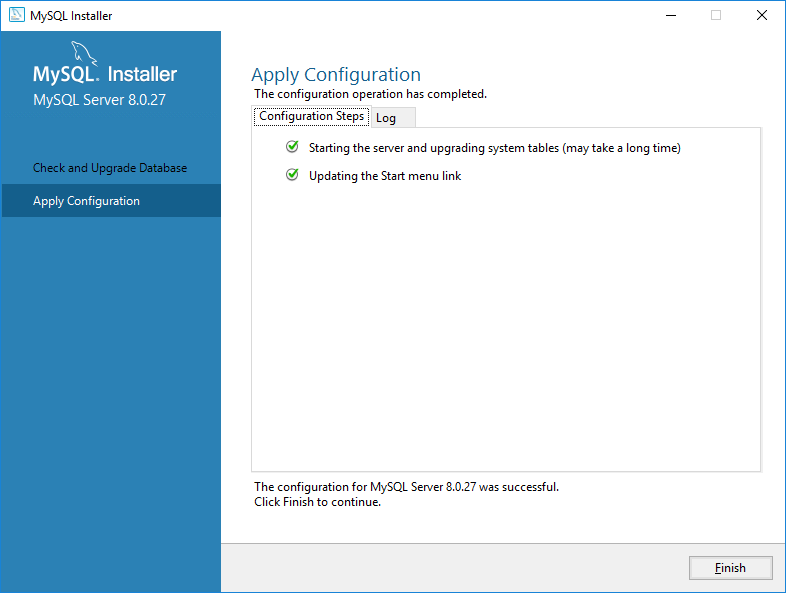
Обновление конфигурации завершено. Finish.
Возвращаемся в раздел Product Configuration. Next.
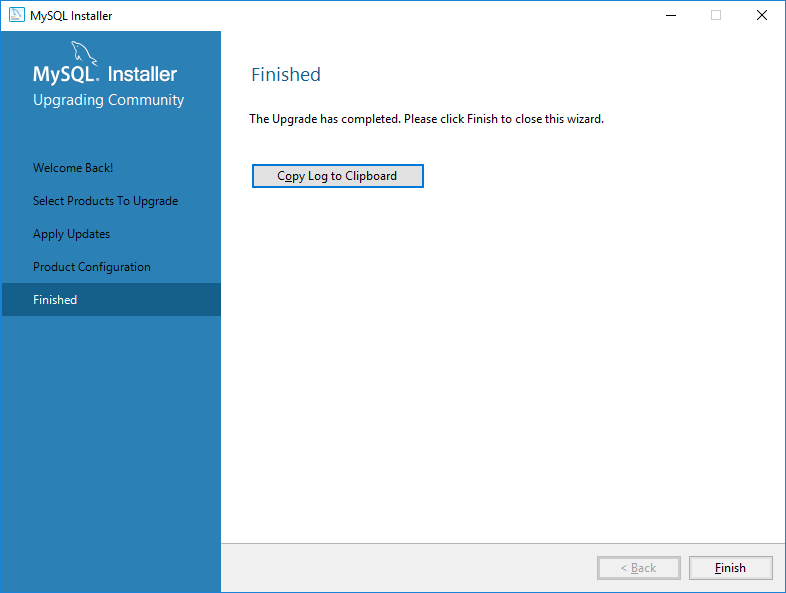
Возвращаемся в раздел Finished. Здесь можно скопировать лог обновления в буфер обмена.
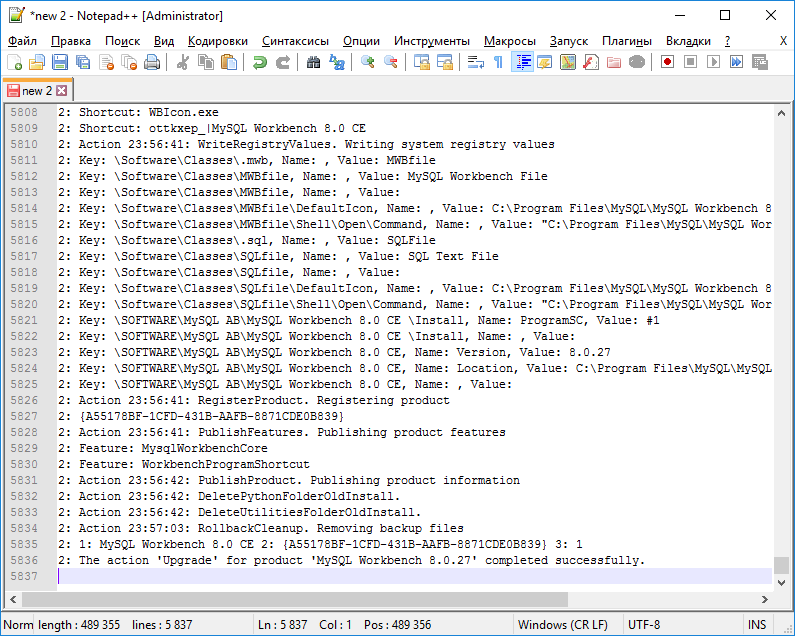
Из буфера можно вставить лог в текстовый файл. Finish.
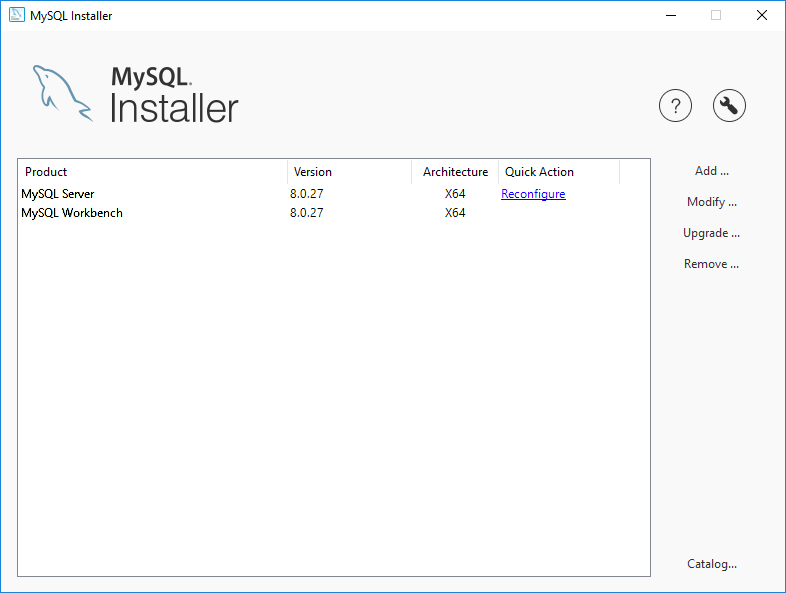
Обновление завершено, закрываем инсталлятор.
Проверяем версию:
mysql --versionМы выполнили обновление MySQL до версии 8.0.27.
В процессе обновления служба MySQL 8 будет перезагружена. Можно снова запустить ПО, которое работает с БД.


