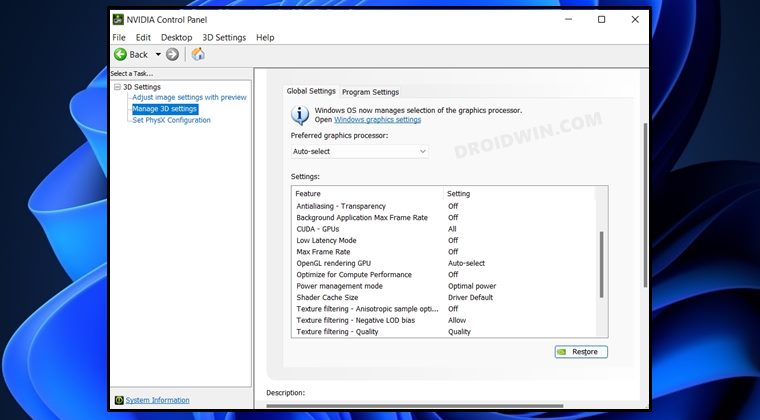
The NVIDIA Control Panel is essential for tweaking your graphical settings, so if it decides to hide from you, here’s how to bring it back.
The NVIDIA Control Panel includes a slew of settings for NVIDIA graphics cards. Users can configure graphical settings for games and software from there. So, it’s a pretty important app for users with PCs that have NVIDIA GPUs.
Some users have reported a curious issue in which the NVIDIA Control Panel disappears in Windows 11/10. Users can’t find that app on the desktop context menu, within the system tray, or in the Windows Control Panel when that issue arises. Consequently, they can’t access that app. This is how you can fix a missing NVIDIA Control Panel in Windows 11/10.
1. Check and Enable all NVIDIA Services
The missing NVIDIA Control Panel issue can arise because certain NVIDIA services are disabled. Thus, enabling and starting all NVIDIA services is one way you might be able to restore the missing graphics panel in Windows 11/10.
Here is how to enable NVIDIA’s services:
- Right-click the Start menu button to open a Power User menu, and select the Run shortcut there.
- Type services.msc in the Open box and click OK to bring up a Services window.
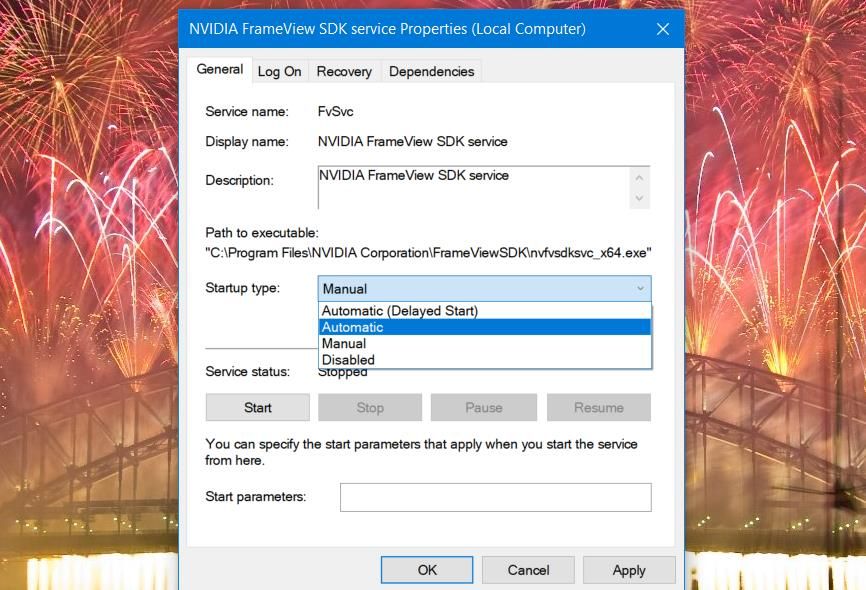
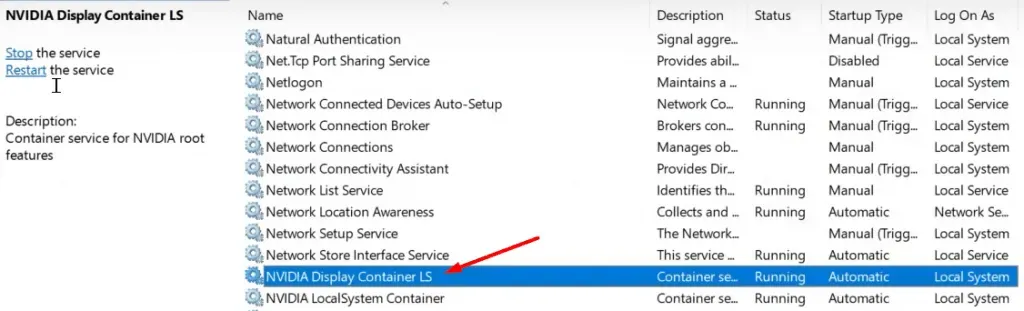
- Scroll down the window to the NVIDIA services as in the snapshot directly below.

- Then double-click any NVIDIA service listed there.
- Select the Automatic option on the Startup type drop-down menu for the service.

- If the service isn’t running, click the Start button.
- Select the Apply option to save the NVIDIA service settings.
- Click OK to close the service properties window.
- Repeat steps four to eight for all listed NVIDIA services.
- Restart your PC after changing NVIDIA service settings.

2. Update Your NVIDIA Graphics Card’s Driver
As the NVIDIA Control Panel is intimately linked with its graphics card, it can go missing because of an outdated or incompatible NVIDIA driver. Therefore, it’s recommended that you update your NVIDIA graphics card’s driver if it’s outdated. You can do that manually or with third-party driver updater software.
This is how you can manually update a driver for an NVIDIA graphics card.
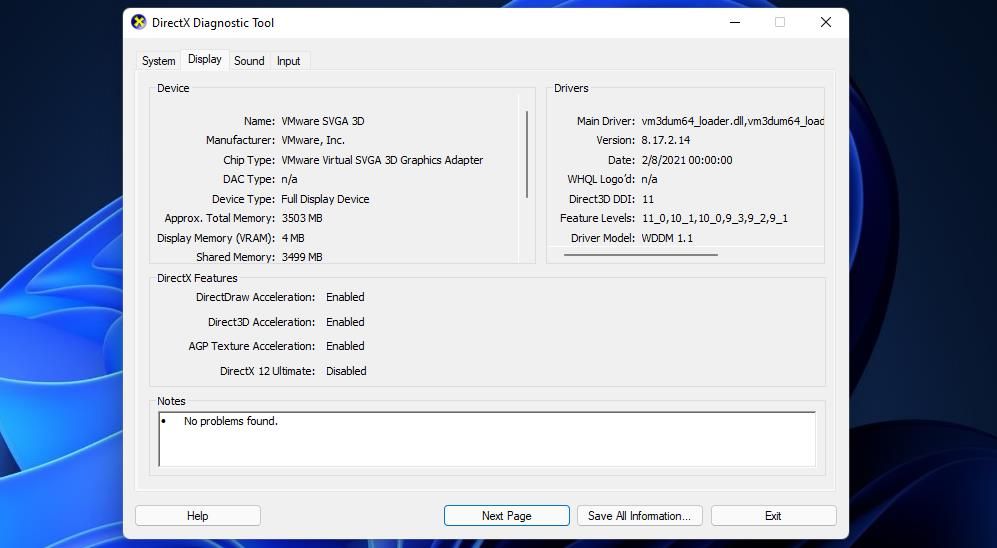
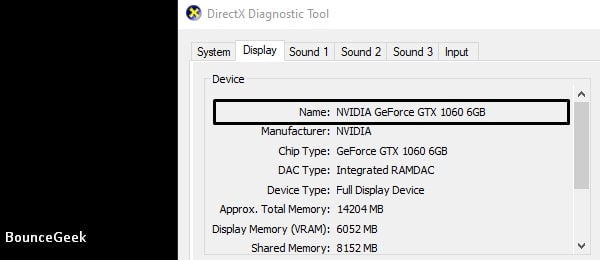
- Open the DirectX Diagnostic Tool.
- Click the Display tab there to view details for your NVIDIA graphics card. There you can see the date and version details for the driver to check if it needs updating.

- Note down the graphics card model detail on the Display tab.
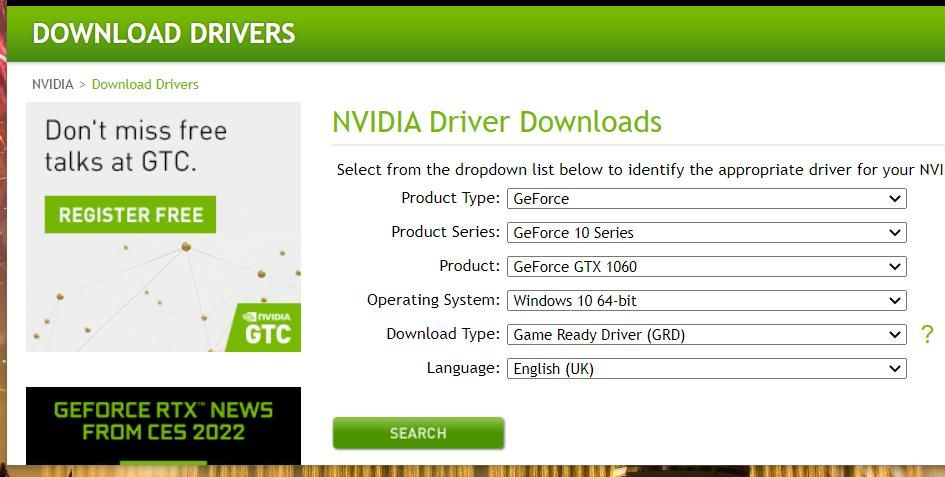
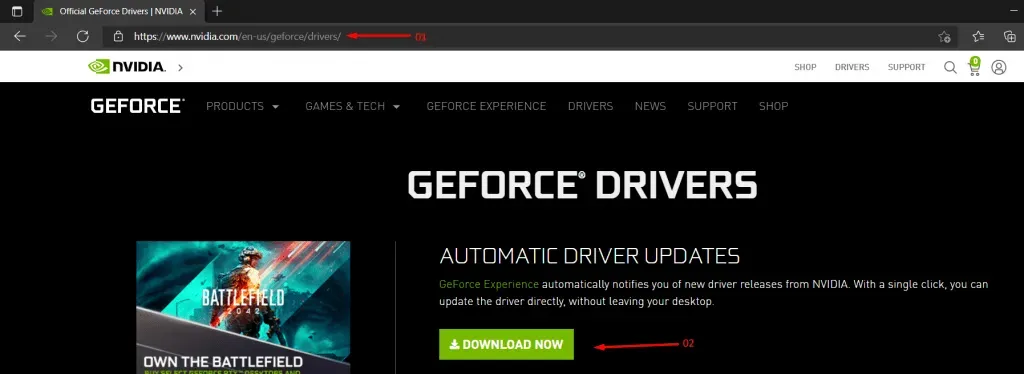
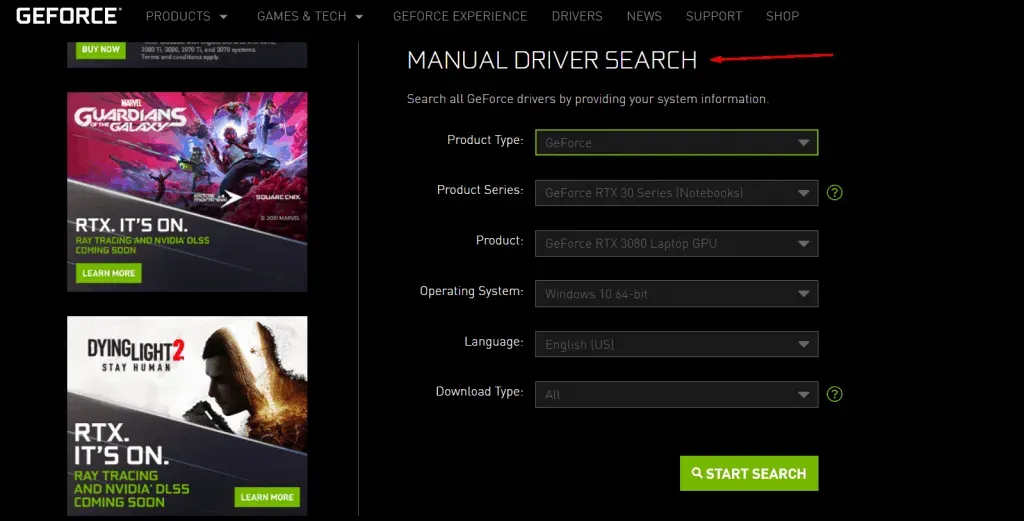
- Open the NVIDIA driver download page in a browser.

- Select your graphics card’s series and model on the drop-down menu.
- Then select your PC’s platform in the Operating System drop-down menu.
- Press the Search button.
- Click the Download button for the latest NVIDIA driver package.
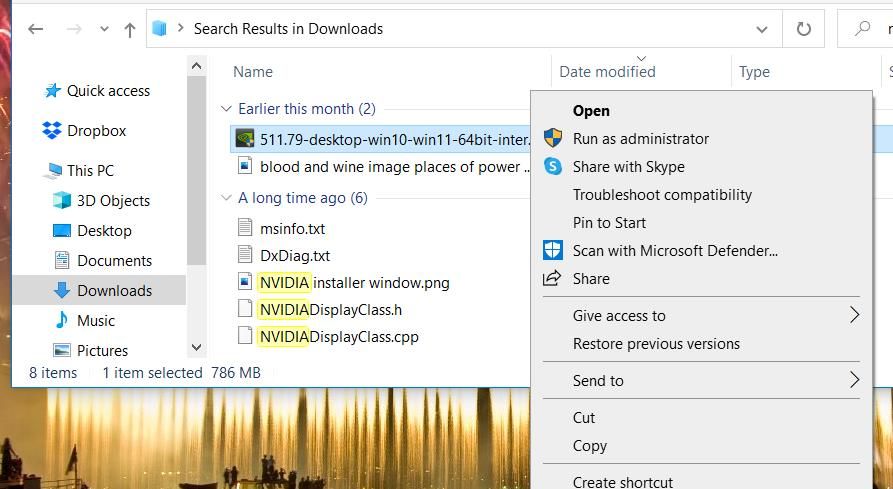
- Open File Explorer and the folder that includes the downloaded driver package.
- Right-click the NVIDIA driver package to select Run as administrator.

- Click OK on the Extraction path window that opens.
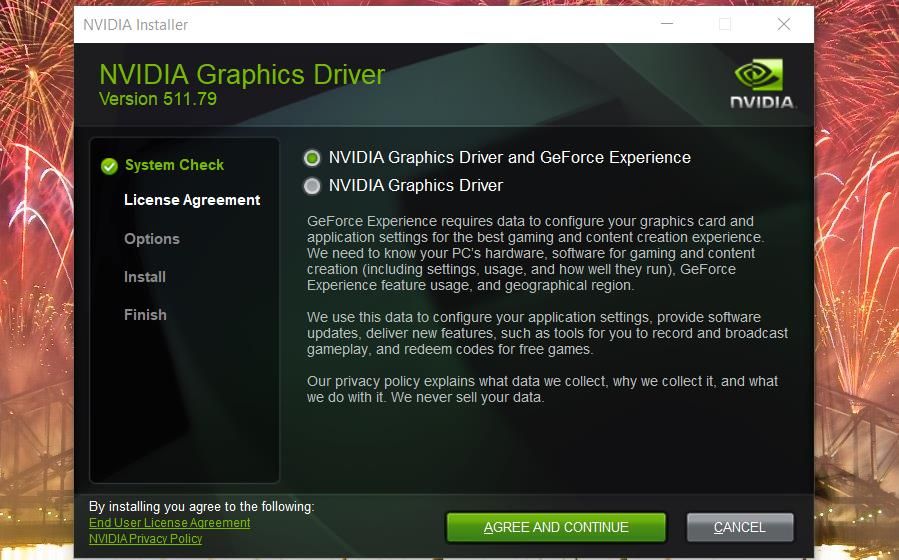
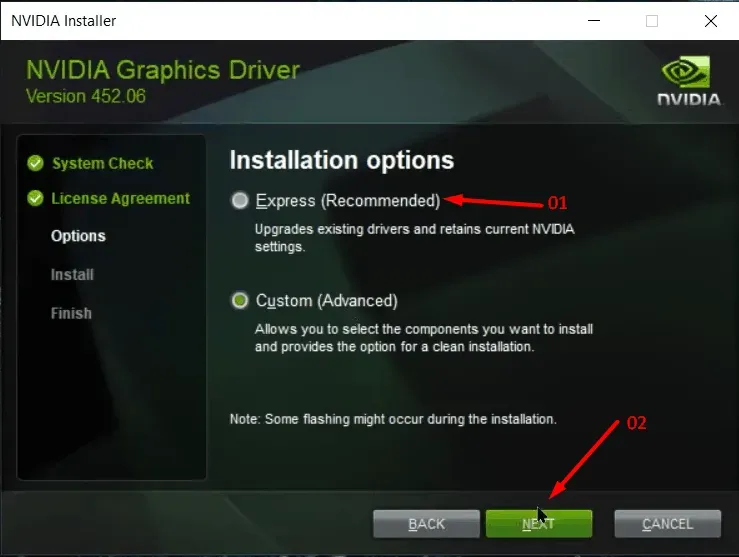
- Select the NVIDIA Graphics Driver radio button in the NVIDIA Installer window that opens.

- Press the Agree and Continue button.
- Select the Express (Recommended) option, and click Next to install.
- Click the Restart Now option to finish.
3. Reinstall Your NVIDIA Graphics Card’s Driver
If your NVIDIA graphics card already has the latest driver, try reinstalling its driver instead. This is how you can reinstall an NVIDIA GPU’s driver.
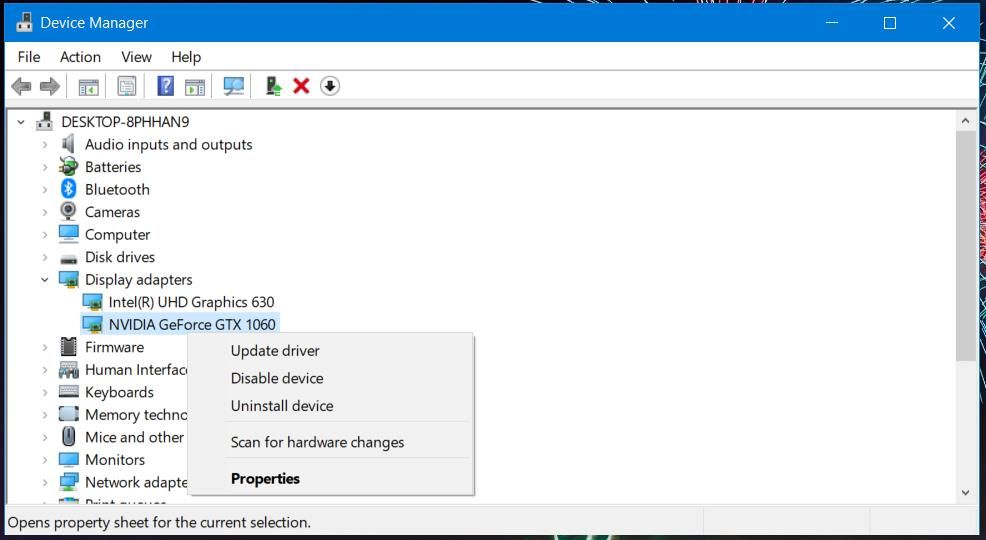
- Open the Power User menu, and select the Device Manager option on it.
- Double-click the Display adapters category to view its devices.

- Right-click your NVIDIA graphics card there to select an Uninstall device option for it.

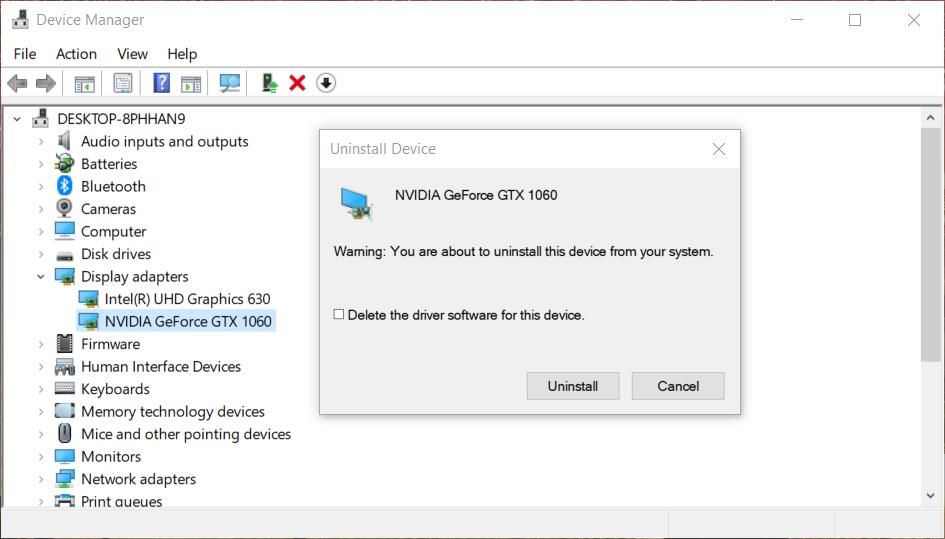
- Select the Delete the driver software for this device option on the confirmation prompt that pops up.

- Click the Uninstall button there to provide confirmation.
- Restart your PC.
- Download and install the latest NVIDIA driver package for your graphics card as outlined for the previous resolution.

4. Try Opening NVIDIA Control Panel From File Explorer
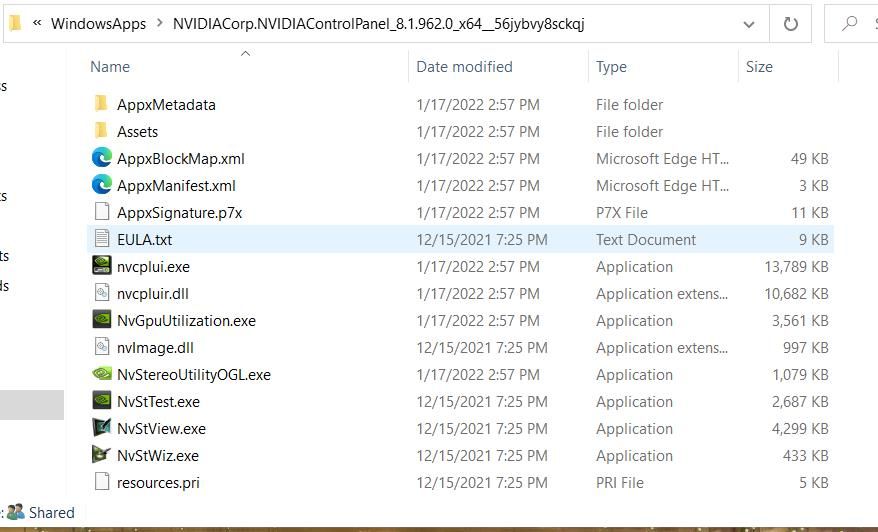
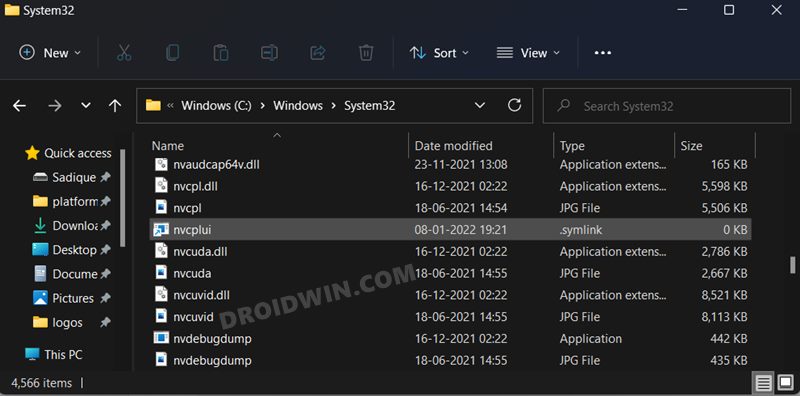
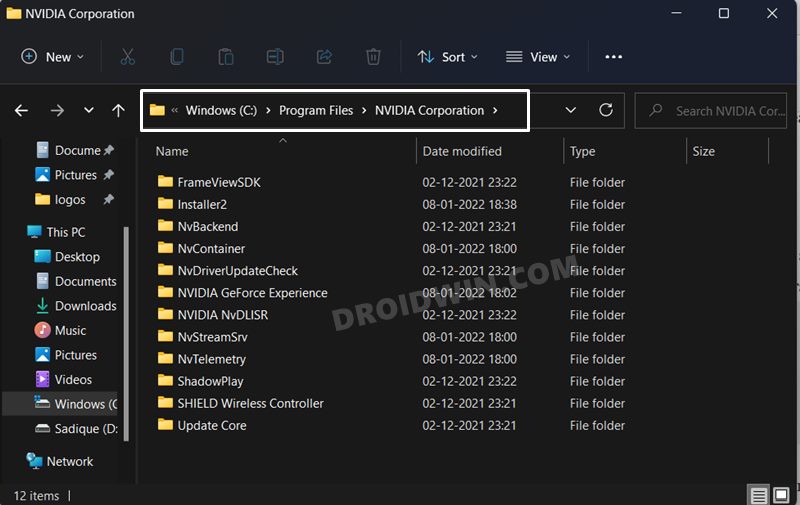
Try looking for the NVIDIA Control Panel within File Explorer. The specific file for opening the Control Panel to look for there is nvcplui.exe. If you can find nvcplui.exe in Explorer, you can then try opening it from there. These are different folder paths you’ll need to look for the nvcplui.exe file in:
- C:\Program Files\NVIDIA Corporation\Control Panel Client
- C:\Program Files\WindowsApps\NVIDIACorp.NVIDIAControlPanel_8.1.962.0_x64__56jybvy8sckqj
If you can’t find the Control Panel Client folder, then nvcplui.exe is probably within the WindowsApps folder path specified above. However, WindowsApps is not a readily accessible folder. You’ll need to take ownership of that folder to open it. You can take ownership of that folder with one of the software packages in MUO’s «Take Ownership of Windows 10 Files and Folders» guide.
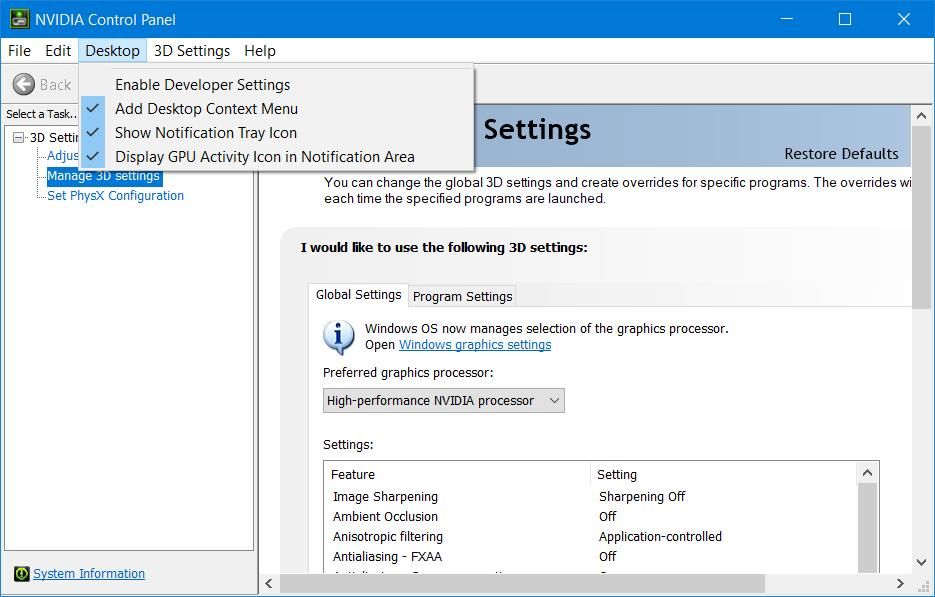
If you find the nvcplui.exe file in Explorer, right-click it to select Run as administrator to open NVIDIA Control Panel. Then click Desktop at the top of its window. Select the Add Desktop Context Menu and Show Notification Tray Icons options to restore it on the system tray and desktop context menu.
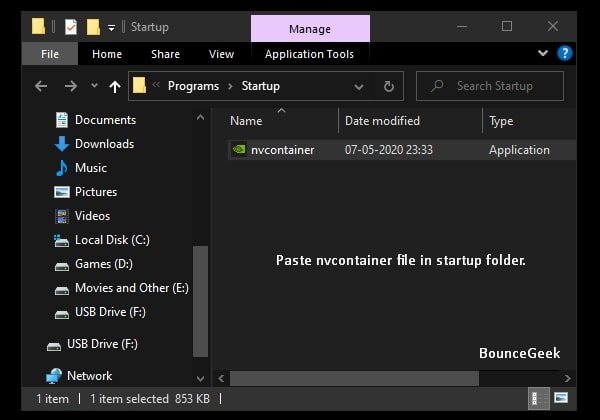
5. Copy the NVDisplay.Container file Into the Startup Folder
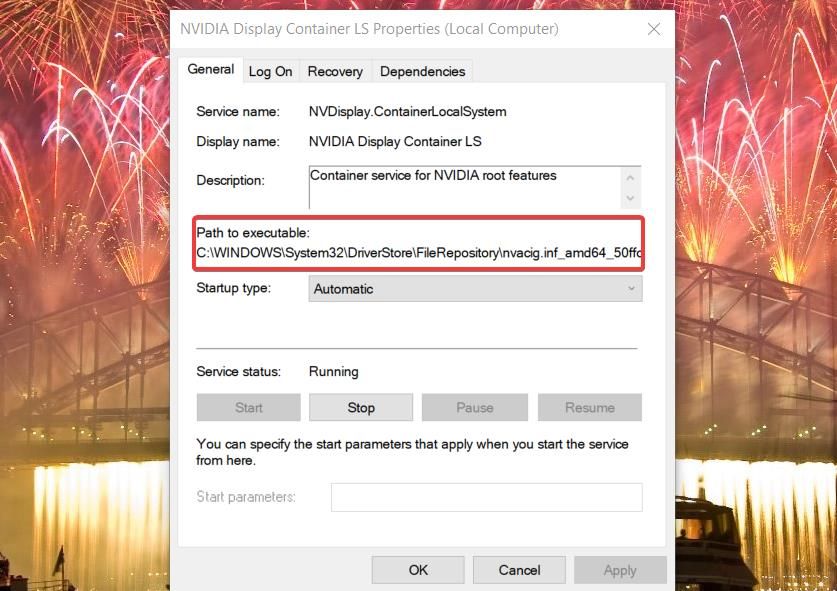
«NVDisplay.Container» is the NVIDIA Display Container LS service’s file. Adding that file to the Windows Startup folder can also fix a missing NVIDIA Control Panel. Here is how you can copy that file into the Startup folder:
- Open the Services window as outlined in steps one and two of the first resolution.
- Double-click the NVIDIA Display Container LS service to open its window.
- Copy the path to the executable specified in that window with the Ctrl + C hotkey.

- Click OK to exit the properties window, and close the Services app.
- Bring up File Explorer, and select the C: drive.
- Paste the copied path into the folder address bar with the Ctrl + V hotkey, and press the Enter key.
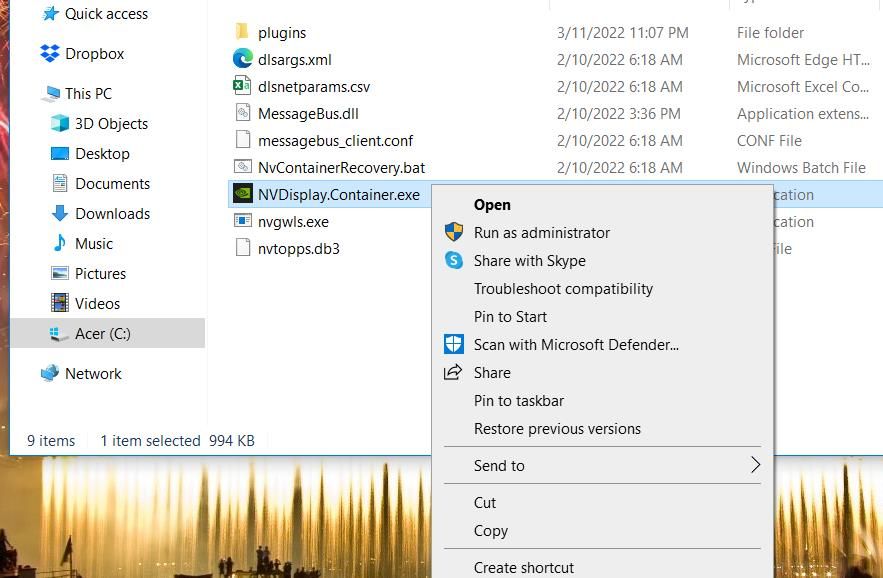
- Then right-click the Display.NvContainer file to select the Copy option on its context menu.

- Open the Run accessory, and type shell:startup in its Open box.
- Right-click inside the Startup folder to select the Paste shortcut option.

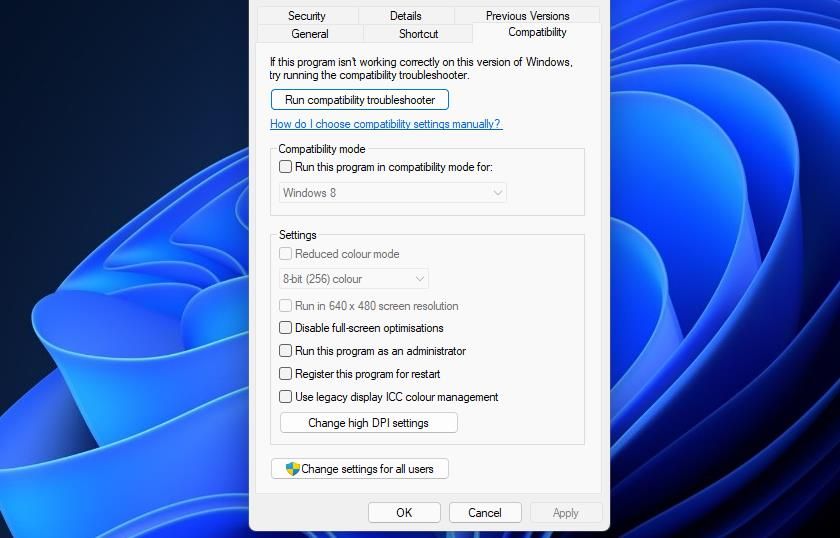
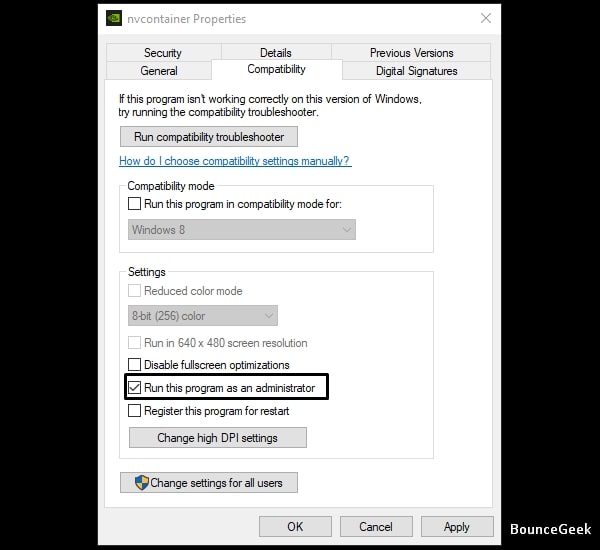
- Next, click Display.NvContainer file with your right mouse button and select Properties.
- Select Run as administrator on the Compatibility tab shown directly below, and click the Apply button.

- Finally, restart your laptop or desktop.

6. Reinstall the NVIDIA Control Panel
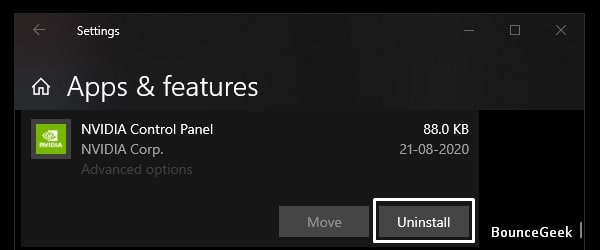
As a last resort, try reinstalling NVIDIA Control Panel. You can reinstall the NVIDIA Control Panel by uninstalling it via Settings as follows.
- Open Settings in Windows.
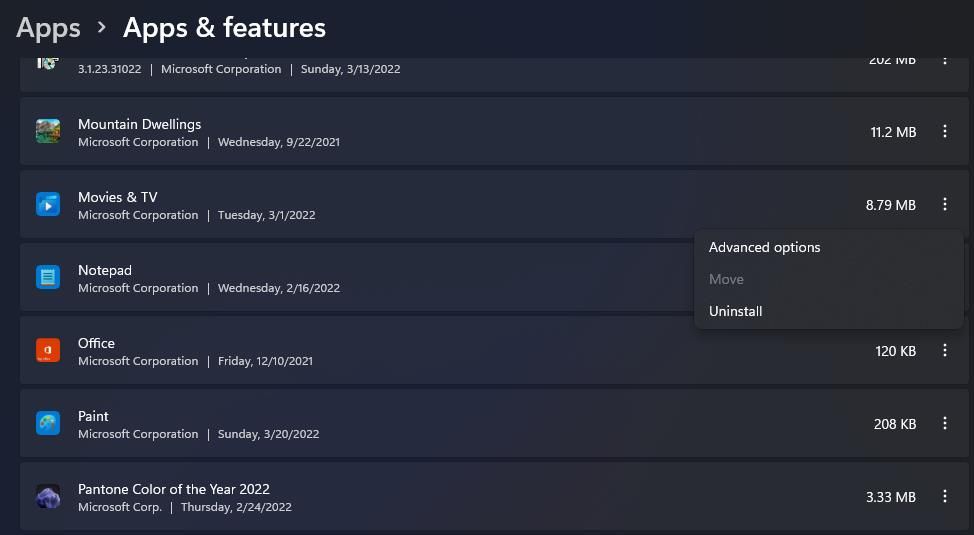
- Then select Apps > Apps & features to bring up a list of installed software.
- Find the NVIDIA Control Panel app listed there, and click its three-dot button.
- Select the Uninstall option for NVIDIA Control Panel.

- Restart your PC after uninstalling the NVIDIA Control Panel app.
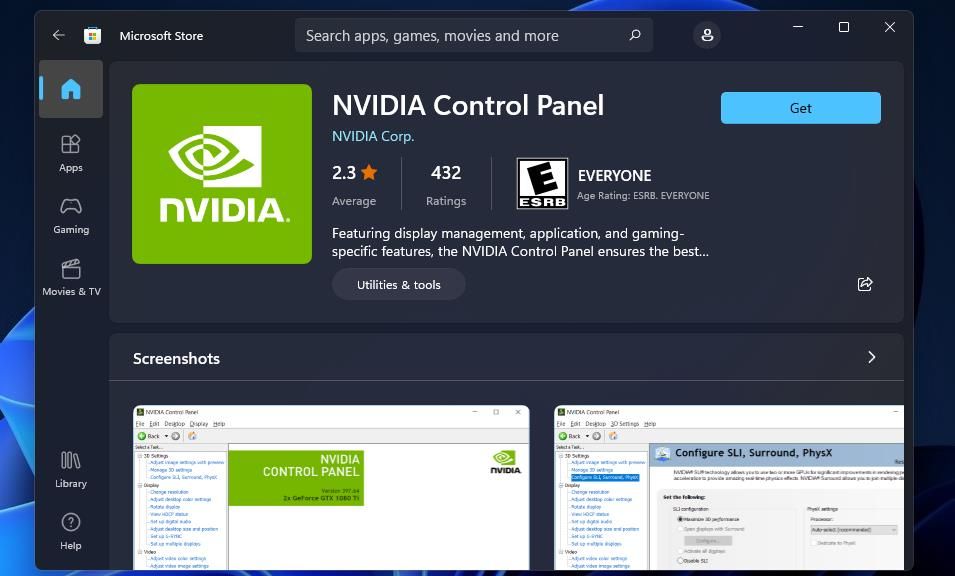
- Click the pinned Microsoft Store app shortcut from the Start menu.
- Type NVIDIA Control Panel in MS Store’s search box.
- Select NVIDIA Control Panel in the search results.

- Press the Get button to reinstall the app.
Restore Your NVIDIA Control Panel With Those Fixes
Although you can configure graphical options in games, it’s better to apply universal settings via the NVIDIA Control Panel. You can restore your missing NVIDIA Control Panel in Windows 11 and 10 by applying the potential fixes above. Then you’ll be able to access and change the graphical settings there as required once again.
Почти каждый пользователь графического процессора Nvidia сталкивался с отсутствием панели управления, в том числе и я. Большинству пользователей ПК панель управления не понадобится, поскольку конфигурации по умолчанию более чем достаточно для оптимальной производительности машины. Однако я геймер, и мне нужен доступ к панели инструментов, чтобы настроить параметры для максимальной производительности.
Я установил свежие графические драйверы, загруженные с официального сайта, но ПК с Windows все равно не мог найти панель управления. Несколько пользователей сообщили, что Nvidia не открывалась, когда значок отображался в результатах поиска.
- Причиной этого является ошибка или сбой пакета Nvidia.
- ПК-угрозы.
- Должно быть, что-то пошло не так во время установки.
- Последняя сборка Windows
Однако я должен сказать, что это не ваша вина, если панель управления не отображается после ее правильной установки. Я смог решить эту проблему несколько раз, полностью переустановив весь пакет.
Скачать ручной пакет драйверов
Окончательное решение — переустановить драйверы графического процессора Nvidia вручную. Вам необходимо удалить программу удаления драйвера дисплея (DDU), которая удалит все остатки с ПК. Позвольте мне показать вам, как полностью удалить драйверы графического процессора с ПК, и я делал это несколько раз в прошлом.
Скачать драйверы:
- Откройте браузер.
- Перейдите на официальный сайт Nvidia и загрузите пакет локально.
- Извлеките файлы в локальную папку.
Вы на полпути к переустановке драйверов графического процессора.
Удалите драйверы графического процессора:
- Откройте браузер.
- Зайдите на сайт DDU и скачайте его.
A. Извлеките папку ZIP.
B. Перейдите в безопасный режим Windows и посмотрите на YouTube наглядные инструкции.
C. Запустите DDU от имени администратора.
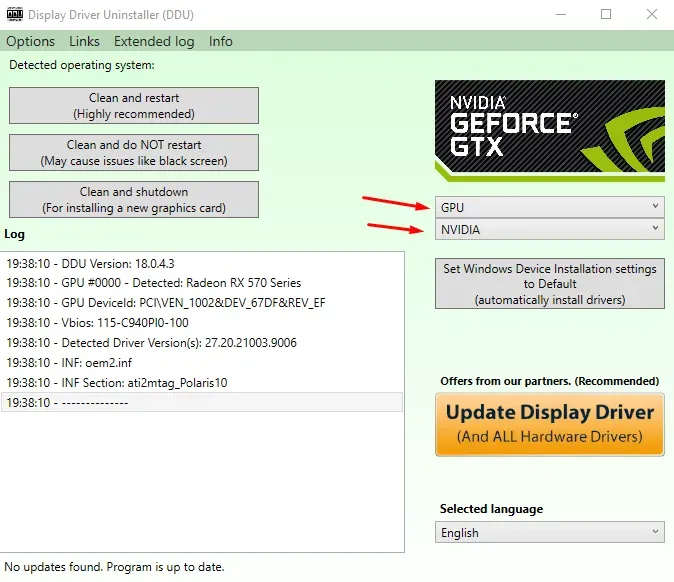
- Выберите GPU и Nvidia в настройках.
- Нажмите «Очистить и перезагрузить», чтобы завершить процесс.
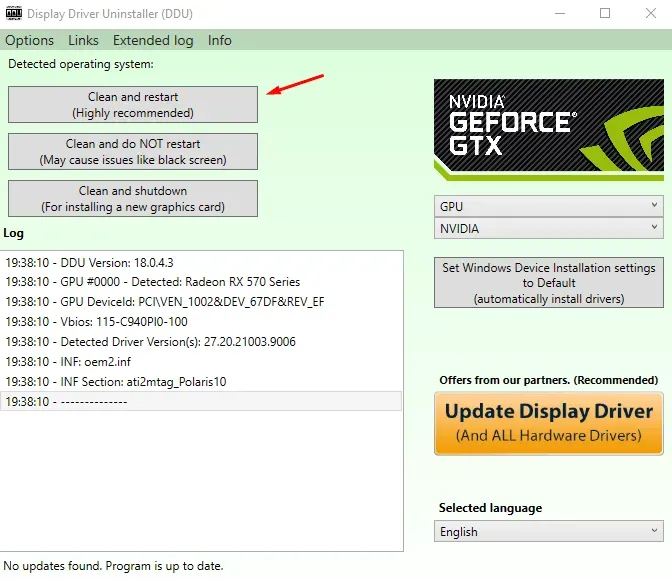
Ваш компьютер перезагрузится, и драйверы графического процессора Nvidia будут удалены с компьютера.
Теперь установите драйверы графического процессора как обычно, никаких дальнейших инструкций не требуется. Display Driver Uninstaller — это мой деинсталлятор графического процессора и аудио, потому что он не оставит ни единого остатка и исправляет недостатки менеджера пакетов Nvidia.
Автоматическое обновление драйверов видеоадаптера
Старые драйвера вызывают много проблем в новой версии сборки Windows. Microsoft заставляет пользователей часто обновлять программное обеспечение, и оно включает версию сборки. Я установил версию сборки Windows 2004, и, честно говоря, это была катастрофа.
Я столкнулся с рядом проблем с приложением FiveM и другими проблемами со стабильностью. Американский производитель графических процессоров выпускает новые обновления программного обеспечения, когда считает необходимым исправить известные проблемы. Используйте Центр обновления Windows и обновите системные видеодрайверы.
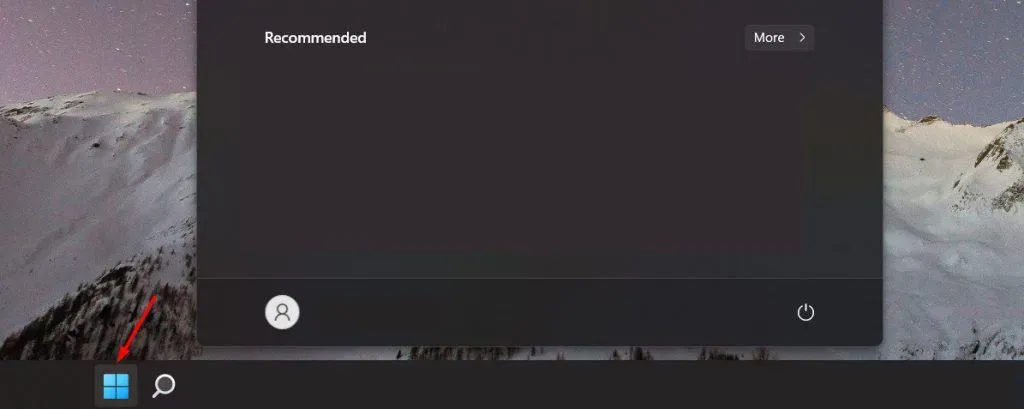
- Нажмите на значок «Windows».
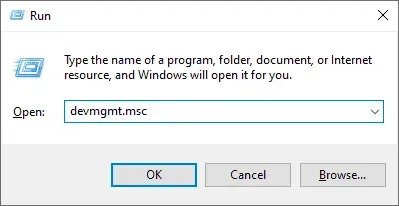
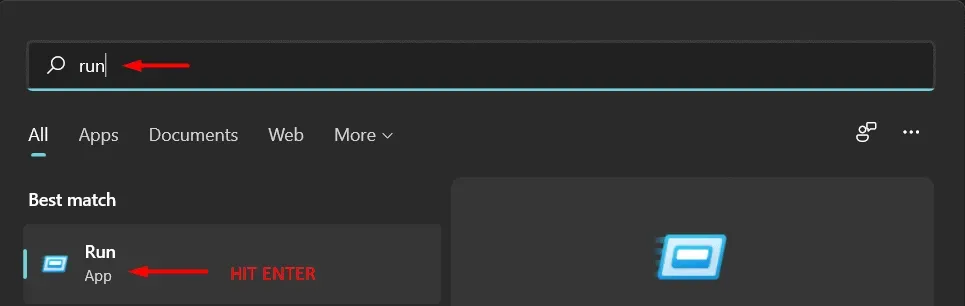
- Введите «Выполнить» и нажмите клавишу «Ввод», чтобы открыть приложение.

- Введите «devmgmt.msc» в параметре запуска, затем нажмите «ОК».
- Найдите и щелкните правой кнопкой мыши «Видеоадаптеры», затем выберите «Обновить драйвер».
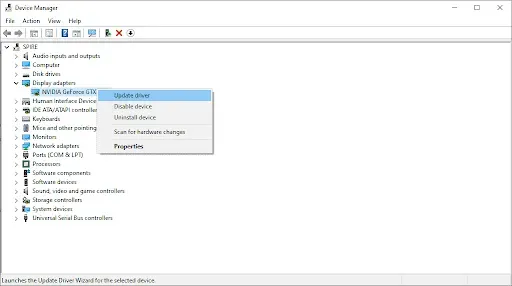
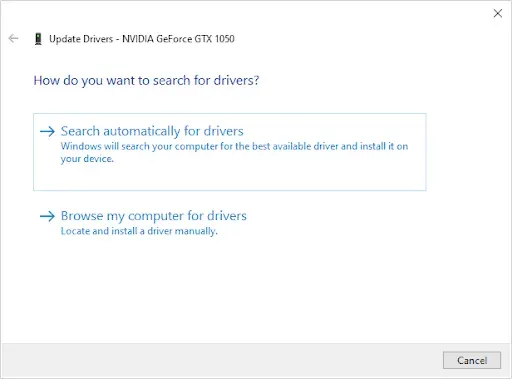
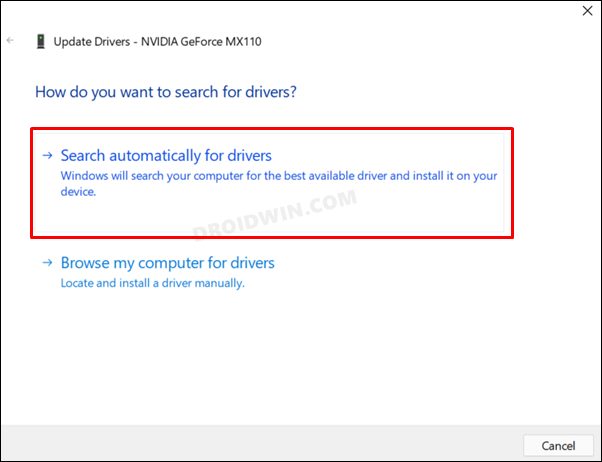
- На экране появится окно и выберите «Автоматический поиск драйверов».
- Пусть Windows ищет подходящие драйверы.
Процесс сканирования и установки занимает несколько минут, так что наберитесь терпения и не закрывайте окно. Перезагрузите компьютер с Windows 11 после установки обновленных графических драйверов.
Перезапустите службы NVIDIA.
Программное обеспечение Windows не идеально и имеет недостатки, с которыми приходится мириться. Однако вы можете принудительно перезапустить службы Nvidia, и это может решить проблему с графическим интерфейсом.
- Нажмите на значок «Windows».
- Введите «Выполнить» и нажмите, чтобы открыть приложение.
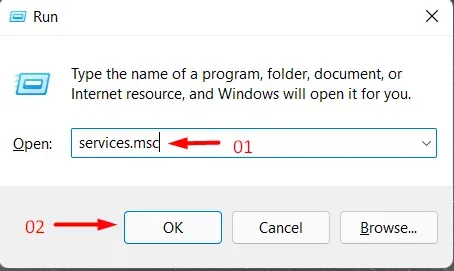
- Введите «services.msc» в параметре запуска, затем нажмите «ОК».
- Найдите «NVIDIA Display Container LS» и щелкните правой кнопкой мыши, чтобы просмотреть дополнительные параметры, а затем выберите «Свойства».
- Вы должны выполнить три шага.
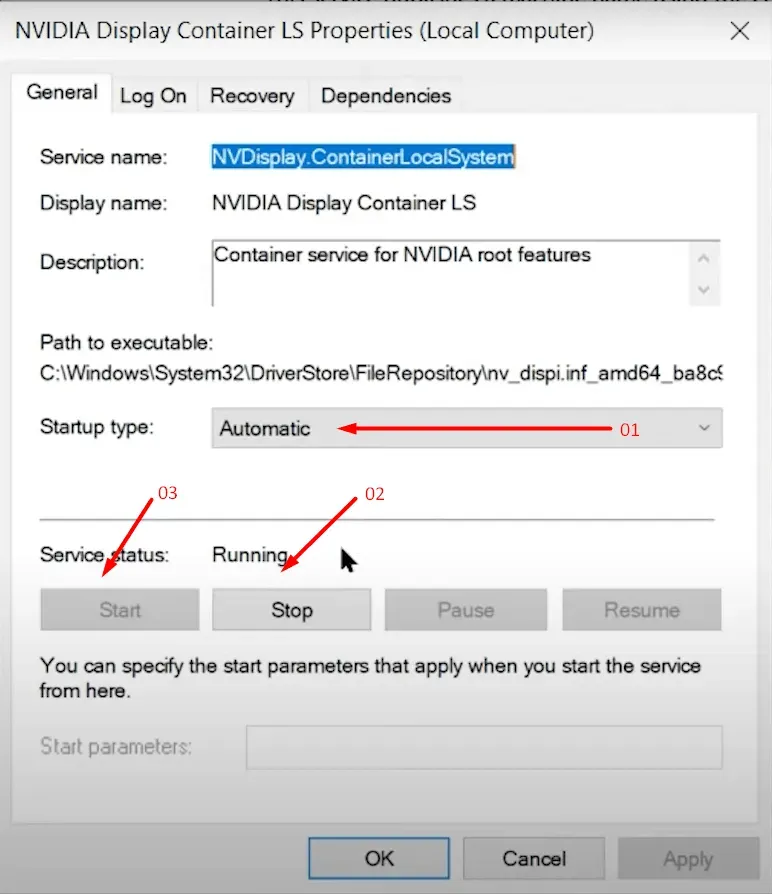
- А. Измените тип запуска на Автоматический.
- B. Нажмите «Стоп», затем нажмите «Пуск».
Нажмите «ОК», чтобы сохранить изменения.
Перезагрузите компьютер с Windows, чтобы снова принудительно перезапустить все службы, и новые изменения вступят в силу во время загрузки ПК.
Как получить доступ к кнопке «Обновить» в Windows? Да, это то, что означает контекстное меню.
- Нажмите на значок «Windows».
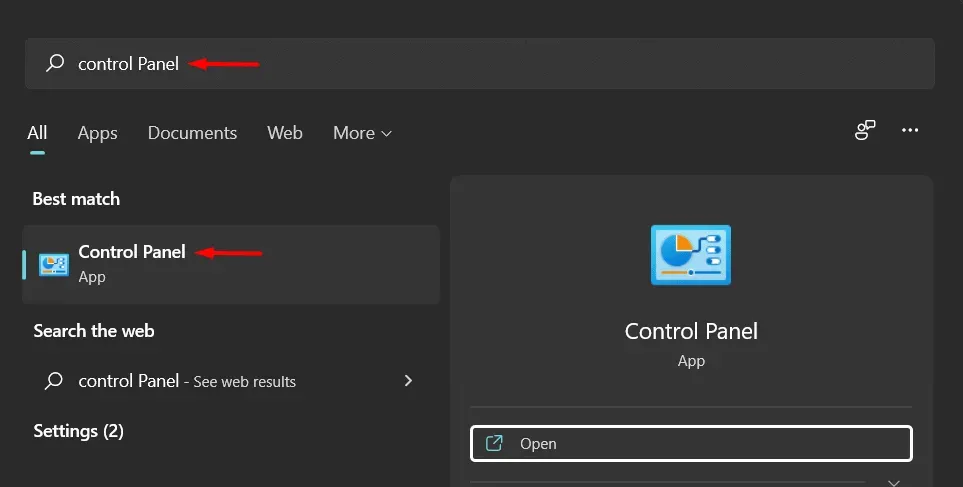
- Найдите «Панель управления» и нажмите «Открыть».
- Измените «Просмотр категорий» на «Крупные значки».

- Нажмите на панель управления Nvidia.
- Нажмите «Рабочий стол», расположенный в верхнем меню, а затем выберите «Добавить контекстное меню рабочего стола».

Теперь закройте панель управления и перезагрузите компьютер, чтобы завершить сеанс. Включите компьютер и проверьте, отображается ли в контекстном меню Панель управления Nvidia.
Заключение
Я исправил отсутствующую панель управления Nvidia, удалив драйверы графического процессора с помощью DDU и переустановив ее вручную. Программа удаления драйвера дисплея несколько раз решала проблему, и она сработала для нескольких других, которые обращались ко мне с подобными ситуациями. Сообщите нам, какое решение помогло решить вашу проблему с панелью управления в разделе комментариев ниже.
Как пользователь NVIDIA, вы наверняка знаете, что NVIDIA Control Panel — это мощный инструмент, позволяющий настроить и оптимизировать работу вашей видеокарты. Он предлагает широкий спектр настроек, которые позволяют вам управлять производительностью, графикой и другими параметрами вашей видеокарты. Однако, если вы обновили свою операционную систему до Windows 11, вы можете столкнуться с трудностями в поиске этого инструмента в новой версии ОС.
Все дело в том, что в Windows 11 Microsoft немного изменили способ доступа к настройкам NVIDIA Control Panel. Вместо того, чтобы располагаться в контекстном меню на рабочем столе, теперь вы должны использовать новое меню «Пуск» для доступа к этому инструменту. Но не переживайте, в этой статье мы расскажем вам, как открыть NVIDIA Control Panel на Windows 11 в несколько простых шагов.
Шаг первый: начать с открытия меню «Пуск». Для этого нажмите на иконку «Пуск» в левом углу панели задач или нажмите клавишу «Windows» на клавиатуре. Меню «Пуск» должно открыться, и вы увидите список установленных приложений и инструментов.
Шаг второй: теперь вам нужно найти папку «NVIDIA Corporation» в списке установленных приложений. Для этого прокрутите список вниз и проверьте, есть ли эта папка в списке. Если вы не видите ее, вы можете воспользоваться поиском — просто начните печатать «NVIDIA» и система автоматически отобразит соответствующие результаты поиска.
Шаг третий: как только вы найдете папку «NVIDIA Corporation», нажмите на нее правой кнопкой мыши, чтобы открыть ее контекстное меню. В этом меню вы должны найти и выбрать пункт «NVIDIA Control Panel». После выбора этого пункта откроется NVIDIA Control Panel, и вы сможете начать настраивать свою видеокарту по своему вкусу.
Содержание
- Как найти и открыть NVIDIA Control Panel на Windows 11
- Шаг 1: Правой кнопкой мыши по рабочему столу
- Шаг 2: Выберите «NVIDIA Control Panel» в контекстном меню
- Шаг 3: Откроется панель управления NVIDIA
- Шаг 4: Настройте графические параметры по своему усмотрению
Как найти и открыть NVIDIA Control Panel на Windows 11
Если у вас установлена видеокарта NVIDIA на компьютере с операционной системой Windows 11 и вы хотите настроить ее параметры, то вам понадобится открыть программу NVIDIA Control Panel. В этом руководстве я покажу вам, как найти и открыть NVIDIA Control Panel на Windows 11.
Вот пошаговая инструкция:
- Кликните правой кнопкой мыши на рабочем столе Windows 11.
- В контекстном меню выберите пункт «NVIDIA Control Panel».
- После этого откроется окно NVIDIA Control Panel.
Теперь вы можете настроить параметры вашей видеокарты NVIDIA в соответствии с вашими потребностями и предпочтениями.
Если вы не видите пункта «NVIDIA Control Panel» в контекстном меню на рабочем столе, то это может означать, что у вас не установлена последняя версия драйверов NVIDIA или программное обеспечение Control Panel. В таком случае вам нужно посетить официальный веб-сайт NVIDIA, чтобы скачать и установить последнюю версию драйверов и программного обеспечения.
Теперь вы знаете, как найти и открыть NVIDIA Control Panel на Windows 11. Наслаждайтесь настройкой вашей видеокарты и получайте максимальное удовольствие от игр и работы на компьютере.
Шаг 1: Правой кнопкой мыши по рабочему столу
Для того чтобы открыть NVIDIA Control Panel, первым шагом необходимо нажать правой кнопкой мыши по свободной области рабочего стола. В результате появится контекстное меню с различными опциями.
В этом меню нужно найти пункт «NVIDIA Control Panel» и кликнуть на него левой кнопкой мыши. Обычно он находится в разделе «NVIDIA» или в самом нижнем разделе меню.
Если вы не видите этот пункт в меню, возможно, у вас не установлены драйверы NVIDIA или Control Panel был удален. В этом случае вам потребуется скачать и установить драйверы с официального сайта NVIDIA перед продолжением.
Шаг 2: Выберите «NVIDIA Control Panel» в контекстном меню
После открытия панели задач в Windows 11 найдите иконку с правым кликом мыши в области пусковой панели или в любом другом месте на рабочем столе. В результате появится контекстное меню, в котором нужно выбрать «NVIDIA Control Panel». Для этого наведите указатель мыши на иконку и нажмите правую кнопку мыши.
Если вы не видите «NVIDIA Control Panel» в контекстном меню, возможно, у вас не установлена или не обновлена программа управления графическим драйвером Nvidia. Чтобы решить эту проблему, перейдите на официальный сайт Nvidia, скачайте и установите последнюю версию программного обеспечения.
Шаг 3: Откроется панель управления NVIDIA
После щелчка по значку NVIDIA Control Panel откроется панель управления. Она предоставляет доступ ко всем настройкам и функциям, связанным с графическими картами NVIDIA.
Панель управления NVIDIA имеет интуитивно понятный интерфейс, разделённый на различные категории. Вы можете настроить параметры производительности, качества изображения, цвета, разрешения экрана и многие другие параметры. Кроме того, вы можете настраивать параметры для каждой отдельной игры или приложения.
Чтобы сделать изменения в настройках, просто выберите нужную категорию, найдите соответствующие опции и внесите необходимые изменения. После внесения изменений не забудьте сохранить их, чтобы они вступили в силу.
Не забывайте регулярно обновлять драйверы графической карты, чтобы обеспечить оптимальную производительность и совместимость с новым программным обеспечением. Вы можете проверить наличие обновлений в разделе «Обновление драйверов» панели управления NVIDIA.
Ознакомьтесь с доступными функциями и возможностями, чтобы получить наилучший опыт использования графической карты NVIDIA и настроить её под себя.
Шаг 4: Настройте графические параметры по своему усмотрению
После открытия панели управления NVIDIA вы можете настроить графические параметры по своим предпочтениям. Вам предоставляется широкий спектр настроек, которые позволяют оптимизировать работу графического процессора и получить максимальную производительность.
Когда вы находите панель управления NVIDIA, найдите раздел «Настройки 3D» или «Настройки видео». Здесь вы можете настроить параметры такие как разрешение экрана, частоту обновления, насыщенность цветов и другие параметры графики.
| Параметр | Описание |
|---|---|
| Разрешение экрана | Позволяет изменить разрешение экрана на вашем мониторе. Вы можете выбрать различные разрешения в зависимости от размера монитора и предпочтений. |
| Частота обновления | Определяет, как часто компьютер обновляет изображение на экране. Вы можете настроить частоту обновления в соответствии с возможностями вашего монитора. |
| Настройки цвета | Позволяют регулировать яркость, контрастность, насыщенность цветов и другие параметры графики. Вы можете настроить цветовые настройки, чтобы достичь наилучшего визуального качества. |
| Настройки эффектов | Позволяют включить или выключить различные графические эффекты, такие как антиалиасинг, вертикальная синхронизация, тени и другие. Эти эффекты могут улучшить визуальный опыт, но могут снизить производительность, поэтому выберите настройки, которые лучше всего подходят для вашей системы. |
После настройки графических параметров сохраните изменения и закройте панель управления NVIDIA. Теперь ваша система будет работать с оптимальными настройками графики, а вы сможете насладиться высококачественным визуальным опытом в приложениях и играх.
In this guide, we will show you various methods to fix the Nvidia Control Panel not opening on your Windows 11 PC. This application is used to efficiently manage display settings and gaming-specific features. Along the same lines, it also beholds quite a few nifty features. These include the ability to tweak 3D settings, adjust image settings, configure surround sound, change resolution, adjust desktop color settings, set up G-Sync, adjust the video color and image settings, among others.
However, not many users are able to make full use of these features. This is because the app is refusing to open on their latest iteration of the OS build. While all the app’s data are still present in their default place and the app still shows up in the Start menu, clicking on it doesn’t do any good. If you are also currently getting bugged with this issue, then this guide is here to help you out. In this tutorial, we will show you various methods to fix the Nvidia Control Panel not opening in Windows 11.
Do note that there’s no universal fix as such. You will have to try out each of the below-mentioned workarounds and see which one works best in your favor. So with that in mind, let’s get started.
Update Graphics Drivers
Your first course of action should be to verify that you are using the latest graphics drivers. If that is not the case, then you should update these drivers to the latest build right away. Here’s how:
- Right-click on the Start Menu and select Device Manager.
- Then expand the Display Adapter section.
- After that, right-click on your graphics drivers and select Update Drivers.

- Now select Search automatically for drivers.

- Windows will now search for the latest drivers and will subsequently install them.
- Once done, restart your PC and then check if it fixes the Nvidia Control Panel not opening in Windows 11.

Restart NVIDIA Container Processes
The NVIDIA Container and NVIDIADisplay Container are the two processes that are constantly running in the background for the efficient running of the app. Any issues with either of these processes and their repercussions would directly be faced with the Nvidia app. Therefore, you should consider restarting both these processes and then let it start off from a fresh instance. Here’s how it could be done:
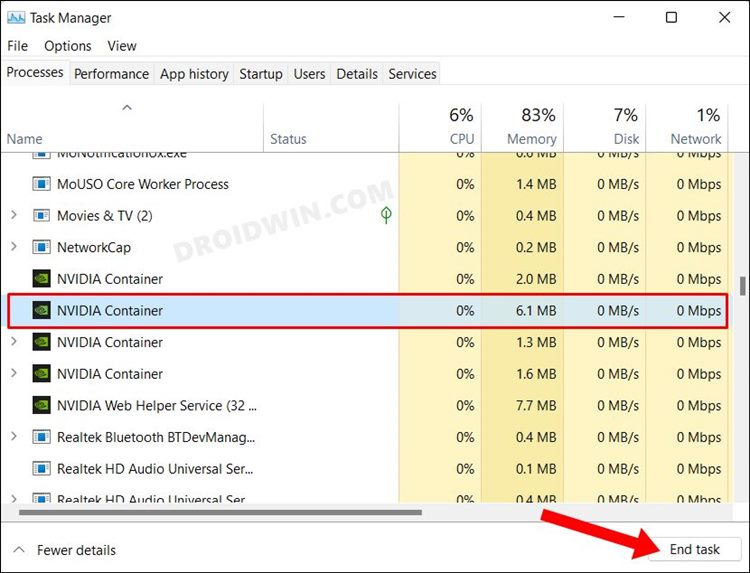
- Use the Ctrl+Shift+Esc shortcut keys to bring up the Task Manager.
- Then go to the Background Process section and select NVIDIA Container.

- After that, hit the End Task button situated at the bottom right.
- Then go to the Details tab and select NVDisplay Container.

- Again click on the End Task button. Now wait for a few seconds and let both these processes restart.
- Once that happens, verify if the Nvidia Control Panel not opening in Windows 11 has been fixed or not.

Restart Nvidia Services
Similar to the processes, Nvidia also has a few important services running in the backend and handling all the important stuff round the clock. If for some reason it isn’t functioning along the expected lines, then its negative consequences will be faced by the Nvidia app itself. Therefore, you should consider giving these services a fresh restart, using the instructions given below.
- Bring up the Run dialog box via Windows+R shortcut keys.
- Then type in the below command and hit Enter to open the Services menu:
services.msc
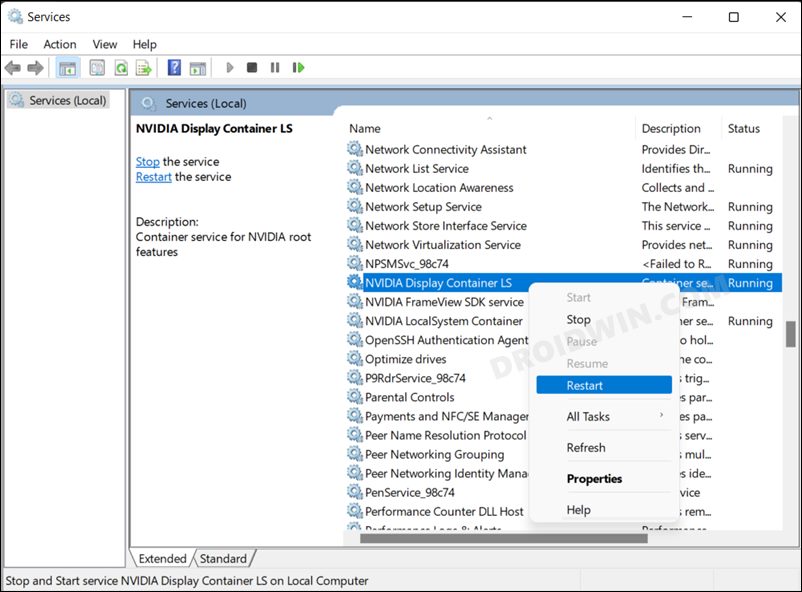
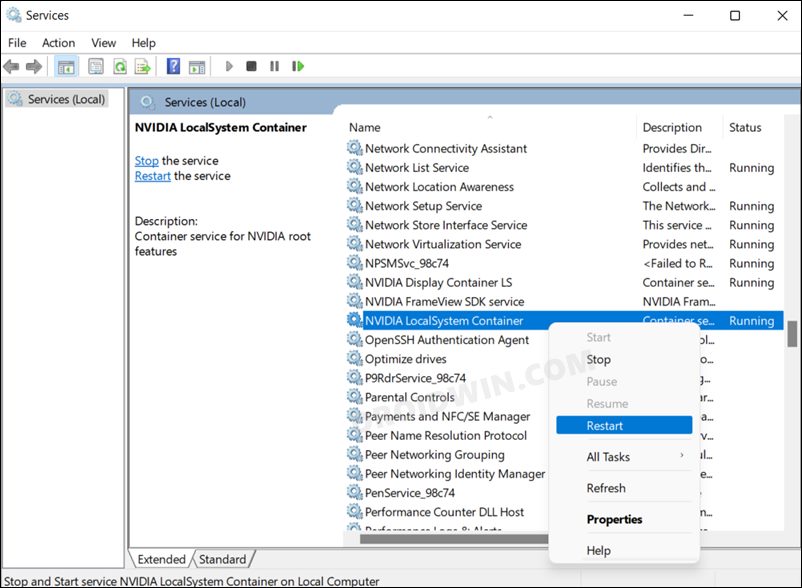
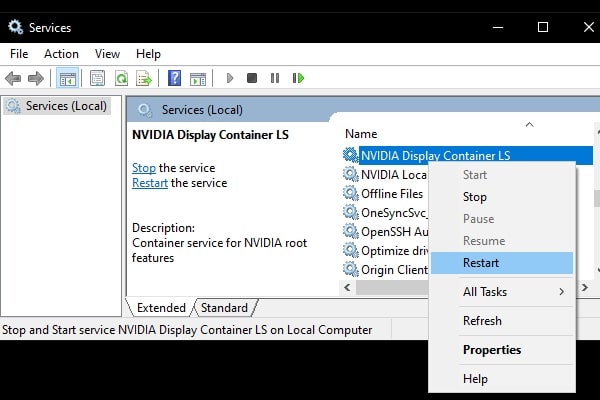
- Now scroll to NVIDIA Display Container LS, right-click on it and select Restart.

- Likewise, restart the NVIDIA LocalSystem Container service as well.

- Once done, check if it fixes the Nvidia Control Panel not opening in Windows 11
Delete Nvidia Cache
If a lot of temporary data gets accrued over the due course of time, then it might conflict with the proper functioning of the app. Therefore, you should consider deleting these cached files at regular intervals, and now could be the perfect time for that. So refer to the below instructions steps to try it out:
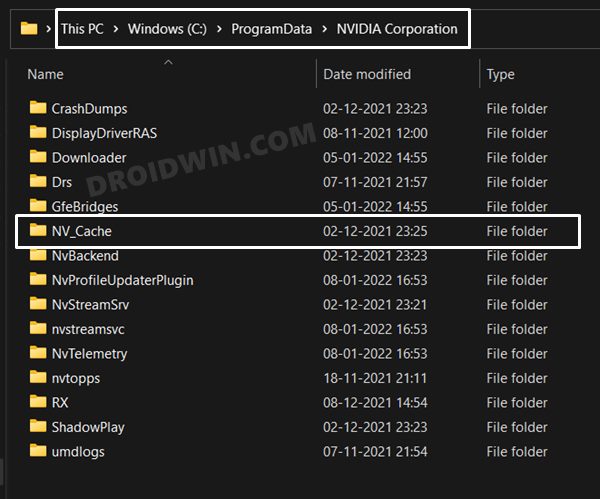
- Bring up the File Explorer via Windows+E shortcut keys.
- Then head over to the Nvidia’s cache folder using the below address:
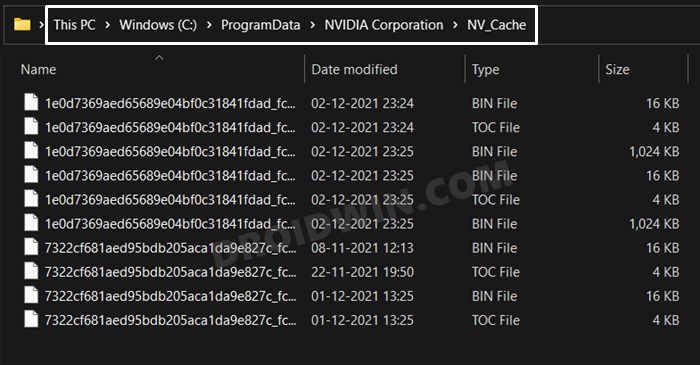
C:\ProgramData\NVIDIA Corporation\NV_Cache

- If the NV_Cache folder is not present there, then check out this directory (replace UserName accordingly):
C:\Users\UserName\AppData\Local\NVIDIA Corporation
- Once you reach the NV_Cache folder, select all the files via Ctrl+A and hit Shift+Del to permanently delete them.

- Now check if you are able to open the Nvidia Control Panel on your Windows 11 PC or not.
Manually Start Nvidia Control Panel
Your next course of action should be to manually start the Nvidia Control Panel app using its executable file. Here’s how it could be done:
- Launch File Explorer via Windows+E shortcut and go to the below location:
C:\Program Files\NVIDIA Corporation\Control Panel Client
- There you should see the nvcplui.exe file, double click to open it.
- It shall open the Nvidia Control Panel app on your Windows 11 PC.
Create Symbolic Link for nvcplui.exe
If the nvcplui.exe is missing from the Control Panel Client directory or it isn’t able to invoke the Nvidia app, then you could also manually create a symbolic link for that file and then access Nvidia via that link. Here’s how:
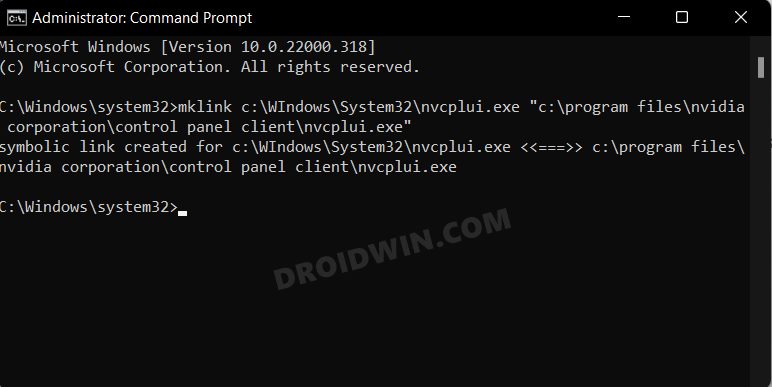
- Head over to the Start Menu, search CMD, and launch it as an administrator.
- Then type in the below command and hit Enter:
mklink c:\WIndows\System32\nvcplui.exe "c:\program files\nvidia corporation\control panel client\nvcplui.exe"

- If you have installed Nvidia in any directory (other than the default one), then make sure to replace its address under double quotes accordingly.
- Once the command has been executed successfully, you will be notified that the symbolic link for nvcplui has been created. So let’s access it now by heading over to the below location:
C:\Windows\System32

- Now double click on the nvcplui.exe file and check it is able to open Nvidia Control Panel on your Windows 11 PC or not.
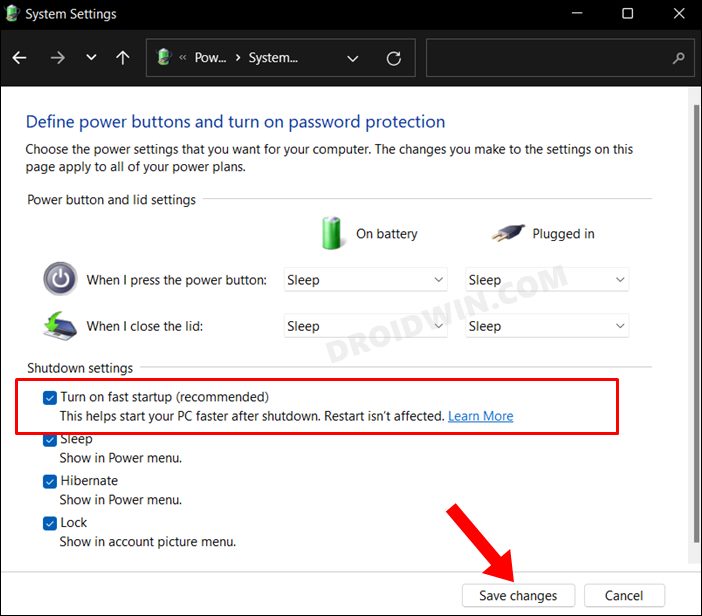
Disable Fast Startup
For some users, it was disabling the Fast Startup that did the trick. So let’s put this tweak to test and see if it gives out the desired results or not:
- Launch Control Panel and go to Hardware and Sound > Power Options.
- After that, click on Choose what the Power button does from the left menu bar.
- Then click on Change Settings that are currently unavailable.

- Now uncheck Turn on fast startup (recommended) and click on Save changes.
- Check if it fixes the Nvidia Control Panel not opening on your Windows 11 PC or not.
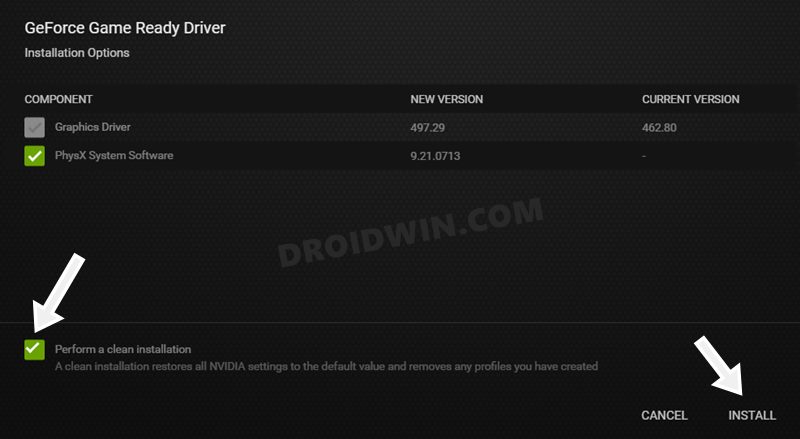
Install Nvidia GeForce Game Ready Driver
For me, it was performing a clean install of the Nvidia GeForce Game Ready Driver that worked out, so I decided to document it here as well. Doing so will restore all Nvidia settings to the factory default state and will remove all the profiles that you have created. For me, it was a small sacrifice to make and if you echo this thought as well, then let’s get started with the steps:
- To begin with, download the GeForce Game Ready Driver from the official site.
- Then launch the setup and checkmark the Perform a Clean Install option situated at the bottom.

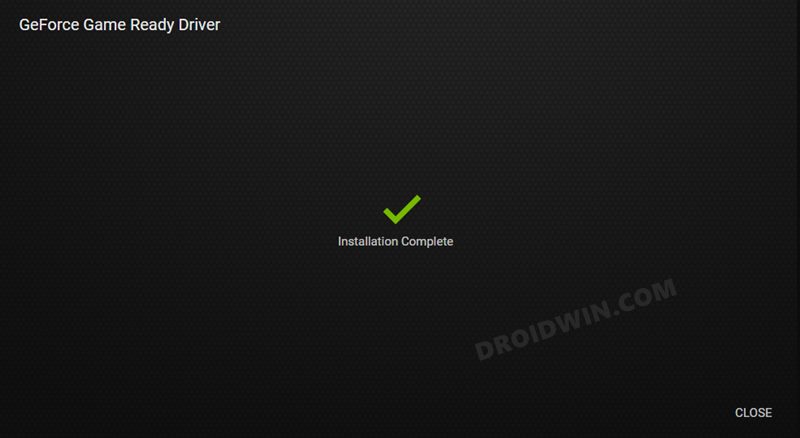
- Hit the Install button and wait for the process to complete.

- Once done, check whether it fixes the Nvidia Control Panel not opening on your Windows 11 PC
Reinstall Nvidia Control Panel
If none of the aforementioned methods did the job, then you will have to opt for the nuclear route of uninstalling the currently installed build and then reinstalling its latest version. Here’s how it could be done:
- Head over to the Start Menu, search Nvidia Control Panel, and hit Uninstall.

- Again click Uninstall in the confirmation dialog box that appears.
- Wait for the process to complete. Once done, launch File Explorer via Windows+E shortcut.
- Then go to the following locations and delete the Nvidia Corporation/Nvidia folders, if you find any:
C:\Program Files\NVIDIA Corporation
C:\Program Files (x86)\NVIDIA Corporation
C:\NVIDIA

- Now that all the old traces of Nvidia has been removed, it is recommended to restart your PC.
- Then go to the official site and download the latest version of the Nvidia Control Panel.

- Launch the setup and proceed with the on-screen instructions to install it. That’s it, the underlying issue should now have been resolved.

With this, we round off the guide on how you could fix the Nvidia Control Panel not opening on your Windows 11 PC. We have listed different methods for the same. Do let us know in the comments section which one spelled out success for you. Likewise, all your queries are welcomed in the comments section below.
- Nvidia GeForce Experience not working in Windows 11 [Fixed]
- How to Delete and Disable Shader Cache in Windows 11
- How to Remove Ads on Nvidia Shield and other Android TVs
- Install a Third-Party Custom Launcher on Nvidia Shield TV
About Chief Editor

Sadique Hassan
administrator
A technical geek by birth, he always has a keen interest in the Android platform right since the birth of the HTC Dream. The open-source environment always seems to intrigue him with the plethora of options available at his fingertips. “MBA by profession, blogger by choice!”
After the recent Windows 11 update, many NVIDIA Graphics Card users have reported that their NVIDIA control panel missing. NVIDIA control panel is quite useful because with it you can change your display settings. Also, can manage 3D settings, and can configure Surround, PhysX. Yes, it is quite annoying, when NVIDIA Control Panel not showing in the context menu, start menu, or even not appears on the Desktop.
What Causes this issue in Windows?
Unfortunately, there isn’t any single cause behind this error. So here are the most common causes of the NVIDIA Control Panel not showing on Windows 10 and Windows 11.
- Graphics Card Driver – Outdated, Corrupted, or Incompatible Graphics card driver can cause such issues. Re-Installation of a compatible driver can be a reliable solution.
- Windows Update – If you don’t check for NVIDIA Graphics Card driver update through the NVIDIA GeForce Experience. Then, maybe you are using an outdated graphics card driver. And, if you have updated Windows 11 recently, then the driver might not be compatible with your new Windows 11 version.
- Incorrect or missing registry entries – In Windows, Registry stores low-level settings of the OS and applications that opt to use the registry. NVIDIA Control Panel also opts to use registry settings. So, If any related registry entries are missing, then it can cause the Control Panel missing issue.
- Other Causes – It might be possible that due to some third-party software interference, the NVIDIA control panel got corrupted or hidden.
Well, whatever the cause, this issue can be resolved. Because I had experienced the same issue. So, if you can’t find the NVIDIA control panel on your PC, then give the following solutions a try.
You don’t have to try all solutions, just try until you find the solution that works for you. From basic to advanced, I have added all solutions to fix the missing NVIDIA Control Panel issue. Don’t hesitate in trying the advanced or complex solution if the basic doesn’t seem to work.
Solutions: NVIDIA Control Panel Missing
Solution 1: Unhide NVIDIA Control Panel.
If the NVIDIA Control Panel is installed on your Windows PC. But it’s not showing on the desktop context menu and notification tray. Then, there is a slight possibility that it might get hidden. This usually happens mostly after the NVIDIA Graphics Card Driver update. Let’s see, how you can get back the NVIDIA Control Panel, by following these steps.
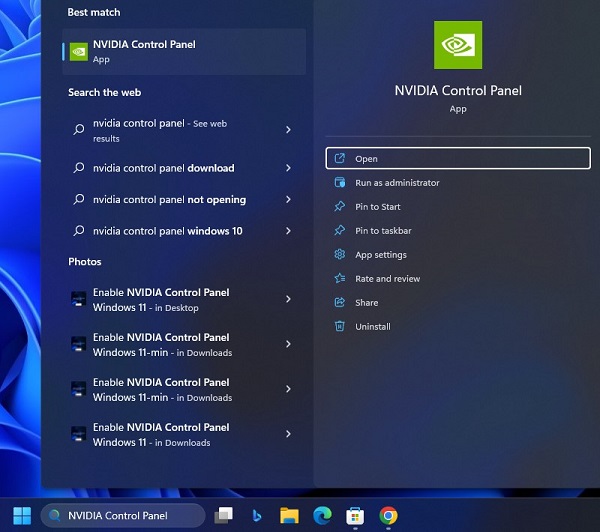
1. Click on the Search icon on Windows 11 and search for “NVIDIA Control Panel”. Click on Open from search results.
Alternative Method for Windows 10 users.
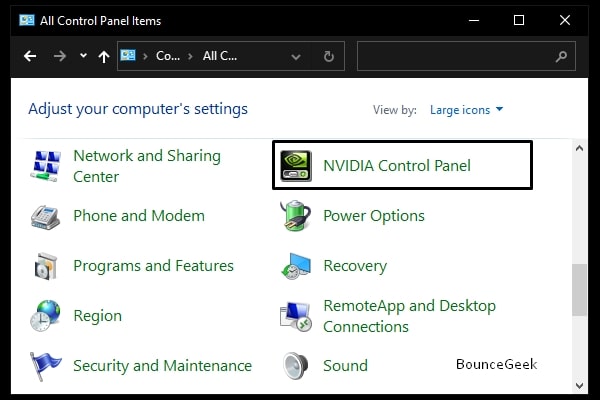
- Click on the start menu, and search for Control Panel. Launch the Application from the search results by clicking on Open.
- Now, to easily access NVIDIA Control Panel, change the Control Panel view. So, In the control panel, under view, select “Large icons”.
![]()
- Scroll down a little, look for “NVIDIA Control Panel”, and click on it to open.
Note: Is NVIDIA Control Panel is not showing in Control Panel. Don’t worry, check out the next solution.
2. Once, NVIDIA Control Panel opens up, click on the Desktop menu, and enable these two options.
- Add Desktop Context Menu
- Show Notification Tray Icon
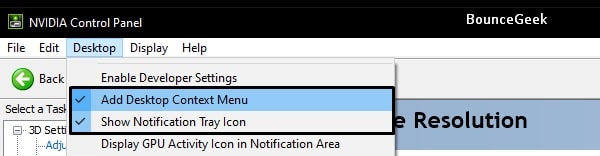
3. That’s it, Close the NVIDIA Control Panel. Now, you can access the NVIDIA Control Panel by right-clicking anywhere on the desktop or using the system tray.

4. In Windows 11, you have to click on “Show more options”.
Solution 2: Open NVIDIA Control Panel manually.
On my PC, NVIDIA Control Panel is not showing after setting up a view to Large Icons. But, On the laptop, it is showing. Ok, so if you’re facing the same issue, then no need to worry. Still, you can open the NVIDIA Control Panel and enable the context menu and notification tray options. (For context, I am using NVIDIA GeForce GTX 1060 6GB Graphics Card, and Windows 11 Pro version in my PC.)
1. Do open the following directory in File Explorer.
C:\Program Files\NVIDIA Corporation\NvContainer
Note: If you can’t find the NVIDIA Corporation folder in Program Files, then look for the same inside the Program Files (x86) Folder.
2. Now, In the NvContainer folder, you will see nvcontainer executable file. Right-click on it and then click on “Run as Administrator”.

3. You” ll now see the “NVIDIA Settings” icon in the notification/system tray.
4. Right-Click on it, and then click on “NVIDIA Control Panel”.

5. That’s it, once NVIDIA Control Panel gets open, enable those two options from the desktop menu. (Check the 4th step of the above solution.)
Solution 3: Use Task Manager.
If you’re not able to find out the NVIDIA Corporation folder inside Program Files and Program Files (x86). Then, you can take the help of the Task Manager.
1. Press Ctrl + Shift + Esc Keyboard shortcut to open Task Manager. (Or, you can right-click on the start menu, and from the WinX menu you can do open task manager.)
2. In Task Manager, under the processes tab, look for NVIDIA Container. (There might be multiple processes, it’s normal.)
3. Right-Click on NVIDIA Container and then click on File Location.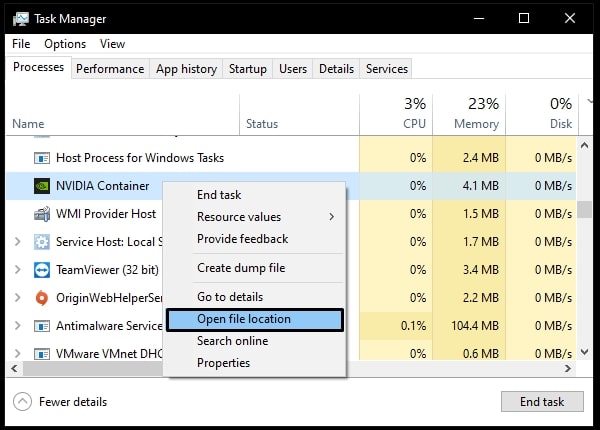
4. This option will open the NvContainer folder. And, from there you can execute the nvcontainer file, and then from NVIDIA settings, you can easily open the NVIDIA Control Panel.
Solution 4: Access NVIDIA Control Panel in Old Laptop.
If NVIDIA Control Panel missing issue occurs on your old laptop. Then, chances are you’re using an old NVIDIA driver. In that case, you have to access the Control Panel Client folder to open the NVIDIA Control Panel.
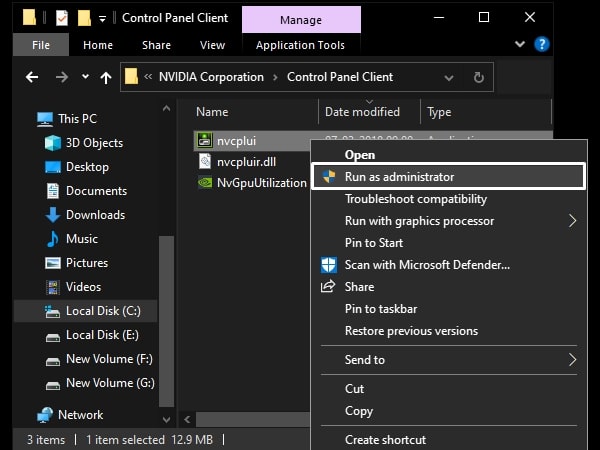
1. Do open the following Directory.
C:\Program Files\NVIDIA Corporation\Control Panel Client
2. Inside the Control Panel Client folder you will see the nvcplui file, right-click on it. And click on “Run as administrator”. NVIDIA Control Panel will get open.
3. You can now pin it to the taskbar. Or, you can create a shortcut for it.
Solution 5: Restart NVIDIA Services.
To keep Apps and Features running in Windows, a huge number of services keep running in the background. And, each Windows program comes with a batch of services. Which launch automatically when you run that program. So, it might be possible that NVIDIA Control Panel-related services have become unresponsive or disabled. Well, in both cases, you have to restart all NVIDIA services in order for the Control Panel to re-appear.
1. Press Windows + R keyboard shortcut, Run window will get open.
2. Type services.msc in it and press the enter key.
3. Services Window will get open, now, you have to restart the following NVIDIA services. (It might be possible that only the first two appear in the services window. Which is ok.)
NVIDIA Display Container LS
NVIDIA LocalSystem Container
NVIDIA NetworkService Container
NVIDIA Telemetry Container
4. Right-Click on the service and then choose the restart option. Do the same with all four services.
5. After restarting all four services, see if you can see the NVIDIA Control Panel in your system tray or in the context menu. If not, then you might need to update Graphics Driver.
Solution 6: Install Nvidia Control Panel App from Microsoft Store
It might be possible that NVIDIA Control Panel App got corrupted. In that case, uninstall it from Windows 11 Settings. And, installing it again from Microsoft Store, can solve the NVIDIA Control Panel not showing the issue.
1. Press the Windows + I keyboard shortcut to open Windows 11 Settings App.
2. Click on Apps > Installed Apps.
3. Scroll down and find NVIDIA Control Panel. Click on the three-dots icon next to the App name, and then click on uninstall.
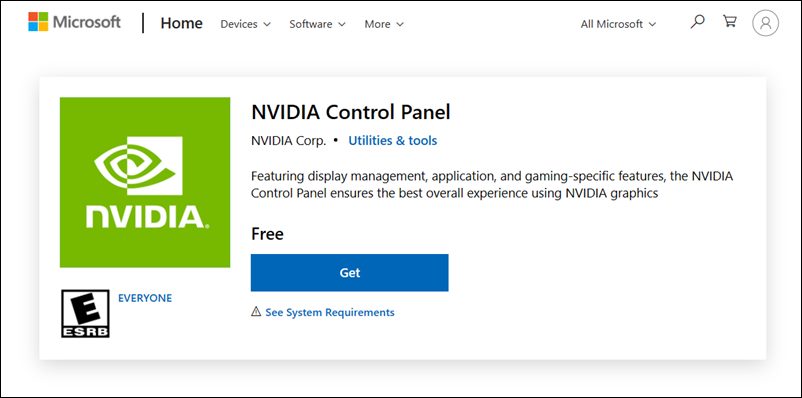
4. Now, open Microsoft Store App, search for NVIDIA Control Panel, and install the App. Or, open the following link.
Get NVIDIA Control Panel Microsoft Store
5. That’s it, you can now add an App in the context menu and system tray from the Desktop Menu.
Solution 7: Add NVIDIA Control Panel in Startup Folder
This solution is suggested by the NVIDIA Support team. If the control panel is missing from the system tray after restarting Windows. Then, this solution might be useful for you. Basically, in this solution, we will add the NvContainer file in the startup folder. So that, it will automatically appear in the system tray whenever you restart Windows next time.
1. First, open the following directory and copy the nvcontainer file.
C:\Program Files\NVIDIA Corporation\NvContainer
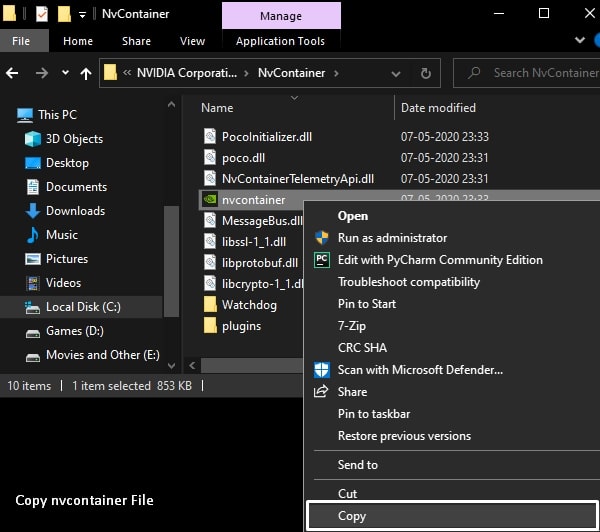
For Old Laptop Users – If you’re using an old Windows laptop, then you have to copy NVDisplay.Container file from the following directory.
C:\Program Files (x86)\NVIDIA Corporation\Display.NvContainer
2. Now, Press Windows + R keyboard shortcut.
3. Type shell:startup in the Run window and press the enter key.
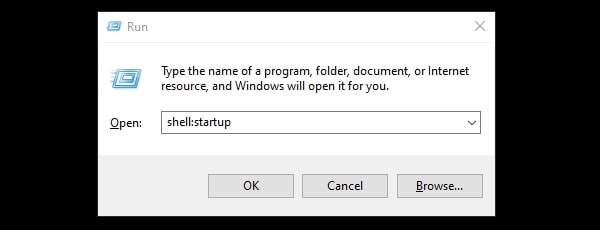
4. Startup folder will get open, paste the copied NvContainer file into it. (And, if you’re using an old laptop or old NVIDIA driver, then you have to paste NVDisplay.Container file in it.)
5. Now, From the startup folder, right-click on the NvContainer file and then click on properties.
6. In the Properties window, click on compatibility, and enable the “Run this program as an administrator” option. Click on Apply then click on ok.
7. That’s it, now, restart your Windows, and hopefully, the issue got resolved now.
Solution 8: Install Latest NVIDIA Graphics Driver.
It could be possible that you’re using an outdated NVIDIA Driver. And, for NVIDIA Control Panel to work, Graphics Driver needs to be up-to-date. Personally, as I mentioned, on my PC, I am using NVIDIA GeForce GTX 1060 Graphics Card. So, to update its graphics driver, I use NVIDIA GeForce Experience software. (Don’t use third-party driver updater software.)
Manually Download and Update NVIDIA Drivers.
1. By going to the official website of NVIDIA Drivers, you can download the latest driver. You have to select your graphics card details and Windows version, in order to download the driver file.
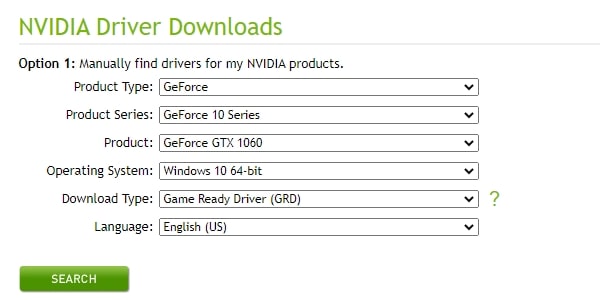
2. Once, you select all the details, you will get the graphics card driver download option. Download and install it on your PC.

Find out Graphics Card Info.
If you don’t know which graphics card you’re using on your Windows PC or laptop. Then, to find out you can either use CPU-Z software. Or, you can use the following method.
1. Open the Run (Press Windows + R Key) Window, and type dxdiag in it.
2. DirectX Diagnostic Tool will get open with your system information.
3. Click on the Display tab, and under device details, you can find out your Graphics Card Information.
Once, you got all the required information, go to the NVIDIA Driver Download site. Enter all information and download the driver file.
Update Driver using Device Manager.
Important: Most of the time, the Device Manager doesn’t seem to work. That’s why I suggest you download and install the driver manually using the above-mentioned method.
1. Right-Click on the start button and then click on Device Manager.
2. In Device Manager, extend Display Adaptors.
And, you will see your Graphics Card. Right-Click on it, and then click on update driver.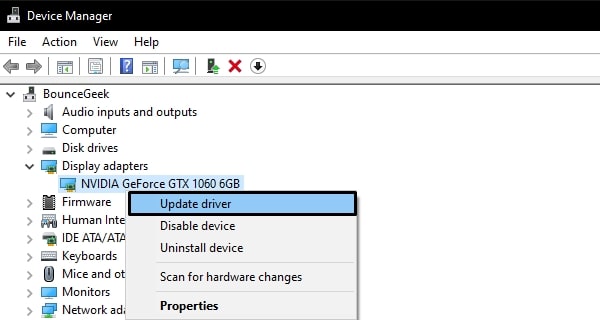
3. After that, click on “Search Automatically for Drivers“.
That’s it, Windows will now check the driver update and will install if found.
So, these were the solutions to fix the “NVIDIA Control Panel is missing” issue. If you face any trouble while trying out any solution, feel free to comment. And, If after getting the NVIDIA Control Panel, it’s showing the “NVIDIA Display settings are not available” error, then you can read my article on it.