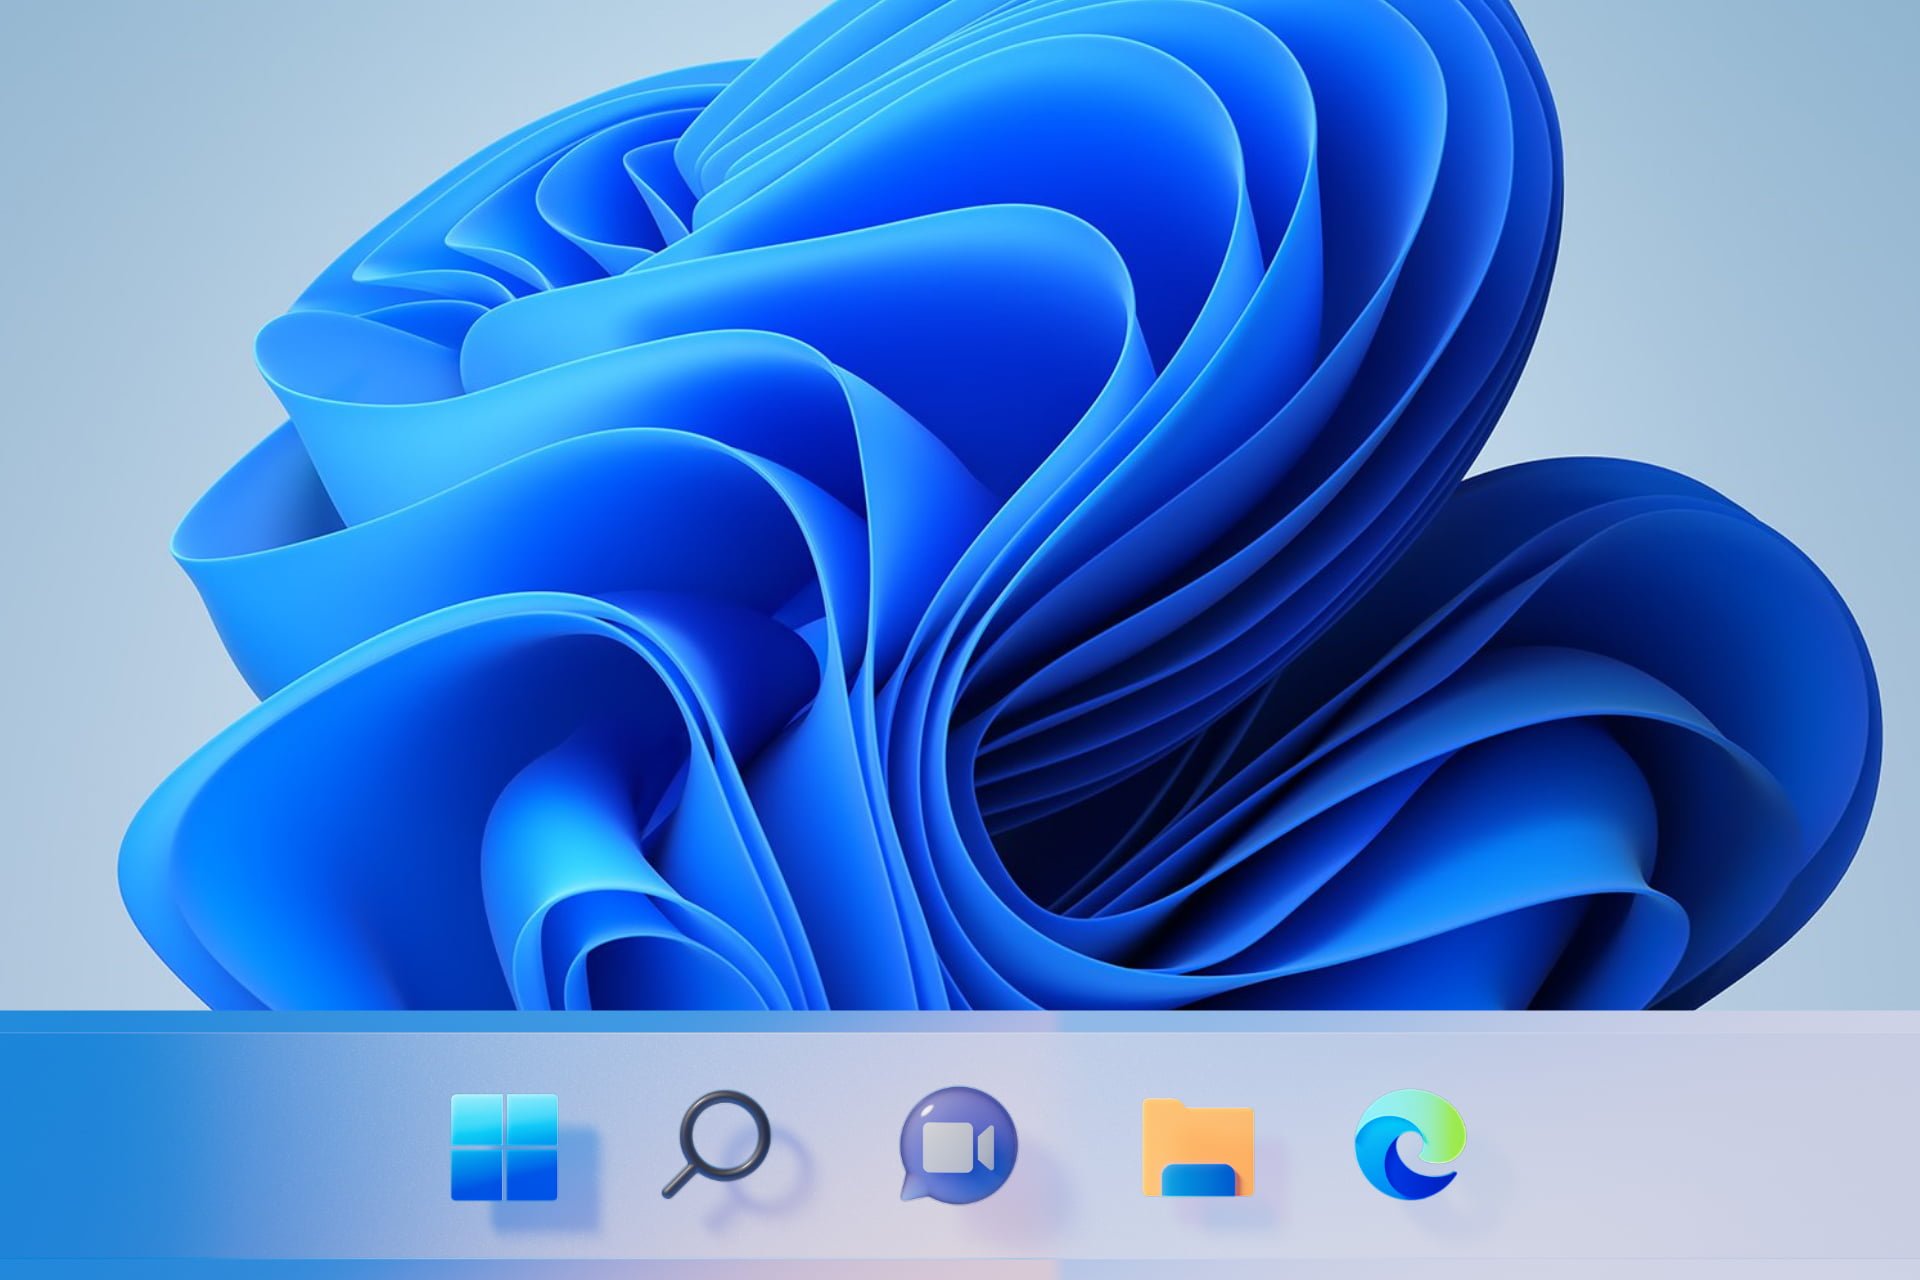
В этой инструкции подробно о том, как изменить цвет панели задач, меню Пуск и сопутствующих элементов в Windows 11 и о возможных проблемах, с которыми при этом можно столкнуться. Близкая тема: Как увеличить или уменьшить панель задач Windows 11.
Изменение цвета панели задач в параметрах персонализации
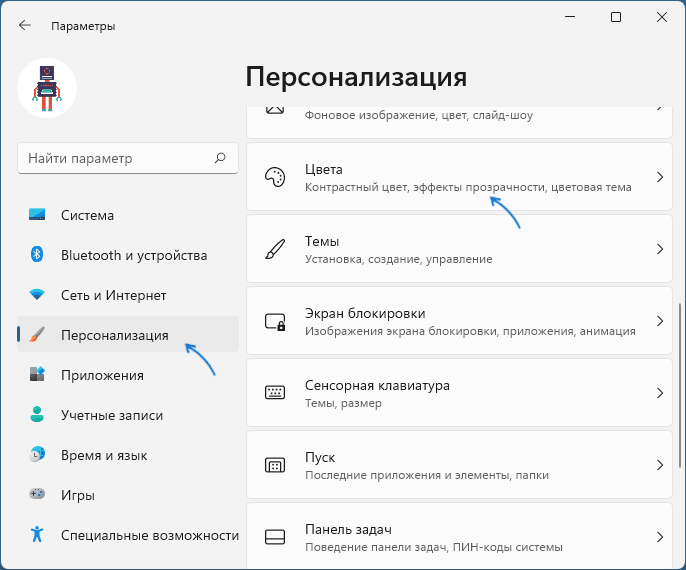
Для того, чтобы изменить цвет панели задач вручную и меню Пуск в Windows 11 достаточно выполнить следующие шаги:
- Открыть Параметры — Персонализация (быстро попасть в параметры персонализации можно через контекстное меню по правому клику на рабочем столе).
- Открыть пункт «Цвета».
- Если в поле «Выберите режим» установлено «Светлый», переключить на «Темный» или «Особые», иначе возможность применения цвета к панели задач будет не активна. Если вам требуется светлое оформление — выберите «Особые», а затем установите темный режим для Windows и светлый режим для приложений.
- В пункте «Контрастный цвет» выберите желаемый цвет, для этого установите «Вручную» (в режиме «Автоматически» цвет будет выбираться в зависимости от обоев рабочего стола) и укажите желаемый цвет из списка или нажмите «Просмотреть цвета» для более точного выбора цвета.
- Включите переключатель «Показать цвет элементов в меню Пуск и на панели задач». Если он не активен и его нельзя включить, обратите внимание на 3-й шаг выше.
- Сразу после этого цвет будет использован на панели задач и других системных элементах Windows 11.
Отмечу, что при установке тем оформления Windows 11 все указанные настройки могут применяться автоматически — всё зависит от конкретной темы. Выше было рассмотрено ручное изменение цветов.
Что делать, если параметры персонализации Windows 11 недоступны
Если Windows 11 не активирована, то параметры персонализации будут недоступны. Однако, при желании мы можем изменить цвет панели задач и меню Пуск с помощью редактора реестра и в этом случае:
- Нажмите клавиши Win+R на клавиатуре (или нажмите правой кнопкой мыши по кнопке Пуск и выберите пункт «Выполнить»), введите regedit и перейдите в раздел реестра
HKEY_CURRENT_USER\Software\Microsoft\Windows\CurrentVersion\Themes\Personalize
- Дважды нажмите по параметру ColorPrevalence и измените его значение на 1.
- Изменения сразу начнут действовать, однако выбор цвета будет осуществляться автоматически в зависимости от цветов обоев рабочего стола.
- Если цвет после изменения выглядит «светлым», измените значение параметра SystemUsesLightTheme на 0 в том же разделе реестра.
К сожалению, для данного сценария попытки найти способ выбрать цвет с помощью изменения значений в расположениях в реестре (те же, что и в предыдущей версии Windows) или файле текущей темы не помогли — при моих тестах они не начинают действовать ни сразу ни после перезагрузки.
A transparent taskbar gives you more space and it looks cool
by Loredana Harsana
Loredana is a passionate writer with a keen interest in PC software and technology. She started off writing about mobile phones back when Samsung Galaxy S II was… read more
Updated on
- Windows 11 users are constantly searching for ways to get a transparent taskbar on their operating system.
- Fortunately, to achieve this effect in no time, you can easily use the Registry.
- Note that the Visual effects option can also bring you one step closer to the desired result.
With the OS released to the general public, information regarding Windows 11’s features and overall performance has been trending. Though the OS came with a few bugs, people are looking for ways to customize it, especially a transparent taskbar in Windows 11.
Windows 11 brings a variety of options to change how your system looks, but there’s still no direct option to customize the aspect of your taskbar aside from its color.
What taskbar customizations are available in Windows 11?
The taskbar’s default functionality is quite limited, as its location cannot be changed, and you cannot drag and drop apps or shortcuts onto the taskbar, as in the previous OS.
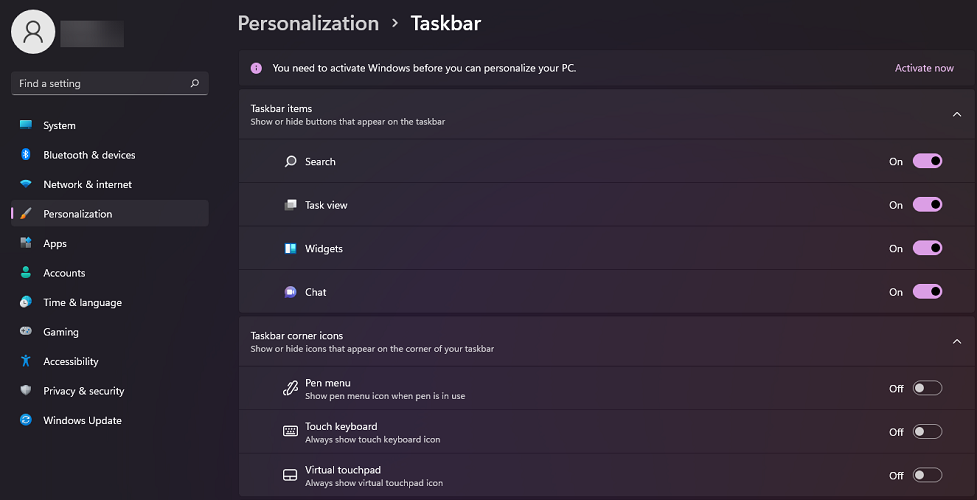
You can only change its color and add a limited level of transparency, add or disable features such as Widgets or Search, or choose which icons to appear in the taskbar corner.
You may move the icons on the left side of the taskbar if you want that sense of familiarity you got used to.
When introducing Windows 11, here is what Panos Panay, Chief Product Officer at Windows + Devices had to say about the taskbar functionality:
We’ve simplified the design and user experience to empower your productivity and inspire your creativity. It’s modern, fresh, clean and beautiful. From the new Start button and taskbar to each sound, font and icon, everything was done intentionally to put you in control and bring a sense of calm and ease.
Even though the taskbar meets the basic requirements, people are always looking for more options, as in this case, the possibility to personalize their devices to make them feel more like their own.
On that note, you should know that Microsoft puts at your disposal apps to customize the OS, so keep reading and learn how to make your taskbar transparent in just a few simple steps.
How do I make the taskbar transparent in Windows 11?
1. Use the Personalization option
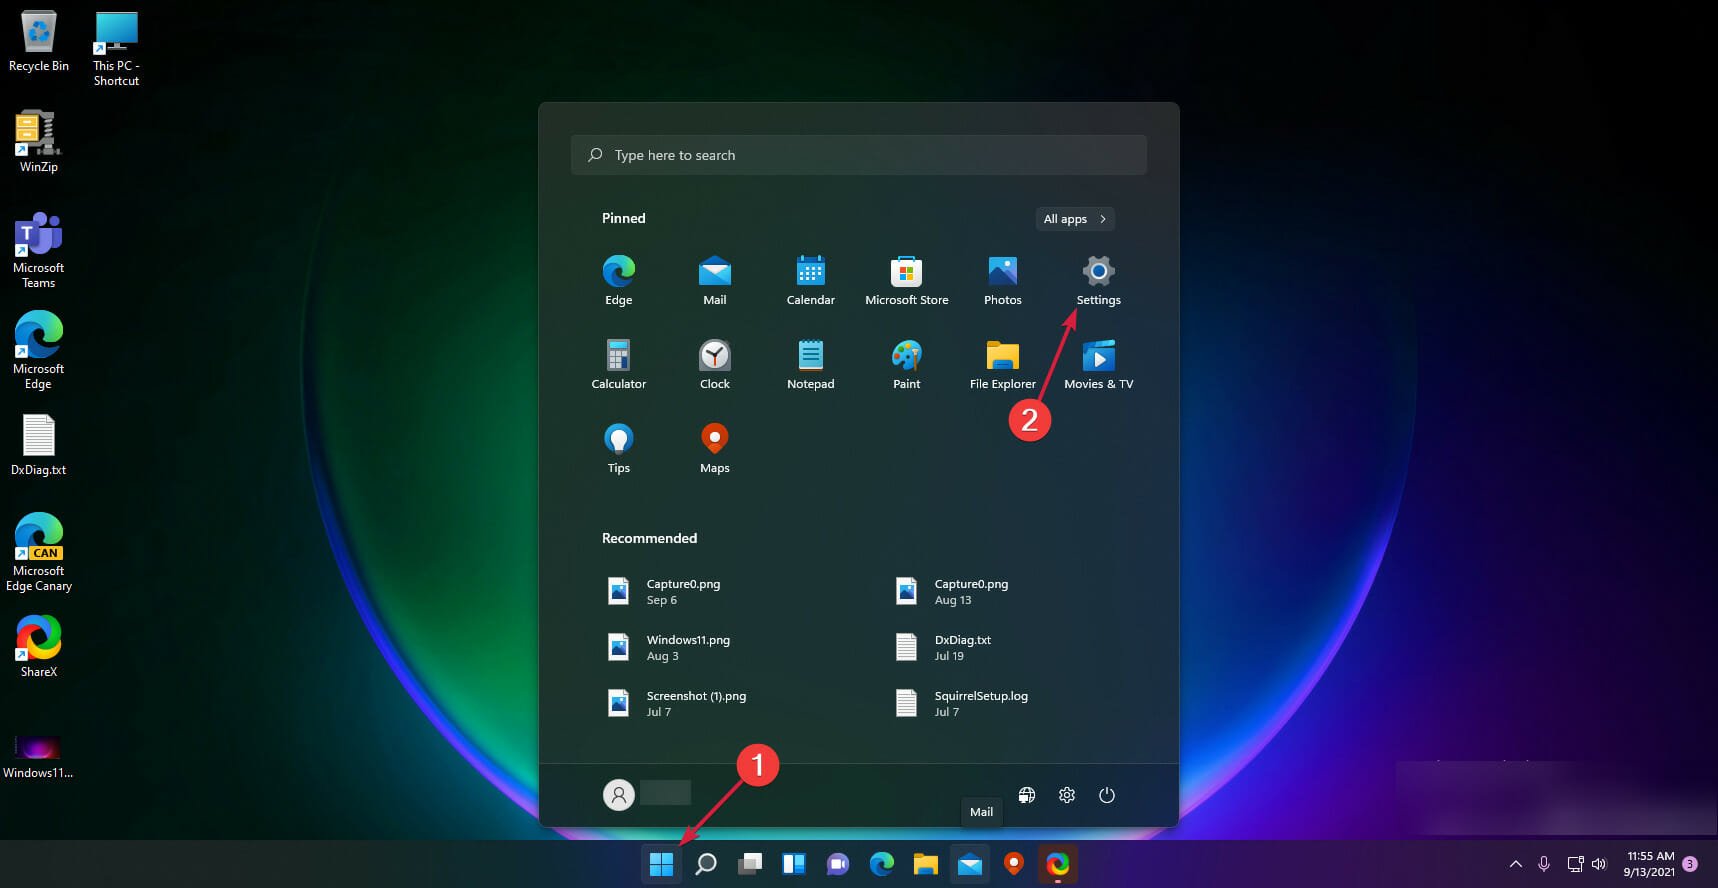
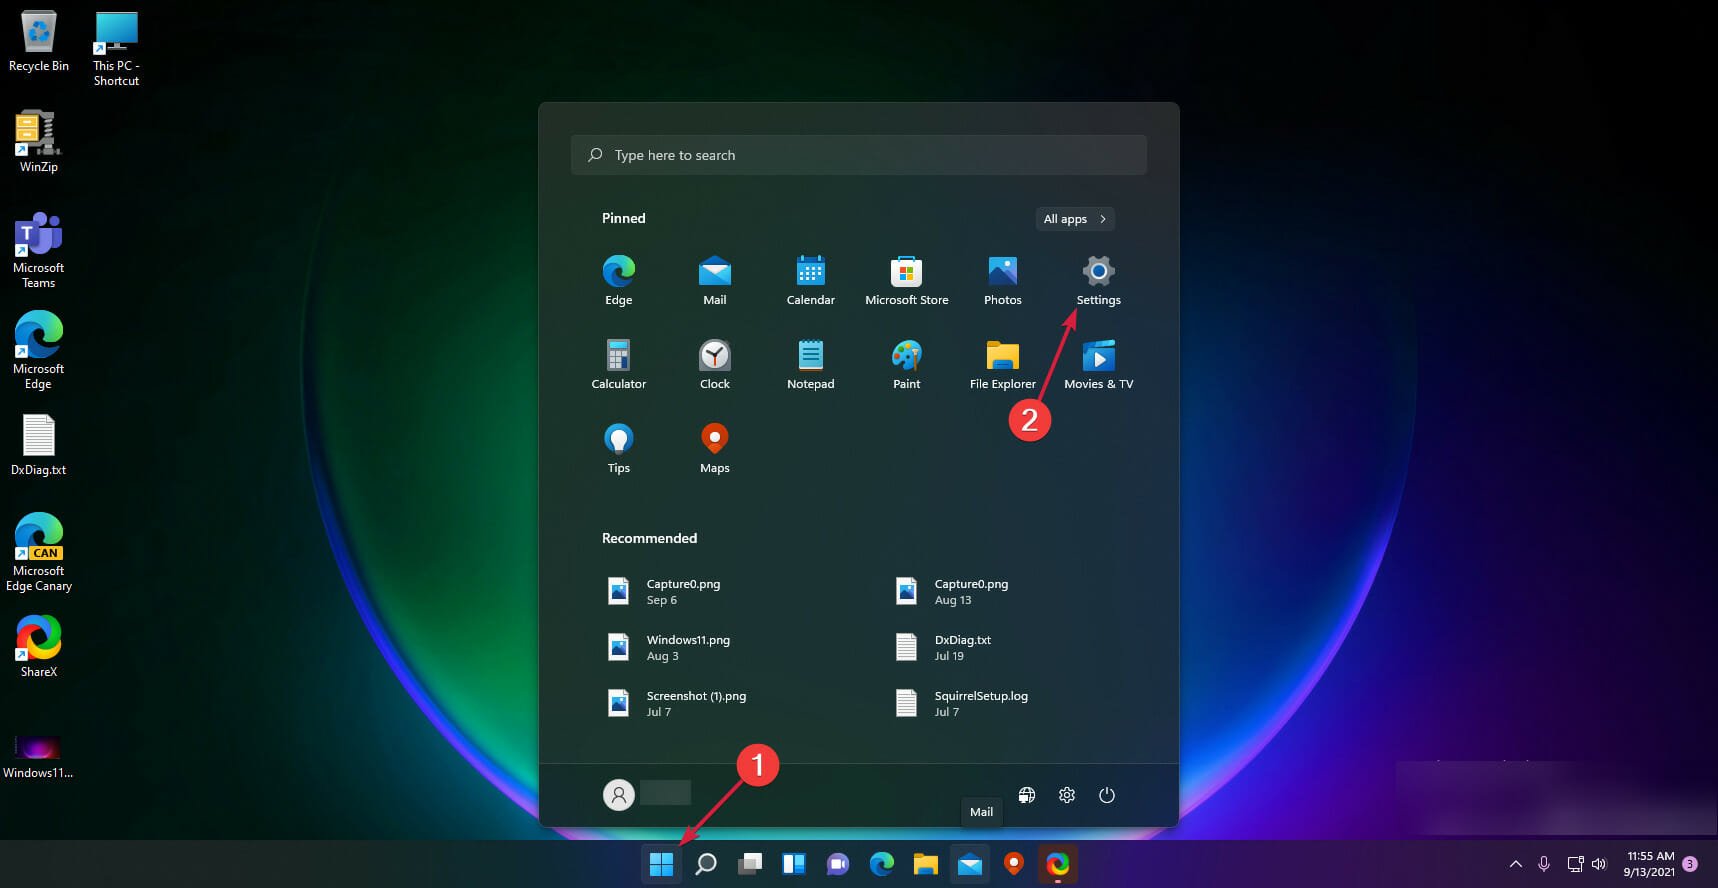
- Go to Start and click on the Settings option.
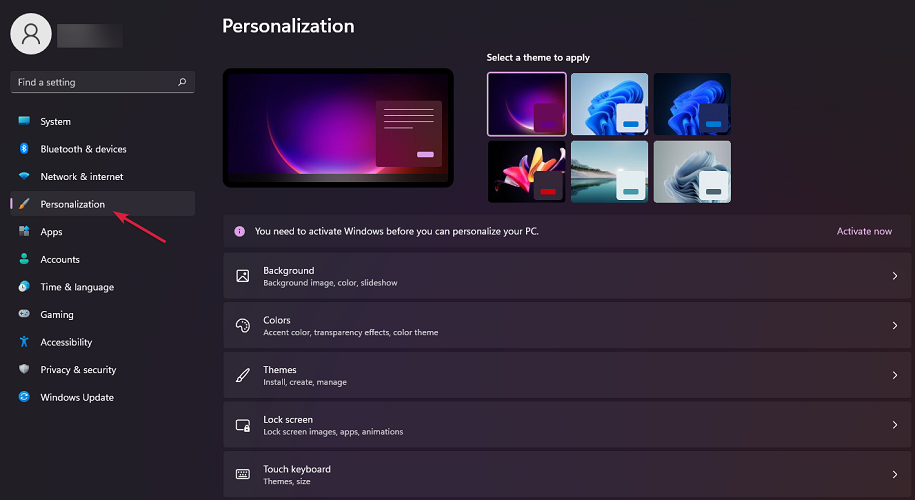
- Click on Personalization from the left-hand pane.
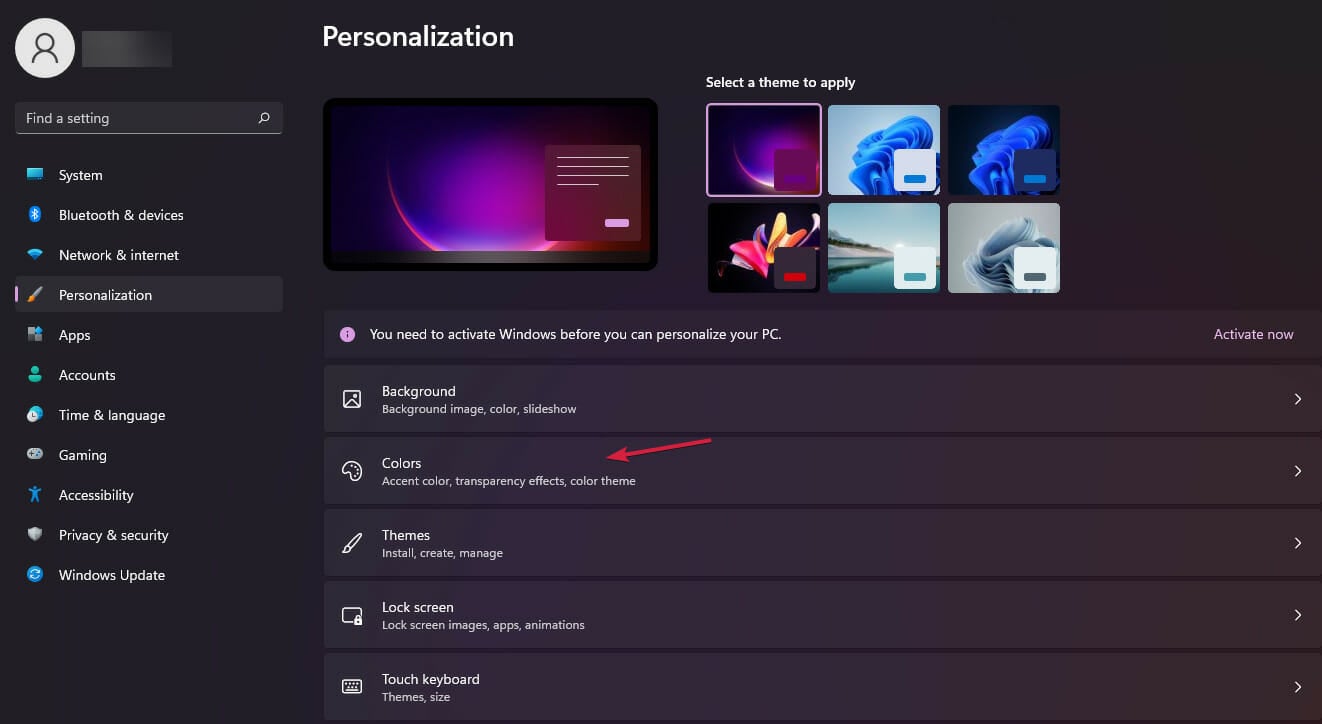
- From here, select Colors.
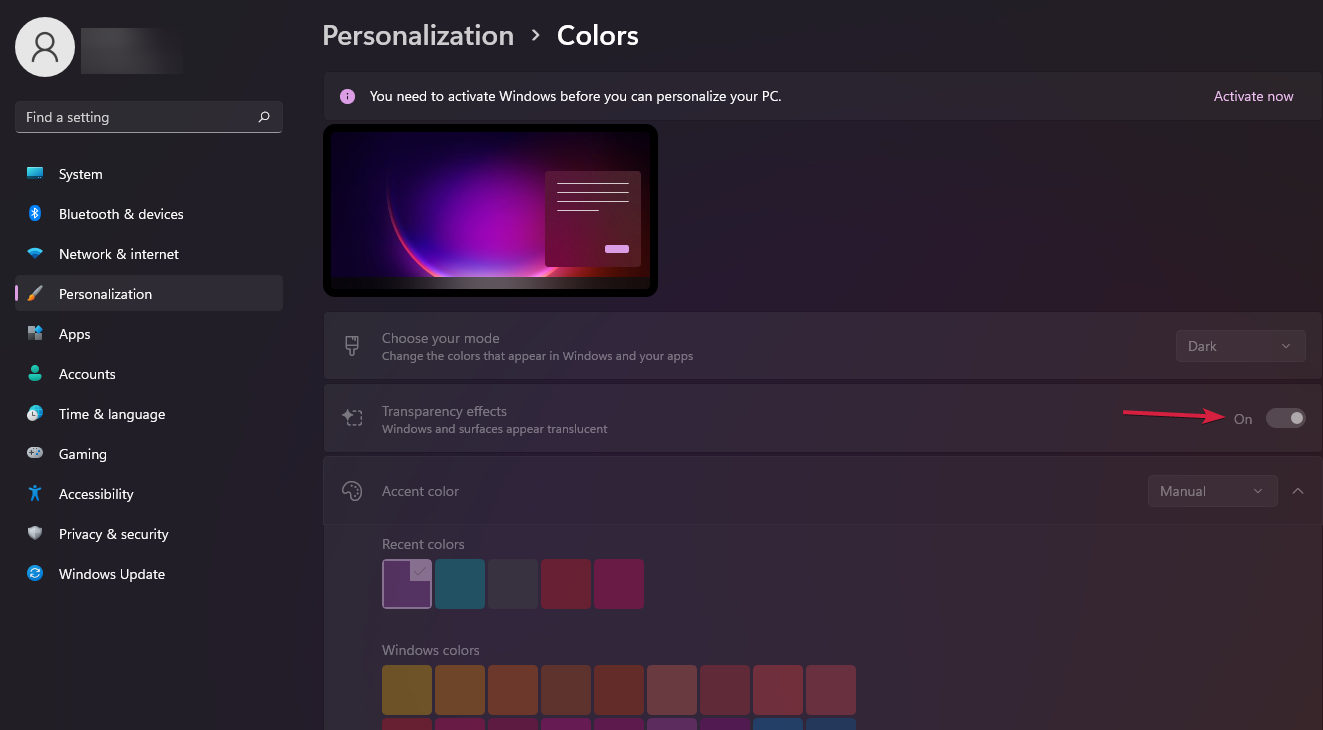
- Turn the toggle On next to Transparency effects.
- Your taskbar should now be more transparent.
While here, you can also choose the desired accent color to match your wallpaper, but as we previously said, your taskbar will only become slightly transparent.
You can also change your mind and change Windows 11 to classic view so you can restore it to that old Windows 10 look.
Move on to the next solution to activate another Windows 11 feature that will increase transparency on your taskbar.
How we test, review and rate?
We have worked for the past 6 months on building a new review system on how we produce content. Using it, we have subsequently redone most of our articles to provide actual hands-on expertise on the guides we made.
For more details you can read how we test, review, and rate at WindowsReport.
2. Use the Visual effects option
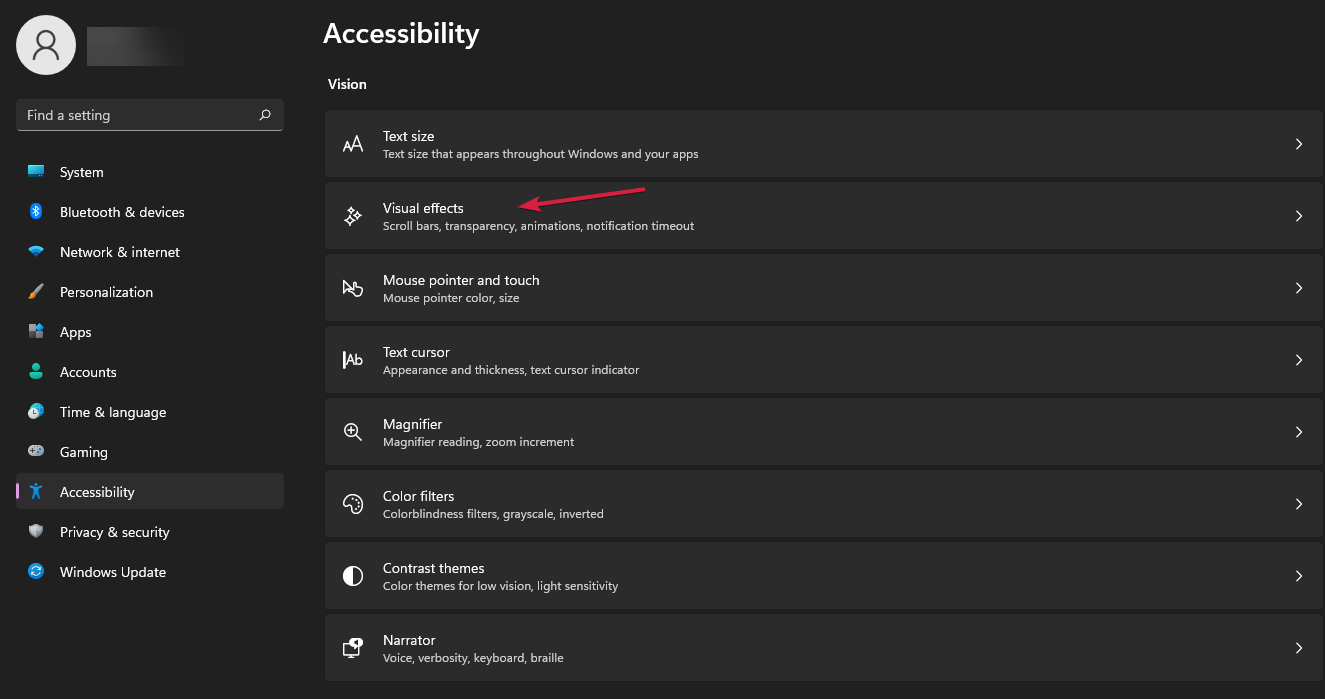
- Once again, open Settings from Start.
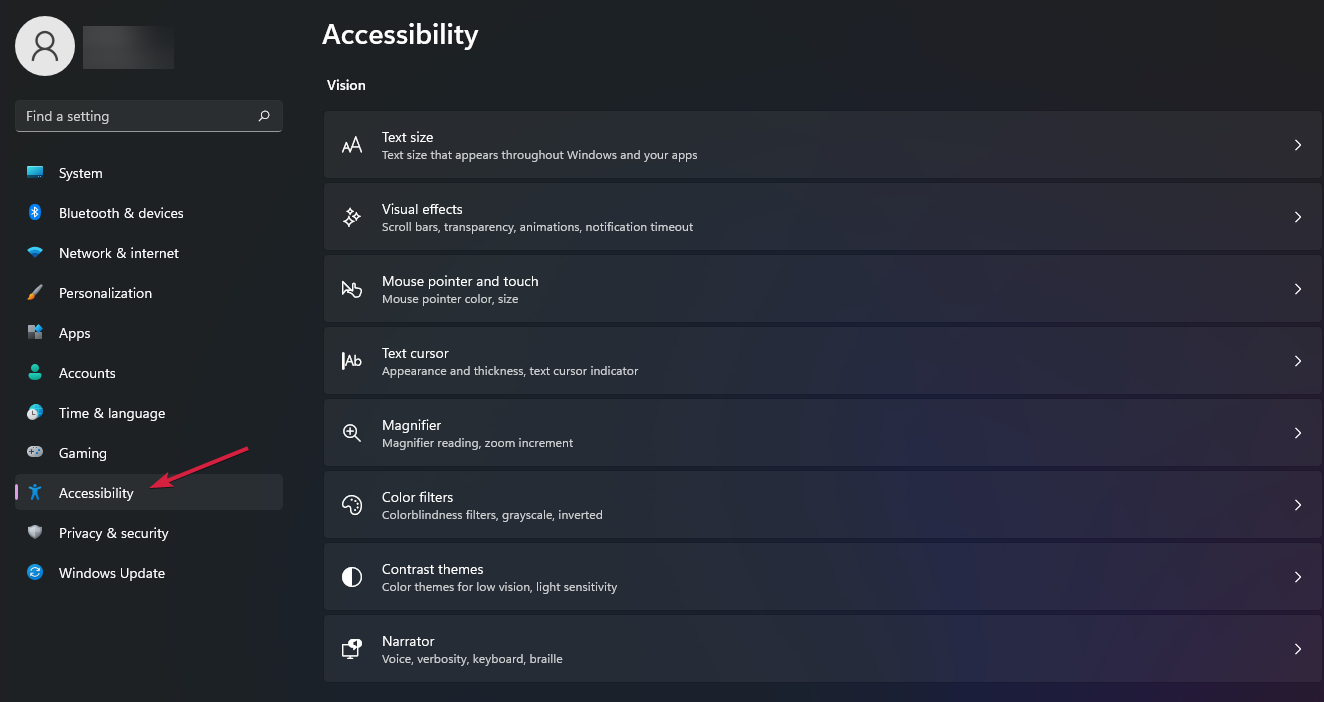
- Go to the Accessibility section.
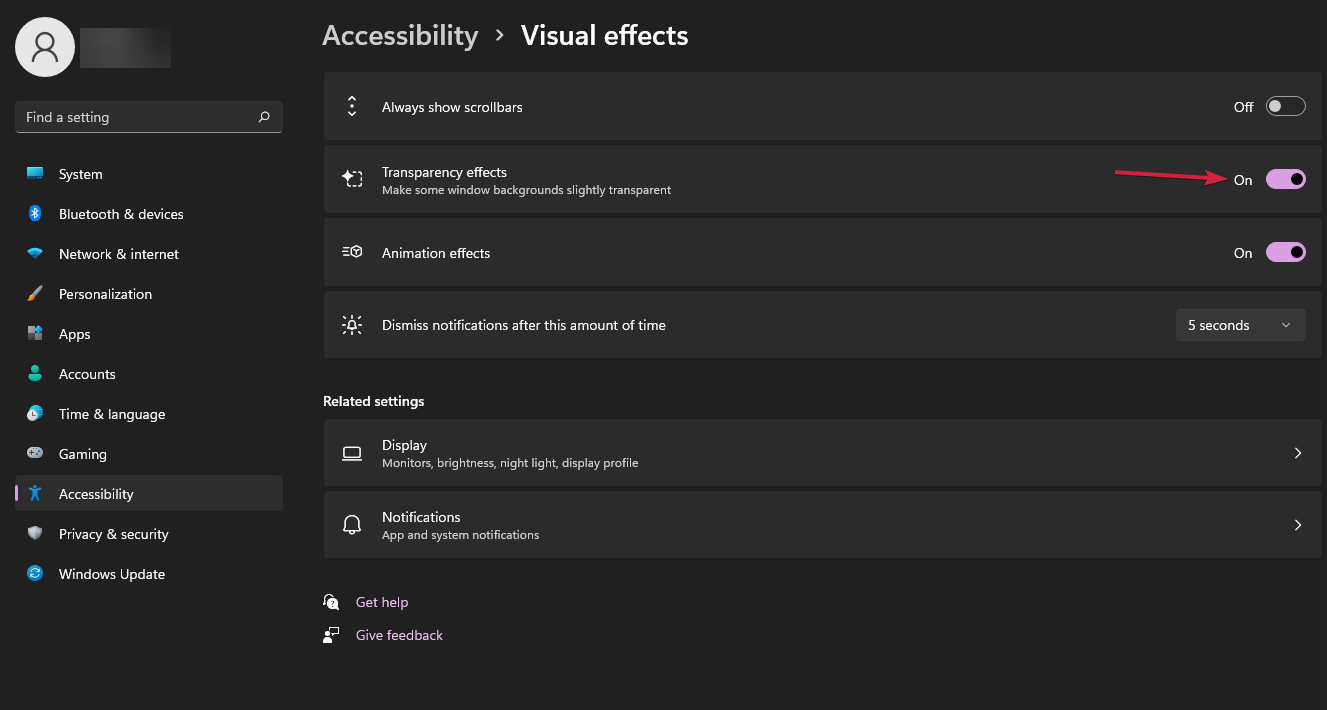
- Click on the Visual effects option.
- Enable the toggle for Transparency Effects.
If you are still unsatisfied with the level of transparency, know there is a way to increase it by using the Windows Registry, and in the next solution, we’ll show you how to do just that.
3. Use the Registry
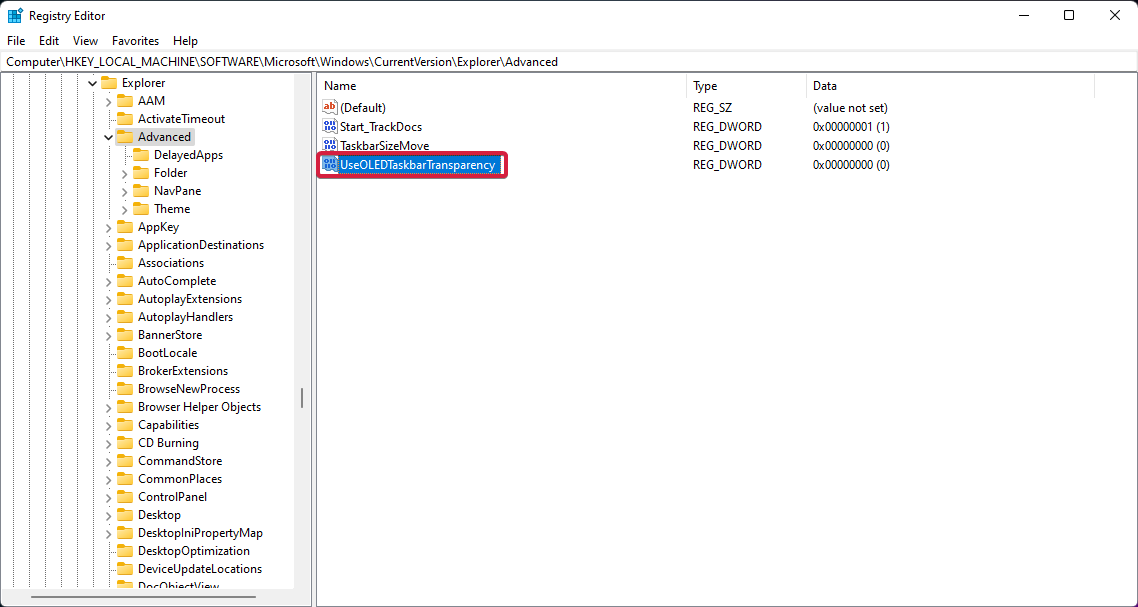
1. Use OLED Taskbar Transparency
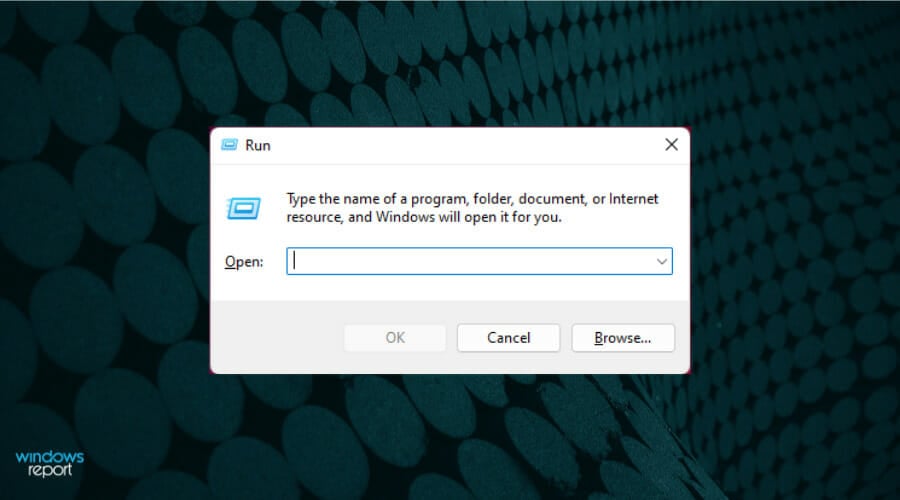
- Press the Windows + R keys to open the Run box.
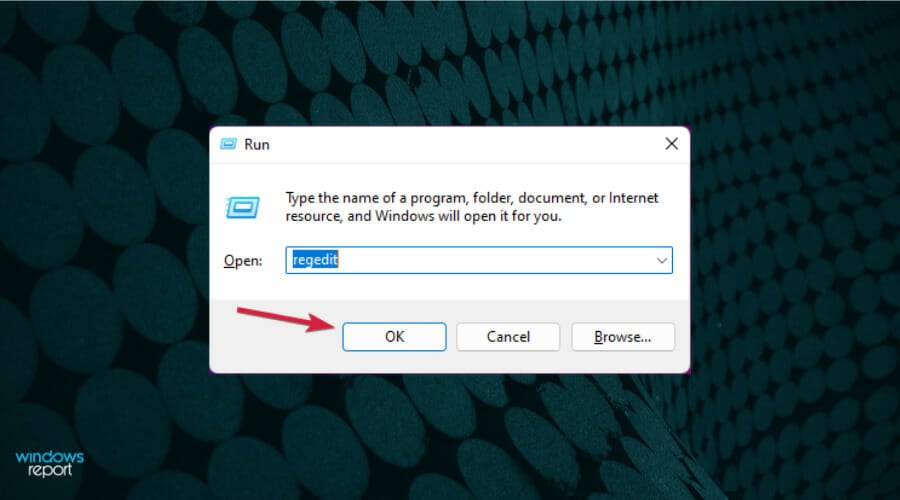
- Type regedit and click on OK.
- Navigate to the following:
HKEY_LOCAL_MACHINE\SOFTWARE\Microsoft\Windows\CurrentVersion\Explorer\Advanced - On the right-side pane, right-click in the white zone and choose New, then DWORD (32-bit) Value.
- Rename the newly created value to: UseOLEDTaskbarTransparency by right-clicking on it and choosing Rename.
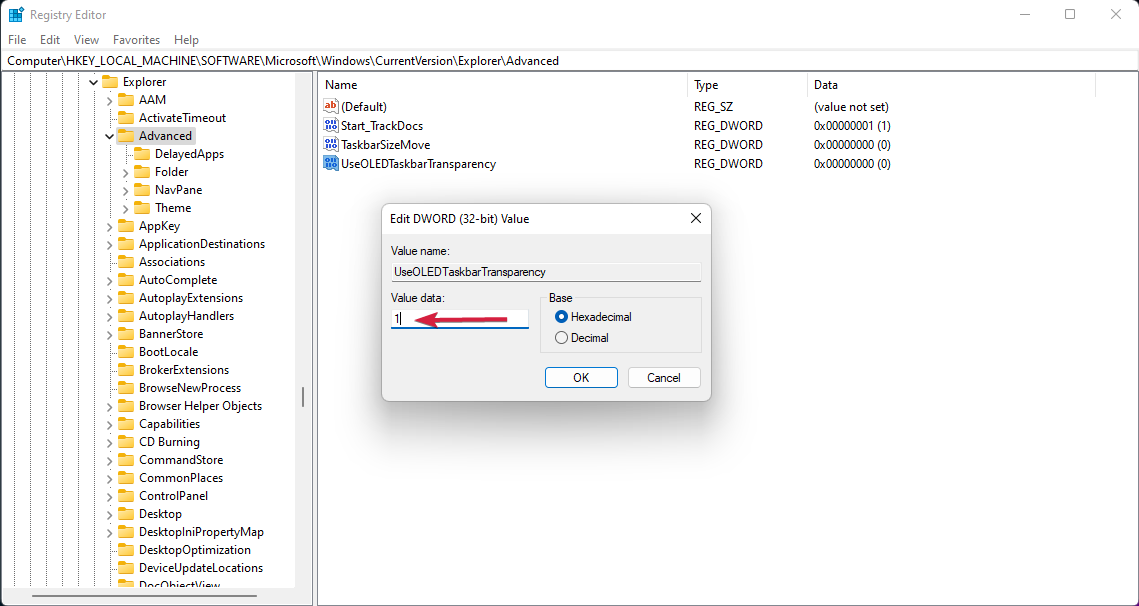
- Right-click again, select Modify and change the value from 0 to 1.
- Click OK to save the settings.
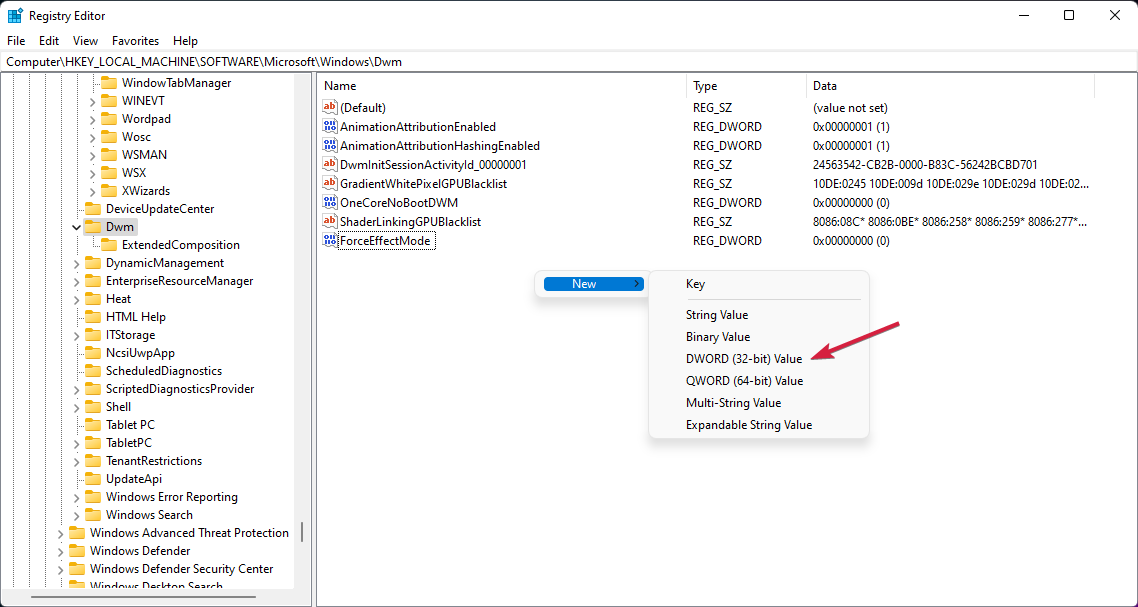
2. Modify the ForceEffectMode
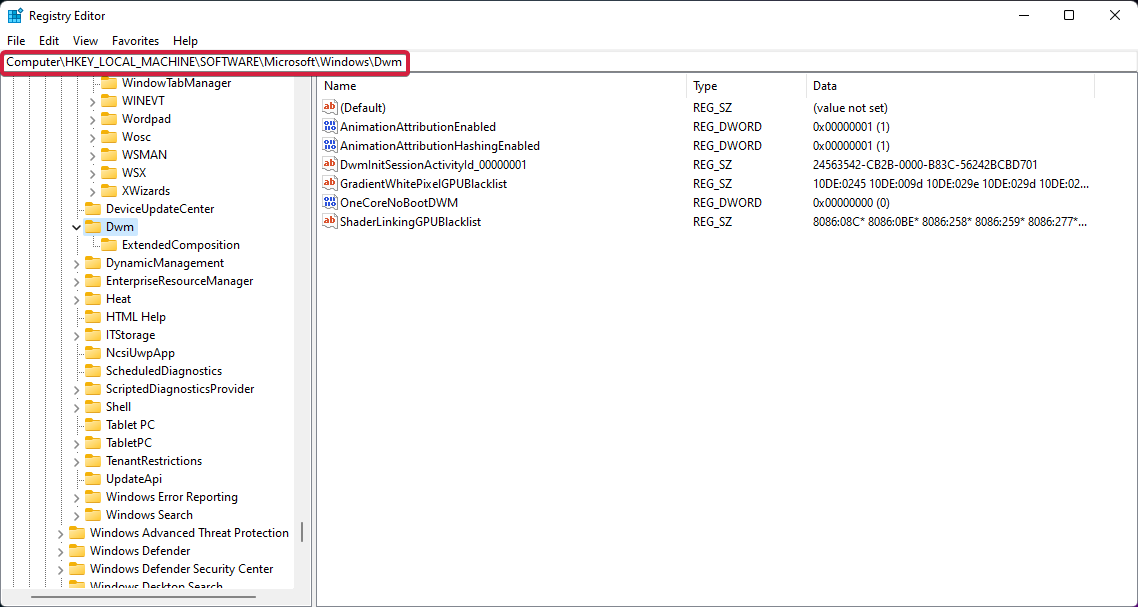
- While you are still in the Registry Editor, navigate to the following key:
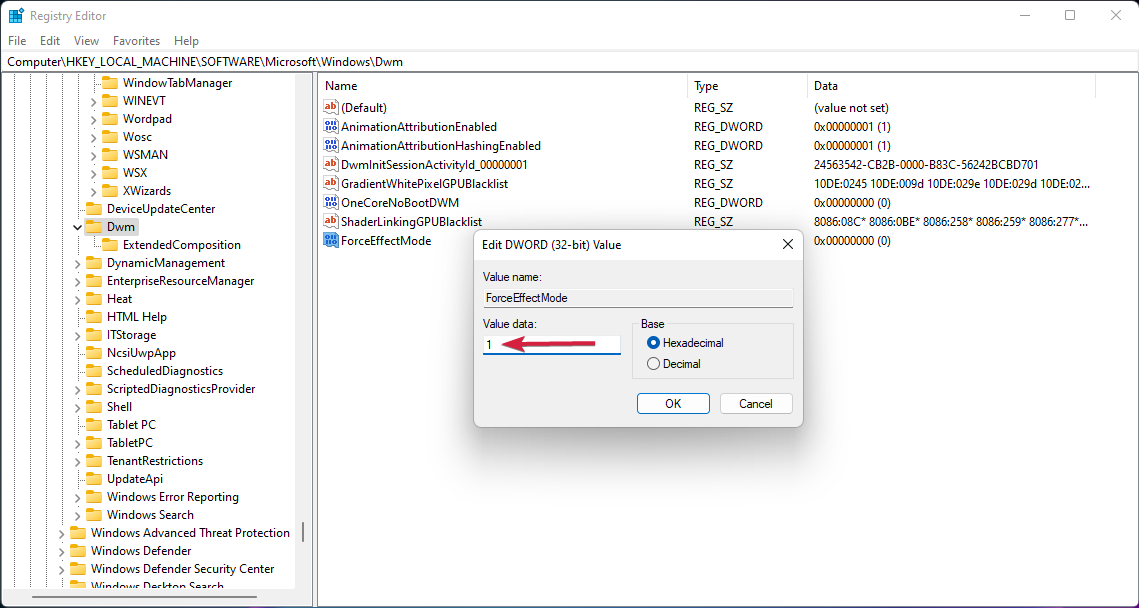
Computer\HKEY_LOCAL_MACHINE\SOFTWARE\Microsoft\Windows\DWM - Locate ForceEffectMode and change its value from 0 to 1, as you did in the previous solution.
- If you cannot locate it, right-click on the white place and choose New, then DWORD (32-bit) Value, and rename it to ForceEffectMode.
- Restart your device.
After restarting, you’ll notice that the taskbar is even more transparent. Adding and modifying these values in the Windows 11 Registry allows you to tweak the settings and achieve higher transparency.
Also, to have even more control over the design, color, placement, or a transparent taskbar in Windows 11, download these apps for the best results when it comes to customization.
However, we have a great article focused on how to customize your Windows 11 using Registry Editor, so you might want to look at it and try a few steps.
Make taskbar transparent with TranslucentTB
Another way to make your Windows 11 taskbar transparent is to use the app TranslucentTB from Microsoft Store. TranslucentTB is a small, free and easy-to-use app.
1. Download TranslucentTB
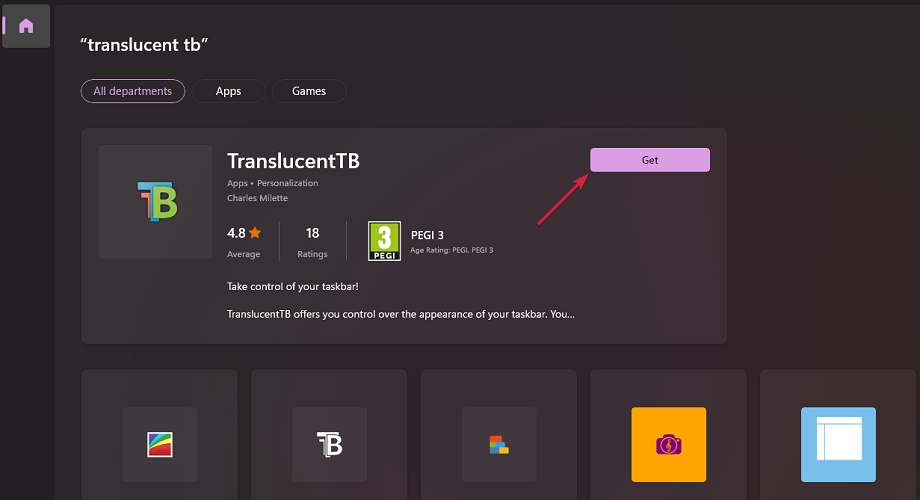
The first step is to enter Microsoft Store and type translucent tb in the search bar. Click on Get to start downloading the app. Alternatively, you can also click here on Get TranslucentTB to download the app.
2. Open the application.
After the download is complete, click Open in order to open TranslucentTB.
3. Click Continue
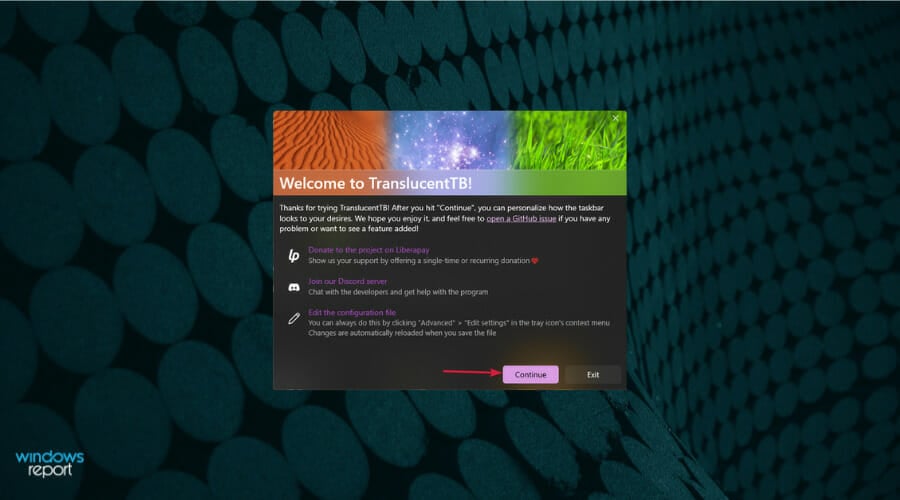
A pop-up will appear after you open the app. Click Continue.
4. Check your transparent taskbar.
Your Windows 11 taskbar will be fully transparent afterward. Note that the app will also make the Windows 10 taskbar transparent.
What features does the free TranslucentTB app offer?
For those trying to figure out how to make my taskbar 100% transparent, it’s possible with TranslucentTB. It’s the best transparent taskbar Windows 11 app, but you can also make it opaque or introduce a blur effect.
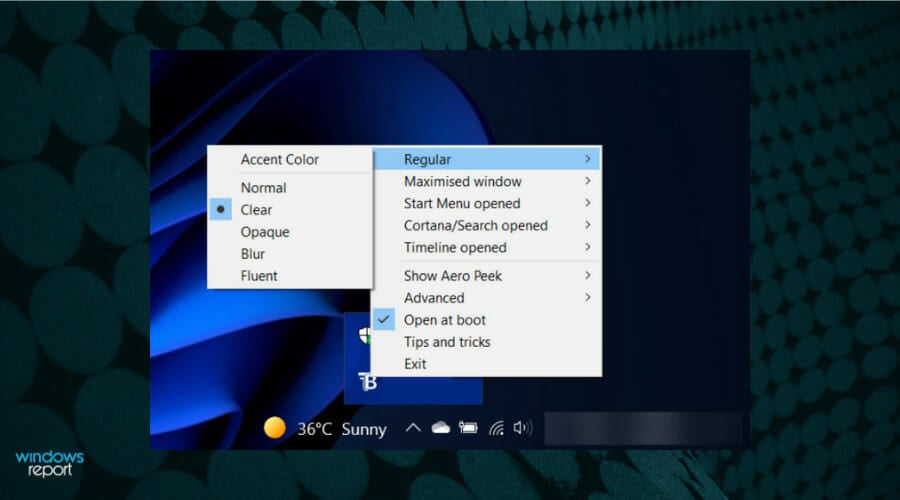
In addition to overriding your color and additional settings for the taskbar, this app combines states such as maximized window, Start Menu open, Cortana open, and Timeline open.
Each one of them has a customizable taskbar appearance to offer you an overall pleasant aspect, personalized to your liking.
For a free app, you have quite a few elements to customize the taskbar. And to make things even better, there’s a Tips and tricks option that teaches you some really cool things.
- How to Type Accents on Windows 11
- How to Disable the Insert Your Security Key Into the USB Port popup
Get Microsoft TaskbarX
If you are looking for another way to achieve the transparent taskbar effect and more, you can also try the Microsoft TaskbarX app for a very small fee.
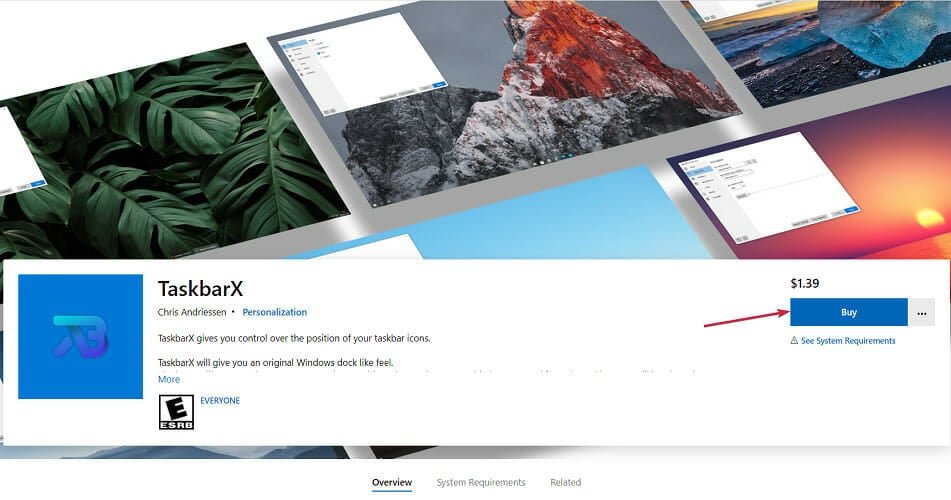
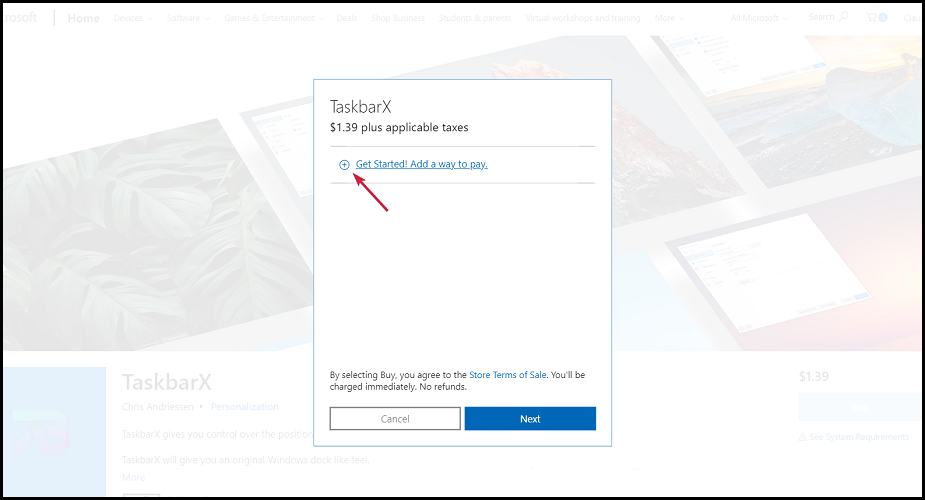
- Go to the official Microsoft Store and look for TaskbarX.
- Click on Buy.
- A pop-up will open. Here, select Get started to add a way to pay for the app.
- Choose the form of payment you want, complete your information in the next windows and click on Save.
- After the download is complete, right-click on the file and unpack the archive.
- Open the TaskbarX folder and run the exe file to install the app.
- After the installation, your taskbar icons will automatically move to the middle of the taskbar.
What features does Microsoft’s TaskbarX offer?
This app is worthy of your attention as there are quite a handful of features to design, customize, or change every aspect of your taskbar.
You can even move it to the left and have it transparent at the same time with the Position option that allows you to adjust the taskbar icons’ placement. Quite neat, isn’t it?
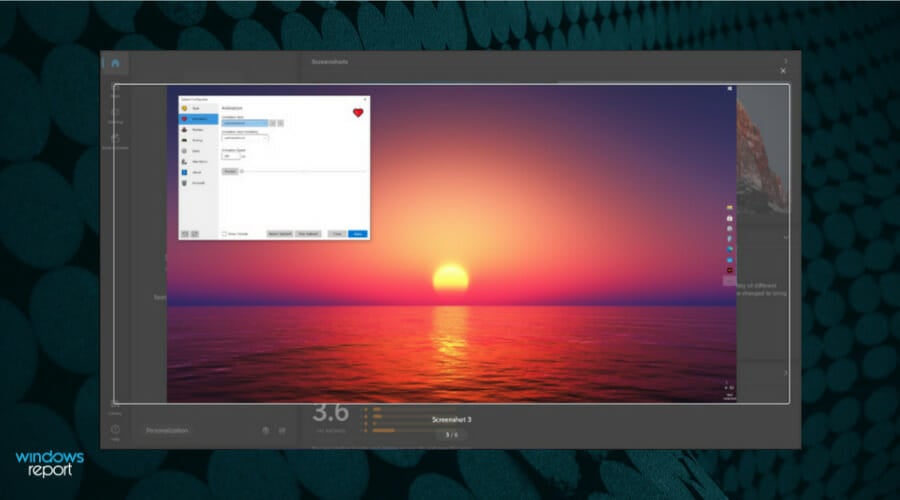
There are other categories on this configurator, such as Style which manages the transparency level or color of your taskbar, and Animation which controls how the taskbar icons move when you open a new app.
Simply put, you can definitely have some fun with TaskbarX as it gives you so many options to choose from to personalize your taskbar.
If you’re looking for more information on the OS’s taskbar, learn how to use the Never combine feature in Windows 11.
Get TaskbarTools
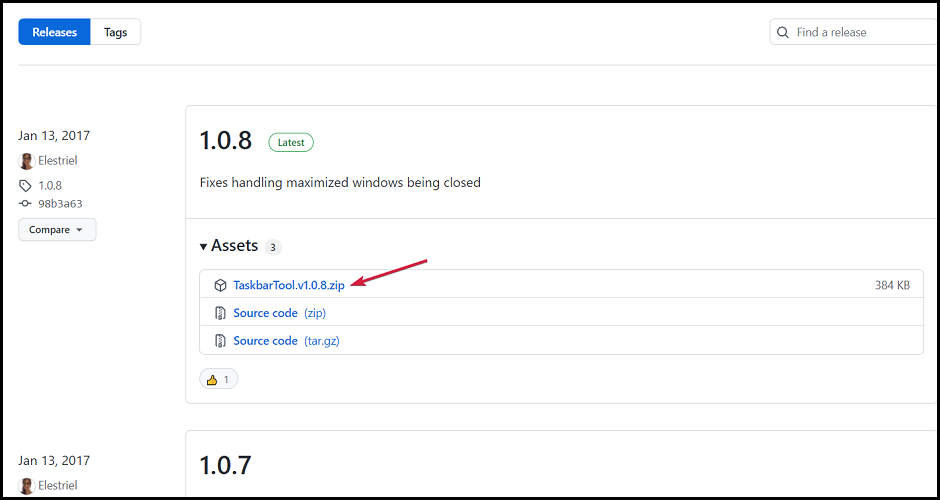
- Download TaskbarTools.
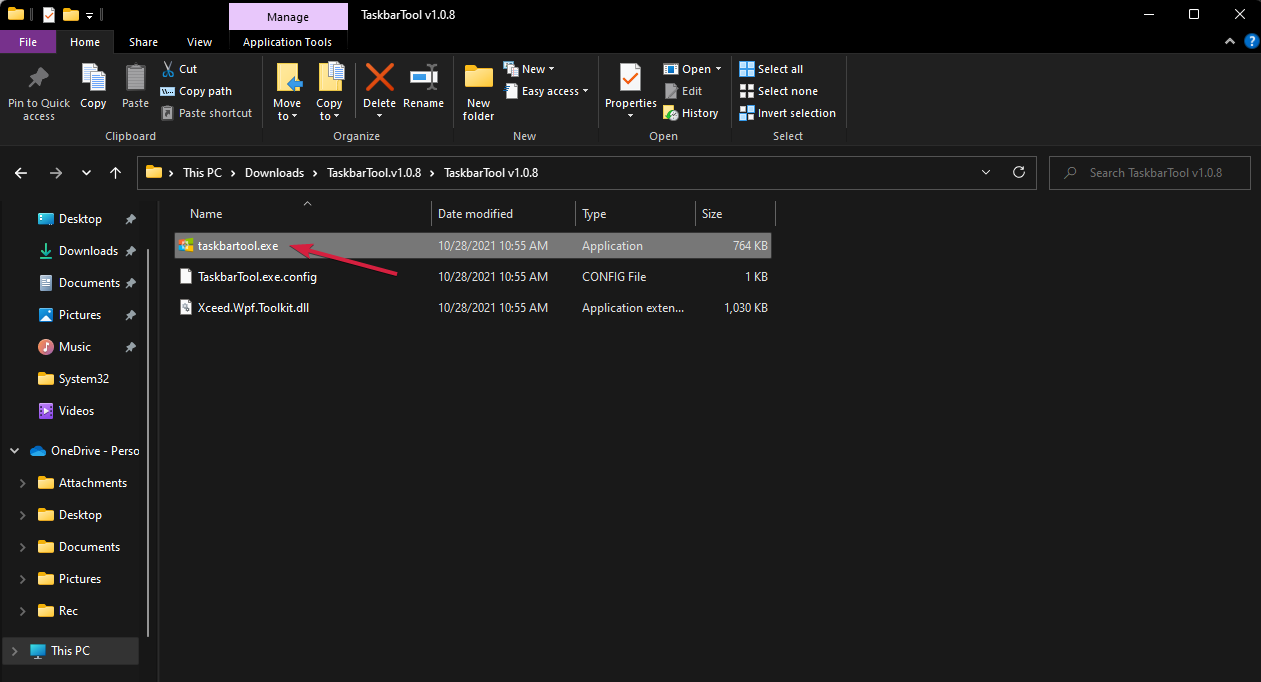
- Extract the Zip file and click the executable file to run the app.
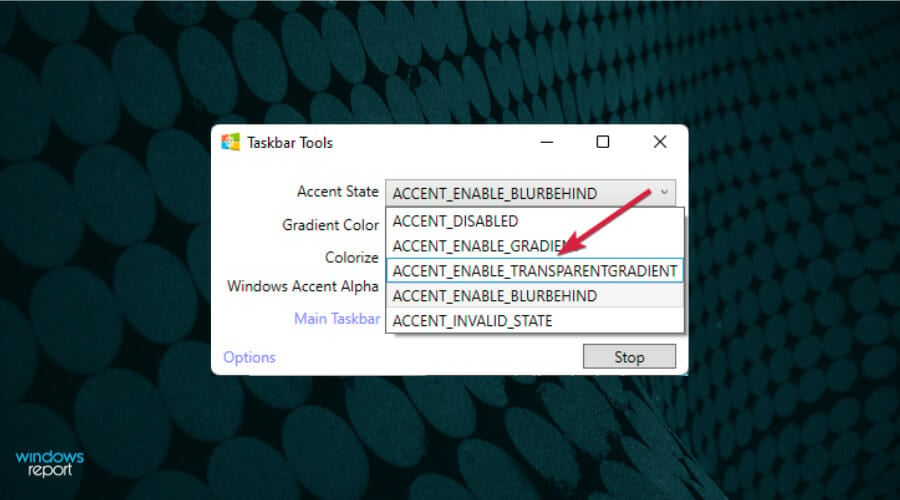
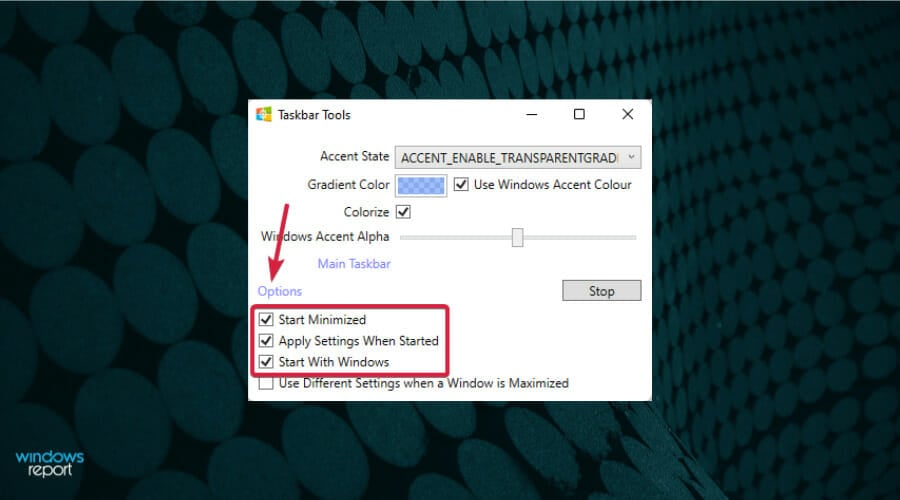
- Set the Accent State to ACCENT_ENABLE_TRANSPARENTGRADIENT.
- Click on Options, then check the Start minimized, Apply Settings When Started, and Start With Windows options, and uncheck the last one.
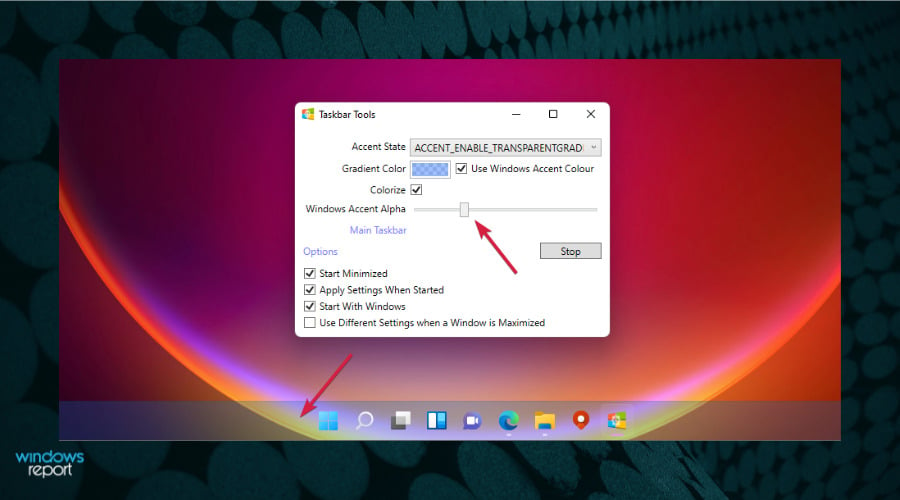
- Now, toggling the Windows Accent Alpha switch to the left and right will determine the level of transparency of the taskbar. Of course, you can also play with all the other settings like the background color and change the Accent state as you prefer.
TaskbarTools is a small free tool that allows you to customize the taskbar to your liking, change its color, and more.
And although its latest version dates from 2017, we tested it on Windows 11, and it worked flawlessly. The great thing about this tool is that you can see the changes in real time. So, if other options for a Windows 11 transparent taskbar are not working, you know which app to go for.
Make the Taskbar transparent with Classic Shell
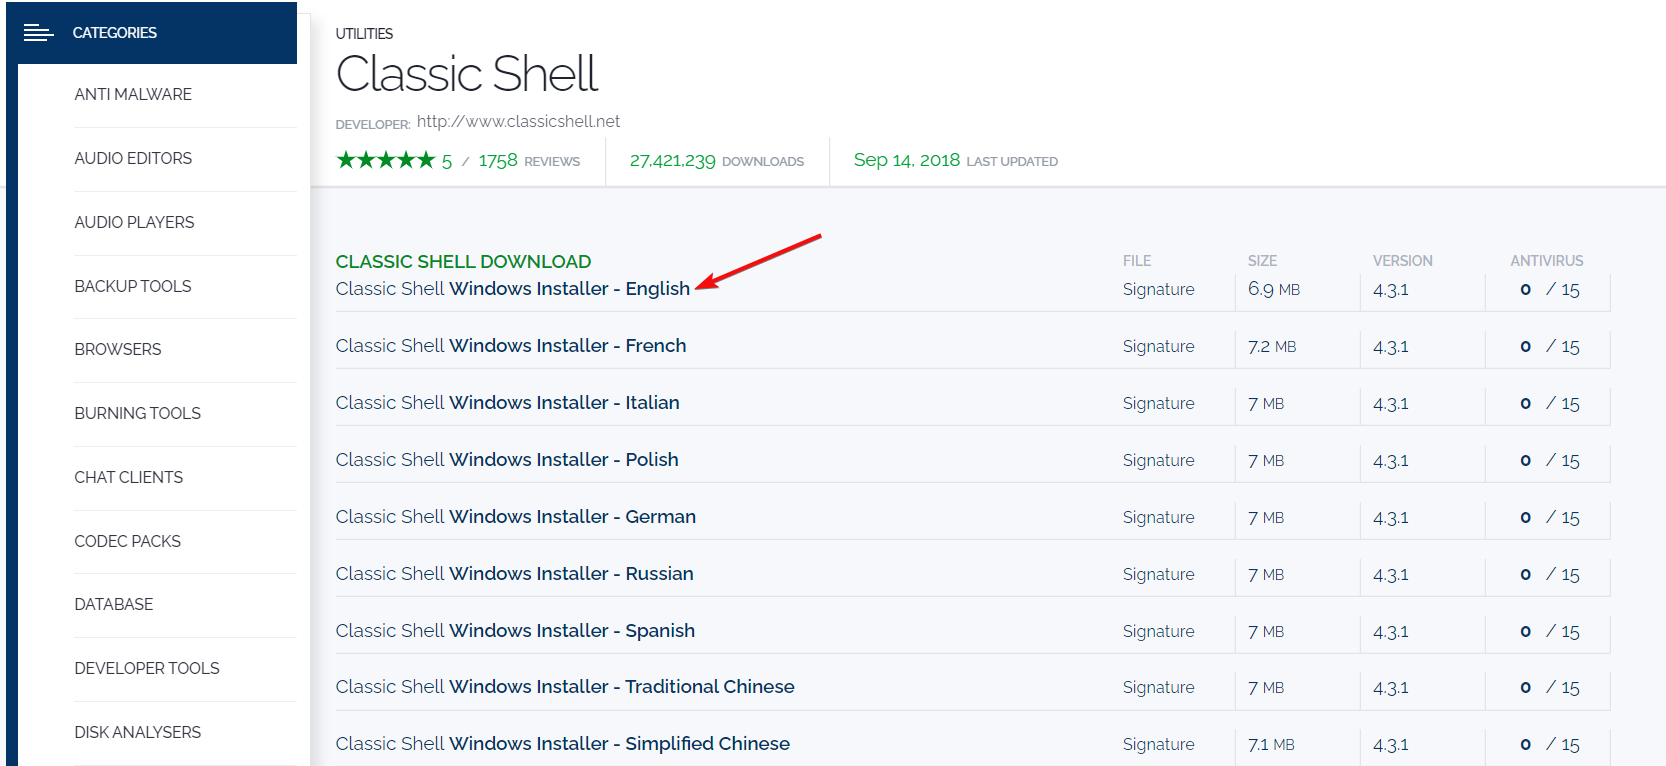
- Download Classic Shell and then install it.
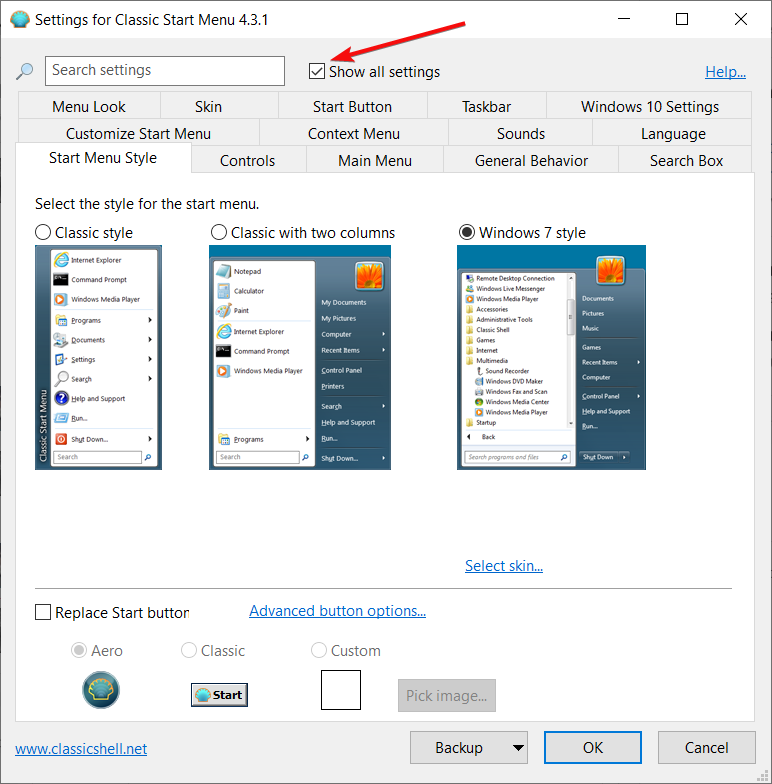
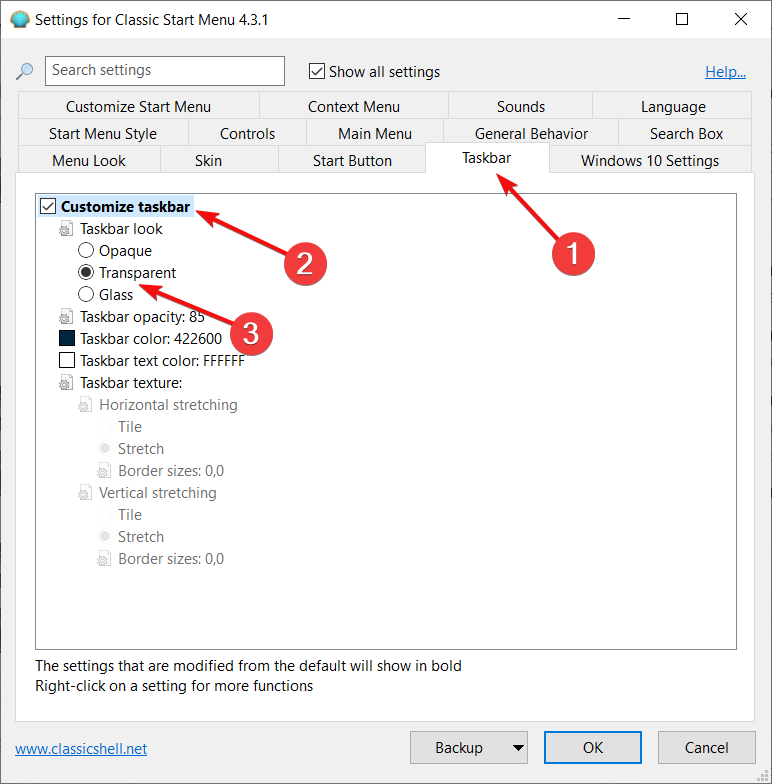
- After the installation, start the app and check the Show all settings.
- Click on the Taskbar tab, check the Customize taskbar box, and click on the Transparent option right below.
- You will see the effect immediately, so you can play with all the other options of the app and see what they do.
- Finally, click the OK button to acknowledge the changes.
Classic Shell has been stopped from development in 2017, but it still works perfectly, so that you might give it a try.
Is there a transparent theme for Windows 11?
There are hundreds of themes available on Microsoft’s official website, and all of them are free to download.
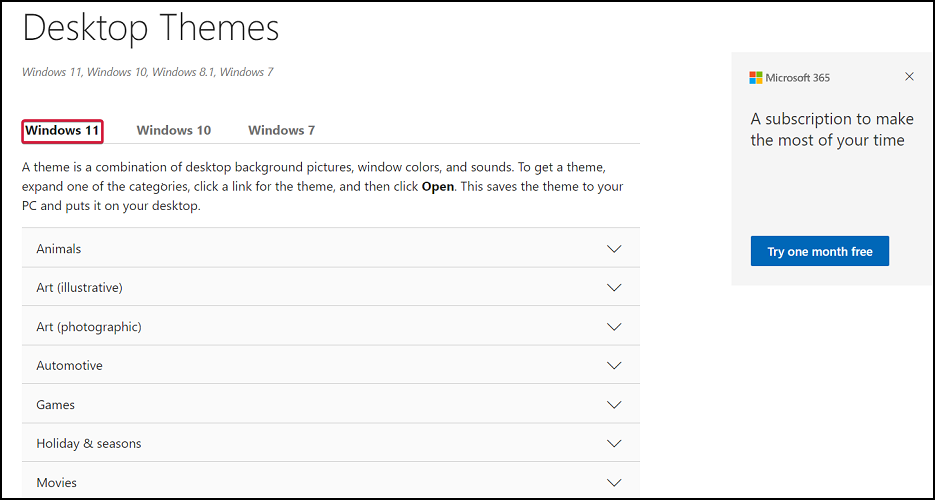
Unfortunately, there isn’t a transparent theme available for your Windows 11 device. The only feature you can make transparent is the taskbar using one of the apps above.
But if you think about it, it would be hard to navigate your PC if your menu would be transparent. Having the taskbar transparent is an interesting effect that doesn’t affect how you use your PC.
The icons are still at the bottom of the screen; you can access them with a single click.
However, Microsoft understands the need to personalize your device, be it your computer, tablet, or smartphone, so make sure to check all their available themes on the official website or on the new store.
Also, we recommend you explore some amazing wallpapers that will go perfectly with the taskbar by looking at the best desktop 4K wallpapers to customize your device.
These are the easiest ways to achieve this cool effect where your taskbar icons float on top of the background.
And before you leave, do find out how to disable transparency effects in Windows 11, a route taken by many. If that doesn’t work, revert the changes.
We hope that this guide helps you enjoy Windows 11 a bit more. If you have any questions, feel free to use the comments section below, and we’ll get back to you.
Как мы все знаем, в Windows 11 значительно улучшен дизайн пользовательского интерфейса, включая панель задач. Он расположен по центру на нижней панели. Но у нас все еще есть некоторые методы, которые помогут вам настроить панель задач в Windows 11.
Персонализировать элементы панели задач
По умолчанию на панели задач расположены следующие элементы: меню «Пуск», «Поиск», «Просмотр задач», «Виджеты», «Чат», «Edge» и «папка». Если вам нужно настроить, какие элементы будут отображаться на панели задач, выполните следующие действия:

- Поиск Панель задач в поле поиска и нажмите Настройки панели задач;
- Под Персонализация, Вы можете переключить кнопку на право решать, какой элемент отображать на панели задач;
Персонализировать поведение панели задач
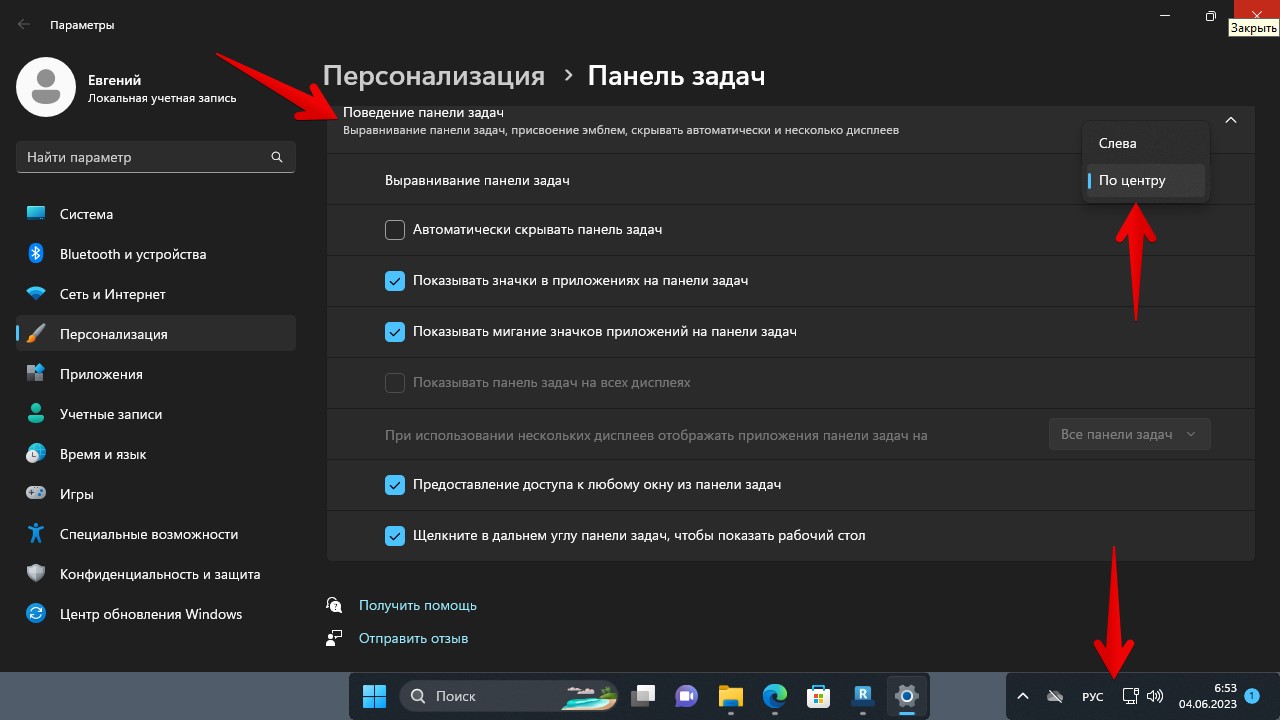
За исключением персонализации элементов панели задач по умолчанию, у нас также есть возможность настроить поведение панели задач для управления выравниванием панели задач, значками и отображением.
Измените выравнивание панели задач влево.

- Поиск Настройки панели задач и щелкните по нему;
- Прокрутите вниз до Поведение панели задач и левый в выпадающем меню справа;
- Панель задач будет слева.

Изменить цвета панели задач
Если мы хотим заменить синий цвет Microsoft по умолчанию для панели задач, мы можем изменить цвета на ваш любимый, выполнив следующие действия:

- Нажмите Цвета под Персонализация;
- Переключитесь на вкладку Темный режим для Windows 11;
- Выберите цвет под Цвет акцента;
- включать Показывать акцентный цвет на Пуске и на панели задач;
- Выбранный цвет вступит в силу.
Конечно, мы продолжим изучать больше настроек и персонализации для панели задач Windows 11, чтобы помочь нам повысить эффективность нашей работы и сделать нашу повседневную работу более интересной.
Панель задач Windows 11. Делаем красивее и удобнее
Привет, сегодня мы рассмотрим как в Windows 11 сделать панель задач максимально компактной и похожей на панель из MacOS, которая будет показывать закрепленные значки без лишних полос справа и слева, при этом, если открыть какое-нибудь приложение, то панель автоматически растянется, а если закрыть, то наоборот сузиться.
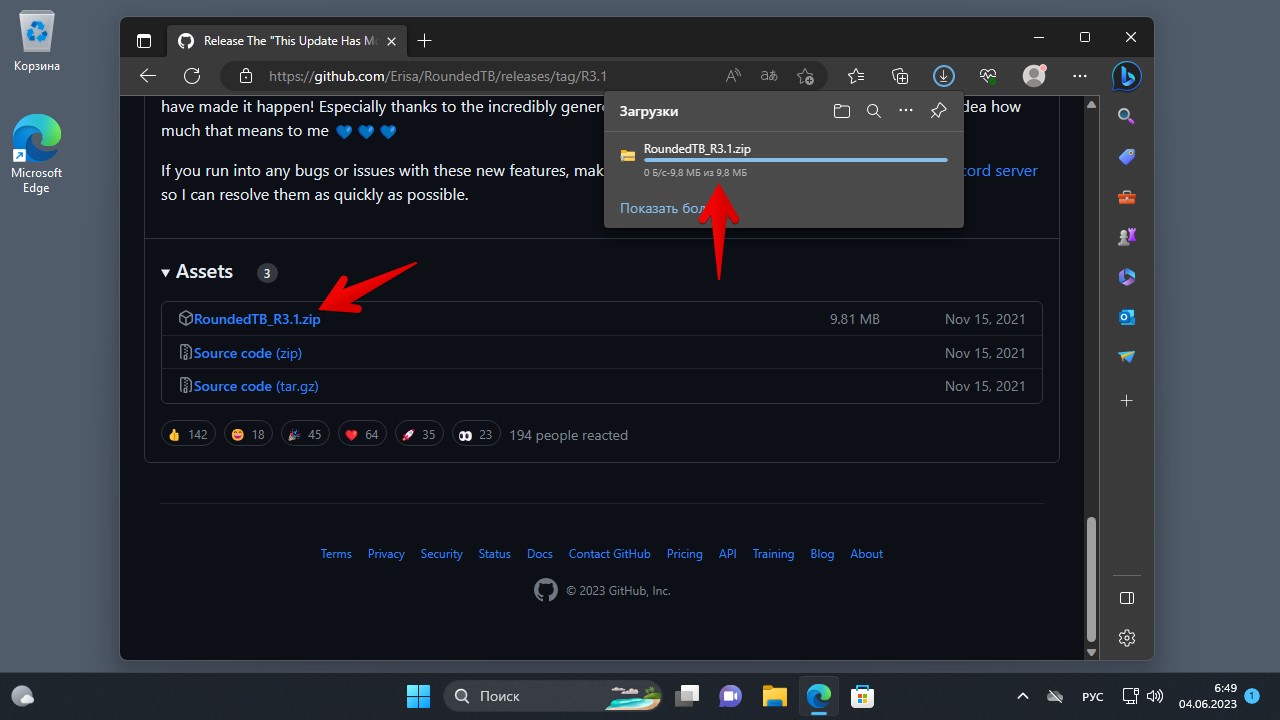
Итак, чтобы преобразить панель задач, необходимо зайти на сайт github и скачать небольшую утилиту — RoundedTB.
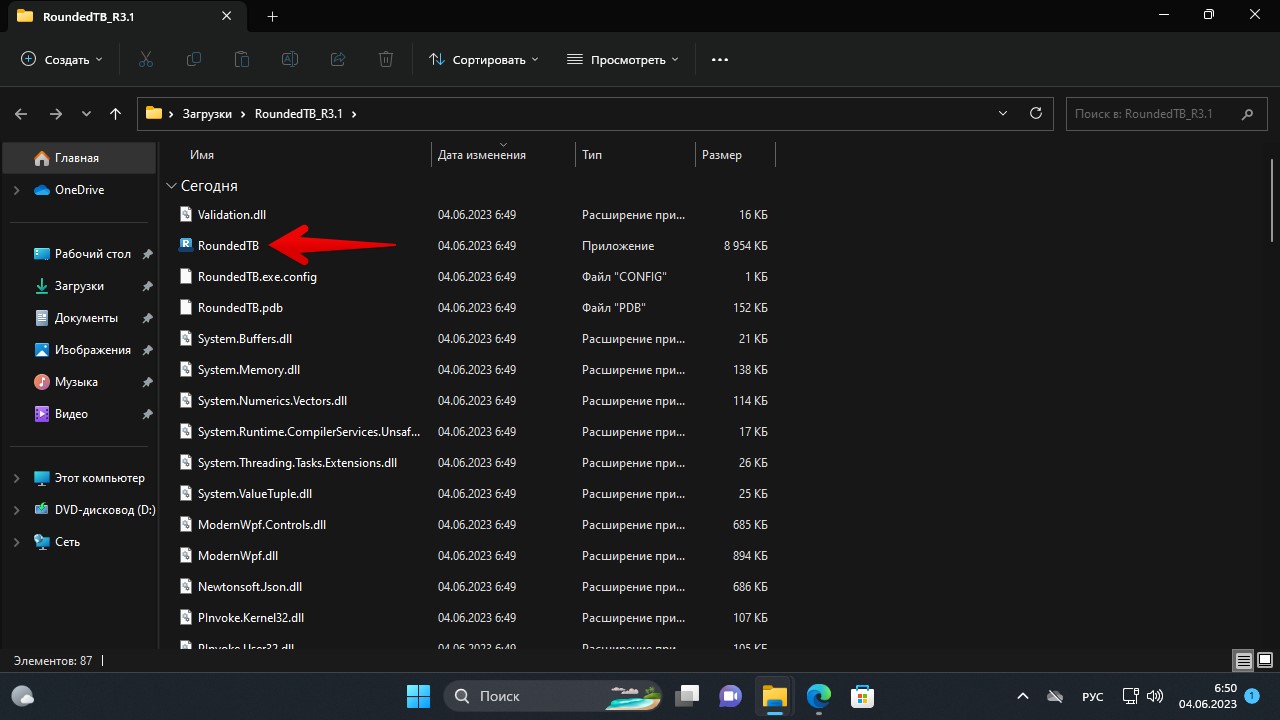
После скачивания извлекаем и запускаем утилиту.
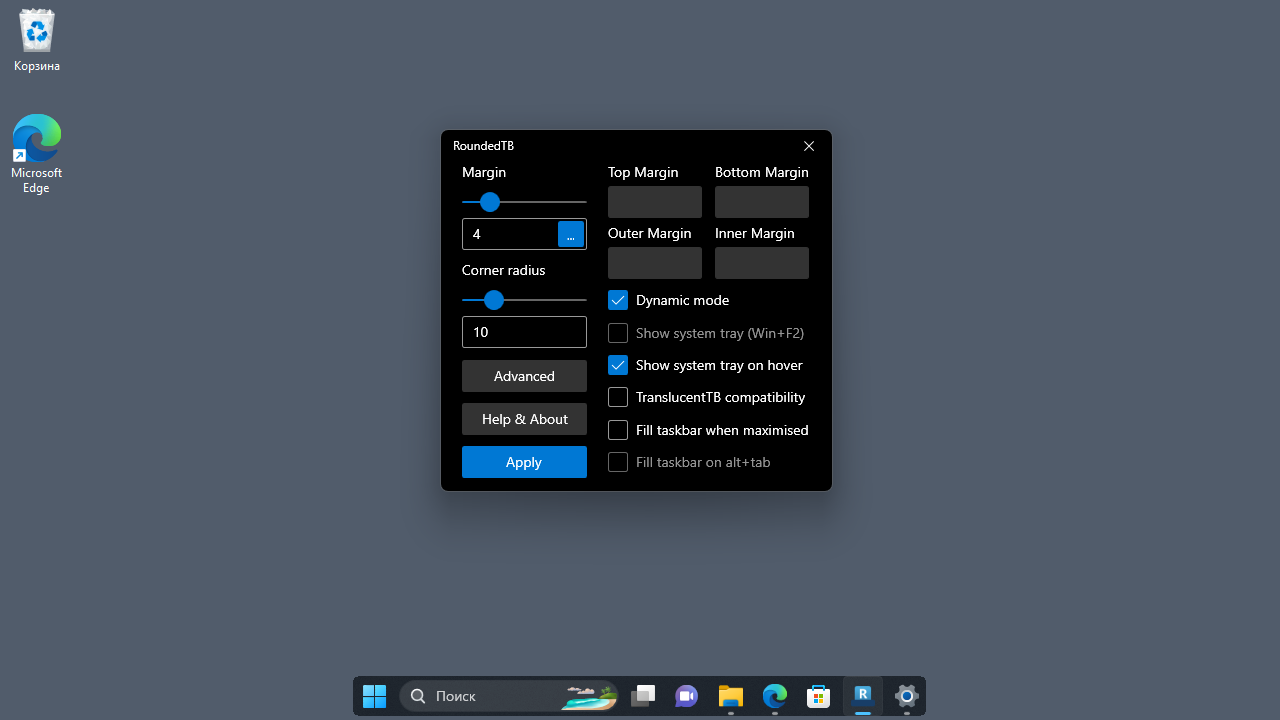
После запуска, нажимаем на кнопку «Advanced» (расширенные), чтобы отобразить дополнительные настройки.
Ползунок «Margin» — отвечает за обрезку панели задач со всех сторон, делая его, как бы парящим, либо можно настроить отдельно обрезку для четырех сторон, «Top Margin» отвечает за обрезку сверху, «Bottom Margin» — за обрезку снизу, «Left Margin» и «Right Margin» за стороны слева и справа соответственно.
Ползунок «Corner radius» отвечает за округление краев панели задач.
Для того, чтобы убрать полосы слева и справа, т.е. сделать панель задач компактной, отмечаем галочку на пункте «Dynamic mode».
Чтобы отображать системный трей справа, выбираем пункт «Show system tray», а чтобы показывать трей только при наведении мыши на правый нижний угол, отмечаем галочку «Show system tray on hover».
В программе RoundedTB имеется баг при первом запуске, который, возможно, исправят в следующих версиях — при выборе настройки «Show system tray», системный трей может не появится справа, для исправления этого бага переходим в «Параметры» Windows 11 в раздел «Персонализация», а затем в раздел «Панель задач», в пункте «Поведение панели задач» и в параметре «Выравнивание панели задач» меняем положение на «Слева», а затем обратно «По центру», после этого все лишние полосы пропадут и панель задач будет работать как надо.
И последнее, чтобы запускать утилиту при старте Windows 11, щелкаем правой кнопкой мыши на значок «RoundedTB» в трее панели задач, чтобы отобразить всплывающее окно, в котором устанавливаем галочку «Run at sturtup».
В этой публикации, друзья, поговорим о том, как в Windows 11 сделать панель задач прозрачной. Это невозможно с помощью системных средств, но возможно с помощью бесплатной программы-кастомайзера TranslucentTB. Тот факт, что у Windows 11 новая панель задач, существующая в рамках нового системного интерфейса на базе WinUI, никак не касается возможности применения эффектов прозрачности. Такие эффекты системно не применимы и к классической панели задач, реализованной в Windows по версию 10 включительно. Именно для панели задач Windows 10 в своё время и создавалась программа TranslucentTB, но она также применима и к панели задач Windows 11. Давайте посмотрим на возможности этой программы.
Прозрачная панель задач в Windows 11
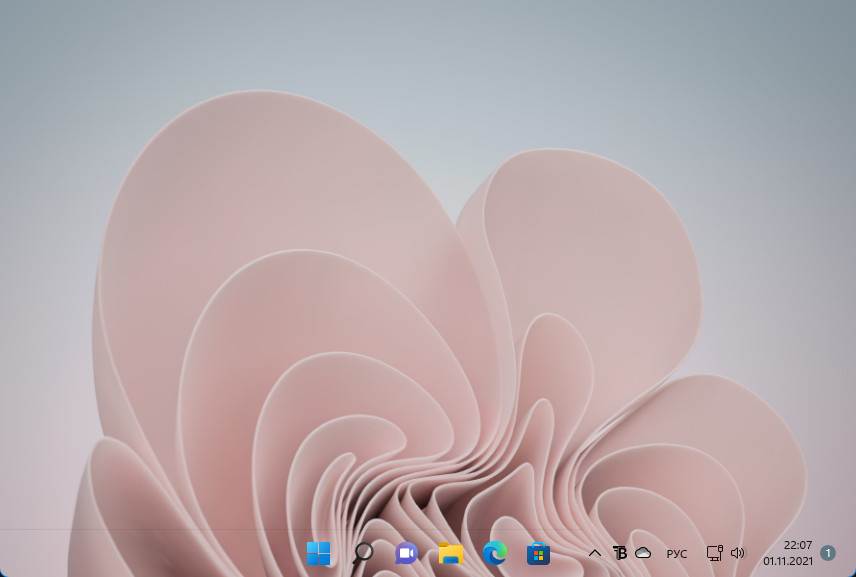
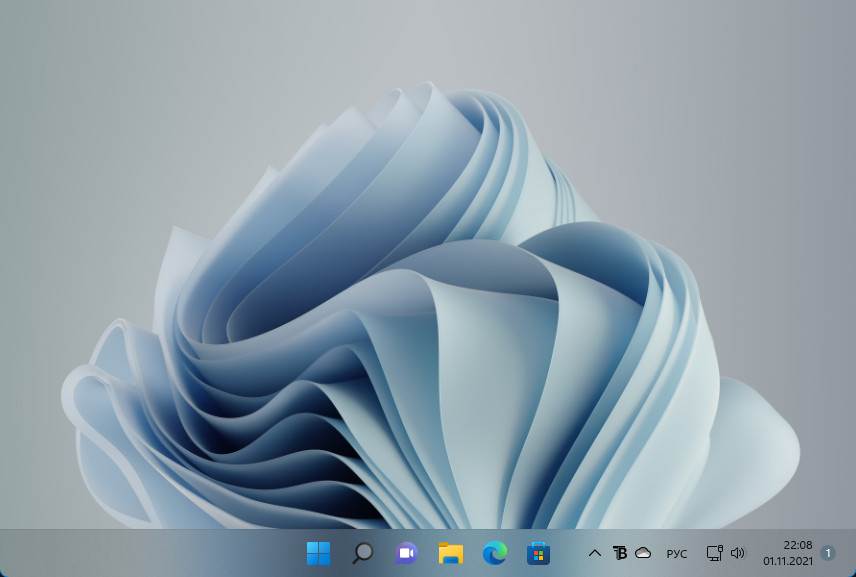
TranslucentTB – бесплатная программа-кастомайзер для панели задач Windows 10 и 11, созданная энтузиастами с GitHub. Программу можно установить как UWP-приложение в Microsoft Store. И можно установить из файла-установщика TranslucentTB.appinstaller, скачанного с GitHub. TranslucentTB может сделать панель задач нужного цвета, заблюреной с эффектом акрила или вообще кристально прозрачной. Кристально прозрачная панель задач неимоверно эффектно смотрится целостно в связке с дизайном Windows 11.
Особенно эффектна полностью прозрачная панель задач в светлых темах Windows 11.
Не менее эффектна в любой теме панель задач с эффектом акрила.
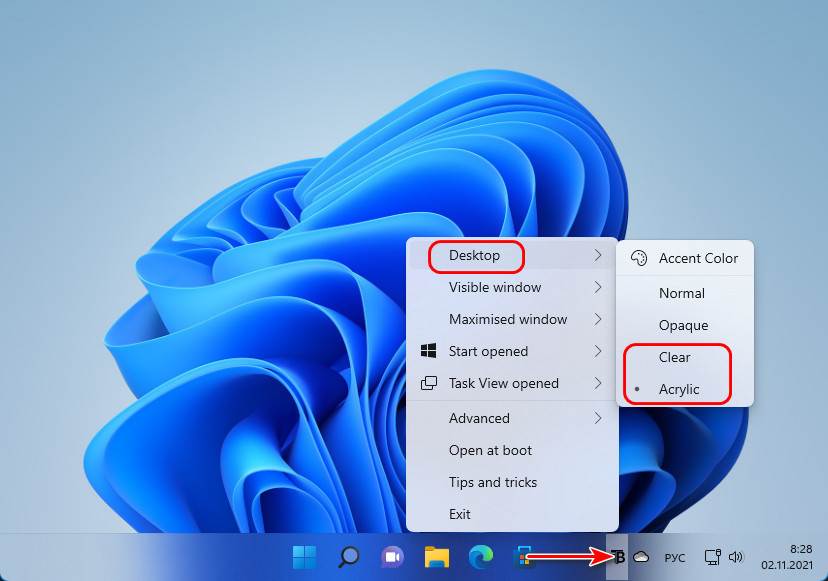
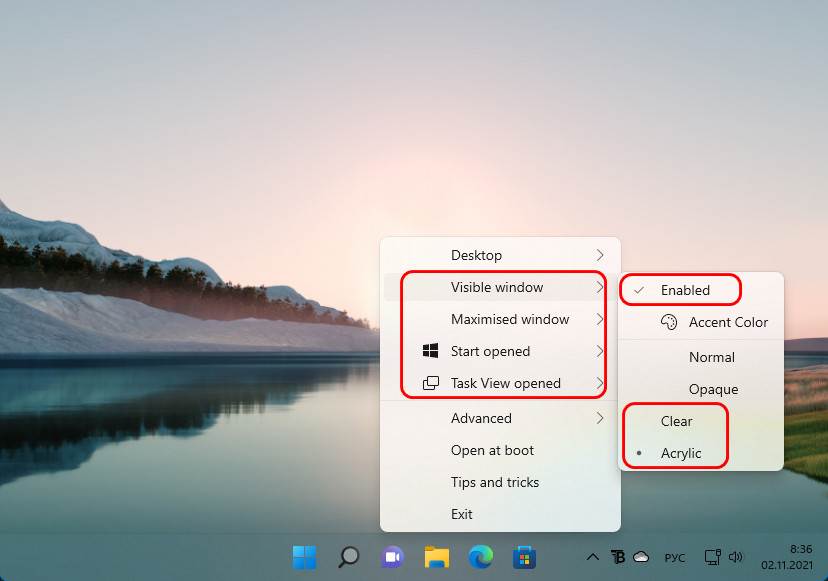
Вот, в частности, такую красоту, друзья, может предложить нам программа TranslucentTB. Программа работает в фоне, настраивается в системном трее. Как сделать панель задач прозрачной в Windows 11? Делаем на значке TranslucentTB в трее клик и для изначального состояния панели задач в режиме Desktop устанавливаем предпочитаемый эффект прозрачности:
- Clear – полностью чистая прозрачность;
- Acrylic – прозрачность с эффектом акрила.
Оформление панели задач может меняться в зависимости от определённых условий. В меню TranslucentTB есть пункты активации и настройки вида панели задач при условии:
- Visible window – отображения окон не в полный экран;
- Maximised window — отображения окон в полный экран;
- Start opened – активного меню «Пуск»;
- Task View opened – активного представления задач.
Можем выбрать каждое из условий, включить его опцией «Enabled» и установить для панели задач эффект прозрачности или акрила.
Но можно использовать и другие эффекты программы:
- Normal – это дефолтный вид панели задач Windows 11;
- Opaque – это непрозрачный вид с цельной заливкой цветом. Вид изначально чёрного цвета, цвет подбирается с помощью опции «Accent Color».
Вот это, друзья, как сделать панель задач прозрачной в Windows 11.
