Hi all,
My setup involves both a Google Workspace subscription (previously named GSuite — used for my email and documents) and an iCloud subscription (for photos/videos taken with my iPhone/iPad). The problem is that they both use the Pictures folder and I don’t want to sync all of my iCloud media to Google.
If you download the newest version of iCloud from the Windows Store you do not get the option to choose the directory where it will sync your media, it will always choose your Pictures folder:

Instructions on installing the new version of iCloud can be found here: https://support.apple.com/en-au/HT201391
INTRODUCING: SYMBOLIC LINKS
In Windows you can create something called a symbolic link or symlink for short. They act similar to shortcuts, which are files that are linked to another place on your PC. Symlinks are more like a wormhole from one place to another on your PC, whenever you put files into one folder, Windows will teleport that file to a different folder. You can use symlinks to change where iCloud media ends up on your PC.
SYMLINKS: PREPARATIONS
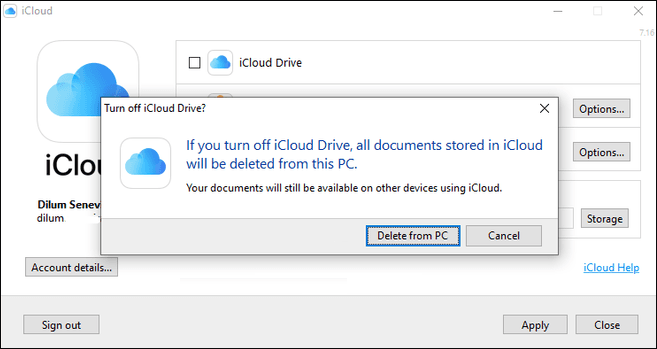
Before we create the symlink, we need to make sure iCloud isn’t syncing photos. If it is, disable this in iCloud and delete the iCloud Photos folder inside the Pictures folder:
TAKE NOTE: ORIGIN FOLDER
Before we start, we need to note the origin folder location. This is the the start of the wormhole, where files enter before being transported. Take note of your origin folder (including the quotation marks!) which is:
«C:\Users\YOUR-USERNAME\Pictures\iCloud Photos»
TAKE NOTE: DESTINATION FOLDER
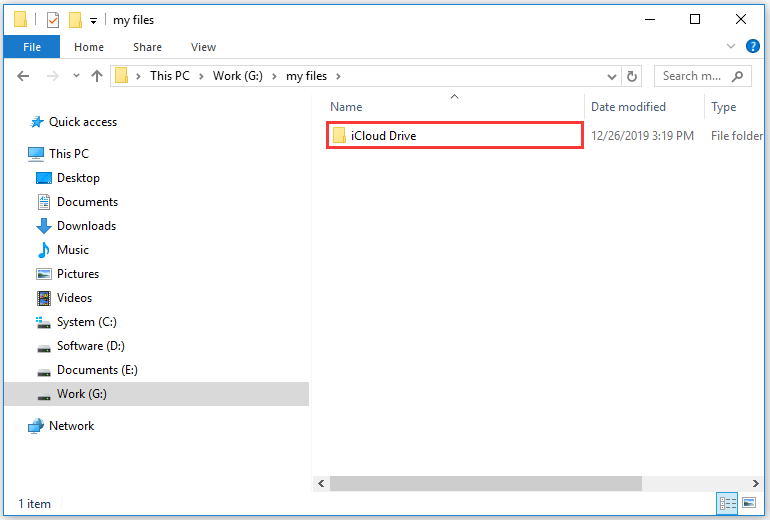
Now browse to the location you’d like the files to be stored within and either create a new folder or choose an existing folder — we’ll call this the destination folder in this example. When the files enter the wormhole, they’re transported to this location. Keep this window open so we can use it a little later.
CREATING THE SYMBOLIC LINK
- Locate the Windows Key in the bottom-left corner of your keyboard (between the Ctrl and Alt keys)
- Hold down the Windows Key and tap R on your keyboard
- In the Run box that we just opened, type the word cmd and press enter
- A black command terminal will appear. Type the following text: mklink /D
- Hit the spacebar to put a space after the /D
- Enter the origin location from above, including the quotation marks
- Now hit the spacebar to put a space after the origin location
- We now need to enter the destination location. You can type this by hand (with quotation marks) but you can also simply drag and drop this folder into the command prompt to enter the entire destination location
- Now just hit enter and you’re done! Here’s what my example looks like:
You can now open iCloud and tick the checkbox next to Photos and click the Apply button to start syncing. The iCloud program thinks it’s putting them in the iCloud Photos folder within the Pictures folder but if you check your destination folder you’ll find all of the content from your iCloud account starting to appear.
I hope this helped some people out there, if you have any feedback on my writing or teaching style, please feel free to leave a comment and I’ll take your advice onboard.
Thank you all,
Eli
-
Home
-
Partition Magic
- How to Move iCloud Drive to Another Location on Windows 10
By Vicky |
Last Updated
You may have set up the iCloud Drive on your Windows 10 computer. But an annoying thing occurs that the space of primary partition (containing the folder) is running out, and you hope to change the folder’s location to get rid of this issue. In this post, MiniTool shows the tutorial on changing iCloud Drive location.
iCloud Drive on Windows 10
It is easy to get up and running iCloud Drive on Windows computers. Some Windows 10 users have created the iCloud Drive folder on their Windows 10 computers. But the annoying thing is that the folder uses the primary partition on PC and the partition space is running out.
This situation needs to be paid attention to, especially when the primary partition is related to system. As we know, when the system-related partition gets full, this will slow down computer performance.
To remain the iCloud Drive folder on your Windows 10 computer and free up the primary partition simultaneously, you can move the folder to another location.
Change iCloud Drive Location on Windows 10
To move the iCloud Drive folder to another location on Windows 10, you can refer to the following steps.
Step 1: Click the iCloud icon on your computer taskbar and then click the Open iCloud Settings button to launch the iCloud app.
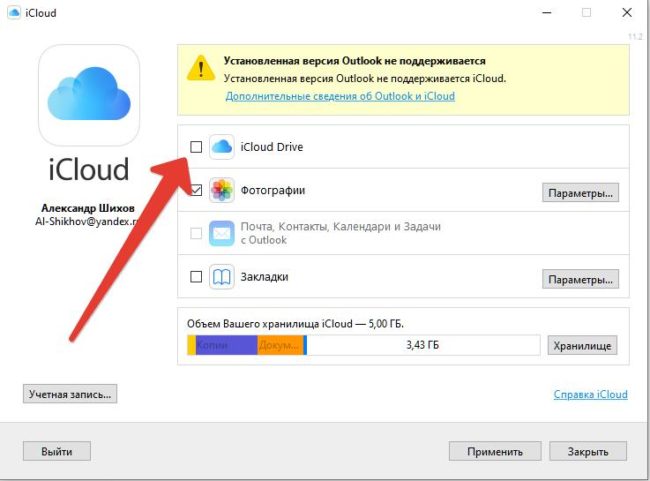
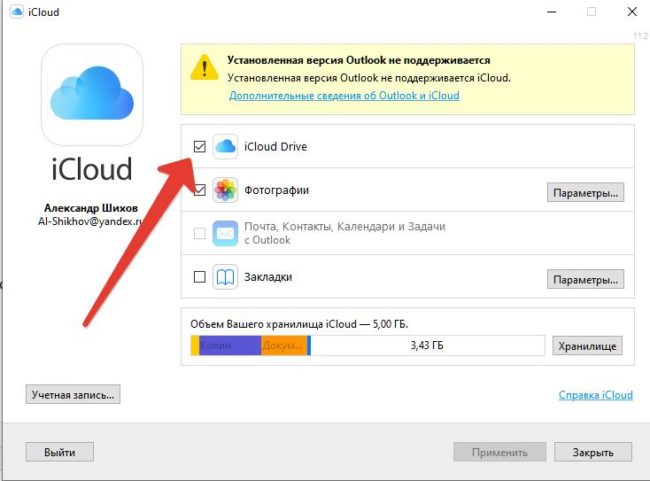
Step 2: On the iCloud app window, uncheck the box next to iCloud Drive and then click Apply to confirm this change.
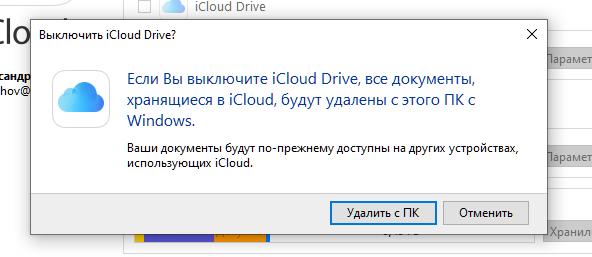
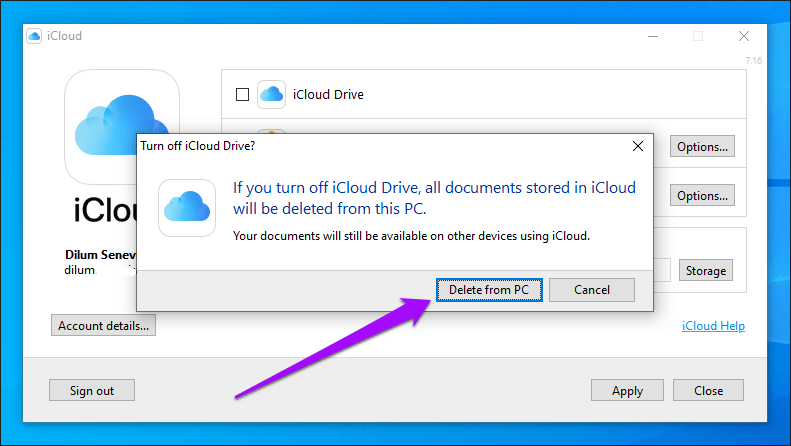
Step 3: On the confirmation window, click the Delete From PC button.
Note: This step will delete all the downloaded iCloud Drive files and folders from your computer. But these files and folders remain on your iCloud account. If you are worried about the data loss caused by this operation, you can create a backup before clicking the Delete From PC button.
Step 4: After removing the files and folders from your computer, please close the iCloud app.
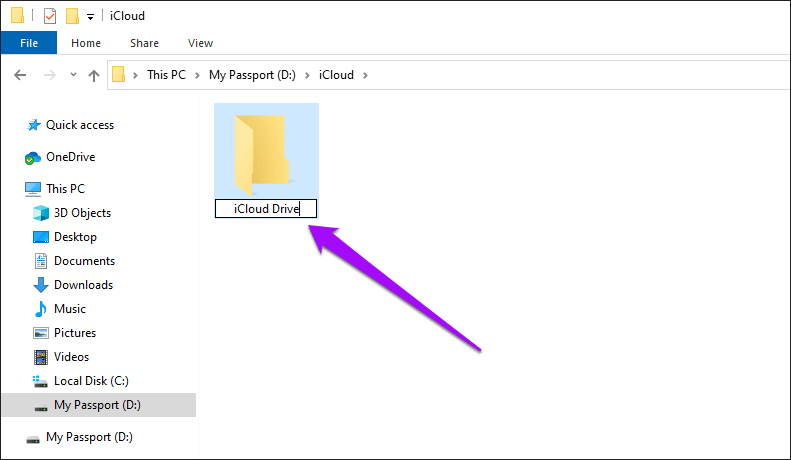
Step 5: Create a new iCloud Drive folder in a different location. You can create it on the local disk or the external storage device, such as USB. Note that it is not recommended that you use the root of the local drive or partition for the new iCloud Drive folder location.
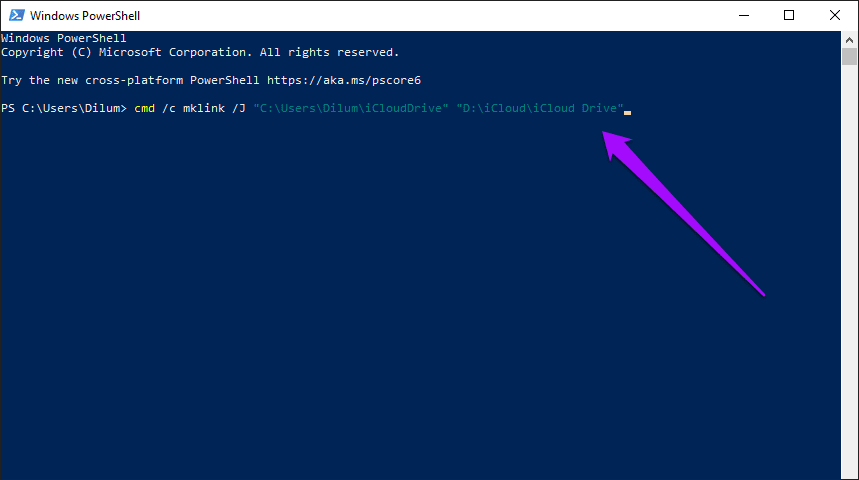
Step 6: Make some changes via Windows PowerShell.
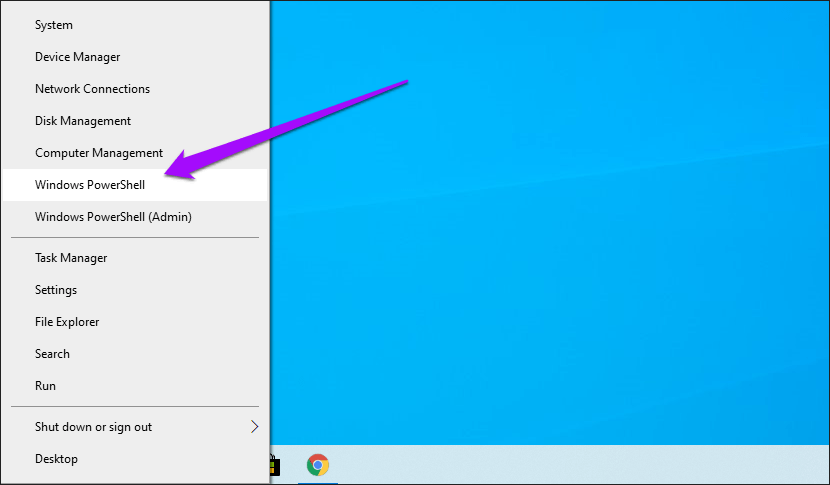
- Open Windows PowerShell by right-clicking the Start button and then choosing Windows PowerShell from the list.
- Once the Windows tool is launched, type the command: cmd /c mklink /J “C:Users*iCloudDrive” “#” (* refers to your Windows username; # refers to the actual path of your created iCloud Drive folder location, like “D:iCloudiCloud Drive”) and then hit the Enter key to run this command.
Step 7: Repeat Step 1 to launch iCloud app and then check the box next to iCloud Drive and click Apply.
After the above steps, the iCloud Drive files will be downloaded on the new location.
Have you changed iCloud Drive location on Windows 10 successfully? If you are still bothered by running out partition space, you can read the post from which you can get other ways to free up disk space.
Bottom Line
Have you mastered how to change iCloud Drive location on Windows 10? Please leave your feedback to the tutorial in the following comment zone, this may be helpful for other Windows 10 users.
About The Author
Position: Columnist
Vicky is a website editor who has been writing tech articles since she was graduated from university. Most of her articles talk about Windows PC and hard disk issues. Some of her articles also touch on YouTube usage and issues.
During her spare time, she likes to spend time reading, watching videos, and sitting on her Yoga mat to relax.
Suppose you want to change the path of default iCloud location in Windows 10 to point to different partition where you have more storage space. Below guide will provide step by step instructions on how to change the path of default path.
1. Make sure your iCloud backup is turned off from the iCloud app.

2. Delete current iCloud Photos folder from C:\Users\UserName\Pictures\
3. Re-create iCloud Photos folder in C:\Users\UserName\Pictures\
4. Create a link of the folder path to point to external drive or external partition.
mklink /J "C:\Users\USERNAME\Pictures\iCloud Photos" "E:\iCloud\Photo_Backup"The reason I am recreating folder again is that when an iCloud app is installed it has a hidden file that doesn’t show up after you change view to show hidden files. To avoid failure of below command to link to an external path. I just deleted and recreated the folder.
Replace USERNAME with your own username. The above command will create a folder link in your pictures folder that will point to E:\ path.
C:\>mklink /J "C:\Users\USERNAME\Pictures\iCloud Photos" "E:\iCloud\Photo_Backup"Junction created for C:\Users\USERNAME\Pictures\iCloud Photos <<===>> E:\iCloud\Photo_BackupMKLINK [[/D] | [/H] | [/J]] Link Target
/D Creates a directory symbolic link. Default is a file
symbolic link.
/H Creates a hard link instead of a symbolic link.
/J Creates a Directory Junction.
Link Specifies the new symbolic link name.
Target Specifies the path (relative or absolute) that the new link
refers to.5. Once Above steps are completed go ahead and click on check box for Photos to start backing up to external path as shown below:
Click on Photos check box

New popup will open:
Click on the iCloud Photos and Shared Albums checkbox and click on Done.
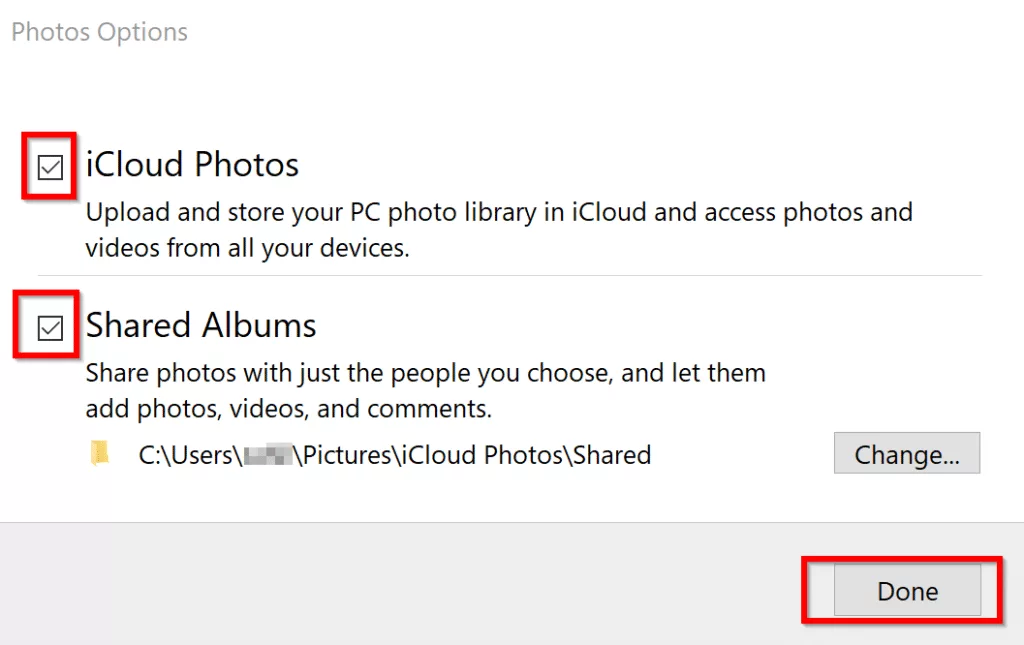
In the iCloud photo app, click on “Apply” button.
This will automatically start creating a Photos folder in iCloud Photos and you will see the folder getting synced with files.

Клиентское приложение облака от Apple для Windows размещает свою папку строго на системном разделе. Когда растет ваше облачное хранилище, эта папка тоже растет, оставляя системе все меньше места. В этой статье мы расскажем как переместить iCloud на диск D.
Устанавливаем клиентское приложение iCloud
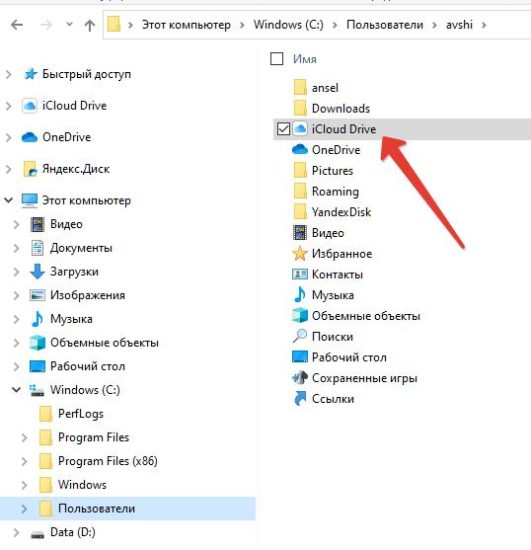
Скачать клиентскую программу для Windows можно по этой ссылке из магазина приложений Microsoft. Сразу после установки и первого запуска в Проводнике появится ярлык iCloud Drive.
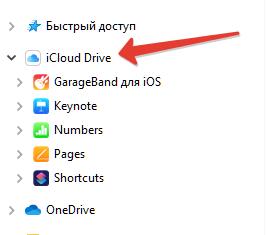
А на диске C появится папка iCloud.
В ней постепенно станут появляться файлы.
Создаем папку облака Apple на диске D
Тут без хитростей. Заходим в стандартный Проводник, в Мой компьютер, диск D. Создаем папку с именем iCloudDrive.
Теоретически можно скопировать ее с диска С.
Но у меня это не получилось, так как нужно было бы остановить в Диспетчере задач все фоновые процессы, связанные с клиентом iCloud.
Выключаем синхронизацию
Чтобы обмануть облачного клиента, нам нужно выключить в Настройках синхронизацию.
После отключения появится сообщение, что все файлы из локальной папки будут удалены.
Соглашаемся, и после окончания процедуры удаления переходим к переназначению папки.
Создаем ссылку для новой папки на D
Теперь главный этап. Мы переназначим папку iCloud Drive с диска C на D. Делается это в Командной строке.

Делать операцию создания ссылки лучше из под прав Администратора. Общая команда примерно такая:
mklink /J «C:\Users\Пользователь\iCloudDrive» «D:\iCloudDrive»
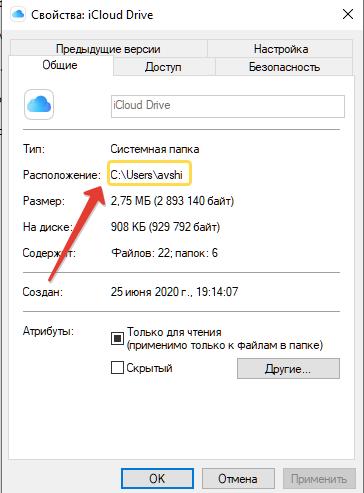
Вместо Пользователь используйте имя текущего пользователя. Его можно подсмотреть в свойствах папки, которую сам клиент создал себе на диске C.
После этого шага, возможно, нужна перезагрузка, но у меня сработало и без нее.
Осталось включить синхронизацию в настройках клиента iCloud, и новые файлы будут уже отправляться на другой, не системный, раздел накопителя.
Перемещение папки облачного хранилища от Apple позволит вам сэкономить место на диске C.
Понравилась статья? Поделитесь!
On Windows 10, iCloud Drive doesn’t let you have any say as to where it downloads and syncs your files. It uses the primary partition on your PC by default. So unless you have lots of free disk space to play around with, this poses an obvious issue. Digging through the various iCloud settings won’t help you out either. Well, I tried.

But don’t worry. You can ‘trick’ iCloud Drive into using another location in Windows 10. And it’s quite easy to do that, as long as you don’t mind the hassle of having to re-download your iCloud Drive files back to your computer.
Let me start by explaining how the process works, and then follow up by walking you through the whole process step by step.
Symbolic Links to the Rescue
A while back, I wrote about changing the default iTunes backup location in Windows 10. For that, I used symbolic links. Otherwise known as symlinks, this native Windows functionality allows you to create a dummy folder and link it to a folder present in another location. The dummy folder works just like a real folder, but any files that are copied into it are actually saved to the folder that it’s linked to. Sounds fascinating, right?
And that’s what we will use to shift the location that iCloud Drive uses to download and sync your data as well. You create a symbolic link for the default iCloud Drive location and point it to a folder present on another partition or drive. That helps you free up space otherwise used by iCloud Drive on the primary partition. Uploads and downloads will function as usual, and you won’t even notice a difference.
Tip:
However, there is a slight catch. Before you create the symbolic link, you must turn off iCloud Drive. That removes all iCloud files from your computer, but they will be re-downloaded later after you re-activate iCloud Drive. You only have to do this once, and the whole process of shifting the default iCloud Drive storage location and recouping space on the primary partition is worth the trouble.
Changing iCloud Drive Storage Location
The following method works for both versions of iCloud for Windows — the traditional desktop app and the Microsoft Store app. You will not have to make any adjustments in the steps below for either version.
Step 1: Click the iCloud icon on the system tray, and then click Open iCloud Settings to bring up the iCloud app.

Step 2: Uncheck the box next to iCloud Drive, and then click Apply.

Step 3: Click Delete From PC on the confirmation box. This will delete all downloaded iCloud Drive files and folders from your computer. Exit the iCloud app afterward.
Note:
Step 4: Create a new folder within the partition or external drive where you want to change the iCloud Drive storage location to. You can insert any name, but I prefer naming it to ‘iCloud Drive’ to prevent confusion.
Note:
Step 5: Right-click the Start icon, and then click Windows PowerShell on the context menu.
Step 6: Make the necessary adjustments to the command below, and then type it into the Windows PowerShell console:
cmd /c mklink /J “C:\Users\username\iCloudDrive” “D:\iCloud\iCloud Drive”
- Replace username with your actual Windows username
- Replace D:\iCloud\iCloud Drive with the actual file path of the new iCloud Drive storage location.
Step 7: Press Enter to execute the command. You should see a ‘Junction created for … ‘ message as confirmation.

Step 8: Relaunch the iCloud app via the system tray, and then re-enable iCloud Drive (check the box next to iCloud Drive, and then click Apply).

Your iCloud Drive files will then start to re-download. You can access them as usual by clicking the iCloud Drive icon within the system tray, and then clicking Open iCloud Drive.
But although the iCloud Drive files and folders do give off the appearance as if they are still present within the same iCloud Drive storage location as before, they are located within the new folder that you created in the steps above.
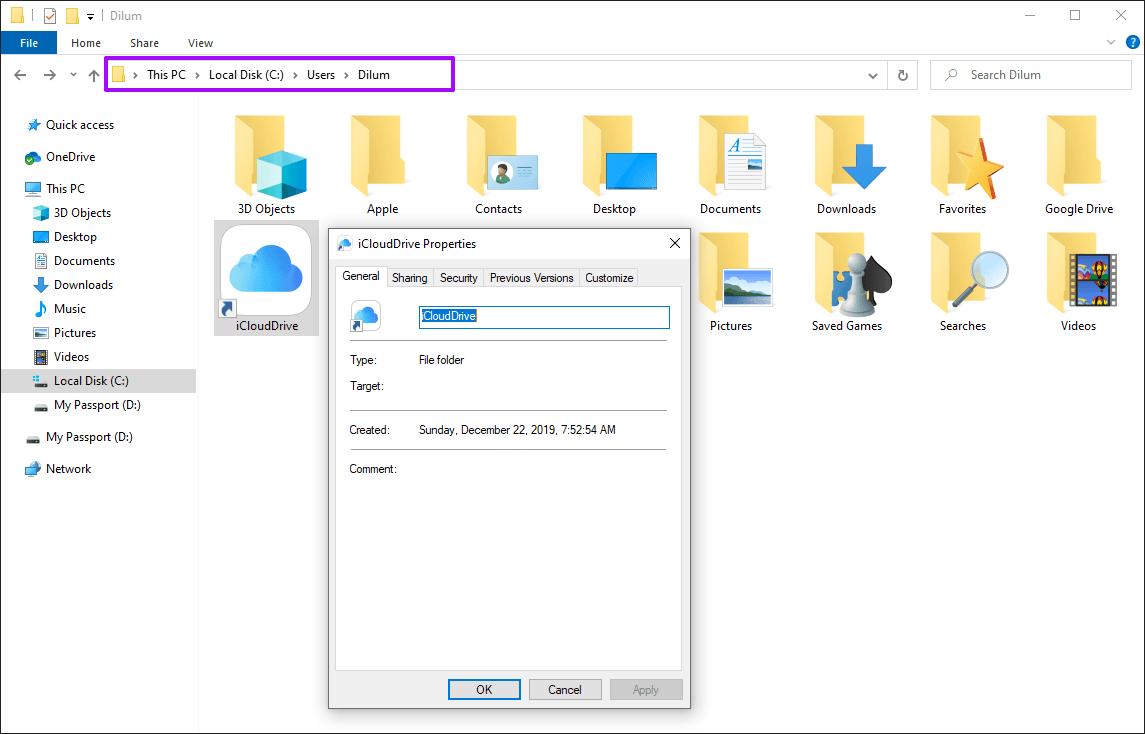
You can confirm this by visiting the default storage location (located within “C:\Users\username”). Right-click the iCloudDrive folder icon (which looks like a shortcut due to its symbolically linked nature), and then click Properties. It won’t relate to the fact that any space is being used.
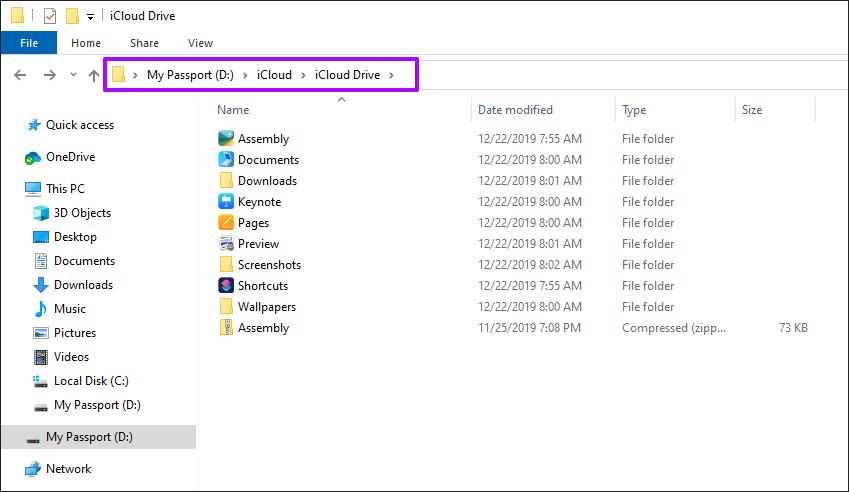
Now, go to the folder where the symbolic link points to, and you should see all of your files located there. The default iCloud Drive storage location is merely mirroring the items present in it.
If you want to go back to using the default iCloud Drive location to store your files and folders, disable iCloud Drive using the iCloud app, and then re-enable it. That should get rid of the symbolically linked folder, and things should be back to normal.
Drives Swapped
If you were close to running out of storage on your primary storage partition, then shifting the iCloud Drive storage location elsewhere will help you save valuable disk space. Yeah — it’s not the most convenient of ways since you have to re-download all of your files. But it sure beats having to spend time trying to scrounge up free space using other means when you can simply get rid of several gigabytes of storage at the very least quickly.
So, did you manage to shift the iCloud Drive storage location without any hitches? Let me know in the comments.
Next up: Are you getting pestered with iCloud notifications? Here’s how to turn them off in Windows 10.