В этой небольшой статье мы покажем, как правильно изменить имя домена Active Directory с
test.com
на
resource.loc
. Вообще говоря, переименование домена Active Directory это не всегда самая лучшая идея. Для больших и сложных инфраструктур AD лучше выполнить постепенную миграцию пользователей, компьютеров и серверов в новый домен. Но и процедура переименования домена вполне рабочая.
Прежде чем начать, убедитесь, что:
- У вас есть актуальная резервная копия контроллеров домена;
- В вашем домене корректно работает репликация и нет критических ошибок контроллеров домена или DNS (проверка здоровья домена Active Directory);
- В вашем домене нет Exchange. Нельзя переименовать домен AD с развёрнутым в нем Exchange (кроме Exchange 2003);
- Для переименования домена нужен уровень не менее Windows Server 2003 (в моем примере функциональный уровень домена и леса – Windows Server 2016).
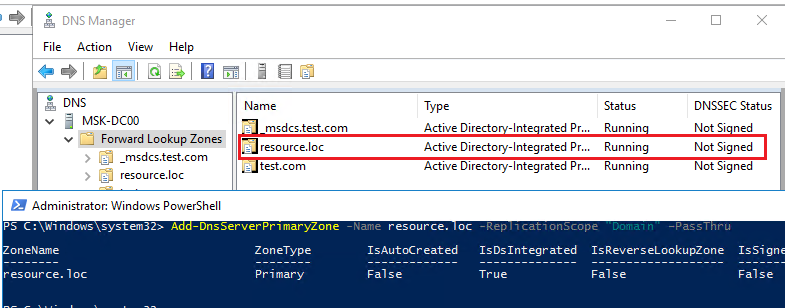
Сначала нужно создать DNS зону нового домена на контроллерах домена. Для этого откройте консоль
dnsmgmt.msc
, создайте новую первичную зону типа Forward Lookup Zone с именем resource.loc и реплицируйте ее по всем DNS серверам в старом домене test.com.
Можно создать новую зону DNS с помощью PowerShell:
Add-DnsServerPrimaryZone -Name resource.loc -ReplicationScope "Domain" –PassThru
Дождитесь окончания репликации новой зоны по всем DC.
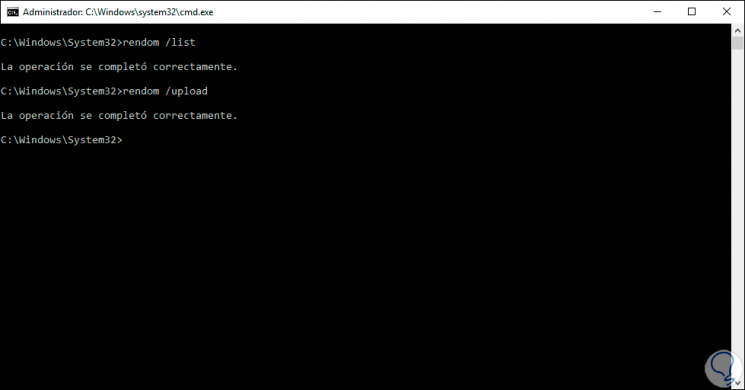
Выполните команду
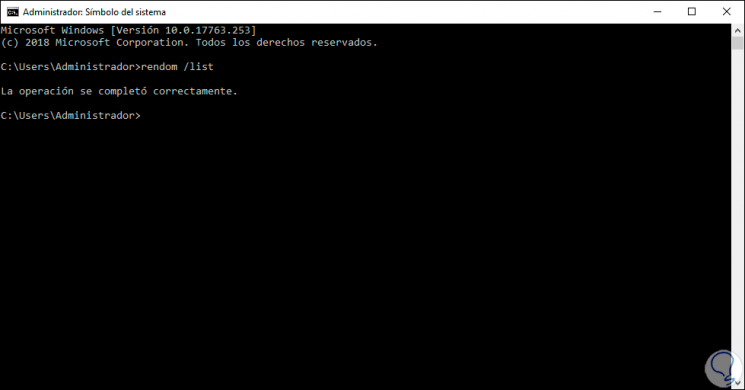
rendom /list
чтобы сгенерировать файл Domainlist.xml с текущей конфигурацией леса AD.
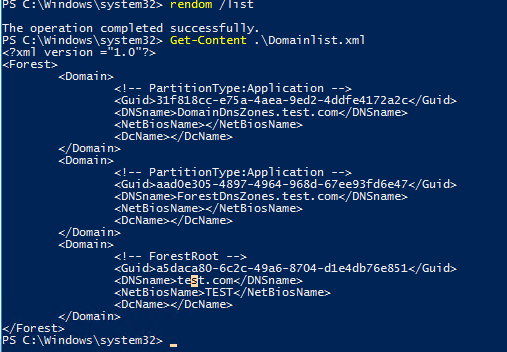
Get-Content .\Domainlist.xml
<Forest>
<Domain>
<!-- PartitionType:Application -->
<Guid>31f818cc-e75a-4aea-9ed2-4ddfe4172a2c</Guid>
<DNSname>DomainDnsZones.test.com</DNSname>
<NetBiosName></NetBiosName>
<DcName></DcName>
</Domain>
<Domain>
<!-- PartitionType:Application -->
<Guid>aad0e305-4897-4964-968d-67ee93fd6e47</Guid>
<DNSname>ForestDnsZones.test.com</DNSname>
<NetBiosName></NetBiosName>
<DcName></DcName>
</Domain>
<Domain>
<!-- ForestRoot -->
 <Guid>a5daca80-6c2c-49a6-8704-d1e4db76e851</Guid>
<DNSname>test.com</DNSname>
<NetBiosName>TEST</NetBiosName>
<DcName></DcName>
</Domain>
</Forest>
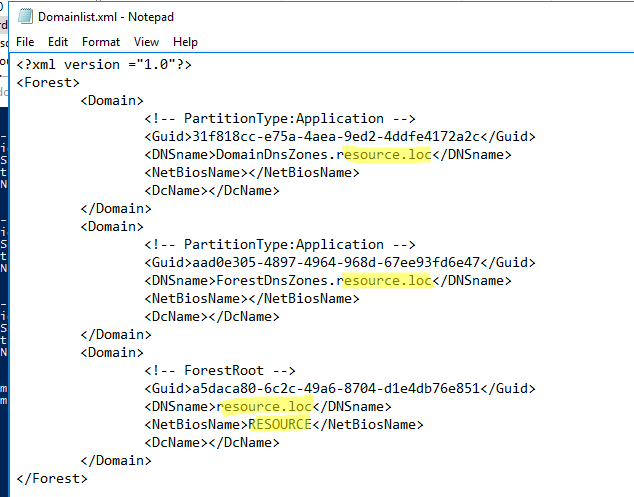
Откройте файл Domainlist.xml на редактирование и замените все имена старого домена на новый:
Notepad .\Domainlist.xml
Сохраните файл и выполните команду:
rendom /showforest
Данная команда покажет какие изменения будут внесены в конфигурацию.

Следующая команда загрузит файл Domainlist.xml с новой конфигурацией разделов AD на контроллер домена с FSMO ролью Domain naming master:
rendom /upload

После этого блокируются любые изменении в конфигурация леса AD
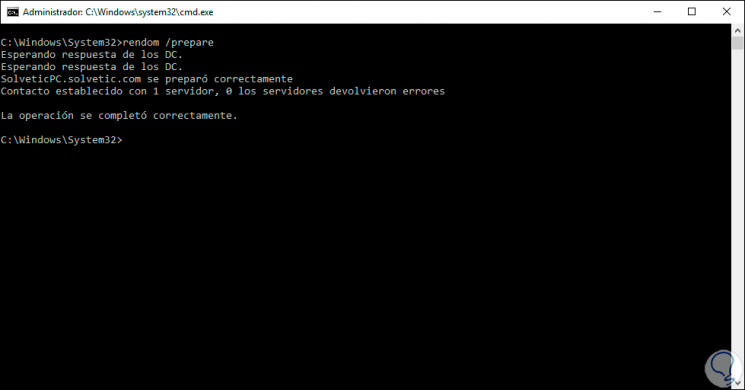
Следующая команда
rendom /prepare
проверит доступность всех DC в лесу и проверить их готовность к переименованию.
Убедитесь, что эта команда не вернула ошибок.
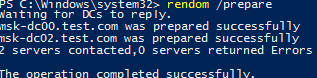
Waiting for DCs to reply.
msk-dc02.test.com was prepared successfully
msk-dc00.test.com was prepared successfully
The operation completed successfully.
Следующая команда выполнит переименование домена (контроллеры домена некоторое время будут недоступны и автоматически перезагрузятся, чтобы применить новые настройки):
rendom /execute
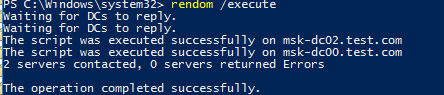
Waiting for DCs to reply.
The script was executed successfully on msk-dc02.test.com
The script was executed successfully on msk-dc00.test.com
2 servers contacted, 0 servers returned Errors
The operation completed successfully.
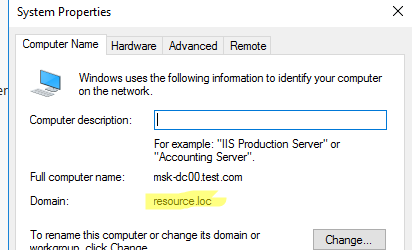
Проверьте, что в свойствах DC теперь указано новое имя домена. Обратите внимание, что полное имя компьютер осталось старым.
Выполните следующую команду, чтобы обновить привязки GPO:
gpfixup /olddns:test.com /newdns:resource.loc
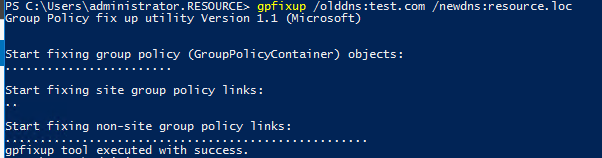
Group Policy fix up utility Version 1.1 (Microsoft)
Start fixing group policy (GroupPolicyContainer) objects:
Start fixing site group policy links:
Start fixing non-site group policy links:
gpfixup tool executed with success.
Затем обновите NetBIOS имя домена:
gpfixup /oldnb:TEST /newnb:RESOURCE
Следующая команда удалит из AD ссылки на старый домен:
rendom /clean
Разблокируйте конфигурацию домена:
rendom /end
Теперь нужно вручную добавить новые имена на каждом контроллере домена и сделать их основными:
netdom computername %COMPUTERNAME%.test.com /add:%COMPUTERNAME%.resource.loc
netdom computername %COMPUTERNAME%.test.com /makeprimary:%COMPUTERNAME%.resource.loc
И перезагрузить DC:
Shutdown –f –r –t 0
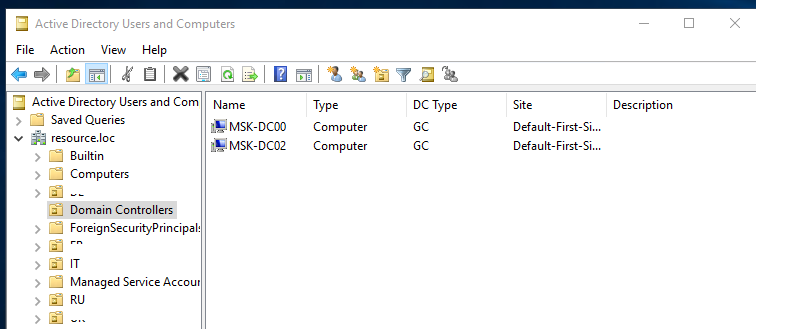
Запустите консоль ADUC (dsa.msc) и проверьте, что она подключилась к новому имени домена, а вся структура OU, пользователи и компьютеры остались на месте.
Осталось сменить “Full computer name” на всех компьютерах и серверах в домене. Для добавления компьютеров в домен можно использовать команды выше.
Обратите внимание, что для перенастройки некоторых сервисов (CA, Failover Clusters) на новый домен придется выполнить дополнительные шаги.
После окончания процедуры переименования домена обязательно проверьте состояние репликации и ошибки на DC (ссылка была выше).
In this article, I will tell you how to rename the domain name in Windows Server 2019, Active Directory Domain name renaming, although not an ordinary situation, occurs in cases such as changing the name of companies, changing hands or merging companies. Windows Server 2000, which cannot be used in Windows Server 2003, We will use the Rendom Tool for Domain Rename, which we can use with XNUMX. This tool NetBIOS domain name renaming is not supported in any version of Exchange Server. Do not forget to take a backup of the server before starting the process.
As per our scenario, we will perform the following steps to change our domain name from SERKANDURAN.LOCAL to KEFE.LOCAL.
- Creating a DNS Zone for the New Domain
- Rendom configuration for Domain Rename
- Group Policy New Domaine Gpfix command
- Changing the Domain Controller FQDN (Fully Qualified Domain Name)
Now we can move on to our actions.
System Properties current domain name You can check your name.
Playing Server Dashboard- DNS Manager We will start with the Zone creation process.
Picture-1
Forwar Lookup Zones right click on New Zone Let’s make the choice.
Picture-2
On our Zone Type screen, Primary zone and “Store the zone in Active Directory” We continue by choosing.
Picture-3
Active Directory Zone Replication Scope section and “To all DNS servers running on domain controllers in this domain”We leave the option as default and continue.
Picture-4
Name area I enter my kefe.local domain name that we want to change as DNS zone.
Picture-5
Dns Zone creation process Finish We’re done with the selection.
Picture-6
I have DNS zone named kefe.local.
Picture-7
We can proceed to the rename process with the Rendom tool, which is the next step. We need to create a report describing the domain name. To do this, let’s open the CMD (command promt) window random / list type and press enter.
Picture-8
When I enter the user profile, DomainList.xml is one of the files that we can open with notepad and access. This file contains domain configuration, Application and Domain partition information as seen below.
Picture-9
At the same time, we see the places on the file where we need to make changes regarding our new domain name. We will specify DNSName, NetbiosName for the new domain name.
Picture-10
We make the domain name change on the file and save it. I don’t make any changes to the name or extension of the file afterwards.
Picture-11
Now, we will upload the changes we have made in the DomainList.xml file to the Domain Controller machine, which has the Domain Naming Master Role. For this process color /upload we are using.
Picture-12
To verify whether all Domain Controller machines in the environment are ready and whether communication can be established. color /prepare We send the command RPC (Remote Procedure Call).
Picture-13
The next step is to check whether the Domain Controllers in the environment are ready for the name change with the Rendom /excute command, and we perform the domain name change on each domain controller.
After this process, all Domain Controller servers that have been modified in the environment are automatically restarted.
Picture-14
If we can see our new domain name after the Domain Controller machine is turned on, it means that there is no error in our operations.
Picture-15
When we check from the System Properties screen, we see that the Domain Name has changed to kefe.local.
Picture-16
In order for the Gpo (Group Policy) settings to work properly with our new domain name, which is our third step in our scenario, you need to run the command I used on the screen.
Picture-17
We perform domain controller hostname renewal for Group Policy settings.
Picture-18
After all these processes, we can now delete our old domain name from Active Directory. For this color /clean We use the command. At the same time, we ensure that the metadata remaining from the old domain related to the Domain Rename process is cleaned.
Picture-19
Since our domain name has changed, our last command color /end.If we do not use this command, we cannot add a new domain or Domain Controller to the Forest environment.
Picture-20
We see that the records for the Domain Controller have been created in the kefe.local zone that we have created by opening the DNS Manager administration panel again.
Picture-21
Now we need to change the DNS Suffix name of the DC machines. After the Domain Controller name change is completed, the last step is FQND (Fully Qualified Domain Name). We can change the FQDN information by removing all the clients in the domain environment from the existing domain, serkanduran.local, and joining them to the new domain. However, the situation is slightly different for Domain Controllers:
Picture-22
System Properties – Change – More Let’s choose.
Picture-23
On the screen that opens, in the «Primary DNS suffix of this computer» section, we change the existing DNS suffix to kefe.local.
Picture-24
After completing this process, we need to restart our Domain Controller.
Picture-25
Finally, let’s open our Active Directory Users and Computers console with the current name, we have completed our rename process without any problems. In this article, I explained to you step by step how to change the name of a domain running on Windows Server 2019.
I hope it was useful. See you in another article…
Your questions on this subject You can ask using the comments field at the bottom.
REFERENCES
www.mshowto.org
TAGs: Windows Server 2019 Domain Rename, Domain Name Change, Rendom Tool
Managing Windows Server 2019 is a task that implies responsibility since any change we make in the domain will have an impact on the entire domain and the objects that are linked to it, edit or delete a shared folder, edit the IP address or change the name The server or domain will simply affect the access of all users unless it is done by a purely administrative task and with prior authorization..
One of the most delicate changes is to rename Windows Server 2019 since this includes creating new zones and making each object in the domain assume the new change in order to have the necessary accesses. Changing the domain name Windows server 2019 is not a frequent task in Windows Server 2019 but it can occur for specific reasons such as:
Reasons to change domain name Windows Server 2019
- Change in the name of the organization
- Company Restructuring
- Domain Errors
TechnoWikis will explain how to change domain name in Windows Server 2019 with a computer whose domain is solvetic.com.
Read before changing domain name
Before proceeding with the change we must take into account some key aspects such as:
- DNS zones: for this process it will be necessary to create the new zone files before renaming the domain so that the name resolution is correct.
- Hosting the domain: at this point we must be clear about where the domain is to be stored.
- Forest functional level: this functional level is required to be equal to or higher than Windows Server 2012 R2.
- Computer name: it is ideal to rename the server name for the configuration of the applications after editing the domain name.
- Authority Certificates (CA: If authority certificates are to be managed in Windows Server 2019, they must be guided by the Microsoft indications available at the following URL: CA Certificates
To rename Windows Server 2019 we must be in the “Domain Administrators†group for permission issues..
To keep up, remember to subscribe to our YouTube channel! SUBSCRIBE
1. Install RSAT Windows Server 2019
The first step to take will be to prepare the operating system for the update, for this we must install RSAT (Remote Server Administration Tool) which is a set of utilities in Windows Server that includes the Server Administrator, the Microsoft Management Console (MMC) add-ons ), Windows PowerShell consoles, cmdlets and providers, and command-line tools to manage roles and features to be executed in the system.
Step 1
To install RSAT on Windows Server 2019 we go to the Server Manager and there we select “Add roles and featuresâ€: 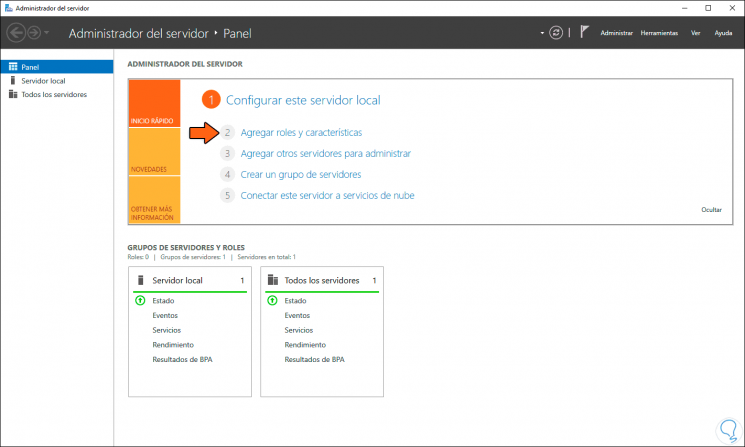
Step 2
The following wizard will be displayed: 
Step 3
We click on Next and in the next window we activate the box “Installation based on roles and characteristicsâ€: 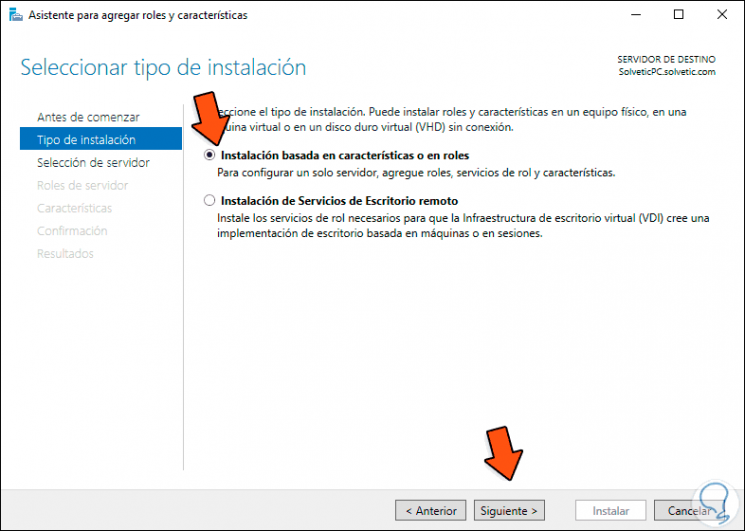
Step 4
Then we select the server where RSAT is to be installed: 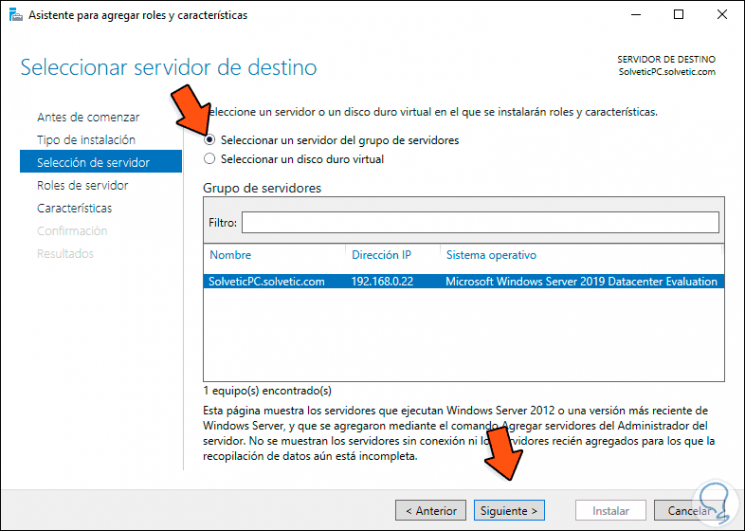
Step 5
In the following window we find the roles of the system: 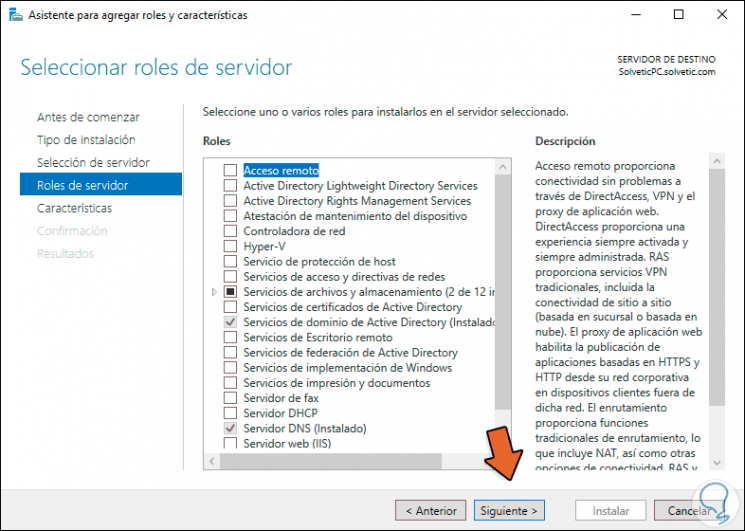
Step 6
In this case we will not add any role, click Next to access the features of Windows Server 2019 and in the following window we activate the “Remote server administration tools†box to add them and the following will be displayed:
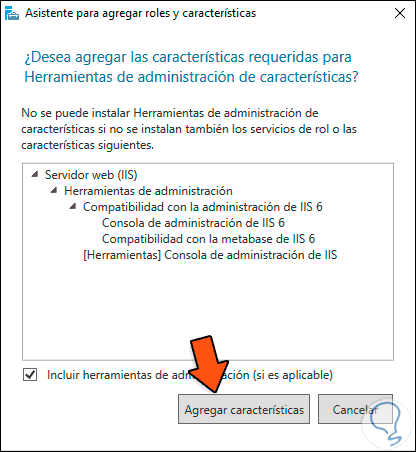
Step 7
We click on “Add features†and validate that the box is active: 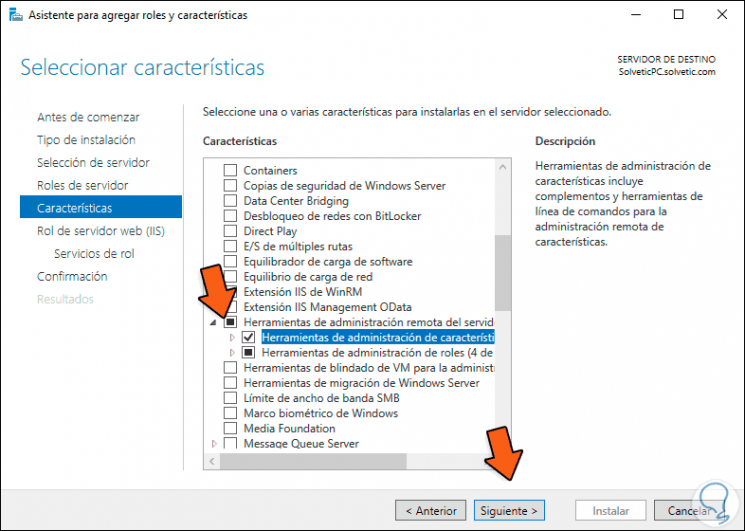
Step 8
We click Next and we can configure some role parameters: 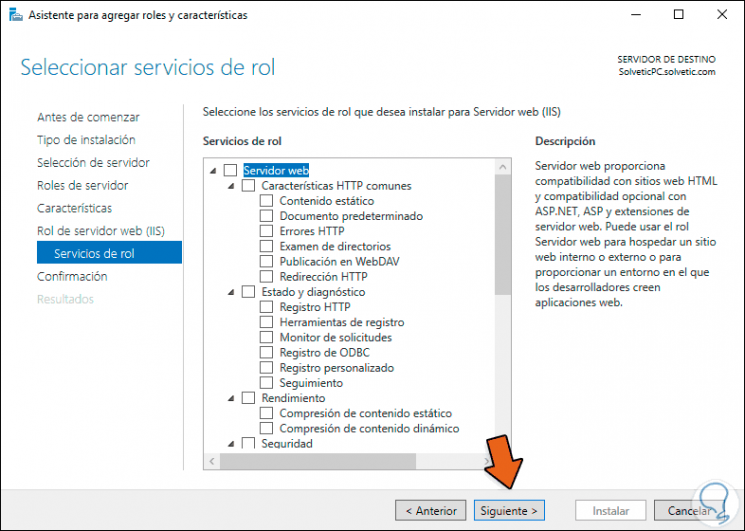
Step 9
After this we will see the following: 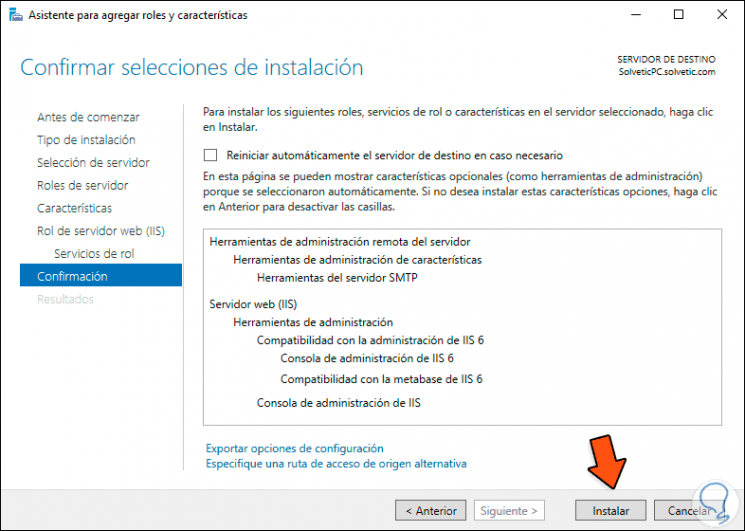
Step 10
We click on the «Install» button to start the RSAT installation process on Windows Server 2019: 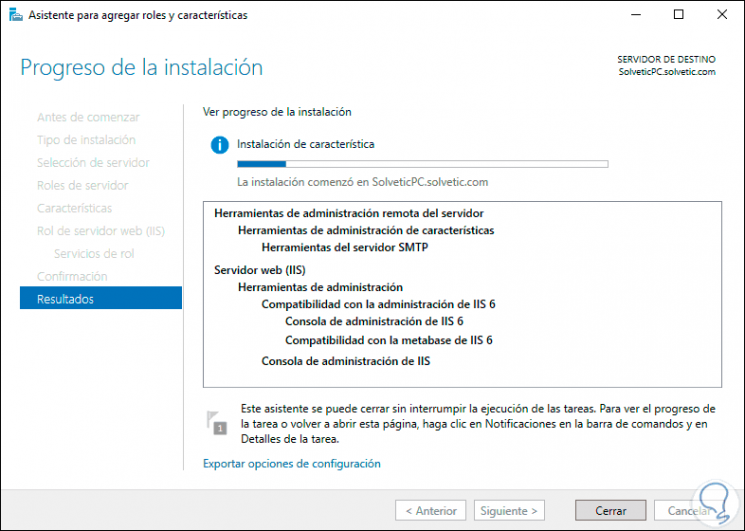
Step 11
When this process ends we will see the following. We click on «Close» to exit the wizard. 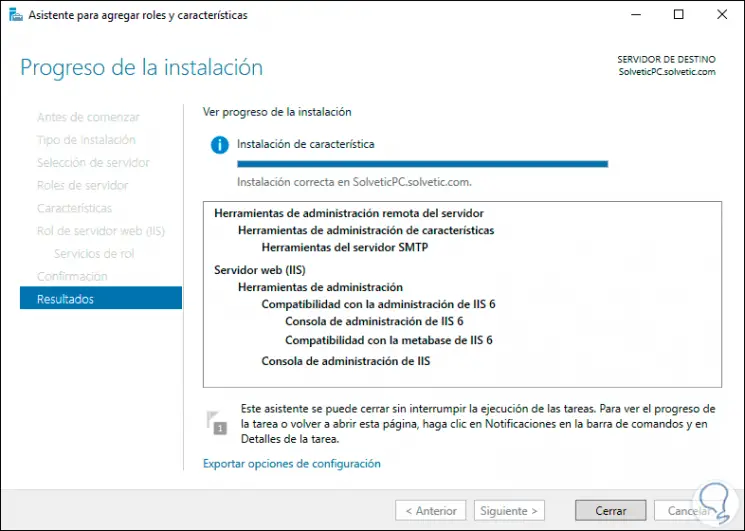
2. Create DNS zone Windows Server 2019
As we mentioned at the beginning, it is required to create a new zone to redirect services.
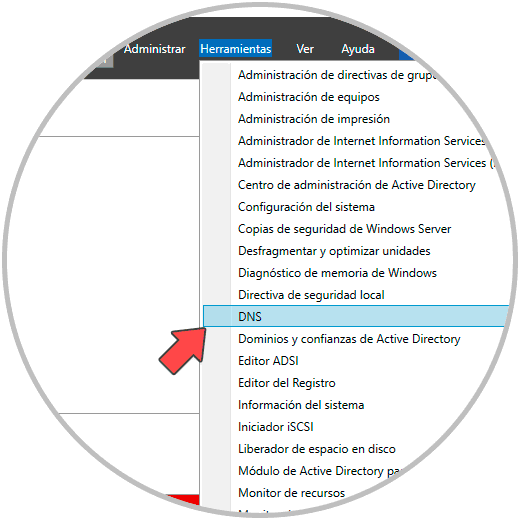
Step 1
To do this we go to the Server Administrator and there we will go to Tools / DNS:
Step 2
In the displayed window we select the server and there we right click on “Direct search areas†to choose the “New zone†option: 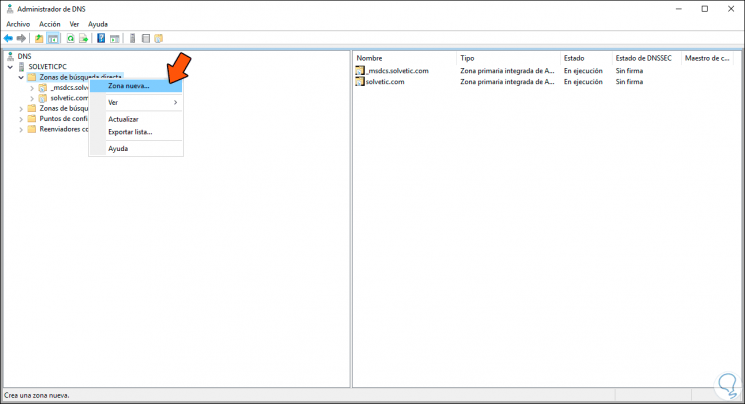
Step 3
The following wizard will be displayed:
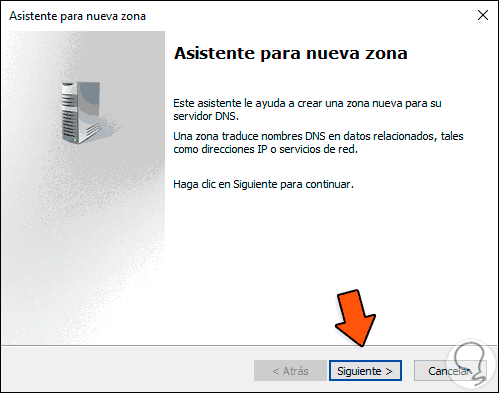
Step 4
We click on Next and in the next window we activate the “Main zone†box:

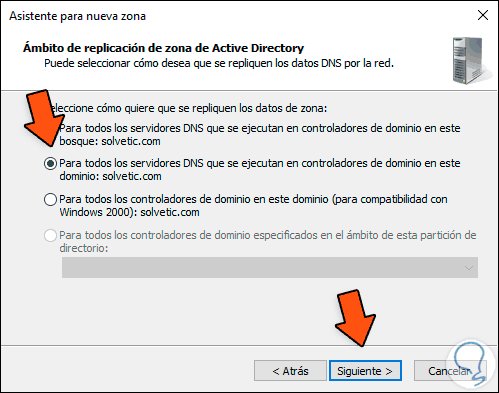
Step 5
We click Next and now check the box «For all domain controllers that run on domain controllers in this domain»:
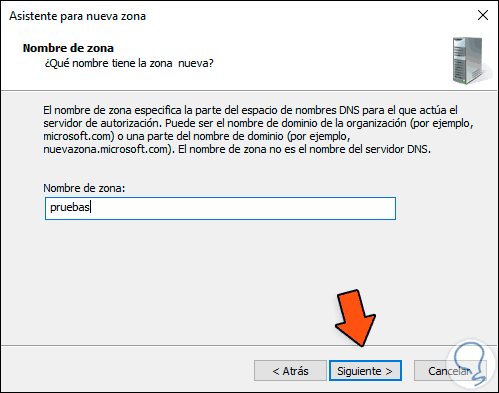
Step 6
In the following window we assign the name of the zone:
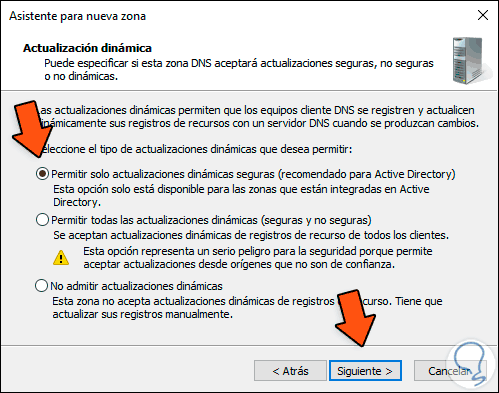
Step 7
We click Next and now we define how to apply the dynamic updates:
Step 8
In the next window we find a summary of the task to be performed:
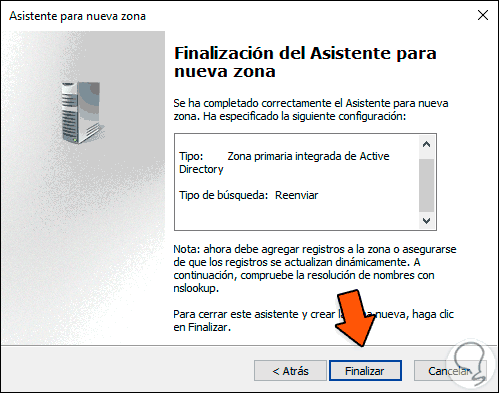
Step 9
We click on «Finish» to complete the process: 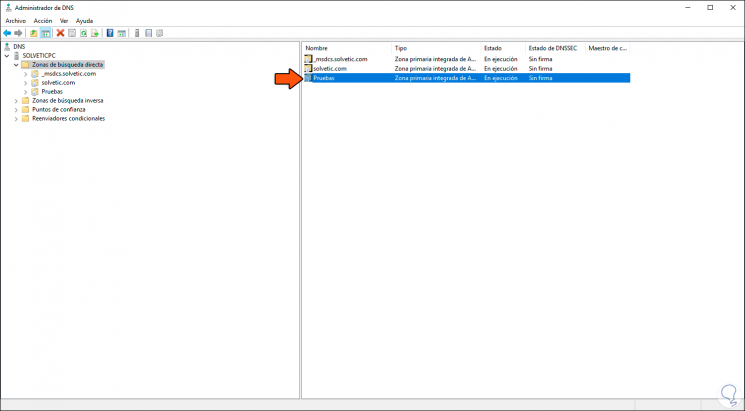
Step 10
We can access the content of the area to visualize its properties: 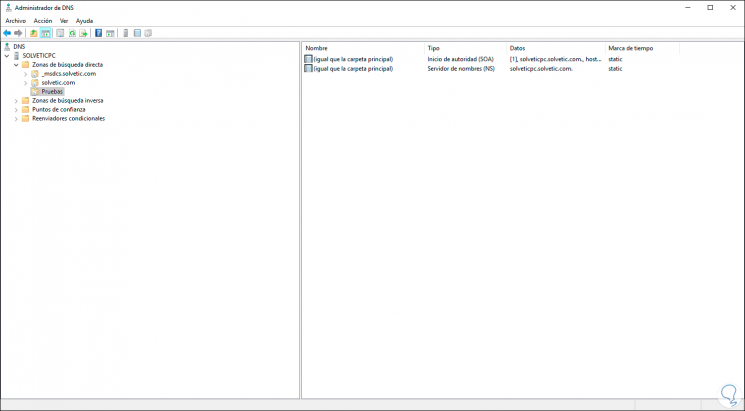
3. Create Windows Server Forest 2019
Step 1
The next step will be to validate the forest in which the domain name will be updated, for this we access the command prompt and there we execute the following line:
rendom / list
Step 2
This will create a DomainList file in the System32 path (C: \ Windows \ System32 \ DomainList.xml), we go to this file and open it with a text editor and see the following: 
Step 3
There we must change the name of the current domain to the new name. We save the changes. 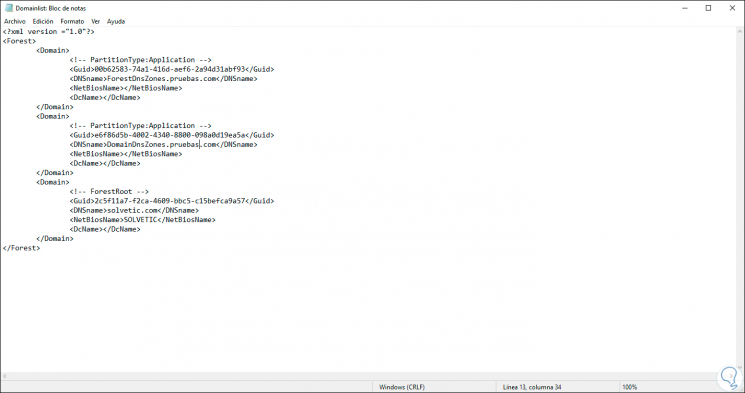
Step 4
We will go back to the command prompt console and update the changes with the command:
rendom / upload
4. Change domain name Windows Server 2019
Step 1
We are ready to prepare the domain in order to make the change, for this we execute the following command in the console:
rendom / prepare
Step 2
We apply the changes in the domain by executing:
rendom / execute
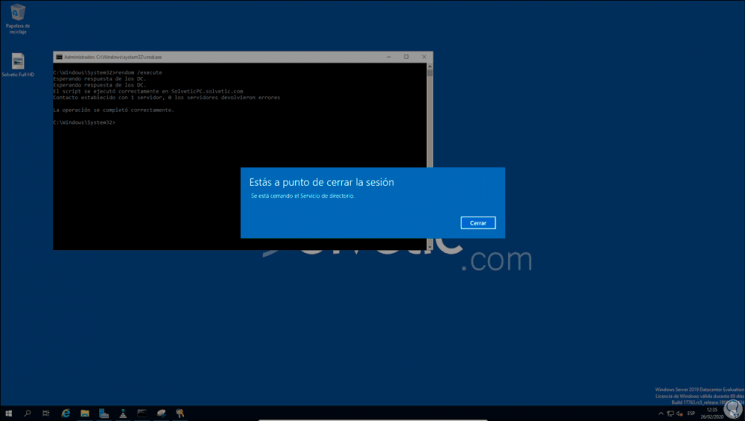
Step 3
As we can see, when this is completed, the session must be closed, when we access it again we go to Active Directory Users and Computers and there we verify that the domain name has been changed: 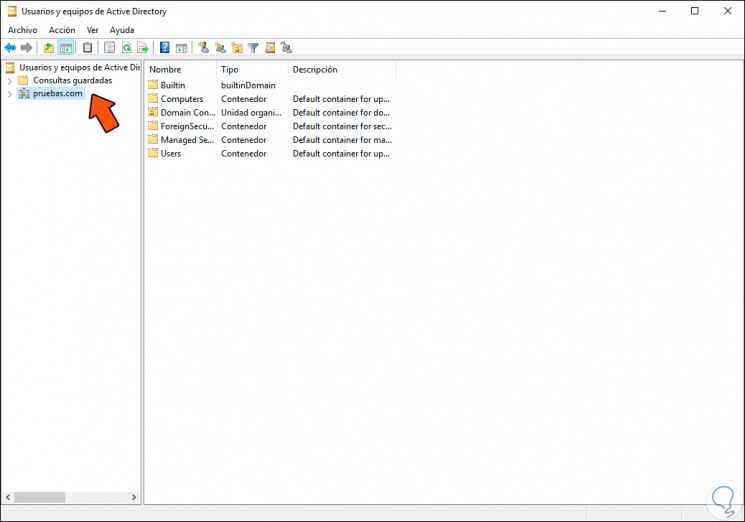
Step 4
Finally, we must execute the following syntax on the domain computers so that they are integrated into the new domain:
netdom computername computer_name.domain / add: computer_name.domain netdom computername computer_name.domain / makeprimary: computer_name.domain
Step 5
Finally, on client computers we update the policies with the following order:
gpfixup /olddns: old-domain.com / newdns: new-domain
With these steps we will be able to modify the domain name in Windows Server 2019 according to the need of the organization.
На чтение 4 мин Опубликовано Обновлено
Изменение имени домена в Windows Server 2019 может быть необходимо по разным причинам: от изменения организационной структуры до переименования самой компании. Независимо от причин, этот процесс является важным и требует аккуратного выполнения, чтобы избежать непредвиденных проблем.
В этой статье мы подробно рассмотрим шаги, необходимые для изменения имени домена в Windows Server 2019. Для начала, важно понять, что процесс изменения имени домена требует административных прав и полного понимания последствий. Поэтому, перед началом, убедитесь, что у вас есть все необходимые права и подготовьтеся к сохранению всех важных данных.
Примечание: перед изменением имени домена, рекомендуется выполнить полное резервное копирование всех серверов и важных данных. Это позволит вам восстановить систему в случае возникновения проблем.
Перед тем как начать, убедитесь, что у вас установлена актуальная версия Windows Server 2019. Важно также проверить, что все службы Windows Server 2019 работают правильно и что у вас есть все необходимые драйверы и обновления.
Теперь, когда вы готовы, давайте перейдем к подробному гайду по изменению имени домена в Windows Server 2019.
Содержание
- Изменение имени домена
- Подготовка перед изменением имени домена
- Изменение имени домена в Windows Server 2019: шаги
Изменение имени домена
Изменение имени домена в Windows Server 2019 может быть произведено с помощью нескольких простых шагов. В этом разделе мы рассмотрим процесс изменения имени домена подробно.
- Предварительные шаги:
- Убедитесь, что у вас есть права администратора на сервере.
- Зарегистрируйте новое имя домена и убедитесь, что оно уникально и доступно.
- Создайте резервную копию всех данных сервера.
- Откройте утилиту «Active Directory Domain and Trusts» на сервере.
- Нажмите кнопку «Пуск», введите «Active Directory Domain and Trusts» в поле поиска и запустите приложение.
- Измените имя домена:
- Нажмите правой кнопкой мыши на текущем домене и выберите «Переименовать».
- Впишите новое имя домена и нажмите «ОК».
- Подтвердите изменение имени домена и подождите, пока процесс завершится.
- Перезагрузите сервер:
- Нажмите кнопку «Пуск», выберите «Выключить/Перезагрузить», а затем «Перезагрузить».
- Дождитесь, пока сервер перезагрузится и войдите в систему под учетной записью администратора.
После выполнения этих шагов имя домена на сервере Windows Server 2019 будет изменено. Убедитесь, что все службы и приложения работают корректно после изменения имени домена и обновите все ссылки и настройки, которые содержат старое имя домена.
Подготовка перед изменением имени домена
Перед тем, как приступить к изменению имени домена в Windows Server 2019, необходимо выполнить ряд подготовительных действий:
- Создайте резервную копию активного каталога и любых других важных данных, чтобы в случае возникновения проблем можно было восстановить систему.
- Убедитесь, что вы имеете полные административные права на сервере, а также административный доступ к контроллеру домена.
- Перед изменением имени домена необходимо убедиться, что все компьютеры и устройства в сети, включая клиентов и серверы, могут успешно связываться по сети с контроллером домена.
- Проверьте текущую системную конфигурацию и установите необходимые обновления перед началом процесса изменения имени домена.
- Важно уведомить всех пользователей и администраторов об изменении имени домена, так как это может повлиять на работу сети и доступ к различным ресурсам.
После выполнения всех подготовительных действий можно приступить к процессу изменения имени домена в Windows Server 2019. В следующем разделе мы рассмотрим, как это сделать шаг за шагом.
Изменение имени домена в Windows Server 2019: шаги
Изменение имени домена в Windows Server 2019 может потребоваться, если вы переименовали вашу организацию, или если вам нужно сменить формат имени домена. Вот пошаговая инструкция, как изменить имя домена в Windows Server 2019.
- Подготовительные меры:
- Заранее скопируйте все важные данные с контроллера домена.
- Убедитесь, что у вас есть административные права для изменения имени домена.
- Запишите старое имя домена и придумайте новое имя, которое хотите присвоить домену.
- Запустите программу «PowerShell» от имени администратора.
- Введите следующую команду, чтобы узнать текущее имя домена:
Get-ADDomain - Переименуйте домен, используя следующую команду:
Rename-ADObject -Identity "DC=староеИмя,DC=домена" -NewName "новоеИмя"Замените «староеИмя» и «новоеИмя» соответствующими значениями.
- Перезагрузите контроллер домена:
Restart-Computer - После перезагрузки, войдите в систему под учетной записью администратора нового домена.
- Убедитесь, что новое имя домена было успешно применено, выполнив следующую команду:
Get-ADDomain
Теперь вы успешно изменили имя домена в Windows Server 2019. Учтите, что процесс изменения имени домена может занять некоторое время, и во время выполнения команды переименования домена возможны временные сбои в работе сети.
Changing the name of an Active Directory domain is a rather rare procedure that few AD administrators have actually performed. The process of renaming a domain must be properly planned so as not to break the entire corporate infrastructure.
Basic requirements for renaming an AD domain:
- AD schema version at least Windows Server 2003 (check if you need to update Active Directory schema);
- If your domain uses a Certificate Authority (CA), you need to do some preparation. Read more here;
- Some applications are incompatible with domain renaming. The domain rename operation is not supported for domains with on-premises Exchange Server deployed. If you need to rename a domain with Exchange Server, you must first create a new AD forest, deploy Exchange in it, and then migrate all objects. There are some other non-Microsoft applications that do not support domain renames (check your application’s documentation).
In this example, we have a domain contoso.com with AD controllers based on Windows Server 2019. Our task is to change the domain name to theitbros.com.
Note. Be sure to backup your AD before you start renaming your domain.
Create a domain zone for the new domain on the primary DNS in your domain. If you are using Microsoft DNS:
- Open DNS Manager console and select your server;
- Expand the Forward Lookup Zones node;
- Select New zone;

- Create a new Primary zone theitbros.com and replicate it to all DNS servers in your forest.


In order to change the AD domain name, you must use the rendom console tool, which is available on any domain controller. The rendom (C:\Windows\System32\rendom.exe) allows you to perform various actions necessary for a domain rename operation.
Note. Check how to change username in Active Directory.
All actions to rename a domain controller must be performed on a domain controller.
Run the command prompt as an administrator and create an XML file with a description of your domain:
rendom /list
This command will generate a Domainlist.xml file in the current directory. Open it with notepad:
notepad Domainlist.xml

Use the Edit > Replace menu to find and replace the old domain name in the file with the new one. Manually change the value in the NetBiosName field.

Save the changes to the Domainlist.xml file.
List changes:
rendom /showforest

Upload a new file:
rendom /upload
This creates a DCclist.xml file that is used to track the progress and status of each domain controller in the forest for the domain rename operation. At this point, the Rendom freezes your Active Directory forest from making any changes to its configuration.
Check if the domain is ready to accept changes (checks the availability of all DCs):
rendom /prepare
If this command returns no errors, you can run the rename operation:
rendom /execute
After that, all domain controllers will be automatically rebooted.
In order for all domain-joined workstations and servers to automatically change their name to the new domain, they must be rebooted twice.
After that, you need to manually rename all domain controllers (they won’t change the name to the new domain automatically).
Use the following command to rename each DC:
netdom computername DC01.contoso.com /add:DC01.theitbros.com

netdom computername DC01.contoso.com /makeprimary:DC01.theitbros.com
Reboot the domain controller to apply the changes.

Now you need to rebind the Group Policy Objects to the new domain name:
gpfixup /olddns:contoso.com /newdns:theitbros.com
Remove links to the old domain:
rendom /clean
Now you can unlock the AD domain with the command:
rendom /end
Make sure that the rename was successful. Check if all Active Directory domain controllers can be contacted, users can sign in to the new domain; check if applications work correctly, and check AD replication and errors on DCs.

Cyril Kardashevsky
I enjoy technology and developing websites. Since 2012 I’m running a few of my own websites, and share useful content on gadgets, PC administration and website promotion.