На чтение 4 мин. Просмотров 19.6k. Опубликовано
Испытание ошибок Windows PowerShell не является распространенной ситуацией, поэтому вам необходимо принять меры при получении сообщения Windows PowerShell перестало работать .
Эта ошибка очень раздражает, так как она остановит процессы, запущенные в вашей системе Windows 10. Более того, вы получите сообщение об ошибке без дополнительной информации, поэтому вы не можете сказать, что именно вызвало эту проблему.
Во всяком случае, вы не должны паниковать. Как всегда, существуют различные решения для устранения неполадок, которые можно применить для исправления ошибки «Windows PowerShell прекратил работу».
Содержание
- Действия по исправлению ошибок Windows PowerShell перестали работать
- 1. Инициируйте полное сканирование системы
- 2. Инициируйте чистую загрузку
- 3. Отключите и снова включите Windows PowerShell
- 4. Создайте новую учетную запись Microsoft
Действия по исправлению ошибок Windows PowerShell перестали работать
- Инициируйте полное сканирование системы.
- Сделайте чистый процесс загрузки.
- Отключите и снова включите Windows PowerShell.
- Создайте новую учетную запись Microsoft.
1. Инициируйте полное сканирование системы
В некоторых ситуациях атака вредоносного ПО может быть причиной того, что Windows PowerShell не работает должным образом. Итак, первое, что нужно сделать, это запустить сканирование безопасности.
Скорее всего, вы заразились Poweliks , вредоносной программой, которая мешает PowerShell. Файл, связанный с этим вирусом: dllhost.exe * 32 или dllhst3g.exe * 32, и его обычно можно остановить из диспетчера задач.
Теперь в этом случае вам нужно использовать антивирусную или антивирусную программу, например Malwarebytes, и сканировать систему Windows 10 на наличие возможных зараженных файлов. Программа безопасности должна автоматически находить и удалять вредоносные программы.
Примечание : рекомендуется запускать сканирование безопасности из безопасного режима, то есть когда сторонние приложения и процессы отключаются платформой Windows 10. Вы можете перейти в безопасный режим:
- Нажмите горячие клавиши Win + R и в поле RUN введите msconfig и нажмите Enter.
-
Из окна Конфигурация системы перейдите на вкладку Загрузка .

- В разделе «Загрузка» выберите Безопасная загрузка .
- Сохраните изменения и перезагрузите компьютер.
- Это все.

2. Инициируйте чистую загрузку
Вы можете увидеть, вызывает ли программный конфликт сбой в Windows PowerShell, инициировав чистую загрузку. Таким образом, вы можете запустить систему Windows 10 только с функциями по умолчанию.
Если ошибка Windows PowerShell перестала работать не отображается после выполнения чистой загрузки, это означает, что существует конфликт программного обеспечения, поэтому необходимо удалить программу, которая стоит за этой проблемой.
Вот как вы можете запустить процесс чистой загрузки:
- Нажмите горячие клавиши Win + R на клавиатуре, чтобы запустить окно RUN.
-
Там введите msconfig и нажмите Enter.
- В Конфигурация системы перейдите на вкладку Общие.
- С этого момента в разделе Выборочный запуск снимите флажок «Загружать элементы запуска».
- Затем перейдите на вкладку Услуги .
-
Установите флажок скрыть все службы Microsoft , а затем нажмите Отключить все .
-
Теперь перейдите на вкладку Автозагрузка и нажмите ссылку открыть диспетчер задач .
- Из диспетчера задач отключите все автозагрузки программ.
- Сохраните ваши изменения и закройте эти окна.
- Перезагрузите систему Windows 10.


ТАКЖЕ ПРОЧИТАЙТЕ . Microsoft PowerShell все чаще используется для распространения вредоносного ПО.
3. Отключите и снова включите Windows PowerShell
- Нажмите горячие клавиши Win + X и выберите Панель управления .
- С панели управления перейдите в категорию .
-
А из отображаемого списка выберите Удалить – в разделе «Программы».
- На левой панели главного окна нажмите ссылку Включить или отключить функции Windows .
- Прокрутите вниз и найдите запись Windows PowerShell .
- Снимите флажок с PowerShell.
- Сохраните и примените ваши изменения.
- Перезагрузите компьютер с Windows 10.
- После этого повторите шаги, описанные выше, и снова включите функцию Windows PowerShell.

ТАКЖЕ ЧИТАЙТЕ: 10 лучших программ для удаления для пользователей ПК
4. Создайте новую учетную запись Microsoft
Ваша учетная запись может быть повреждена (по разным причинам), и поэтому вы можете получить сообщение об ошибке «Windows PowerShell прекратил работу».
Итак, попробуйте создать новую учетную запись, а затем убедитесь, что проблема все еще возникает или нет.Вот то, что вам нужно следовать:
- Нажмите на значок запуска Windows.
- Выберите Настройки и перейдите в раздел Аккаунты .
-
Оттуда выберите Семья и другие пользователи .
- Нажмите Добавить кого-то еще на этот компьютер.
- Просто следуйте инструкциям на экране для возобновления этого процесса.
- Подсказка: не забудьте сделать резервную копию своих данных перед завершением этого процесса – возможно, вам придется импортировать ваши личные файлы и приложение под новой учетной записью.

Надеемся, что сообщение об ошибке «Windows PowerShell перестало работать» исчезло. Если у вас есть вопросы, связанные с решениями для устранения неполадок, описанными выше, свяжитесь с нашей командой.
Вы можете легко связаться с нами, используя поле для комментариев снизу или заполнив контактную форму, доступную на странице О нас.
Кроме того, если вы сталкивались с другими решениями для исправления этой ошибки, перечислите шаги по устранению неполадок в комментариях ниже, и мы соответствующим образом обновим это пошаговое руководство.
Identify issues in a clean boot environment
by Andrew Wafer
Andrew is not just trying to bring you closer to Windows, but he’s truly interested in this platform. He just happens to be passionate about sharing that knowledge… read more
Updated on
- PowerShell issues are part of the Windows errors that users experience day by day.
- If Windows PowerShell has stopped working, chances are your computer contains hidden software, like a virus.
- Be sure to run a malware scan with your security software or initiate a clean boot to verify if it’s a third-party app creating conflicts.
Experiencing Windows PowerShell errors is not a pleasant situation, so you need to take action when receiving the Windows PowerShell has stopped working message.
Why is PowerShell not working? In some situations, a malware attack might be why Windows PowerShell is not functioning correctly.
This error is annoying as it will stop the processes running on your Windows 10 system. Also, you will get this error message with no further details, and as a result, you cannot tell what exactly caused this issue.
Anyway, you shouldn’t panic. Different troubleshooting solutions can be applied to fix the Windows PowerShell has stopped working error.
Why is Powershell not working?
Windows PowerShell won’t open due to corrupt system files or when conflicting third-party apps are installed on the computer.
Besides, there is a chance that PowerShell is disabled, so it has stopped working. In this case, you will need to enable it from Windows Features.
In addition to that, the solutions listed here would also work in the following cases:
- Windows PowerShell not running scripts try catch / import module / unblock-file / uninstall-package / update-help PowerShell not working
- Windows PowerShell commands not working after Windows Update
- Powershell has stopped working
- Windows PowerShell not typing
- Windows Powershell not opening as administrator – Windows Powershell won’t open
- Powershell not working in Windows 11, 10
- CMD and Powershell not working
- Powershell not showing prompt
- Visual Studio code Powershell not working
- Task Scheduler Powershell not working
- Server 2016, 2012 r2 Powershell not working
Many users reported that nothing happens when they click Run as administrator on PowerShell, which is most likely caused by corrupted system files.
How we test, review and rate?
We have worked for the past 6 months on building a new review system on how we produce content. Using it, we have subsequently redone most of our articles to provide actual hands-on expertise on the guides we made.
For more details you can read how we test, review, and rate at WindowsReport.
This isn’t the only application affected by this issue, and many reported that they couldn’t run Command Prompt as administrator on their PC.
Another indication that you have a system corruption issue is the PowerShell is not recognized message, but luckily, there are ways to fix that.
What can I do if PowerShell has stopped working?
- Why is Powershell not working?
- What can I do if PowerShell has stopped working?
- 1. Initiate a full system scan
- 2. Initiate a clean boot
- 3. Disable and re-enable Windows PowerShell
- 4. Create a new Microsoft account
- 5. Reset PowerShell to default
- What can I do if PowerShell is not working on Windows 11?
1. Initiate a full system scan
In some situations, a malware attack might be the reason why Windows PowerShell is not working properly. So, the first thing to do is to initiate a security scan.
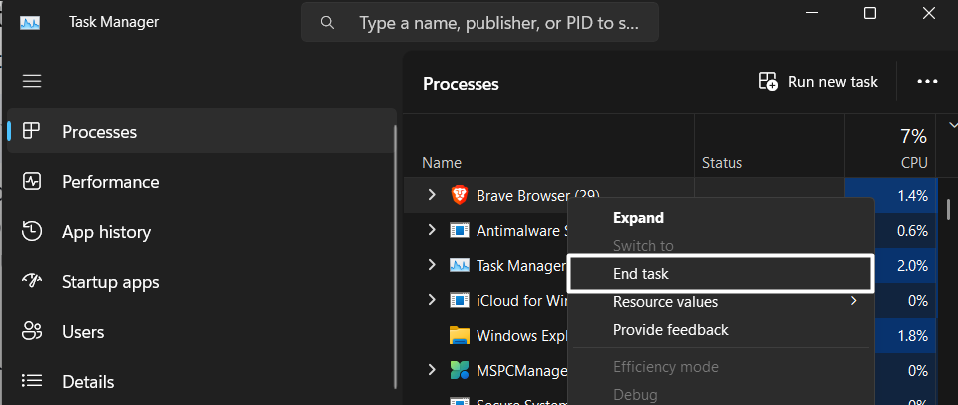
Chances are you got infected with Poweliks, a malware that interferes with PowerShell. The file associated with this virus are dllhost.exe *32 or dllhst3g.exe *32 and can usually be stopped from Task Manager.
Now, in this case, you need to use an antivirus tool, and scan your Windows 10 system for possible infected files. The security program should find and remove the malware automatically.
It’s recommended to run the security scan from Safe Mode when the Windows 10 platform disables third-party apps and processes.
2. Initiate a clean boot
- Press the Windows + R to open the Run command, type msconfig, and click OK.

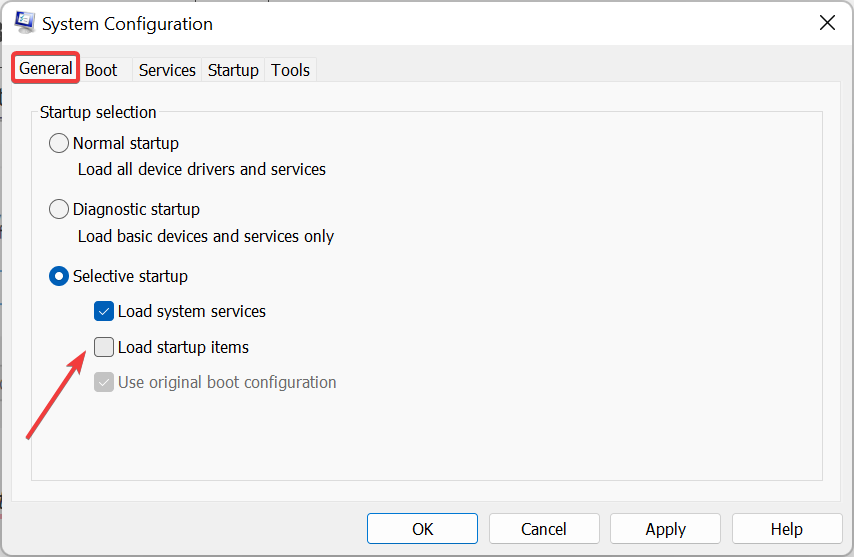
- From System Configuration, go to the General tab, and uncheck the Load startup items field under Selective startup.

- Next, switch to the Services tab, check the Hide all Microsoft services checkbox and afterward click on Disable all.
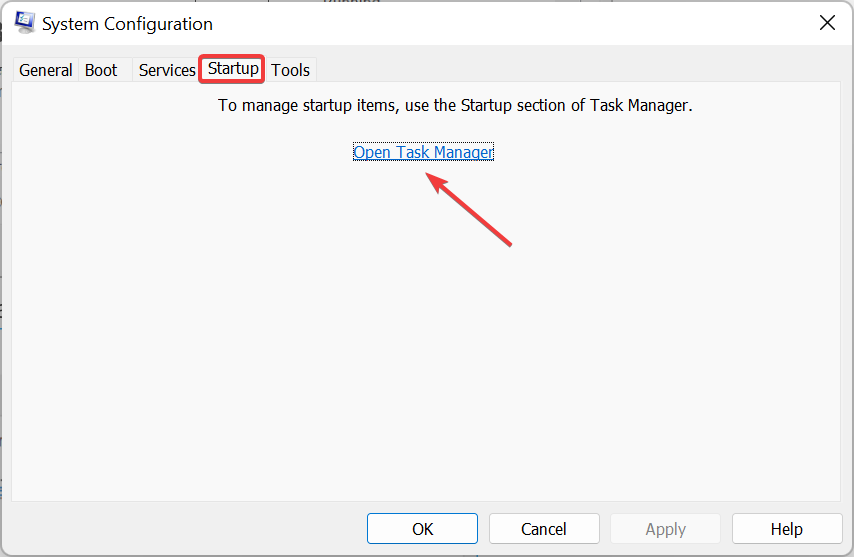
- Now, switch to the Startup tab and click on the Open Task Manager link.
- Select the programs listed here individually and click on Disable at the bottom.

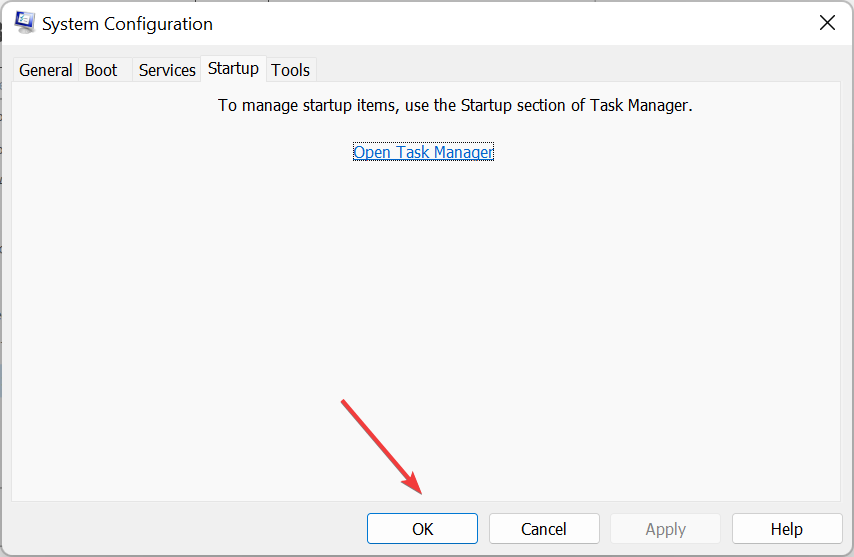
- Now, head back to the System Configuration window, and click on OK.
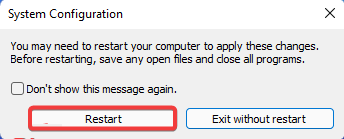
- Click Restart in the prompt that appears.


By initiating a clean boot, you can see if a software conflict is causing Windows PowerShell malfunctions. In this way, you can start the Windows 10 system only with default features.
If the Windows PowerShell has stopped working error is not displayed after the clean boot is performed it means that there is a software conflict, so you need to remove the program responsible for this issue.
- PowerShell module cannot be loaded? Try these simple fixes
- How to use the Windows Update reset script in Windows 10
- PowerShell history is not working? Check out these solutions
3. Disable and re-enable Windows PowerShell
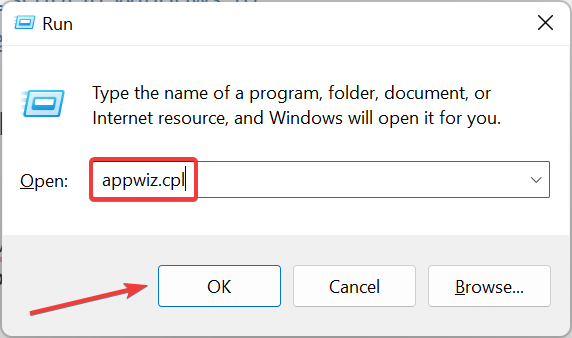
- Press Windows + R to open Run, enter appwiz.cpl in the text field, and click OK.
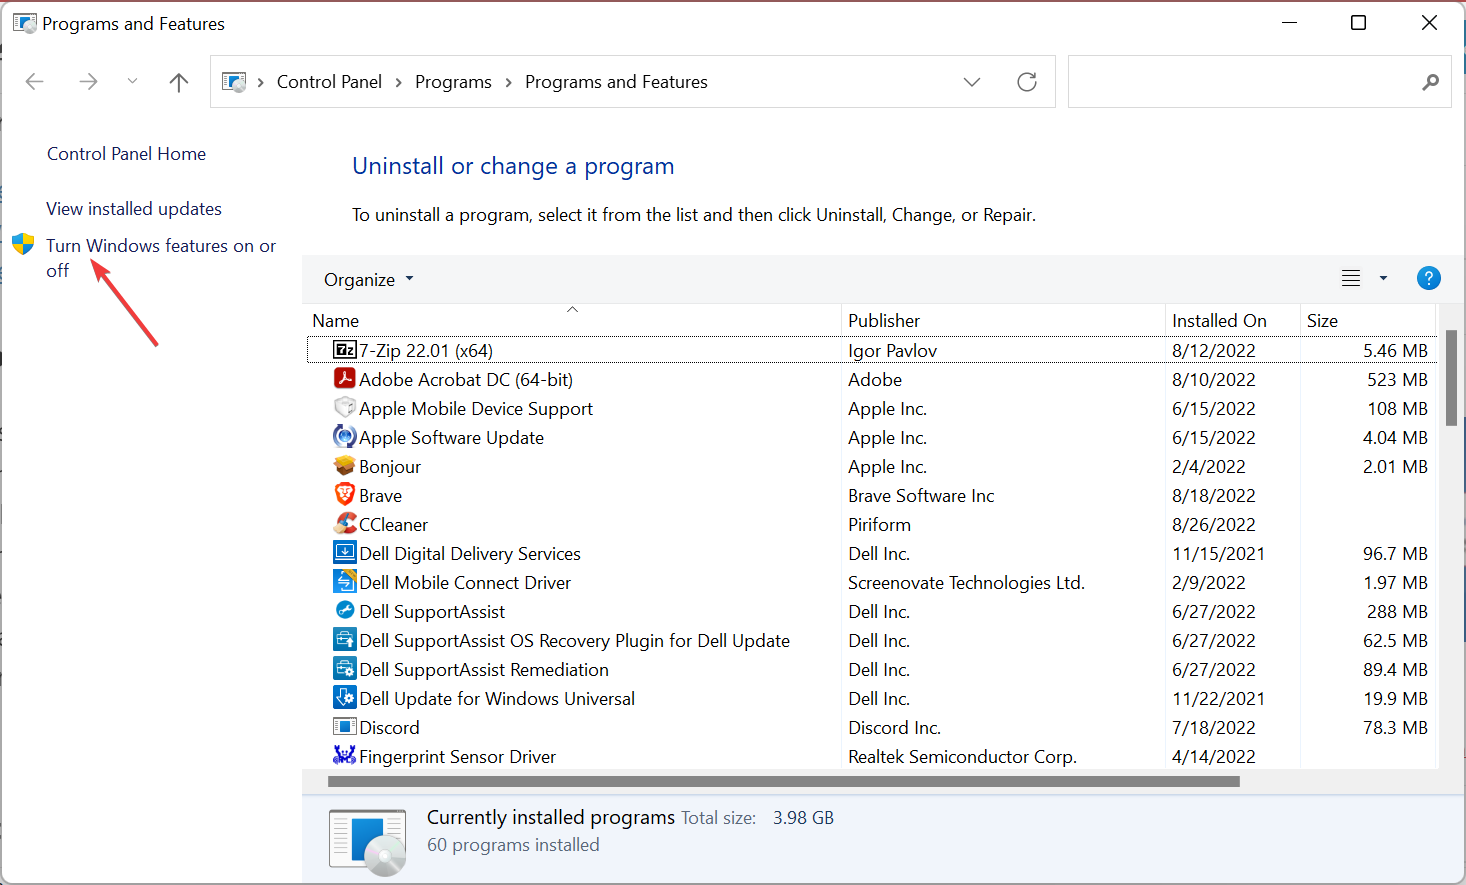
- From the left panel of the main window, click on Turn Windows features on or off.

- Scroll down, locate the Windows PowerShell entry, uncheck the option and then click OK.

- Restart the computer for the changes to come into effect.
- Once the PC turns on, head back to the Windows Features window, tick the checkbox for Windows PowerShell, and click OK to re-enable it.
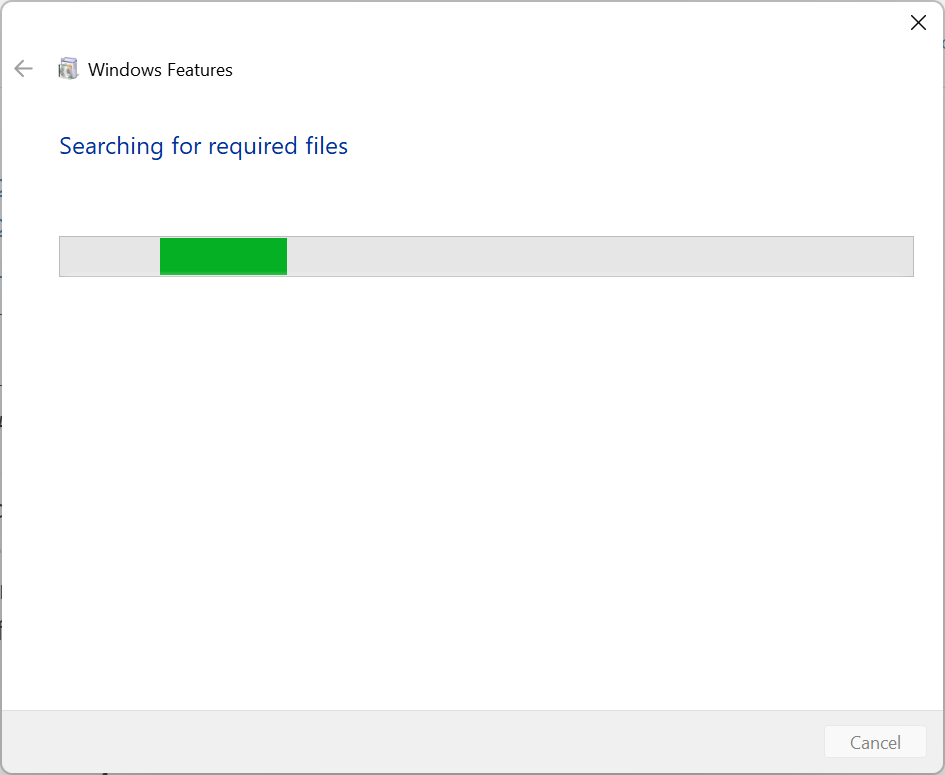
- Wait for it to install.

After re-enabling the feature, check if the Windows Powershell stopped working issue is resolved.
4. Create a new Microsoft account
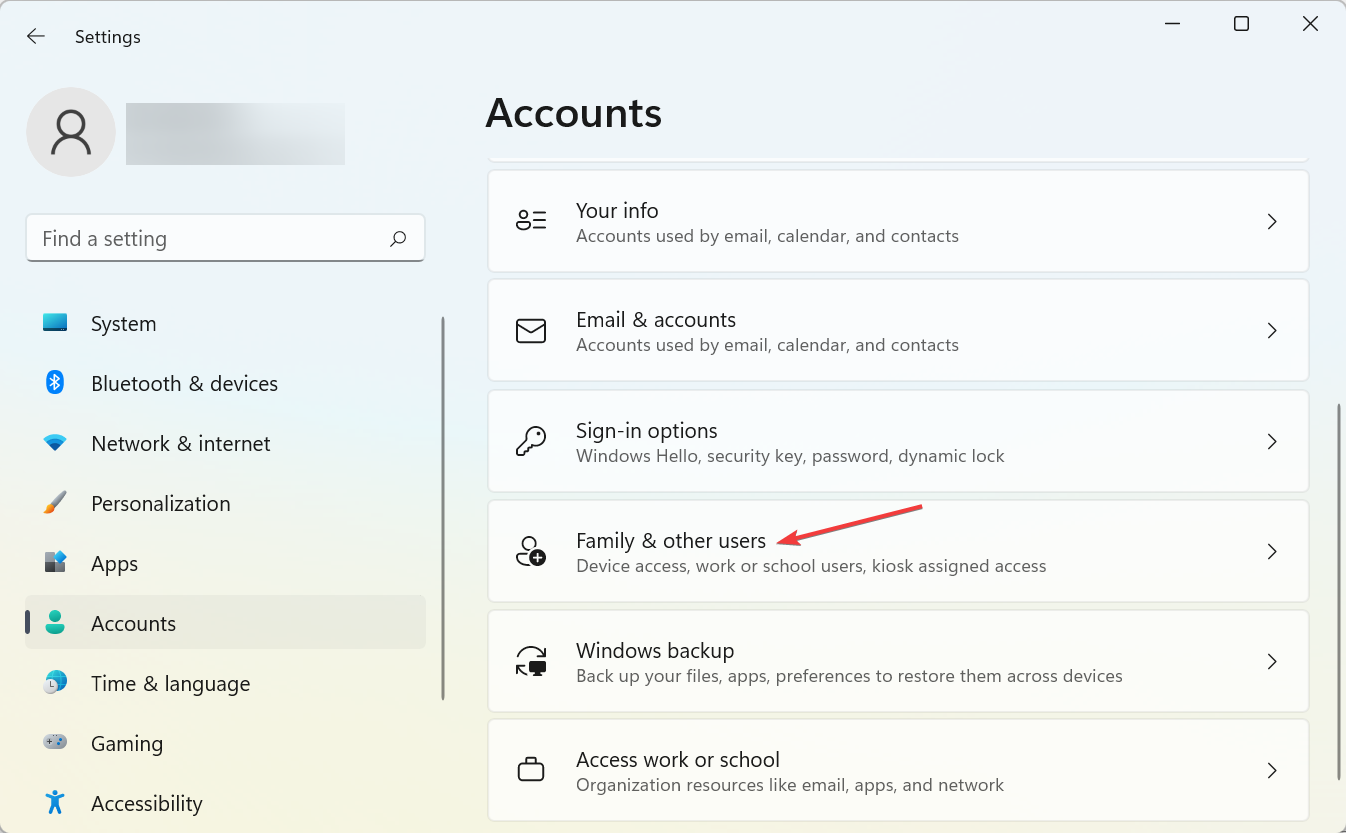
- Press Windows + I to launch Settings, select Accounts from the navigation pane, and then click on Family & other users.

- Click the Add account button next to Add other user.
- Provide the required information and follow the on-screen instructions to complete the process.


Remember to back up your data before completing this process. You might have to import your personal files and app under the new account.
Your account might be corrupted (due to various reasons), and that’s why you still get the Windows PowerShell has stopped working error. So, try to create a new account, and the problem should be fixed.
5. Reset PowerShell to default
- Press Windows + E to launch File Explorer, paste the following path in the address bar while replacing Username with the one on your device, and hit Enter:
C:\Users\Username\AppData\Roaming\Microsoft\Windows\Start Menu\Programs\Windows PowerShell - Now, select the Windows PowerShell entry, and hit the Del key to delete it. Choose the appropriate response in case a confirmation prompt show up.

- Now, create a new user account on the same computer, head down the same path, and copy the PowerShell shortcut to a USB drive.
- Next, go back to the initial account, navigate to the Windows PowerShell folder, and paste the PowerShell shortcut here.
That’s it! PowerShell has now been reset to the factory settings, and any changes made will automatically be removed.
To ensure PowerShell is working, try to run commands like to list & remove Windows default app.
What can I do if PowerShell is not working on Windows 11?
You can install the latest version of Windows 11, remove conflicting third-party apps, scan for malware, or identify and eliminate corrupt system files.
In addition to these solutions, if the problem started recently, performing a system restore should do the trick and get things up and running quickly.
What version of PowerShell comes with Windows 11?
Right now, on Windows 11, we have PowerShell version 5. However, you can see your exact version by entering the script below into Powershell and hitting Enter.
$PSversionTable
Hopefully, the error message is gone now. If you have questions about the troubleshooting solutions from above, contact our team. You can get in touch with us by using the comments field below.
Also, if you come across other solutions to fix this error, list the troubleshooting steps in the comments, and we’ll update this guide accordingly.
![]()
PowerShell is a powerful command-line tool in Windows that’s mainly used for automating the system’s management. As PowerShell is an integral part of a Windows OS, it must always work without issues. But that’s not the same for some users. A set of users reported that their Windows PowerShell utility isn’t opening on their Windows 11 system.
Whereas some users are getting the “PowerShell Has Stopped Working” error while using it. If you’re also facing similar issues with Windows PowerShell on your Windows 11 PC, try all the working fixes we’ve shared in this troubleshooting guide to resolve them all. All the workarounds can easily fix the PowerShell not working issue in Windows 11.
There could be several reasons for the ill-functioning of the PowerShell utility in Windows 11. But below are some of the most common reasons for the PowerShell not working issue:
- Lack of Admin Privileges
- Disabled Windows PowerShell
- Improperly Configured Group Policies
- Corrupted Windows PowerShell Files
- Issues With the User Account
- Missing System Files
- Glitches in the System
- Background Service Conflict
- Buggy Windows Update
- Viruses & Malware
Fix the PowerShell Not Working Issue in Windows 11
Here are some working workarounds that can help you fix the “PowerShell Has Stopped Working” error:
1. Make Sure Windows PowerShell Is Enabled
If you’ve recently turned on Hyper-V on your Windows PC, then it’s possible that due to this, Windows PowerShell got disabled. Thus, we once suggest you make sure that Windows PowerShell is enabled on your PC.
If you don’t know how to check the same, follow the below steps as they explain the same:
1. Press the Windows + R to open the Run utility, type OptionalFeatures in it, and press Enter.
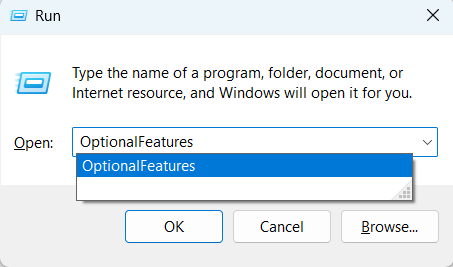
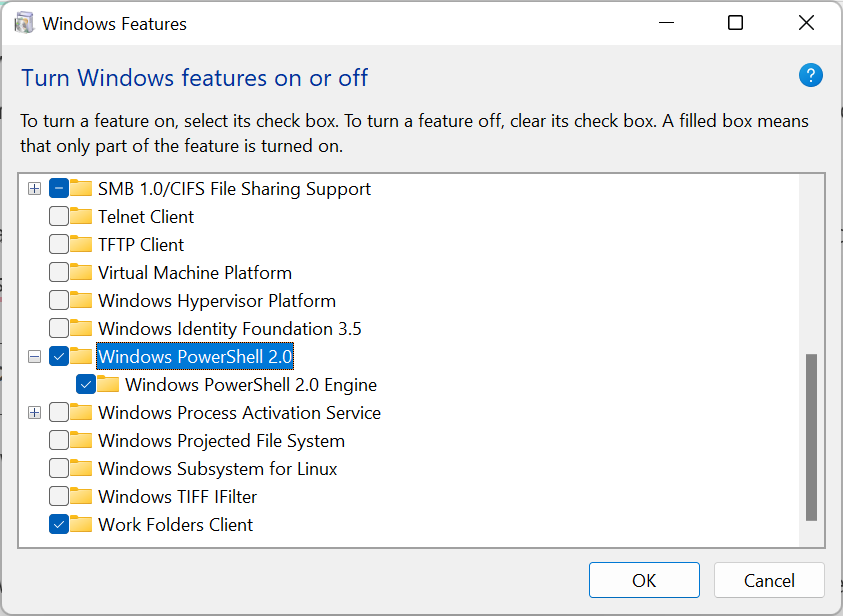
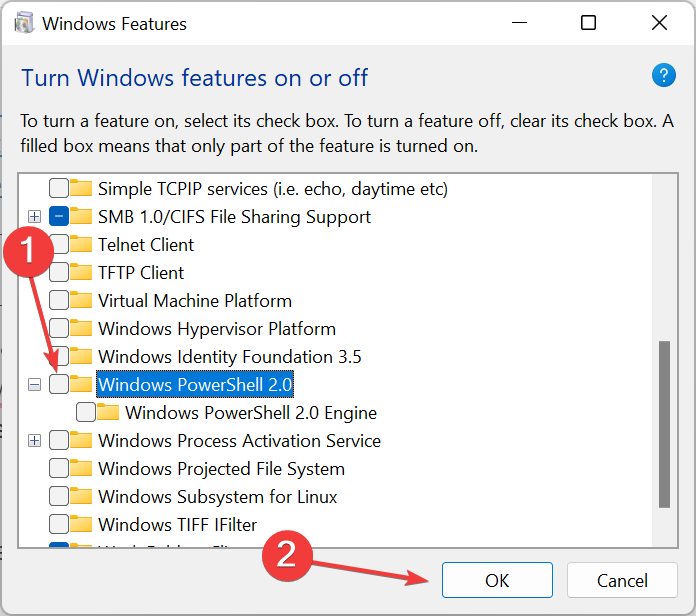
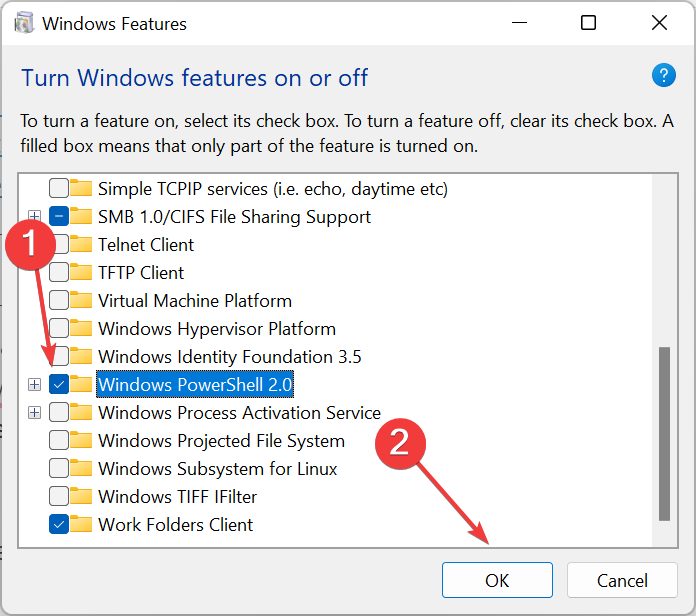
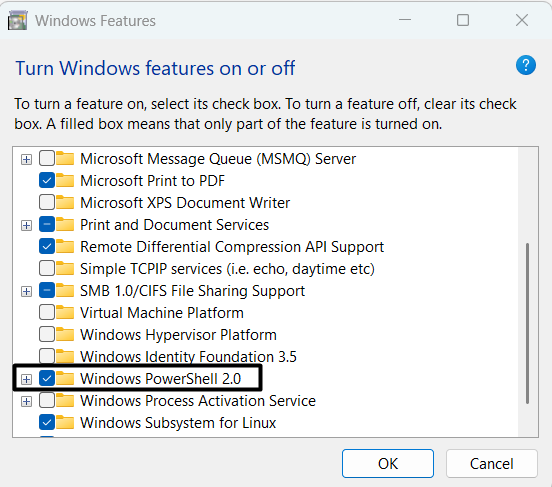
2. Search for the Windows PowerShell 2.0 option in the Turn Windows features on or off box.
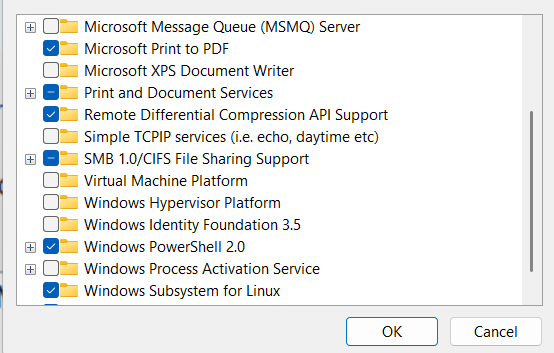
3. Make sure the box next to Windows PowerShell 2.0 is checked.
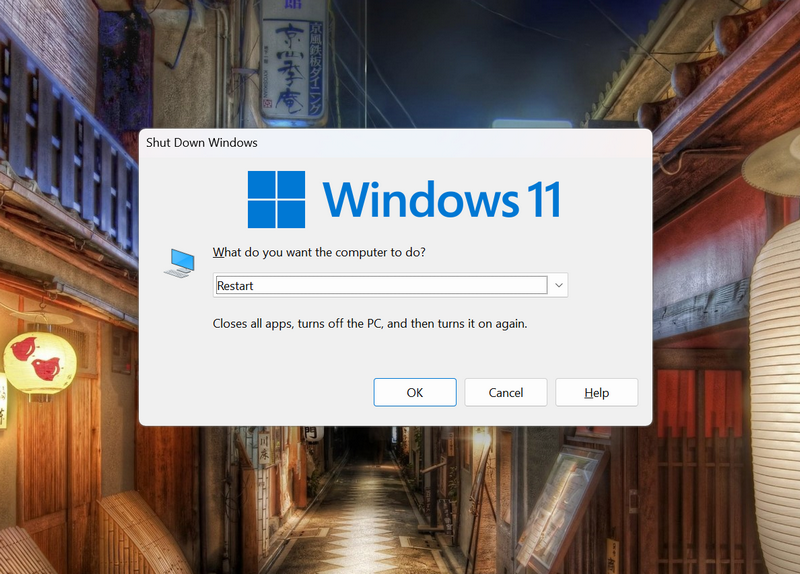
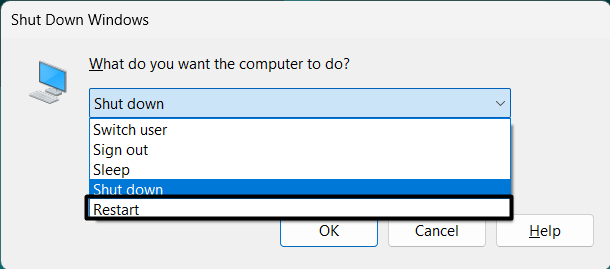
2. Restart Your Computer
Suppose PowerShell is already enabled on your system and is still not working or opening. In that case, this inconvenience may be occurring because of some temporary bugs & glitches in the system.
To check the same, we recommend you restart your Windows 11 PC or laptop, as doing so easily eliminates the temporary bugs and glitches from the system.
3. Use Alternate Ways To Open PowerShell
There are several ways to open PowerShell on a Windows 11 PC. If the one way doesn’t work, there are still more ways to open Windows PowerShell. So, if you’re unable to open PowerShell using a particular method, you can try an alternate method to open it.
Below we’ve explained all the possible methods to open Windows PowerShell in Windows 11:
From Run
PowerShell can easily be opened using the Run utility, and below are the steps to do so:
1. Press the Windows and R keys simultaneously to open the Run program on your Windows 11 system.
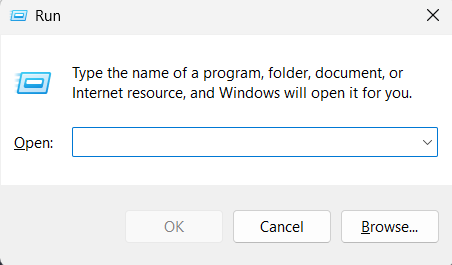
2. Type PowerShell or powershell.exe in its search box and hit Enter to open Windows PowerShell.

From File Explorer
You can also open PowerShell using the File Explorer program. Here are the steps to do so:
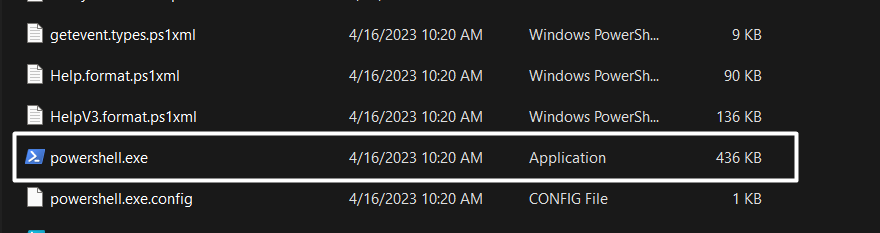
1. Open the File Explorer program on your Windows 11 PC and go to the mentioned path:
C:\Windows\System32\WindowsPowerShell\v1.0
2. Search for powershell.exe, and double-click on it to open the Windows PowerShell utility.
Using Command Prompt
Another way to open PowerShell is using Command Prompt. Follow the steps to know how to do so:
1. Open the Command Prompt utility on your Windows 11 system using the Windows Search Box.

2. Select Command Prompt from the Best match section and run the below command in it:
PowerShell
Lastly, you can launch PowerShell on your PC from the Start Menu. Follow the below steps to know how to do so:
1. Hit the Windows key on your keyboard to open the Windows Search Box and click on All apps >.
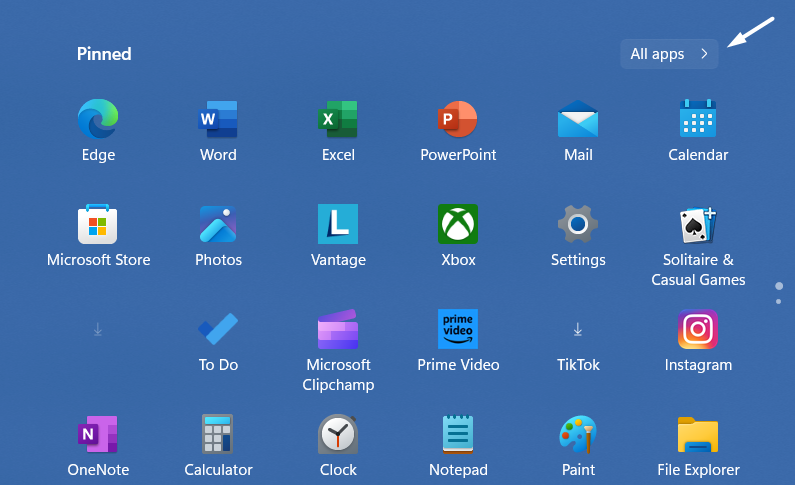
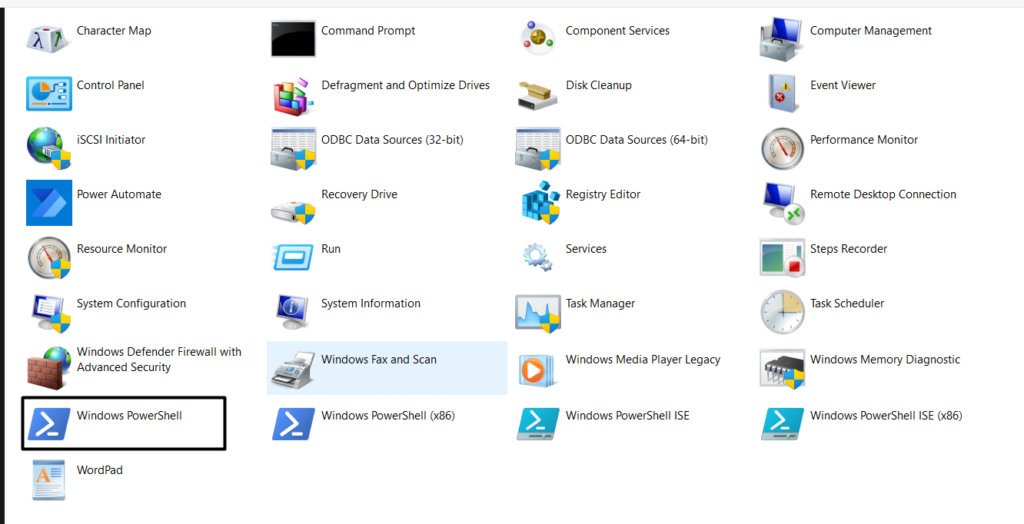
2. Search for Windows Tools in the All apps section and click on it to access all the Windows tools.

3. Choose Windows PowerShell in the Windows Tools window to open Windows PowerShell.
4. Run Powershell as Administrator
Sometimes apps or programs also don’t open because of a lack of administrative privileges, which could be the same in this case. So, we suggest you run PowerShell with admin rights to see if it opens or not. Try the below-mentioned steps to check the same:
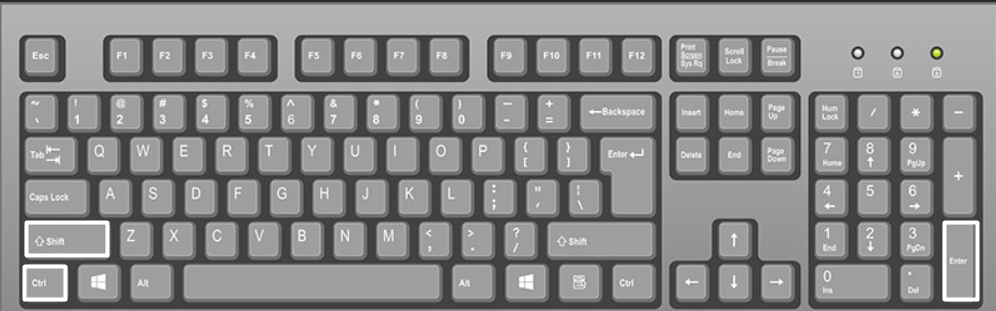
1. Open the Run utility using the Windows + R shortcut and type powershell in the search box.
2. Press the Ctrl + Shift + Enter keys at the same time and then click on Yes in the UAC to open it with admin rights.
5. Run a Quick Antivirus Scan
It could be possible that your Windows system has malware and viruses, which is preventing the PowerShell utility from working on your Windows 11 PC.
Due to this, we suggest you run a quick antivirus scan on your system to find all the infectious files and remove them. So, follow the below steps to run a virus scan on your Windows 11 PC:
1. Open the Windows Security app on your Windows PC and go to the Virus & threat protection section.
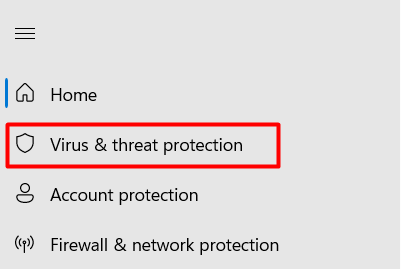
2. Click the Quick scan button to start the quick virus scan to find infectious files on the system.
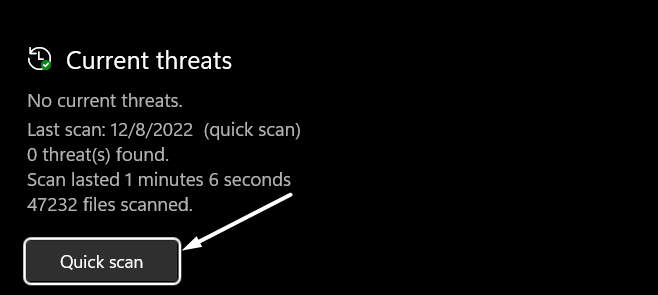
Once the scan is completed, check if any infectious files are found on your Windows 11 system. If yes, follow the on-screen instructions to remove those from your Windows system.
6. Run DISM & SFC Scans
One of the most common reasons for the PowerShell not working problem in Windows 11 is the missing essential system files and corrupted Windows OS image.
Due to this reason, we suggest you run DISM and SFC scans on your Windows 11 system, respectively, to get rid of this issue. You can try the below steps to run both scans on your PC:
1. Use any method to open the Command Prompt or Terminal utility on your Windows system.
2. Execute the below-mentioned commands in it one by one to start the DISM scan on the system:
Dism /Online /Cleanup-Image /CheckHealthDism /Online /Cleanup-Image /ScanHealthDism /Online /Cleanup-Image /RestoreHealth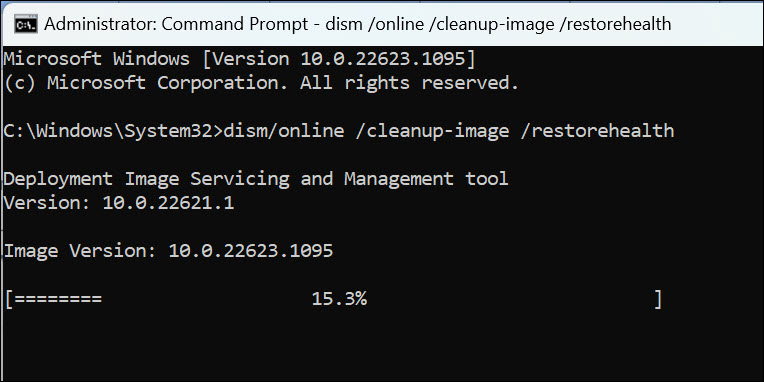
3. Type sfc /scannow in the console and press Enter to start the System File Checker (SFC) scan.

4. After running the SFC and DISM scans, restart your computer to check the status of the issue.
7. Delete Suspicious Third-Party Programs
If you started facing the PowerShell not working issue after installing a particular app or you think that a particular app is causing this issue, we suggest you remove it from the system.

It could be possible that your instincts are true and the app is the real culprit for the issue. In case you can’t delete the app, try updating it to fix all the bugs and glitches with it.
8. Edit Group Policy and Registry
Misconfigured group policy settings could also be the reason for the ill-functioning of PowerShell in Windows 11 PC. Luckily, it can be fixed by setting the Don’t run specified Windows applications policy in the Group Policy Editor program to the Not configured option.
So, try the same by following the below steps and check if it works:
1. Open the Group Policy Editor program on your PC and follow the below-mentioned path:
User Configuration > Administrative Templates > System2. Search for Don’t run specified Windows applications in the right pane and double-click on it.
3. Select the Not configured radio button in the Don’t run specified Windows applications dialog box.
4. Once done, click on OK to save the changes and restart your Windows 11 PC to fix the issue.
9. Change Execution Policy
If you’re running a script that isn’t digitally signed, then you may be getting an error due to the execution policy. Fortunately, the error can easily be eliminated by making minor changes to the execution policy. Try the below-mentioned steps to change the execution policy:
1. Use the Windows and R keys at the same to open Run, type powershell in it, and press Enter.
2. Copy-paste the below-mentioned command in the PowerShell utility and press the Enter key:
Set-ExecutionPolicy RemoteSigned -Force -Scope LocalMachine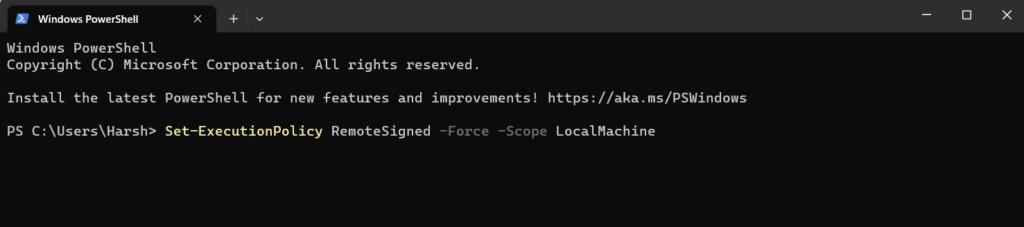
3. Restart your Windows 11 PC and check whether the Windows PowerShell program is working fine now.
10. Update PowerShell
Bugs and glitches in the PowerShell utility could also be the reason for its improper functioning. Thus, to fix those bugs and glitches, we suggest you update your PowerShell utility. Follow the below-listed steps to update the Windows PowerShell program:
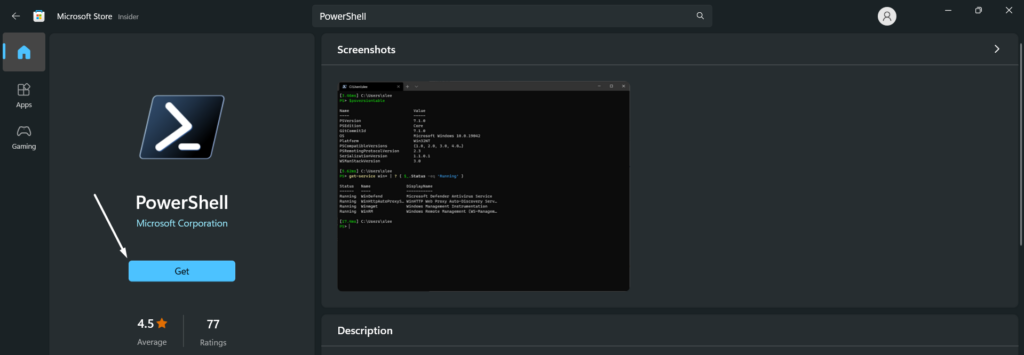
1. Open the Microsoft Store on your Windows 11 PC and search for PowerShell using the search at the top.

2. Select PowerShell from the search results and click the Get or Update button to start updating it.
11. Reset PowerShell To Default
It could be possible that the PowerShell itself has some issues, maybe incorrect settings, because of which the “PowerShell Has Stopped Working” error is appearing on your Windows 11 system.
In that ase, we suggest you reset your Windows PowerShell utility to default to correct all its settings. You can follow the below instructions to do so:
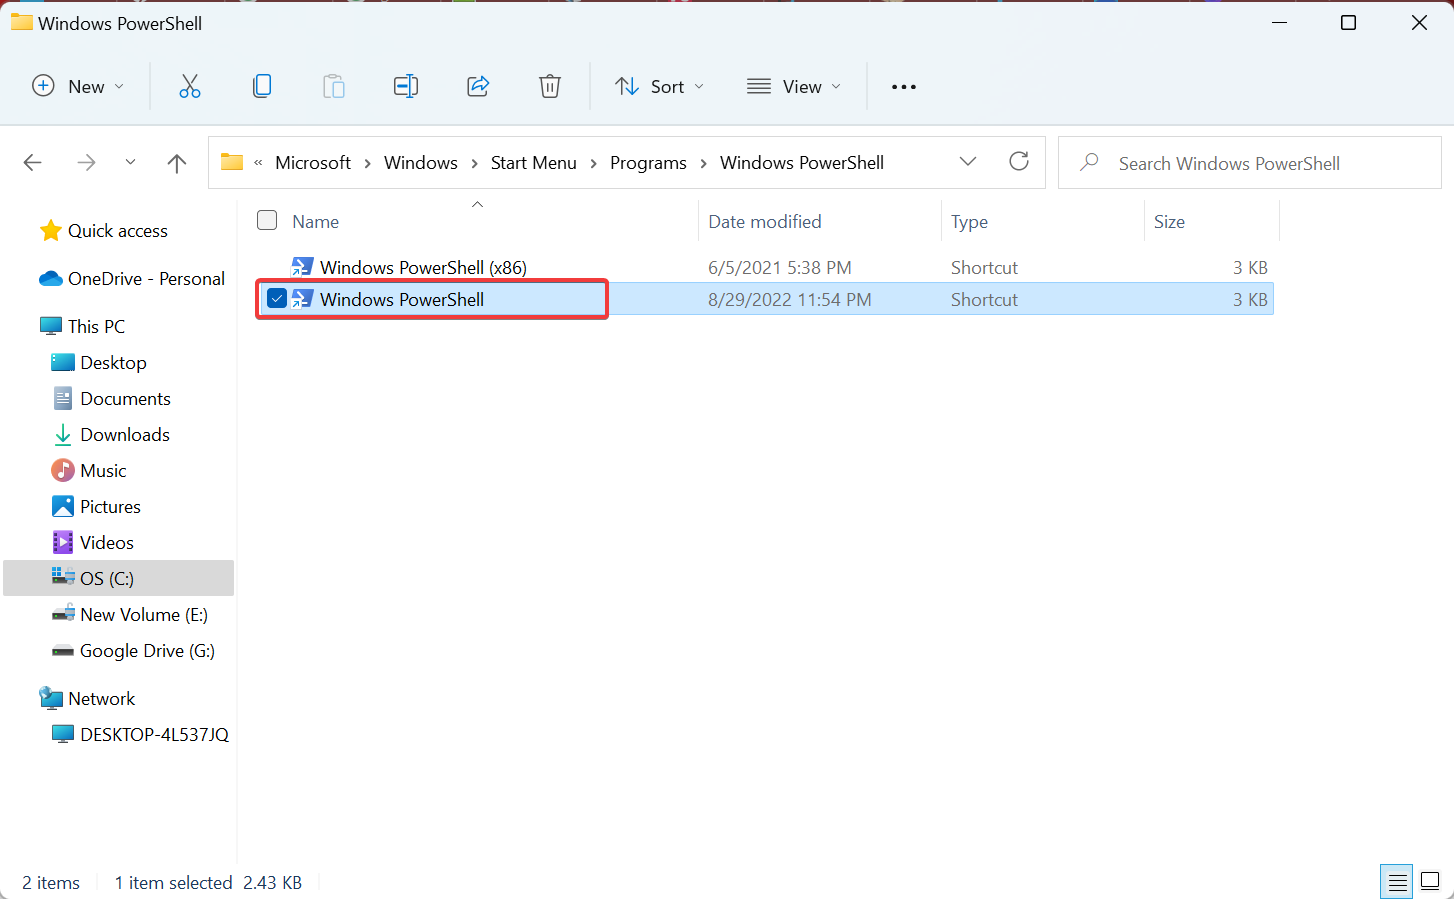
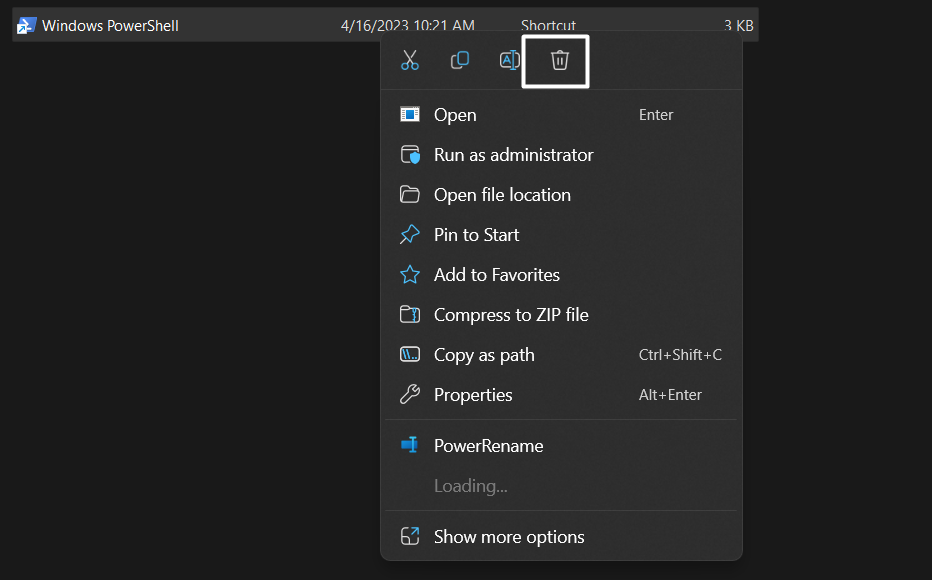
1. Use the Windows + E shortcut to open File Explorer and navigate to the below path in it:
C:\Users\Username\AppData\Roaming\Microsoft\Windows\Start Menu\Programs\Windows PowerShell
2. Right-click on Windows PowerShell there and click on the Bin icon in the context menu.
3. Create a new user account, move to the above path again, and copy the PowerShell shortcut to a USB drive.
4. Once done, sign into your system with the old user account, and copy the shortcut in the same directory.
12. Use System Maintenance Troubleshooter
Windows 11 comes with a System Maintenance troubleshooter that helps you find and fix issues in your system. The best part is that it can fix issues with the PowerShell utility.
So, we advise you to run the System Maintenance troubleshooter and check if it resolves the PowerShell not working issue. You can follow the below-listed prompts to run it:
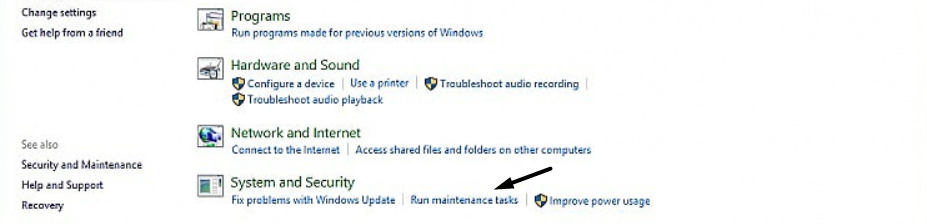
1. Open the Control Panel on your system using the Windows Search Box or any other way.

2. Change the View by: dropdown to Small icons and choose the Troubleshooting option.
![]()
3. Click on the Run maintenance tasks option under the System and Security section.
4. Lastly, follow the on-screen instructions to run the System Maintenance troubleshooter on your PC.
13. Create a New User Account
It could be possible that your user account has been corrupted, which is why the Windows PowerShell program isn’t working properly.
In that case, the best possible workaround is to create a new user account and log in with it to fix the issue. So try the below instructions to create a new Windows user account:
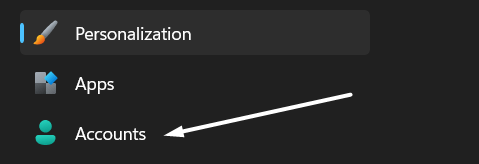
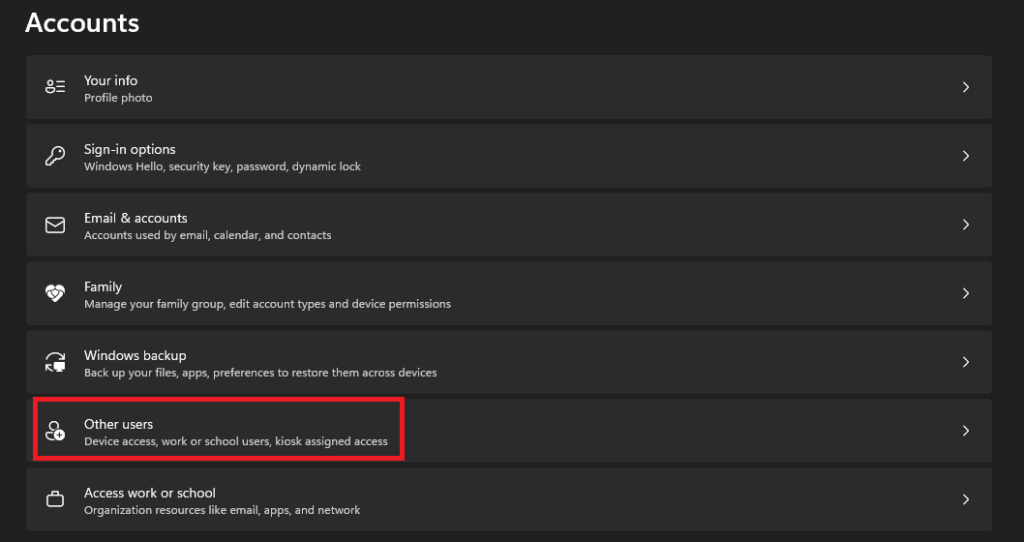
1. Open the Settings app using the keyboard shortcut and go to the Accounts section from the left.
2. Click on Other users in the Account settings section and then click the Add account button.
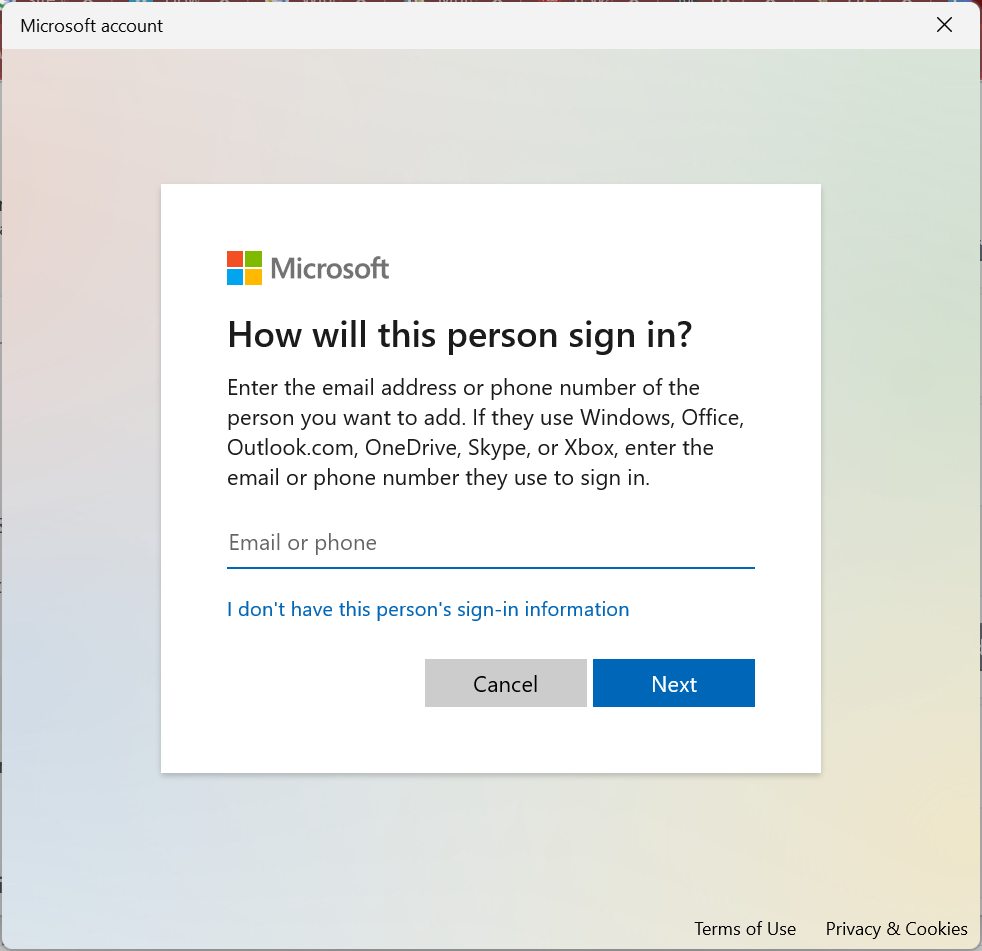
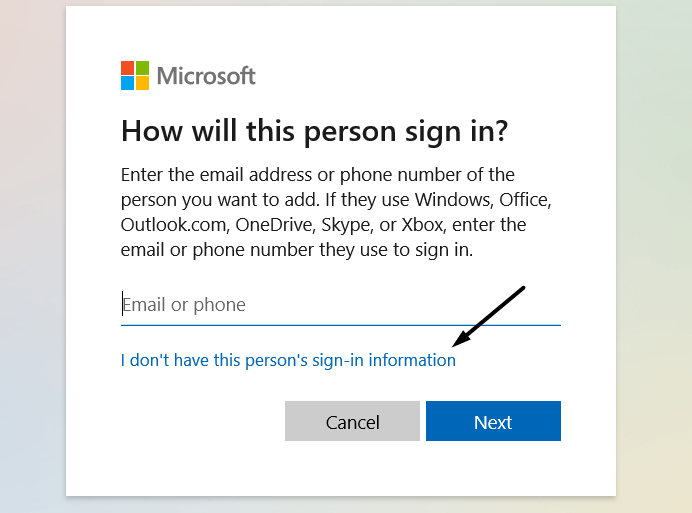
3. Select the I don’t have this person’s sign-in information option and then click on Next.
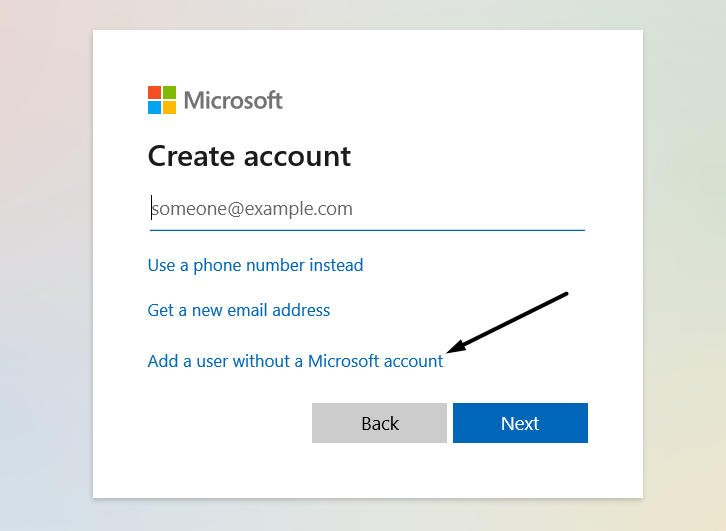
4. Click on the Add a user without a Microsoft account option and then click the OK button.
5. In the following window, enter the name and password you want to assign to your new user.
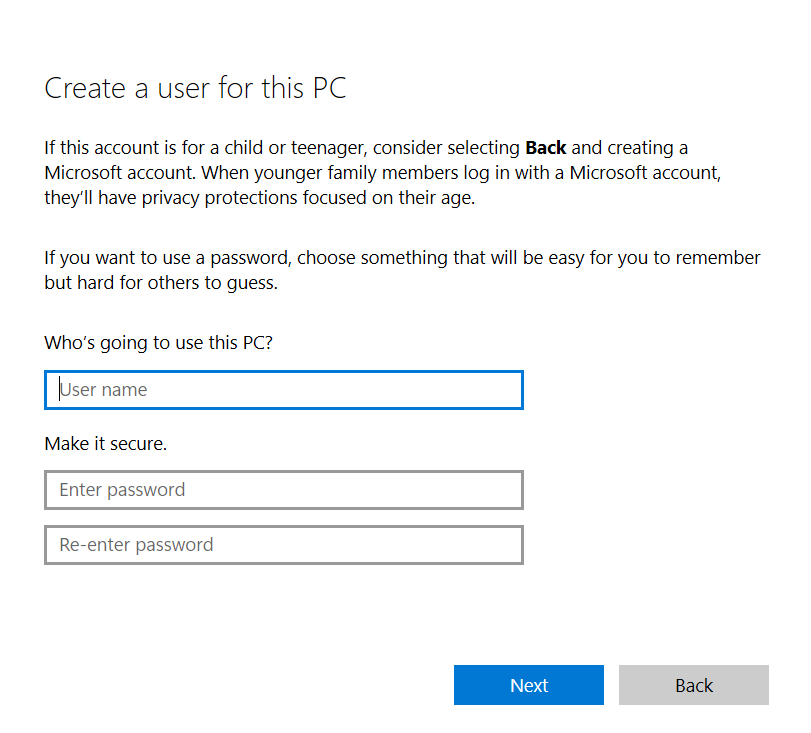
6. Lastly, follow the on-screen instructions to create a new user account and sign in with it.
14. Perform a Clean Boot
If the issue is still there, it could be possible that a third-party program or service is causing it.
To check whether that’s the same, we suggest you boot your Windows 11 PC in Safe mode. You can follow the below-mentioned steps to learn to boot your system in Safe mode:
1. Open the Run utility, type msconfig in its search box, and hit the Enter key on your keyboard.

2. Go to the Boot section, and tick the Safe boot and Network checkboxes in the Boot options section.

3. Click on the Apply button to save the changes and then move to the Startup tab of it.

4. Click on Open Task Manager in the System Configuration window to open Task Manager.

5. In the end, force close all the running programs & processes in the Task Manager app.
Once done, restart your system and check whether the PowerShell not working issue is fixed. If yes, then a third-party program was causing it, and you can find the real culprit by deleting all the apps one by one.
15. Update Windows
It could be possible that your current Windows build has some bugs and glitches which is causing this issue. Keeping this in mind, we recommend you update your system to the latest version to eliminate the issue. Follow the mentioned steps to update your system:
1. Open the Settings app on your system and click on Windows Update at the top right corner.
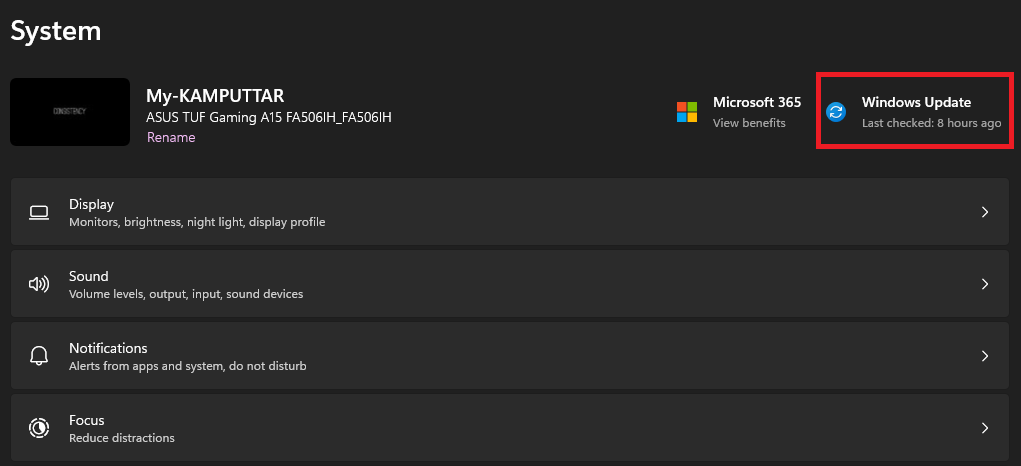
2. Click the Check for updates button to search for newly available Windows build updates.

3. Click the Download & install all button to install the pending Windows updates on your system.

4. Restart your Windows 11 system and check whether the Windows PowerShell not working issue is fixed.
16. Reset the Device
Lastly, if nothing makes Windows PowerShell work again, you’ve no other option than resetting your Windows 11 PC or laptop. Doing so will definitely eliminate the “PowerShell Has Stopped Working” error on your PC, as it’ll clean the entire system and reset the settings to default.
As a result, the issue will get eliminated during the reset process. So follow the below-mentioned steps to factory reset your Windows 11 device:
1. Open the Windows key on your keyboard to open Windows Search Box, and type Settings in it.

2. Select the Settings option from the Best match section to launch the Settings program.

3. Move to the Recovery section of it and click on the Reset PC button on the following window.
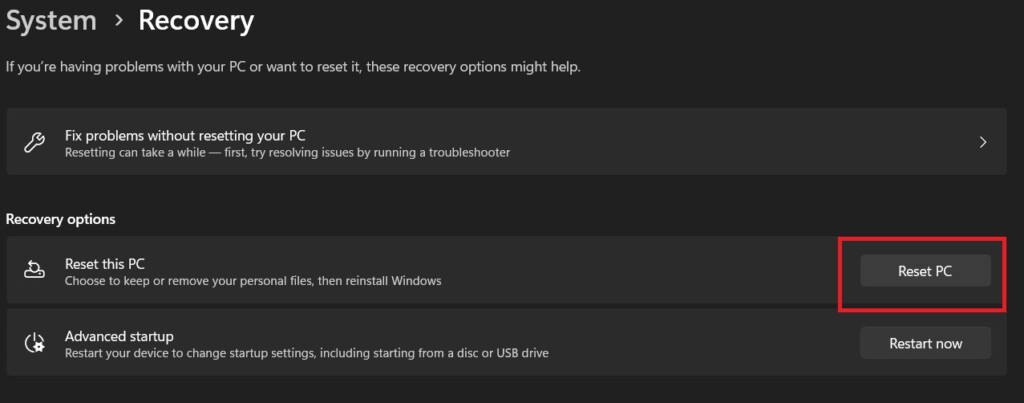
4. Select the Remove everything option in the next prompt and then select Local Reinstall.

5. You need to now follow the on-screen prompts to factory reset your Windows 11 system.
FAQs
Why Can’t I Run PowerShell on Windows 11?
It could be possible that your Windows 11 system has some bugs and glitches, because of which it isn’t working. Another possible reason could be incorrect PowerShell settings.
How Do I Enable PowerShell in Windows 11?
Follow the below-mentioned path to enable Windows PowerShell on your Windows 11 PC:
Settings > Apps > Optional features > More Windows features > Enable Windows PowerShell 2.0
How Do I Fix PowerShell Not Working?
If your Windows PowerShell utility isn’t working properly, try resetting it. If that also doesn’t make it work again, consider updating it from the native app store, Microsoft Store.
How Do I Reset PowerShell in Windows 11?
You need to reinstall the Windows PowerShell program on your Windows 11 system to reset it.
Does PowerShell Work on Windows 11?
Yes, Windows PowerShell works on Windows 11. You can install it from the Microsoft Store.
Use Windows PowerShell With Ease
PowerShell is an integrated component of Windows 11 and other versions. We use it for a variety of purposes, such as running system scans, deploying codes, and much more. But some users are currently facing different issues with PowerShell on their Windows 11 PC.
If you were also experiencing issues with Windows PowerShell on your Windows 11 PC, we hope this guide helped you get rid of them. If yes, then let us know which of the mentioned workaround assisted you in fixing the PowerShell not working issue on your PC.

Updated October 2023: Stop these error messages and fix common problems with this tool. Get it now at this link
- Download and install the software.
- It will scan your computer for problems.
- The tool will then fix the issues that were found.
Windows PowerShell errors in Windows 10 don’t appear very often. So, if you get the “Powershell has stopped working” error message, you should try some effective methods to fix it.
The appearance of the “Powershell has stopped working” error means that something has stopped the execution process on your Windows 10 computer, but there are no other details about what caused the problem. So, how to fix the “Powershell has stopped working” error in Windows 10? Read the following paragraphs prepared by IR Cache to learn about the methods.
Table of Contents:
What is the cause of the “Powershell has stopped working” problem in Windows

The “Powershell has stopped working” error is caused by two recurring factors. In the first case, the error message may be caused by a Trojan horse called Poweliks. It works like a regular Trojan horse: it can disable you from your email account, run memory-intensive CPO tasks such as dllhost.exe *32 or dllhst3g.exe *32, which directly affect PC performance and cause blue screen of death and frequent error messages.
On the other hand, the “Windows Powershell stopped working” error may be the result of Microsoft security update KB3163245 for Windows 7 and Vista systems. Windows 10 users are less likely to encounter this error through the update.
Updated: October 2023
This tool is highly recommended to help you fix your error. Plus, this tool offers protection against file loss, malware, and hardware failures, and optimizes your device for maximum performance. If you already have a problem with your computer, this software can help you fix it and prevent other problems from recurring:
- Step 1 : Install the PC Repair and Optimizer Tool. (Windows 10, 8, 7, XP, Vista).
- Step 2 : Click Start Scan to determine what problems you are experiencing with your computer.
- Step 3 : Click Repair Allto resolve all problems.


Initiate a clean restart
You can determine if a software conflict is causing Windows PowerShell to fail by initiating a restart. This way, you can restart your Windows 10 system with only the default features.
- Press the Win+R shortcut to launch the startup window.
- There, type MSConfig and press Enter.
- In the system configuration, switch to the General tab.
- Under Selective startup, deselect the field for items to be loaded.
- Then switch to the Services tab.
- Select the Hide all Microsoft services checkbox, and then click Disable all.
- Now switch to the Startup tab and click the Open Task Manager link.
- In Task Manager, disable all startup programs.
- Save your changes and close these windows.
- Reboot your Windows 10 system.
If the “Windows PowerShell stopped working” error does not appear after restarting, then there is a software conflict. You should uninstall the program that caused the problem.
Create a new Microsoft account
- Click on the Windows Start icon.
- Select Settings, then go to Accounts.
- From there, select Family and Other Users.
- Click on Add someone else to this PC.
- Just follow the instructions on the screen to continue this process.
Tip: Remember to back up your data before completing this process – you may have to import personal files and applications under your new account.
Your account may be corrupted (for a variety of reasons), so you always get the Windows PowerShell stopped working error. So try creating a new account and then see if the problem persists or not.
Deactivating and reactivating Windows PowerShell
- Press the Win+X key combination and select Control Panel.
- In the Control Panel, navigate to a category.
- In the list that appears, select Uninstall located in the Programs section.
- On the left side of the main window, click Enable or disable Windows features.
- Scroll down and find the Windows PowerShell entry.
- Disable the PowerShell feature.
- Save and apply the changes.
- Restart your Windows 10 computer.
- Then repeat the previous steps and re-enable the Windows PowerShell feature.
Perform a full system scan
In some situations, Windows PowerShell may be caused by a malware attack. Therefore, the first thing you should do is run a security scan.
You may be infected with Poweliks, a malicious program that disrupts PowerShell. The files associated with this virus are dllhost.exe *32 or dllhst3g.exe *32 and can usually be stopped via Task Manager.
In this case, you should use an antivirus tool and scan your Windows 10 system for possible infected files. The security tool should find and remove the malware automatically.
Tip: It is recommended to run the security scan in Safe Mode – in this mode, third-party applications and processes are disconnected from the Windows 10 platform.
APPROVED: To fix Windows errors, click here.
Frequently Asked Questions
In some situations, Windows PowerShell may not work properly because of a malware attack. You may have been infected with Poweliks, a malicious program that infects PowerShell. The files associated with this virus are dllhost.exe *32 or dllhst3g.exe *32 and can usually be stopped via Task Manager.
- Perform a full system scan. In some situations, Windows PowerShell may be caused by a malware attack.
- Start a reboot.
- Shut down Windows PowerShell and bring it back online.
- Create a new Microsoft account.
- Restart the program.
- Run the program in compatibility mode.
- Run the program as an administrator.
- Configure the data execution prevention settings.
- Scan for viruses and malware.
- Recover Windows system files.
- Update device drivers.
- Reinstall the program.
- Click Start, type PowerShell, and then click Windows PowerShell.
- From the Start menu, click Start, select All Programs, select Accessories, select the Windows PowerShell folder, and then select Windows PowerShell.
Post Views: 1,121