![]()
Download Article
![]()
Download Article
The rivalry between MacBooks and PCs may forever rage on, but that doesn’t mean the two computers can’t still work together! You can even use a MacBook as the second monitor for your PC using a free and easy streaming application called Deskreen. Using your MacBook as a second display for your PC is a great way to mirror or extend your desktop space. This wikiHow article will teach you the easiest way to use a MacBook as a second monitor for your Windows PC.
-

1
Download and install Deskreen on your PC. Deskreen is an open-source application that allows you to turn any computer into a second screen via Wi-Fi. Because the Macbook does not support local display input, we will need to create our second monitor this way. You can download Deskreen from https://deskreen.com.
- Deskreen is one of several similar apps, but keep in mind more popular versions such as Spacedesk may not be available on macOS. [1]
- You only need to install Deskreen on your PC, as your MacBook can project your PC’s screen via an IP address that Deskreen will give you.
- Deskreen is one of several similar apps, but keep in mind more popular versions such as Spacedesk may not be available on macOS. [1]
-
2
Find a virtual display adapter. Software like Deskreen relies on the use of a small USB plug called a virtual display adapter. These adapters make your computer think an external display is connected. They tend to be very affordable and will make your second-screen experience much smoother.
- You may sometimes see virtual display adapters referred to as display dummy plugs.[2]
Advertisement
- You may sometimes see virtual display adapters referred to as display dummy plugs.[2]
-
3
Plug the virtual display adapter into your PC’s USB port. This adapter will come in handy later when we want to trick Deskreen into thinking an external display is connected.
-
4
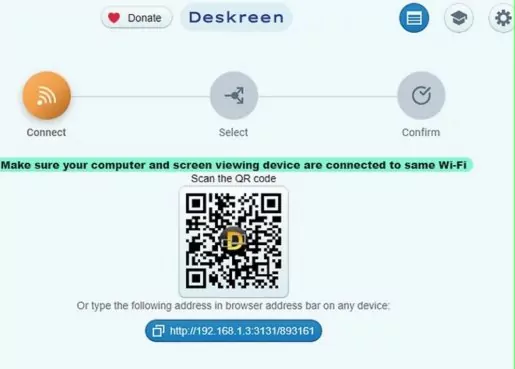
Open Deskreen on your PC. The homepage for Deskreen will show you a QR code as well as a customized IP address. If you are trying to extend to an iPad or iPhone, the QR code may come in handy. We need the IP address.
- Before continuing any further, ensure your MacBook and PC are on the same Wi-Fi network.
-
5
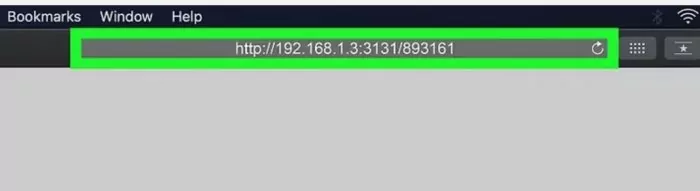
Type the IP address into your Mac’s browser. Enter the address exactly as you see it on Deskreen, then click Enter. [3]
-
6
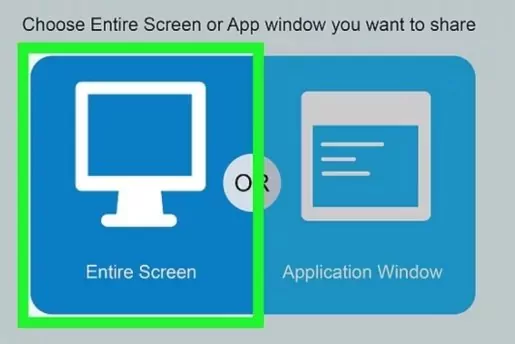
Click Allow on Deskreen from your PC. If you entered the IP address correctly, Deskreen should receive notification from your MacBook that it is trying to connect. Allow your MacBook to connect and choose to share your Entire Screen.
- If you only need to project a single application to your second monitor, you can do so at this time and get to work with your dual monitors!
-
7
Choose your second screen from Deskreen’s list of options. Once you cast your entire screen, Deskreen should show you two screens: your current desktop as it appears to you, and a blank version of it. This blank version is the extension enabled by your virtual display adapter. Click on it to project it onto your MacBook.
-
8
Change your PC’s projection settings to Extend. With the virtual display adapter plugged in, hold down the Windows and P keys simultaneously, then choose Extend from the options that appear in the ensuing menu.
- Extending your display allows you to see your desktop across multiple screens, as opposed to mirroring it perfectly on another device. Luckily, with Deskreen enabled, we have a second screen to extend!
-
9
Start working with your dual set of monitors. Now, your MacBook should be functioning as a second monitor for your PC. To test it, drag any window to the edge of the page until it disappears. It should then appear on your second screen (i.e., your MacBook).


Advertisement
Ask a Question
200 characters left
Include your email address to get a message when this question is answered.
Submit
Advertisement
About This Article
Thanks to all authors for creating a page that has been read 77,204 times.
Is this article up to date?
Вас не устраивает размер экрана вашего ПК, над которым вы работаете? Фактически, Apple дает iMac особую функцию, которая может использоваться в качестве дисплеев на других устройствах. Поскольку iMac обладает впечатляющей функцией отображения, вы можете использовать его в качестве монитора для ПК с Windows. Этот пост даст вам пошаговое руководство по использованию iMac как монитор для ПК.


- Часть 1. Как использовать iMac в качестве монитора для ПК
- Часть 2. Как использовать iMac в качестве монитора для ПК через двойную загрузку
- Часть 3. Часто задаваемые вопросы об использовании iMac в качестве монитора для ПК
Часть 1. Как использовать iMac в качестве монитора для ПК
Последний iMac отличается превосходными дисплеями, такими как монитор Retina 4K, высокий динамический диапазон, яркие цвета и многое другое. Это действительно отличный выбор для отображения экрана на ПК с Windows. Перед этим вам необходимо проверить, можно ли использовать ваш iMac в качестве дополнительного монитора. Если на iMac есть порт Thunderbolt или Mini Display, его можно использовать в качестве монитора. Вы можете проверить следующие совместимые модели:
— 27-дюймовые iMac с конца 2009 и середины 2010 года с портом Mini Display.
— iMac середины 2011 и 2014 годов с портом Thunderbolt
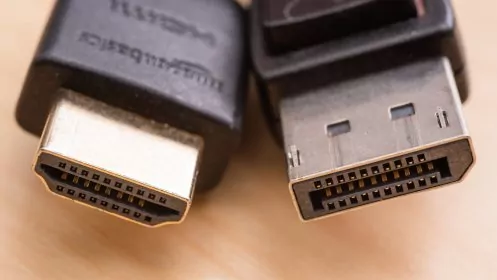
Кроме того, вам необходимо убедиться, что на вашем ПК есть мини-дисплей или порт USB Type-C / Thunderbolt. Если нет, вы можете использовать порт HDMI или Display с подходящим адаптером. Теперь следуйте инструкциям по использованию iMac в качестве монитора для вашего ПК.
Шаг 1. Выключите iMac и компьютер. Затем вам нужно соединить их вместе с помощью кабеля Thunderbolt.
Шаг 2. Подключите один конец кабеля к разъему HDMI, Display Port или Thunderbolt на ПК или ноутбуке с Windows. Другой конец кабеля подключите к разъему Mini Display Port или Thunderbolt вашего iMac. Если вы используете адаптер, сначала подключите кабель к адаптеру, а затем вставьте вилку в порт Mini Display / Thunderbolt на iMac.
Шаг 3. Теперь вы можете включить iMac и ПК. Нажмите и удерживайте Cmd + F2 или Cmd + Fn + F2 на iMac. Через несколько секунд вы сможете отобразить экран вашего ПК на iMac.
Лучшее средство записи экрана для ПК с Windows и Mac, которое вам может понравиться
![]() Vidmore Screen Recorder
Vidmore Screen Recorder
- Записывайте активность экрана, видео, аудио и веб-камеру на Windows и Mac.
- Захватите весь экран или настройте регион для записи активности в нем.
- Редактируйте записанное видео в реальном времени, добавляя примечания, текст, выделение, линии и многое другое.
- Экспорт записанных видео и аудио в MP4, WMV, AVI, FLV, GIF, MP3, AAC и т. Д.
- Создавайте запланированные задачи записи для автоматической записи экрана в определенное время.
Часть 2. Как использовать iMac в качестве монитора для ПК через двойную загрузку
Если вы устанавливаете Windows на iMac, вы можете использовать его в качестве дополнительного дисплея. Для этого на iMac должна быть установлена последняя версия Windows 10 Домашняя или Профессиональная.
Шаг 1. Подключите ПК с Windows и iMac под управлением Windows к одной сети Wi-Fi или подключите их к Интернету через кабель Ethernet.
Шаг 2. На iMac под управлением Windows выберите Настройки, перейдите к Система и выберите Проецирование на этот ПК вариант.
Шаг 3. Затем щелкните значок Доступно везде вариант из раскрывающегося меню. А затем выберите Только в первый раз вариант под Попросить проецировать на этот ПК. Затем вам нужно дать вашему компьютеру имя внизу страницы.
Шаг 4. Затем на вашем ПК с Windows перейдите в Центр событий вкладка в правом нижнем углу. Выберите плитку Project и выберите Подключитесь к беспроводному дисплею. Затем ваш компьютер выполнит поиск беспроводных дисплеев, и iMac должен появиться в списке.
В конце нажмите на iMac, чтобы добавить дисплей, и дисплей вашего ПК должен мерцать. Теперь ваш iMac будет зеркалом вашего ПК с Windows.
Часть 3. Часто задаваемые вопросы об использовании iMac в качестве монитора для ПК
1. Как использовать старый iMac в качестве монитора для другого Mac?
Вам нужно включить целевой режим отображения, чтобы использовать iMac в качестве монитора для другого Mac. Все, что вам нужно, — это iMac с поддержкой TDM и кабеля Thunderbolt. Сначала выключите iMac и Mac и подключите их с помощью кабеля Thunderbolt. Затем включите их и нажмите Command-F2 на клавиатуре iMac, чтобы включить целевой режим отображения. Затем ваш iMac отобразит экран вашего Mac.
2. Что такое режим отображения цели?
Целевой режим отображения — это относительно новая функция, представленная Apple и изначально доступная только на 27-дюймовом iMac конца 2009 года. Это позволило пользователям подключить совместимое устройство к порту Mini Display на iMac и получить эксклюзивное право на использование дисплея iMac.
3. Что такое режим целевого диска?
Режим целевого диска — это более старый родственник режима целевого дисплея, который позволяет использовать жесткий диск одного Mac в качестве внешнего диска на старом Mac.
Это все, чтобы использовать ваш iMac в качестве внешнего монитора для ПК. Если вам нужно экранная запись вашего Mac, Vidmore Screen Record будет отличным вариантом, чтобы помочь вам в этом. И вы также можете использовать его для записывать звук на вашем Mac. Мы надеемся, что это руководство помогло вам управлять дисплеем iMac с ПК с Windows.
Если вы хотите подключить iMac в качестве монитора к ноутбуку под Windows, вам потребуется использовать функцию Target Display Mode, которая доступна только для определенных моделей iMac.
Шаг 1: Убедитесь, что ваш iMac поддерживает Target Display Mode. Обычно эту функцию можно использовать на iMac с Thunderbolt-портами, выпущенных в середине 2011 года и позже.
Шаг 2: Подключите ваш iMac к ноутбуку с помощью кабеля Thunderbolt или Mini DisplayPort. У вас может потребоваться использовать адаптер, если в вашем ноутбуке нет соответствующего порта.
Шаг 3: Если всё подключено правильно, нажмите комбинацию клавиш Command + F2 на iMac. Это активирует режим Target Display Mode и позволит вашему iMac функционировать как внешний монитор для ноутбука.
Шаг 4: Убедитесь, что настройки iMac были правильно сконфигурированы для работы в Target Display Mode. Вам может потребоваться изменить разрешение экрана или другие параметры через системные настройки.
Шаг 5: Теперь вы можете использовать iMac в качестве внешнего монитора для ноутбука под управлением Windows. Просто переключитесь на внешний вход на вашем iMac, и вы сможете работать с ноутбуком на мониторе iMac.
Как подключить монитор Apple Cinema Подробная инструкция
Imac как монитор для ноутбука
old imac as main monitor or external monitor
Подключение ноутбука вместо монитора в 2022 году
Using an iMac as a monitor Amazon Basics 4K Mini DisplayPort to DisplayPort Cable 6 Feet Black
imac 27 2011 года как внешний монитор
Есть ноутбук (W10) с нормальной дискретной видеокартой но плохим экраном , и Macbook Pro Retina 13′ 2013 года
Хотелось бы как-то через HDMI-порты соединить и вывести изображение на Mac, облазил много ресурсов в интернете и нигде не нашёл такой вопрос или попытку так сделать. Это или слишком просто и я не понимаю что нужно сделать, или просто никому не нужно.
-
Вопрос задан
-
8265 просмотров
Напрямую никак. Хоть есть мизерна теоретическая возможность технической реализации подобного, но врядли кто-то это делал или будет делать. Слишком сложно при слишком малом полезном действии.
Советую воспользоваться софтом для шаринга/стриминга экрана: Nvidia Experience/ShadowPlay или чго по-проще.
Пригласить эксперта
Хотелось бы как-то через HDMI-порты соединить и вывести изображение на Mac,
Никак.
-
Показать ещё
Загружается…
09 окт. 2023, в 15:35
1000 руб./в час
09 окт. 2023, в 15:21
1500 руб./за проект
09 окт. 2023, в 15:04
50000 руб./за проект
Минуточку внимания
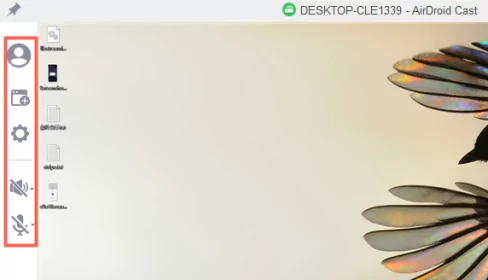
- Use MacBook as a Second Monitor for PC with AirDroid Cast
- Cast Windows and MacOS screens to a computer wirelessly
- Enjoy free screen casting on local networks.
- Cast device’s audio and microphone sound
- 1. Using MacBook as a Second Monitor for PC
- 2. Top 3 Wireless Methods to Use MacBook As Second Monitor for PC
- AirDroid Cast: The Ideal Option

- Duet Display (No required Any Hardware)
- Deskreen — An Open-Source Application
- 3. 2 Wire Methods to Used Macbook as Second Monitor for PC
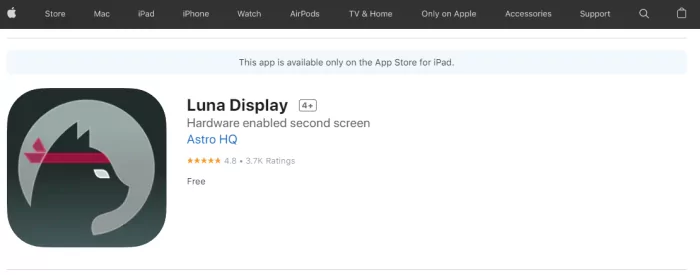
- Luna Display (Need a USB-C dongle)
- HDMI & USB-C Digital AV Multiport Adapter
- 4. Popular FAQs about Second Monitor for PC
- 5. The Bottem Line
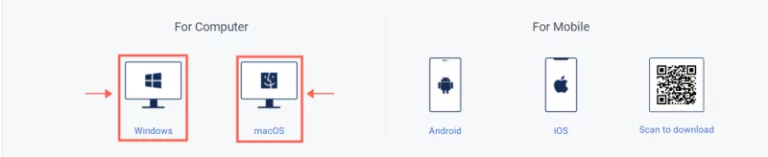
- Step 1 Download and Install AirDroid Cast
- First of all, you have to download the AirDroid Cast software for both your Windows computer and Apple Mac PC. You can easily download it from the official website.
- Once the packages have been downloaded, install them on relevant computers.
- Step 2 Launch the Software
- Launch the AirDroid Cast on both of your systems – computer and MacBook. Since you want to mirror the PC screen to MacBook, use the ‘Cast to’ option from your computer.
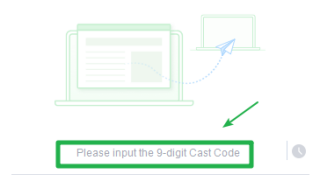
- Step 3 Enter Cast Code
- AirDroid Cast client on your MacBook will ask you to enter the cast code generated by another computer. Enter this 9-digit code and press enter.
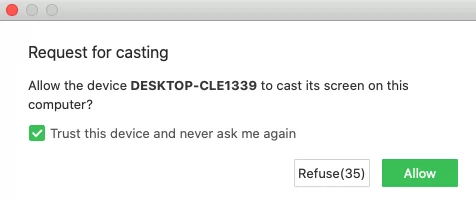
- Step 4 Allow Casting Permission
- If you are using AirDroid Cast for the first time, the system will ask for permission to start screen mirroring. Click on allow to start mirroring.
- Step 5 Enjoy Casting
- Now you will be able to use your Apple Mac PC as a second monitor for your PC. You can perform certain features while mirroring your PC to Mac, such as starting a new window, account management, mute/unmute, and casting settings.
- Only download and install the AirDroid Cast Desktop on the casting computer, i.e., your Windows PC. Launch the software and click on ‘Share this computer screen.’
- Open the ‘webcast.airdroid.com’ on your receiving device, i.e., your MacBook, in this situation.
- Enter the cast code displayed on your MacBook into your casting PC.
- Click on ‘Allow’ and start casting to start using MacBook as a second monitor for your PC.
- Support for different platforms and systems.
- Mirroring is easy as all you have to do is enter the cast code.
- You can cast up to 5 devices onto a system such as your MacBook.
- All of these functions can be obtained wirelessly without buying any device.
- No need to install or download any software to cast your screen to any web browser.
- No cable, device, or wired connection is required.
- Enjoy cross-platform screen sharing between your PC and MacBook via a web browser.
- Webcasting is possible for both local and remote networks.
- Step 1Download and Install Duet Display
- Download and install Duet Display in your MacBook as well as Windows from which you want to share the screen.
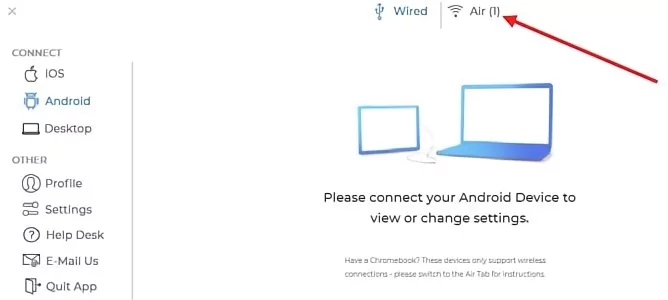
- Step 2 Launch the App
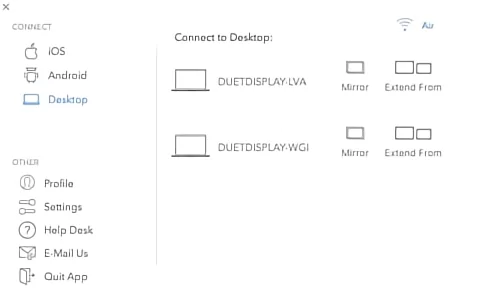
- Launch the software on both of your devices and make sure the systems are connected to the same Wi-Fi network. Head to the ‘Air’ tab to see the available devices. Make sure screen sharing is enabled on both devices.
- Step 3 Click on Your Device
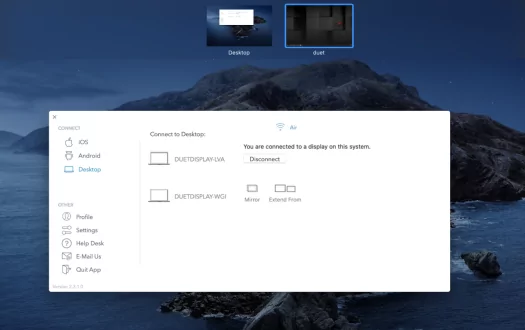
- Select your desktop name in the Apple Mac PC to start mirroring or extending the screen.
- Step 4 Enjoy Screen Mirroring
- Once you select the computer, it will start mirroring your PC screen to the MacBook.
- Supports all major computer platforms and mobile platforms.
- Easy to set up and use.
- Touch-screen capability and responsive performance.
- It is quite expensive.
- Does not have impressive in-app display options.
- Only paid in-app upgrades are possible if support for Apple Pencil is available.
- Step 1Download and Install Deskreen on your PC
- You only have to download and install Deskreen on your PC as MacBook can project the computer’s screen through an IP address.
- Step 2 Use a Virtual Display Adapter
- Generally, you can find a virtual display adapter at an affordable rate. Plug the adapter into your PC’s USB port.
- Step 3 Launch Deskreen on your PC
- The main page of the Deskreen will provide you with a QR code and a customized IP address. Make sure your PC and MacBook are connected to the same Wi-Fi network before proceeding.
- Step 4Open the IP Address on your MacBook
- Type the IP address generated by the PC into your Mac’s browser.
- Step 5 Select Second Screen Option
- Deskreen will provide you the option to share the entire screen or a particular window. Select the suitable option as per your requirements.
- Step 6 Start Using MacBook As A Second Monitor
- After following the above steps, your MacBook will start working as a second monitor for your PC.
- Wide-ranging support for different platforms and systems.
- Availability of web browser functions for screen mirroring.
- Dark mode UI support.
- Supports multiple screen sharing.
- Step 1 Install and Launch Luna Apps
- First of all, you will have to download and install the Luna apps on both your desktop app and Mac devices. Launch these apps.
- Step 2 Plug in the Luna Device
- Insert the Luna dongle into your MacBook.
- Step 3 Select the Device
- Luna will automatically detect all the connected devices over the Wi-Fi network. Choose your Windows computer to start using MacBook as a second monitor for your PC.
- USB-C (Mac and PC) costs $119.99.
- Mini DisplayPort (Mac only) costs $79.99.
- HDMI (PC only) costs $79.99.
- Connect the Windows laptop and MacBook to the same Wi-Fi network.
- Download and install AirPlay software on your Windows laptop.
- Enable AirPlay on MacBook.
- Launch AirPlay on Windows.
- Extend the Mac display to Windows Screen.
- Connect the ethernet cable in both systems. If the MacBook does not have an Ethernet port, you can use a USB-to-Ethernet Adapter.
- Turn on File Sharing on your Windows computer.
- Turn off the Internet Connection Firewall.
- On your MacBook, select Go > Connect to Server > Browser > and type the address displayed by the computer.
Many people wrongly assume that a MacBook and PC cannot work together because they are competition for each other. However, you might be surprised to know that modern tools and technology allow you to use a MacBook as the second monitor for your PC. through different methods.
If you are interested in learning how to use MacBook as a second monitor for your PC, you are in the perfect place. Keep reading to learn all about it step-by-step.
Using MacBook as a Second Monitor for PC
It has become possible to use MacBook as a second monitor for a computer PC due to the availability of different apps and software. There are both wired and wireless methods of connecting a second monitor to a PC.
Let’s explore various ways through which you can connect your Windows PC to an Apple Mac PC so that you are able to choose a suitable method.
Top 3 Wireless Methods to Use MacBook As Second Monitor for PC
Nowadays, various different screen casting and mirroring apps are available, due to which it is possible that you might want to prefer wireless methods over wired ones. In these methods, you don’t have to deal with extensive wires or external hardware.
Let’s look at the top 3 methods of using a MacBook as a second monitor for your PC wirelessly.
1AirDroid Cast
Using AirDroid Cast for screen mirroring from any device’s browser is one of the most powerful and efficient methods currently available to fulfill your mirroring requirements. It is a user-friendly screen-sharing tool through which you can deal with all types of devices, such as Android, iPhone, Windows, Mac, and TV.

You can use AirDroid Cast to mirror your PC to an Apple Mac PC. The web version of AirDroid Cast makes the entire process of using your MacBook as a second monitor much easier and quicker as you don’t have to deal with any external hardware. There are no lags in cross-platform screen sharing with AirDroid Cast that you might find on other platforms.
How to Use AirDroid Cast to Mirror PC to MacBook?
If you want to use AirDroid Cast to mirror PC to MacBook, you should follow these steps:


If you want to use AirDroid Cast Web, you don’t have to install AirDroid Cast in both of the systems.
How to use AirDroid Cast Web:
Why Should We Use AirDroid Cast to Mirror PC to Mac?
You should use AirDroid Cast to mirror your PC to MacBook because it has the following features and benefits:
Similarly, if you are using the web version of AirDroid Cast, you can get the following benefits:
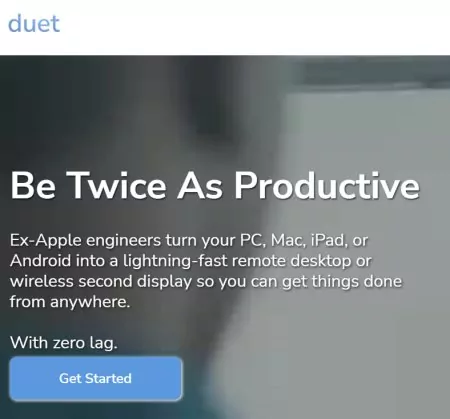
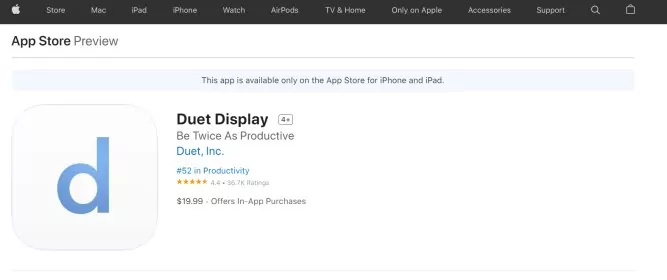
2Duet Display
Duet Display is another popular screen mirroring and casting platform. It is known for its quick, productive, and wide-ranging features. It works on all major platforms like macOS, Windows, and Android to facilitate users.
Therefore, you can use Duet Display to turn your MacBook into a second monitor for a PC by following these steps:
Pros and Cons of Duet Display
Some of the major beneficial features of Duet Display are:
However, there are some significant advantages of using Duet Display as well:
3Deskreen
Deskreen is an open-source desktop software through which you can turn a device such as MacBook into a secondary screen for your PC. Using Deskreen is different from the other two methods because it involves using a small USB plug called a virtual display adapter.
The purpose of these adapters is to trick your computer into thinking that an external display is connected. If you want to use Deskreen to convert your Apple Mac PC into a second monitor for your PC, you can follow these steps:

Key Features & Limitations
Overall, Deskreen is a reliable and efficient software because it has the following features:
However, a major limitation of Deskreen is that it only works efficiently with a virtual display adapter. You cannot expect Deskreen to work quickly when you don’t have a virtual display adapter which was possible with AirDroid Cast and Duel Display.
2 Wire Methods to Use MacBook As A Second Monitor for PC
There are a few reliable wired methods of using a MacBook as a second monitor for your PC as well.
4 Use Luna Display o Turn Your MacBook into A Second Monitor for Your PC
Luna Display is a popular device that allows you to turn your MacBook or iPad into a second monitor for your Windows computer or other Mac devices. It supports a wide range of compatible devices as it has a special dongle for it.

Luna Display can be used in three simple steps:
Buying Luna Display
Since you need a dongle called Luna Display to use this method, you must identify the ports present on your MacBook before buying the device. Following are the three variants of Luna Display available in the market:
5Use HDMI & Adapter to Turn Your MacBook into A Second Monitor for Your PC
By default, you cannot use MacBook as a second monitor for your PC using HDMI. The reason behind this is that both of these systems support only HDMI output and no HDMI input. Most of the MacBook models don’t even have HDMI ports nowadays, except Mac Mini, which has a single HDMI output port.
A wide range of adapters is available in the market, such as VGA-to-HDMI and USB-C to HDMI Cable adapters. These adapters are useful in connecting HDMI to your MacBook as per the available ports.
First of all, you should identify the right ports on your MacBook and PC to get suitable HDMI cables and adapters. The method of using the MacBook as a second monitor for your PC will work for iMac, Mac Mini, MacBook Air, and 13-inch MacBook Pro.
How Do I Use my Mac As a Second Monitor with HDMI?
Follow these steps to use your Mac as a second monitor for your PC with HDMI:
1. Connect the HDMI or HDMI Adapter to your PC.
2. Connect the other end of the adapter to your MacBook either directly or through the USB-C Digital AV Multiport Adapter.
3. Open the ‘Screen Sharing’ settings on your Windows and make sure the sharing options are enabled.
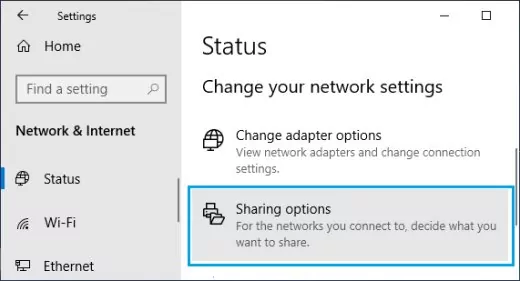
4. You will be able to start using the MacBook as a second monitor for your PC.
Overall, using HDMI and adapters to convert MacBook into a second monitor is a difficult task as you have to consider many different factors like port compatibility and buy the HDMI and adapters. Therefore, it is much better to rely on other methods to ensure maximum efficiency.
Popular FAQs about Second Monitor for PC
How do I use a Windows laptop as a second monitor for a MacBook?
If your MacBook supports AirPlay, you can easily use a Windows laptop as a second monitor by following these steps:
On the other hand, if you are using an older MacBook that does not support AirPlay, you can use a tool like AirDroid Cast to mirror your MacBook to a Windows laptop.
Can I hook up a monitor to my laptop so that I can use the monitor as a desktop computer?
Yes, you can definitely hook up a monitor to your laptop via HDMI and use the ‘Extend’ option to use the monitor as a desktop computer.
Can I connect my old monitor from my desktop to my new laptop?
In most situations, it is possible to connect an old monitor to your new laptop via an HDMI cable. Make sure that the HDMI port of the monitor is working fine. Even if the monitor has the old VGA port, you can use a VGA to HDMI adapter.
How do I Connect my Mac to my Windows using Ethernet?
You can connect your Mac to your Windows by following these steps:
The Bottom Line
Turning your MacBook into a second monitor for your PC does not have to be a difficult procedure. A wide range of wired and wireless methods are available to help you out. Most of these methods can be used to connect external displays to MacBook as well. It all comes down to your requirements and the method you are choosing to fulfill your needs.
Since there are many different methods of connecting your PC with a MacBook, you should keep in mind that both wires and wireless methods have their pros and cons.
If you don’t want to spend too much money on buying adapters and wires, you should select a wireless method of using your MacBook as a second monitor for your PC. By choosing a wireless tool like AirDroid Cast that provides comprehensive support for all platforms, you will be able to use the same platform for all of your mirroring and screencasting requirements.
Was This Page Helpful?
![]()
![]()