A Button is an essential part of an application, or software, or webpage. It allows the user to interact with the application or software. For example, if a user wants to exit from the current application so, he/she click the exit button which closes the application. It can be used to perform many actions like to submit, upload, download, etc. according to the requirement of your program. It can be available with different shape, size, color, etc. and you can reuse them in different applications. In .NET Framework, Button class is used to represent windows button control and it is inherited from ButtonBase class. It is defined under System.Windows.Forms namespace.
In C# you can create a button on the windows form by using two different ways:
1. Design-Time: It is the easiest method to create a button. Use the below steps:
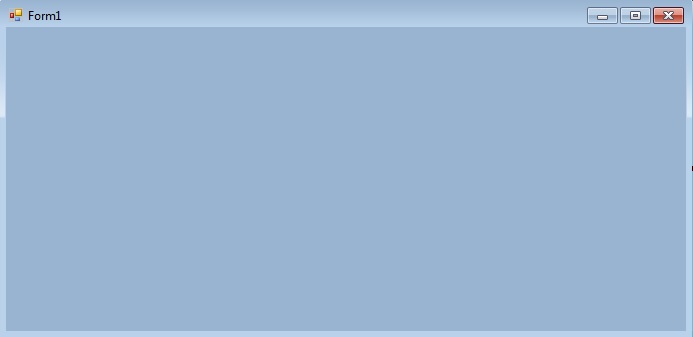
- Step 1: Create a windows form as shown in the below image:
Visual Studio -> File -> New -> Project -> WindowsFormApp
- Step 2: Drag the Button control from the ToolBox and drop it on the windows form. You are allowed to place a Button control anywhere on the windows form according to your need.
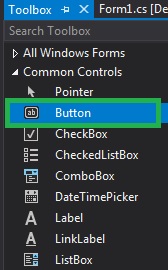
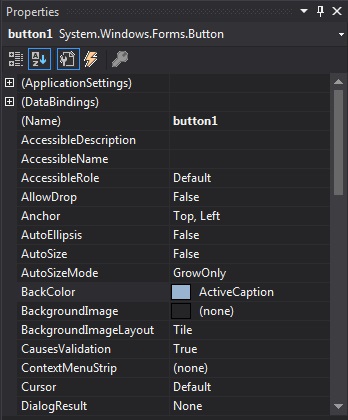
- Step 3: After drag and drop you will go to the properties of the Button control to set the properties of the Button.
2. Run-Time: It is a little bit trickier than the above method. In this method, you can create your own Button using the Button class.
- Step 1: Create a button using the Button() constructor is provided by the Button class.
// Creating Button using Button class
Button MyButton = new Button();
- Step 2: After creating Button, set the properties of the Button provided by the Button class.
// Set the location of the button
Mybutton.Location = new Point(225, 198);

// Set text inside the button
Mybutton.Text = "Submit";

// Set the AutoSize property of the button
 Mybutton.AutoSize = true;

// Set the background color of the button
Mybutton.BackColor = Color.LightBlue;

// Set the padding of the button
Mybutton.Padding = new Padding(6);

// Set font of the text present in the button
Mybutton.Font = new Font("French Script MT", 18);
- Step 3: And last add this button control to form using Add() method.
// Add this Button to form
this.Controls.Add(Mybutton);
- Example:
CSharp
using System;
using System.Collections.Generic;
using System.ComponentModel;
using System.Data;
using System.Drawing;
using System.Linq;
using System.Text;
using System.Threading.Tasks;
using System.Windows.Forms;
namespace WindowsFormsApp8 {
public partial class Form1 : Form {
public Form1()
{
InitializeComponent();
}
private void Form1_Load(object sender, EventArgs e)
{
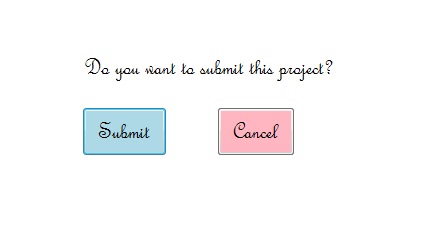
Label l = new Label();
l.AutoSize = true;
l.Text = "Do you want to submit this project?";
l.Location = new Point(222, 145);
l.Font = new Font("French Script MT", 18);
this.Controls.Add(l);
Button Mybutton = new Button();
Mybutton.Location = new Point(225, 198);
Mybutton.Text = "Submit";
Mybutton.AutoSize = true;
Mybutton.BackColor = Color.LightBlue;
Mybutton.Padding = new Padding(6);
Mybutton.Font = new Font("French Script MT", 18);
this.Controls.Add(Mybutton);
Button Mybutton1 = new Button();
Mybutton1.Location = new Point(360, 198);
Mybutton1.Text = "Cancel";
Mybutton1.AutoSize = true;
Mybutton1.BackColor = Color.LightPink;
Mybutton1.Padding = new Padding(6);
Mybutton1.Font = new Font("French Script MT", 18);
this.Controls.Add(Mybutton1);
}
}
}
- Output:
Important Properties of Button
| Property | Description |
|---|---|
| BackColor | Using BackColor property you can set the background color of the button. |
| BackgroundImage | Using BackgroundImage property you can set the background image on the button. |
| AutoEllipsis | Using AutoEllipsis property you can set a value which shows that whether the ellipsis character (…) appears at the right edge of the control which denotes that the button text extends beyond the specified length of the button. |
| AutoSize | Using AutoSize property you can set a value which shows whether the button resizes based on its contents. |
| Enabled | Using Enabled property you can set a value which shows whether the button can respond to user interaction. |
| Events | Using Events property you can get the list of the event handlers that are applied on the given button. |
| Font | Using Font property you can set the font of the button. |
| FontHeight | Using FontHeight property you can set the height of the font. |
| ForeColor | Using ForeColor property you can set the foreground color of the button. |
| Height | Using Height property you can set the height of the button. |
| Image | Using Image property you can set the image on the button. |
| Margin | Using Margin property you can set the margin between controls. |
| Name | Using Name property you can set the name of the button. |
| Padding | Using Padding property you can set the padding within the button. |
| Visible | Using Visible property you can set a value which shows whether the button and all its child buttons are displayed. |
Important Events on Button
| Event | Description |
|---|---|
| Click | This event occur when the button is clicked. |
| DoubleClick | This event occur when the user performs double click on the button. |
| Enter | This event occur when the control is entered. |
| KeyPress | This event occur when the character, or space, or backspace key is pressed while the control has focus. |
| Leave | This event occur when the input focus leaves the control. |
| MouseClick | This event occur when you click the mouse pointer on the button. |
| MouseDoubleClick | This event occur when you double click the mouse pointer on the button. |
| MouseHover | This event occur when the mouse pointer placed on the button. |
| MouseLeave | This event occur when the mouse pointer leaves the button. |
Last Updated :
21 May, 2021
Like Article
Save Article
In today’s tutorial, we are gonna have a look at How to use Button in C# Windows Form. In our previous tutorials, we have first discussed the …
- Computer Science
- C#
- Microsoft Visual Studio
So, now we are gonna add back end programming in those Controls one by one. In today’s tutorial, I am gonna add the code for the Buttons and you will see that it won’t be any difficult to use them in your projects. So, let’s get started with How to use Button in C# Windows Form.
How to use Button in C# Windows Form ???
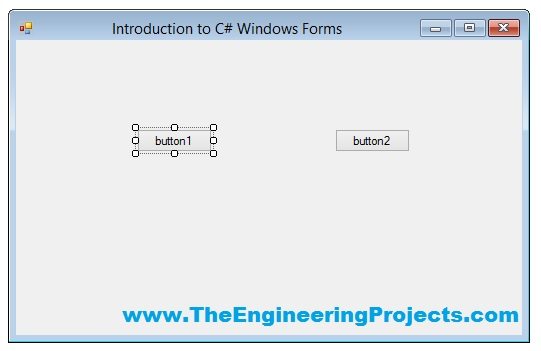
- First of all, create a new Project as we did in Introduction to C# Windows Forms and then add two Buttons in your Windows Form, which we have learned in How to add C# Controls in Windows Form.
- Now, I think your C# Windows form will look something like this:
- So, now we have two buttons in our C# Windows Form, so now First of all, let’s change the text of first button from its Properties as shown in below figure:
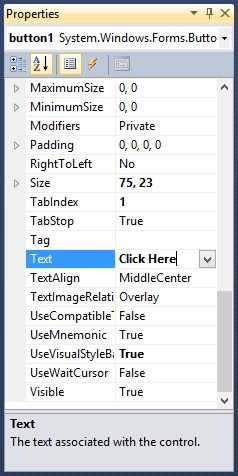
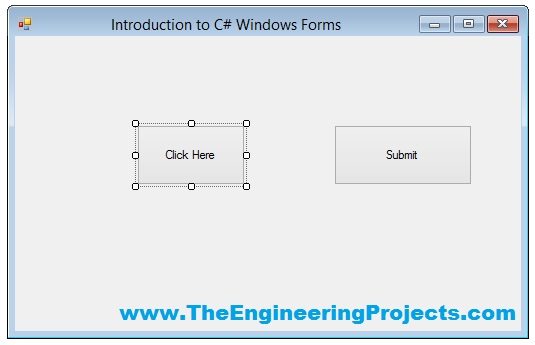
- So, I have changed the text of Button1 to Click Here and I am gonna change the text of Button2 to Submit and they will now look like something as shown in below figure:
- Now you can see in the above figure that the Text on these buttons have changed to that which I have added in the Text section of their properties.
- Moreover, you must have also noticed that now their size has also increased, which I did by dragging the buttons.
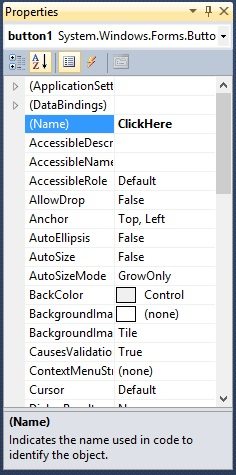
- Now let’s change the name of these buttons too so I am gonna change the Name of first button to ClickHere and that of second button to Submit.
- We can’t add spaces in the Name of the Button.
- The Name Change for first button is shown in below figure:
- Now let’s add the Click event for each of these buttons.
- Click event is the event which should happened when you press the button.
- So, now double click the first button and it will open up its code as shown below:
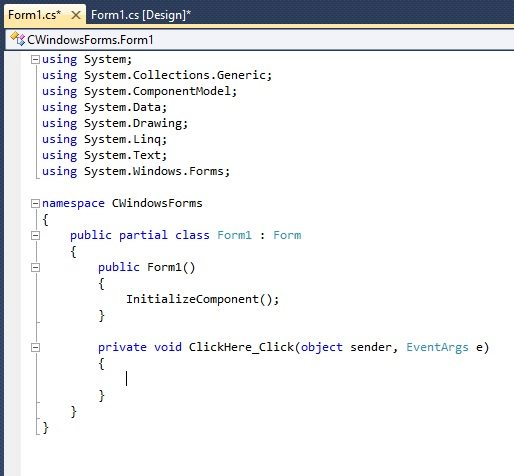
- Now you can see in the above code we have a function named ClickHere_Click, which is the click event function for first button.
- ClickHere is the name of the button which we changed above and _Click is the event. In simple words, this event will call on when the ClickHere Button is clicked.
- Next we have the arguments, which I am not currently gonna discuss here but we will have a look at them later and then we have these curly brackets { }, and that’s where our code is gonna pasted for the click event of this button.
- So, add the below code into these brackets.
MessageBox.Show("Its a Click Here Button");
- Now when you pressed the Click Here Button then a sall message box will open up as shown in below figure:
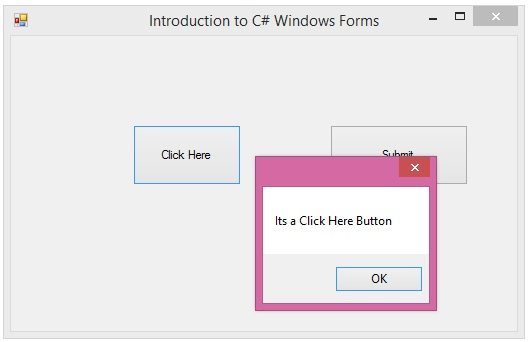
- So, now you have seen, first we have added the Button then we changed its Text and Name and later we added the back end code in it so that it could perform an event on clicking.
- Now, I have added a small code in the Submit Button Click event and it looks something like this when you click it:
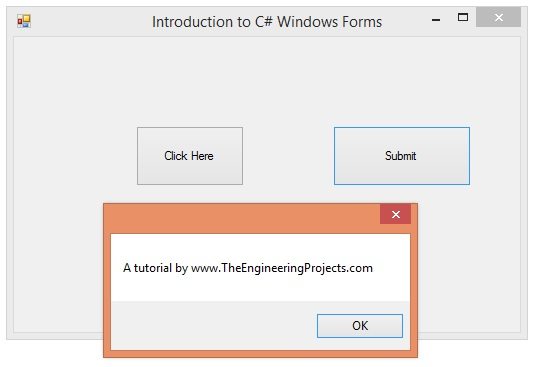
- So, that’s all about how to use button in C# Windows Form.
That’s all for today. Will meet you guys in the next tutorial on C#. Till then take care and have fun!!! 
Syed Zain Nasir
syedzainnasir
I am Syed Zain Nasir, the founder of The Engineering Projects (TEP). I am a
programmer since 2009 before that I just search things, make small projects and now I am sharing my
knowledge through this platform. I also work as a freelancer and did many projects related to
programming and electrical circuitry. My Google Profile+
Follow
Get Connected

Элементы управления
Последнее обновление: 31.10.2015
Элементы управления представляют собой визуальные классы, которые получают введенные пользователем данные и могут инициировать различные события.
Все элементы управления наследуются от класса Control и поэтому имеют ряд общих свойств:
-
Anchor: Определяет, как элемент будет растягиваться
-
BackColor: Определяет фоновый цвет элемента
-
BackgroundImage: Определяет фоновое изображение элемента
-
ContextMenu: Контекстное меню, которое открывается при нажатии на элемент правой кнопкой мыши.
Задается с помощью элемента ContextMenu -
Cursor: Представляет, как будет отображаться курсор мыши при наведении на элемент
-
Dock: Задает расположение элемента на форме
-
Enabled: Определяет, будет ли доступен элемент для использования. Если это свойство имеет значение False,
то элемент блокируется. -
Font: Устанавливает шрифт текста для элемента
-
ForeColor: Определяет цвет шрифта
-
Location: Определяет координаты верхнего левого угла элемента управления
-
Name: Имя элемента управления
-
Size: Определяет размер элемента
-
Width: ширина элемента
-
Height: высота элемента
-
TabIndex: Определяет порядок обхода элемента по нажатию на клавишу Tab
-
Tag: Позволяет сохранять значение, ассоциированное с этим элементом управления
Кнопка
Наиболее часто используемым элементом управления является кнопка. Обрабатывая событие нажатия кнопки, мы может производить те или иные действия.
При нажатии на кнопку на форме в редакторе Visual Studio мы по умолчанию попадаем в код обработчика события Click,
который будет выполняться при нажатии:
private void button1_Click(object sender, EventArgs e)
{
    MessageBox.Show("Hello World");
}
Оформление кнопки
Чтобы управлять внешним отображением кнопки, можно использовать свойство FlatStyle. Оно может принимать следующие значения:
-
Flat — Кнопка имеет плоский вид
-
Popup — Кнопка приобретает объемный вид при наведении на нее указателя, в иных случаях она имеет плоский вид
-
Standard — Кнопка имеет объемный вид (используется по умолчанию)
-
System — Вид кнопки зависит от операционной системы
Изображение на кнопке
Как и для многих элементов управления, для кнопки можно задавать изображение с помощью свойства BackgroundImage.
Однако мы можем также управлять размещением текста и изображения на кнопки.
Для этого надо использовать свойство TextImageRelation. Оно приобретает следующие значения:
-
Overlay: текст накладывается на изображение
-
ImageAboveText: изображение располагается над текстом
-
TextAboveImage: текст располагается над изображением
-
ImageBeforeText: изображение располагается перед текстом
-
TextBeforeImage: текст располагается перед изображением
Например, установим для кнопки изображение. Для этого выберем кнопку и в окне Свойств нажмем на поле Image (не путать с BackgroundImage). Нам откроется диалоговое окно
установи изображения:
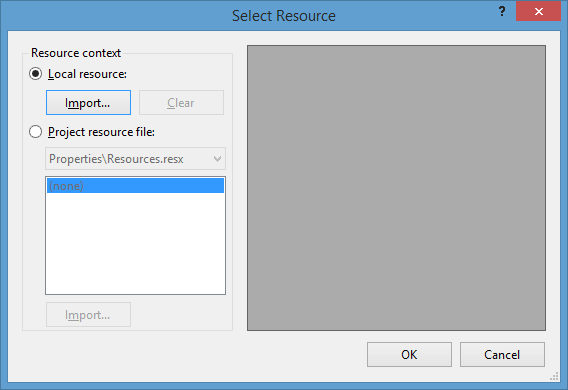
В этом окне выберем опцию Local Resource и нажмем на кнопку Import, после чего нам откроется диалоговое окно для выбора файла изображения.
После выбора изображения мы можем установить свойство ImageAlign, которое управляет позиционированием изображения на кнопке:
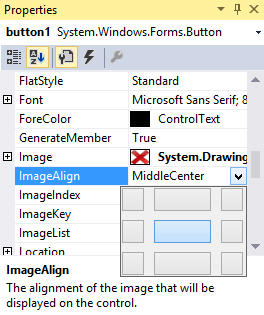
Нам доступны 9 вариантов, с помощью которых мы можем прикрепить изображение к определенной стороне кнопки. Оставим здесь значение по умолчанию — MiddleCenter,
то есть позиционирование по центру.
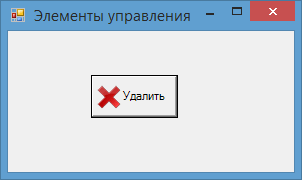
Затем перейдем к свойству TextImageRelation и установим для него значение ImageBeforeText. В итоге мы получим кнопку,
где сразу после изображения идет надпись на кнопке:
Клавиши быстрого доступа
При работе с формами при использовании клавиатуры очень удобно пользоваться клавишами быстрого доступа. При нажатии на клавиатуре комбинации
клавиш At+некоторый символ, будет вызываться определенная кнопка. Например, зададим для некоторой кнопки свойство Text равное &Аватар.
Первый знак — амперсанд — определяет ту букву, которая будет подчеркнута. В данном случае надпись будет выглядеть как
Аватар. И теперь чтобы вызвать событие Click, нам достаточно нажать на комбинацию клавиш Alt+А.
Кнопки по умолчанию
Форма, на которой размещаются все элементы управления, имеет свойства, позволяющие назначать кнопку по умолчанию и кнопку отмены.
Так, свойство формы AcceptButton позволяет назначать кнопку по умолчанию, которая будет срабатывать по нажатию на клавишу Enter.
Аналогично работает свойство формы CancelButton, которое назначает кнопку отмены. Назначив такую кнопку, мы можем вызвать ее нажатие,
нажав на клавишу Esc.
This C# tutorial uses the Button control from Windows Forms. A Button can be clicked.
Button. A button accepts clicks.
In Windows Forms we use a Button control that accepts click events and performs other actions in the user interface. This control provides a way to accept input—and invoke logic based on that input.
Start. First, this tutorial uses the Windows Forms control set. The Button control is one control you can add to any Windows Forms program. It renders as a rectangular box with text or images in the center.
Action: You can use a Button control to perform an action when the user clicks or presses a key to activate the button.
Event
Add. Let’s describe how you can add a Button control to a Windows Forms program. In Visual Studio, make sure the Window you want to add the button to is shown. Go to the View menu and select the Toolbox option.
This presents a list of all the Windows Forms controls you can add to your project on the screen. Locate the Button item in the Toolbox window and either double-click it or drag it to your window.
And: Now, when you see the Button on the window that was inserted, you can right-click on it and select Properties.
Text. In the properties pane or window, you can either change the regular properties or the event handlers on the Button control. You can alter any Button property through the properties window.
Next: We see how the Button properties were changed so that the Button contains the text «Open» instead of the «button1» default label.
Using ellipsis (three periods). Here we use three periods after the Text property on the Button control in the properties window. We use three periods (an ellipsis) because the Button in our example will be used to open a dialog window.
The ellipsis is used to signal that an action that requires the user’s attention such as a dialog box will occur if the control is activated as by clicking on it. I feel that using ellipses correctly on strings in programs is important.
Click. Windows Forms programs are event-based. They are idle until the user takes an action upon a control. When you add a Click event handler to a Button, the event handler method will be invoked when the user clicks on the button.
Note: Windows Forms provides some automatic features that will turn an Enter keypress into a Click event in some cases.
In the Visual Studio properties window, a lightning bolt signifies the event handlers list. You can click on it and then double-click on an event. At that point, the C# code will be inserted into the user-code portion of the project.
Then: You manually edit that C# code to add the program-specific logic. Any statements can be used.
Instead of double-clicking to create a new event handler for one control event, you can use the drop-down box to select a method that already exists to handle the events. There are restrictions: the method signature must be compatible.
Tip: Wiring multiple events to one event handler is useful. It can simplify the source code of medium-complexity programs.
Windows Forms code that uses Button control: C#

using System;
using System.Windows.Forms;

namespace WindowsFormsApplication21
{
    public partial class Form1 : Form
    {
	public Form1()
	{
	    InitializeComponent();
	}

	private void button1_Click(object sender, EventArgs e)
	{
	    MessageBox.Show("Dot Net Perls says hello.", "How is your day going?");
	}
    }
}


We see the body of the Click event that can be added to handle click events for the button1 control instance. You do not need to manually type in the «button1_Click» method signature, and doing so is much harder to maintain.
Instead: You can the interface in Visual Studio to create empty event handler methods.
Then: You can insert logic such as calling the MessageBox.Show method call to perform a trivial action when the event is processed.
MessageBox.Show
Discussion. Let’s consider various tips and tricks you can use to enhance the Button functionality in your Windows Forms controls. Generally, by specifying the constraints of your Button, you can avoid modifying pixel dimensions for the most part.
Tip: You should experiment with the Anchor property to control the resizing of the Button if it is in a variable-sized window.
Further: I recommend putting Buttons inside TableLayoutPanel cells, as this reduces the need to position them manually.
TableLayoutPanel
Button Enabled property. You can at any time change the enabled state of buttons by setting Enabled to true or false. I recommend tying the Enable property’s value to an expression based on another part of the user interface.
Also: You can assign multiple Enabled properties on controls to each other to ensure the user interface is usable at all times.
Summary. We explored the Button control in the Windows Forms control set. First we created a new Windows Forms project. We added add a new instance of the Button control. We next changed the appearance of the Button control and its text.
Related Links
Adjectives
Ado
Ai
Android
Angular
Antonyms
Apache
Articles
Asp
Autocad
Automata
Aws
Azure
Basic
Binary
Bitcoin
Blockchain
C
Cassandra
Change
Coa
Computer
Control
Cpp
Create
Creating
C-Sharp
Cyber
Daa
Data
Dbms
Deletion
Devops
Difference
Discrete
Es6
Ethical
Examples
Features
Firebase
Flutter
Fs
Git
Go
Hbase
History
Hive
Hiveql
How
Html
Idioms
Insertion
Installing
Ios
Java
Joomla
Js
Kafka
Kali
Laravel
Logical
Machine
Matlab
Matrix
Mongodb
Mysql
One
Opencv
Oracle
Ordering
Os
Pandas
Php
Pig
Pl
Postgresql
Powershell
Prepositions
Program
Python
React
Ruby
Scala
Selecting
Selenium
Sentence
Seo
Sharepoint
Software
Spellings
Spotting
Spring
Sql
Sqlite
Sqoop
Svn
Swift
Synonyms
Talend
Testng
Types
Uml
Unity
Vbnet
Verbal
Webdriver
What
Wpf
As you said it is Winforms, you can do the following…
First create a new Button object.
Button newButton = new Button();
Then add it to the form inside that function using:
this.Controls.Add(newButton);
Extra properties you can set…
newButton.Text = "Created Button";
newButton.Location = new Point(70,70);
newButton.Size = new Size(50, 100);
Your issue you’re running to is that you’re trying to set it on Form_Load event, at that stage the form does not exist yet and your buttons are overwritten. You need a delegate for the Shown or Activated events in order to show the button.
For example inside your Form1 constructor,
public Form1()
{
    InitializeComponent();
    this.Shown += CreateButtonDelegate;
}
Your actual delegate is where you create your button and add it to the form, something like this will work.
private void CreateButtonDelegate(object sender, EventArgs e)
{
    Button newButton= new Button();
    this.Controls.Add(newButton);
    newButton.Text = "Created Button";
    newButton.Location = new Point(70,70);
    newButton.Size = new Size(50, 100);
    newButton.Location = new Point(20, 50);
}