Windows 11 brings along numerous changes to the new UI and among these is the new right-click context menu. The context menu has been a long-standing controversial addition of Windows 11, especially during the early days due to the missing ‘Refresh’ option. The option has now been restored, though you are still missing essential options, including compression shortcuts that were available in the traditional context menu. So can you add these options back to the context menu in Windows 11? Let’s find out!
Can you get WinRAR and 7-Zip in the context menu?
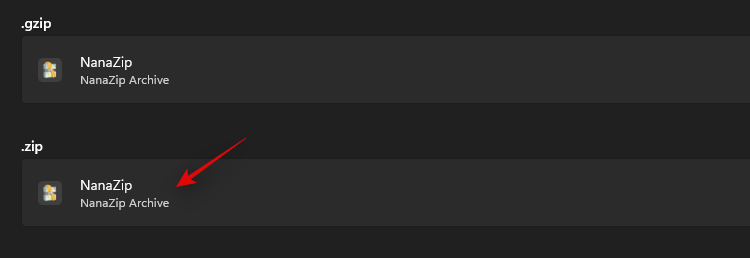
Well, you can. Finally! It was about time, anyway. As of October 13, 2021, Winrar Beta v6.10 gives you the ability to access the app right from the context menu was you used to on the good old Windows 10. Not WinRAR, but 7-Zip is also available via the context menu, but things are not that simple here. Another open source software called NanaZip — a fork of the 7-Zip’s code — is now available that gets you 7-Zip in a new form and adds support for the context menu too.
Check out the guides below to get WinRAR and NanaZip (thus, 7-Zip) into the context menu on your Windows 11.
We recommend using NanaZip to get context menu compression shortcuts in Windows 11. NanaZip is a fork of 7-Zip which ensures maximum compatibility and stability when using it on Windows 11. If however, you aren’t happy with NanaZip, you can opt for the latest WinRAR beta instead. The beta version adds context menu compression shortcuts in Windows 11 however it might include some bugs.
Install NanaZip on your Windows 11 PC using the link below.
- Get NanaZip from Microsoft Store
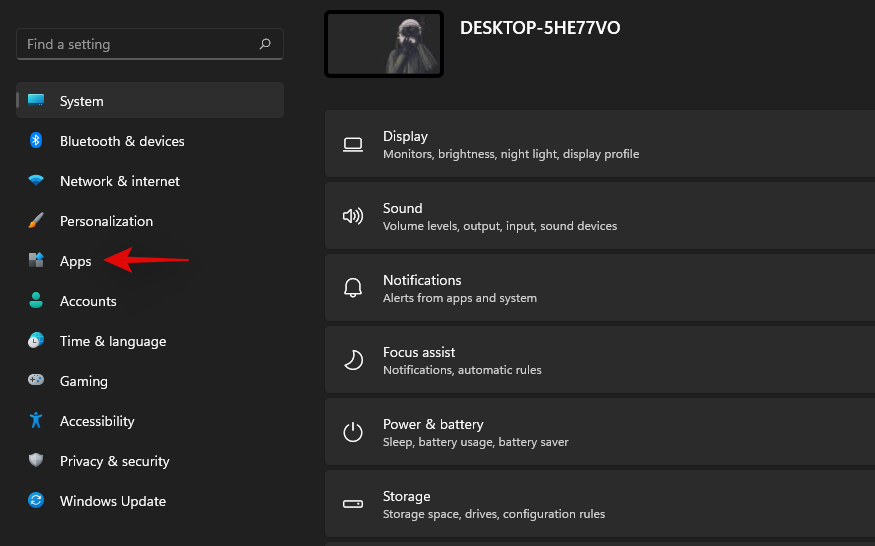
Press Windows + I on your keyboard to open the Settings app instead. Click on ‘Apps’ on your left.
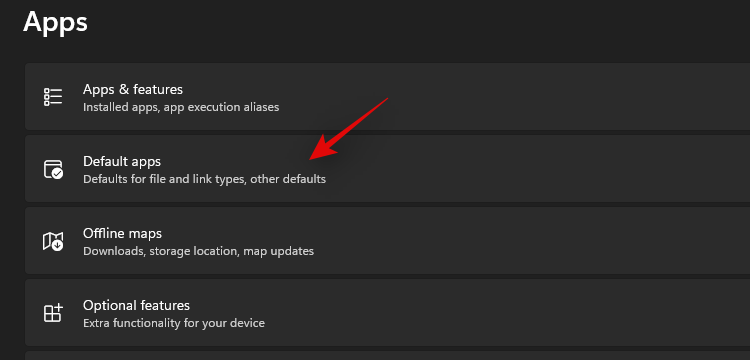
Click on ‘Default Apps’ now.
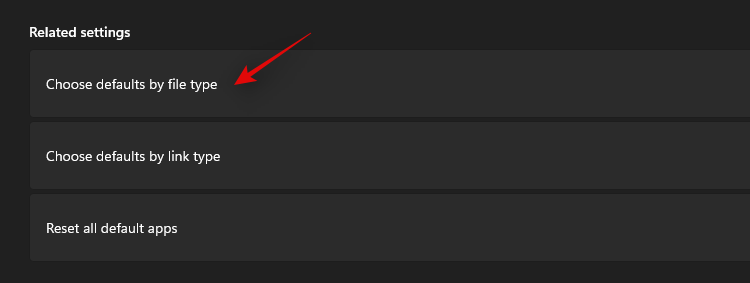
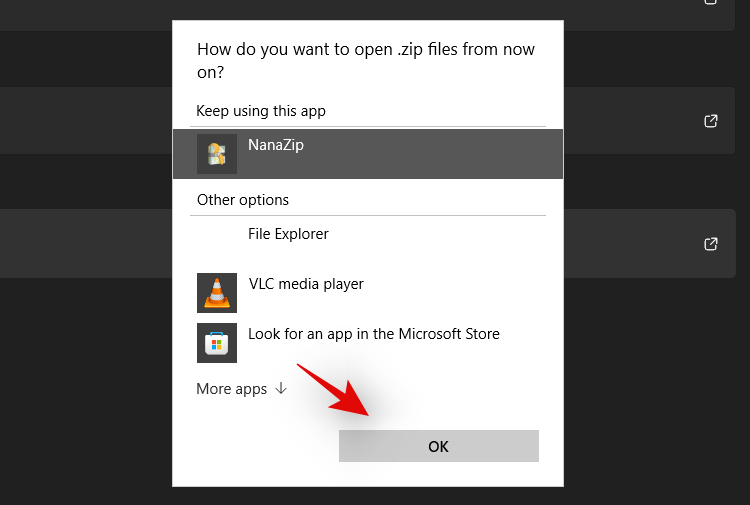
Scroll down and click on ‘Choose defaults by file type’.
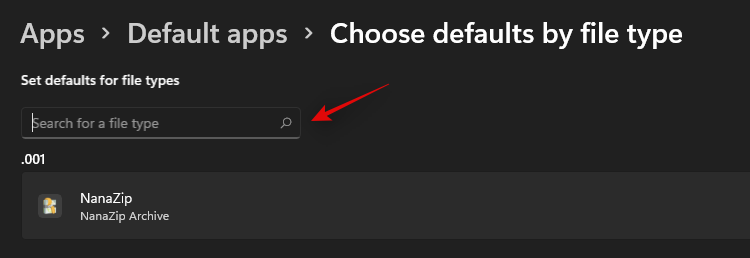
Use the search box at the top and search for ‘zip’.
Click on the listing under .zip.
Select ‘NanaZip’.

Click on ‘Ok’.
Right-click on any random file in the file explorer now and you should now have a listing for NanaZip which can be used to create a zip archive or unzip them.

NanaZip will now be set up and ready to use on your system.
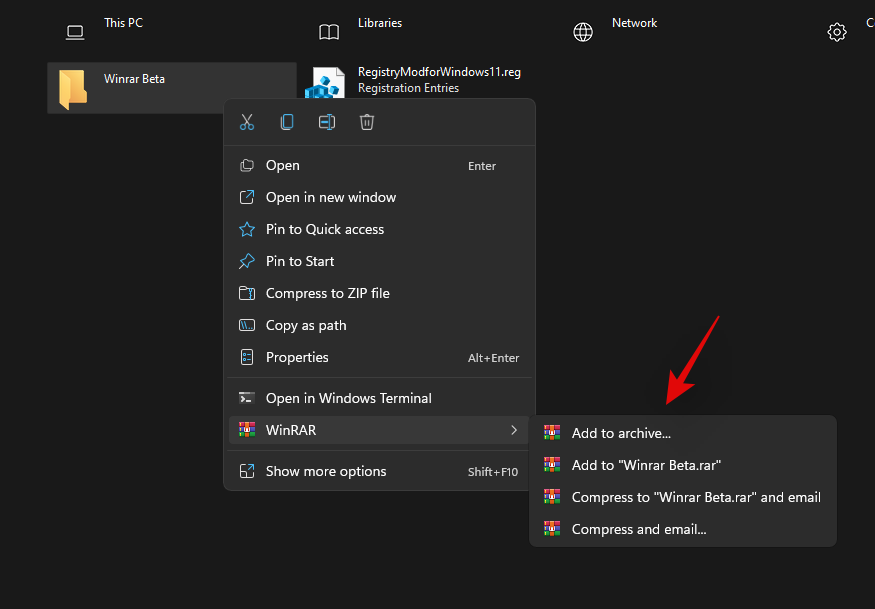
You can also use the latest WinRAR Beta to get context menu compression shortcuts in Windows 11. Use the guide below to get you started.
Download the setup file from the link given below.
- Required version: WinRAR Beta v6.10 | Download Link
Double-click the setup file to run Setup and install WinRAR on your PC.

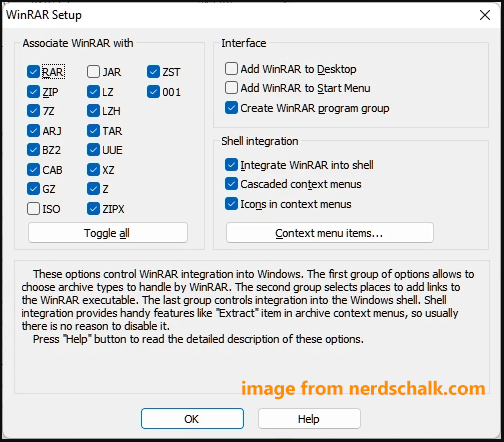
Once installed, it will give apop-up windows for setting up integrations with the common files types it supports. Be sure to select zip, rar and other file types you want WinRAR to handle on your PC.

Click OK after selecting the file types.
(If you miss the integration part during setup, then you can do so by opening WinRAR app and then heading to Options (in the menu bar at the top) > Settings. In the pop-up, click Integration, and then select the file as shown above.)
Now, right-click on a random file and you should now have WinRAR compression shortcuts in your right-click context menu.
FAQs
Here are some common queries around the new context menu additions that should help you get up to date with the latest information.
Windows 11 comes with a new minimalistic frosted glass aesthetic which calls for a minimized context menu. The traditional all option context menu can always be accessed by clicking on ‘Show more options’. The new context menu requires third-party apps to update their upcoming apps accordingly while there seems to be no way to access the native compression utility directly from the current context menu for now.
Yes, you can easily restore the old context menu in Windows 11 by following the steps in this guide. You can also use updated versions of third-party utilities like WinAero Tweaker, OpenShell, or more.
What is the ‘Show More Options’ shortcut?
You can use Shift + F10 on your keyboard to directly get the old context menu in Windows 11.
How to install NanaZip without Microsoft Store
Visit the Github download page given below and click and expand ‘Assets for the latest release.
- NanaZip | Download Link
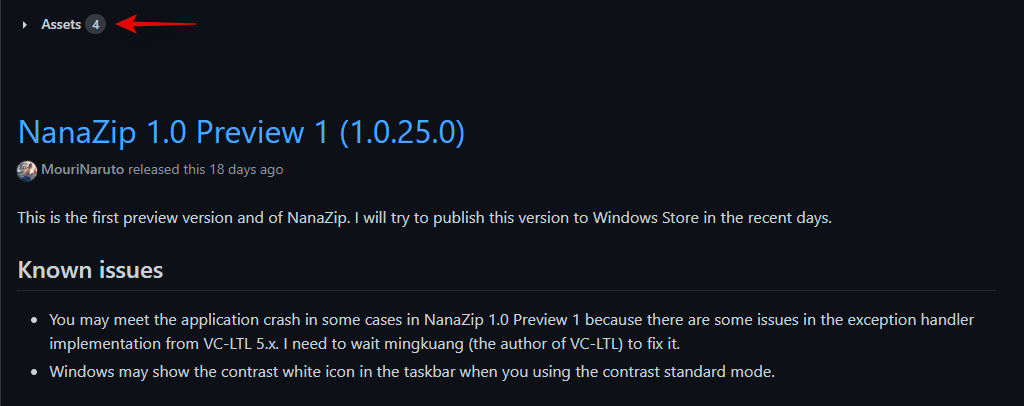
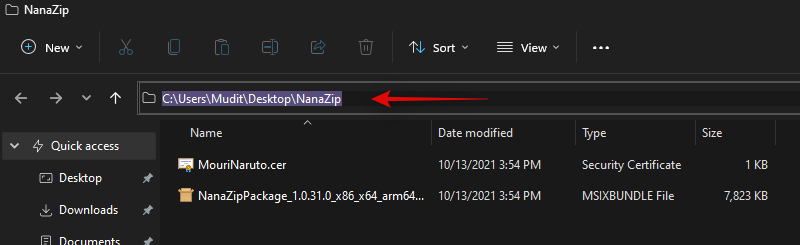
Download the following files by clicking on them. Save both the files in a folder on your desktop to ensure you don’t encounter any bugs when installing the certificate.

- MouriNaruto.cer
- NanaZipPackage_1.0.31.0_x86_x64_arm64.msixbundle
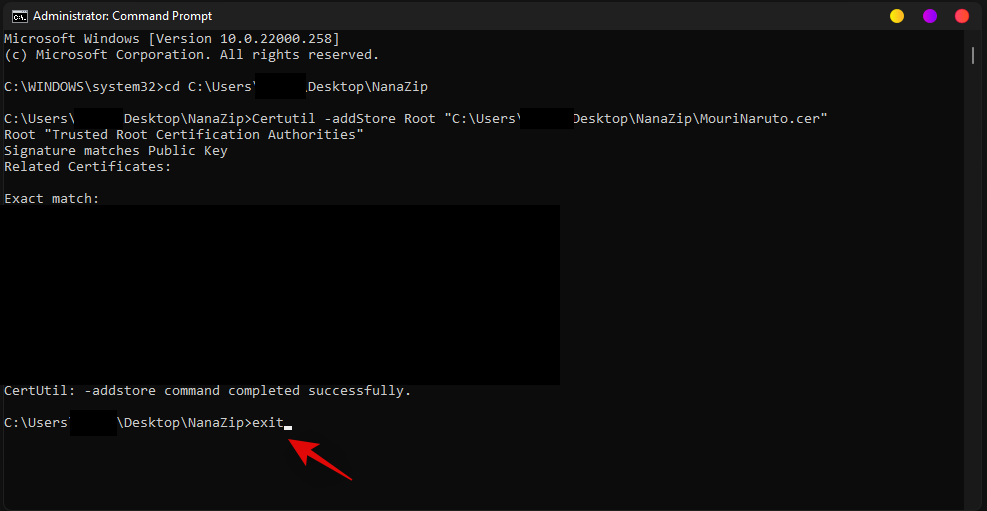
Now open the location where you saved your files, click in the address bar, and copy the address to your clipboard.
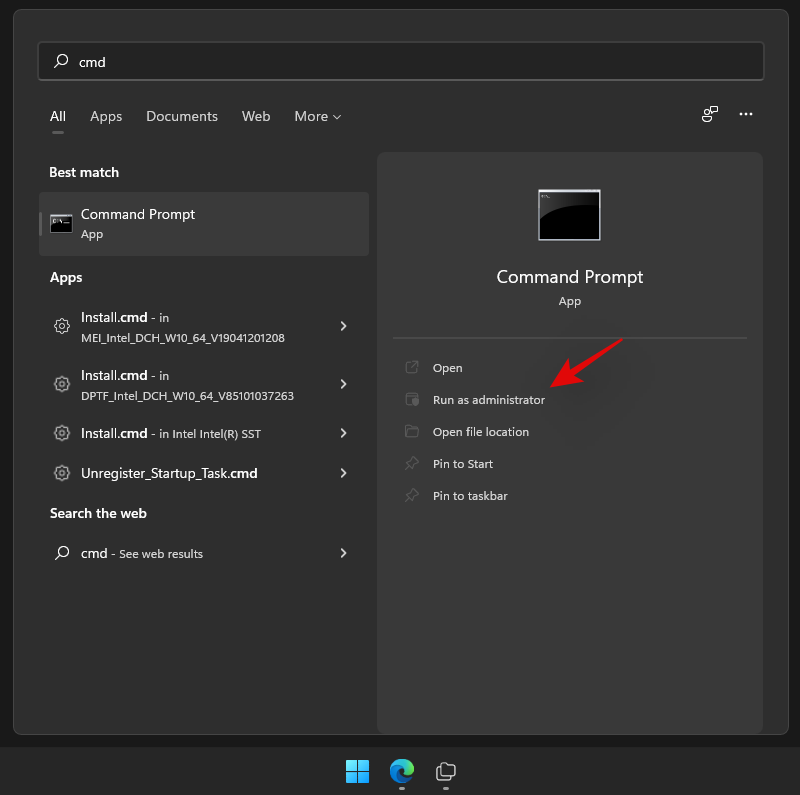
Press Windows + S on your keyboard and search for CMD. Click on ‘Run as administrator’ once the app shows up in your search results.
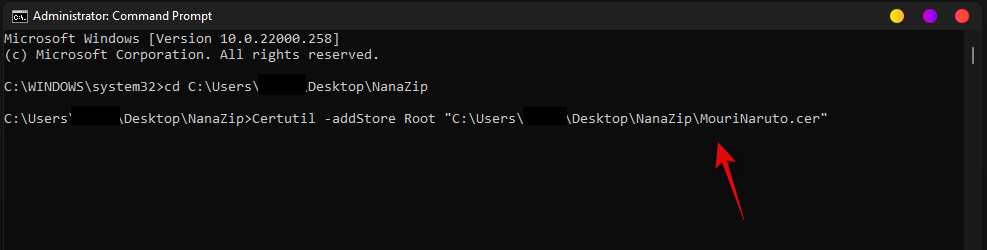
Type in the following command and replace PATH with the path copied to your clipboard.
cd PATH

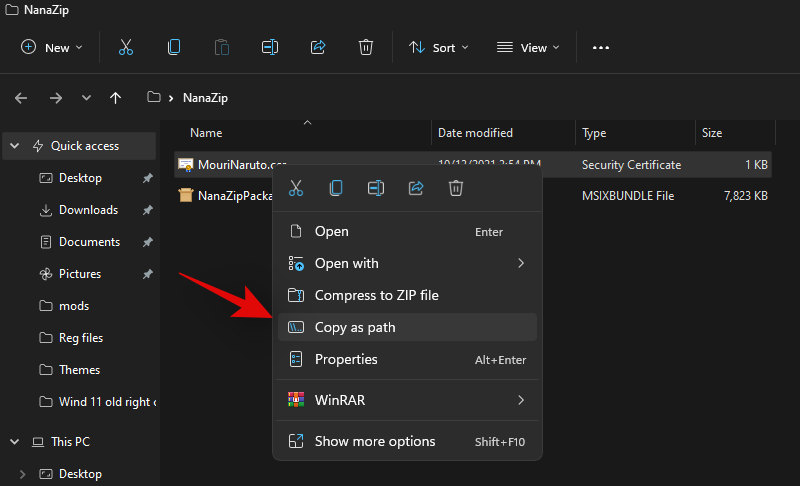
Now head back to the folder, right-click on ‘MouriNaruto.cer’ and select ‘Copy as path’.
Switch to CMD and execute the following command. Replace PATH with the path for the certificate copied to your clipboard in the last step.
Certutil -addStore Root "PATH"
The certificate will now be installed on your PC. Type in ‘Exit’ to close the command prompt.
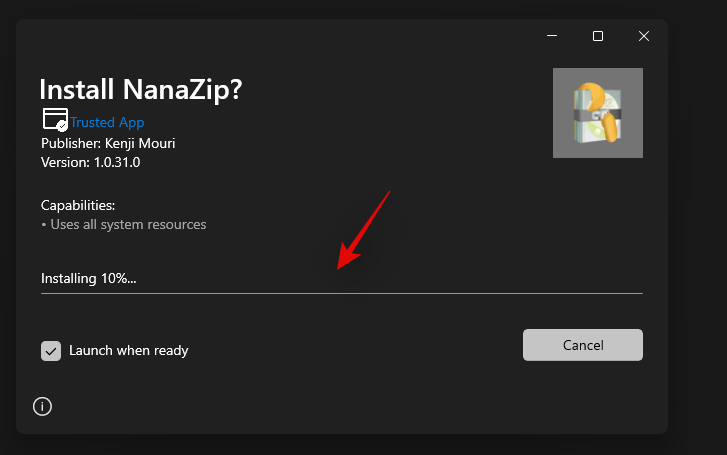
Now double click and run the other package file downloaded along with the certificate. Click on ‘Install’.

NanaZip will be be installed on your PC in no time.
We hope you were able to easily get new compression shortcuts in the right-click in context menu using the guide above. If you need help with anything, feel free to drop a comment below.
Related:
- What Is Windows 11 Registry Bypass?
- How to Use Disable TPM and Secure Boot in Rufus
- Will Windows 11 Support More Processors?
- How to Download and Install Official Windows 11 ISO yourself
- How to install Windows 11 with Windows 11 Installation Assistant
![]()

В январе 2022 года компания RARLAB, разработчик архиватора WinRAR, выпустила новую версию WinRAR 6.10, в которой прекращена поддержка операционной системы Windows XP.
Многие разработчики уже отказались от поддержки Windows XP для своих продуктов. Такие программы, как Firefox, Chrome, Audacity, Sumatra или Dropbox, официально не поддерживают Windows XP.
Теперь для использования WinRAR 6.10 потребуется как минимум Windows Vista, которая также, как и Windows XP, больше не поддерживается Microsoft. Windows 7 и Windows 8.1 будут получать обновления до января 2023 года.

Что нового
Кроме пересмотренных системных требования, WinRAR 6.10 получил и другие улучшения. Программа получила поддержку контекстного меню Windows 11. Напомним, что в Windows 11 Microsoft изменила контекстное меню Проводника, вызываемое правой кнопкой мыши. Компания добавила новое контекстное меню в файловый менеджер, но сохранила классическое контекстное меню в виде опции Показать дополнительные параметры. Записи многих сторонних приложений сейчас не отображаются в новом контекстном меню, поскольку компаниям необходимо реализовывать его поддержку с помощью обновлений.
Одним из ограничений контекстного меню является то, что программам разрешено использовать только одну запись верхнего уровня или пункт меню. В новом контекстном меню WinRAR в Windows 11 используется вложенное подменю со всеми необходимыми командами.
Пользователи WinRAR могут настраивать меню в настройках. Параметр Вложенные контекстные меню (Cascaded context menus) определяет, будет ли отображаться подменю со всеми командами WinRAR. При отключении этого параметра становится доступна всего одна команда извлечения или архивирования, которую пользователи могут выбрать в разделе Элементы контекстного меню (Context Menu Items).
Выберите Настройки > Параметры > Интеграция (Options > Settings > Integration), чтобы получить доступ к настройкам. Там вы можете переключить Вложенные контекстные меню, а также найти кнопку Элементы контекстного меню, чтобы выбрать элементы для отображения. Диалоговое окно конфигурации также отображается после установки программы.

Пользователи WinRAR могут использовать новую опцию Устаревшие контекстные меню (Legacy context menus), если элементы меню отсутствуют в унаследованном контекстном меню Windows 11 или в контекстных меню сторонних файловых менеджеров. Этот параметр доступен только на устройствах с Windows 11.
Среди других улучшений WinRAR 6.10 — добавление поддержки извлечения архивов .zst и .zipx.
Для создания записей восстановления RAR5 установлено новое максимальное ограничение — теперь это 1000%, а значит размер томов для восстановления может быть до 10 раз больше, чем фактический размер томов RAR. Размер файла восстановления более 99% от объема архива, поддерживается только WinRAR 6.10 или более поздней версии. Также WinRAR теперь поддерживает сценарии, когда количество томов для восстановления больше, чем количество защищенных томов RAR. В этом случае старые версии WinRAR нельзя использовать для восстановления архивов.
Полный список изменений доступен на официальном сайте.
В Windows 11 внесены многочисленные изменения в новый пользовательский интерфейс, в том числе новое контекстное меню, вызываемое правой кнопкой мыши. Контекстное меню было давним спорным дополнением Windows 11, особенно в первые дни из-за отсутствия опции «Обновить». Теперь этот параметр восстановлен, хотя вам по-прежнему не хватает основных параметров, включая ярлыки сжатия, которые были доступны в традиционном контекстном меню. Так можно ли добавить эти параметры обратно в контекстное меню Windows 11? Давайте разберемся!
Что ж, можно. Наконец-то! В любом случае, пора было. По состоянию на 13 октября 2021 года Winrar Beta v6.10 дает вам возможность получить доступ к приложению прямо из контекстного меню, к которому вы привыкли в старой доброй Windows 10. Не WinRAR, но 7-Zip также доступен через контекстное меню. , но здесь все не так просто. Еще одно программное обеспечение с открытым исходным кодом под названием NanaZip – ответвление кода 7-Zip – теперь доступно, которое предоставляет вам 7-Zip в новой форме, а также добавляет поддержку контекстного меню.
Ознакомьтесь с приведенными ниже руководствами, чтобы добавить WinRAR и NanaZip (таким образом, 7-Zip) в контекстное меню Windows 11.
Мы рекомендуем использовать NanaZip для получения ярлыков сжатия контекстного меню в Windows 11. NanaZip – это форк 7-Zip, который обеспечивает максимальную совместимость и стабильность при его использовании в Windows 11. Если, однако, вас не устраивает NanaZip, вы можете выбрать взамен последней бета-версии WinRAR. Бета-версия добавляет ярлыки сжатия контекстного меню в Windows 11, однако может содержать некоторые ошибки.
Установите NanaZip на свой компьютер с Windows 11, используя ссылку ниже.
Нажмите Windows + I на клавиатуре, чтобы вместо этого открыть приложение «Настройки». Нажмите «Приложения» слева.
Нажмите «Приложения по умолчанию» сейчас.
Прокрутите вниз и нажмите «Выбрать значения по умолчанию по типу файла».
Воспользуйтесь окном поиска вверху и введите слово «zip».
Щелкните список под .zip.
Выберите «NanaZip».
Щелкните “ОК”.
Щелкните правой кнопкой мыши любой случайный файл в проводнике файлов, и теперь у вас должен быть список для NanaZip, который можно использовать для создания zip-архива или их распаковки.
NanaZip будет настроен и готов к использованию в вашей системе.
Вы также можете использовать последнюю бета-версию WinRAR для получения ярлыков сжатия контекстного меню в Windows 11. Используйте приведенное ниже руководство, чтобы начать работу.
Загрузите установочный файл по приведенной ниже ссылке.
Дважды щелкните файл установки, чтобы запустить программу установки и установить WinRAR на свой компьютер.
После установки появится всплывающее окно для настройки интеграции с общими типами файлов, которые он поддерживает. Обязательно выберите zip, rar и другие типы файлов, которые WinRAR будет обрабатывать на вашем компьютере.
Щелкните OK после выбора типов файлов.
(Если вы пропустили часть интеграции во время установки, вы можете сделать это, открыв приложение WinRAR и выбрав «Параметры» (в строке меню вверху)> «Настройки». Во всплывающем окне нажмите «Интеграция», а затем выберите файл. как показано выше.)
Теперь щелкните правой кнопкой мыши случайный файл, и в контекстном меню, вызываемом правой кнопкой мыши, должны появиться ярлыки сжатия WinRAR.
FAQs
Вот несколько распространенных запросов о новых дополнениях в контекстное меню, которые должны помочь вам получать самую свежую информацию.
Windows 11 поставляется с новой минималистичной эстетикой матового стекла, которая требует минимизированного контекстного меню. К традиционному контекстному меню всех параметров всегда можно получить доступ, щелкнув «Показать дополнительные параметры». Новое контекстное меню требует, чтобы сторонние приложения обновляли свои будущие приложения соответствующим образом, в то время как, похоже, на данный момент нет возможности получить доступ к собственной утилите сжатия непосредственно из текущего контекстного меню.
Да, вы можете легко восстановить старое контекстное меню в Windows 11, выполнив действия, описанные в этом руководстве. Вы также можете использовать обновленные версии сторонних утилит, таких как WinAero Tweaker, OpenShell или другие.
Что такое ярлык “Показать дополнительные параметры”?
Вы можете использовать Shift + F10 на клавиатуре, чтобы напрямую получить старое контекстное меню в Windows 11.
Как установить NanaZip без Microsoft Store
Посетите страницу загрузки Github, указанную ниже, и щелкните и разверните «Активы для последней версии».
Загрузите следующие файлы, щелкнув по ним. Сохраните оба файла в папке на рабочем столе, чтобы избежать ошибок при установке сертификата.
- MouriNaruto.cer
- NanaZipPackage_1.0.31.0_x86_x64_arm64.msixbundle
Теперь откройте место, где вы сохранили файлы, щелкните в адресной строке и скопируйте адрес в буфер обмена.
Нажмите Windows + S на клавиатуре и найдите CMD. Нажмите «Запуск от имени администратора», когда приложение появится в результатах поиска.
Введите следующую команду и замените PATH на путь, скопированный в буфер обмена.
cd PATH
Теперь вернитесь в папку, щелкните правой кнопкой мыши «MouriNaruto.cer» и выберите «Копировать как путь».
Переключитесь на CMD и выполните следующую команду. Замените PATH на путь к сертификату, скопированному в буфер обмена на последнем шаге.
Certutil -addStore Root “ПУТЬ”
Сертификат будет установлен на ваш компьютер. Введите «Выход», чтобы закрыть командную строку.
Теперь дважды щелкните и запустите другой файл пакета, загруженный вместе с сертификатом. Щелкните «Установить».
NanaZip будет установлен на ваш компьютер в кратчайшие сроки.
Мы надеемся, что вы смогли легко получить новые ярлыки сжатия, щелкнув правой кнопкой мыши в контекстном меню, используя приведенное выше руководство. Если вам нужна помощь в чем-либо, не стесняйтесь оставлять комментарии ниже.
Связанный:
-
Home
-
News
- WinRAR Not Showing in Right-click Menu? Here’s How to Add It.
By Vera | Follow |
Last Updated
If you are running into the issue of WinRAR not showing in right-click menu or 7-Zip context menu not showing after upgrading to Windows 11, what should you do to get rid of the trouble? Don’t worry and you can read this post to find the way that is collected by MiniTool Solution.
Windows 11 brings a brand new UI design and one big change you should pay much attention to is the new context menu. You can find the new right-click menu is different from the one in Windows 10 – missing essential options, including compression shortcuts available in the traditional context menu.
Of course, you can still access all the options in the classic context menu by clicking Show More Options. Or you can change some settings to switch back to the old context menu. To get more information, refer to this post – Guide: How to Switch back to Win10 File Explorer on Windows 11.
If you want to still access the modern right-click menu, you can add more menus to the context menu. If you meet the issue of WinRAR not showing in right-click menu or 7-Zip option not showing up in context menu, you can add WinRAR or 7-Zip to Windows 11 context menu. In the following part, we will focus on this topic.
WinRAR is a famous archiver tool that can help extract contents from ZIP, RAR, or other archive files. To access WinRAR in Windows 11 context menu, you need to use WinRAR Beta V6.10.
Step 1: Go to this link to download the latest version of WinRAR (Beta V6.10) based on your system architecture.
Step 2: Double-click on this setup file to install it on your PC.
Step 3: You will get a pop-up window to set up integrations with the standard files types it supports. Besides, make sure Integrate WinRAR into shell is selected. After that, click OK to save the setting.
Now, you can right-click on any file and you can see the WinRAR compression shortcuts in the context menu.

If you don’t set up integrations during WinRAR setup, you can add the missing WinRAR to Windows 11 context menu in another way.
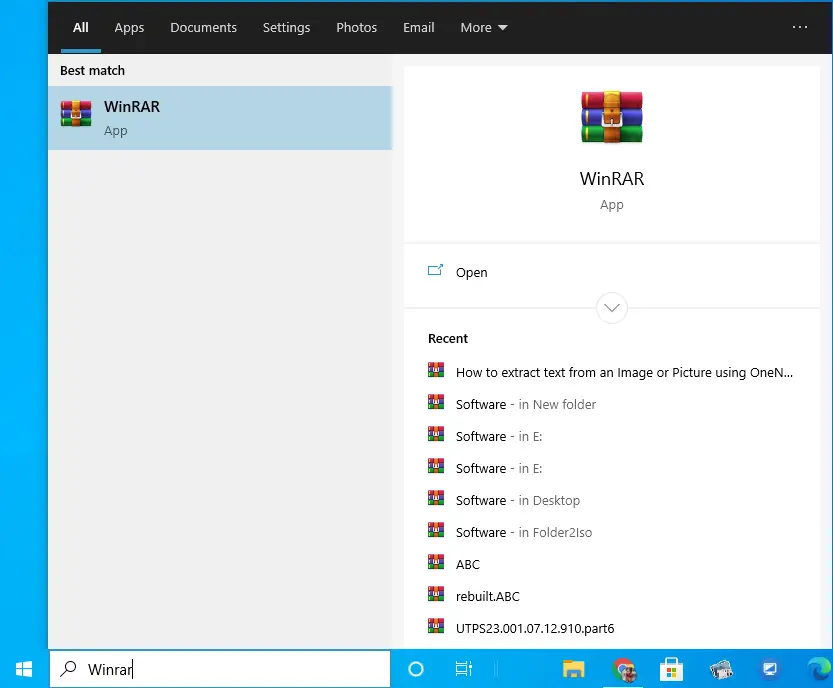
Step 1: Launch WinRAR via Windows 11 search.
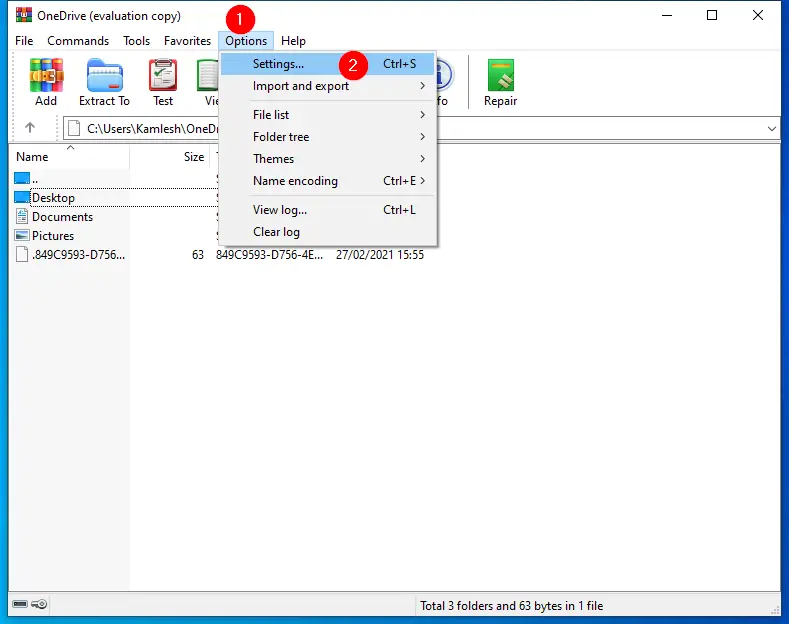
Step 2: In the application, click Options > Settings.
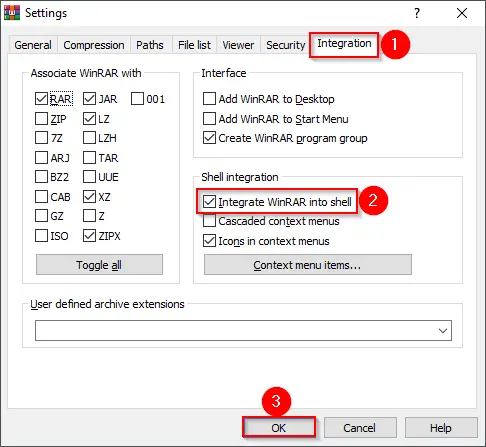
Step 3: Under the Integrations tab, tick the checkbox of Integrate WinRAR into shell. You can also check the boxes of some file types in Associate WinRAR with.
Step 4: Click OK.
If you encounter the issue of 7-Zip right-click menu missing in Windows 11, how can you fix this issue?
When searching for 7-Zip context menu not showing Windows 11 online, you can find some users talked about this topic on forums. Integrating 7-Zip isn’t a simple way in the new system. But you can add NanaZip (a 7-Zip fork) to the new context menu in Windows 11.
Step 1: Download NanaZip via Microsoft Store and install it on your Windows 11 computer.
Step 2: Open the Settings app by pressing Win + I.
Step 3: Go to Apps > Default apps > Choose defaults by file type.
Step 4: Search for zip in the search box. Then, click the result and choose open .zip files from NanaZip. Now, right-click on any file and you can see NanaZip from the context menu.

Final Words
Is WinRAR not showing in right-click menu? Is 7-Zip context menu not showing? After reading this post, you can know how to add WinRAR or NanaZip (a 7-Zip fork) to Windows 11 context menu. Hope it can help you.
About The Author

Position: Columnist
Vera is an editor of the MiniTool Team since 2016 who has more than 7 years’ writing experiences in the field of technical articles. Her articles mainly focus on disk & partition management, PC data recovery, video conversion, as well as PC backup & restore, helping users to solve some errors and issues when using their computers. In her spare times, she likes shopping, playing games and reading some articles.
WinRAR is a widely recognized archiving tool that enables you to effortlessly extract contents from various archive files, such as RAR, ZIP, and more, with a simple right-click. Once you perform the right-click action, select the “Extract Files” option to obtain the archive file’s contents in a designated folder. With WinRAR’s default configuration, it seamlessly integrates into the right-click context menu, making it more convenient to extract archive file contents. This application not only allows you to open and extract archive file content but also proves useful when you need to access an ISO file without mounting it onto a virtual CD-ROM.
Typically, when you install WinRAR on your computer, it automatically integrates itself into the right-click context menu. However, some Windows users have reported that the WinRAR option is missing when performing a right-click on a RAR or ZIP file.
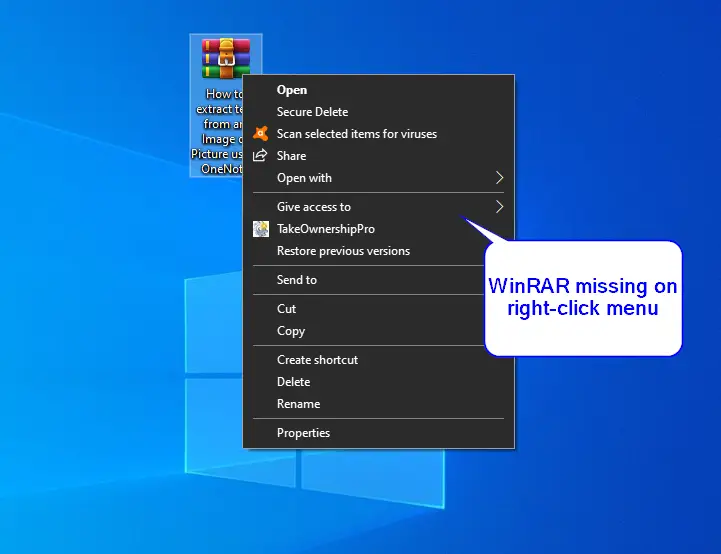
In the event that the WinRAR option is absent from the File Explorer context menu, extracting content from an archive file becomes a more complicated process. Previously, a single click was sufficient to extract an archive file’s contents, but now it requires four to five mouse clicks to obtain the desired outcome.
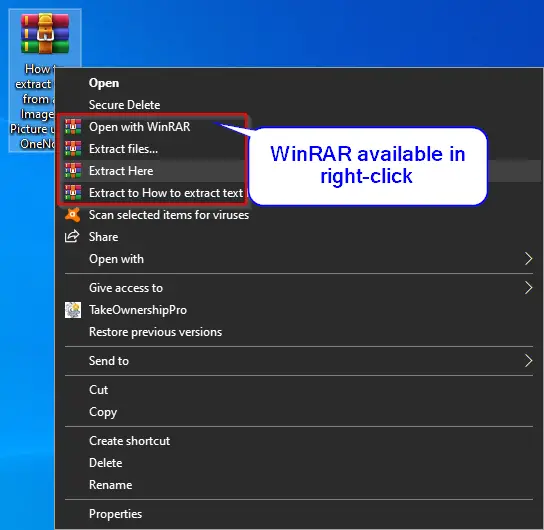
Assuming WinRAR is functioning correctly, right-clicking on a RAR or ZIP file should display four additional options: Open with WinRAR, Extract files, Extract Here, and Extract to. These options prove useful for Windows users to manipulate archive files.
In the event that the WinRAR entry is missing from the right-click context menu on your Windows 10 PC, this article by GearupWindows will provide guidance on adding it back.
Follow these steps to add a missing WinRAR Entry in right-click context menu:-
Step 1. Open the WinRAR application from the desktop shortcut or by searching in the Start menu.
Step 2. In the WinRAR application, click on the Options menu and then select Settings from the drop-down.
Step 3. In the WinRAR Settings, navigate to the Integration tab, and under the Shell integration section, check the checkbox Integrate WinRAR into shell.
Step 4. Once done, click the OK button.
After performing the above steps, now perform a right click on any RAR or ZIP file on your PC. I am sure you will see all four missing WinRAR options back on the context menu.
That’s all.
Conclusion
In conclusion, WinRAR is an essential archiving tool for Windows users. It simplifies the process of extracting archive file contents and allows access to ISO files without mounting them onto a virtual CD-ROM. While WinRAR usually integrates itself into the right-click context menu upon installation, some Windows users may experience the absence of the WinRAR option. This can make extracting archive file content a more complicated process, requiring several mouse clicks. Fortunately, GearupWindows provides a simple solution to add the missing WinRAR entry in the right-click context menu. By following the steps outlined in this article, users can quickly and easily restore the WinRAR option, making the extraction of archive file contents more convenient.