A Button is an essential part of an application, or software, or webpage. It allows the user to interact with the application or software. For example, if a user wants to exit from the current application so, he/she click the exit button which closes the application. It can be used to perform many actions like to submit, upload, download, etc. according to the requirement of your program. It can be available with different shape, size, color, etc. and you can reuse them in different applications. In .NET Framework, Button class is used to represent windows button control and it is inherited from ButtonBase class. It is defined under System.Windows.Forms namespace.
In C# you can create a button on the windows form by using two different ways:
1. Design-Time: It is the easiest method to create a button. Use the below steps:
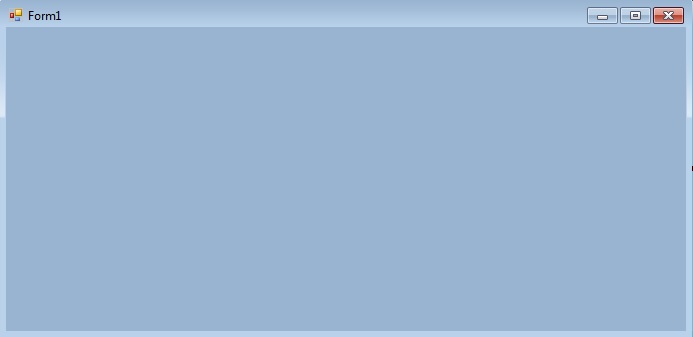
- Step 1: Create a windows form as shown in the below image:
Visual Studio -> File -> New -> Project -> WindowsFormApp
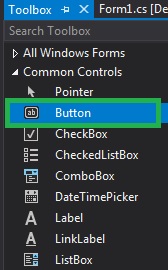
- Step 2: Drag the Button control from the ToolBox and drop it on the windows form. You are allowed to place a Button control anywhere on the windows form according to your need.
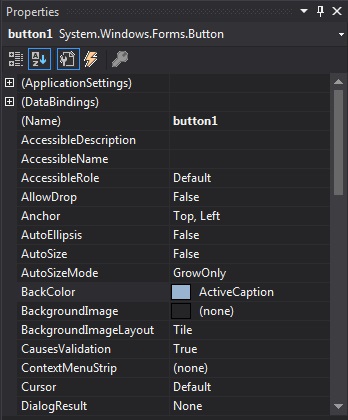
- Step 3: After drag and drop you will go to the properties of the Button control to set the properties of the Button.
2. Run-Time: It is a little bit trickier than the above method. In this method, you can create your own Button using the Button class.
- Step 1: Create a button using the Button() constructor is provided by the Button class.
// Creating Button using Button class
Button MyButton = new Button();
- Step 2: After creating Button, set the properties of the Button provided by the Button class.
// Set the location of the button
Mybutton.Location = new Point(225, 198);

// Set text inside the button
Mybutton.Text = "Submit";

// Set the AutoSize property of the button
 Mybutton.AutoSize = true;

// Set the background color of the button
Mybutton.BackColor = Color.LightBlue;

// Set the padding of the button
Mybutton.Padding = new Padding(6);

// Set font of the text present in the button
Mybutton.Font = new Font("French Script MT", 18);
- Step 3: And last add this button control to form using Add() method.
// Add this Button to form
this.Controls.Add(Mybutton);
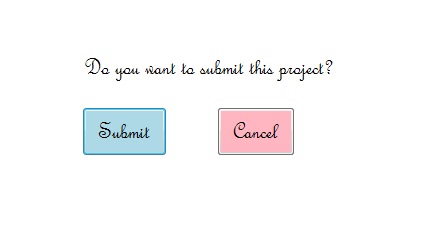
- Example:
CSharp
using System;
using System.Collections.Generic;
using System.ComponentModel;
using System.Data;
using System.Drawing;
using System.Linq;
using System.Text;
using System.Threading.Tasks;
using System.Windows.Forms;
namespace WindowsFormsApp8 {
public partial class Form1 : Form {
public Form1()
{
InitializeComponent();
}
private void Form1_Load(object sender, EventArgs e)
{
Label l = new Label();
l.AutoSize = true;
l.Text = "Do you want to submit this project?";
l.Location = new Point(222, 145);
l.Font = new Font("French Script MT", 18);
this.Controls.Add(l);
Button Mybutton = new Button();
Mybutton.Location = new Point(225, 198);
Mybutton.Text = "Submit";
Mybutton.AutoSize = true;
Mybutton.BackColor = Color.LightBlue;
Mybutton.Padding = new Padding(6);
Mybutton.Font = new Font("French Script MT", 18);
this.Controls.Add(Mybutton);
Button Mybutton1 = new Button();
Mybutton1.Location = new Point(360, 198);
Mybutton1.Text = "Cancel";
Mybutton1.AutoSize = true;
Mybutton1.BackColor = Color.LightPink;
Mybutton1.Padding = new Padding(6);
Mybutton1.Font = new Font("French Script MT", 18);
this.Controls.Add(Mybutton1);
}
}
}
- Output:
Important Properties of Button
| Property | Description |
|---|---|
| BackColor | Using BackColor property you can set the background color of the button. |
| BackgroundImage | Using BackgroundImage property you can set the background image on the button. |
| AutoEllipsis | Using AutoEllipsis property you can set a value which shows that whether the ellipsis character (…) appears at the right edge of the control which denotes that the button text extends beyond the specified length of the button. |
| AutoSize | Using AutoSize property you can set a value which shows whether the button resizes based on its contents. |
| Enabled | Using Enabled property you can set a value which shows whether the button can respond to user interaction. |
| Events | Using Events property you can get the list of the event handlers that are applied on the given button. |
| Font | Using Font property you can set the font of the button. |
| FontHeight | Using FontHeight property you can set the height of the font. |
| ForeColor | Using ForeColor property you can set the foreground color of the button. |
| Height | Using Height property you can set the height of the button. |
| Image | Using Image property you can set the image on the button. |
| Margin | Using Margin property you can set the margin between controls. |
| Name | Using Name property you can set the name of the button. |
| Padding | Using Padding property you can set the padding within the button. |
| Visible | Using Visible property you can set a value which shows whether the button and all its child buttons are displayed. |
Important Events on Button
| Event | Description |
|---|---|
| Click | This event occur when the button is clicked. |
| DoubleClick | This event occur when the user performs double click on the button. |
| Enter | This event occur when the control is entered. |
| KeyPress | This event occur when the character, or space, or backspace key is pressed while the control has focus. |
| Leave | This event occur when the input focus leaves the control. |
| MouseClick | This event occur when you click the mouse pointer on the button. |
| MouseDoubleClick | This event occur when you double click the mouse pointer on the button. |
| MouseHover | This event occur when the mouse pointer placed on the button. |
| MouseLeave | This event occur when the mouse pointer leaves the button. |
Last Updated :
21 May, 2021
Like Article
Save Article
Search code, repositories, users, issues, pull requests…
Provide feedback
Saved searches
Use saved searches to filter your results more quickly
Sign up
C# Button class in .NET Framework class library represents a Windows Forms Button control. A Button control is a child control placed on a Form and used to process click event and can be clicked by a mouse click or by pressing ENTER or ESC keys.
If AutoEllipsis property is true, it adds ellipsis character to a control if text in control does not fit. You may have to set AutoSize to false to see the ellipses character.
Image in Button
The Image property of a Button control is used to set a button background as an image. The Image property needs an Image object. The Image class has a static method called FromFile that takes an image file name with full path and creates an Image object.
You can also align image and text. The ImageAlign and TextAlign properties of Button are used for this purpose.
The following code snippet sets an image as a button background.
- dynamicButton.Image = Image.FromFile(@«C:\Images\Dock.jpg»);
- dynamicButton.ImageAlign = ContentAlignment.MiddleRight;
- dynamicButton.TextAlign = ContentAlignment.MiddleLeft;
- dynamicButton.FlatStyle = FlatStyle.Flat;
Text and Font
The Text property of Button represents the contents of a Button. The TextAlign property if used to align text within a Button that is of type ContentAlignment enumeration.
The Font property is used to set font of a Button.
The following code snippet sets Text and Font properties of a Button control.
- dynamicButton.Text = «I am Dynamic Button»;
- dynamicButton.TextAlign = ContentAlignment.MiddleLeft;
- dynamicButton.Font = new Font(«Georgia», 16);
Button Control States
Button control has five states — Normal, Flat, Inactive, Pushed, and All. ButtonState enumeration represents a button state.
Unfortunately, Windows Forms does not have a straight-forward way to set a button control state but there is a work around.
Windows Forms has a ControlPaint class with some static methods that can be used to draw various controls at runtime. The DrawButton method is used to draw a Button control and the last parameter of this method is ButtonState enumeration.
The following code snippet sets the button state of button1 using ControlPaint class.
- ControlPaint.DrawButton(System.Drawing.Graphics.FromHwnd(button1.Handle), 0, 0, button1.Width, button1.Height, ButtonState.Pushed);
Adding Button Click Event Hander
A Button control is used to process the button click event. We can attach a button click event handler at run-time by setting its Click event to an EventHandler obect. The EventHandler takes a parameter of an event handler. The Click event is attached in the following code snippet.
- dynamicButton.Click += new EventHandler(DynamicButton_Click);
The signature of Button click event handler is listed in the following code snippet.
- private void DynamicButton_Click(object sender, EventArgs e)
- { }
Creating a C# Button Dynamically
Creating a Button control at run-time is merely a work of creating an instance of Button class, set its properties and add Button class to the Form controls.
First step to create a dynamic button is to create an instance of Button class. The following code snippet creates a Button control object.
- Button dynamicButton = new Button();
Next step, you need to set Button class properties. You need to make sure to specify the Location, Width, Height or Size properties. The default location of Button is left top corner of the Form. The Location property takes a Point that specifies the starting position of the Button on a Form. The Size property specifies the size of the control. We can also use Width and Height property instead of Size property. The following code snippet sets Location, Width, and Height properties of a Button control.
- dynamicButton.Location = new Point(20, 150);
- dynamicButton.Height = 40;
- dynamicButton.Width = 300;
In the next step, you may set more properties of the Button control.
The following code snippet sets background color, foreground color, Text, Name, and Font properties of a Button.
- dynamicButton.BackColor = Color.Red;
- dynamicButton.ForeColor = Color.Blue;
- dynamicButton.Text = «I am Dynamic Button»;
- dynamicButton.Name = «DynamicButton»;
- dynamicButton.Font = new Font(«Georgia», 16);
A Button control is used to process the button click event. We can attach a button click event handler at run-time by setting its Click event to an EventHandler obect. The EventHandler takes a parameter of an event handler. The Click event is attached in the following code snippet.
- dynamicButton.Click += new EventHandler(DynamicButton_Click);
The signature of Button click event handler is listed in the following code snippet.
- private void DynamicButton_Click(object sender, EventArgs e)
- { }
Now the last step is adding a Button control to the Form. The Form.Controls.Add method is used to add a control to a Form. The following code snippet adds a Button control to the current Form.
- Controls.Add(dynamicButton);
The complete code is listed in the following code, where CreateDynamicButton methods creates a Button control to a Form at run-time, attaches a click event handler of the button and adds Button control to the Form by calling Form.Controls.Add() method.
- private void CreateDynamicButton()
- {
- Button dynamicButton = new Button();
- dynamicButton.Height = 40;
- dynamicButton.Width = 300;
- dynamicButton.BackColor = Color.Red;
- dynamicButton.ForeColor = Color.Blue;
- dynamicButton.Location = new Point(20, 150);
- dynamicButton.Text = «I am Dynamic Button»;
- dynamicButton.Name = «DynamicButton»;
- dynamicButton.Font = new Font(«Georgia», 16);
- dynamicButton.Click += new EventHandler(DynamicButton_Click);
- Controls.Add(dynamicButton);
- }
- private void DynamicButton_Click(object sender, EventArgs e)
- {
- MessageBox.Show(«Dynamic button is clicked»);
- }
You need to make sure to call CreateDynamicButton() method on the Form’s constructor just after InitializeComponent() method, listed as following.
- public Form1()
- {
- InitializeComponent();
- CreateDynamicButton();
- }
Summary
In this article, we discussed how to create Button control in Windows Forms using C# at design-time as well as at run-time. We also saw how to set a button properties and set the button click event handler.
As you said it is Winforms, you can do the following…
First create a new Button object.
Button newButton = new Button();
Then add it to the form inside that function using:
this.Controls.Add(newButton);
Extra properties you can set…
newButton.Text = "Created Button";
newButton.Location = new Point(70,70);
newButton.Size = new Size(50, 100);
Your issue you’re running to is that you’re trying to set it on Form_Load event, at that stage the form does not exist yet and your buttons are overwritten. You need a delegate for the Shown or Activated events in order to show the button.
For example inside your Form1 constructor,
public Form1()
{
    InitializeComponent();
    this.Shown += CreateButtonDelegate;
}
Your actual delegate is where you create your button and add it to the form, something like this will work.
private void CreateButtonDelegate(object sender, EventArgs e)
{
    Button newButton= new Button();
    this.Controls.Add(newButton);
    newButton.Text = "Created Button";
    newButton.Location = new Point(70,70);
    newButton.Size = new Size(50, 100);
    newButton.Location = new Point(20, 50);
}
In today’s tutorial, we are gonna have a look at How to use Button in C# Windows Form. In our previous tutorials, we have first discussed the …
- Computer Science
- C#
- Microsoft Visual Studio
So, now we are gonna add back end programming in those Controls one by one. In today’s tutorial, I am gonna add the code for the Buttons and you will see that it won’t be any difficult to use them in your projects. So, let’s get started with How to use Button in C# Windows Form.
How to use Button in C# Windows Form ???
- First of all, create a new Project as we did in Introduction to C# Windows Forms and then add two Buttons in your Windows Form, which we have learned in How to add C# Controls in Windows Form.
- Now, I think your C# Windows form will look something like this:
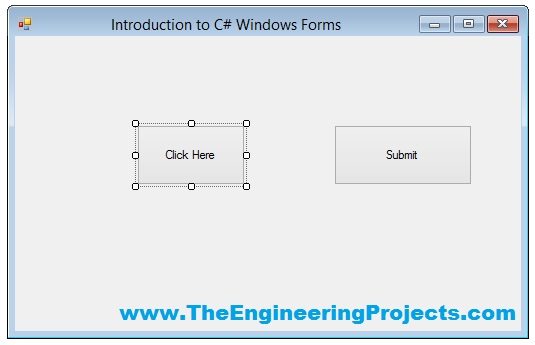
- So, now we have two buttons in our C# Windows Form, so now First of all, let’s change the text of first button from its Properties as shown in below figure:
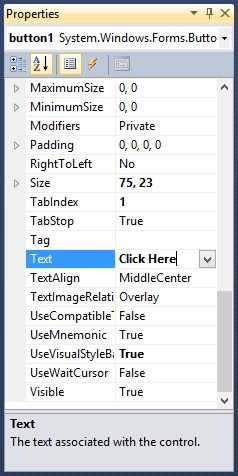
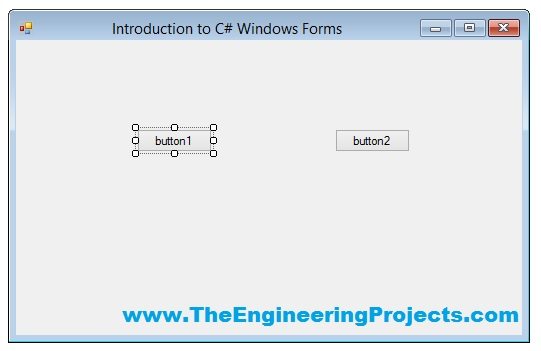
- So, I have changed the text of Button1 to Click Here and I am gonna change the text of Button2 to Submit and they will now look like something as shown in below figure:
- Now you can see in the above figure that the Text on these buttons have changed to that which I have added in the Text section of their properties.
- Moreover, you must have also noticed that now their size has also increased, which I did by dragging the buttons.
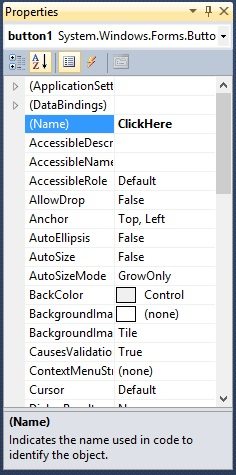
- Now let’s change the name of these buttons too so I am gonna change the Name of first button to ClickHere and that of second button to Submit.
- We can’t add spaces in the Name of the Button.
- The Name Change for first button is shown in below figure:
- Now let’s add the Click event for each of these buttons.
- Click event is the event which should happened when you press the button.
- So, now double click the first button and it will open up its code as shown below:
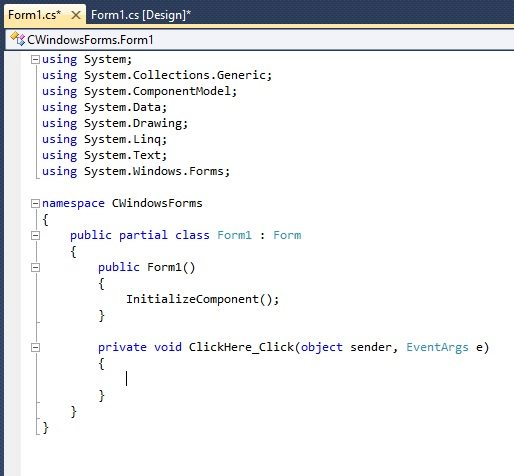
- Now you can see in the above code we have a function named ClickHere_Click, which is the click event function for first button.
- ClickHere is the name of the button which we changed above and _Click is the event. In simple words, this event will call on when the ClickHere Button is clicked.
- Next we have the arguments, which I am not currently gonna discuss here but we will have a look at them later and then we have these curly brackets { }, and that’s where our code is gonna pasted for the click event of this button.
- So, add the below code into these brackets.
MessageBox.Show("Its a Click Here Button");
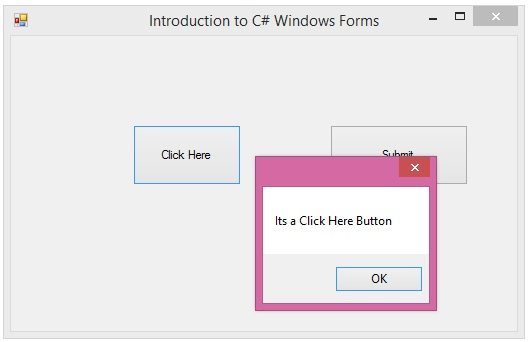
- Now when you pressed the Click Here Button then a sall message box will open up as shown in below figure:
- So, now you have seen, first we have added the Button then we changed its Text and Name and later we added the back end code in it so that it could perform an event on clicking.
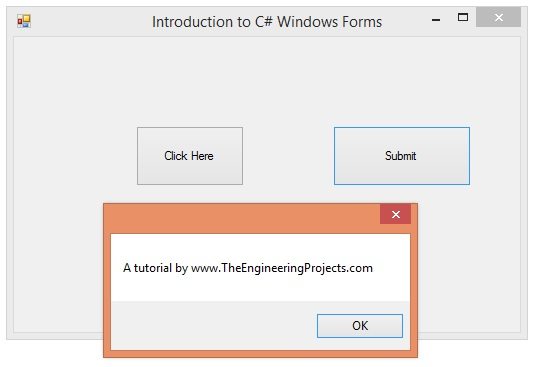
- Now, I have added a small code in the Submit Button Click event and it looks something like this when you click it:
- So, that’s all about how to use button in C# Windows Form.
That’s all for today. Will meet you guys in the next tutorial on C#. Till then take care and have fun!!! 
Syed Zain Nasir
syedzainnasir
I am Syed Zain Nasir, the founder of The Engineering Projects (TEP). I am a
programmer since 2009 before that I just search things, make small projects and now I am sharing my
knowledge through this platform. I also work as a freelancer and did many projects related to
programming and electrical circuitry. My Google Profile+
Follow
Get Connected