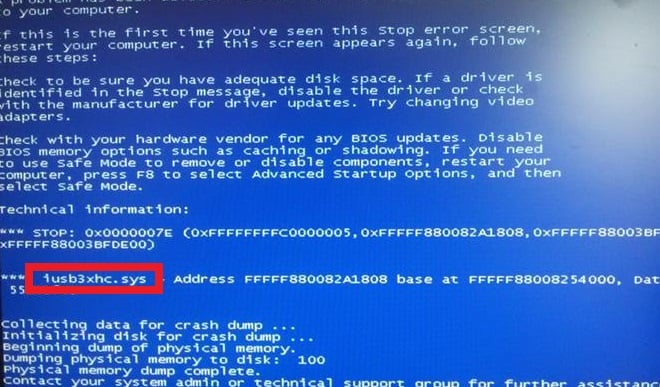
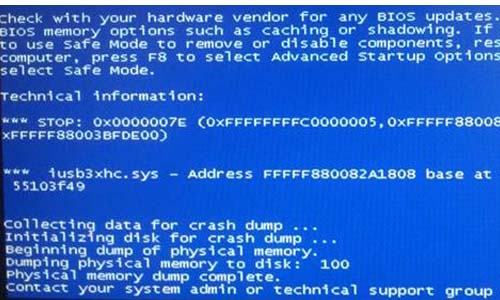
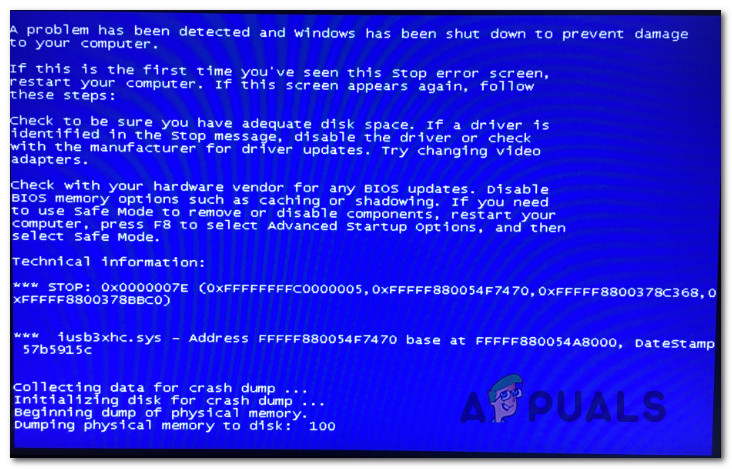
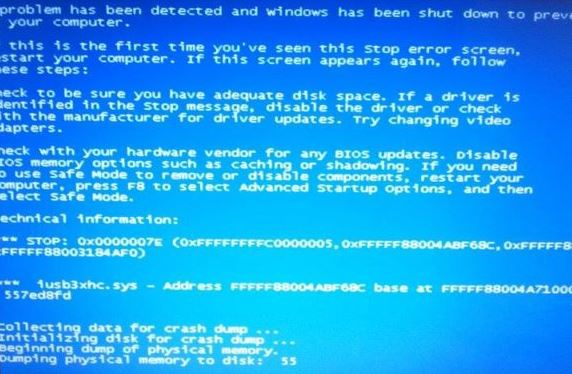
iusb3xhc.sys — проблемный элемент, который указывается среди информации на синем экране смерти (BSoD) с кодом 0x0000007e. Данный BSoD может проявляться на любой версии Windows, начиная с Windows XP и заканчивая последними билдами Windows 10.
Причины BSoD iusb3xhc.sys
Для BSoD iusb3xhc.sys выделяют несколько причины. Самая распространенная — поврежденные или несовместимые драйвера для хост-контроллера USB. К счастью, такая проблема запросто решается через диспетчер устройств.
В редких же случаях проблемы с драйверами для хост-контроллеров USB могут возникать по вине антивирусного ПО, установленного в системе пользователя. Некоторые юзеры в сети утверждают, что их антивирус решил поместить в карантин сам драйвер хост-контроллера либо файл, который был важен для его корректной работы.
Еще одна частая причина — отсутствие в системе драйвера для чипсета Intel. Само собой, такая проблема возникает лишь в системах, в основе которого лежит процессор от Intel. Простая установка драйвера поставит все на свои места.
Следующая причина — банальное повреждение тех или иных системных файлов Windows. Как бы глупо это не звучало, но такой сценарий может возникнуть буквально в любой момент времени. И BSoD является очевидным знаком о том, что с системной что-то не так. Благо, у пользователя есть средства для восстановления системных файлов.
И последнее — проблемы с кэшированными данными, относящимися к оперативной памяти в вашей системе. В таком случае решением является отключение батарейки для CMOS-памяти от материнской платы.
Методы решения BSoD iusb3xhc.sys
Метод №1 Переустановка драйвера хост-контроллера USB
Некорректно работающие драйвера частенько становятся причиной появления различных проблем. BSoD iusb3xhc.sys может возникать из-за неправильной работы драйверов хост-контроллеров USB. Чтобы переустановить эти драйвера, сделайте следующее:
- нажмите ПКМ на Пуск и кликните на пункт «Диспетчер устройств»;
- раскройте в диспетчере устройств раздел «Контроллеры USB»;
- нажмите на каждый пункт ПКМ и выберите «Удалить устройство»;
- проделайте так с каждым контроллером USB и перезагрузите компьютер.
Метод №2 Установка драйвера чипсета Intel
Оказывается, BSoD iusb3xhc.sys может возникать в тех системах, где не установлен драйвер для чипсета Intel. Как правило, такой драйвер автоматически устанавливается в систему, тем не менее это может не произойти на более старых версиях Windows или тех копиях Windows, которые не были активированы. Перейдите по этой ссылке, загрузите особое приложение от Intel по установке драйверов и следуйте инструкциям.
Метод №3 Запуск SFC и DISM
Давайте предположим, что некоторые системные файлы в вашей копии Windows были повреждены. В таком случае вам необходимо прибегнуть к утилитам SFC и DISM. Они в автоматическом режиме проведут проверку системных файлов и попытаются исправить найденные повреждения. Вот как воспользоваться этими утилитами:
- нажмите ПКМ на Пуск и кликните на «Командная строка (администратор)»;
- пропишите команду «sfc /scannow» и нажмите Enter;
- после окончания работы SFC перезагрузите компьютер;
- снова откройте командную строку и выполните в ней команду «DISM /Online /Cleanup-Image /RestoreHealth»;
- перезагрузите ПК после работы DISM.
BSoD iusb3xhc.sys должен будет исчезнуть, если дело заключалось в поврежденных системных файлах Windows.
Метод №4 Удаление стороннего антивируса
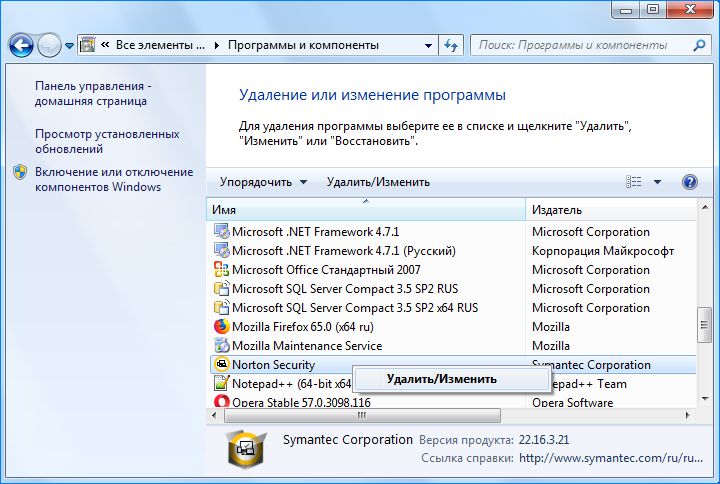
К сожалению, некоторые антивирусы могут препятствовать нормальной работе системы. Пожалуй, наиболее частым виновником за появлением iusb3xhc.sys является антивирус Kaspersky. Мы рекомендуем попробовать удалить свой сторонний антивирус и посмотреть, исправит ли это ситуацию. Удалить антивирус можно через компонент «Приложения и возможности» в параметрах системы.
Метод №5 Сброс CMOS
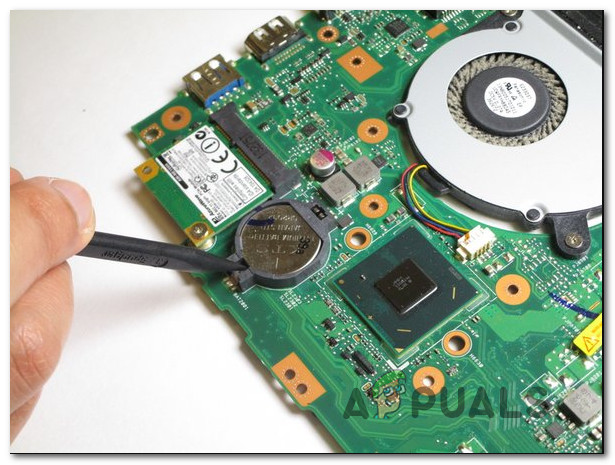
Если BSoD вызван проблемами с памятью, то вы можете попробовать сбросить свою CMOS. Некоторые пользователи утверждают, что им удалось устранить iusb3xhc.sys, вытащив CMOS-батарейку из материнской платы. Отключаем компьютер, открываем системный блок/вскрываем корпус ноутбука, аккуратненько достаем CMOS-батарейку из материнки и вставляем ее обратно через десять секунд.
Мы надеемся, что у вас получилось избавиться от iusb3xhc.sys на своем компьютере.
Неожиданно работу системы может прервать синий экран с кодом ошибки iusb3xhc.sys. Узнаем подробнее причины и способы его исправления.
Причины ошибки
По отзывам пользователей синий экран с кодом остановки iusb3xhc.sys может аварийно завершить работу Windows по следующим причинах.
- Повреждены драйвера универсального хост-контроллера USB. Для решения нужно удалить их в Диспетчере устройств и обновить конфигурацию оборудования.
- Не установлены драйвера чипсетов Intel. Решить ошибку можно с помощью утилиты Intel Driver Support Assistant для установки отсутствующего встроенного ПО.
- Нарушена целостность системы. Еще одна причина, которая может привести к синему экрану iusb3xhc.sys. Для исправления запустите утилиты DISM и SFC.
- Блокировка брандмауэром. Антивирусная программа или брандмауэр могут заблокировать компоненты драйвера хост-контроллера.
- Проблема с кэшированием памяти. Ошибка может возникнуть из-за проблем с кэшированием данных в оперативную память. Для ее решения нужно сбросить CMOS.
Переустановка драйверов хост-контроллера USB
Во многих случаях синий экран с кодом ошибки iusb3xhc.sys возникает из-за несовместимого или поврежденного драйвера хост-контроллера USB. Чтобы решить проблему, выполните следующие шаги.
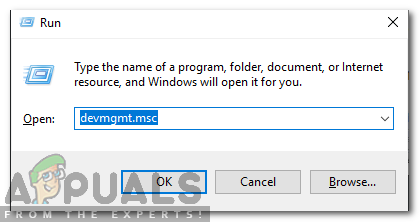
Откройте Диспетчер устройств командой devmgmt.msc, запущенной из окна «Выполнить» (Win + R).
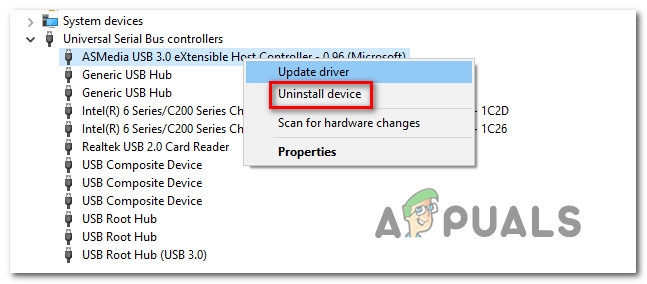
В списке раскройте вкладку Контроллеры USB. Затем кликните правой кнопкой на каждом хост-контроллере и выберите «Удалить».
Затем обновите конфигурацию оборудования на вкладке «Действие» или перезагрузите ПК. При запуске Windows автоматически переустановит новые драйвера.
На некоторых конфигурациях с Windows 7, система не может установить драйвера автоматически. В этом случае можно переустановить их с диска к материнской плате или с помощью драйвера расширяемого хост-контролерра Intel.
Установка драйверов чипсета Intel
Если установлена Windows 10, то эта система автоматически устанавливает требуемые драйвера чипсета. Но в предыдущих версиях Windows, возможно, это нужно будет сделать вручную, чтобы решить ошибку iusb3xhc.sys, связанную с синим экраном.
Найдите страницу в интернете по запросу «Intel Driver Support Assistant» и загрузите указанную утилиту.
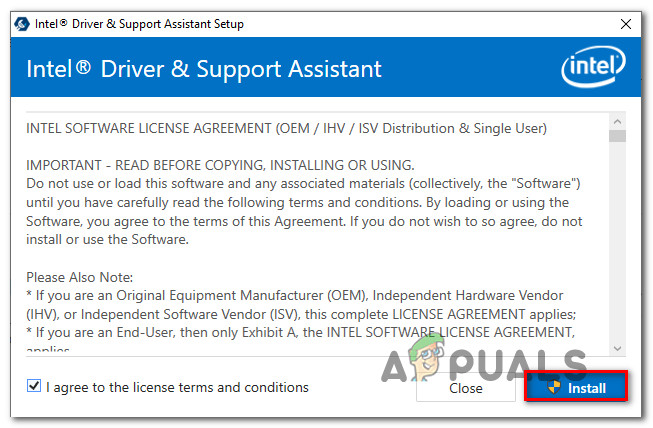
Запустите загруженный файл и следуйте запросам установщика. Затем откройте помощника, и установите доступные драйвера Intel.
После перезагрузки проверьте, решена ли проблема с синим экраном.
Восстановление поврежденных системных файлов
Неожиданный сбой системы, связанный с ошибкой iusb3xhc.sys, может произойти из-за повреждения системного файла. Возможно, компонент Windows, который взаимодействует с iusb3xhc.sys поврежден, что в итоге приводит к возникновению синего экрана.
Для исправления целостности системы запустите сканирование системы утилитами SFC и DISM.
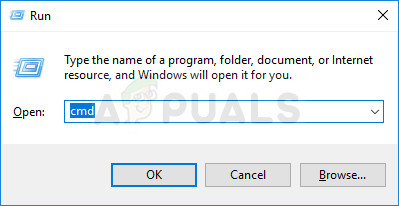
В строке системного поиска наберите cmd и под найденным результатом выберите запуск от имени администратора.
В консоли запустите сканирование командой:
sfc /scannow
Не закрывайте командную строку в ходе сканирования.
После перезагрузки системы снова откройте командную строку с правами администратора и выполните команду:
DISM / Online / Cleanup-Image / RestoreHealth
Перед выполнением команды DISM проверьте подключение к интернету. Поскольку утилита использует сервера Майкрософта для замены поврежденных файлов рабочими экземплярами.
После завершения сканирования перезагрузите ПК.
Отключение антивируса
По отзывам пользователей, сторонний пакет защиты ПК или брандмауэр могут заблокировать работу компонентов, которые имеют отношение к iusb3xhc.sys, что приведет к падению системы и синему экрану.
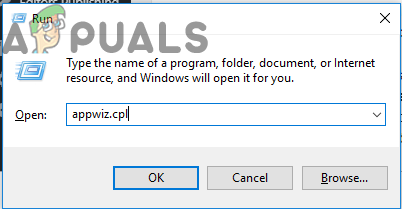
Перейдите в раздел «Удаления или изменения программ» командой appwiz.cpl, запущенной из окна «Выполнить» (Win + R).
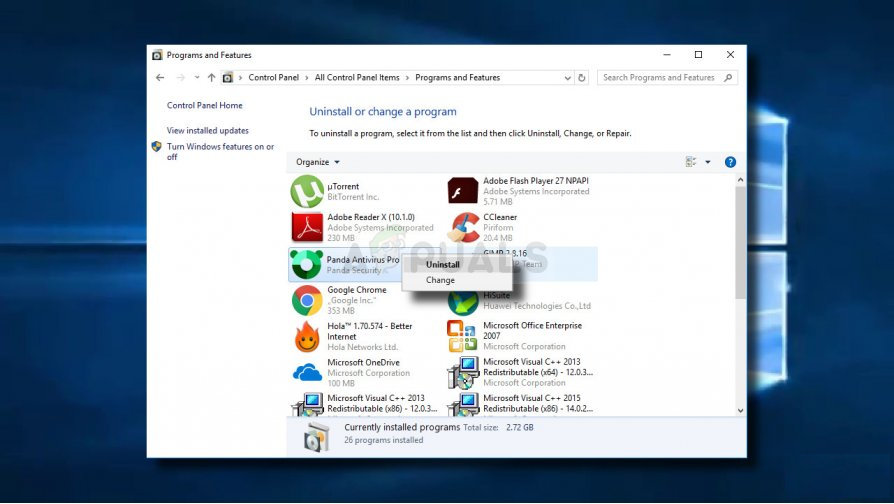
В списке найдите пакет защиты стороннего разработчика. Кликните на нем правой кнопкой и выберите «Удалить».
После перезагрузки компьютера проверьте, удалось ли исправить ошибку.
Очистка CMOS
Если синий экран связан с кэшированием памяти, то для исправления ошибки iusb3xhc.sys попробуйте сбросить CMOS.
Отключите компьютер от электросети и снимите крышку из системного блока.
Извлеките батарею из гнезда и подождите 10 секунд. Верните батарею на место, подключите компьютер к источнику питания и включите его. После загрузки проверьте, устранена ли ошибка.
Several users have been reaching us with questions after getting constant BSOD (Blue Screen of Death) crashes that point towards iusb3xhc.sys as the culprit responsible for the critical system shutdown. Most affected users come to this conclusion after seeing iusb3xhc.sys mentioned in the crash screen or after viewing the crash log using Event Viewer. The issue is not specific to a certain Windows version as it’s commonly reported on Windows 7, Windows 8.1 and Windows 10.
What is causing the iusb3xhc.sys BSOD crashes?
We investigated this particular issue by looking at various user reports and the repair strategies that are commonly being used to fix this particular error message. As it turns out, there are multiple causes that could lead to a BSOD of this kind. Here’s a shortlist of potential culprits that can cause constant iusb3xhc.sys blue screens:
- Corrupted / Incompatible USB Host Controller drivers – As it turns out, this particular issue can also occur due to a corrupted or incompatible Host USB Controller driver. If this scenario is applicable, you should be able to resolve the issue by uninstalling the Host USB controller drivers via Device Manager and reinstalling them at the next system startup.
- Intel Chipset drivers are not installed – Missing Intel Chipsets can also be a potential cause for this issue – especially if you’re using a motherboard that is designed to work with these drivers. In this case, you should be able to resolve the issue by using the Intel Support Assistant utility to install the missing firmware.
- System file corruption – System file corruption is another possible cause that might lead to unexpected BSOD crashes related to the iusb3xhc.sys file. If this scenario is applicable to your particular case, you can resolve the issue by fixing the corrupted system file with a utility like DISM or SFC.
- Overprotective security suite – Judging from various user reports, this particular issue can also be caused by an AV or firewall that is interfering with the host controller driver. In most cases, Karsperksly is singled out as a culprit capable of quarantining a dependency of the Host controller driver. In this case, you can resolve the issue by uninstalling the 3rd party security suite and removing any remnant files.
- Cached memory issue – Another possibility is that you’re dealing with badly cached data regarding the usage of your memory. If this scenario is applicable, you will be able to resolve the issue simply by opening the case of your unit and taking out the CMOS battery.
Method 1: Reinstalling the USB Host Controller Drivers
In most cases, this particular issue is caused by an improper or corrupted Host USB Controller driver. Several users that we’re also encountering this issue have reported that the issue was resolved after they reinstalled all USB Host controller drivers.
It’s possible that one or more USB controllers have become tainted by file corruption. In this case, you should be able to resolve the issue by using Device Manager to remove or reinstall the USB Host controller responsible for the critical crash.
Here’s a quick guide on uninstalling & reinstalling the USB controllers using Device Manager:
- Open a Run dialog box by pressing Windows key + R. Then, inside the run box, type “devmgmt.msc” and press Enter to open up Device Manager. If you’re prompted by the User Account Control (UAC), click Yes to grant administrative privileges.
Typing “devmgmt.msc” in the run prompt. - Once you’ve made your way inside Device Manager, scroll down through the list of installed devices and open the drop-down menu associated with Universal Serial Bus controllers.
- Next, right-click on every Host controller under Serial Bus controllers and choose Uninstall Device from the context menu. Then, click Yes at the confirmation prompt to uninstall the host controller.
Uninstalling every available host controller - Repeat step 3 with every USB host controller until every driver is uninstalled. Then, close Device Manager and restart your computer.
- At the next startup sequence, Windows will automatically install fresh drivers to replace the ones you uninstalled earlier.
Note: If you have Windows 7 or older, WU might not install those drivers automatically. In this case, you’ll need to navigate to your manufacturer’s website and download the drivers. Additionally, you can reinstall the drivers from the installation media that you received with your motherboard. Or, you can use Intel’s generic eXtensible Host Controller drive – Download (here) - Once every driver has been reinstalled, use your computer normally and see if the same BSOD is still occurring.
If the same issue is still occurring, move down to the next method below.
Method 2: Installing the Intel Chipset drivers (if applicable)
As it turns out, this particular issue can also occur in instances where you’re using a motherboard that is designed to work with Intel chipset driver. If you’re using Windows 10, you’re OS should automatically install the required chipset drivers. But on older Windows versions (or if your Windows copy is not activated), chances are you’ll need to do it manually in order to resolve the iusb3xhc.sys related BSODs.
Here’s a quick guide on installing the required Intel Chipset drivers automatically using the Intel Driver & Support Assistant (Intel DSA):
- Visit this link (here) and click the Download Now button to download the Inter Driver Support assistant.
Downloading the Intel Support Assistant utility - Wait until the installation executable is downloaded, then double-click on it and follow the on-screen prompts to install the Intel Support Assistant on your computer. Start by checking the box associated with I agree to the license terms and conditions, then click on Install and hit Yes at the UAC Prompt.
Installing the Intel Support Assistant utility - Wait until the installation is complete, then open Intel Support Assistant and follow the on-screen prompts to install every pending Intel Driver.
- Once all pending drivers have been installed, close the utility and restart your computer. At the next startup, see if the issue has been resolved.
If you’re still encountering BSOD crashes related to the iusb3xhc.sys file, move down to the next method below.
Method 3: Running SFC and DISM checks
As it turns out, unexpected BSODs related to iusb3xhc.sys can also occur due to an underlying system file corruption instance. It’s possible that a driver or other element that works in relation with iusb3xhc.sys has become corrupted and is crashing the operating system whenever this scenario repeats.
Several users that were also affected by this issue have reported that they managed to resolve the issue by using a couple of built-in utilities. After doing so successfully, a large portion of them reported that the critical crashes have stopped occurring.
SFC (System File Checker) and DISM (Deployment Image Servicing and Management) are two built-in Windows utilities capable of fixing system file corruption. The only difference is they do it in different ways.
Since DISM is mostly used in instances where SFC is not capable of resolving the issue by itself, we highly encourage you to perform both scans in order to resolve any possible system file corruption that might end up causing the issue.
Here’s a step by step guide on running SFC and DISM scans from an elevated Command prompt:
- Press Windows key + R to pop open a Run dialog box. Next, type or paste ‘cmd’ and press Ctrl + Shift + Enter to open up a Command Prompt with administrative privileges.
Running Command Prompt as an administrator Note: When you see the UAC (User Account Control) window, click Yes to grant administrative privileges.
- Once you manage to get inside the elevated Command Prompt, type or paste the following command and hit Enter to initiate an SFC scan:
sfc /scannow
Note: DO NOT close the CMD window while the scan is in progress. Doing so runs the risk of producing further system file corruption. With this in mind, wait until the process is complete without closing the CMD window or restarting your computer.
- When the operation is complete, restart your computer and wait for the next startup sequence to complete.
- At the next startup, follow step 1 again to open another elevated CMD, then type/paste the following command to initiate a DISM scan:
DISM /Online /Cleanup-Image /RestoreHealth
Note: DISM used the WU (Windows Update) component to download fresh copies in order to replace the corrupted system files that it manages to identify. With this in mind, make sure your computer is connected to a network with a stable Internet connection.
- Once the procedure is complete, restart your computer once again and see if the issue is resolved at the next system startup.
If you’re still encountering BSOD crashes related to iusb3xhc.sys, move down to the next method below.
Method 4: Uninstalling 3rd party security suite (if applicable)
As several users have reported, crashes of this kind can also be triggered by a 3rd party security suite or firewall. Kaspersky is commonly linked with BSOD crashes related to the iusb3xhc.sys. If this scenario is applicable and you’re indeed using a 3rd party AV suite, chances are you’ll be able to stop the crashes by uninstalling the 3rd party security suite and ensuring that you leave no remnant files behind.
Several affected users struggling with the same issue have reported that the BSOD crashes have suddenly stopped after they uninstalled their 3rd party AV suite and moved over to the built-in solution (Windows Defender).
Here’s a quick guide on installing the 3rd party security suite:
- Open a Run dialog box by pressing Windows key + R. Next, type “appwiz.cpl” and press Enter to open up Programs and Features. When you’re prompted by the User Account Control (UAC), click Yes.
Typing in “appwiz.cpl” in the Run prompt - Inside the Programs and Features screen, make you’re way through the list of applications that are currently installed and locate the 3rd party suite that you want to install. Once you see it, right-click on it and choose Uninstall.
Uninstalling your 3rd party antivirus - From the uninstallation screen, follow the on-screen prompts to complete the uninstallation of the 3rd party software.
- Once the process is complete, restart your computer and wait for the next startup is complete.
- In order to remove any remnant file from your AV suite, follow this guide (here) to ensure that you don’t leave behind any leftover files.
- Restart your computer once again and see if the issue is resolved at the next system startup.
If the same issue is still occurring, move down to the next method below.
Method 5: Clearing the CMOS
If the problem is caused by a memory issue, resetting the CMOS (Complementary metal-oxide-semiconductor) might allow you to resolve the iusb3xhc.sys related crashes. But keep in mind that this procedure might reset some custom BIOS settings to the default values. So if you have previously overclocked the frequencies of your controller, the changes will be lost after you take out the CMOS battery.
Here’s a quick guide on clearing the CMOS battery:
Note: The instructions below are only applicable if you’re encountering the issue on a desktop computer.
- Turn off your computer completely and make sure it’s unplugged from the power source.
- Remove the case of your unit and equip a static wrist band (if you have one) to avoid damaging any components.
Note: A static wristband grounds you to the frame of the computer and events out the electrical energy. - Analyze your motherboard and identify your CMOS battery. When you see it, use your fingernail (or a non-conductive screwdriver to remove it from it’s slow.
Removing the CMOS battery - Wait 10 seconds or more before putting it back into place.
- Once the CMOS battery is back into its slot, plug your computer into a power source and power it on.
- Wait until the startup sequence is complete, then use your computer normally and see if the issue is still occurring.
Kevin Arrows
Kevin Arrows is a highly experienced and knowledgeable technology specialist with over a decade of industry experience. He holds a Microsoft Certified Technology Specialist (MCTS) certification and has a deep passion for staying up-to-date on the latest tech developments. Kevin has written extensively on a wide range of tech-related topics, showcasing his expertise and knowledge in areas such as software development, cybersecurity, and cloud computing. His contributions to the tech field have been widely recognized and respected by his peers, and he is highly regarded for his ability to explain complex technical concepts in a clear and concise manner.

Доброго времени суток!
Подскажите кто сталкивался с такой ошибкой, при подключении любого USB устройства,при установке драйвера выдает BSOD с ошибкой
stop:0x0000007E (0x000000005, 0xFFFFF880076A26EO, 0xFFFFF880035085A8, 0xFFFFF88003507E00)
iusb3xhc.sys — Address FFFFF880076A26EO base at FFFFF8807655000, DateStamp54c7bc7a
Все пролазил, чистил ОЗУ, отключал все USB и удалял драйвера и ставил заново. Ошибка не пропадает.
Прикладываю дамп.
P.S. В безопасном режиме все отлично драйвера устанавливаются и синего экрана не наблюдается.
Minidump.rar
- Blue screen occurs when Windows encounters a “STOP Error” This critical failure causes Windows to crash and stop working.
- Blue screens are generally caused by problems with your computer’s hardware or issues with their hardware driver software.
- Blue screen is caused by low-level software (or drivers) crashing or faulty hardware issues.
- In general, rebooting the computer can be able to fix the problem with the iusb3xhc.sys BSOD.
The blue screen of death or BSOD is always an unwelcome sight. BSODs appear when Microsoft Windows encounters a critical error from which it can’t recover, usually the result of low-level software (or drivers) crashing or faulty hardware.
Blue screens are generally caused by problems with your computer’s hardware or issues with their hardware driver software. Sometimes, they can be caused by issues with low-level software running in the Windows kernel. Regular apps usually won’t be able to cause blue screens. If an app crashes, it will do so without taking the operating system out with it.
A blue screen occurs when Windows encounters a “STOP Error.” This critical failure causes Windows to crash and stop working. The only thing Windows can do at that point is to restart the PC. This can lead to data loss, as programs don’t have a chance to save their open data.
I’m having an intermittent blue screen issue on my Windows 7 laptop. Below are the instructions from bleepingcomputer and a txt file, screenshot, and zip file that contains the sysnative file collection. Thank you.
When a blue screen occurs, Windows automatically creates a “minidump” file that contains information about the crash and saves it to your disk. You can view information about these minidumps to help identify the cause of the blue screen.
Blue screens also look a bit different, depending on what version of Windows you’re running. In Windows 7 and previous versions, the blue screen looked much like a terminal screen, displaying all manner of information. In Windows 8 and 10, blue screens are much simpler.
That’s really not as big a deal as it sounds, though. Even in previous versions, blue screens tended to go by fast enough that reading that information was difficult, anyway. And there are easier ways to get all the details you need for troubleshooting.
What is causing the iusb3xhc.sys BSOD crashes?
We investigated this particular issue by looking at various user reports and the repair strategies that are commonly being used to fix this particular error message. As it turns out, there are multiple causes that could lead to a BSOD of this kind. Here’s a shortlist of potential culprits that can cause constant iusb3xhc.sys blue screens:
Corrupted / Incompatible USB Host Controller drivers – As it turns out, this particular issue can also occur due to a corrupted or incompatible Host USB Controller driver. If this scenario is applicable, you should be able to resolve the issue by uninstalling the Host USB controller drivers via Device Manager and reinstalling them at the next system startup.
Occasionally, my PC crashes with BSODs, which look like they are caused by iusb3xhc.sys. However, I am not sure if that is caused by its driver, or if it is caused by another connected device.
Intel Chipset drivers are not installed – Missing Intel Chipsets can also be a potential cause for this issue – especially if you’re using a motherboard that is designed to work with these drivers. In this case, you should be able to resolve the issue by using the Intel Support Assistant utility to install the missing firmware.
System file corruption – System file corruption is another possible cause that might lead to unexpected BSOD crashes related to the iusb3xhc.sys file. If this scenario is applicable to your particular case, you can resolve the issue by fixing the corrupted system file with a utility like DISM or SFC.
On Wed 11/07/2012 20:39:22 GMT your computer crashed
crash dump file: C:\Windows\memory.dmp
This was probably caused by the following module: iusb3xhc.sys (iusb3xhc+0x2FD97)
Bugcheck code: 0xD1 (0x2C, 0x2, 0x0, 0xFFFFF8800948FD97)
Error: DRIVER_IRQL_NOT_LESS_OR_EQUAL
file path: C:\Windows\system32\drivers\iusb3xhc.sys
product: USB 3.0 Device Driver
company: Intel Corporation
description: Intel(R) USB 3.0 eXtensible Host Controller Driver
Bug check description: This indicates that a kernel-mode driver attempted to access pageable memory at a process IRQL that was too high.
This appears to be a typical software driver bug and is not likely to be caused by a hardware problem.
A third party driver was identified as the probable root cause of this system error. It is suggested you look for an update for the following driver: iusb3xhc.sys (Intel(R) USB 3.0 eXtensible Host Controller Driver, Intel Corporation).
Google query: iusb3xhc.sys Intel Corporation DRIVER_IRQL_NOT_LESS_OR_EQUAL
Overprotective security suite – Judging from various user reports, this particular issue can also be caused by an AV or firewall that is interfering with the host controller driver. In most cases, Karsperksly is singled out as a culprit capable of quarantining a dependency of the Host controller driver. In this case, you can resolve the issue by uninstalling the 3rd party security suite and removing any remnant files.
Cached memory issue – Another possibility is that you’re dealing with badly cached data regarding the usage of your memory. If this scenario is applicable, you will be able to resolve the issue simply by opening the case of your unit and taking out the CMOS battery.
Effective Ways to Fix iusb3xhc.sys BSOD Error
BSOD iusb3xhc.sys error solution is shown in this section.
In general, rebooting the computer is able to fix the error iusb3xhc.sys BSOD. Then you can log in to the computer to perform the following solutions. If you can’t log in, you can enter the Safe Mode to perform the solutions.
Reinstall the USB Host Controller Drivers
Using the drivers for your USB host controller can fix the iusb3xhc.sys blue screen error.
Dear friends, this error is caused by an incorrectly installed Intel USB 3.0 driver.
I’m going to walk you through this tutorial now.
Open the Run dialog by pressing Windows + R together, then type devmgmt.msc and click OK.
The Universal Serial Bus Controller can be found by scrolling down in the pop-up window.
To continue, expand it and select Uninstall device from the right-click menu.
All controllers must be uninstalled again by following step 3.
Upon restarting Windows, the uninstalled drivers are automatically reinstalled.
Check that the blue screen of death caused by iusb3xhc.sys has been resolved after reinstalling drivers on your computer.
Trying other solutions may be more effective if this one fails.
Install the Intel Chipset Driver
If you are using a motherboard designed to work with Intel chipset drivers, the iusb3xhc.sys blue screen error may also occur. With Windows 10, the chipset driver will be automatically installed by the operating system. The problem with the iusb3xhc.sys Intel corporation USB 3.0 device driver error can, however, be fixed by installing the Intel chipset driver manually if you are using an older version.
I’m going to walk you through this tutorial now.
- For more information about Intel Driver & Support Assistant, click here.
- Your computer needs to be installed with it.
- The Intel driver assistant will install all pending Intel drivers after being installed. Follow the on-screen instructions.
- The iusb3xhc.sys blue screen of death should be resolved once all pending drivers are installed. Once all drivers have been installed, close the utility, restart your computer, and verify that it is fixed.
Here are other solutions that might work if this one doesn’t.
Run SFC and DISM Tools
Your computer may also display the Error iusb3xhc.sys blue screen if there are corrupted system files. Therefore, you can scan your computer and repair the corrupted files to fix this error.
I’m going to walk you through this tutorial now.
- Click on Run as administrator when you right-click on the matched search result in Windows.
- Click Enter to proceed to the next step. Type sfc /scannow in the pop-up window.
If the iusb3xhc.sys problem has been resolved by rebooting your computer, start the scanning process again.
It is also possible to use the DISM tool to repair corrupted system files if System File Checker fails to do so.
I’m going to walk you through this tutorial now.
- Install an administrator account and run Command Prompt.
- Click Enter to continue after typing DISM /Online /Cleanup-Image /RestoreHealth.
Check to see if the blue screen issue with iusb3xhc.sys has been resolved by rebooting your computer after the process is completed.
Disable Third-Party Antivirus Software
There is evidence that the use of third-party antivirus software may be causing the iusb3xhc.sys BSOD error.
Third-party antivirus software can be disabled to fix this startup error.
I’m going to walk you through this tutorial now.
- Windows’ search box can be used to find Command Prompt.
- Then, under the Programs section, select Uninstall a program.
- You can now proceed by selecting the antivirus software in the pop-up box, right-clicking it, and choosing Uninstall from the menu.
You can check whether your computer works again after uninstalling third-party antivirus software.

Mark Ginter
Mark Ginter is a tech blogger with a passion for all things gadgets and gizmos. A self-proclaimed «geek», Mark has been blogging about technology for over 15 years. His blog, techquack.com, covers a wide range of topics including new product releases, industry news, and tips and tricks for getting the most out of your devices. If you’re looking for someone who can keep you up-to-date with all the latest tech news and developments, then be sure to follow him over at Microsoft.
