Windows Server 2019 Standard is ideal for customers with low density or
non-virtualized environments. Windows Server 2019 offers additional
features in Standard and Datacenter editions. Features exclusive to the
Windows Server 2016 Datacenter edition include Shielded Virtual
Machines, software-defined networking, Storage Spaces Direct, and
Storage Replica. While no features from the Windows Server 2016 R2
Standard edition have been removed, we have added features like Nano
Server and unlimited Windows Server containers to the Windows Server
2019 Standard edition.
- Addeddate
- 2021-07-16 22:01:18
- Identifier
- mu_windows_server_2019_language_pack_x64_dvd_679192ff
- Scanner
- Internet Archive HTML5 Uploader 1.6.4
comment
Reviews
There are no reviews yet. Be the first one to
write a review.
Apart from the
Windows and Office downloader
we don’t provide any downloads. However, the information on this page will help you find a trustworthy download on Google instead. You can proceed as follows:
- Search Google for the metadata given on this page, such as the SHA1 Hash, SHA256 Hash or the File Name.
- Go through the search results, and download any file that seems to match this product.
- To avoid receiving any tampered downloads, compare the File Size and Hashes of your file with the information
on this page. You can calculate the hashes of a file using
7-ZIP for example.
Start your search by pasting a hash or the file name into the Google box here (opens in a new tab):
Some days ago I need to install additional language on windows server 2019. I will share with you how to do it.
Firts, you need to download ISO language pack for Windows Server 2019 and mount this image by double clicking and then it will show as a DVD drive in “This PC”.

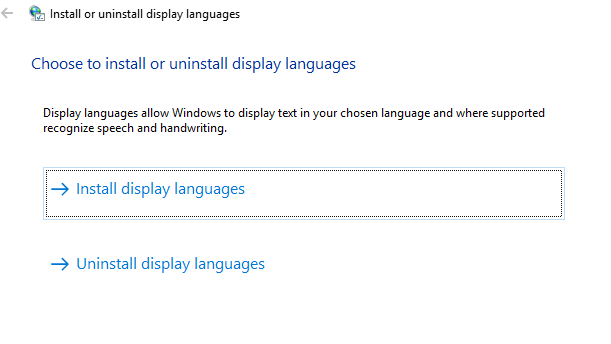
Next, need to start lpksetup.exe. Choose option 1: Install display languages.
Search for language you want to install.

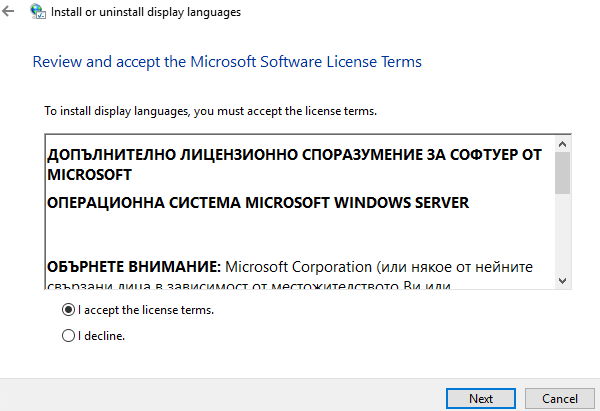
Accept license.
Wait some time and then language will be available to set.
Windows Server 2019 offers us more than 40 languages ​​(with its variations) to use in its interface and this is ideal since since it is a global operating system it must be available in the language of each user, or many times it can happen that we travel to somewhere with a different language and there it will be necessary to edit the way to display the language of Windows Server 2019 , so today we will talk about how we can change the language in Windows Server and match it to the needs of the moment.
Language is important to be able to understand each other well through the system interface with all the settings it includes. If we only understand our native language and have one system in another, it will be difficult to efficiently accomplish the tasks we are looking for. Typically, we can have our default language installed, but we may have to change the Windows Server 2019 language because it has been installed in another language such as English.
Next, we will see how to change Windows Server 2019 language both by downloading Windows server 2019 language pack and by installing ISO Windows Server 2019 free download with our language.
1. Download Windows Server 2019 language pack to change language
To access the language settings in Windows Server 2019 we have different ways such as:
Step 1
Enter the term «language» in the Start search box. There we select the «Language settings» option. 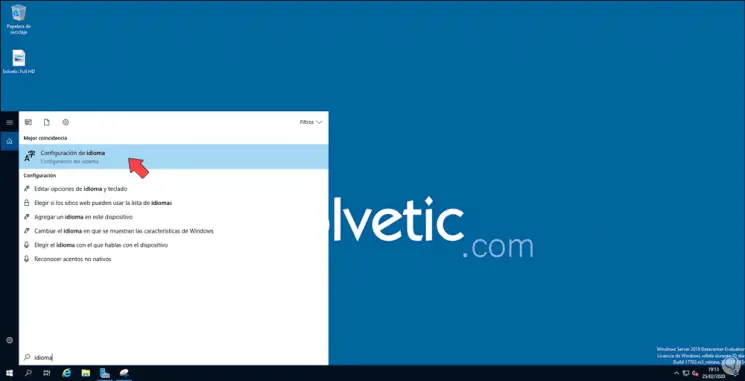
Step 2
Another option is to go to the Start / Configuration path: 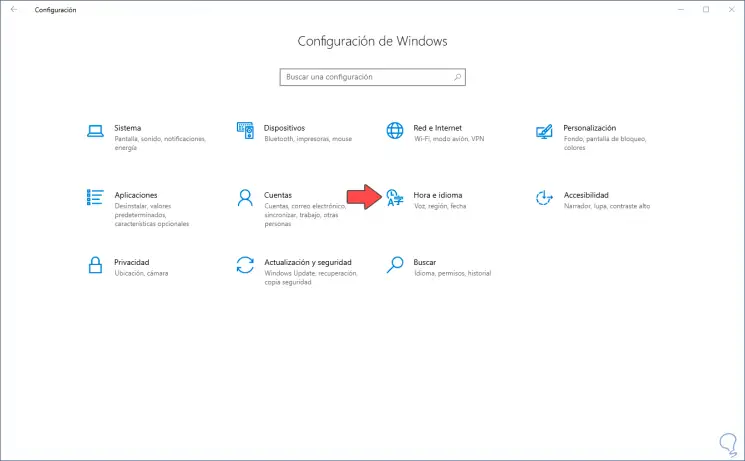
Step 3
There we go to the «Time and language» category and then we go to the «Language» section: 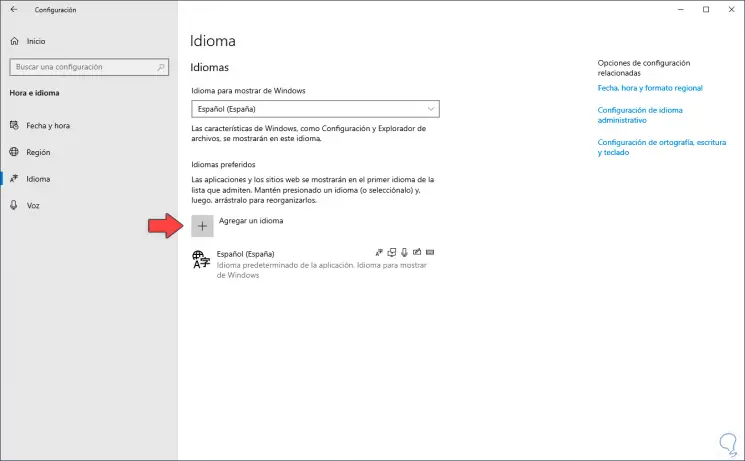
Step 4
We can see that the only language available at the moment is Spanish, to add a new language we click on the «Add a language» button and the following pop-up window will appear where we can search for the language or enter the initials of the same for a Direct language filter: 
Step 5
We click on the desired language and the «Next» button will be activated: 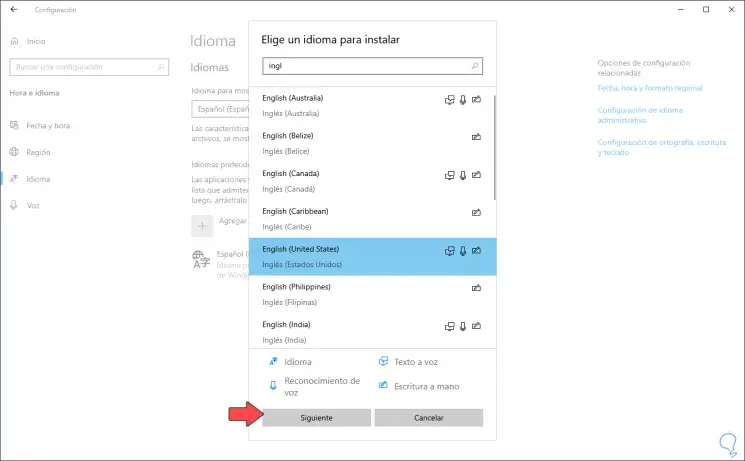
Step 6
In the next window we can download the language itself, as well as extra functions such as voice, handwriting, etc: 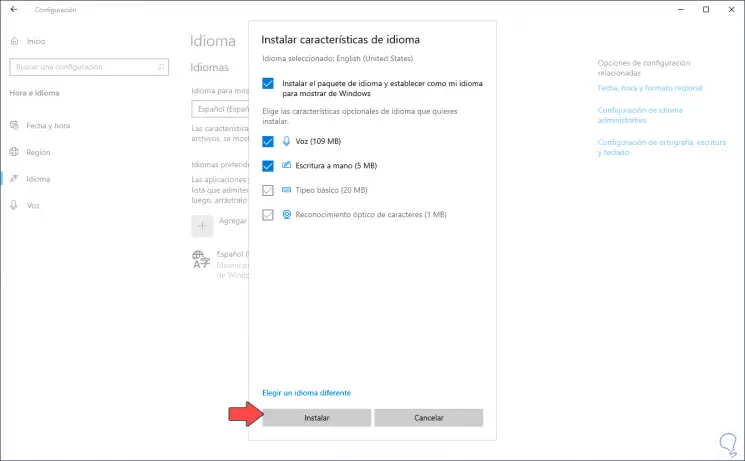
Step 7
We click on «Install» to start the process of downloading and installing the selected language in Windows Server 2019: 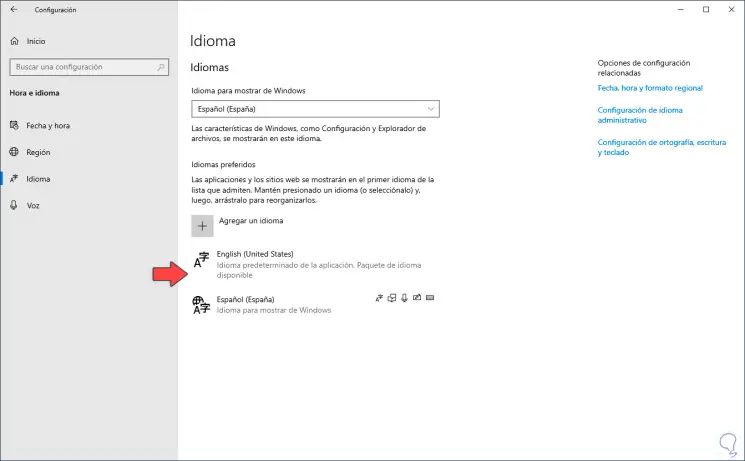
Step 8
When the selected language is available in the Windows Server Language console, we can click on it and we will see the following: 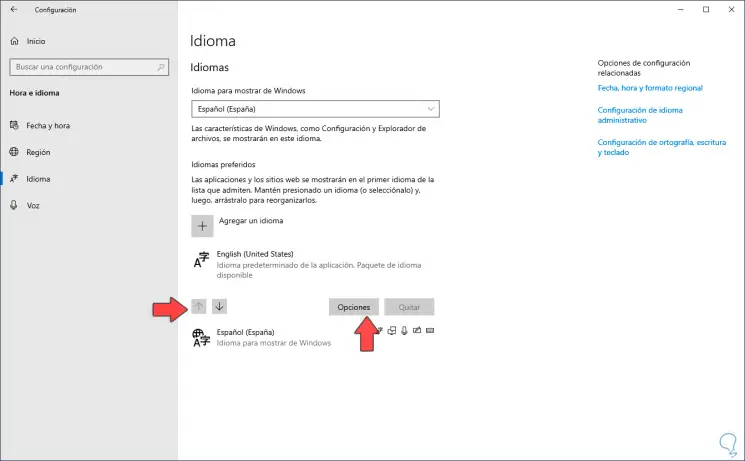
Step 9
There we can use the direction button to set it as a second option, but by clicking on «Options» it will be possible to download additional language options. There we click on the «Download» button so that the selected language is downloaded locally in Windows Server 2019. 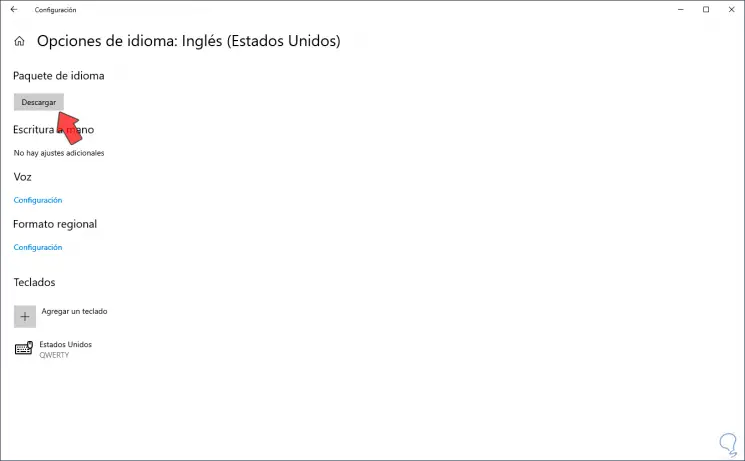
Step 10
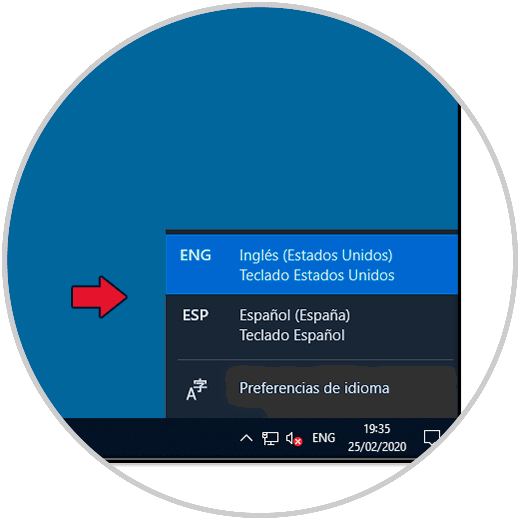
Once the language has been installed we can access it from the language icon in the Windows Server 2019 taskbar:
2. Change language Windows Server 2019 from ISO
Step 1
In case that for some reason the language is not downloaded, we can use the option to download the Windows Server language packs in the following link:
Windows Server 2019 languages
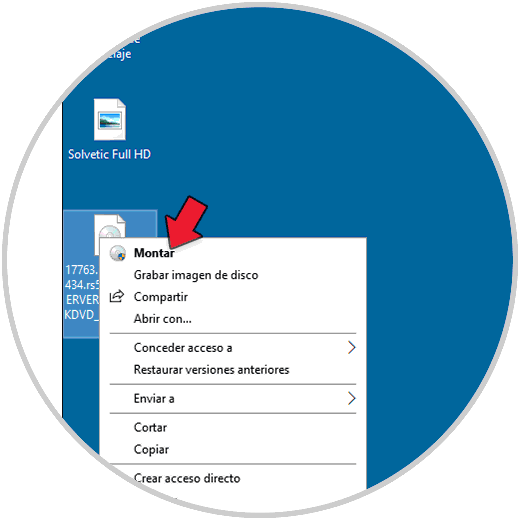
Step 2
Once the ISO image has been downloaded, we right click on it and select the option «Mount»:
Step 3
Then, in the mounted unit, we will go to the x64 / langpacks route: 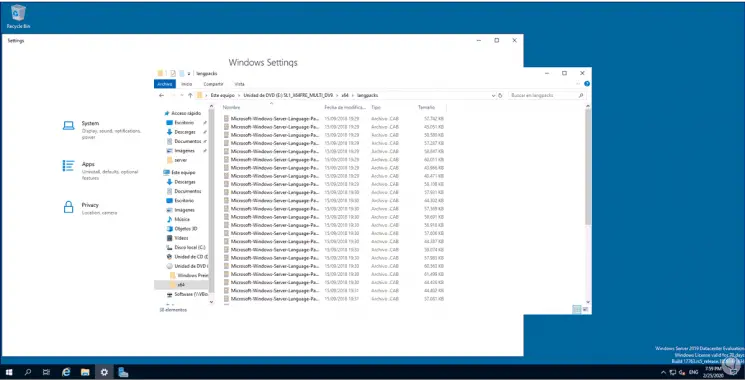
Step 4
There we will copy the desired language to a new folder or desired location: 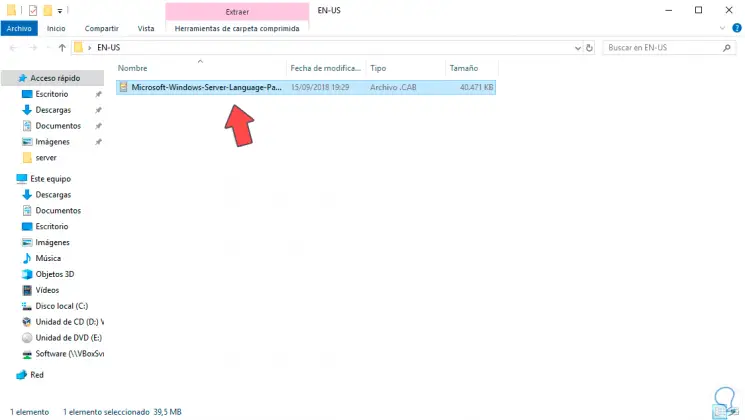
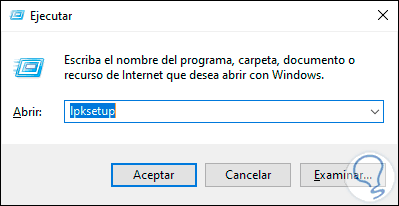
Step 5
Once this is done, we will use the following key combination and execute the «lpksetup» command:
+ R
Step 6
Click OK and the following will be displayed:
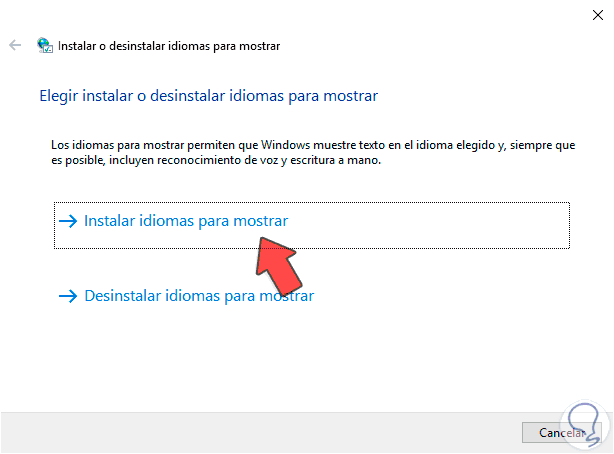
Step 7
We click on the «Install languages ​​to display» line and in the next window click on «Browse» and we will go to the folder where we have copied the desired language:
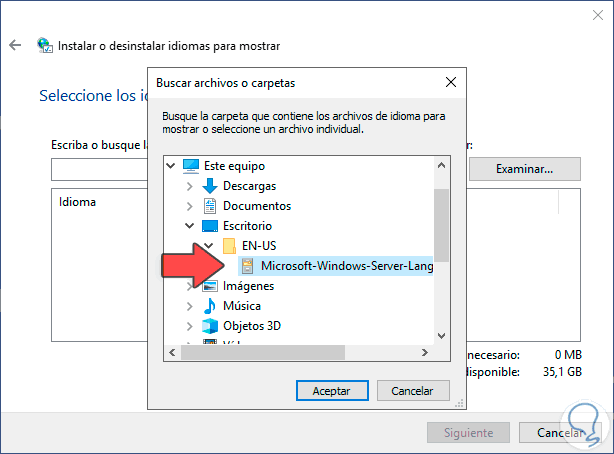
Step 8
We click OK to add this language:

Step 9
We click Next and we must accept the license terms:
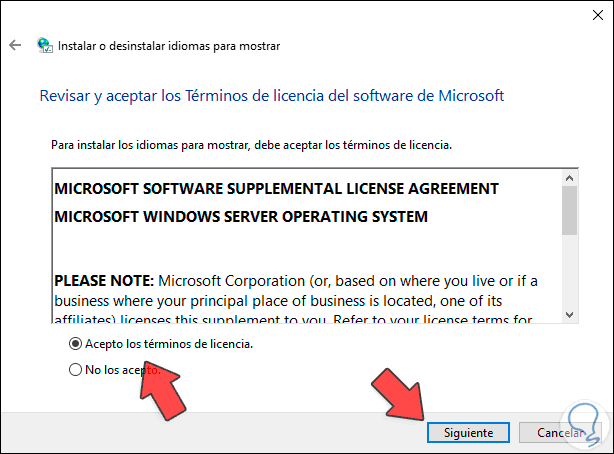
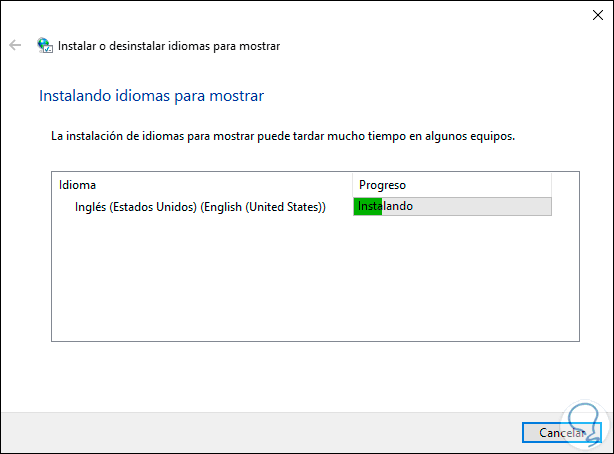
Step 10
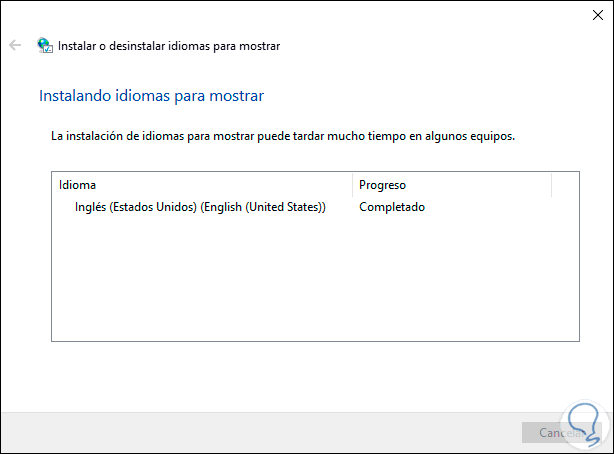
We click Next and the installation process of the selected language will be given:
Step 11
When the process reaches its end we will see the following:
Step 12
After this we can validate that the language has been installed from Configuration: 
Step 13
For this new language to be the one established in Windows Server 2019, we must go to the «Windows language to display» section and in the drop-down field we select the new language: 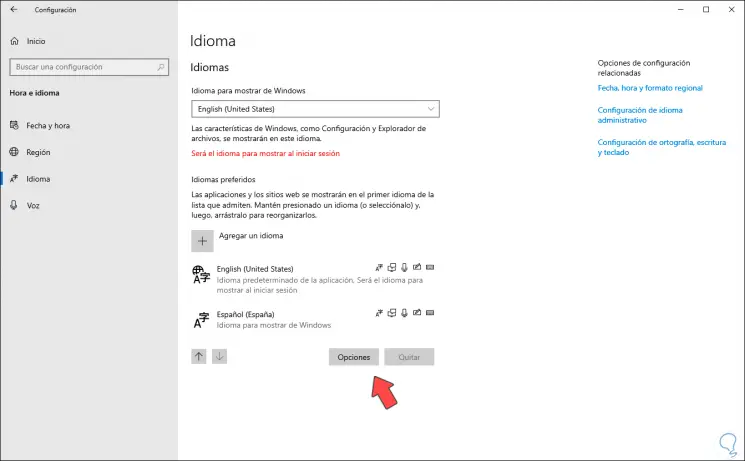
Step 14
It will be necessary to log out to apply the changes, when accessing we can see Windows Server 2019 in the new language that we have downloaded and installed: 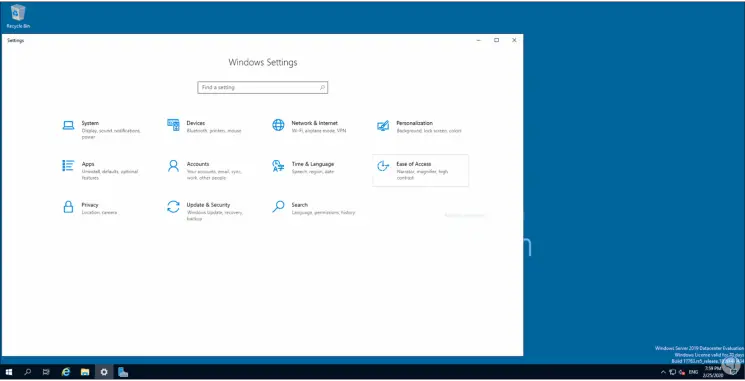
This change will affect all the menus and applications of the system, so we must be responsible for defining what language is to be downloaded for the system since the work from now on will be linked to this new language until the moment we establish the original language again.
В операционной системе Windows по умолчанию всегда выставлен английский язык интерфейса. Это удобно далеко не всем, поэтому мы расскажем, как изменить язык. Опишем два основных способа:
- Лёгкий, но долгий — установка всех доступных обновлений.
- Посложнее, зато побыстрее — установка пакета KB4476976 вручную.
Подготовительный этап
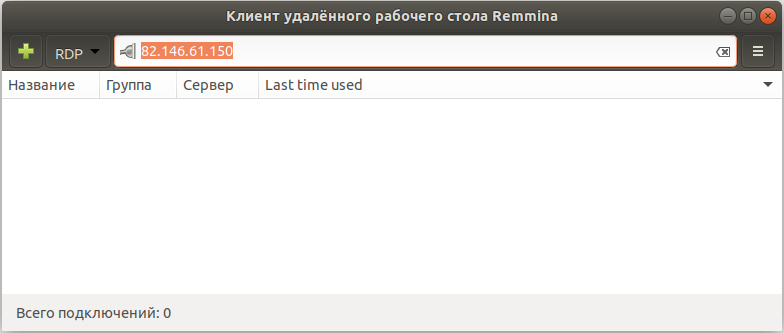
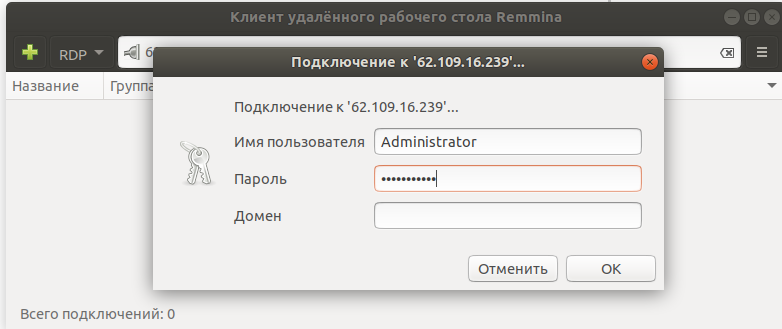
Прежде всего, необходимо подключиться к вашему серверу по протоколу RDP. Сделать это можно с помощью любого RDP-клиента, например, мы любим использовать Remmina для Linux. Используйте IP-адрес вашего сервера в качестве имени хоста, а также данные пользователя Administrator (отправляются на почту после заказа сервера) в качестве логина/пароля:
Способ 1: Установка всех обновлений ОС
Обновление
Переходим в настройки:
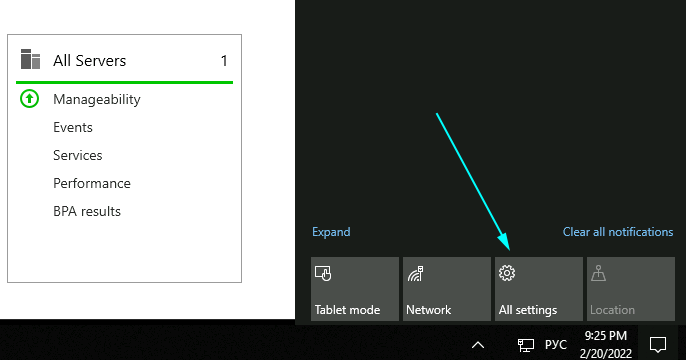
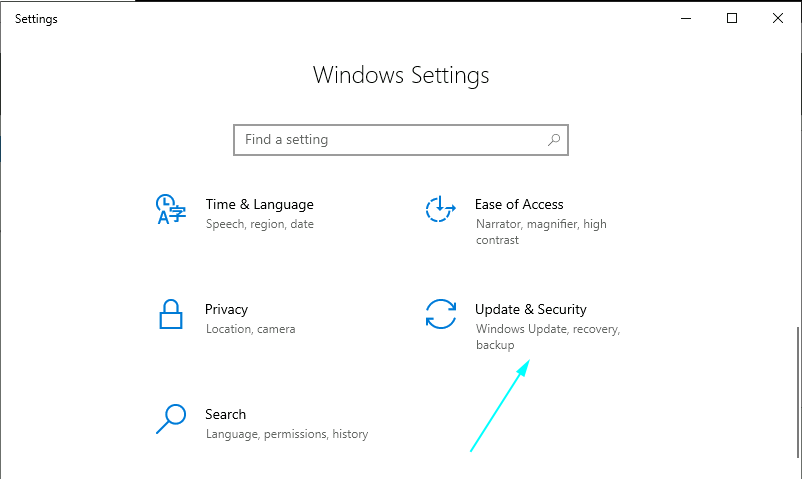
Далее переходим в раздел «Update and Security»:
Запускаем поиск и установку обновлений по кнопке «Check for updates»:
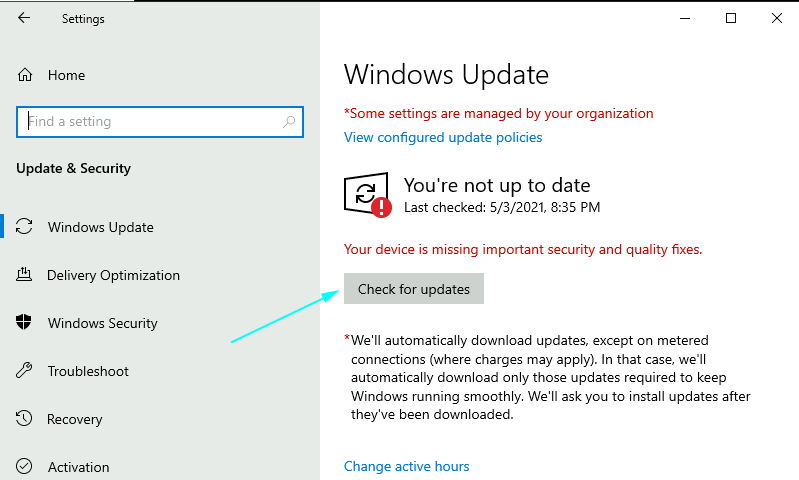
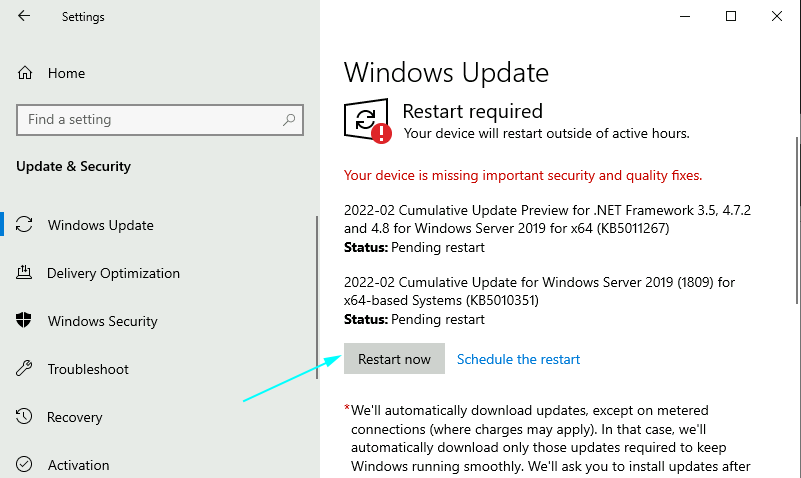
Дожидаемся окончания поиска и установки обновлений. Перезагружаем сервер по кнопке «restart now»:
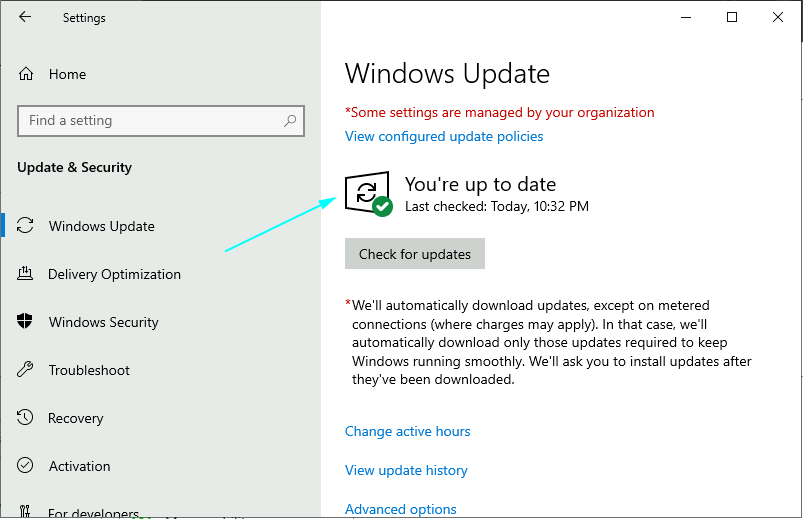
При необходимости повторяем поиск и установку обновлений несколько раз, пока при нажатии кнопки «Check for updates» не увидим надпись «You’re up to date»:
Готово! Все доступные обновления операционной системы установлены. Теперь осталось сменить язык.
Изменение языка интерфейса
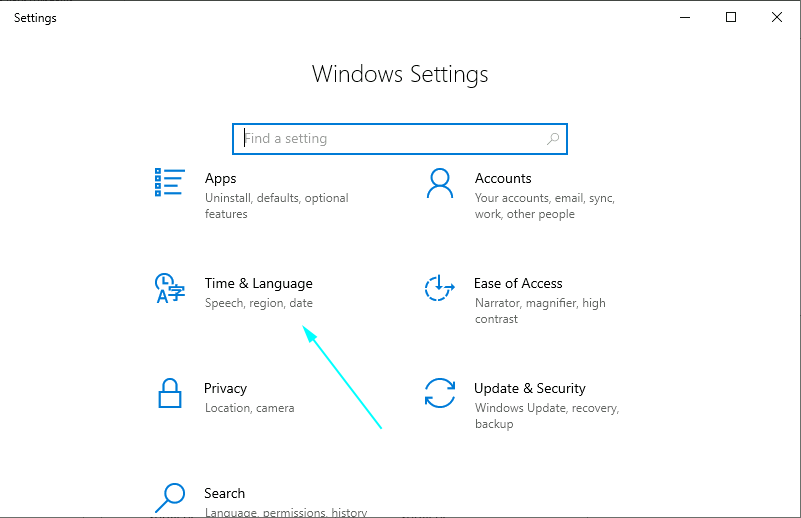
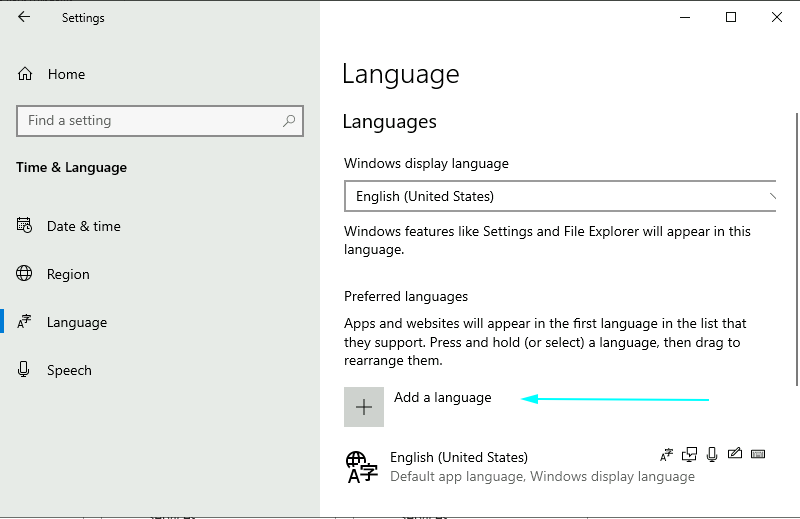
Возвращаемся в меню настроек операционной системы и выбираем пункт «Time & Language»:
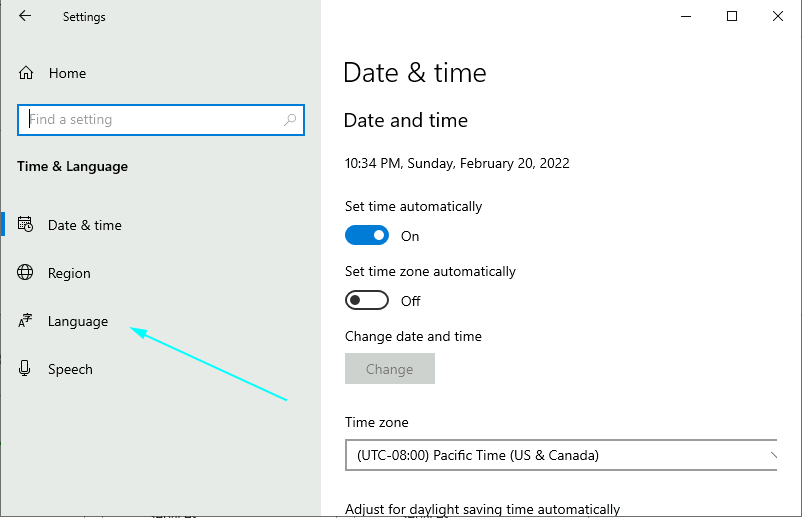
Далее переходим в пункт «Language»:
Добавляем язык по кнопке «Add a language»:
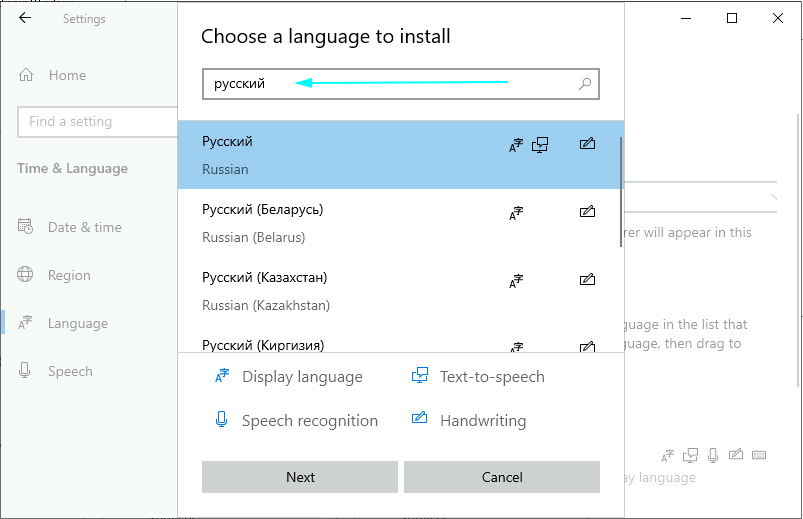
Ищем в поиске русский язык, выделяем, нажимаем кнопку «Next»:
Наконец, жмем кнопку «Install» и дожидаемся окончания установки:
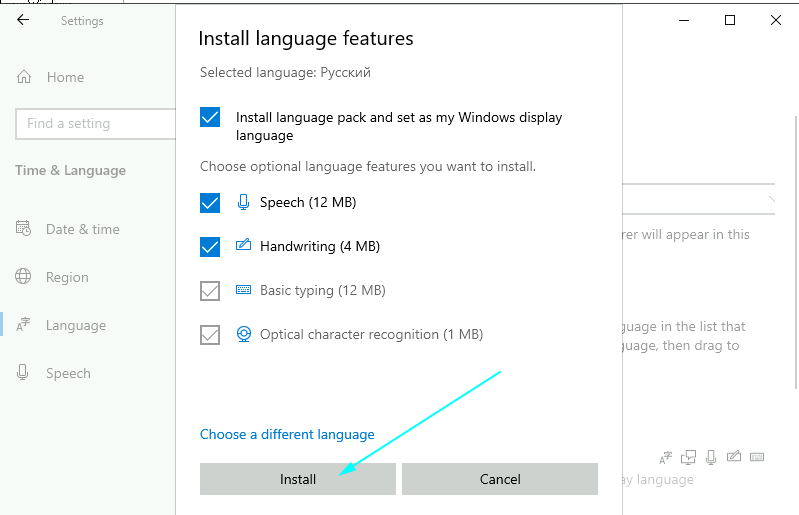
После того, как установка завершится, нужно будет заново авторизоваться по RDP для принятия настроек. Готово! Русский язык установлен для интерфейса ОС.
Способ 2: Ручная установка пакета KB4476976
Если первый способ кажется вам утомительно долгим, предлагаем вам альтернативу. Открываем ссылку в браузере сервера и качаем «2019-01 Cumulative Update for Windows Server 2019 for x64-based Systems (KB4476976)»:
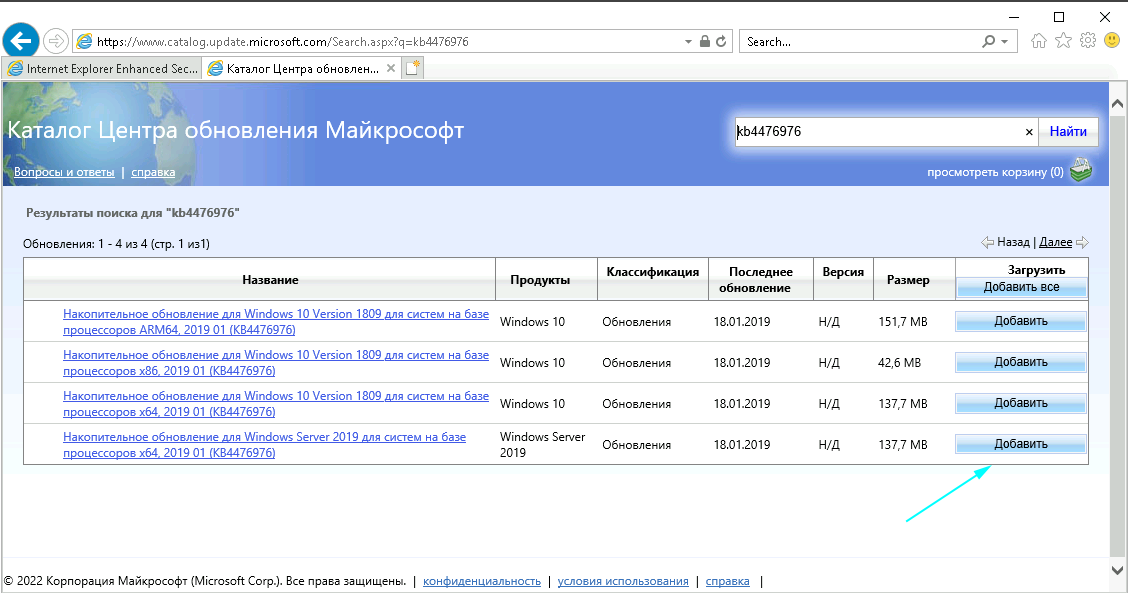
Добавляем нужный пакет в корзину, переходим в нее и загружаем файл:
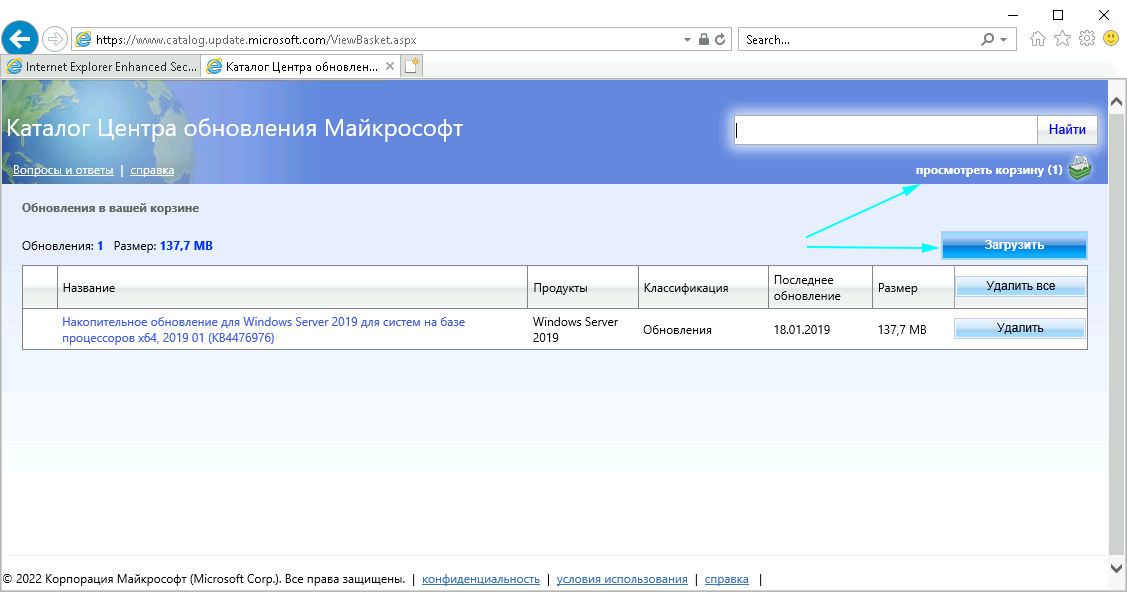
Подтверждаем загрузку и дожидаемся окончания процесса:
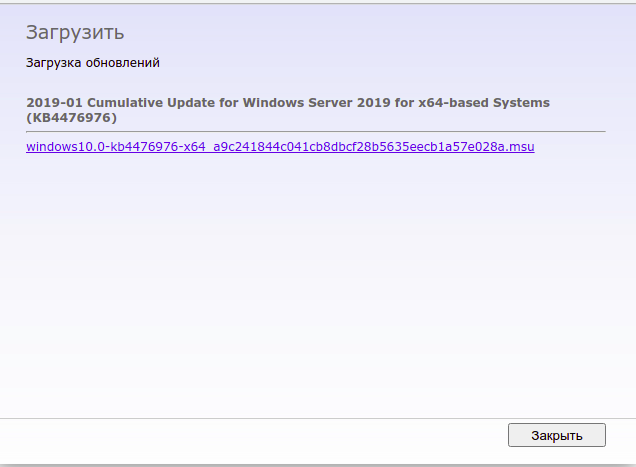
После завершения загрузки откроется автоматический установщик. После успешной установки пакета вы увидите сообщение «Installation complete». Это значит, что сейчас самое время перезагрузить сервер. После перезагрузки сервера останется лишь сменить язык интерфейса.
Заключение
В этой статье описаны основные способы добавления русского языка в Windows 2019. Безусловно, существуют другие методы, однако, они требуют более высоких навыков работы с ОС Windows, поэтому рассматривать их мы не будем. Если у вас возникли вопросы или трудности по теме, обращайтесь в нашу службу поддержки. Мы поможем вам в любое время дня и ночи.