Проводное подключение Ethernet позволяет быстро получить доступ к Интернету: подключите один конец кабеля Ethernet к домашнему маршрутизатору, а другой — к порту Ethernet на компьютере с Windows. (Если на вашем компьютере нет порта Ethernet, но вы хотите попробовать этот вариант, вы можете получить адаптер USB-Ethernet.)
Если вы не можете получить доступ к Интернету через подключение Ethernet, попробуйте выполнить следующие инструкции, чтобы устранить проблему.
На домашнем маршрутизаторе
Чтобы решить проблему или сузить область поиска решения, в первую очередь выполните следующие действия:
-
Проверьте кабель Ethernet и подключение. Убедитесь, что кабель Ethernet надежно подключен к порту Ethernet на маршрутизаторе и компьютере с Windows 11. Убедитесь, что кабель Ethernet подключен к правильному порту Ethernet маршрутизатора, а не к порту Интернета, который используется для подключения модема и маршрутизатора.
Если один кабель Ethernet не работает и у вас под рукой есть другой, попробуйте подключить этот другой кабель Ethernet. Если он работает, вероятно, проблема заключается в первом кабеле.
-
Перезагрузите модем и беспроводной маршрутизатор. Это поможет установить новое соединение с поставщиком услуг Интернета. При этом все подключения к вашей сети Wi‑Fi будут временно разорваны. Инструкции по перезагрузке модема и маршрутизатора могут отличаться, но основные действия таковы:
Примечание: Если у вас есть комбинированное устройство с кабельным модемом/маршрутизатором Wi-Fi, вам просто нужно выполнить предлагаемые действия на одном устройстве.
-
Отсоедините кабель питания маршрутизатора от источника питания.
-
Отсоедините кабель питания модема от источника питания.
В некоторых модемах есть резервный аккумулятор. Если после отключения модема его индикаторы не гаснут, извлеките аккумулятор.
-
Подождите не менее 30 секунд.
Если вы вынимали из модема аккумулятор, верните его на место.
-
Подключите модем к источнику питания. Индикаторы модема замигают. Подождите, пока они перестанут мигать.
-
Подключите маршрутизатор к источнику питания.
Подождите несколько минут, пока модем и маршрутизатор полностью включатся. Как правило, готовность этих устройств можно проверить по индикаторам состояния.
-
На компьютере попробуйте снова зайти в Интернет с помощью Ethernet-подключения.
На компьютере
-
Проверьте состояние сети в разделе “Параметры”. Откройте Параметры > Сеть и Интернет. Проверьте состояние подключения Ethernet в верхней части экрана. Убедитесь, что под именем сетевого подключения указано Подключено. Если возникает ошибка, например выдается сообщение Требуется действие, выберите Ethernet, чтобы просмотреть параметры подключения Ethernet.
Если один кабель Ethernet не работает и у вас под рукой есть другой, попробуйте подключить этот другой кабель Ethernet. Если он работает, вероятно, проблема заключается в первом кабеле.
-
Подключение к сети Wi-Fi. Если ваш маршрутизатор поддерживает сеть Wi-Fi, попробуйте подключиться к Wi-Fi и посмотрите, удастся ли вам это. Эта рекомендация преследует две цели: помочь вам подключиться к Интернету и ограничить число возможных причин проблемы. Подробнее см. в разделе Подключение к сети Wi-Fi в Windows.
-
Запуск сетевых команд. Попробуйте запустить эти сетевые команды, чтобы вручную сбросить стек TCP/IP, освободить и обновить IP-адрес, а также очистить и сбросить кэш сопоставителя DNS-клиента.
-
Выберите Поиск на панели задач и введите Командная строка. Появится кнопка Командная строка. Справа от нее выберите Запуск от имени администратора > Да.
-
В командной строке выполните в указанном порядке следующие команды, а затем проверьте, помогло ли это решить проблему с подключением:
-
Введите netsh winsock reset и нажмите клавишу ВВОД.
-
Введите netsh int ip reset и нажмите клавишу ВВОД.
-
Введите ipconfig /release и нажмите клавишу ВВОД.
-
Введите ipconfig /renew и нажмите клавишу ВВОД.
-
Введите ipconfig /flushdns и нажмите клавишу ВВОД.
-
-
Удалите драйвер сетевого адаптера Ethernet и выполните перезапуск Если предыдущие шаги не помогли устранить проблему, попробуйте удалить драйвер сетевого адаптера и перезагрузить компьютер. Windows установит последнюю версию драйвера автоматически. Воспользуйтесь этим способом, если сетевое подключение стало работать неправильно после недавнего обновления.
Сначала убедитесь, что у вас есть резервные копии драйверов. Перейдите на веб-сайт изготовителя компьютера и скачайте последнюю версию драйвера для сетевого адаптера. Если компьютер не подключается к Интернету, скачайте драйвер на другом компьютере, сохраните его на USB-устройстве флэш-памяти, а затем установите на своем компьютере. Вам нужно знать изготовителя компьютера и название или номер модели.
-
Выберите поиск на панели задач, введите диспетчер устройств, а затем выберите Диспетчер устройств в списке результатов.
-
Разверните раздел Сетевые адаптеры и найдите сетевой адаптер Ethernet для своего устройства.
-
Выберите сетевой адаптер, нажмите и удерживайте его (или щелкните правой кнопкой мыши), затем выберите Удалить устройство > Попытка удалить драйвер для этого устройства > Удалить.
-
После удаления драйвера нажмите кнопку Пуск > Выключение > Перезагрузка.
После перезапуска компьютера операционная система Windows автоматически выполнит поиск драйверов и установит драйвер сетевого адаптера. Проверьте, помогло ли это решить проблему с подключением. Если Windows не устанавливает драйвер автоматически, попробуйте установить резервную копию драйвера, сохраненную перед удалением.
-
Выполните сброс сети. Сброс сетевых параметров является крайним шагом. Используйте его, только если вышеперечисленные действия не помогли установить подключение.
Возможно, это поможет устранить проблемы с подключением после перехода с Windows 10 на Windows 11, а также проблему, из-за которой вы можете подключиться к Интернету, но не к общим сетевым дискам. Сброс сети позволяет удалить все установленные сетевые адаптеры и их параметры. После перезапуска компьютера все сетевые адаптеры будут переустановлены, а параметрам будут заданы значения по умолчанию.
-
Нажмите кнопку Пуск и введите слово параметры. Выберите Параметры > Сеть и Интернет > Дополнительные параметры сети > Сброс сети.
Открытие параметров состояния сети и Интернета
-
В окне Сброс сетевых параметров выберите пункты Сбросить > Да.
Дождитесь завершения перезагрузки компьютера и проверьте, удалось ли решить проблему.
Примечания:
-
После выполнения сброса сетевых параметров может потребоваться переустановить и настроить другое сетевое программное обеспечение, которое вы можете использовать, например клиент VPN или виртуальные коммутаторы от Hyper‑V (если вы используете то или иное программное обеспечение для виртуализации сети).
-
При выполнении сброса сетевых параметров все ваши известные сетевые подключения могут быть переведены на профиль общедоступной сети. При использовании профиля общедоступной сети обнаружение вашего компьютера другими компьютерами и устройствами, находящимися в сети, будет недоступно, за счет чего повышается степень безопасности вашего компьютера. Тем не менее, если ваш компьютер используется для общего доступа к файлам или принтеру, вам придется заново включить возможность сетевого обнаружения вашего компьютера, выбрав профиль частной сети. Для этого нажмите кнопку Пуск и введите слово параметры. Выберите Параметры > Сеть и Интернет > Ethernet. На экране Ethernet в разделе Тип сетевого профиля выберите Частная.
-
На другом компьютере
-
Попробуйте подключиться к той же сети с другого устройства. Если у вас дома есть другой компьютер с Windows и адаптер USB-Ethernet, попробуйте подключиться с помощью этого компьютера. Если вам это удастся, проблема, скорее всего, возникла из-за вашего первого компьютера. Если вы не можете подключиться к сети Ethernet с любого компьютера, причиной проблемы может быть маршрутизатор, поставщик услуг Интернета или адаптер USB-Ethernet.
На домашнем маршрутизаторе
Чтобы решить проблему или сузить область поиска решения, в первую очередь выполните следующие действия:
-
Проверьте кабель Ethernet и подключение. Убедитесь, что кабель Ethernet надежно подключен к порту Ethernet на маршрутизаторе и компьютере с Windows 10. Убедитесь, что кабель Ethernet подключен к правильному порту Ethernet маршрутизатора, а не к порту Интернета, который используется для подключения модема и маршрутизатора.
Если один кабель Ethernet не работает и у вас под рукой есть другой, попробуйте подключить этот другой кабель Ethernet. Если он работает, вероятно, проблема заключается в первом кабеле.
-
Перезагрузите модем и беспроводной маршрутизатор. Это поможет установить новое соединение с поставщиком услуг Интернета. При этом все подключения к вашей сети Wi‑Fi будут временно разорваны. Инструкции по перезагрузке модема и маршрутизатора могут отличаться, но основные действия таковы:
Примечание: Если у вас есть комбинированное устройство с кабельным модемом/маршрутизатором Wi-Fi, вам просто нужно выполнить предлагаемые действия на одном устройстве.
-
Отсоедините кабель питания маршрутизатора от источника питания.
-
Отсоедините кабель питания модема от источника питания.
В некоторых модемах есть резервный аккумулятор. Если после отключения модема его индикаторы не гаснут, извлеките аккумулятор.
-
Подождите не менее 30 секунд.
Если вы вынимали из модема аккумулятор, верните его на место.
-
Подключите модем к источнику питания. Индикаторы модема замигают. Подождите, пока они перестанут мигать.
-
Подключите маршрутизатор к источнику питания.
Подождите несколько минут, пока модем и маршрутизатор полностью включатся. Как правило, готовность этих устройств можно проверить по индикаторам состояния.
-
На компьютере попробуйте снова зайти в Интернет с помощью Ethernet-подключения.
На компьютере
-
Проверьте состояние сети в разделе “Параметры”. Откройте Параметры > Сеть и Интернет> Состояние. Проверьте состояние подключения Ethernet. Под сетевым подключением Ethernet должно быть указано Вы подключены к Интернету.
Если один кабель Ethernet не работает и у вас под рукой есть другой, попробуйте подключить этот другой кабель Ethernet. Если он работает, вероятно, проблема заключается в первом кабеле.
-
Подключение к сети Wi-Fi. Если ваш маршрутизатор поддерживает сеть Wi-Fi, попробуйте подключиться к Wi-Fi и посмотрите, удастся ли вам это. Эта рекомендация преследует две цели: помочь вам подключиться к Интернету и ограничить число возможных причин проблемы. Подробнее см. в разделе Подключение к сети Wi-Fi в Windows.
-
Запуск сетевых команд. Попробуйте запустить эти сетевые команды, чтобы вручную сбросить стек TCP/IP, освободить и обновить IP-адрес, а также очистить и сбросить кэш сопоставителя DNS-клиента.
-
В поле поиска на панели задач введите Командная строка. Появится кнопка Командная строка. Справа от нее выберите Запуск от имени администратора > Да.
-
В командной строке выполните в указанном порядке следующие команды, а затем проверьте, помогло ли это решить проблему с подключением:
-
Введите netsh winsock reset и нажмите клавишу ВВОД.
-
Введите netsh int ip reset и нажмите клавишу ВВОД.
-
Введите ipconfig /release и нажмите клавишу ВВОД.
-
Введите ipconfig /renew и нажмите клавишу ВВОД.
-
Введите ipconfig /flushdns и нажмите клавишу ВВОД.
-
-
Удалите драйвер сетевого адаптера Ethernet и выполните перезапуск Если предыдущие шаги не помогли устранить проблему, попробуйте удалить драйвер сетевого адаптера и перезагрузить компьютер. Windows установит последнюю версию драйвера автоматически. Воспользуйтесь этим способом, если сетевое подключение стало работать неправильно после недавнего обновления.
Сначала убедитесь, что у вас есть резервные копии драйверов. Перейдите на веб-сайт изготовителя компьютера и скачайте последнюю версию драйвера для сетевого адаптера. Если компьютер не подключается к Интернету, скачайте драйвер на другом компьютере, сохраните его на USB-устройстве флэш-памяти, а затем установите на своем компьютере. Вам нужно знать изготовителя компьютера и название или номер модели.
-
В поле поиска на панели задач введите диспетчер устройств, а затем выберите пункт Диспетчер устройств в списке результатов.
-
Разверните раздел Сетевые адаптеры и найдите сетевой адаптер Ethernet для своего устройства.
-
Выберите сетевой адаптер, нажмите и удерживайте его (или щелкните правой кнопкой мыши), затем выберите Удалить устройство > Попытка удалить драйвер для этого устройства > Удалить.
-
После удаления драйвера нажмите кнопку Пуск > Выключение > Перезагрузка.
После перезапуска компьютера операционная система Windows автоматически выполнит поиск драйверов и установит драйвер сетевого адаптера. Проверьте, помогло ли это решить проблему с подключением. Если Windows не устанавливает драйвер автоматически, попробуйте установить резервную копию драйвера, сохраненную перед удалением.
-
Выполните сброс сети. Сброс сетевых параметров является крайним шагом. Используйте его, только если вышеперечисленные действия не помогли установить подключение.
Возможно, это поможет устранить проблему, из-за которой вы можете подключиться к Интернету, но не к общим сетевым дискам. Сброс сети позволяет удалить все установленные сетевые адаптеры и их параметры. После перезапуска компьютера все сетевые адаптеры будут переустановлены, а параметрам будут заданы значения по умолчанию.
-
Нажмите кнопку Пуск и выберите Параметры > Сеть и Интернет > Состояние > Сброс сети.
Открытие параметров состояния сети и Интернета
-
В окне Сброс сетевых параметров выберите пункты Сбросить > Да.
Дождитесь завершения перезагрузки компьютера и проверьте, удалось ли решить проблему.
Примечания:
-
После выполнения сброса сетевых параметров может потребоваться переустановить и настроить другое сетевое программное обеспечение, которое вы можете использовать, например клиент VPN или виртуальные коммутаторы от Hyper‑V (если вы используете то или иное программное обеспечение для виртуализации сети).
-
При выполнении сброса сетевых параметров все ваши известные сетевые подключения могут быть переведены на профиль общедоступной сети. При использовании профиля общедоступной сети обнаружение вашего компьютера другими компьютерами и устройствами, находящимися в сети, будет недоступно, за счет чего повышается степень безопасности вашего компьютера. Тем не менее, если ваш компьютер используется для общего доступа к файлам или принтеру, вам придется заново включить возможность сетевого обнаружения вашего компьютера, выбрав профиль частной сети. Для этого нажмите кнопку Пуск и выберите Параметры > Сеть и Интернет > Ethernet. На экране Ethernet выберите сетевое подключение Ethernet, которое нужно изменить, и нажмите Частная в области Профиль сети.
-
На другом компьютере
-
Попробуйте подключиться к той же сети с другого устройства. Если у вас дома есть другой компьютер с Windows и адаптер USB-Ethernet, попробуйте подключиться с помощью этого компьютера. Если вам это удастся, проблема, скорее всего, возникла из-за вашего первого компьютера. Если вы не можете подключиться к сети Ethernet с любого компьютера, причиной проблемы может быть маршрутизатор, поставщик услуг Интернета или адаптер USB-Ethernet.
A wired Ethernet connection lets you get a fast internet connection—plug one end of the Ethernet cable into your router at home, then plug the other end into the Ethernet port on your Windows PC. (If your PC doesn’t have an Ethernet port but you want to try this option, you might consider getting a USB to Ethernet adapter.)
If you’re using an Ethernet connection and can’t connect to the internet, there are a few things you can try to try to fix the problem and get connected.
On your home router
Try these things first to help you fix or narrow down the connection problem.
-
Check the Ethernet cable and connection. Make sure the Ethernet cable is securely plugged into the Ethernet port on both your router and Windows 11 PC. On your router, make sure the Ethernet cable is plugged into the correct Ethernet port—not the Internet port that’s used to connect your modem and router.
If one Ethernet cable doesn’t work and you have another one nearby, try the other Ethernet cable to see if that works. If it does, it might be a problem with the first cable.
-
Restart your modem and wireless router. This helps create a new connection to your internet service provider (ISP). When you do this, everyone that is connected to your Wi-Fi network will be temporarily disconnected. The steps you take to restart your modem and router can vary, but here are the general steps.
Note: If you have a cable modem/Wi-Fi router combo device, you only need to follow the steps for the single device.
-
Unplug the power cable for the router from the power source.
-
Unplug the power cable for the modem from the power source.
Some modems have a backup battery. If you unplug the modem and lights stay on, remove the battery from the modem.
-
Wait at least 30 seconds or so.
If you had to remove the battery from the modem, put it back in.
-
Plug the modem back into the power source. The lights on the modem will blink. Wait for them to stop blinking.
-
Plug your router back into the power source.
Wait a few minutes for the modem and router to fully power on. You can usually tell when they’re ready by looking at the status lights on the two devices.
-
On your PC, try to connect again using the Ethernet connection.
On your PC
-
Check the network status in Settings. Open Settings > Network & internet. Check your Ethernet connection status at the top of the screen. Make sure it says Connected underneath the network connection name. If there’s an error, such as one that says Action needed, select Ethernet to view your Ethernet connection settings.
If one Ethernet cable doesn’t work and you have another one nearby, try the other Ethernet cable to see if that works. If it does, it might be a problem with the first cable.
-
Connect to Wi-Fi instead. If your router is a Wi-Fi router, try to connect to Wi-Fi and see if you can get connected. This can do two things—help you get an internet connection and help you narrow down the source of the problem. For more info, see Connect to a Wi-Fi network in Windows.
-
Run network commands. Try running these network commands to manually reset the TCP/IP stack, release and renew the IP address, and flush and reset the DNS client resolver cache:
-
Select Search on the taskbar, type Command prompt. The Command Prompt button will appear. To the right of it, select Run as administrator > Yes.
-
At the command prompt, run the following commands in the listed order, and then check to see if that fixes your connection problem:
-
Type netsh winsock reset and select Enter.
-
Type netsh int ip reset and select Enter.
-
Type ipconfig /release and select Enter.
-
Type ipconfig /renew and select Enter.
-
Type ipconfig /flushdns and select Enter.
-
-
Uninstall the Ethernet network adapter driver and restart. If the previous steps didn’t work, try to uninstall the network adapter driver, and then restart your computer. Windows will automatically install the latest driver. Consider this approach if your network connection stopped working properly after a recent update.
Before uninstalling, make sure you have drivers available as a backup. Visit the PC manufacturer’s website and download the latest network adapter driver from there. If your PC can’t connect to the internet, you’ll need to download a driver on a different PC and save it to a USB flash drive so you can install the driver on your PC. You’ll need to know the PC manufacturer and model name or number.
-
Select Search on the taskbar, type Device Manager, and then select Device Manager from the list of results.
-
Expand Network adapters and locate the Ethernet network adapter for your device.
-
Select the network adapter, press and hold (or right-click), and then select Uninstall device > the Attempt to remove the driver for this device check box > Uninstall.
-
After uninstalling the driver, select the Start button > Power > Restart.
After your PC restarts, Windows will automatically look for and install the network adapter driver. Check to see if that fixes your connection problem. If Windows doesn’t automatically install a driver, try to install the backup driver you saved before uninstalling.
-
Use network reset. Using network reset should be the last step you try. Consider using it if the steps above don’t help to get you connected.
This can help solve connection problems you might have after upgrading from Windows 10 to Windows 11. It can also help to fix the problem where you can connect to the internet but can’t connect to shared network drives. Network reset removes any network adapters you have installed and the settings for them. After your PC restarts, any network adapters are reinstalled, and the settings for them are set to the defaults.
-
Select the Start button, then enter settings. Select Settings > Network & internet > Advanced network settings > Network reset.
Open Network & internet status settings
-
On the Network reset screen, select Reset now > Yes to confirm.
Wait for your PC to restart and see if that fixes the problem.
Notes:
-
After using network reset, you might need to reinstall and set up other networking software you might be using, such as VPN client software or virtual switches from Hyper‑V (if you’re using that or other network virtualization software).
-
Network reset might set each one of your known network connections to a public network profile. In a public network profile, your PC is not discoverable to other PCs and devices on the network, which can help make your PC more secure. However, if your PC is used for file or printer sharing, you’ll need to make your PC discoverable again by setting it to use a private network profile. To do this, select the Start button, then enter settings. Select Settings > Network & internet > Ethernet . On the Ethernet screen, under Network profile type, select Private.
-
On another PC
-
Try to connect to the same network on a different device. If you have another Windows PC in your home and a USB to Ethernet adapter, try to connect using that PC. If you can connect, the source of the problem is likely due to your first PC. If you can’t connect to the Ethernet network on either PC, it might be a problem with your router, internet service provider, or USB to Ethernet adapter.
On your home router
Try these things first to help you fix or narrow down the connection problem.
-
Check the Ethernet cable and connection. Make sure the Ethernet cable is securely plugged into the Ethernet port on both your router and Windows 10 PC. On your router, make sure the Ethernet cable is plugged into the correct Ethernet port—not the Internet port that’s used to connect your modem and router.
If one Ethernet cable doesn’t work and you have another one nearby, try the other Ethernet cable to see if that works. If it does, it might be a problem with the first cable.
-
Restart your modem and wireless router. This helps create a new connection to your internet service provider (ISP). When you do this, everyone that is connected to your Wi-Fi network will be temporarily disconnected. The steps you take to restart your modem and router can vary, but here are the general steps.
Note: If you have a cable modem/Wi-Fi router combo device, you only need to follow the steps for the single device.
-
Unplug the power cable for the router from the power source.
-
Unplug the power cable for the modem from the power source.
Some modems have a backup battery. If you unplug the modem and lights stay on, remove the battery from the modem.
-
Wait at least 30 seconds or so.
If you had to remove the battery from the modem, put it back in.
-
Plug the modem back into the power source. The lights on the modem will blink. Wait for them to stop blinking.
-
Plug your router back into the power source.
Wait a few minutes for the modem and router to fully power on. You can usually tell when they’re ready by looking at the status lights on the two devices.
-
On your PC, try to connect again using the Ethernet connection.
On your PC
-
Check the network status in Settings. Open Settings > Network & Internet > Status. Check your Ethernet connection status there. It should display You’re connected to the Internet underneath the Ethernet network connection.
If one Ethernet cable doesn’t work and you have another one nearby, try the other Ethernet cable to see if that works. If it does, it might be a problem with the first cable.
-
Connect to Wi-Fi instead. If your router is a Wi-Fi router, try to connect to Wi-Fi and see if you can get connected. This can do two things—help you get an internet connection and help you narrow down the source of the problem. For more info, see Connect to a Wi-Fi network in Windows.
-
Run network commands. Try running these network commands to manually reset the TCP/IP stack, release and renew the IP address, and flush and reset the DNS client resolver cache:
-
In the search box on the taskbar, type Command prompt. The Command Prompt button will appear. To the right of it, select Run as administrator > Yes.
-
At the command prompt, run the following commands in the listed order, and then check to see if that fixes your connection problem:
-
Type netsh winsock reset and select Enter.
-
Type netsh int ip reset and select Enter.
-
Type ipconfig /release and select Enter.
-
Type ipconfig /renew and select Enter.
-
Type ipconfig /flushdns and select Enter.
-
-
Uninstall the Ethernet network adapter driver and restart. If the previous steps didn’t work, try to uninstall the network adapter driver, and then restart your computer. Windows will automatically install the latest driver. Consider this approach if your network connection stopped working properly after a recent update.
Before uninstalling, make sure you have drivers available as a backup. Visit the PC manufacturer’s website and download the latest network adapter driver from there. If your PC can’t connect to the internet, you’ll need to download a driver on a different PC and save it to a USB flash drive so you can install the driver on your PC. You’ll need to know the PC manufacturer and model name or number.
-
In the search box on the taskbar, type Device Manager, and then select Device Manager from the list of results.
-
Expand Network adapters and locate the Ethernet network adapter for your device.
-
Select the network adapter, press and hold (or right-click), and then select Uninstall device > the Attempt to remove the driver for this device check box > Uninstall.
-
After uninstalling the driver, select the select the Start button > Power > Restart.
After your PC restarts, Windows will automatically look for and install the network adapter driver. Check to see if that fixes your connection problem. If Windows doesn’t automatically install a driver, try to install the backup driver you saved before uninstalling.
-
Use network reset. Using network reset should be the last step you try. Consider using it if the steps above don’t help to get you connected.
This can help fix the problem where you can connect to the internet but can’t connect to shared network drives. Network reset removes any network adapters you have installed and the settings for them. After your PC restarts, any network adapters are reinstalled, and the settings for them are set to the defaults.
-
Select the Start button, then select Settings > Network & Internet > Status > Network reset.
Open Network & internet status settings
-
On the Network reset screen, select Reset now > Yes to confirm.
Wait for your PC to restart and see if that fixes the problem.
Notes:
-
After using network reset, you might need to reinstall and set up other networking software you might be using, such as VPN client software or virtual switches from Hyper‑V (if you’re using that or other network virtualization software).
-
Network reset might set each one of your known network connections to a public network profile. In a public network profile, your PC is not discoverable to other PCs and devices on the network, which can help make your PC more secure. However, if your PC is used for file or printer sharing, you’ll need to make your PC discoverable again by setting it to use a private network profile. To do this, select the Start button, then select Settings > Network & Internet > Ethernet . On the Ethernet screen, select the Ethernet network connection you want to change, then select Private under Network profile.
-
On another PC
-
Try to connect to the same network on a different device. If you have another Windows PC in your home and a USB to Ethernet adapter, try to connect using that PC. If you can connect, the source of the problem is likely due to your first PC. If you can’t connect to the Ethernet network on either PC, it might be a problem with your router, internet service provider, or USB to Ethernet adapter.
Need more help?
Want more options?
Explore subscription benefits, browse training courses, learn how to secure your device, and more.
Communities help you ask and answer questions, give feedback, and hear from experts with rich knowledge.

If you’re having WiFi or wireless connection just fine, but the Internet isn’t working or you’re only with limited connectivity, you’re not alone. Many Windows 10 users are reporting this problem as well. But no worries, it’s possible to fix.
Here are some effective solutions for you to try. You don’t need to try them all, just work your way down until you find the one that works.
If You Can’t browse the web on any devices
If You Can browse the web on other devices but not PC:
Method 1: Delete Temp Files
Method 2: Reset DNS
Method 3: Run Commands
Method 4: Update Device Drivers
Method 5: Update or uninstall McAfee
If You Can’t browse the web on any devices
If all your devices, laptops, mobile phones, tablets, are connected to the WiFi just fine, but have no Internet access, the problem might be your network hardware or the network itself. Try the solutions below to fix it:
-
Restart your modem, router and your devices
1) Remove the power cord and the batteries (if there are any) from your modem and router.
2) Wait for at least 30 seconds after the light goes out. Then plug the modem in.
3) Wait for another 60 seconds, then plug your router in.
-
Restart your PC
1) On your keyboard, click the Start button and Restart.
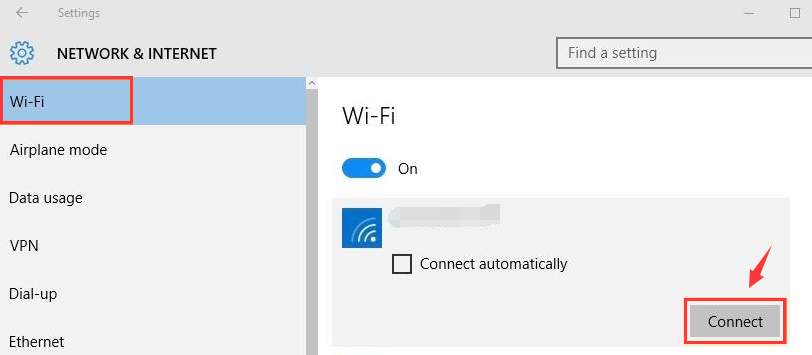
2) After your PC restarts, follow the path: click the Start button > Settings > Network & Internet > WiFi (on the left side of the pane). Select the network connection you have and click Connect.
If the problem persists, try contact your network provider or the manufacturer of your router.
Can browse the web on other devices but not on the laptop
-
Delete Temp Files
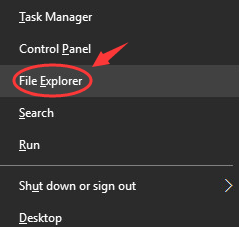
1) On your keyboard, press the Windows key and X at the same time, then click File Explorer.
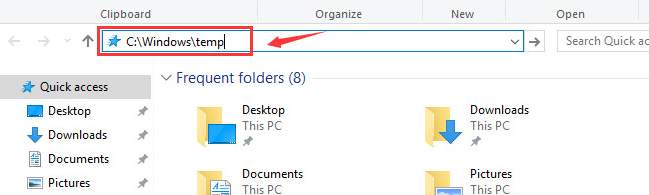
2) In the address box, type in C:\Windows\temp and press Enter.
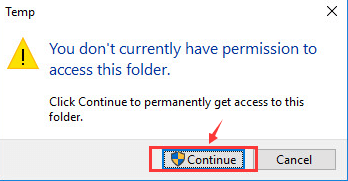
3) If you’re prompted about administrator permission, click Continue.
4) You’ll see many temp files here in this folder. Press Ctrl + A at the same time to select all the files, then right-click and click Delete.

5) Now, re-connect to the network. See if the problem persists.
-
Reset DNS
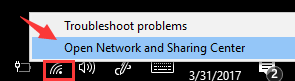
1) Right-click the network connection icon at the bottom right corner and click Open Network and Sharing Center.
2) Click Change adapter settings. 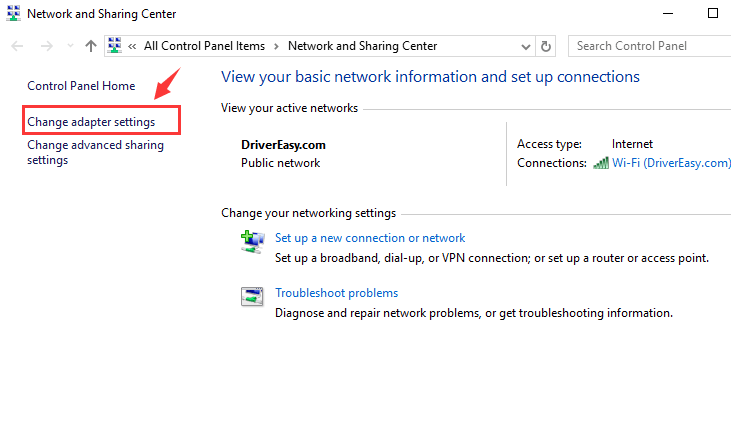
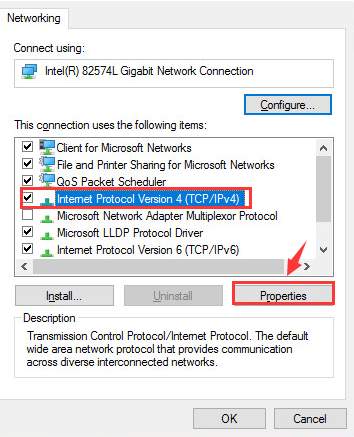
3) Right-click your WiFi adapter and click Properties. 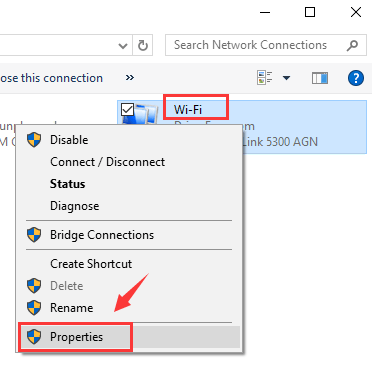
4) Select Internet Protocol Version 4 (TCP/IPv4) and click Properties.
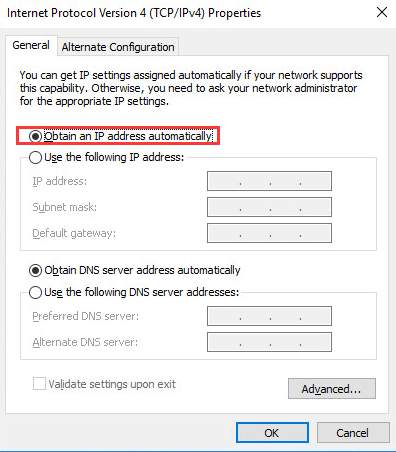
5) Click Obtain an IP address automatically.
6) If you still can’t connect to the internet, select Use the following DNS server addresses and fill in the address like the screen shot below:
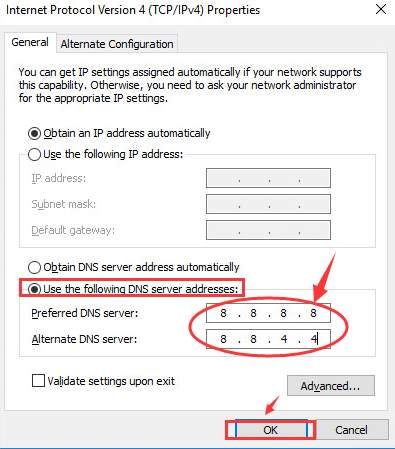
Click OK.
-
Run Commands in Command Prompt
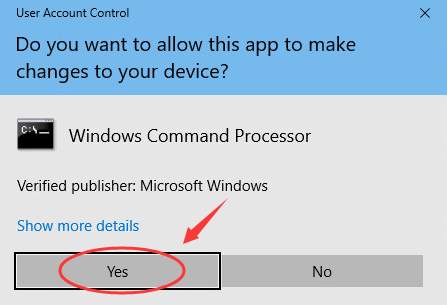
1) On your keyboard, press the Windows key and X at the same time, then click Command Prompt (Admin).
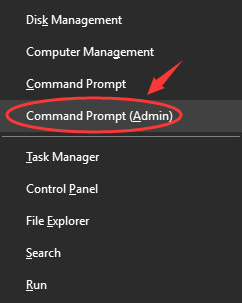
When prompted about the administrator permission, click Yes.
2) In the command prompt window, type in the following commands. Press Enter after each command.
ipconfig/flushdns
nbtstat -R
nbtstat -RR
netsh int ip reset c:\resetlog.txt
netsh winsock reset
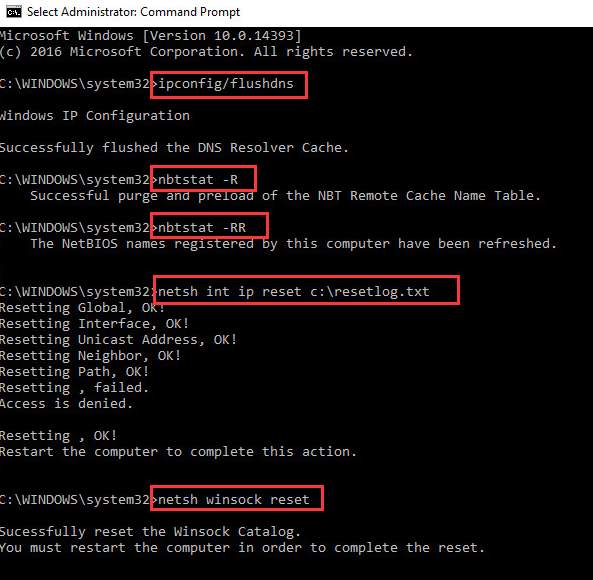
You may need to restart your computer for the changes to take effect.
3) Right-click the WiFi connection icon at the bottom right corner and click Open Network and Sharing Center.
4) Click Change adapter settings.
5) Right-click your WiFi adapter and click Disable. Wait for a while. Right-click your WiFi adapter and click Enable. 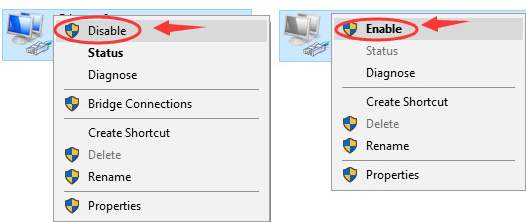
-
Update Device Drivers
If the above methods don’t help, we highly recommend you update your network adapters’ drivers.
If you don’t have the time, patience or computer skills to update your drivers manually, you can do it automatically with Driver Easy.
Driver Easy will automatically recognize your system and find the correct drivers for it. You don’t need to know exactly what system your computer is running, you don’t need to risk downloading and installing the wrong driver, and you don’t need to worry about making a mistake when installing.
You can update your drivers automatically with either the FREE or the Pro version of Driver Easy. But with the Pro version it takes just 2 clicks (and you get full support and a 30-day money back guarantee):
1) Download and install Driver Easy.
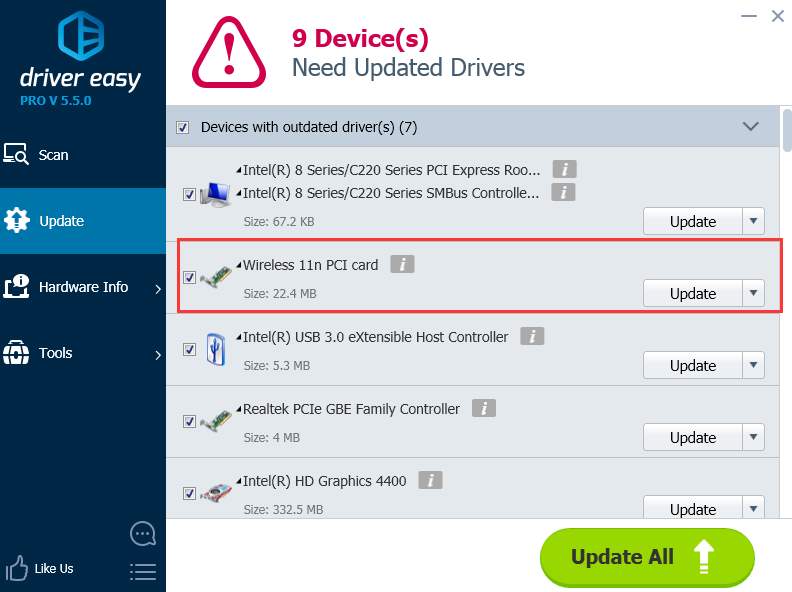
2) Run Driver Easy and click the Scan Now button. Driver Easy will then scan your computer and detect any problem drivers.
3) Click the Update button next to the flagged network card driver to automatically download and install the correct version of this driver (you can do this with the FREE version).
Or click Update All to automatically download and install the correct version of all the drivers that are missing or out of date on your system (this requires the Pro version – you’ll be prompted to upgrade when you click Update All).
-
Update or uninstall McAfee
Quite a number of users found that this problem was gone once they replaced their McAfee with other antivirus programs.
It’s still unknown why McAfee would hinder you from connecting to the Internet. But if you’re using McAfee as your antivirus program and the problem just won’t go away, update your McAfee to the latest version to have a try.
127
127 people found this helpful
Windows 10 internet not working, it is one of the most frustrating issues you may encounter. If your computer or laptop frequently losing internet connection after installing the latest Windows update or connected to the internet (WiFi) But there is no internet access, unable to browse web pages. Here in this article, we help you troubleshoot Internet and network connectivity problems on windows 10
Note: Below solutions are also applicable to troubleshoot network connectivity issues (Both Wireless and ethernet connection ) on Windows 10, 8.1 and 7 computers.
Contents
— Advertisement —
- 1 Why is my internet not working?
- 2 How to fix internet connection problems
- 2.1 Restart network devices
- 2.2 Run The Network Troubleshooter
- 2.3 Configure DHCP for a valid IP Address
- 2.4 Reset network and TCP/IP stack
- 2.5 Switch to Google DNS
- 2.6 Disable proxy server
- 2.7 Reinstall network adapter
- 2.8 Change power management setting
- 2.9 Reset Network Settings
Why is my internet not working?
Network and internet connection problems mostly occur due to incorrect network configuration, Outdated or incompatible network adapter drivers. Again corrupted system files, buggy updates or Security software also cause Internet and network connectivity problems on windows 10.
If you notice Windows 10 connected to the internet and that the connection is secure, but you won’t be able to access the web. These issues normally caused by either a faulty TCP/IP stack, IP address, or DNS client resolver cache.
How to fix internet connection problems
Before start, let’s first check for a loose connection. if your device connected to the LAN network check the ethernet cable connected properly. If your laptop has a physical wireless switch, make sure that it didn’t get bumped to the off position.
— Advertisement —
Temporarily disable third-party antivirus or firewall and make sure disconnect from VPN (if configured on your device)
If you are connected to a Wireless network (WiFi), then the distance between the device and the wireless access point will affect the performance of the WiFi connection. Move your device closer to the router and check if the problem is resolved.
Make sure Airplane mode is disabled, If Airplane mode is enabled, you won’t be able to connect to the network.
Open command prompt as administrator, type netsh wlan show wlanreport Press Enter key to Generate a wireless network report. This report can help you diagnose the problem, or at least provide you with more information to give to others who might be able to help. see how to Analyze the wireless network report
— Advertisement —
Restart network devices
To troubleshoot Internet and network connectivity problems on windows 10, the first thing we recommend to restart your computer and network devices include router, modem or switch. This will refresh the system, fixes minor software conflicts and create a new connection to your Internet service provider (ISP). Here a video explains, why does restart network devices fix the Internet connection problem.
Also, check the lights on your router and/or modem flashing green as normal? If no lights come on after the reboot, the device could be dead. If you get red lights, or a power light but no connection light, your ISP is likely down.
Run The Network Troubleshooter
Windows 10 includes a built-in network adapter troubleshooters that can automatically find and fix common internet & network connectivity issues. Run the troubleshooter and let windows detect and fix problems that cause network and Internet connection problems.
- Press Windows key + X select settings,
- Go to Network & Internet, then click Network troubleshooter,
- Follow on-screen instructions to allow windows to diagnose and fix detected problems with the connection to the Internet or websites.

Configure DHCP for a valid IP Address
Check if incorrect IP or DNS configuration may causing No internet access on windows 10.
- Press Windows key + R, type ncpa.cpl and click ok
- This will open the network connections window,
- Right-click on active network adapter (ethernet/wireless) and select properties.
- Double click on internet protocol version 4, And make sure it’s selected to obtain an IP address and DNS server address automatically. If not make changes accordingly.

Reset network and TCP/IP stack
Still internet not working? try to reset the TCP/IP stack and clearing any DNS information on your computer. Which would be very helpful to fix most of the internet and network connectivity issues. Again this is very helpful if you are having problem with a specific website only as well.
To this open command prompt as administrator And perform command below one by one. And press the enter key after each to execute the command.
- netsh int ip reset
- netsh ipconfig /release
- netsh ipconfig /renew
- netsh ipconfig /flushdns

Once done close the command prompt and restart your PC. Now check if the internet connection problem is solved.
Switch to Google DNS
Here another effective solution helps most users to fix the internet connection problem.
- Press Windows key + x select network connections,
- Go to properties, then click edit (next to IP settings)
- Here set preferred DNS 8.8.8.8 and alternate DNS 8.8.4.4 and click save.

Disable proxy server
There are chances, internet not working because of proxy server interfere. Let’s disable it and check the internet status.
- Press Windows key + R, type inetcpl.cpl and click ok,
- This will open Internet properties, Go to the Connections tab,
- Click on LAN settings, then make sure to uncheck use a proxy server for your LAN option
- Click ok, Apply and ok to save changes and check the internet & network status.
Reinstall network adapter
An outdated or incompatible network adapter driver also causes internet & network connectivity issues. If you recently upgraded to Windows 10, it’s possible that the current driver was designed for a previous version of Windows Check to see if an updated driver is available.
- Press Windows key+ R, type devmgmt.msc and hit the enter key to open device manager.
- This will display all installed driver list on your computer.
- Expand network adapters, Right-click on the installed network adapter driver select uninstall the device.
- Click uninstall again when ask for confirmation and restart your computer.

Windows automatically install the latest network driver upon restart. If windows fail to do the same, again open the device manager. Click on the action then scan for hardware changes.
In addition On a different computer, visit the problematic computer/network driver manufacturer website. Download the latest available network adapter driver. Transfer it to the problematic computer via USB and install it.
Change power management setting
Again Problematic power management settings could be the cause of this problem. You can modify the setting to fix it. Here is how:
- On your keyboard, press the Windows logo key and X click Device Manager.
- Expand the Network adapter, Right-click your network connection device and click Properties.
- Go to the Power Management tab, and un-tick the box for Allow the computer to turn off this device to save power.
- Click OK to save check to see if your Internet connection is back to normal again.
Tip: This is very helpful when your network and internet disconnect frequently.

Reset Network Settings
With Windows 10 Microsoft added network reset option which corrects and reset the network configuration to its default setup. Performing network reset should be another best solution to fix the Windows 10 Internet connection problems.
- Go to Settings using windows key + I
- Click on Network & Internet then Network Reset link.
- Select Reset now and then Yes to confirm the same.
Performing this action reinstall network adapters and the settings for them are set to the defaults
Restart your computer and check If there is no more Network and internet connection problems present.

Did these solutions help fix Network and internet connection problems on windows 10? Let us know on comments below
Also Read
- 3 Ways to Resolve IP address Conflict on windows 10.
- WiFi connected but no internet Access Windows 10 (5 Working fixes)
- Network adapters missing after Windows 10 update? Try these solutions
- Solved: Windows 10 Can’t Connect to This Network (WiFi)
- 7 Basic Troubleshooting steps to fix Windows 10 problems
Microsoft regularly updates Windows 10 with the latest bug fixes and security improvements and it’s essential to install Windows updates on your device to keep it safe and secure. But sometimes unexpected issues can occur, one of which is Internet not working after Windows 10 update. The Wifi is connected but there is No Internet access or the WiFi keeps disconnecting frequently. A number of users report, Wi-Fi Not Working After Updating to Windows 10. Well, Internet connectivity issues can be frustrating, but there are several solutions you can apply to fix and restore internet access on Windows 10. In this article, we will discuss why Windows 10 Internet not working and provide solutions on how to fix them.
Contents
- 1 No internet after Windows 10 update
- 2 How to Troubleshoot Internet Issues
- 2.1 Run Network troubleshooter
- 2.2 Run Network Troubleshooting Commands
- 2.3 Check Network Adapter Settings
- 2.4 Disable Proxy Settings
- 2.5 Switch to Google DNS
- 2.6 Roll Back Network Adapter Driver
- 2.7 Update Network Adapter Driver
- 2.8 Reset Network Settings:
There can be several reasons why the Internet not working after update, Outdated network drivers or incorrect network configurations are common which may result connectivity issues. Again loose or unplugged network cable, weak Wi-Fi signal, third-party software or computer’s network hardware malfunction also could be the reason why there is No Internet access after the Windows update.
- Running related troubleshooters is one of the most effective ways to fix Internet problems on Windows 10.
- In addition, you need to update the network or WiFi driver that helps restore internet access on your computer.
- You can also Reset the TCP/IP Stack and Clear the DNS Cache on your computer to fix such problems.
How to Troubleshoot Internet Issues
Let’s first restart your computer and router, this can often resolve temporary connectivity issues. In addition, check the physical connections before getting too involved with troubleshooting.
Ensure you check the physical connections before getting too involved with troubleshooting. Someone could have accidentally kicked the router or modem’s power cable or pulled an Ethernet cable out of a socket, causing the problem.
If you are experiencing problems with Wifi connectivity check the WiFi signal or take the laptop closer to Router. Makes sure Wi-Fi is set to On. Open Settings > Network & Internet > Wi-Fi and move the slider to the On position. Also, make sure that the physical Wi-Fi button on your laptop is turned on.
In addition, if you are using VPN, disconnect it and check probably the internet working now. Here are a few troubleshooting steps to apply if the Internet not working with VPN connection.
Run Network troubleshooter
Let’s first run the Network Troubleshooters help automatically identify and eliminate problems with the network adapter and its related drivers
- Press the Windows key + X and select settings
- Click on Network and Internet then click on Network Troubleshooter,

The troubleshooter automatically detects network and internet problems and try to fix them. You only need to follow on-screen instructions, once done reboot your system and check if this help Restore the internet access on Windows 10.
In addition, if you notice Laptop is Connected to Wi-Fi, but there is No Internet Access then run the internet troubleshooter following the steps below.
- Press Windows key + I to open the settings app
- Go to Update & Security then troubleshoot, and Click on the additional troubleshooters link,
- Now select Internet connections, then click on Run the troubleshooter,
- Select Troubleshoot my connection to the internet and follow on-screen instructions to restore internet access.

Run Network Troubleshooting Commands
Sometimes incorrect network configuration or DNS Cache could cause internet connectivity problems on Windows 10. Flush the DNS cache and reset the Transmission Control Protocol/Internet Protocol (TCP/IP) help fix Internet and wifi connectivity issues.
- Press Windows key + S, type cmd, and click on Run as administrator,
- First, flush the DNS cache using the command ipconfig /flushdns
- Next, run netsh int ip reset and netsh winsock reset command to reset TCP/IP
- And run ipconfig /release and ipconfig /renew to release and request a new IP address from DHCP server.

Once done close the command prompt and reboot your PC. Now open the web browser and check if you access the Internet.
Check Network Adapter Settings
Checking power management settings for network or WiFi adapter can be helpful if the power saving feature cause the adapter to turn off or enter a lower power state and results connectivity issue.
- Press Windows + X and select “Device Manager“
- This will display all devices and peripherals connected to your computer,
- Locate and expand the “Network Adapters” option
- Right-click on your network adapter and select “Properties.”
- Move to “Power Management” tab and uncheck the box next to “Allow the computer to turn off this device to save power.”
- Click Apply and ok to save changes, then Restart your computer.

Disable Proxy Settings
If you’re using a proxy server, it could be proxy server is misconfigured or not functioning properly and causing the connectivity issue. And disabling the proxy server can sometimes help fix internet problems on Windows 10.
- Press Windows + I to open Settings.
- Click on “Network & Internet” then “Proxy” on the left side.
- And finally, Turn off the “Use a proxy server” toggle.
In addition, disable the proxy settings for your browser by following the steps below.
- Press Windows key + R, type inetcpl.cpl and click ok
- Move to the Connections tab, and click on LAN settings.
- Here uncheck the box next to Use a proxy server for your LAN then Click OK, then Apply.

Switch to Google DNS
Sometimes changing the DNS address or switch to a different DNS server that offers faster or more reliable service help resolve slow internet speed, frequent timeout, or unable to access certain web pages on Windows 10. There are free third-party DNS services such as Google Public DNS or OpenDNS, you can which may offer improved performance
- Press Windows key + R, type ncpa.cpl and click ok
- Right-click on Active network adapter select properties
- Double-click on Internet protocol version 4 (TCP/IPv4) to open properties,
- Here select use following DNS server address and set preferred DNS 8.8.88 and Alternate DNS 8.8.4.4

Click ok and apply, Now try to open web browser and access any web pages to check if the internet connection is restored or not.
Roll Back Network Adapter Driver
This solution can help in case you were able to connect to the internet and the problem has only started recently after you updated the Network Adapter Driver.
- Right Click on Windows 10 Start button and click on Device Manager from the menu that pops up.
- On the Device Manager screen, click on Network Adapters to expand the entry
- From the expanded list, right-click on the Network Adapter for your computer and click on Properties

- In the Properties screen, click on the Driver tab and select Roll Back Driver.
If the Roll Back Driver button is unavailable, it means that there is no Driver available to roll back to.
After rolling back to the previous version of the driver, restart your computer for the changes to take effect.
Update Network Adapter Driver
The network or Wifi driver enables the computer network adapter to communicate with the network. If it’s outdated or corrupt it can cause connectivity issues or the internet working after update. And you need to update or install the latest driver for Network or Wifi adapter to ensure that the network adapter is functioning correctly and has the necessary updates and bug fixes.
Updating the network driver can help resolve issues such as slow or intermittent internet connectivity, limited network connectivity
In order to update the Driver, you will need another computer with a working internet connection. Visit the website of your Network Adapter manufacturer, download the latest drivers to a USB drive and follow the steps below.
- Press the Windows key + R, type devmgmt.msc and click ok to open Device Manager,
- Locate and expand the Network adapters option.
- Right-click on your network adapter, and select Update driver.
Now select the first option to search the driver automatically or select the second option to locate the driver manually.

Also, you can download the latest driver from your computer manufacturer’s website and install it to fix the problem.
Reset Network Settings:
If none of the above solutions work, try resetting your network settings that revert all network-related settings to their default state. But keep in mind you need to re-enter the Wi-Fi password to connect wifi network.
- Press the Windows key + X and select Settings
- Go to Network & Internet then Status and click on Network reset.

- Click reset Now, then click yes to confirm the action.

- This will reset all network settings to their default values, and can often fix connectivity issues.
- Once done reboot your computer and check if the internet connection is working now.
+
FAQ
Why is my internet not working on Windows 10?
- Some common reasons why your internet connection is not working on Windows 10 include network adapter issues, outdated drivers, DNS server problems, firewall settings, and malware infections.
How do I troubleshoot internet connectivity issues on Windows 10?
- Restarting your router/modem and computer, checking network adapter settings, updating network drivers, checking DNS server settings, and disabling firewall settings temporarily are some common solutions you need to apply to fix internet connection problems.
How do I reset my network settings on Windows 10?
- To reset network settings on Windows 10, go to Settings > Network & Internet > Status > Network reset. Click on Reset now and confirm the action. Note that this will reset all your network settings to their default values, including Wi-Fi and Ethernet settings.
How do I update my network drivers on Windows 10?
- You can update your network drivers on Windows 10 through the Device Manager. Go to Start > Search > Device Manager > Network adapters. Right-click on your network adapter and select Update driver. Alternatively, you can download the latest drivers from your manufacturer’s website and install them manually.
How do I check my DNS settings on Windows 10?
- You can check your DNS settings on Windows 10 through the Command Prompt using ipconfig /all command.
What should I do if my internet connection is slow on Windows 10?
Restarting your router/modem, checking for bandwidth-hogging apps, optimizing network adapter settings, clearing browser cache, and disabling unnecessary startup apps help speed up your internet connection.
Also read:
- Solved: Windows 10 Wi-Fi issue “Can’t connect to this network”
- Solved: WiFi Keeps Disconnecting After Windows 10 update
- Laptop keeps Disconnecting from the internet? Apply these solutions
- Fix DHCP is not enabled for wireless network connection
- Is FREE VPNS really free! The dark side of using a FREE VPN