PostgreSQL — это бесплатная объектно-реляционная СУБД с мощным функционалом, который позволяет конкурировать с платными базами данных, такими как Microsoft SQL, Oracle. PostgreSQL поддерживает пользовательские данные, функции, операции, домены и индексы. В данной статье мы рассмотрим установку и краткий обзор по управлению базой данных PostgreSQL. Мы установим СУБД PostgreSQL в Windows 10, создадим новую базу, добавим в неё таблицы и настроим доступа для пользователей. Также мы рассмотрим основы управления PostgreSQL с помощью SQL shell и визуальной системы управления PgAdmin. Надеюсь эта статья станет хорошей отправной точкой для обучения работы с PostgreSQL и использованию ее в разработке и тестовых проектах.
Содержание:
- Установка PostgreSQL 11 в Windows 10
- Доступ к PostgreSQL по сети, правила файерволла
- Утилиты управления PostgreSQL через командную строку
- PgAdmin: Визуальный редактор для PostgresSQL
- Query Tool: использование SQL запросов в PostgreSQL
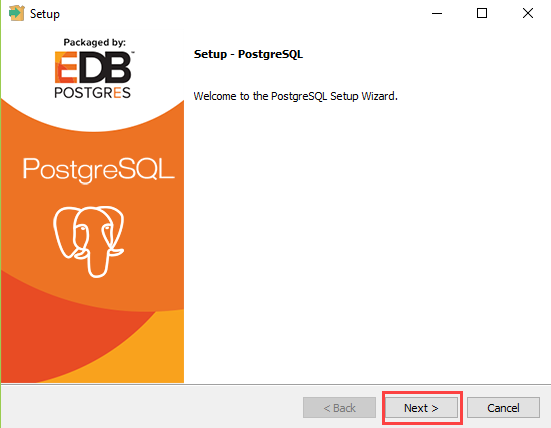
Установка PostgreSQL 11 в Windows 10
Для установки PostgreSQL перейдите на сайт https://www.postgresql.org и скачайте последнюю версию дистрибутива для Windows, на сегодняшний день это версия PostgreSQL 11 (в 11 версии PostgreSQL поддерживаются только 64-х битные редакции Windows). После загрузки запустите инсталлятор.

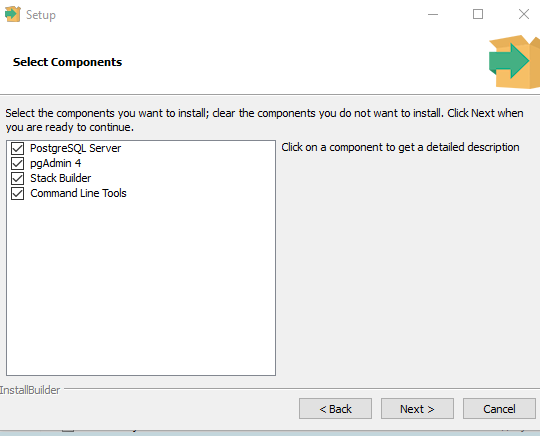
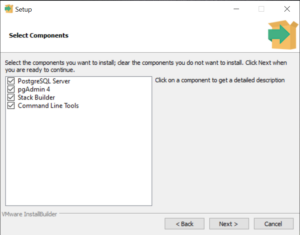
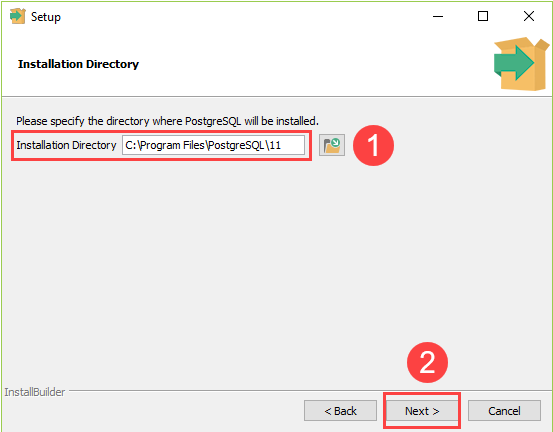
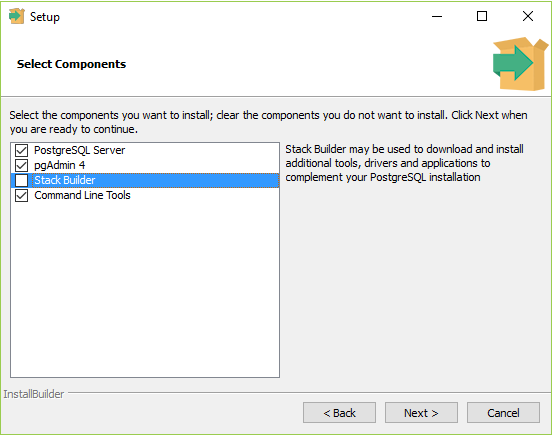
В процессе установки установите галочки на пунктах:
- PostgreSQL Server – сам сервер СУБД
- PgAdmin 4 – визуальный редактор SQL
- Stack Builder – дополнительные инструменты для разработки (возможно вам они понадобятся в будущем)
- Command Line Tools – инструменты командной строки
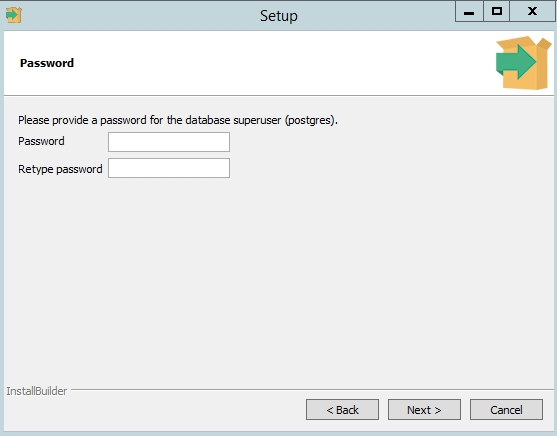
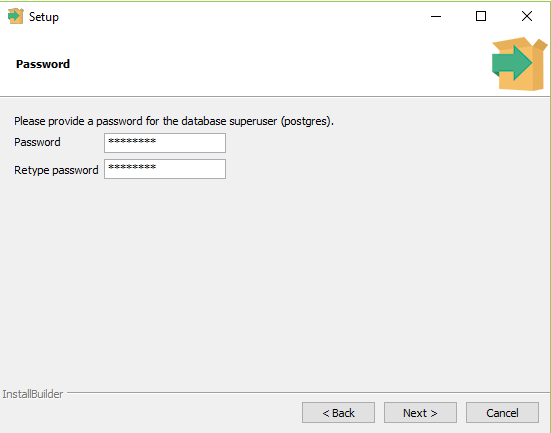
Установите пароль для пользователя postgres (он создается по умолчанию и имеет права суперпользователя).
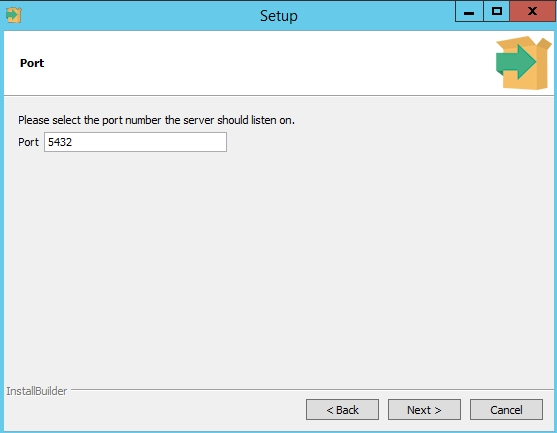
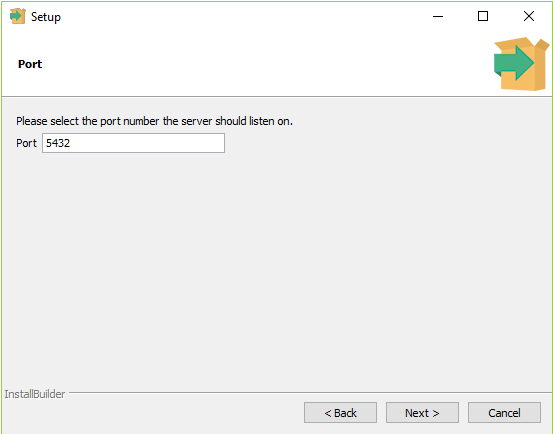
По умолчание СУБД слушает на порту 5432, который нужно будет добавить в исключения в правилах фаерволла.
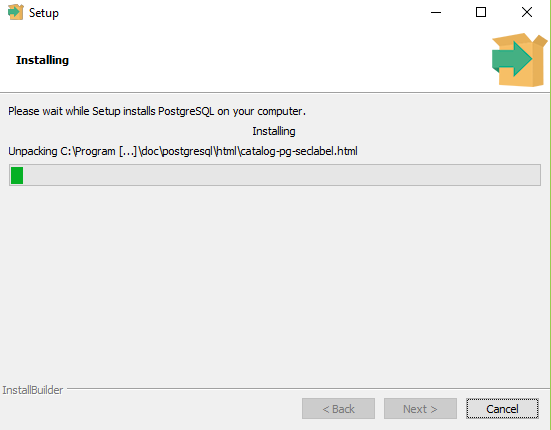
Нажимаете Далее, Далее, на этом установка PostgreSQL завершена.
Доступ к PostgreSQL по сети, правила файерволла
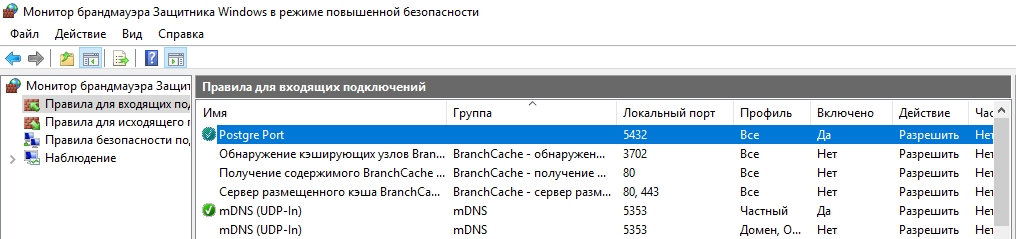
Чтобы разрешить сетевой доступ к вашему экземпляру PostgreSQL с других компьютеров, вам нужно создать правила в файерволе. Вы можете создать правило через командную строку или PowerShell.
Запустите командную строку от имени администратора. Введите команду:
netsh advfirewall firewall add rule name="Postgre Port" dir=in action=allow protocol=TCP localport=5432
- Где rule name – имя правила
- Localport – разрешенный порт
Либо вы можете создать правило, разрешающее TCP/IP доступ к экземпляру PostgreSQL на порту 5432 с помощью PowerShell:
New-NetFirewallRule -Name 'POSTGRESQL-In-TCP' -DisplayName 'PostgreSQL (TCP-In)' -Direction Inbound -Enabled True -Protocol TCP -LocalPort 5432
После применения команды в брандмауэре Windows появится новое разрешающее правило для порта Postgres.
Совет. Для изменения порта в установленной PostgreSQL отредактируйте файл postgresql.conf по пути C:\Program Files\PostgreSQL\11\data.
Измените значение в пункте
port = 5432
. Перезапустите службу сервера postgresql-x64-11 после изменений. Можно перезапустить службу с помощью PowerShell:
Restart-Service -Name postgresql-x64-11

Более подробно о настройке параметров в конфигурационном файле postgresql.conf с помощью тюнеров смотрите в статье.
Утилиты управления PostgreSQL через командную строку
Рассмотрим управление и основные операции, которые можно выполнять с PostgreSQL через командную строку с помощью нескольких утилит. Основные инструменты управления PostgreSQL находятся в папке bin, потому все команды будем выполнять из данного каталога.
- Запустите командную строку.
Совет. Перед запуском СУБД, смените кодировку для нормального отображения в русской Windows 10. В командной строке выполните:
chcp 1251 - Перейдите в каталог bin выполнив команду:
CD C:\Program Files\PostgreSQL\11\bin

Основные команды PostgreSQL:

PgAdmin: Визуальный редактор для PostgresSQL
Редактор PgAdmin служит для упрощения управления базой данных PostgresSQL в понятном визуальном режиме.
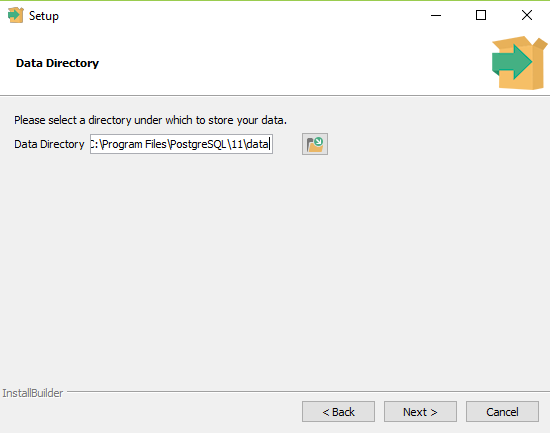
По умолчанию все созданные базы хранятся в каталоге base по пути C:\Program Files\PostgreSQL\11\data\base.
Для каждой БД существует подкаталог внутри PGDATA/base, названный по OID базы данных в pg_database. Этот подкаталог по умолчанию является местом хранения файлов базы данных; в частности, там хранятся её системные каталоги. Каждая таблица и индекс хранятся в отдельном файле.
Для резервного копирования и восстановления лучше использовать инструмент Backup в панели инструментов Tools. Для автоматизации бэкапа PostgreSQL из командной строки используйте утилиту pg_dump.exe.
Query Tool: использование SQL запросов в PostgreSQL
Для написания SQL запросов в удобном графическом редакторе используется встроенный в pgAdmin инструмент Query Tool. Например, вы хотите создать новую таблицу в базе данных через инструмент Query Tool.
- Выберите базу данных, в панели Tools откройте Query Tool
- Создадим таблицу сотрудников:
CREATE TABLE employee
(
Id SERIAL PRIMARY KEY,
FirstName CHARACTER VARYING(30),
LastName CHARACTER VARYING(30),
Email CHARACTER VARYING(30),
Age INTEGER
);
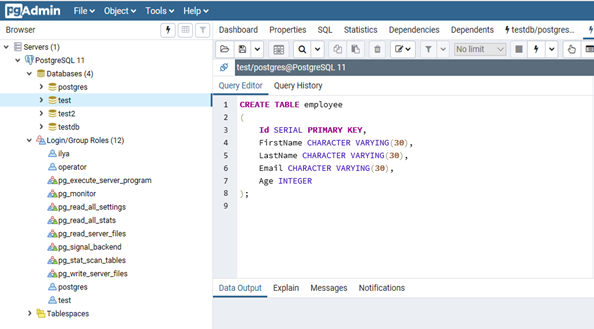
Id — номер сотрудника, которому присвоен ключ SERIAL. Данная строка будет хранить числовое значение 1, 2, 3 и т.д., которое для каждой новой строки будет автоматически увеличиваться на единицу. В следующих строках записаны имя, фамилия сотрудника и его электронный адрес, которые имеют тип CHARACTER VARYING(30), то есть представляют строку длиной не более 30 символов. В строке — Age записан возраст, имеет тип INTEGER, т.к. хранит числа.
После того, как написали код SQL запроса в Query Tool, нажмите клавишу F5 и в базе будет создана новая таблица employee.
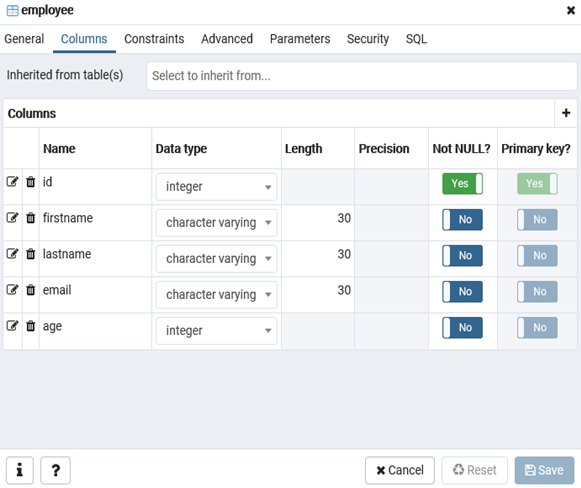
Для заполнения полей в свойствах таблицы выберите таблицу employee в разделе Schemas -> Tables. Откройте меню Object инструмент View/Edit Data.
Здесь вы можете заполнить данные в таблице.
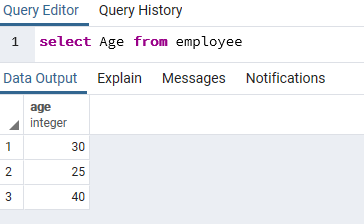
После заполнения данных выполним инструментом Query простой запрос на выборку:
select Age from employee;
In this tutorial, you’ll learn how to install PostgreSQL 14.7 on Windows 10.
The process is straightforward and consists of the following steps:
- Install PostgreSQL
- Configure Environment Variables
- Verify the Installation
- Download the Northwind PostgreSQL SQL file
- Create a New PostgreSQL Database
- Import the Northwind SQL file
- Verify the Northwind database installation
- Connect to the Database Using Jupyter Notebook
Prerequisites
- A computer running Windows 10
- Internet connection
- Download the official PostgreSQL 14.7 at https://get.enterprisedb.com/postgresql/postgresql-14.7-2-windows-x64.exe
- Save the installer executable to your computer and run the installer.
Note: We recommend version 14.7 because it is commonly used. There are newer versions available, but their features vary substantially!
Step 1: Install PostgreSQL
We’re about to initiate a vital part of this project — installing and configuring PostgreSQL.
Throughout this process, you’ll define critical settings like the installation directory, components, data directory, and the initial ‘postgres’ user password. This password grants administrative access to your PostgreSQL system. Additionally, you’ll choose the default port for connections and the database cluster locale.
Each choice affects your system’s operation, file storage, available tools, and security. We’re here to guide you through each decision to ensure optimal system functioning.
-
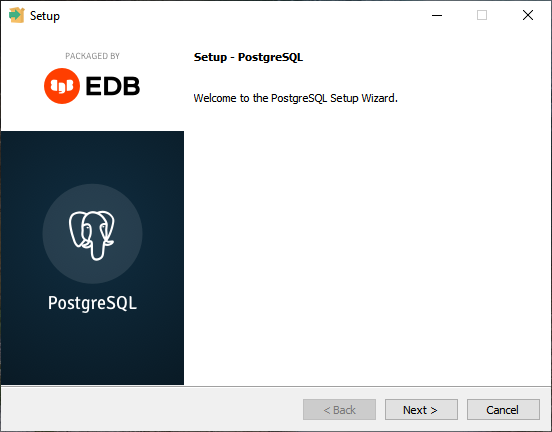
In the PostgreSQL Setup Wizard, click Next to begin the installation process.

-
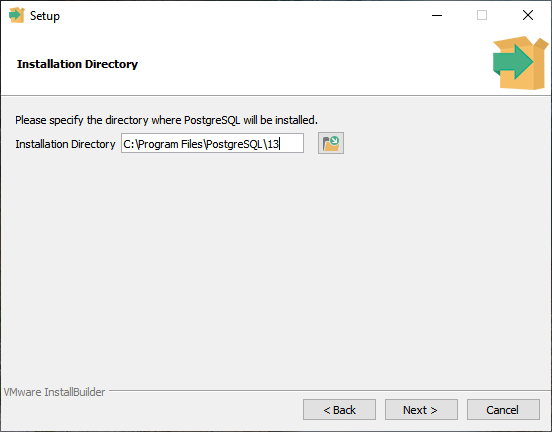
Accept the default installation directory or choose a different directory by clicking Browse. Click Next to continue.
-
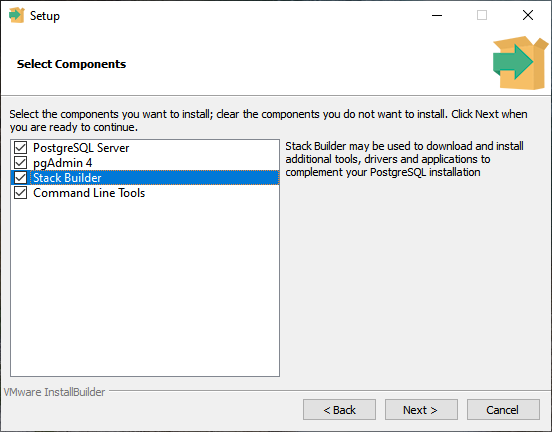
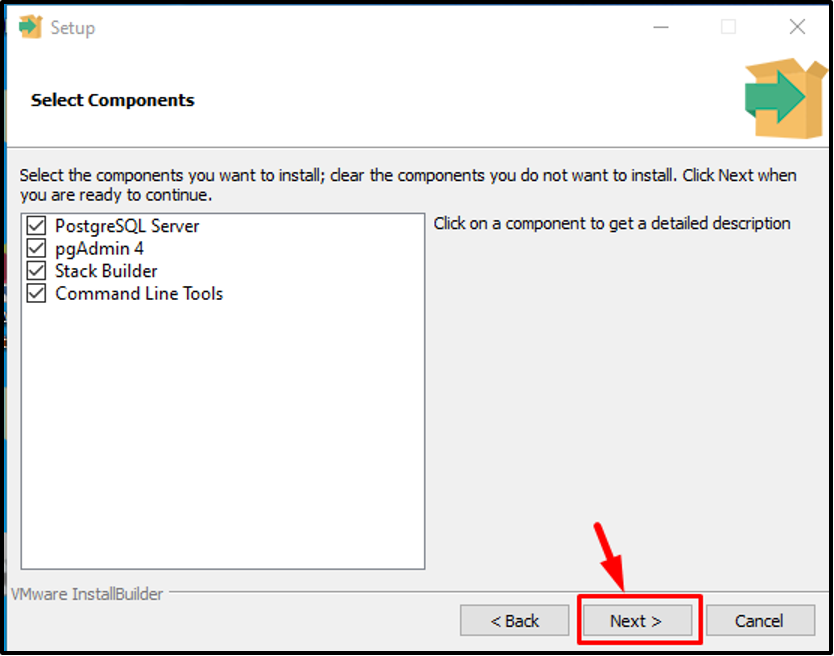
Choose the components you want to install (e.g., PostgreSQL Server, pgAdmin 4 (optional), Stack Builder (optional), Command Line Tools),no characters will appear on the screen as you type your password and click Next.
-
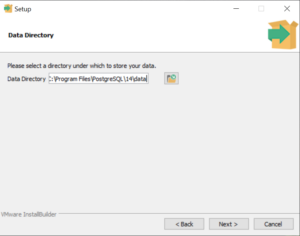
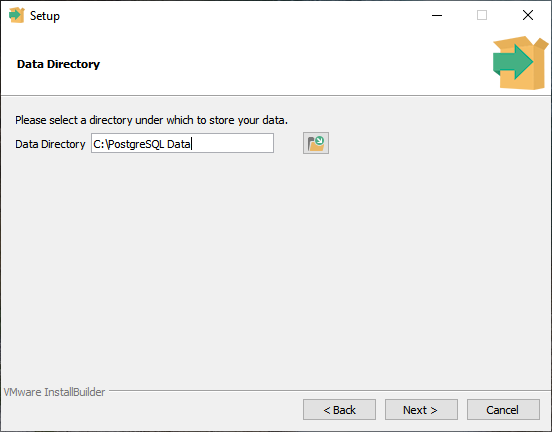
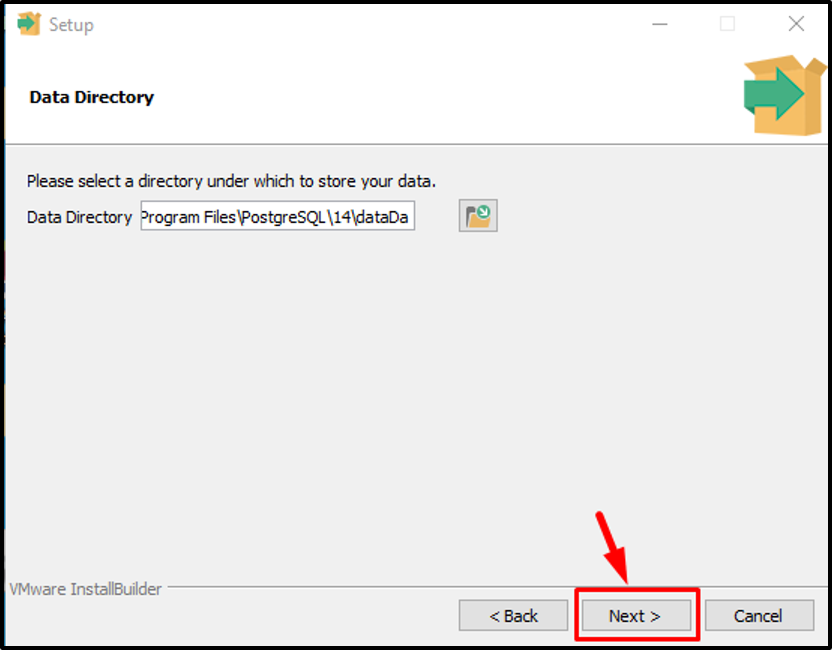
Select the data directory for storing your databases and click Next.
-
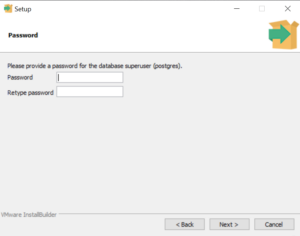
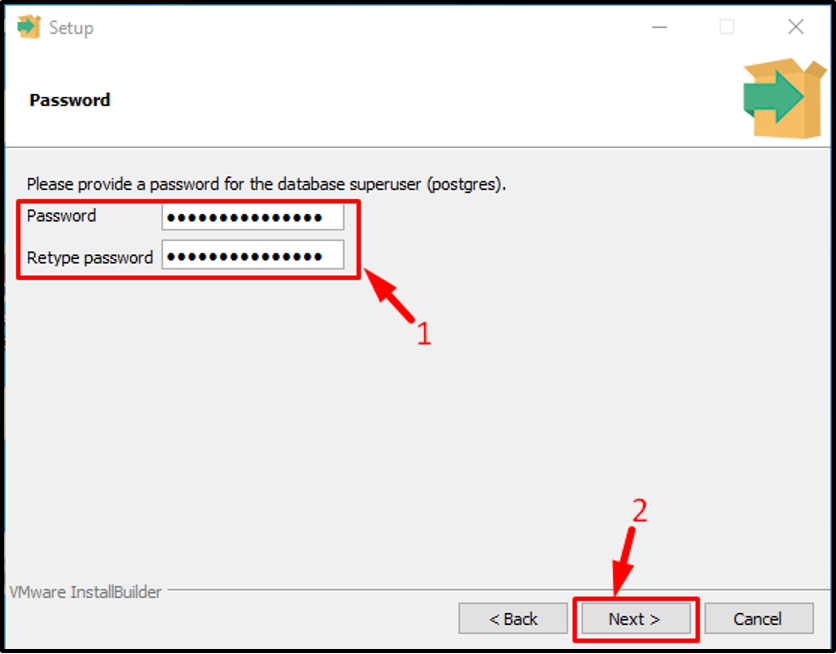
Set a password for the PostgreSQL “postgres” user and click Next.
-
There will be some points where you’re asked to enter a password in the command prompt. It’s important to note that for security reasons, as you type your password, no characters will appear on the screen. This standard security feature is designed to prevent anyone from looking over your shoulder and seeing your password. So, when you’re prompted for your password, don’t be alarmed if you don’t see any response on the screen as you type. Enter your password and press ‘Enter’. Most systems will allow you to re-enter the password if you make a mistake.
-
Remember, it’s crucial to remember the password you set during the installation, as you’ll need it to connect to your PostgreSQL databases in the future.
-
-
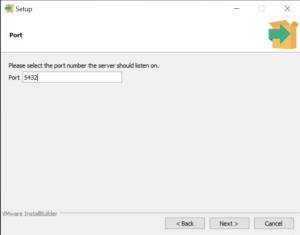
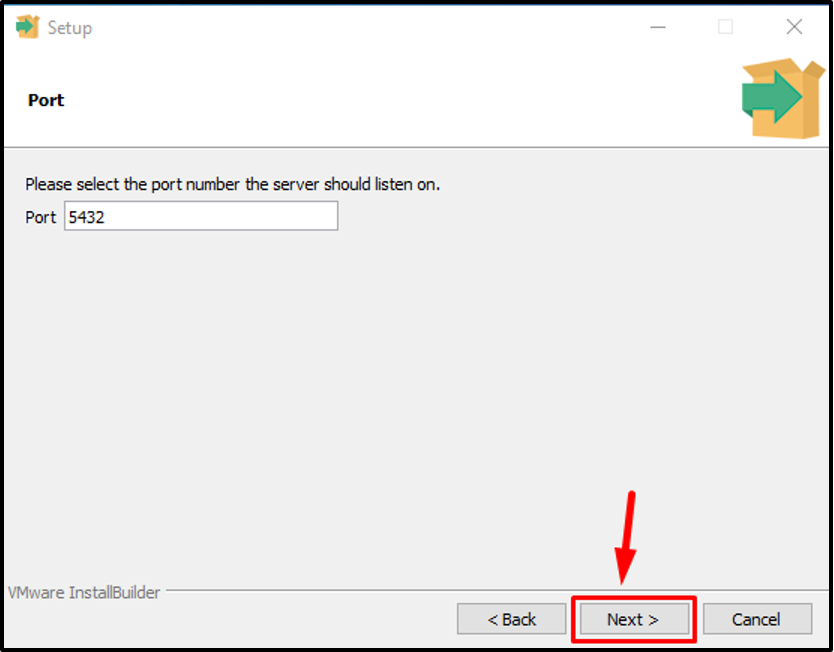
Choose the default port number (5432) or specify a different port, then click Next.
-
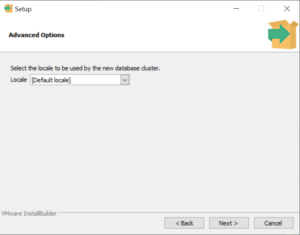
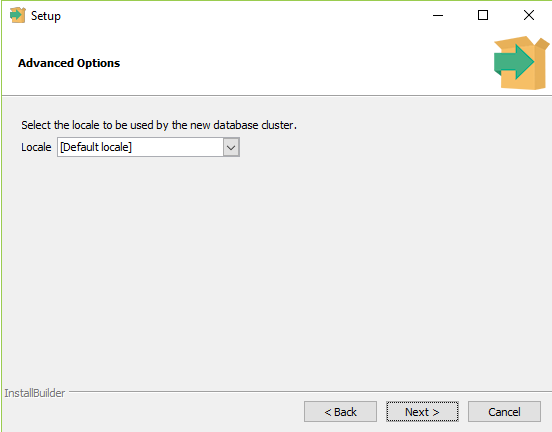
Select the locale to be used by the new database cluster and click Next.
-
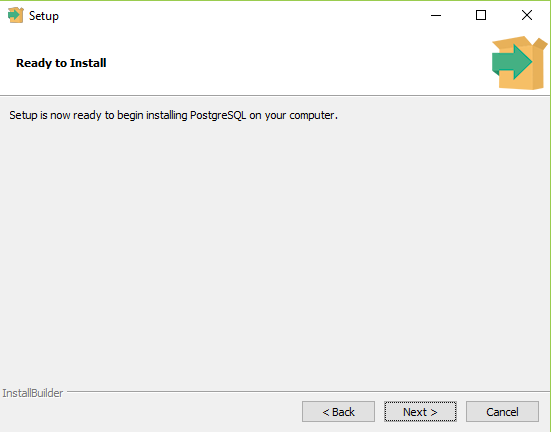
Review the installation settings and click Next to start the installation process. The installation may take a few minutes.
-
Once the installation is complete, click Finish to close the Setup Wizard.


Step 2: Configure Environment Variables
Next, we’re going to configure environment variables on your Windows system. Why are we doing this? Well, environment variables are a powerful feature of operating systems that allow us to specify values — like directory locations — that can be used by multiple applications. In our case, we need to ensure that our system can locate the PostgreSQL executable files stored in the «bin» folder of the PostgreSQL directory.
By adding the PostgreSQL «bin» folder path to the system’s PATH environment variable, we’re telling our operating system where to find these executables. This means you’ll be able to run PostgreSQL commands directly from the command line, no matter what directory you’re in, because the system will know where to find the necessary files. This makes working with PostgreSQL more convenient and opens up the possibility of running scripts that interact with PostgreSQL.
Now, let’s get started with the steps to configure your environment variables on Windows!
-
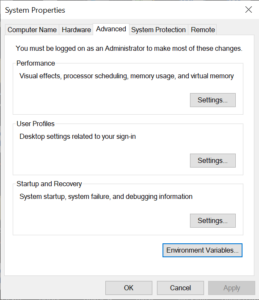
On the Windows taskbar, right-click the Windows icon and select System.
-
Click on Advanced system settings in the left pane.
-
In the System Properties dialog, click on the Environment Variables button.
-
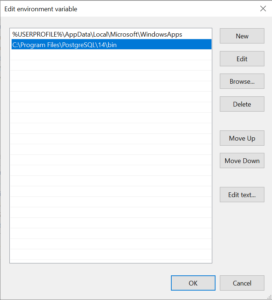
Under the System Variables section, scroll down and find the Path variable. Click on it to select it, then click the Edit button.
-
In the Edit environment variable dialog, click the New button and add the path to the PostgreSQL bin folder, typically
C:\\Program Files\\PostgreSQL\\14\\bin. -
Click OK to close the «Edit environment variable» dialog, then click OK again to close the «Environment Variables» dialog, and finally click OK to close the «System Properties» dialog.
Step 3: Verify the Installation
After going through the installation and configuration process, it’s essential to verify that PostgreSQL is correctly installed and accessible. This gives us the assurance that the software is properly set up and ready to use, which can save us from troubleshooting issues later when we start interacting with databases.
If something went wrong during installation, this verification process will help you spot the problem early before creating or managing databases.
Now, let’s go through the steps to verify your PostgreSQL installation.
- Open the Command Prompt by pressing Win + R, typing cmd, and pressing Enter.
- Type
psql --versionand press Enter. You should see the PostgreSQL version number you installed if the installation was successful. - To connect to the PostgreSQL server, type
psql -U postgresand press Enter. - When prompted, enter the password you set for the postgres user during installation. You should now see the postgres=# prompt, indicating you are connected to the PostgreSQL server.
Step 4: Download the Northwind PostgreSQL SQL File
Now, we’re going to introduce you to the Northwind database and help you download it. The Northwind database is a sample database originally provided by Microsoft for its Access Database Management System. It’s based on a fictitious company named «Northwind Traders,» and it contains data on their customers, orders, products, suppliers, and other aspects of the business. In our case, we’ll be working with a version of Northwind that has been adapted for PostgreSQL.
The following steps will guide you on how to download this PostgreSQL-compatible version of the Northwind database from GitHub to your local machine. Let’s get started:
First, you need to download a version of the Northwind database that’s compatible with PostgreSQL. You can find an adapted version on GitHub. To download the SQL file, follow these steps:
-
Open your Terminal application.
-
Create a new directory for the Northwind database and navigate to it:
mkdir northwind && cd northwind -
Download the Northwind PostgreSQL SQL file using curl:
curl -O <https://raw.githubusercontent.com/pthom/northwind_psql/master/northwind.sql>This will download the
northwind.sqlfile to thenorthwinddirectory you created.
Step 5: Create a New PostgreSQL Database
Now that we’ve downloaded the Northwind SQL file, it’s time to prepare our PostgreSQL server to host this data. The next steps will guide you in creating a new database on your PostgreSQL server, a crucial prerequisite before importing the Northwind SQL file.
Creating a dedicated database for the Northwind data is good practice as it isolates these data from other databases in your PostgreSQL server, facilitating better organization and management of your data. These steps involve connecting to the PostgreSQL server as the postgres user, creating the northwind database, and then exiting the PostgreSQL command-line interface.
Let’s proceed with creating your new database:
-
Connect to the PostgreSQL server as the
postgresuser:psql -U postgres -
Create a new database called
northwind:postgres-# CREATE DATABASE northwind; -
Exit the
psqlcommand-line interface:postgres-# \\q
Step 6: Import the Northwind SQL File
We’re now ready to import the Northwind SQL file into our newly created northwind database. This step is crucial as it populates our database with the data from the Northwind SQL file, which we will use for our PostgreSQL learning journey.
These instructions guide you through the process of ensuring you’re in the correct directory in your Terminal and executing the command to import the SQL file. This command will connect to the PostgreSQL server, target the northwind database, and run the SQL commands contained in the northwind.sql file.
Let’s move ahead and breathe life into our northwind database with the data it needs!
With the northwind database created, you can import the Northwind SQL file using psql. Follow these steps:
- In your Terminal, ensure you’re in the
northwinddirectory where you downloaded thenorthwind.sqlfile. -
Run the following command to import the Northwind SQL file into the
northwinddatabase:psql -U postgres -d northwind -f northwind.sqlThis command connects to the PostgreSQL server as the
postgresuser, selects thenorthwinddatabase, and executes the SQL commands in thenorthwind.sqlfile.
Step 7: Verify the Northwind Database Installation
You’ve successfully created your northwind database and imported the Northwind SQL file. Next, we must ensure everything was installed correctly, and our database is ready for use.
These upcoming steps will guide you on connecting to your northwind database, listing its tables, running a sample query, and finally, exiting the command-line interface. Checking the tables and running a sample query will give you a sneak peek into the data you now have and verify that the data was imported correctly. This means we can ensure everything is in order before diving into more complex operations and analyses.
To verify that the Northwind database has been installed correctly, follow these steps:
-
Connect to the
northwinddatabase usingpsql:psql -U postgres -d northwind -
List the tables in the Northwind database:
postgres-# \\dtYou should see a list of Northwind tables: categories, customers, employees, orders, and more.
-
Run a sample query to ensure the data has been imported correctly. For example, you can query the
customerstable:postgres-# SELECT * FROM customers LIMIT 5;This should return the first five rows from the
customerstable. -
Exit the
psqlcommand-line interface:postgres-# \\q
Congratulations! You’ve successfully installed the Northwind database in PostgreSQL using an SQL file and psql.
Step 8: Connect to the Database Using Jupyter Notebook
As we wrap up our installation, we will now introduce Jupyter Notebook as one of the tools available for executing SQL queries and analyzing the Northwind database. Jupyter Notebook offers a convenient and interactive platform that simplifies the visualization and sharing of query results, but it’s important to note that it is an optional step. You can also access Postgres through other means. However, we highly recommend using Jupyter Notebook for its numerous benefits and enhanced user experience.
To set up the necessary tools and establish a connection to the Northwind database, here is an overview of what each step will do:
-
!pip install ipython-sql: This command installs theipython-sqlpackage. This package enables you to write SQL queries directly in your Jupyter Notebook, making it easier to execute and visualize the results of your queries within the notebook environment. -
%load_ext sql: This magic command loads thesqlextension for IPython. By loading this extension, you can use the SQL magic commands, such as%sqland%%sql, to run SQL queries directly in the Jupyter Notebook cells. -
%sql postgresql://postgres@localhost:5432/northwind: This command establishes a connection to the Northwind database using the PostgreSQL database system. The connection string has the following format:postgresql://username@hostname:port/database_nameIn this case,
usernameispostgres,hostnameislocalhost,portis5432, anddatabase_nameisnorthwind. The%sqlmagic command allows you to run a single-line SQL query in the Jupyter Notebook. -
Copy the following text into a code cell in the Jupyter Notebook:
!pip install ipython-sql
%load_ext sql
%sql postgresql://postgres@localhost:5432/northwindOn Windows you may need to try the following command because you need to provide the password you set for the “postgres” user during installation:
%sql postgresql://postgres:{password}@localhost:5432/northwindBear in mind that it’s considered best practice not to include sensitive information like passwords directly in files that could be shared or accidentally exposed. Instead, you can store your password securely using environment variables or a password management system (we’ll link to some resources at the end of this guide if you are interested in doing this).
-
Run the cell by either:
- Clicking the «Run» button on the menu bar.
- Using the keyboard shortcut:
Shift + EnterorCtrl + Enter.
-
Upon successful connection, you should see an output similar to the following:
'Connected: postgres@northwind'This output confirms that you are now connected to the Northwind database, and you can proceed with the guided project in your Jupyter Notebook environment.
Once you execute these commands, you’ll be connected to the Northwind database, and you can start writing SQL queries in your Jupyter Notebook using the %sql or %%sql magic commands.
Next Steps
Based on what you’ve accomplished, here are some potential next steps to continue your learning journey:
- Deepen Your SQL Knowledge:
- Try formulating more complex queries on the Northwind database to improve your SQL skills. These could include joins, subqueries, and aggregations.
- Understand the design of the Northwind database: inspect the tables, their relationships, and how data is structured.
- Experiment with Database Management:
- Learn how to backup and restore databases in PostgreSQL. Try creating a backup of your Northwind database.
- Explore different ways to optimize your PostgreSQL database performance like indexing and query optimization.
- Integration with Python:
- Learn how to use
psycopg2, a popular PostgreSQL adapter for Python, to interact with your database programmatically. - Experiment with ORM (Object-Relational Mapping) libraries like
SQLAlchemyto manage your database using Python.
- Learn how to use
- Security and Best Practices:
- Learn about database security principles and apply them to your PostgreSQL setup.
- Understand best practices for storing sensitive information, like using
.envfiles for environment variables. - For more guidance on securely storing passwords, you might find the following resources helpful:
- Using Environment Variables in Python
- Python Secret Module
In this article, we are going to learn how we can install and configure PostgreSQL on windows 10. PostgreSQL, also known as Postgres, is a free and open relational database management system.
The PostgreSQL database manages the multi-version concurrency control to manage the concurrency (MVCC). When we run
a transaction on PostgreSQL, it gives the snapshot of the database, which allows each transaction to made changes on
the database without affecting the other transaction. PostgreSQL has three levels of transaction isolation.
- Read committed
- Repeatable Read
- Serializable
We can install PostgreSQL on the following operating systems:
- Windows
- Linux
- Mac OS Server
- Free BSD and Open BSD
In this article, we are going to focus on the step-by-step installation process of PostgreSQL on windows 10. Before
the installation, we must download the stable copy of the PostgreSQL 13 server from the location. We can use this installer to install PostgreSQL on windows in
graphical and silent mode. The setup file contains the following software packages:
- PostgreSQL 13 server
- pgAdmin: It is a graphical tool to develop and manage the PostgreSQL server and database
- Stack builder: It is a package manager that contains additional tools that are used for management, migration, replication, connectors, and other tools
Once the setup file has been downloaded, double-click on the file. The installation wizard of PostgreSQL on Windows has begun. The first screen is the Welcome screen of the PostgreSQL installation.
On the Installation directory screen, specify the location where you want to install the PostgreSQL.
On the Select component screen, choose the component that you want to install on your workstation. You can choose any of the following:
- PostgreSQL Server
- pgAdmin4: It is a graphical interface that is used to manage the PostgreSQL database
- Stack builder: The stack builder will be used to download and install drivers and additional tools
- Command-line tools. The command-line tools and client libraries like pg_bench, pg_restore, pg_basebackup, libpq, pg_dump, and pg_restore will be installed
In our case, we will install all components.
On the Data Directory screen, specify the directory where you want to store the database files. In our case, the data directory is C:\PostgreSQL Data.
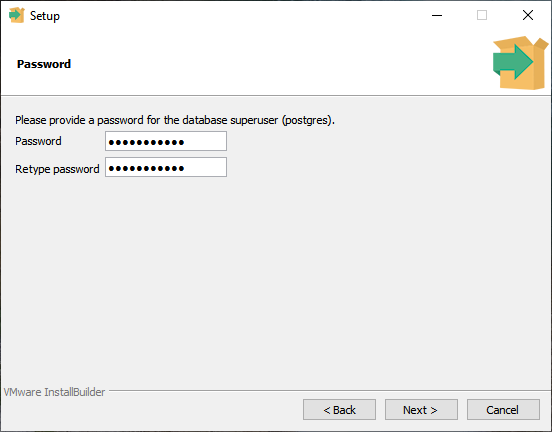
On the Password screen, specify the database superuser password. This password will be used to connect to the PostgreSQL database server.
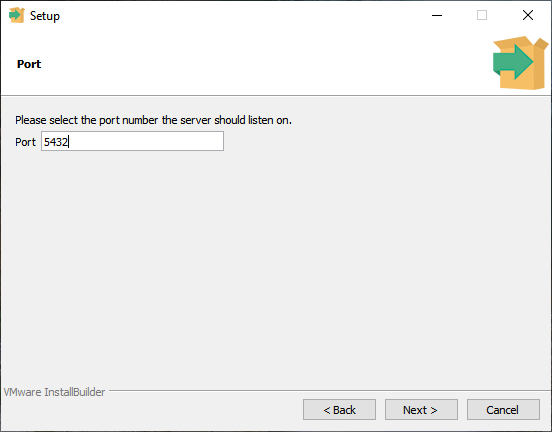
On the Port screen, specify the Port number on which the PostgreSQL server will listen to the incoming connections.
By default, the PostgreSQL server listens on port number 5432. You can specify the non-default post on this screen.
Make sure any other application must not use the port you specify in the Port textbox, and it must allow the incoming and outgoing connections. In our case, I am not changing the port.
You can choose the locale that you want to use in the database on the advance option screen. In our case, I am choosing the default locale.

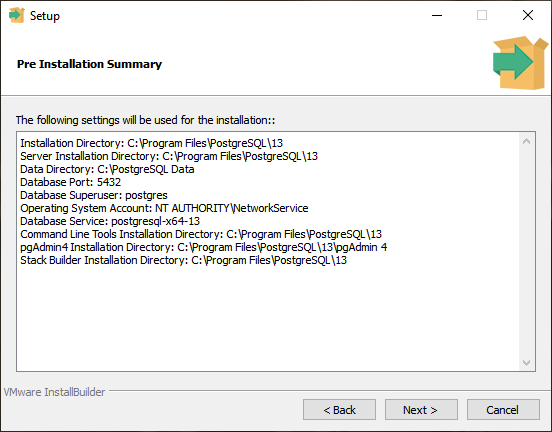
On the Pre-Installation Summary screen, you can view the settings used for installing the PostgreSQL server.
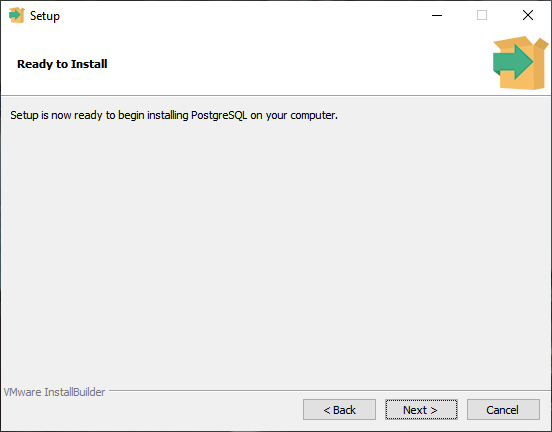
The Ready to install screen is the notification screen that states that the PostgreSQL installation process will begin.
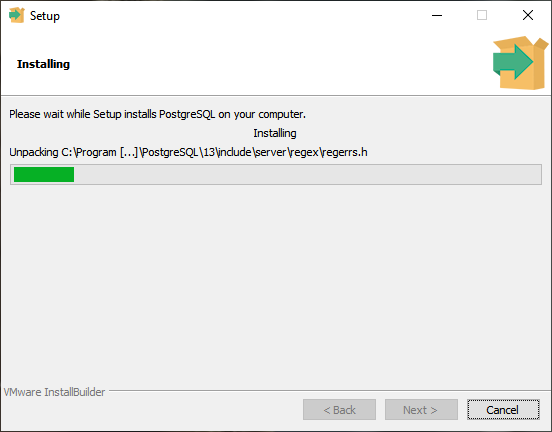
The installation process of PostgreSQL on windows has begun.
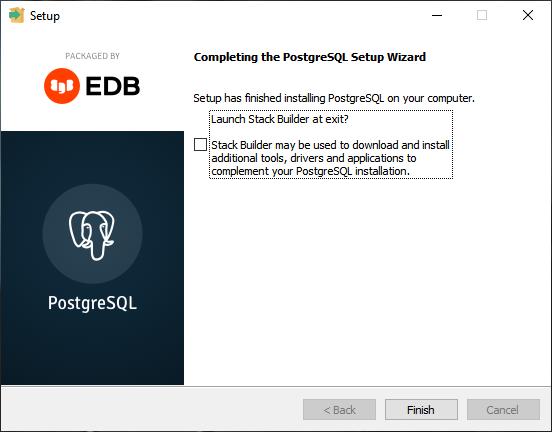
The PostgreSQL server has been installed successfully. If you want to install additional components and drivers, you
can choose to open the stack builder. In our case, I am not installing additional components. Click on Finish to complete the installation.
Now, reboot the workstation. Let us understand how we can connect to the PostgreSQL server using pgAdmin4 and SQL Shell (pSQL).
Connect to PostgreSQL using pgAdmin4
We can use the pgAdmin4 tool to manage and administrate the PostgreSQL server. We can also use the pgAdmin4 to execute the Adhoc queries and create database objects.
To connect to the PostgreSQL. Launch the pgAdmin4. On the first screen, specify the password of the superuser that
can be used to connect to the PostgreSQL Server.

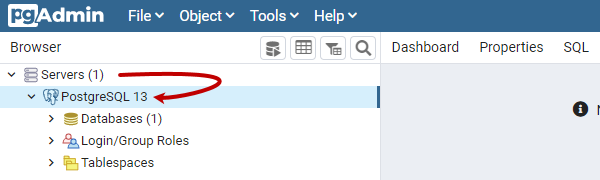
Once you’re connected to PostgreSQL13, you can view the database objects in the Browser pan. To view the installed
servers, expand Servers. Under Servers, you can view the list of installed servers. In our case, the installed
PostgreSQL is PostgreSQL13. You can view the list of databases, users, and tablespaces under PostgreSQL13.
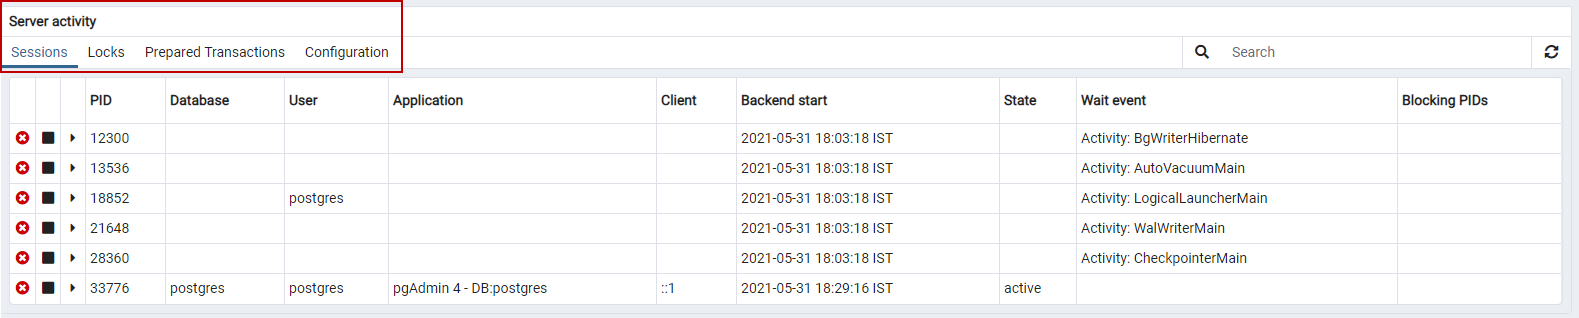
We can view the Server Activities and the configuration of the PostgreSQL server in the Dashboard tab.

You can view the list of sessions, locks acquired by the process, prepared transactions, and configuration under the server activity pan.
Now, let us see how we can create a database.
How to create a database using pgAdmin4
Now, let us create a database using pgAdmin4. To create a database, Expand Serves 🡪 Expand PostgreSQL13 🡪 Right-click on Databases 🡪 Hover Create 🡪 Select Database.
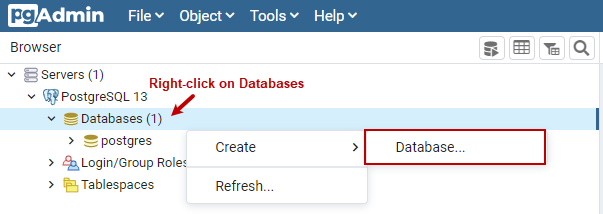
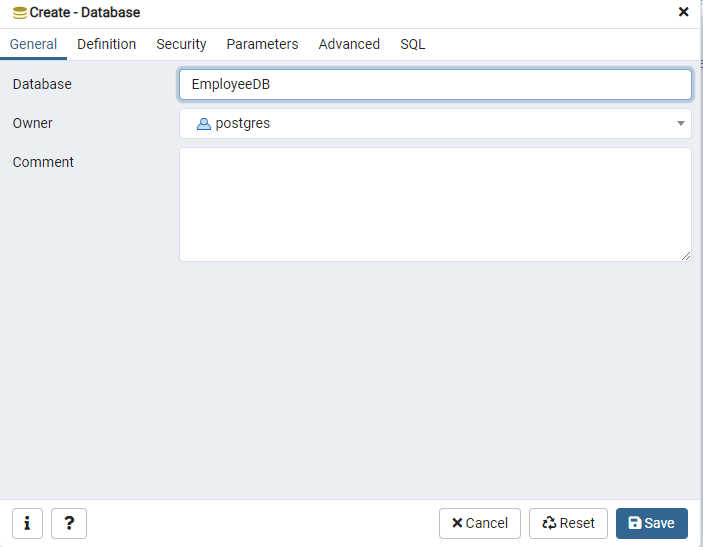
A Create database dialog box opens. In the general tab, specify the database name in the Database Textbox.
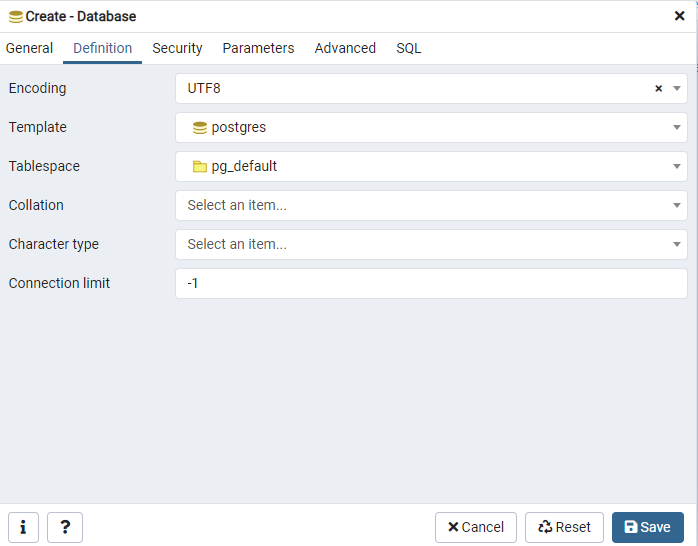
You can specify the Database Encoding template used to create a database, tablespace, database collation, character type, and connection limit on the Definition tab.
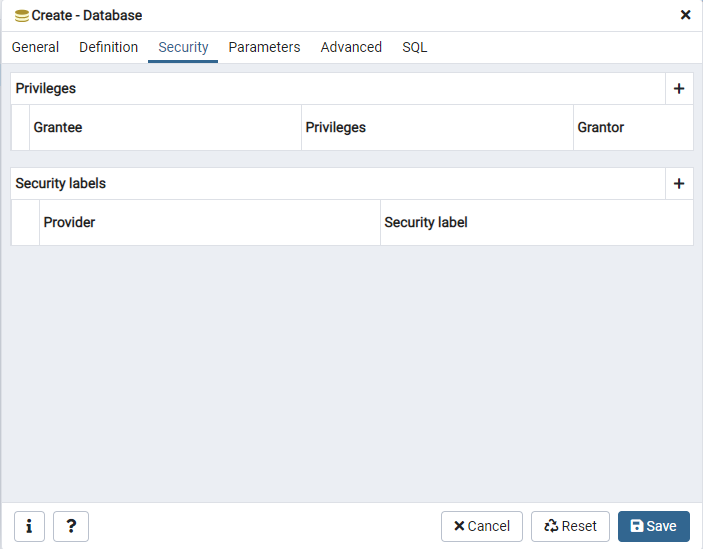
In the Security tab, you can configure the privileges and security configuration. In our case, we have not changed anything.
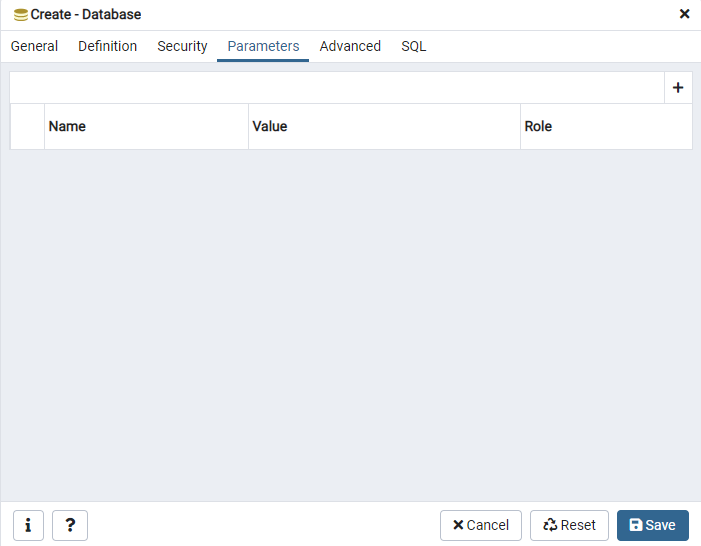
In the Parameters tab, you can configure the database-specific parameters. I have not changed any configuration.
In the SQL tab, you can view the CREATE DATABASE statement generated with the configuration defined in the Create – database dialog box.
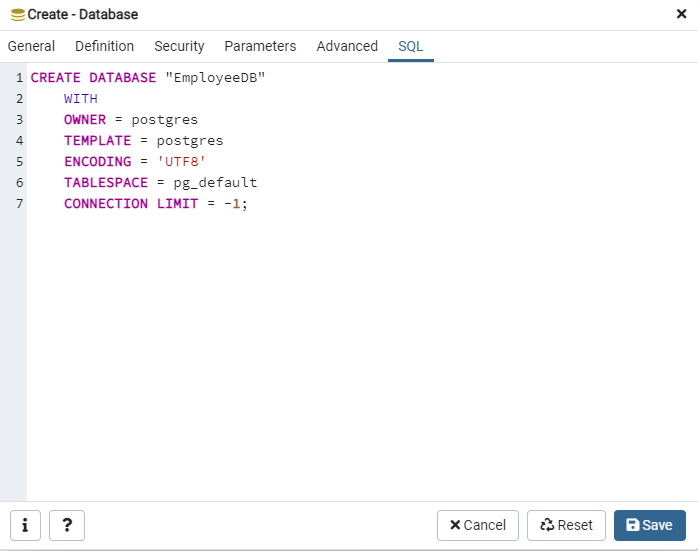
Click on Save to create the database named EmployeeDB and close the dialog box. You can view the new database in Browser pan.
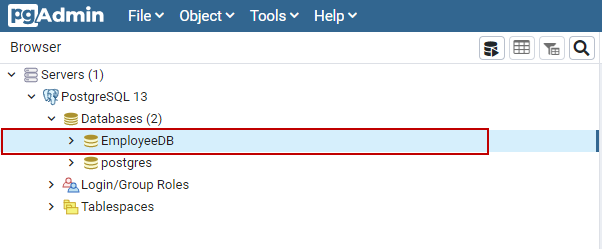
As you can see, the database has been created successfully.
-
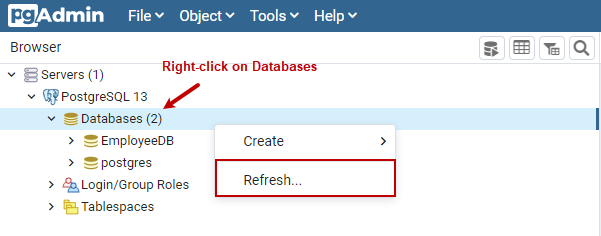
Note: If you do not see the EmployeeDB database in the Browser pane, right-click on the Databases and select Refresh
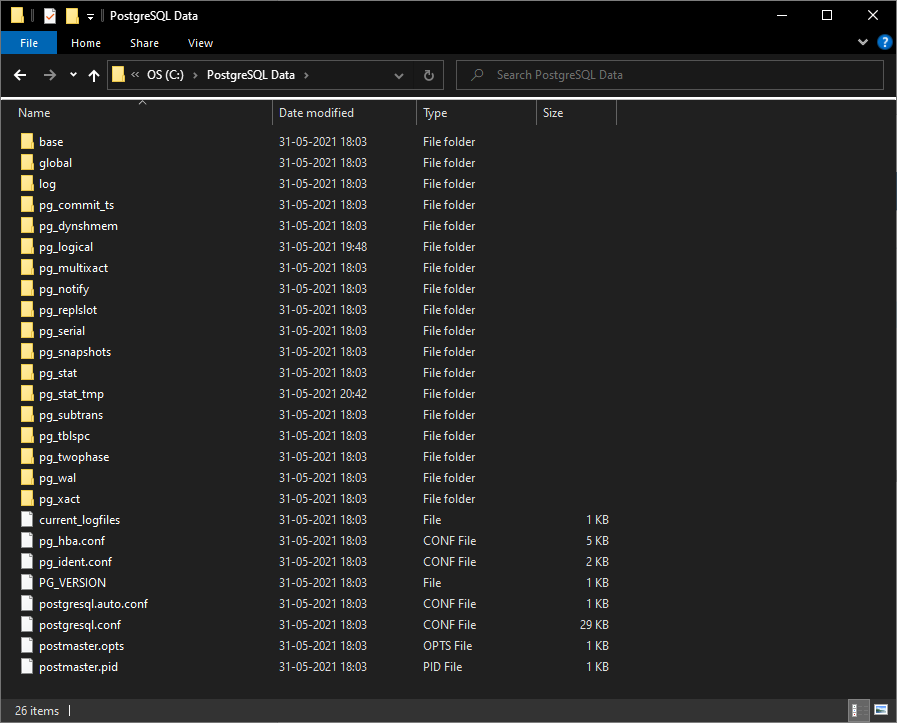
We can view the database files under the C:\PostgreSQL Data directory. See the following screenshot.
Now, let us see how we can execute the queries on PostgreSQL.
Querying the PostgreSQL database using pgAdmin4
To execute the queries using the pgAdmin4, Click on Tools 🡪 Click on Query Tool.

A query editor pan opens. Now, let us create a table named tblEmployeeGrade. The following query creates a table.
|
Create table tblEmployee ( Employee_ID varchar(20), First_name varchar(500), middle_name varchar(500), last_name varchar(500), Address varchar(1000), Contact_number int, DepartmentID int, GradeID int, ) |
Screenshot of the Query Editor:
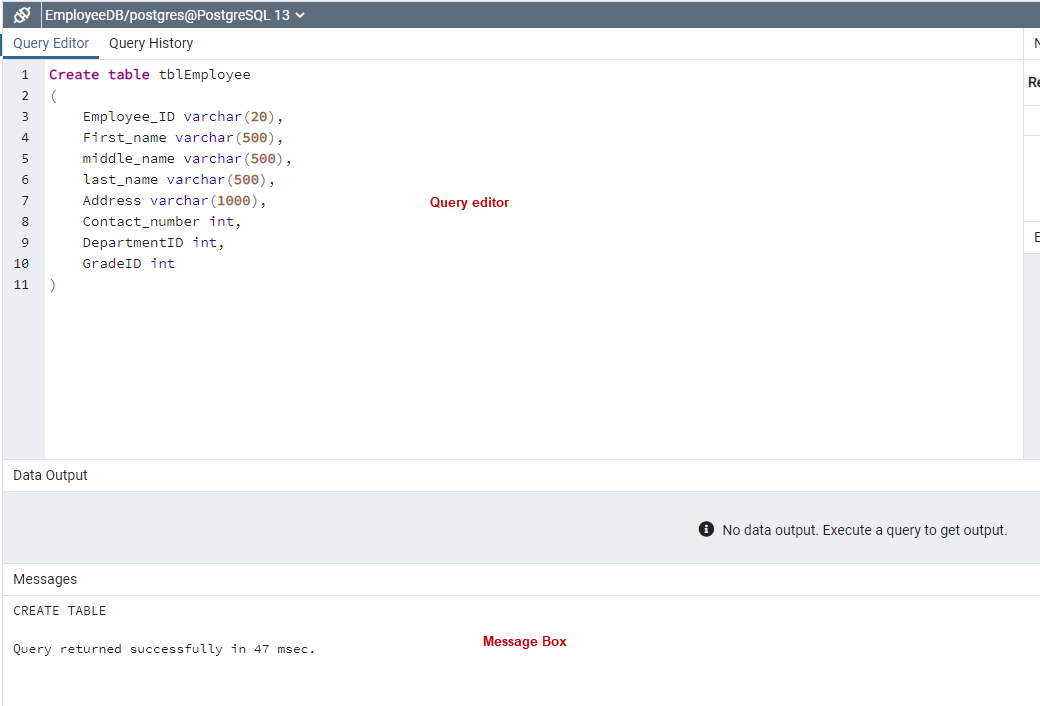
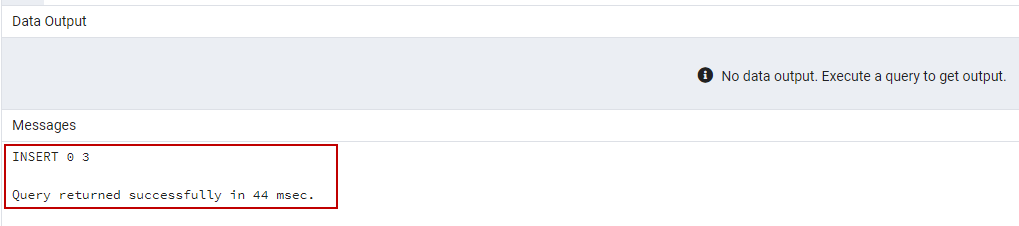
As you can see, the query execution status will be displayed in the messages pan. Now, let us insert some records in the tblemployee. Run the following query to insert data in tblemployee.
|
insert into tblemployee (Employee_ID,First_name,middle_name,last_name,Address,Contact_number,DepartmentID,GradeID) values (‘EMP0001’,‘Nisarg’,‘Dixitkumar’,‘Upadhyay’,‘AB14, Akshardham Flats, Mehsana’,123456,10,10), (‘EMP0002’,‘Nirali’,‘Nisarg’,‘Upadhyay’,‘AB14, Suyojan Road, Ahmedabad’,123456,10,10), (‘EMP0003’,‘Dixit’,‘Lalshankar’,‘Upadhyay’,‘AB14, Suramya Stauts, Ahmedabad’,123456,10,10) |
Run the SELECT statement to populate the data from the tblemployee table.
|
Select * from tblemployee |

As you can see, the query output had populated the data in grid view format and can be viewed in the Data output pan.
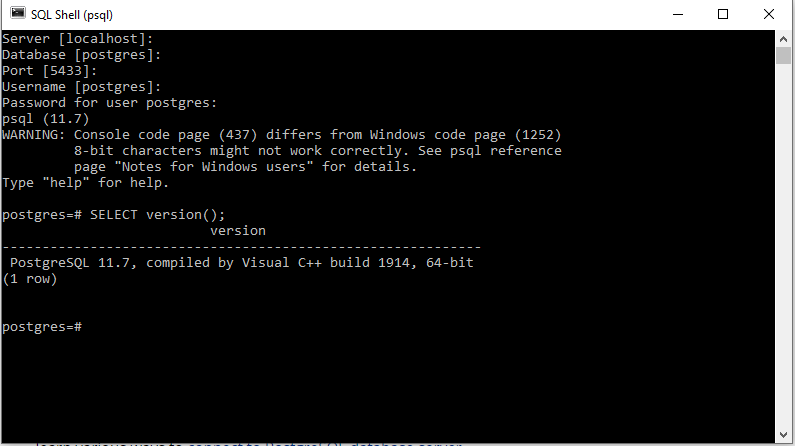
Connect to PostgreSQL using SQL Shell (pSQL)
We can use the pSQL command-line utility to manage the PostgreSQL database. The SQL Shell is automatically installed
with the PostgreSQL server. When we launch the SQL Shell, it prompts for following options.
- Server Name: Specify the hostname of the machine on which the PostgreSQL has been installed. If you do not specify the hostname, then pSQL will connect to the localhost
- Database: Specify the database name that you want to use. If you do not specify the database name, pSQL will connect to the Postgres database
- Port: Specify the port. If you do not specify any port, pSQL will use port number 5432 to connect to the server
- Username: specify the username that you want to use to connect to PostgreSQL. If you do not specify the username, the pSQL will use the Postgres user
- Password: Specify the password of the user specified in the username parameter
Specify all the parameters and hit enter to connect to the database.
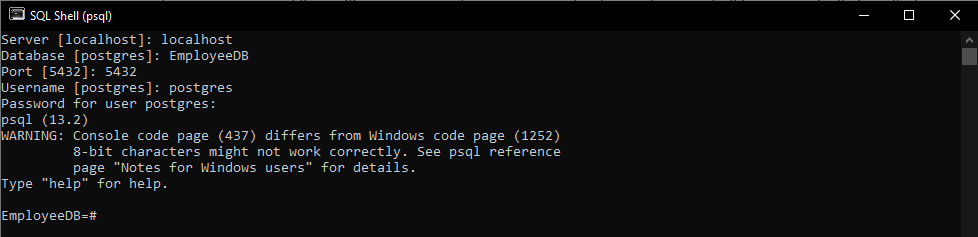
As you can see, the connection has been established successfully.
Summary
In this article, we learned the step-by-step installation process of PostgreSQL on windows 10. I have also given a high-level overview of the pgAdmin4 tool and how we can connect to the PostgreSQL database using pgAdmin and SQL Shell (pSQL) utility.
- Author
- Recent Posts

Nisarg Upadhyay is a SQL Server Database Administrator and Microsoft certified professional who has more than 8 years of experience with SQL Server administration and 2 years with Oracle 10g database administration.
He has expertise in database design, performance tuning, backup and recovery, HA and DR setup, database migrations and upgrades. He has completed the B.Tech from Ganpat University. He can be reached on nisargupadhyay87@outlook.com
This is a step-by-step guide to install PostgreSQL on a windows machine. Since PostgreSQL version 8.0, a window installer is available to make the installation process fairly easier.
We will be installing PostgreSQL version 11.3 on Windows 10 in this article.
There are three crucial steps for the installation of PostgreSQL as follows:
- Download PostgreSQL installer for Windows
- Install PostgreSQL
- Verify the installation
Downloading PostgreSQL Installer for Windows
You can download the latest stable PostgreSQL Installer specific to your Windows by clicking here
Installing the PostgreSQL installer
After downloading the installer double click on it and follow the below steps:
- Step 1: Click the Next button
- Step 2: Choose the installation folder, where you want PostgreSQL to be installed, and click on Next.
- Step 3: Select the components as per your requirement to install and click the Next button.
- Step 4: Select the database directory where you want to store the data and click on Next.
- Step 5: Set the password for the database superuser (Postgres)
- Step 6: Set the port for PostgreSQL. Make sure that no other applications are using this port. If unsure leave it to its default (5432) and click on Next.
- Step 7: Choose the default locale used by the database and click the Next button.
- Step 8: Click the Next button to start the installation.
- Wait for the installation to complete, it might take a few minutes.
- Step 9: Click the Finish button to complete the PostgreSQL installation.

Verifying the Installation of PostgreSQL
There are couple of ways to verify the installation of PostgreSQL like connecting to the database server using some client applications like pgAdmin or psql.
The quickest way though is to use the psql shell. For that follow the below steps:
- Step 1: Search for the psql shell in the windows search bar and open it.
- Step 2: Enter all the necessary information like the server, database, port, username, and
password and press Enter. - Step 3: Use the command SELECT version(); you will see the following result:
Last Updated :
01 Mar, 2023
Like Article
Save Article
PostgreSQL or Postgres is the most commonly used open-source relational database. It offers features like robustness, reliability, cost-free, etc. PostgreSQL serves as a data warehouse for multiple applications like web apps, mobile apps, etc. It enables us to store enormous and sophisticated data securely. However, to achieve any of its functionalities or features, firstly, we have to download and install PostgreSQL.
This write-up will present a detailed guide on downloading and installing PostgreSQL on Windows 10. So, let’s get started!
How to download PostgreSQL for Windows 10?
You have to follow the below-given steps appropriately to download the PostgreSQL:
Step1: Visit postgresql.org
Firstly, open the browser of your choice and enter “www.postgresql.org/download” in the address bar of your browser or click on the following link:
Download postgreSQL
Clicking on the link will open the following window:
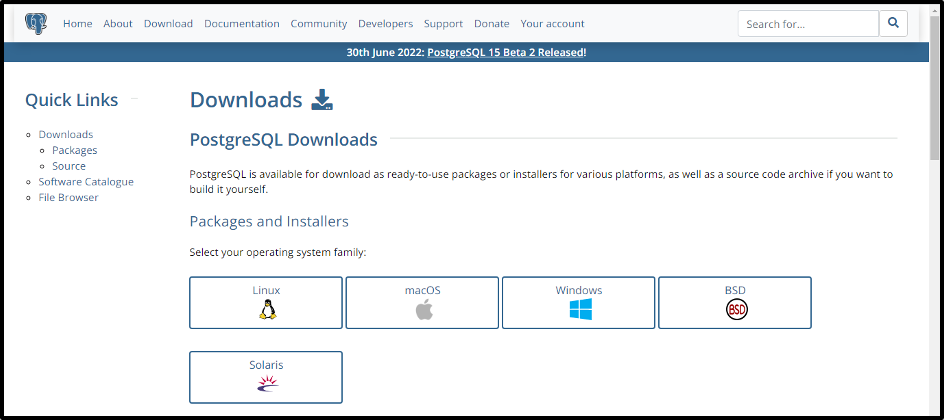
Step2: Select your OS
Select the operating system on which you want to download the PostgreSQL. In our case, its Windows operating system:
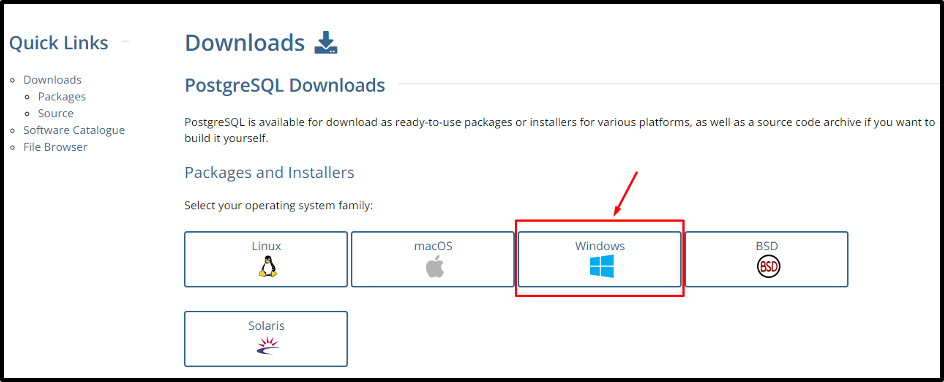
Step3: Download the installer
Clicking on the “Windows” option will direct to the below-given page:
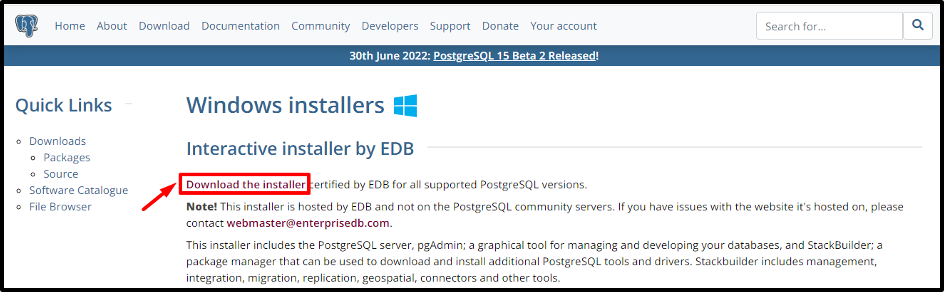
Click on the “Download the installer” option to download the interactive installer by EDB.
Step4: Choose the relevant PostgreSQL Version
Clicking on the above-given link will show you PostgreSQL versions for the different operating systems. Choose the latest PostgreSQL version for your respective operating system and click on the download button:
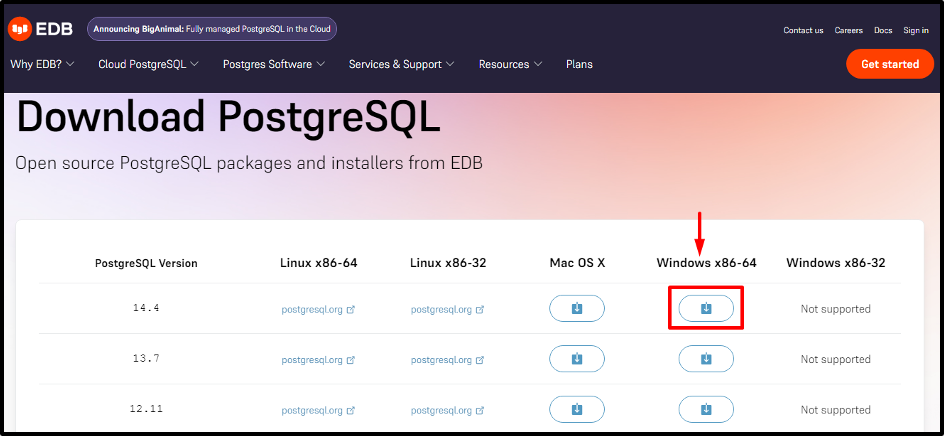
Clicking on the download button will start the downloading process:

PostgreSQL will be downloaded to your windows operating system within a few minutes.
How to install PostgreSQL?
Follow the below-listed steps to install PostgreSQL on your Windows operating system:
Step 1: Open the downloaded file
Once the downloading is completed, open the respective “.exe” file:
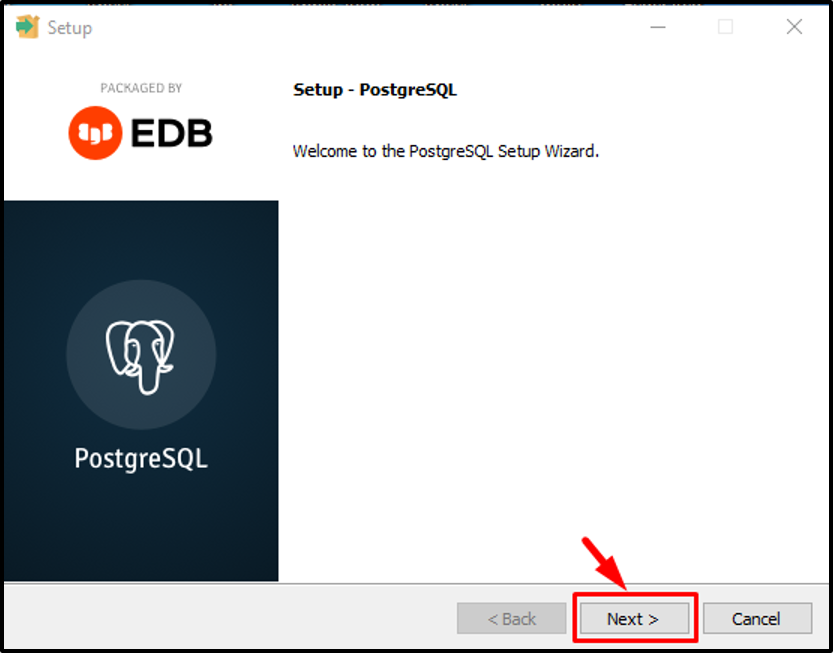
Initially, a «welcome» window will appear; click «Next» to proceed.
Step 2: Choose Installation directory
Specify or browse the directory where you want to install the PostgreSQL:
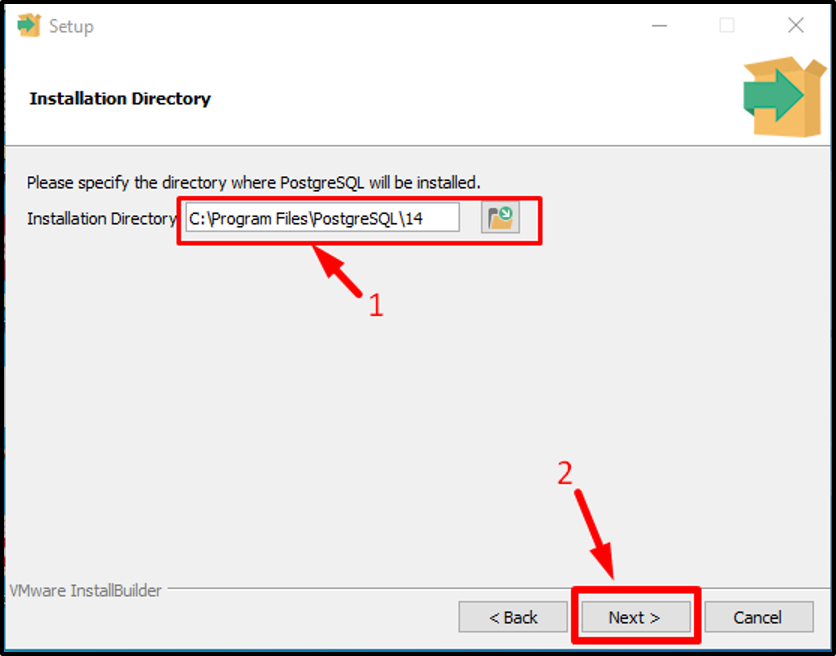
After specifying, click on the “Next” button to proceed further.
Step 3: Select Components
You can select the components of your choice to install on your computer. We will proceed with the default settings, so just click on the “Next” button:
Step 4: Select Data Directory
Select a data directory to store your data and click on the “Next” button:
Step 5: Set Password
Set a password (must remember it for later use) for the Postgres superuser and click on the “Next” button:
Step 6: Set Port Number
Whether set the port number or go with the default port number “5432” to connect to a database:
Step 7: Advanced Options
The next window will give you choice to select locale; leave them as it is, and click on the “Next” button:
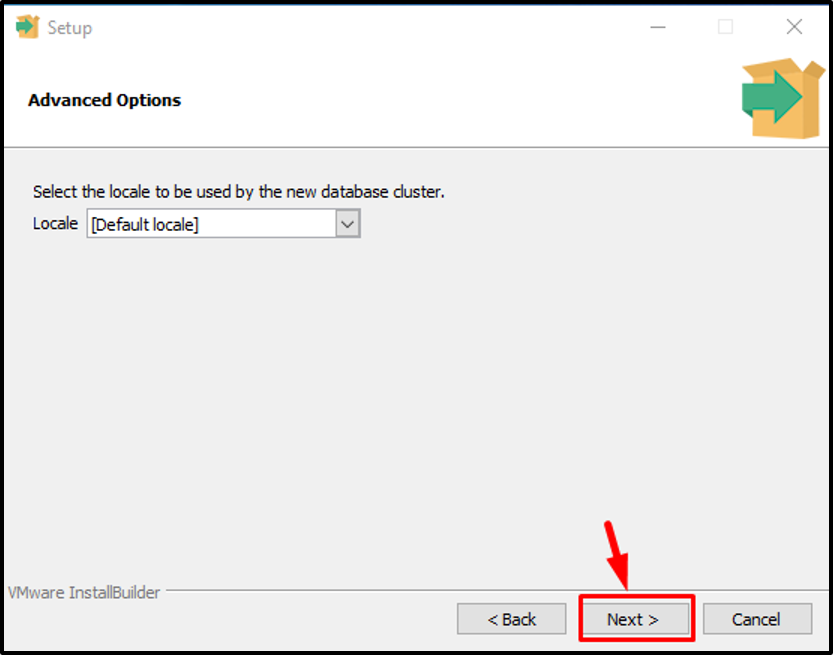
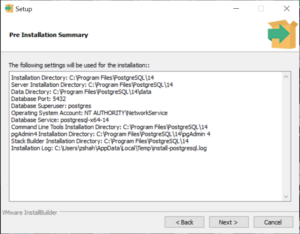
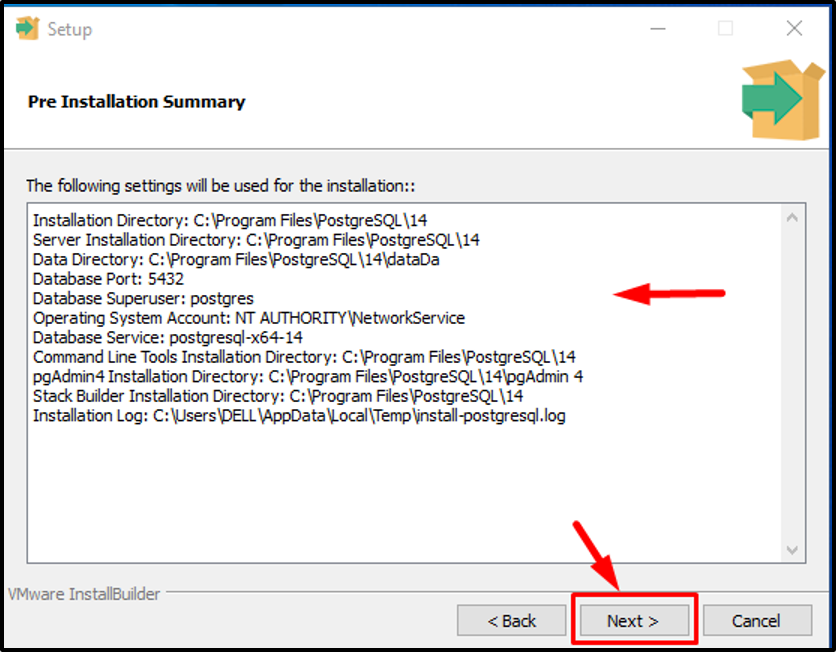
Step 8: Verify Pre-installation Summary
The pre-installation summary will tell you which settings will be used for the installation:
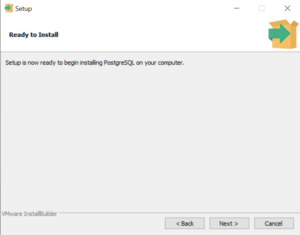
Step 9: Begin PostgreSQL Installation
The setup is ready to install Postgres on your windows operating system:
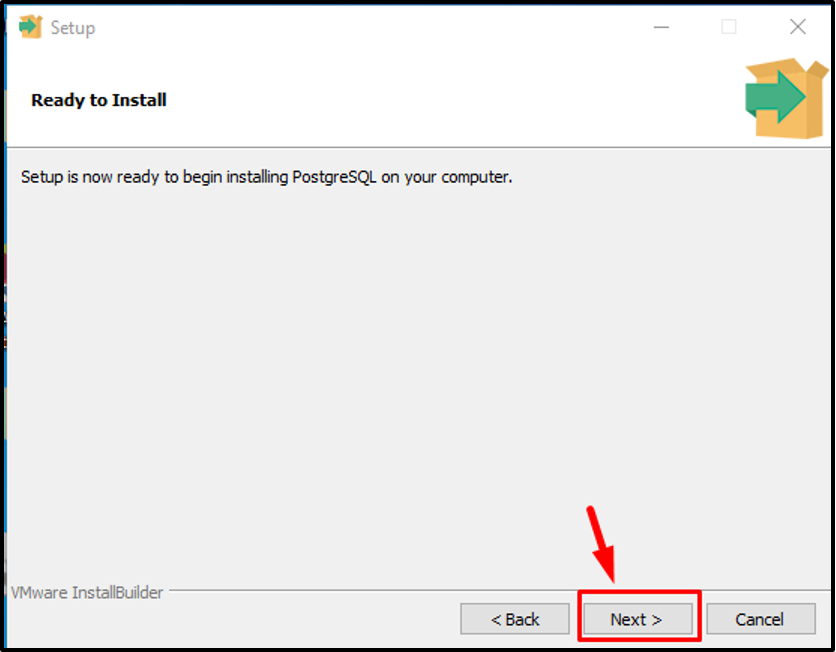
Just click on the “Next” button to begin the installation:

The whole process will take a few minutes to complete:
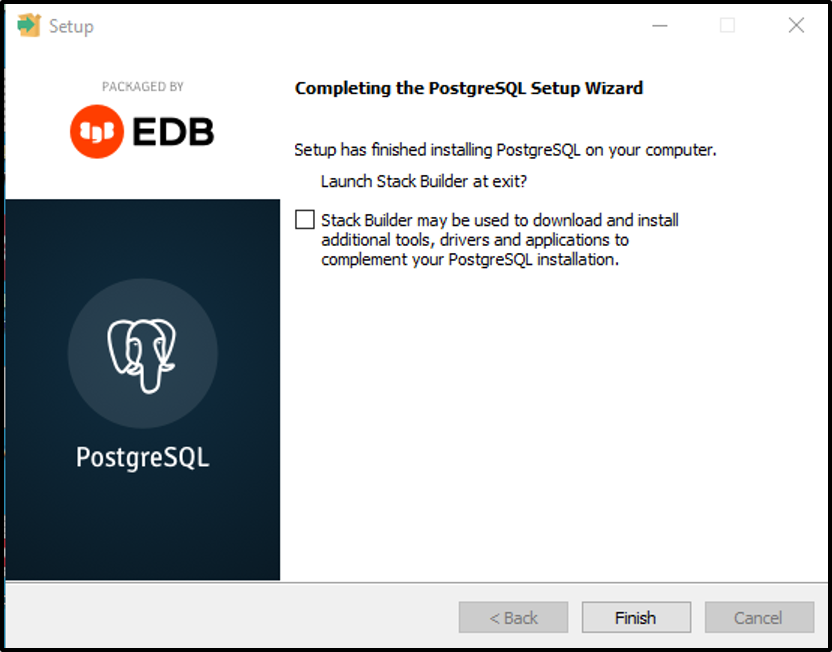
Once the PostgreSQL setup wizard is completed, click on the “Finish” button to close the installation windows.
How to launch PostgreSQL on Windows 10?
The below-given steps are required to launch PostgreSQL on Windows Operating System:
Step 1: Open pgAdmin
Click the windows button and find the “postgreSQL 14”. Once you find it click on it and select the “pgAdmin 4”:
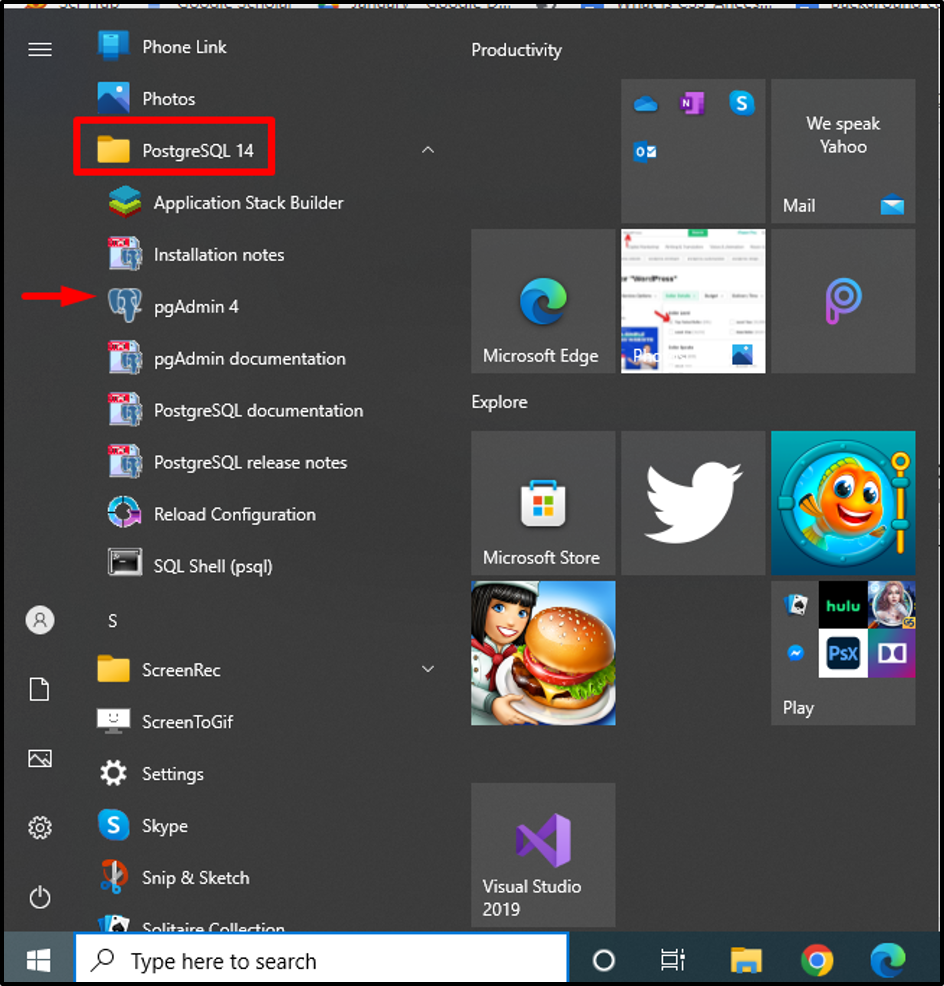
Or you can directly search for the “pgAdmin 4” in the windows search bar.
Step 2: Enter Password
Clicking on the “pgAdmin 4” will ask you to enter the password:

Provide the master password that you have recently set during the installation and click the “Ok” button to proceed.
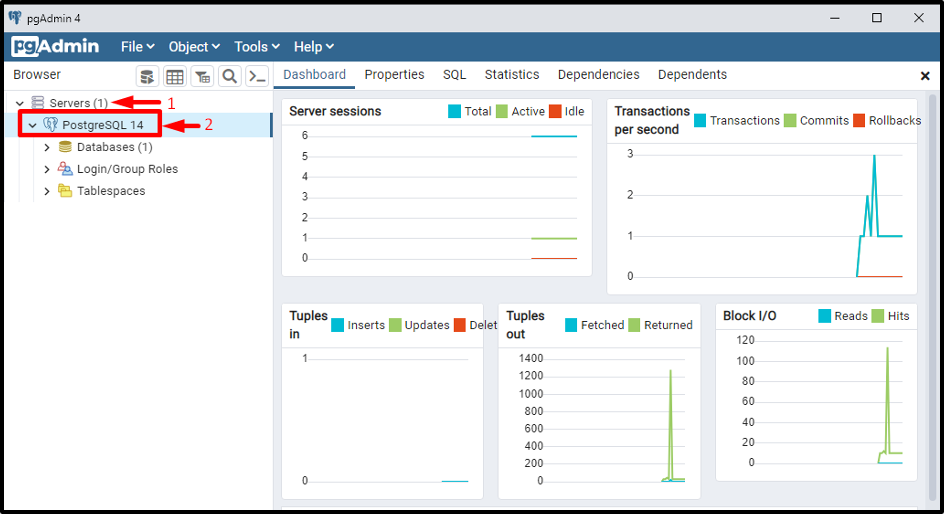
Step 3: Select PostgreSQL 14
In the left pane, click on the “Servers” and then “PostgreSQL 14”. Consequently, the following dashboard will appear:
That was all the necessary information about downloading, installing, and launching PostgreSQL on Windows 10 operating system.
Conclusion
To download PostgreSQL, visit “www.postgresql.org/download” > Select your OS > Download the installer > Choose the relevant PostgreSQL Version, consequently, a “.exe” file will be downloaded. To install PostgreSQL on Windows 10, open the downloaded file > specify installation directory > select components > select data directory > set password > read pre installation summary and finally click on the next button to begin the installation process.