1. Overview
In this tutorial, we’ll walk you through one of the easiest ways to try out Ubuntu Desktop on a virtual machine. VirtualBox is a general purpose virtualiser that is available across Linux, Mac OS and Windows. It’s a great way to experience Ubuntu regardless of your current operating system.
VirtualBox 7 and above includes a new feature called Unattended Guest OS Install which significantly streamlines the setup experience for common operating systems like Ubuntu, making it easier than ever to get started.
Note: This tutorial will also work for other distributions, so try it out with some of the Ubuntu flavours as well!
What you’ll learn
- How to install and configure VirtualBox
- How to import an Ubuntu image
- How to run a virtual instance of Ubuntu Desktop
- Further configuration options
What you’ll need
- A PC with internet access!
Download an Ubuntu Image
Duration: 3:00
You can download an Ubuntu image here. Make sure to save it to a memorable location on your PC! For this tutorial, we will use the latest Ubuntu 22.10 release.

Download and install VirtualBox
Duration: 5:00
You can download VirtualBox from the downloads page here. This page includes instructions on how to install VirtualBox for your specific OS so we won’t repeat those here.
Once you have completed the installation, go ahead and run VirtualBox.

2. Create a new virtual machine
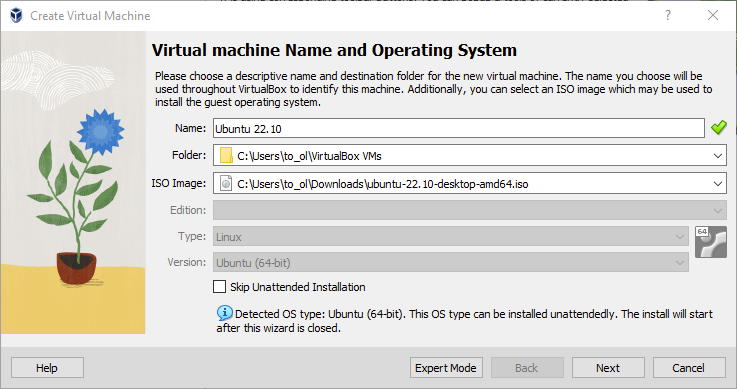
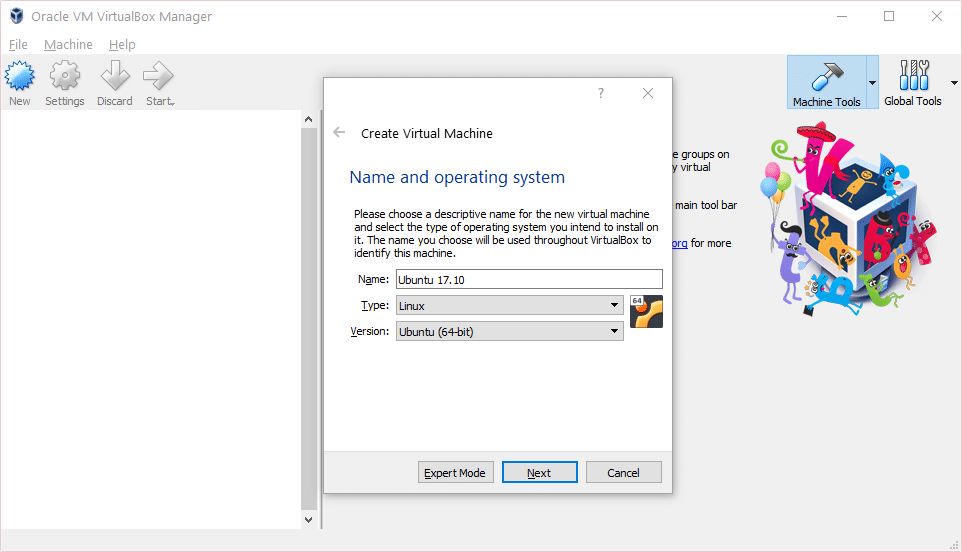
Click New to create a new virtual machine. Fill in the appropriate details:
- Name: If you include the word Ubuntu in your name the Type and Version will auto-update.
- Machine Folder: This is where your virtual machines will be stored so you can resume working on them whenever you like.
- ISO Image: Here you need to add a link to the ISO you downloaded from the Ubuntu website.
We want to install Ubuntu unattendedly so we can leave the checkbox to skip unchecked.
Create a user profile
To enable the automatic install we need to prepopulate our username and password here in addition to our machine name so that it can be configured automatically during first boot.
The default credentials are:
- Username: vboxuser
- Password: changeme
It is important to change these values since the defaults will create a user without sudo access.
Ensure your Hostname has no spaces to proceed!
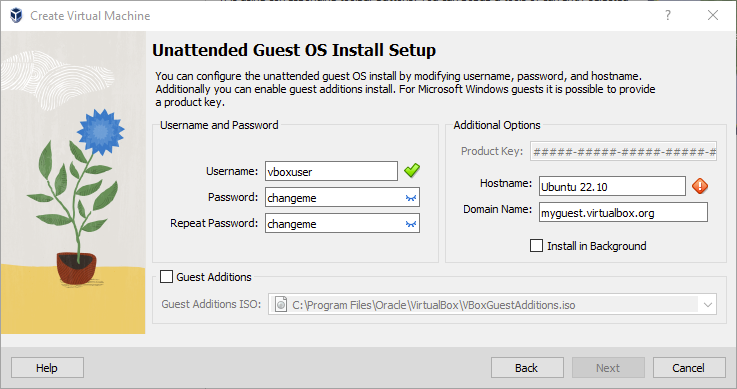
It is also recommended to check the Guest Additions box to install the default Guest Additions ISO that is downloaded as part of VirtualBox. Guest additions enables a number of quality of life features such as changing resolution and dynamic screen resizing so it is highly recommended!
Note: If you choose not to use unattended install then this step will be skipped and you will go straight to the following screen. Once your machine has been created you will be able to create a username and password by proceeding through the standard Ubuntu Desktop installation flow on first boot.
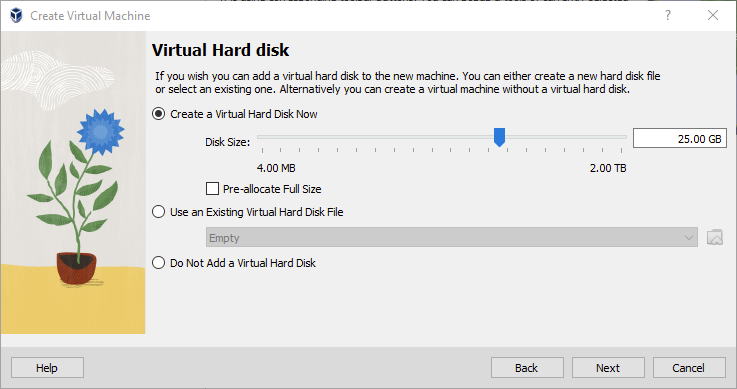
Define the Virtual Machine’s resources
In the next section we can specifiy how much of our host machine’s memory and processors the virtual machine can use. For good performance it’s recommended to provide your VM with around 8GB of RAM (althought 4GB will still be usable) and 4 CPUs. Try to remain in the green areas of each slider to prevent issues with your machine running both the VM and the host OS.

Then we need to specify the size of the hard disc for the virtual machine. For Ubuntu we recommend around 25 GB as a minimum. By default the hard disk will scale dynamically as more memory is required up to the defined limit. If you want to pre-allocate the full amount, check the ‘Pre-allocate Full Size’ check box. This will improve performance but may take up unnecessary space.
Click Next to continue and view a summary of your machine setting.

After this click Finish to initialize the machine!
3. Install your image
Click Start to launch the virtual machine.

You will see a message saying ‘Powering VM up …’ and your desktop window will appear.
On first boot the unattended installation will kick in so do not interact with the prompt to ‘Try and Install Ubuntu’ and let it progress automatically to the splash screen and into the installer.
Note: If you chose not to use unattended install then you will need to progress through the Ubuntu install manually. Check out our Ubuntu Desktop installation tutorial for more details.

You will notice at this stage that the resolution of the window is fixed at 800×600. This is because the Guest Additions features are not installed until after the Ubuntu installation has completed.

Once the installation completes, the machine will automatically reboot to complete the installation.

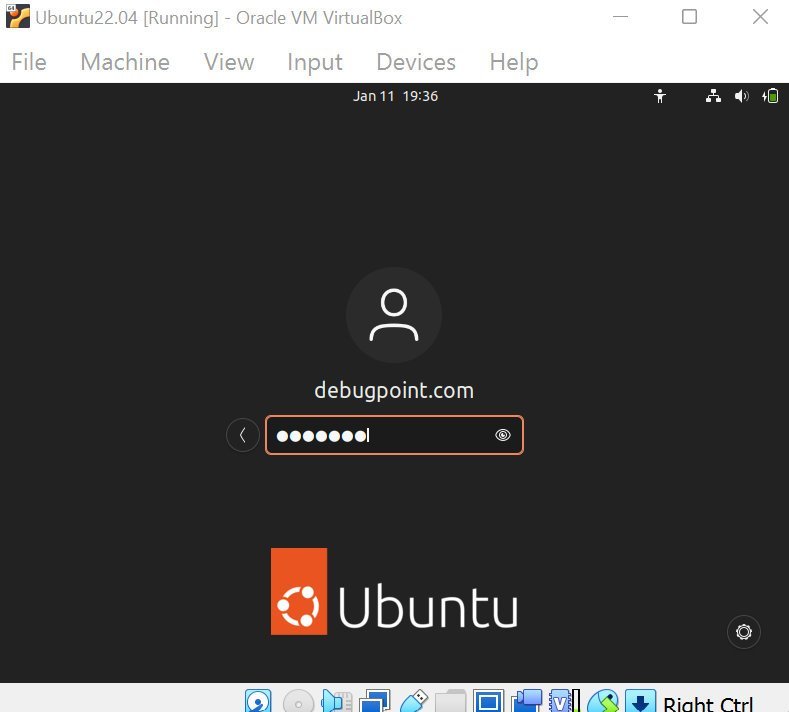
Finally you will be greeted with the Ubuntu log-in screen where you can enter your username and password defined during the initial setup (don’t forget that the default password is ‘changeme’ if you left everything as the default).

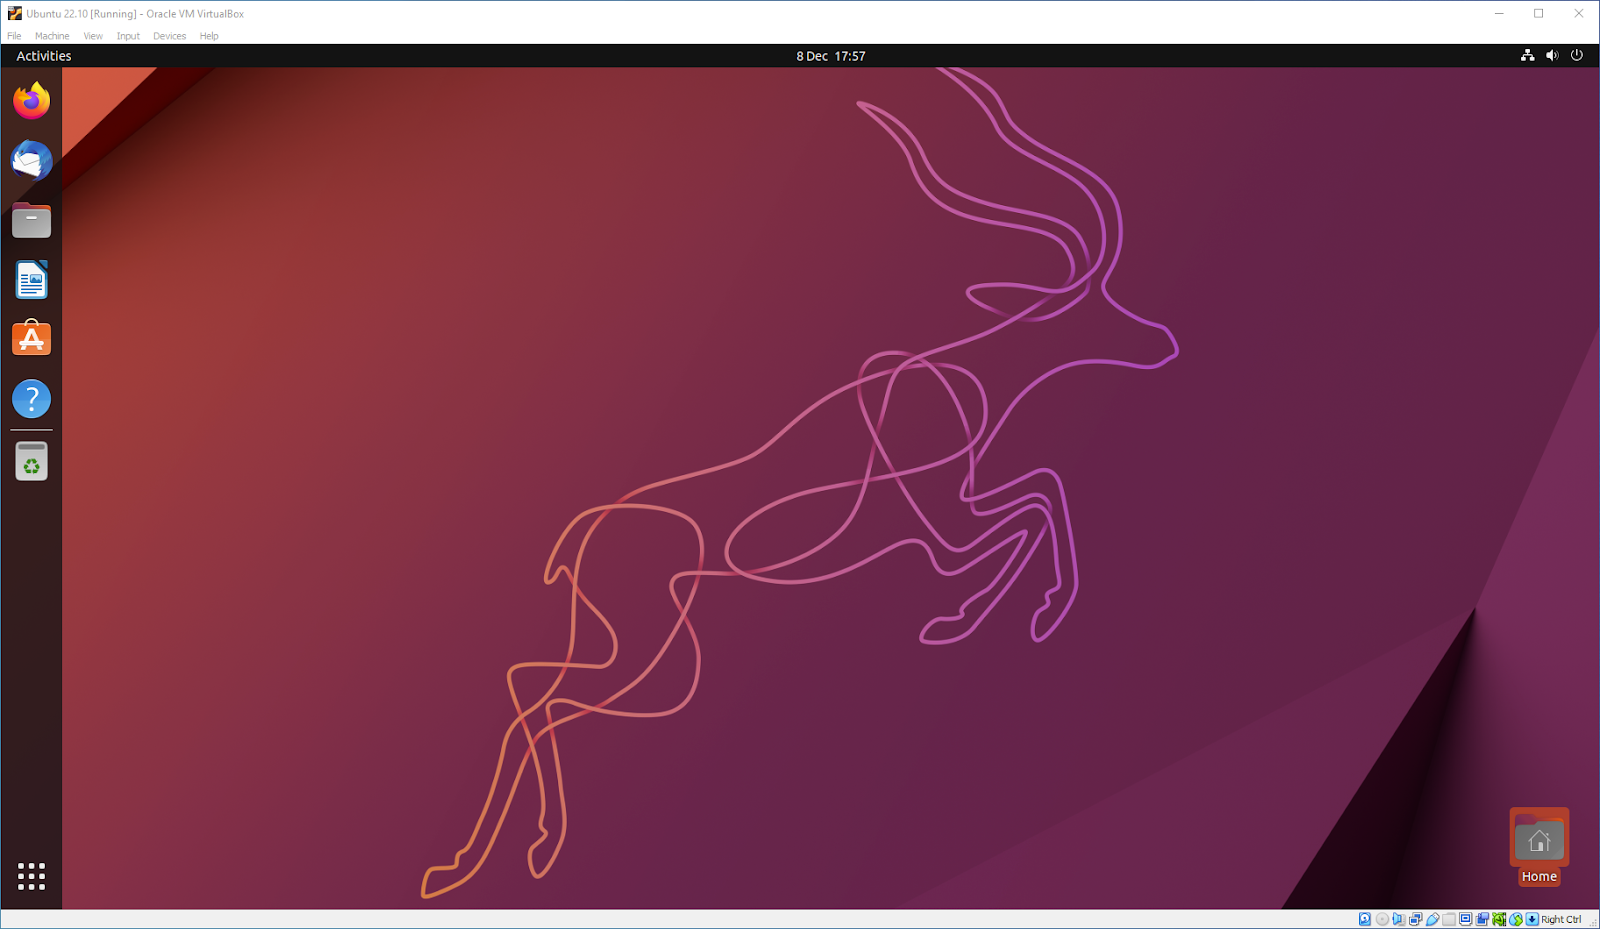
4. Explore Virtual Box
Enjoy your shiny new Ubuntu Desktop!
As always we recommend opening a terminal and running sudo apt update && sudo apt upgrade -y and then sudo snap refresh to get everything updated to the latest versions.
Once you’ve finished your session you can close your machine by clicking the X in the top right of the window and choosing whether to keep your machine frozen in its current state or shut it down completely.

As you can probably tell, there are tonnes of further configuration options available in VirtualBox and we’ve only scratched the surface.
VirtualBox allows you to create and configure multiple virtual machines, so don’t be afraid to create new instances of Ubuntu to try out different system and storage configurations to fine tune your performance.
Why not try following the tutorial above with one of the Ubuntu flavours!

5. Tell us your thoughts!
Thank you for following this tutorial, we’d love to hear how you got on.
Give us feedback in the Ubuntu Discourse if you have any issues.
To help us improve our tutorials, we’d love to hear more about you:
How will you use this tutorial?
Only read through it
Complete the exercise
What is your current level of experience?
Novice
Intermediate
Proficient
What operating system are you following this tutorial on?
Ubuntu
Other Linux OS
Windows
Mac OS
Was this tutorial useful?
Thank you for your feedback.
Если вы работаете на Windows версии ниже 10 или хотите получить изолированную операционную систему Linux, да ещё и с графическим окружением, то можно воспользоваться сторонним бесплатным программным продуктом под названием VirtualBox.
Общая информация о технологии виртуализации
Вам потребуется:
-
Инсталлятор Oracle VM VirtualBox для Windows Hosts
Ссылка на скачивание: Download Oracle VM VirtualBox -
Образ операционной системы Ubuntu Linux в формате ISO
Ссылка на скачивание: Download Ubuntu Desktop
Для начала необходимо установить и запустить приложение VirtualBox.

Нажимаем кнопку «Создать», выбираем из списка тип операционной системы «Linux», если нет своих предпочтений по дистрибутиву, то выбираем версию «Ubuntu» 32 или 64 битной архитектуры, а название можно ввести любое.

Указываем объём оперативной памяти выделенной под виртуальную систему. Рекомендованный объём составляет 1024 MB.

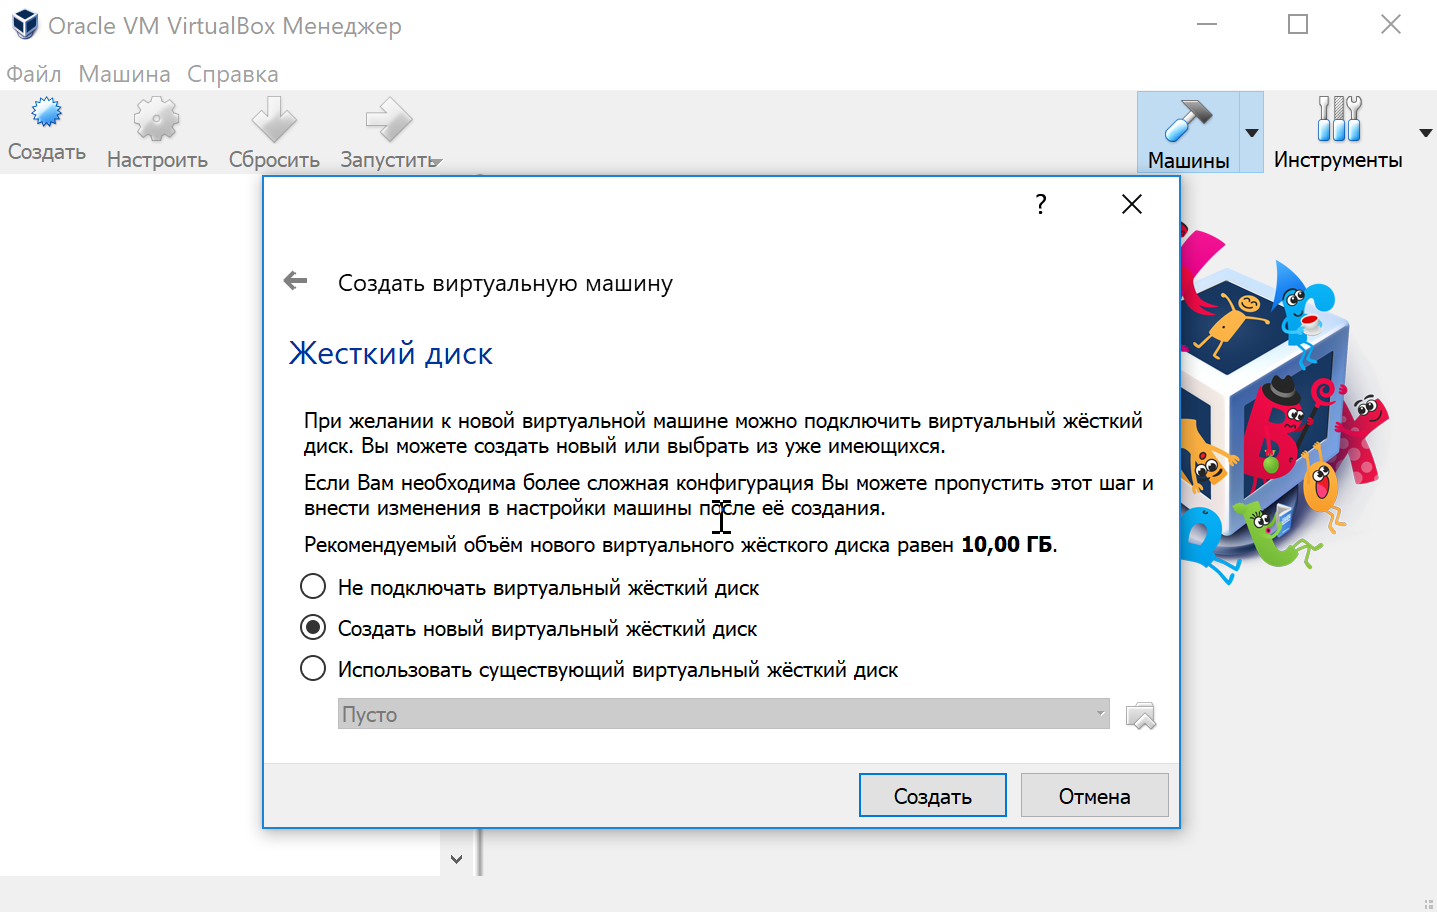
Указываем объём дискового пространства выделенного под виртуальную систему. Рекомендованный объём составляет 10 GB.
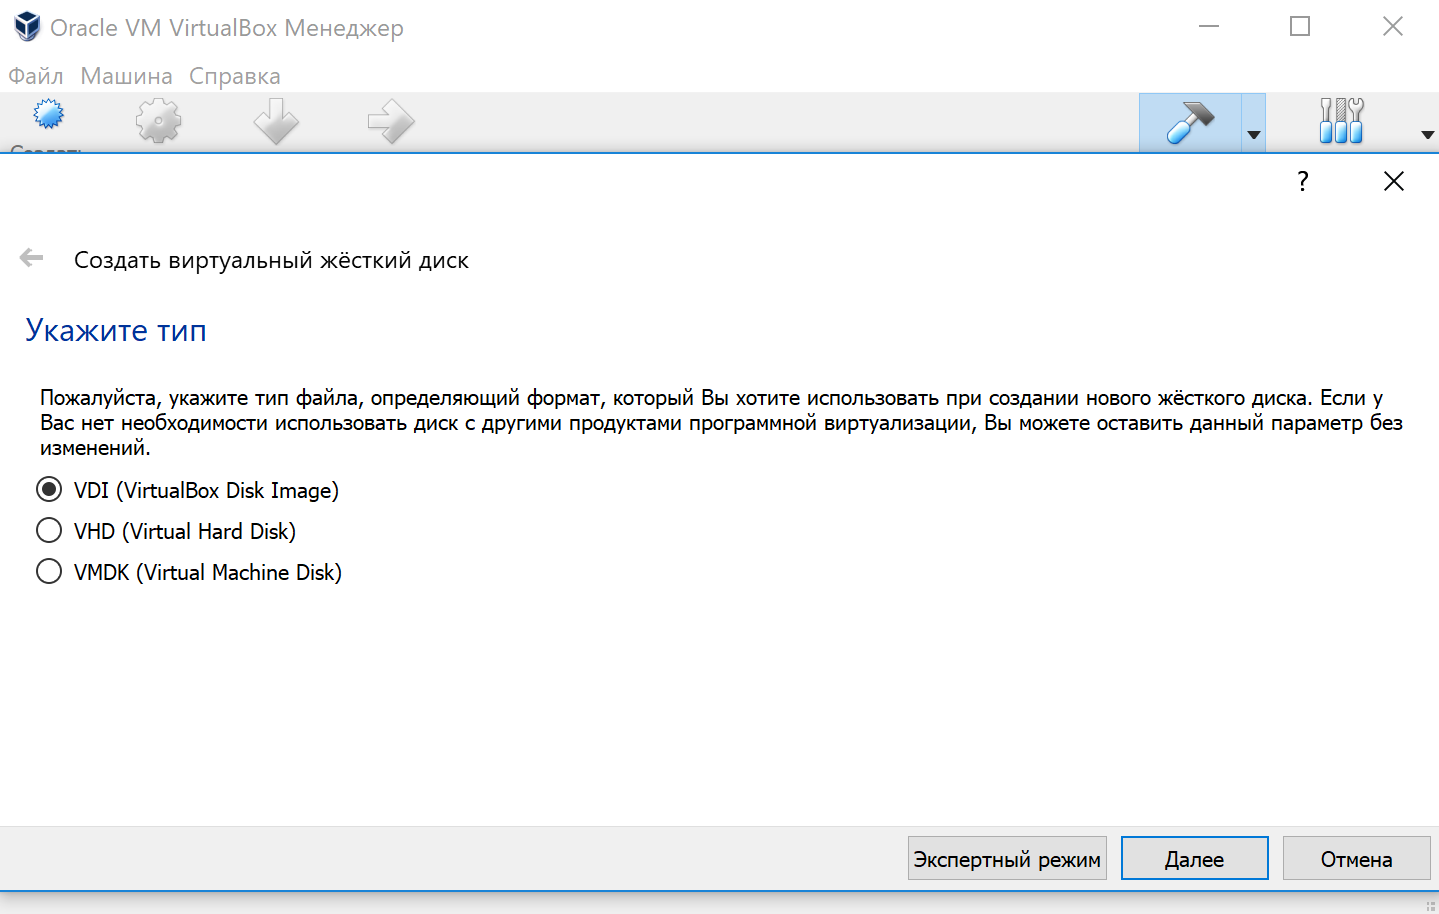
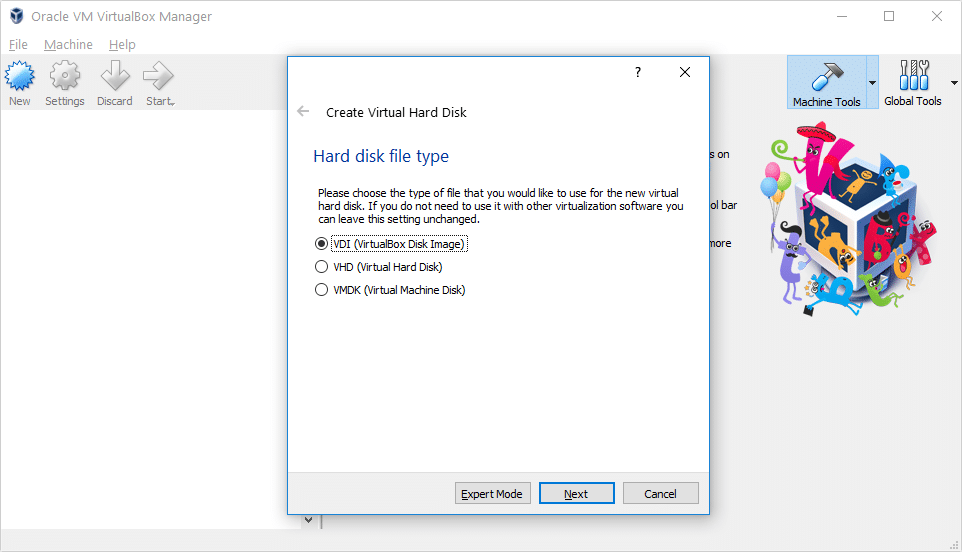
Тип виртуального жёсткого диска можно оставить как есть — VDI (VirtualBox Disk Image).
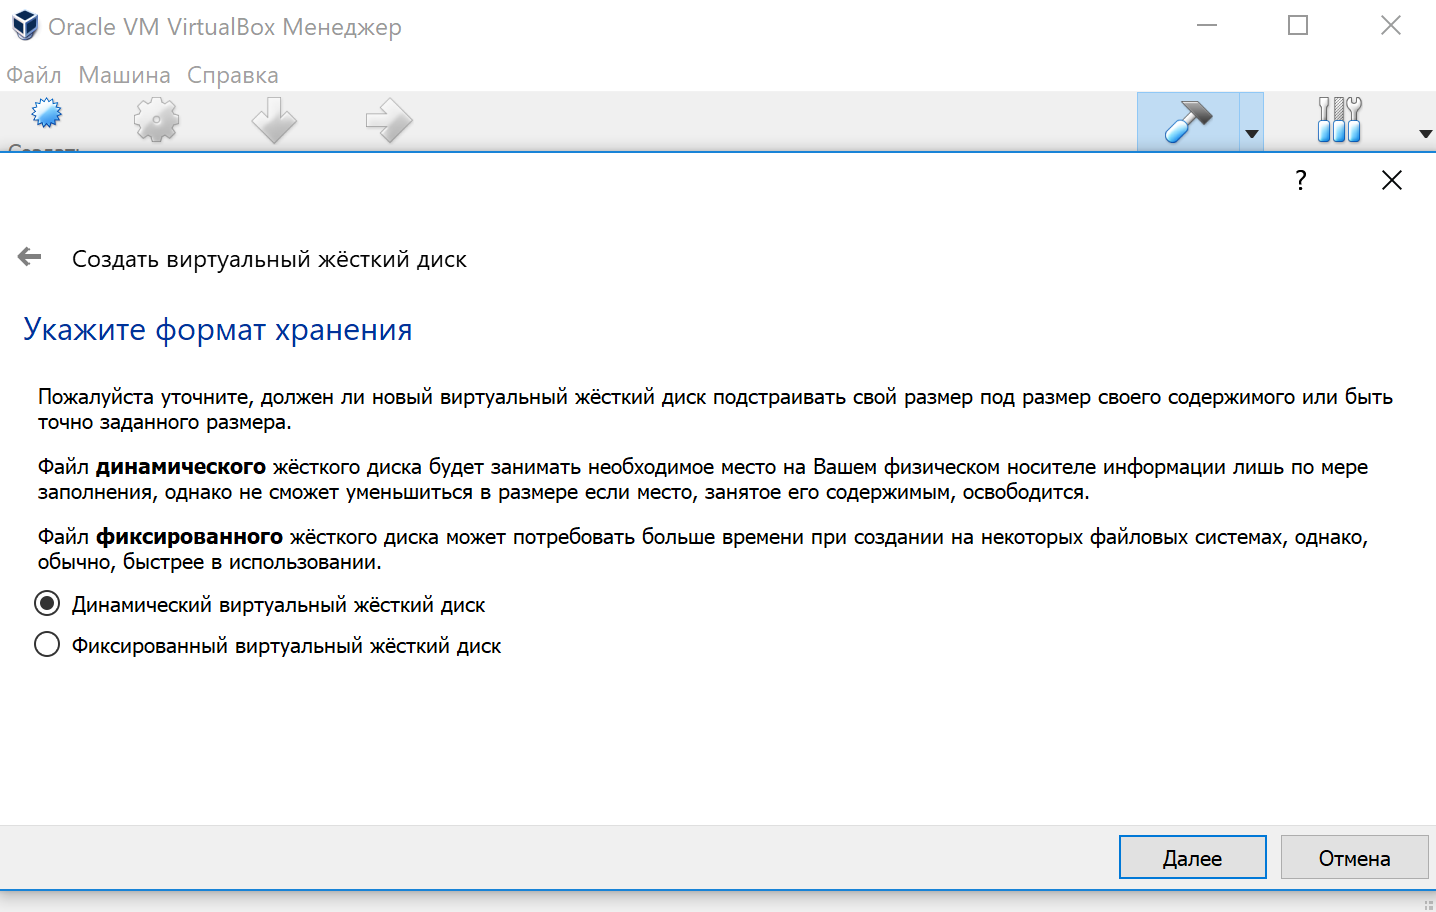
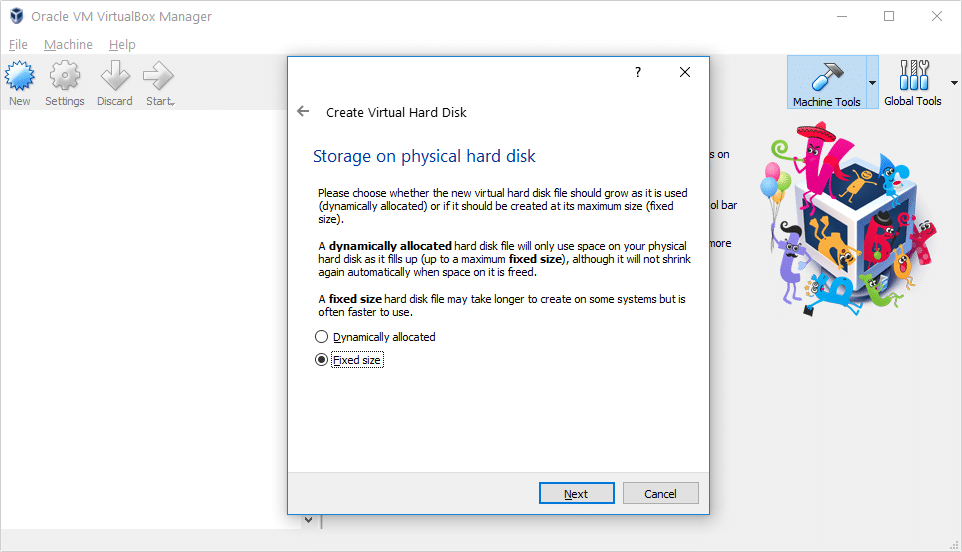
Формат хранения данных выберите исходя из личных предпочтений. Динамический виртуальный жёсткий диск растёт по мере заполнения, а фиксированный создаётся сразу того размера, который был указан на предыдущем шаге.
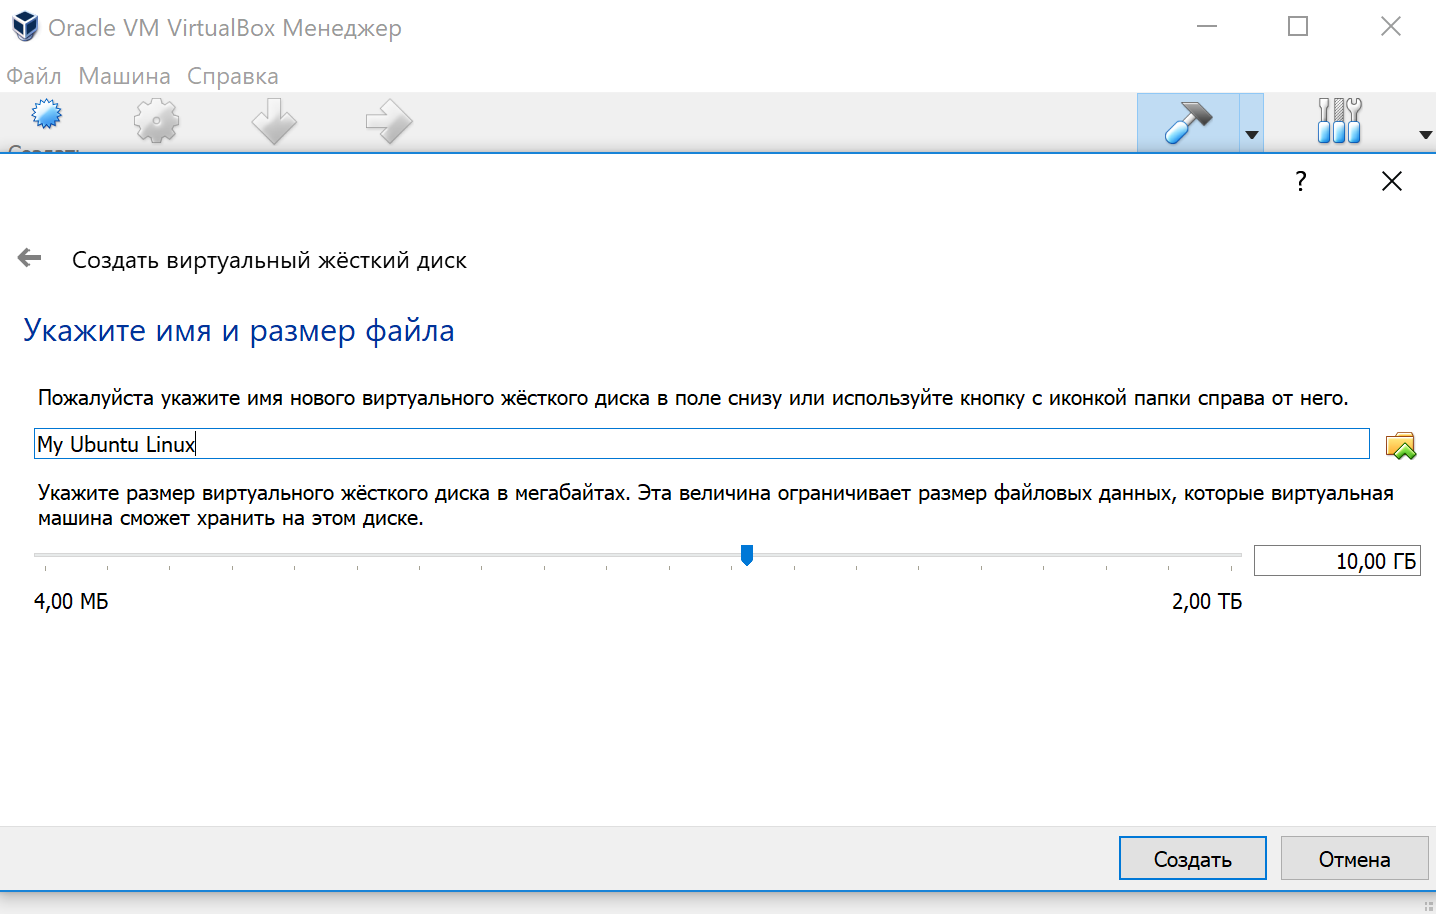
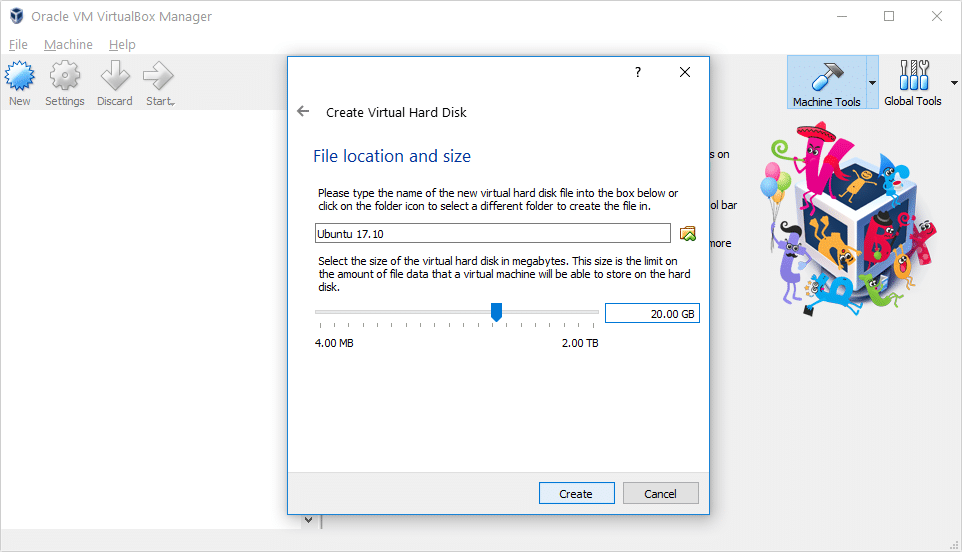
Имя и размер файла можно оставить без изменений и сразу нажать на кнопку «Создать».
По завершению у вас будет создана виртуальная машина, но она пока без операционной системы. Для того чтобы её установить, нужно скачать Ubuntu Linux (32-bit или 64-bit, в зависимости от того, что было выбрано на шаге, где мы указывали тип ОС).
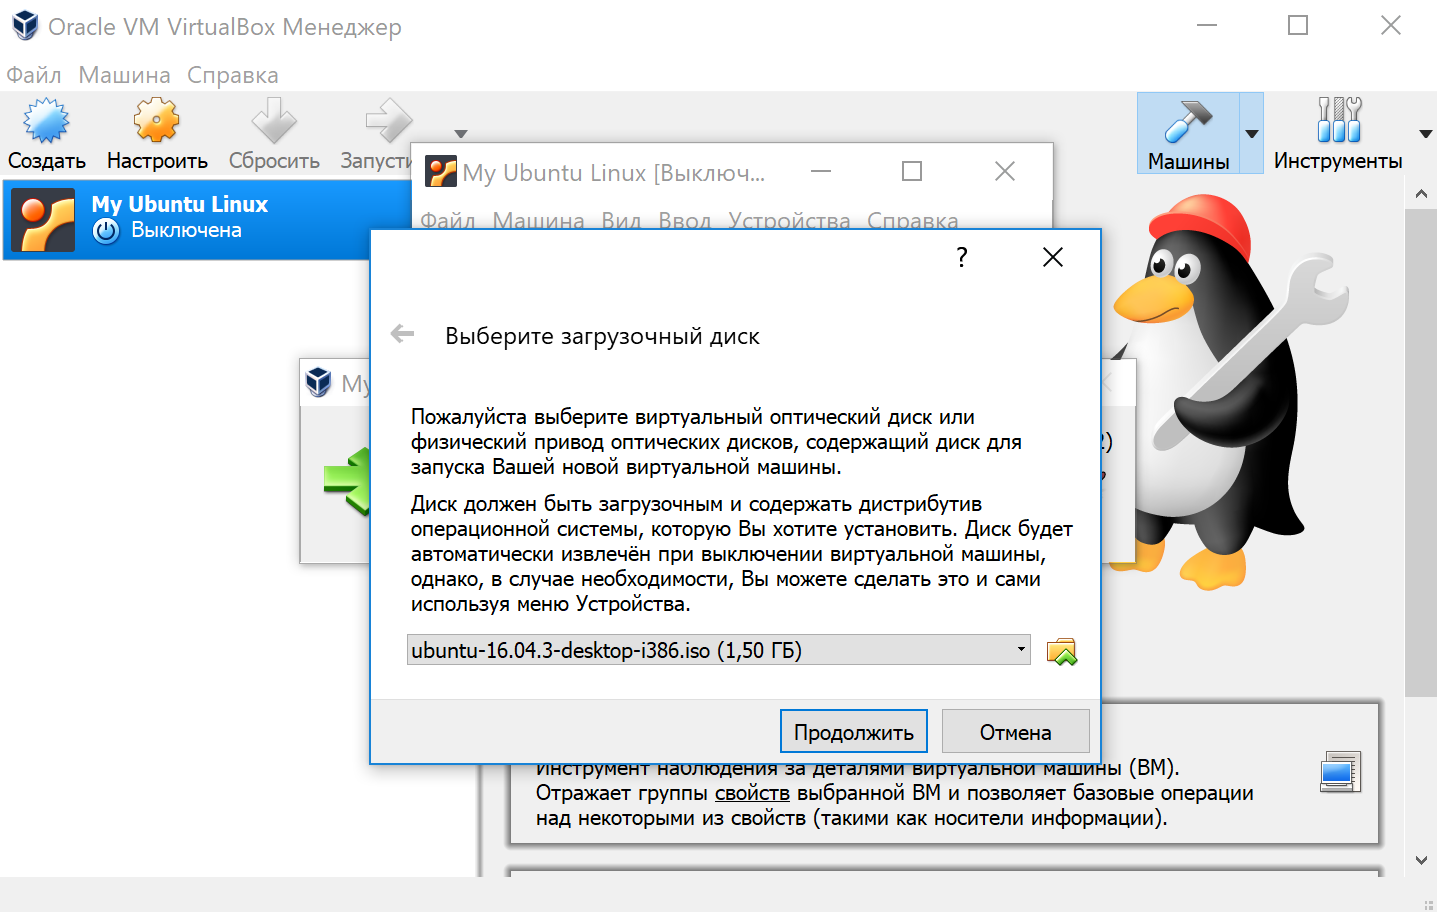
Нажатие на кнопку «Запустить» должно привести к появлению диалогового окна с предложением указать путь до скаченного ISO образа. Сделайте этого и нажмите кнопку «Продолжить»
Виртуальная машина автоматически будет выполнять часть процессов, но в некоторых операциях всё же потребуется участие пользователя.
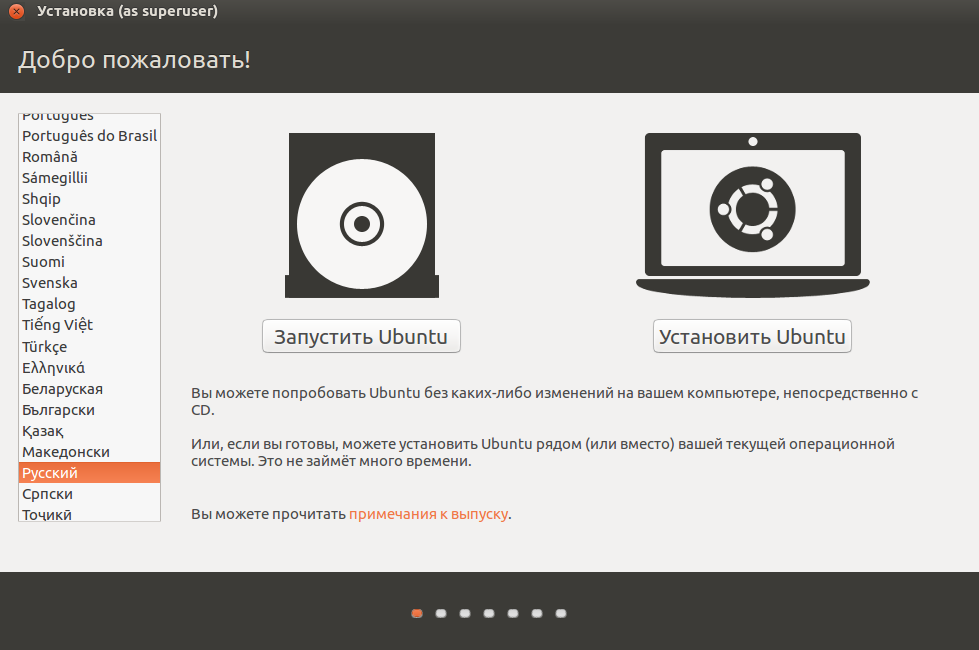
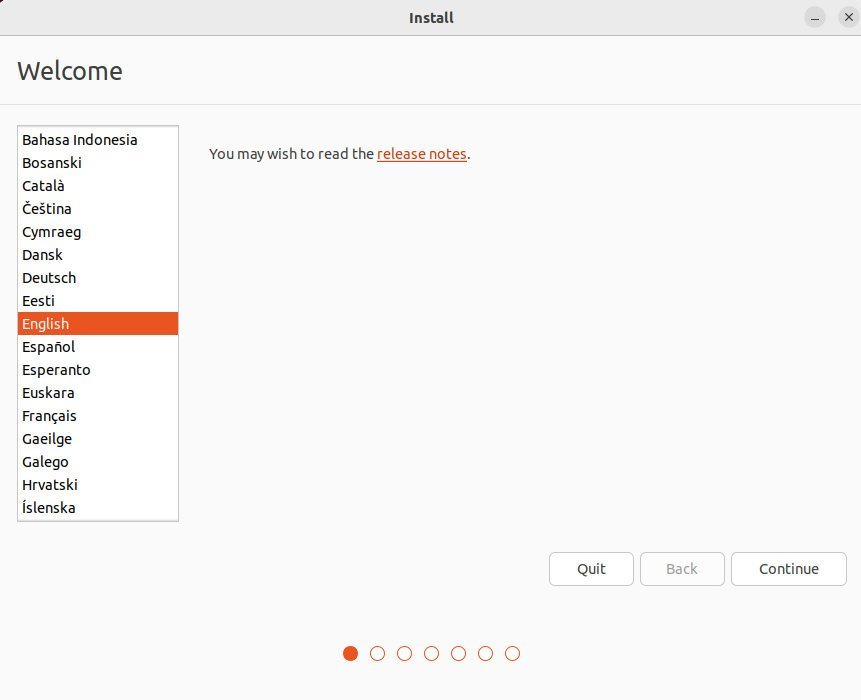
Выберите языковую поддержку в списке слева и нажмите «Установить Ubuntu».
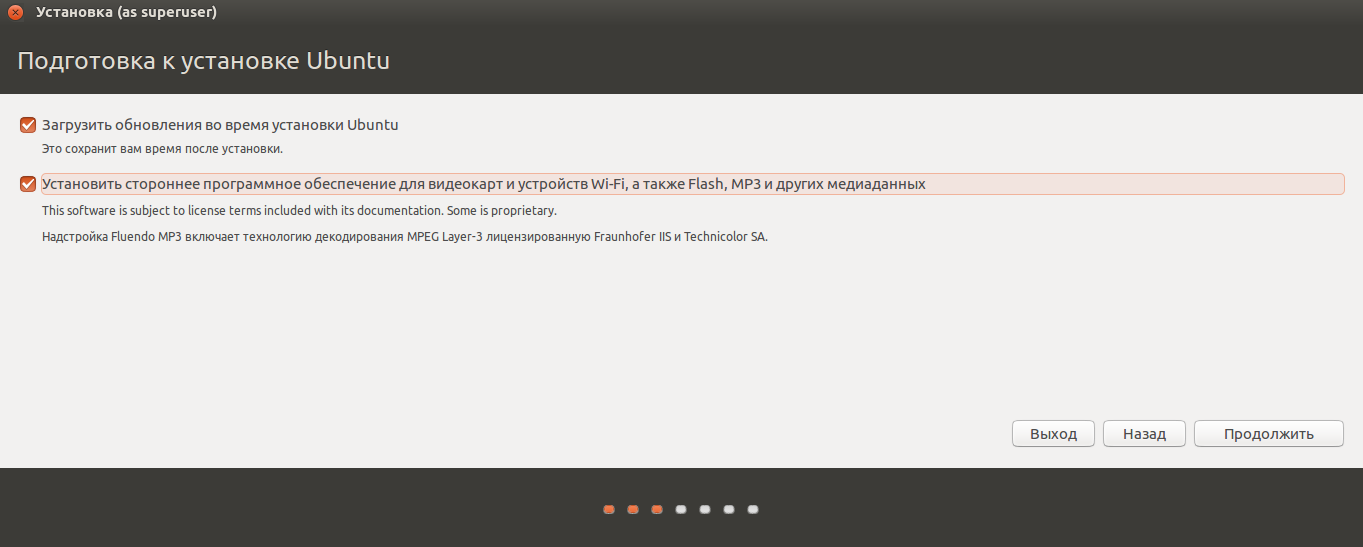
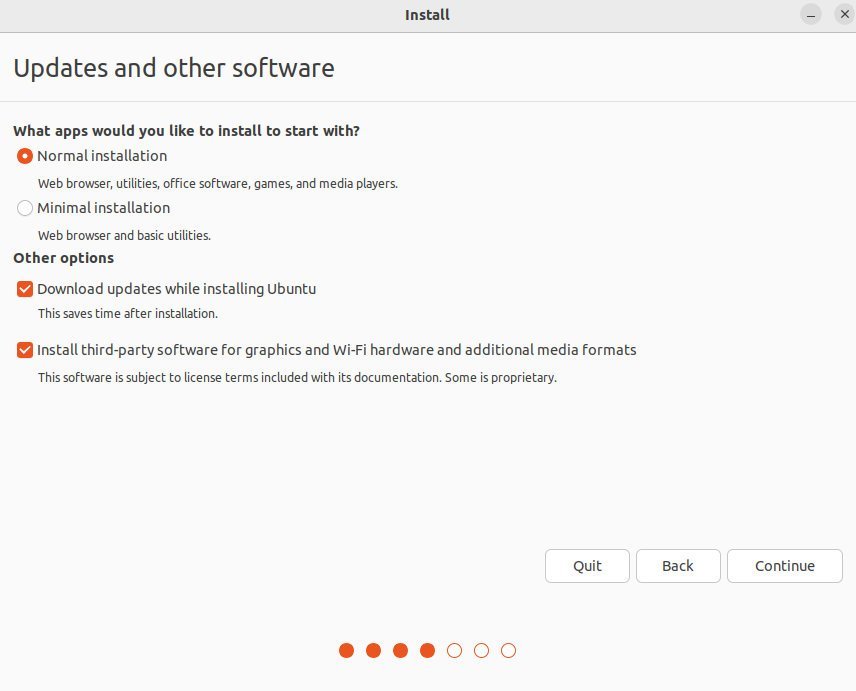
Можно загрузить обновления сразу на этапе установки.
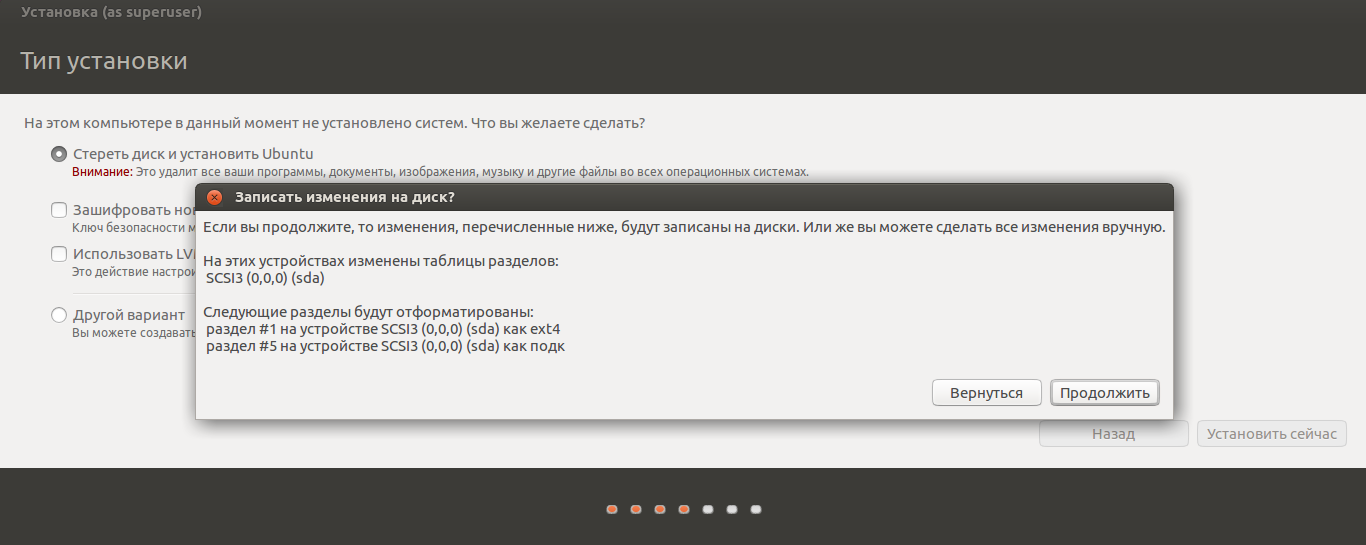
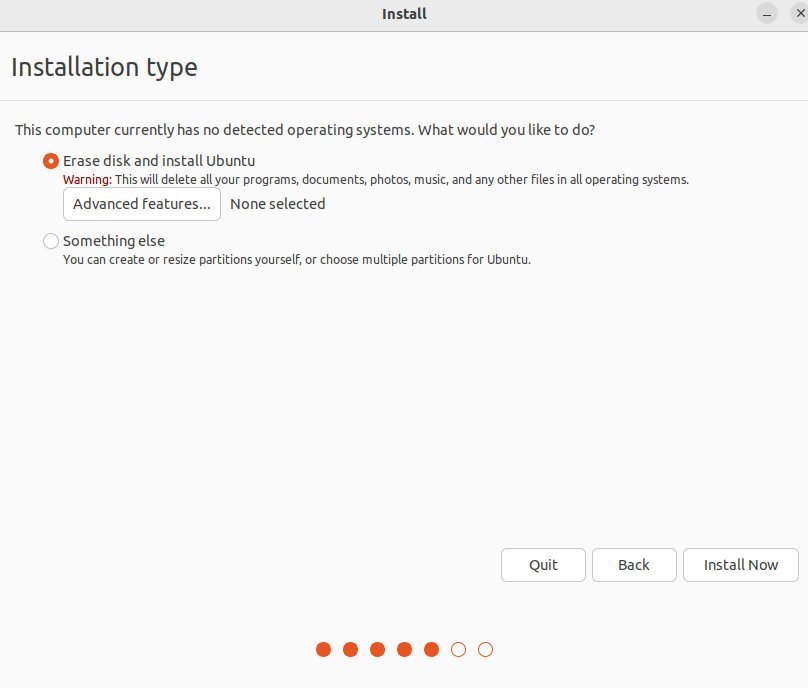
Без особых опасений выбираем пункт «Стереть диск и установить Ubuntu» и двигаемся дальше.
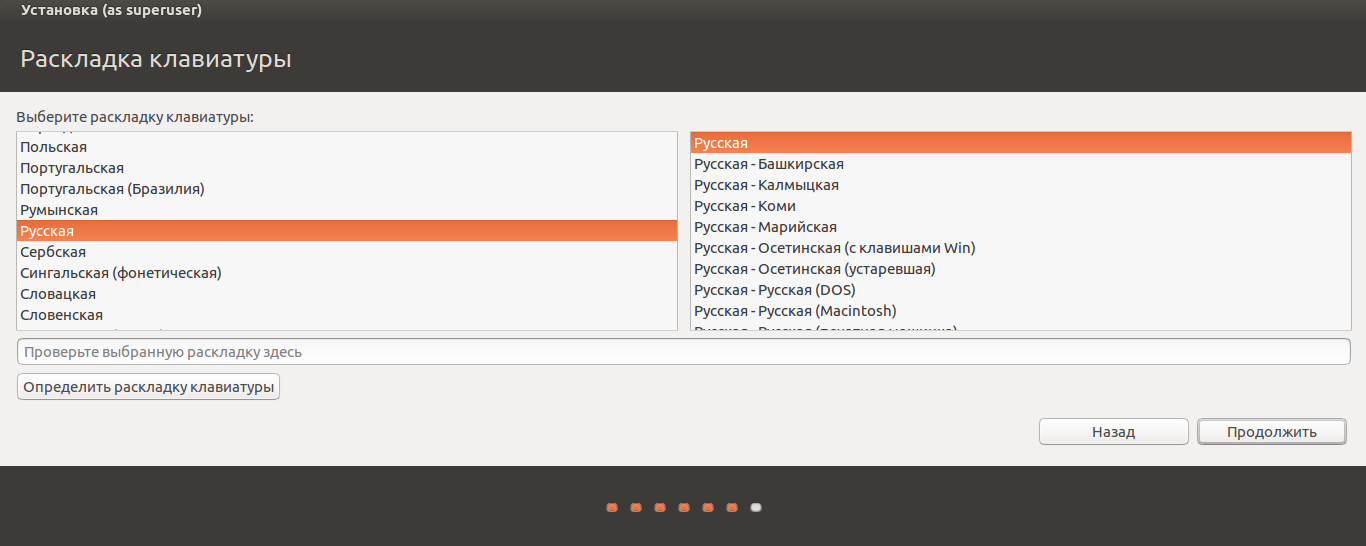
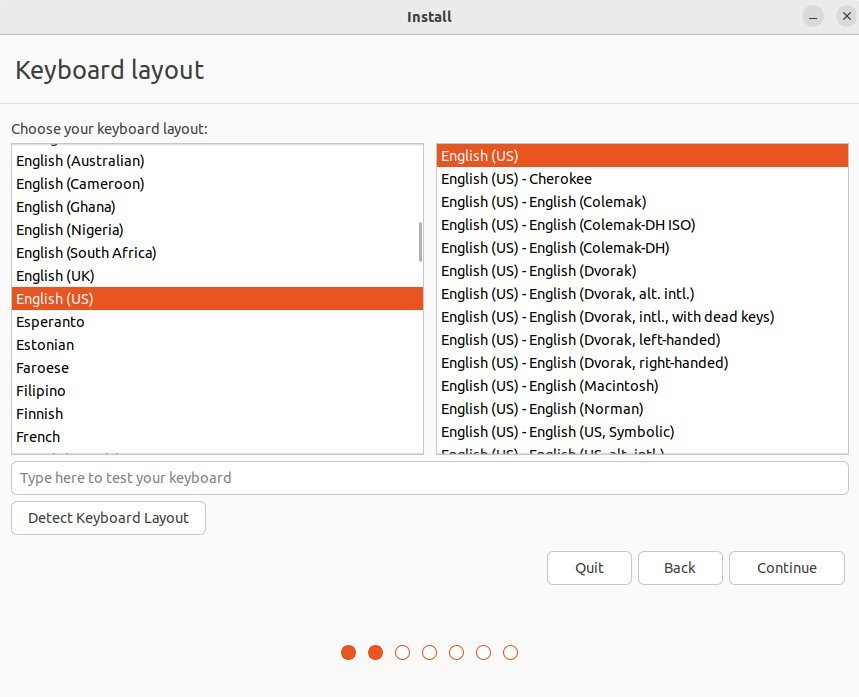
Если вы выбрали русский язык на первом этапе установки, то вам предложат русскую раскладку клавиатуры в качестве дополнительной.
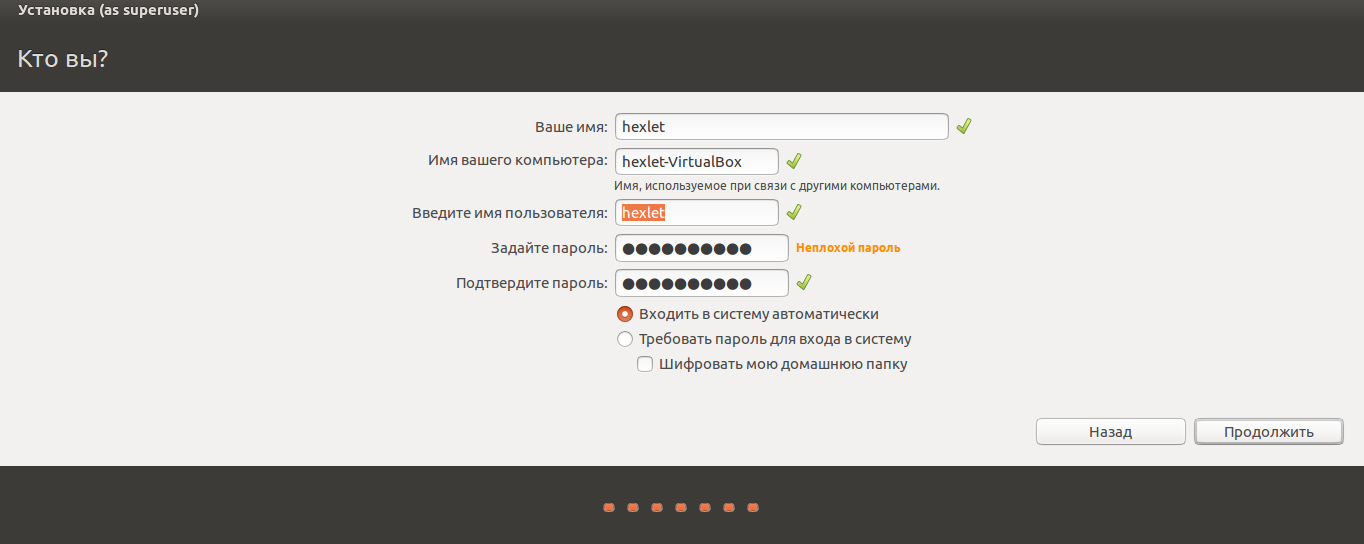
Заполните поля и выберите режим входа в систему.
Далее начнётся процедура разметки диска, переноса файлов, установка обновлений и другие процессы, которые не потребуют прямого участия пользователя.
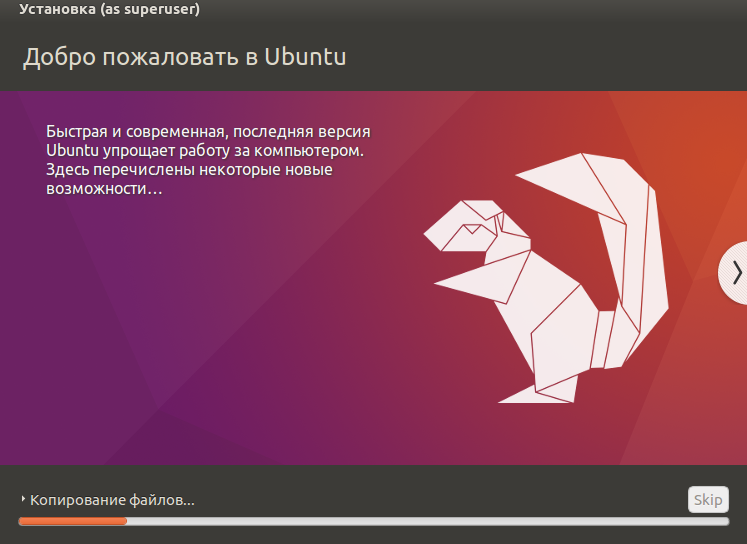
По завершению виртуальный компьютер перезагрузится и вы попадёте в уже установленную среду Ubuntu Linux.
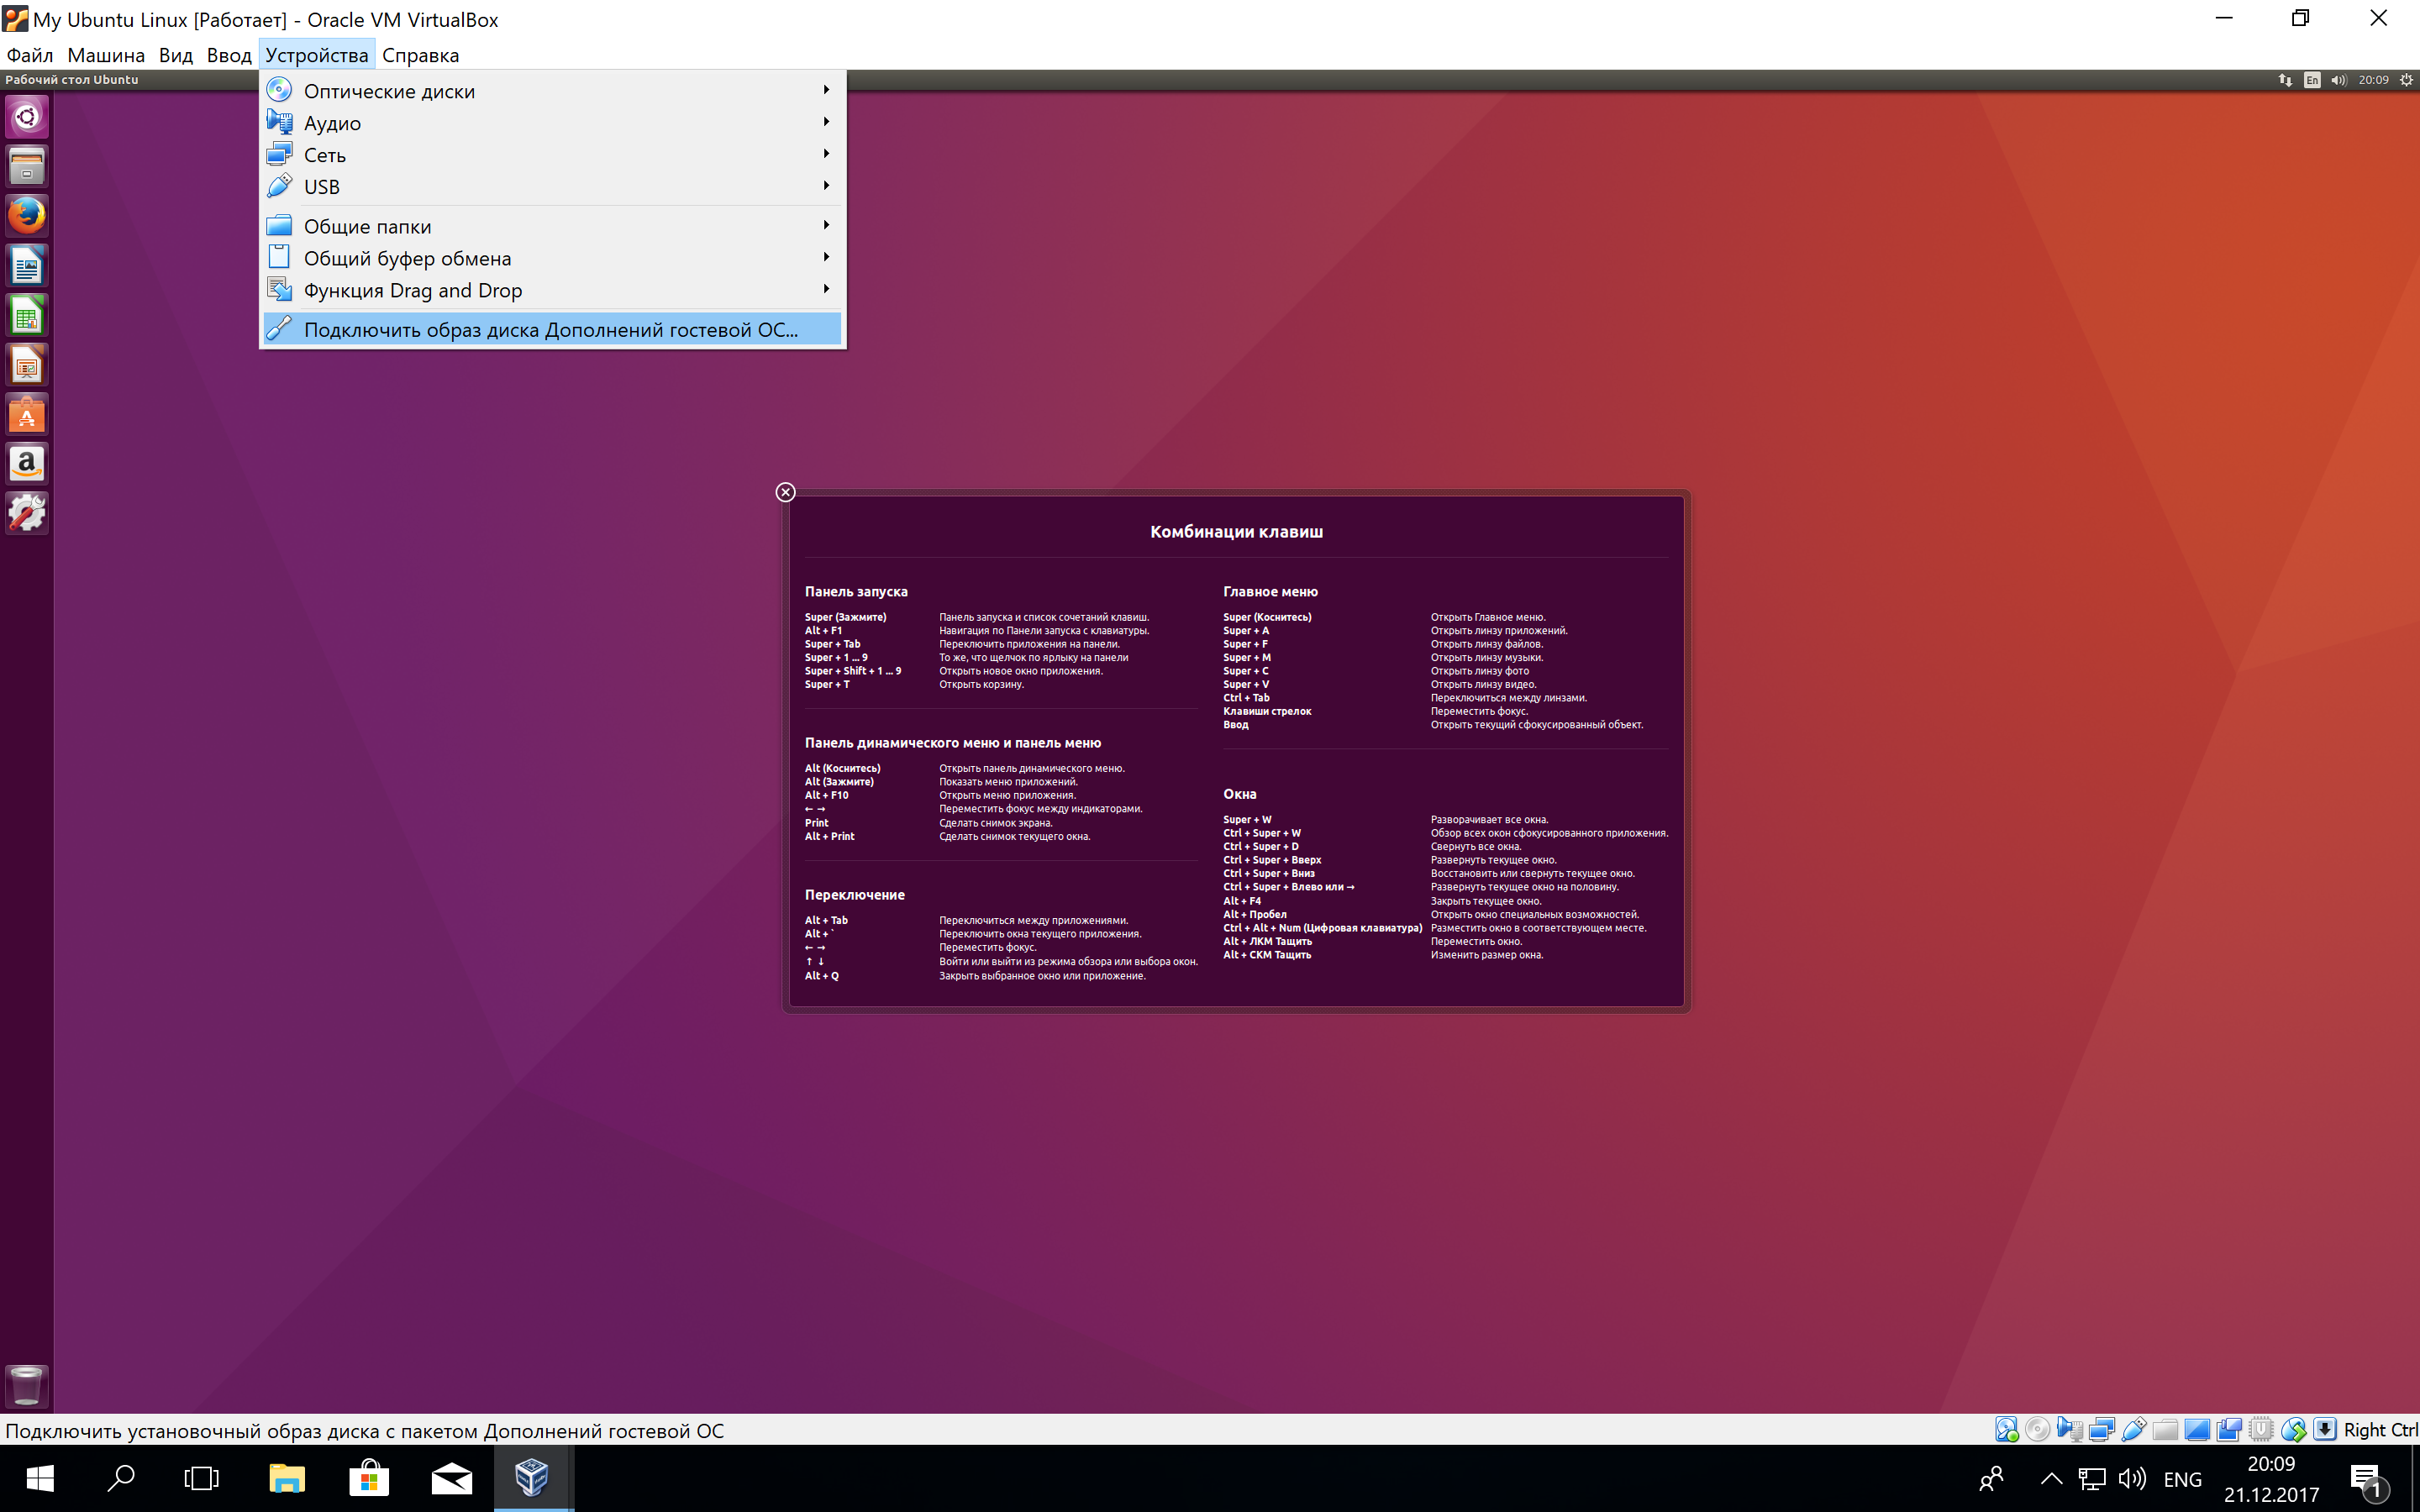
Но это ещё не всё. Весьма желательно установить так называемые «Дополнения гостевой ОС». Они содержат драйверы и прочие системные файлы, необходимые для наилучшей производительности и обеспечения дополнительных функциональных возможностей между виртуальной и гостевой операционными системами.
Выберите пункт меню «Устройства» программы VirtualBox, подпункт «Подключить образ диска Дополнений гостевой ОС…» и дождитесь предложение запустить приложение для автоматического запуска с виртуального привода.
Виртуальная ОС Ubuntu Linux установлена и готова к работе.
Ссылка на официальную документацию: Oracle VM VirtualBox User Manual
There are quite a few ways you can install Ubuntu on your Windows PC. You can always wipe it entirely and install Ubuntu, thus losing the Windows part of your PC. You can install Ubuntu in a dual boot set up that lets you choose between Windows or Ubuntu at the time of boot. Thanks to Microsoft’s efforts you can now also install Ubuntu on your Windows 10 PC via the Microsoft Store now. However, this will only install a command-line version with all the command line tools and utilities. Of course, Redmond won’t want to help you in switching the OS entirely. Another popular way of doing installing Ubuntu is in the form of an Ubuntu virtual machine.
There are some advantages and disadvantages to this method. First, if you install Ubuntu as a virtual machine, you don’t have to make any permanent changes to your computer. It is basically like installing a big AAA game, only a little more complicated. You can uninstall it just as easily as you uninstall another app. However, this means you’re running an operating system, within an operating system. Windows 10 is already using up your RAM and processor power, and when you run the Ubuntu virtual machine that too will need some resources and RAM. Therefore, this isn’t exactly an ideal solution if you want to use Ubuntu for some serious work. If your usage of Ubuntu is only very limited an Ubuntu virtual machine is perhaps the most comfortable choice.
Requirements
We’ll try to make the process of installing an Ubuntu virtual machine a little easier for you. But there are a few things you will require before you can start.
- Virtual machines can be created using software tools designed for this. Some of the popular options include VMware and Virtual Box. In this tutorial, we will be using Virtual Box because it’s free and open-source just like Ubuntu. Also, it’s better. You can download it using the link in the Downloads section below.
- You’ll of course also need a copy of Ubuntu to install Ubuntu. Ubuntu is available to download for free on its official website. You can download it using the link in the Downloads section below.
Downloads
- Virtual Box (Select Windows hosts)
- Ubuntu ISO (Select any version of Ubuntu you want. We will be using Ubuntu 17.10 in this tutorial, however, the steps apply to any version of Ubuntu)
There are other ways to enjoy dual OS on your Windows PC. One of them is by creating a bootable Ubuntu flash drive and you can learn how to do that by heading over to our tutorial.
Install Virtual Box on your PC. This isn’t exactly a difficult process. Just double-click on the downloaded EXE file and click on Next and Install wherever asked.
Create virtual machine
- Once you have it installed, start Virtual Box and click on the icon that has New under it.

- Virtual Box will already know that you want to install 64-bit Ubuntu Linux because it’s just that good. Give your machine a name and click Next.
- You’ll now be asked to allocate RAM to the machine. Depending on how much RAM you have you can give it anywhere between 2 GB to 4 GB or even 6 GB. Although, 4GB would be more than sufficient. make sure you don’t end up allocating all your RAM because Windows needs some of it too. Click Next when you’ve allocated the RAM.
- Next, you will be asked which method to use to provide a hard disk to the Ubuntu virtual machine. Create a virtual hard disk now is pre-selected, so simply click Create.
- Since you won’t be using this Virtual Machine with any other software select VDI in the next step and click Next.
- Now you’ll need to select whether the hard disk is Dynamic allocated or given a Fixed size. What these mean is explained right there and either of the options works fine.
- The 10 GB size recommended by Virtual Box is sufficient, but not enough. If you have enough space available, give it at least 20GB. and click Create. Creating the virtual hard disk can take some time depending on your choices and your hardware.

Install Ubuntu
- Once the virtual machine is created, it is time to load up and install Ubuntu on it. To do this, either double-click on the newly created machine or select it and click the Start button.

- Click on the folder icon and select the downloaded Ubuntu ISO image then click Start.
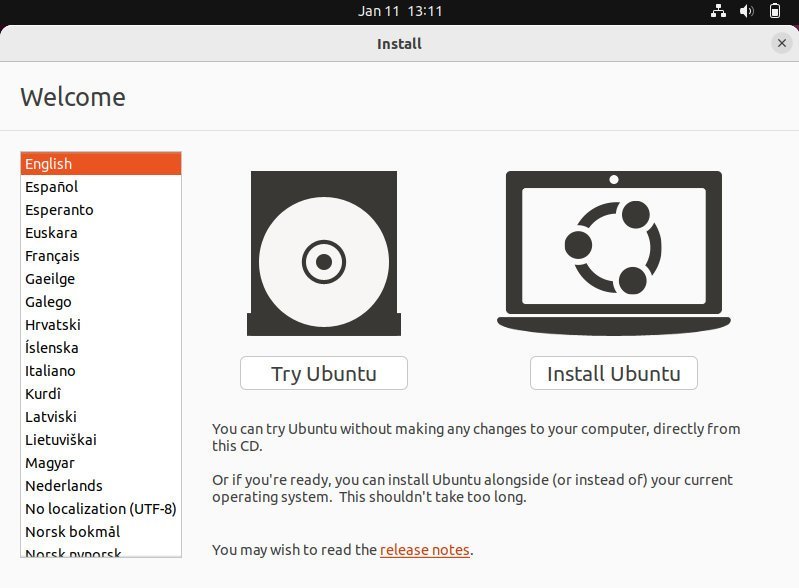
- The machine will boot up Ubuntu normally as it would boot up on any PC and you can then select whether to Try Ubuntu or Install Ubuntu. Select Install Ubuntu.
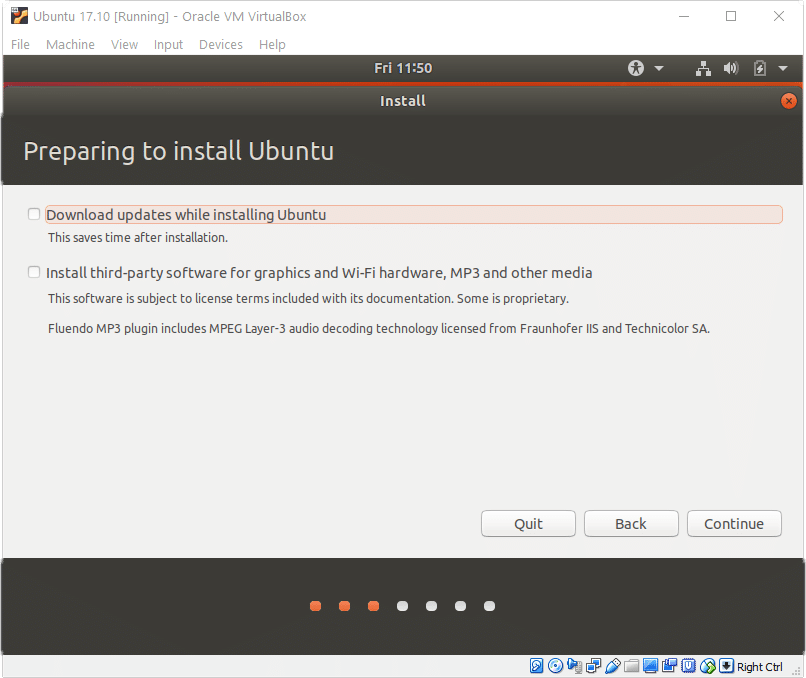
- Read the available choices on the next page and check the ones you want, then click Continue.

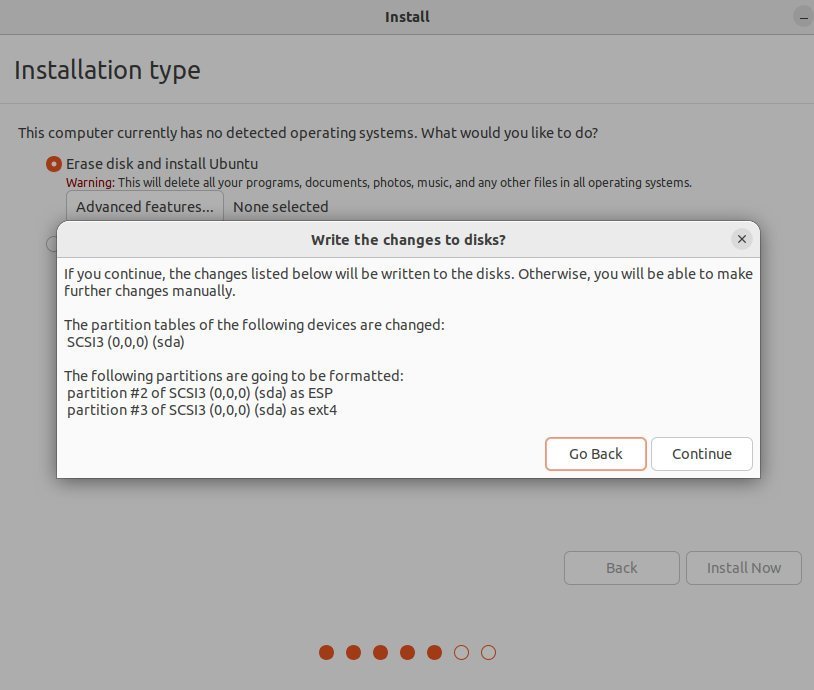
- Select Erase disk and install Ubuntu in the next step This is safe for the Virtual Machine and will not really wipe anything. Click Install Now and Continue.
- From here on, the steps are quite obvious and self-explanatory and all you have to do is make some choices and click Continue.
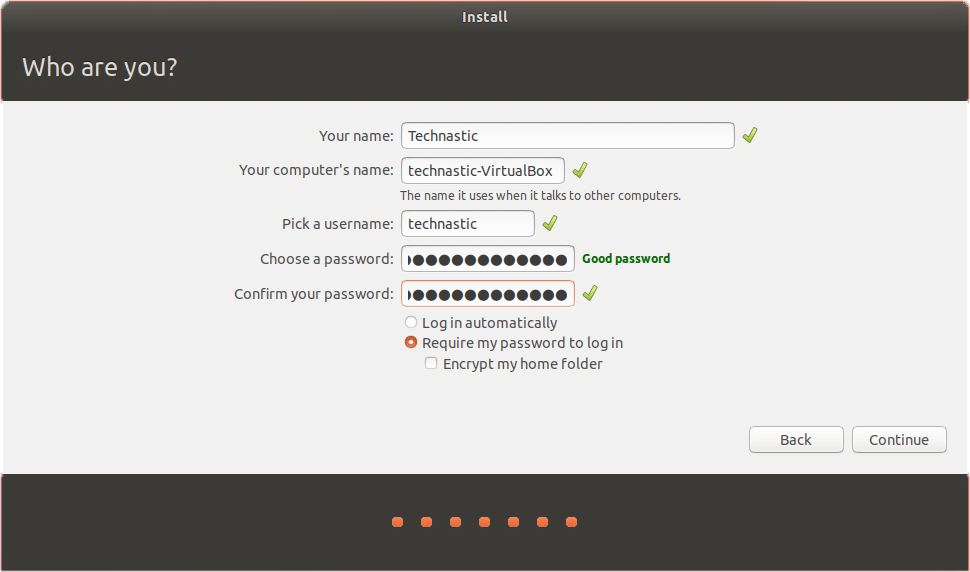
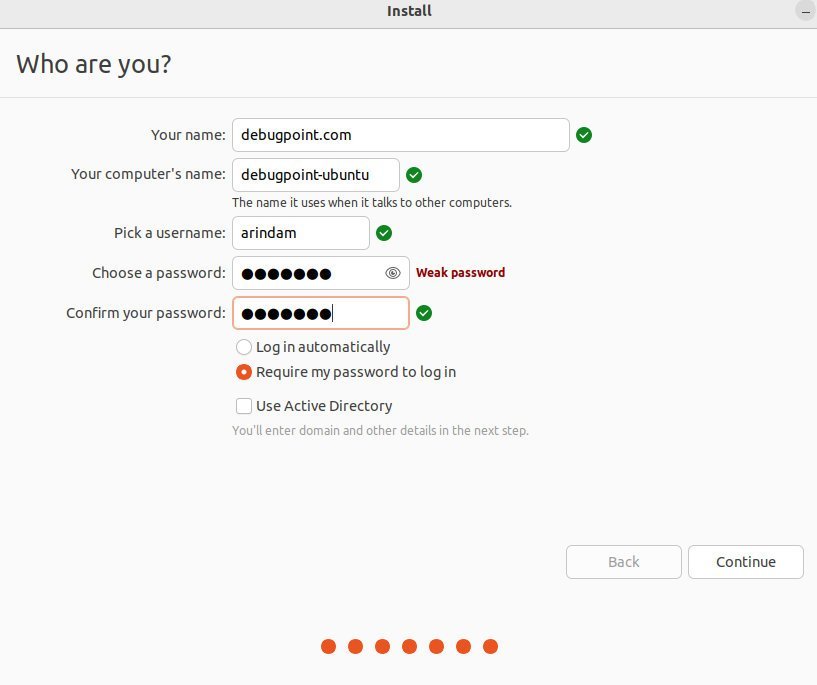
- Provide a username and password in the last step and click Continue again. Ubuntu will now be installed on the virtual machine and it can take a while, again, depending on your choices and your hardware.

- Click Restart Now when the installation is complete. If the machine does not automatically restart, just close it and start it again.


Read Next: How to Run Windows Programs on Mac and Linux
This tutorial will guide you through the easiest steps to install an Ubuntu desktop on Windows using Oracle VirtualBox.
VirtualBox is a popular virtualization software by Oracle which is available for Linux, mac and Windows systems. It is flexible and brings many features to take advantage of your virtualization. It’s the best and easy way to experience Ubuntu in Windows without installing it. However, I strongly recommend installing Ubuntu physically as a dual-boot to enjoy its advantage.
The steps outlined below assume that you are installing Ubuntu for the first time in Windows. Hence the steps are a little descriptive and a bit lengthy. Furthermore, the following steps should work for Windows 10 and Windows 11 as host machines.
What you’ll need
- A PC with internet access
- Ubuntu Linux ISO image file for installation
- Windows system with VirtualBox installed
Download and install the necessary items
- Download the Ubuntu Linux desktop ISO image file from the following link.
- Also, download the Oracle VirtualBox installer from the official website below.

How to install and configure VirtualBox
VirtualBox in Windows requires Microsoft Visual C++ 2019 Redistributable package. And you have to install it first. Download the package (under X64 architecture) from the below link:


- After the above installation is complete, download the latest Python package from the below link. Python bindings are also a dependency for VirtualBox installation on Windows.
- Then, launch the VirtualBox installation and follow the onscreen instructions to install it.
- After installation, restart your Windows system again.
Set up a virtual machine for Ubuntu
- Launch VirtualBox from the start menu.

- On the VirtualBox window toolbar, click New.
- On the Create VirtualBox window, give the name of your virtual machine. It can be any name which identifies this version of Ubuntu.
- Keep the Folder Name unchanged. This is the path where the virtual machine file will be created.
- In the ISO Image field, browse the Ubuntu ISO file you downloaded.
- And select the Unattended installation. If you un-select this, a default user id (vboxuser) and password will be created in your virtual machine. Let’s not follow it for now.


- Click on Hardware and select the RAM you want for your virtual box. A thumb rule is that your VM’s RAM size should be less than your physical RAM in the host system. I would recommend using 2 GB to 4 GB for a virtual machine for an 8 GB RAM system. For 4 GB RAM, use the slider (or type in) to make it 4096 MB (i.e. 4*1024).
- Choose processor as 2 or 4.
- Click on the Hard Disk section, and keep the file location unchanged.
- Give a minimum of 20GB to 25GB for Ubuntu installation.
- The hard disk file type value keeps as VDI (VirtualBox Disk Image)
- Do not select the pre-allocate full size.
- And finally, click on Finish.


- You should see a new entry at the left panel of VirtualBox with an Ubuntu 22.04 entry (the name which you gave above).
- Select the entry and click on Start to boot into the virtual machine

Install Ubuntu using VirtualBox
- After a successful boot, you should see the following screen, which shows various options for installing Ubuntu. Select Try or install Ubuntu.
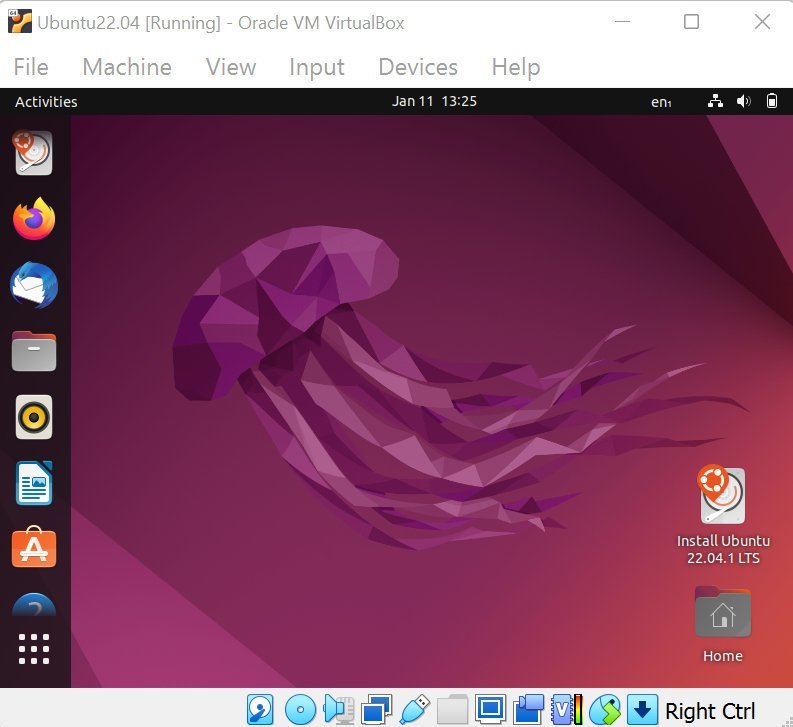
- In the Welcome screen, click on Try Ubuntu. And after a few moments, you should see the following Ubuntu LIVE desktop. If you want to change the resolution, right-click on the desktop and select Display settings. And change the resolution to 1400×900.
- On the desktop, double-click on “Install Ubuntu…”.
- In the next set of screens, select Language and Keyboard Layout as your needs.
- The Install screen provides you with the type of installation you need. Select Normal Installation, and select both options under Other options.
- Since you are installing in the virtual disk space, i.e. which is just a file, you can safely choose the “Erase disk and install Ubuntu” option.
- Hit Install Now and Continue.
- Then select region, add name, user and password. This will be your user id and password to log on to Ubuntu after installation.
- Hit continue to start the installation. Wait until it finishes.

Click on Restart Now after the installation is complete. Wait for a few seconds and you should see a login screen. Use the user id and password to log in. And you should see Ubuntu desktop is running inside VirtualBox as VM in Windows.

Post-install configuration and tips (optional)
Install Guest Additions
After the successful installation, you should install the VirtualBox guest additions for Windows Host and Ubuntu Guest. The guest addition is a set of packages you need to install inside the guest VM (i.e. Ubuntu) to enable shared folders, bi-directional copy/paste, automatic resolution change, and many such features.
To install it, boot into Ubuntu. From the VirtualBox menu, select Devices > Insert Guest Additions CD Image. The necessary packages will be mounted inside Ubuntu.

Open the file manager and open the mounted folder as shown below. And then right-click > select open in terminal.
Then run the following command:
sudo ./VBoxLinuxAdditions.run


After the above command is complete, restart Ubuntu VM.
Enable Copy and paste between Windows and Ubuntu
- To enable the copy and paste between Windows and Ubuntu systems, select
Devices > Shared Clipboard > Bi-directionalfrom the menu.

Shutting down Ubuntu VM
- Ideally, you should shut down a VM from its own power off menu. However, you can also shut down from the main VirtualBox window. Right-click on the VM name and select
Close > Poweroff.

How to delete Ubuntu and remove all data
- If you want to delete the Virtual machine entirely (.e.g. Ubuntu) and its data, select
Removeanddelete all files.


Close notes
In this tutorial, you learned the easiest way to install Ubuntu on Windows (10 or 11) using VirtualBox. Also, you learned several post-install basic steps to configure the Ubuntu VM. You can use the above steps for any other Linux distributions in VirtualBox.
Feel free to comment below if you have any problems or questions.
Introduction
Since the introduction of Windows 10 Fall Creators Update, it’s possible to run Ubuntu natively on Windows 10. However, there are limitations to running Ubuntu natively on Windows, such as being restricted to using the command-line interface.
Hyper-V offers a built-in way of creating and managing virtual machines on Windows 10. It allows you to install a distribution of Linux, including Ubuntu.
In this tutorial, we will go over the step-by-step process of installing Ubuntu 20.04 on a virtual machine using Hyper-V on Windows 10.
Prerequisites
- A system running Windows 10
- An account with administrator-level privileges
Hyper-V Ubuntu Installation Guide
Following the steps outlined below, you can enable Hyper-V and start using it to create an Ubuntu virtual machine:
STEP 1: Enable Virtualization in BIOS
Using Hyper-V requires virtualization enabled in the motherboard’s BIOS. The exact steps of this process will vary depending on the model of your motherboard.
1. Open the BIOS by rebooting your computer and pressing the BIOS button (F1, F2, F10, F12, or Delete, depending on the motherboard model) when prompted.
2. The virtualization settings are located under the CPU or Advanced BIOS Settings category, depending on your system.
Note: The virtualization settings have different names on different systems. Look for items like Hyper-V, SVM, Vanderpool, VT-X, Intel Virtualization Technology, or AMD-V.
3. Once you enable the appropriate settings, use the Save and Exit option to confirm the changes.
STEP 2: Enable Hyper-V
Before setting up the virtual machine, you need to enable Hyper-V in Windows settings:
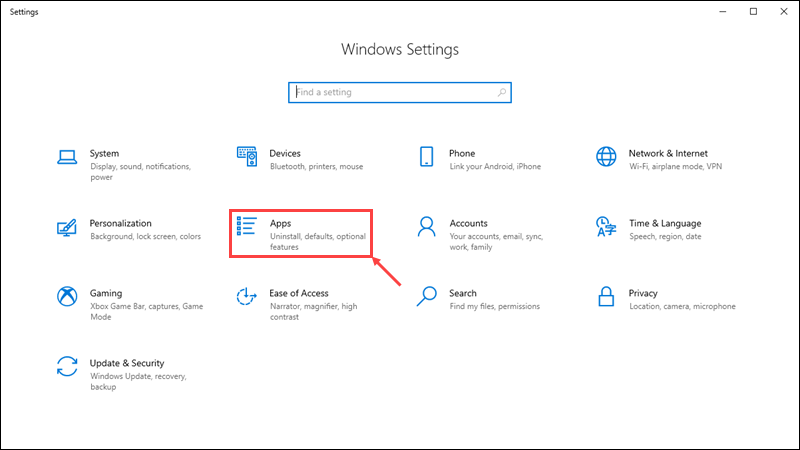
1. Open the Windows Start menu, and select the Settings window.
2. Click the Apps tile to open application settings.
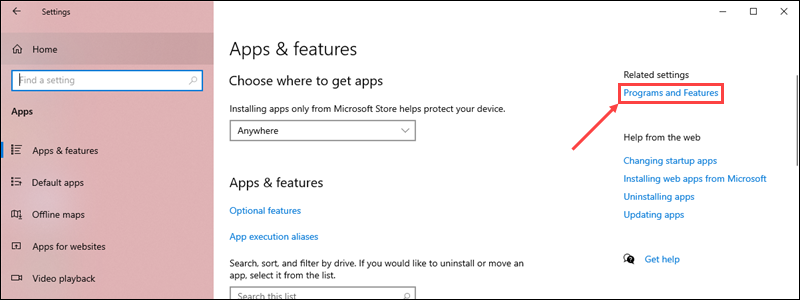
3. On the right-hand side, click the Programs and Features link.
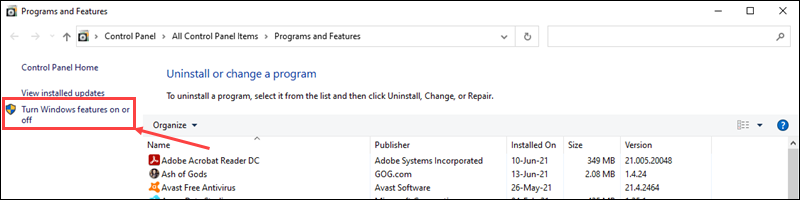
4. In the Programs and Features window, click the Turn Windows features on or off link on the left-hand side.
5. Scroll down and check the Hyper-V option, along with the Hyper-V Management Tools and Hyper-V Platform sub-options.
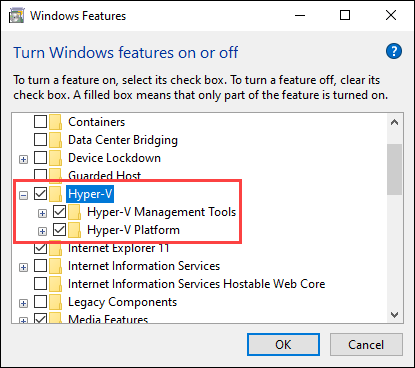
6. Click OK to confirm the changes.
7. Restart your computer.
STEP 3: Create a Virtual Switch
After enabling Hyper-V, create a virtual network switch for the virtual machine to use:
1. In the Start menu, navigate to the Windows Administrative Tools folder and open Hyper-V Manager.
2. Right-click on the name of your system on the left-hand side of the Hyper-V Manager window. Select the Virtual Switch Manager option from the drop-down menu.

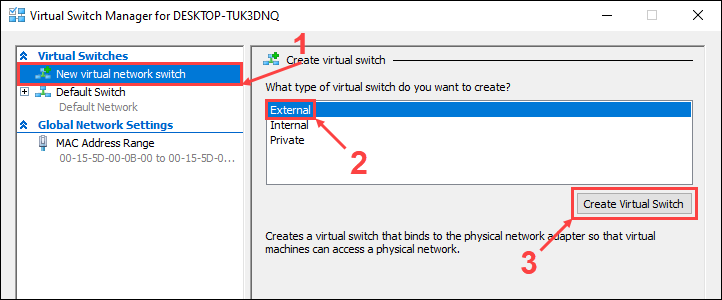
3. In the Virtual Switch Manager window, select the New virtual network switch option on the left-hand side. Set the virtual switch type to External and click Create Virtual Switch.
4. Enter a name for the new virtual switch. In this example, we will be using Ubuntu 20.04. Click OK to finish setting up the virtual switch.
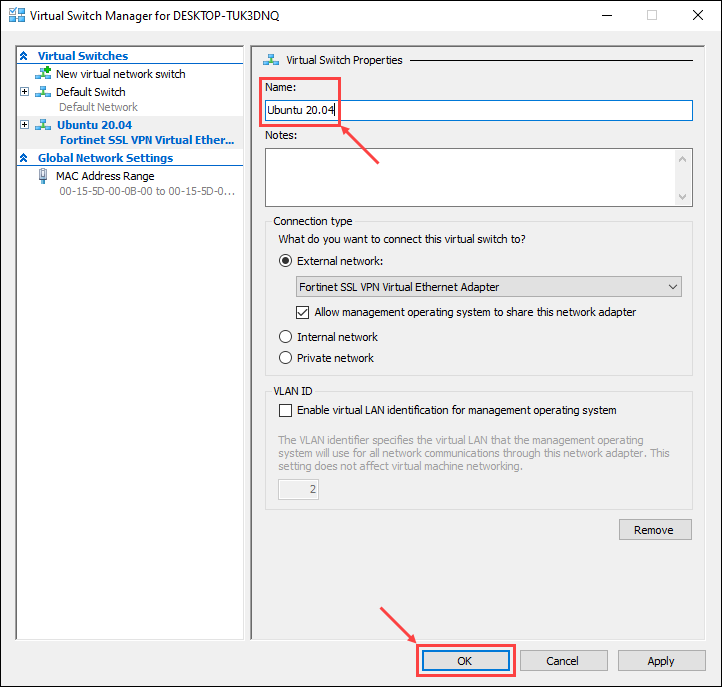
5. A new window might appear prompting you to apply network changes. Click Yes to confirm.

STEP 4: Install Ubuntu 20.04
Hyper-V offers two options when creating a new virtual machine:
- The Quick Create option lets you use a wizard to automatically download an operating system and install it on a virtual machine.
- You can also manually set up a new virtual machine and install an operating system from your hard drive or external media.
We will go over the process of installing Ubuntu 20.04 using both options:
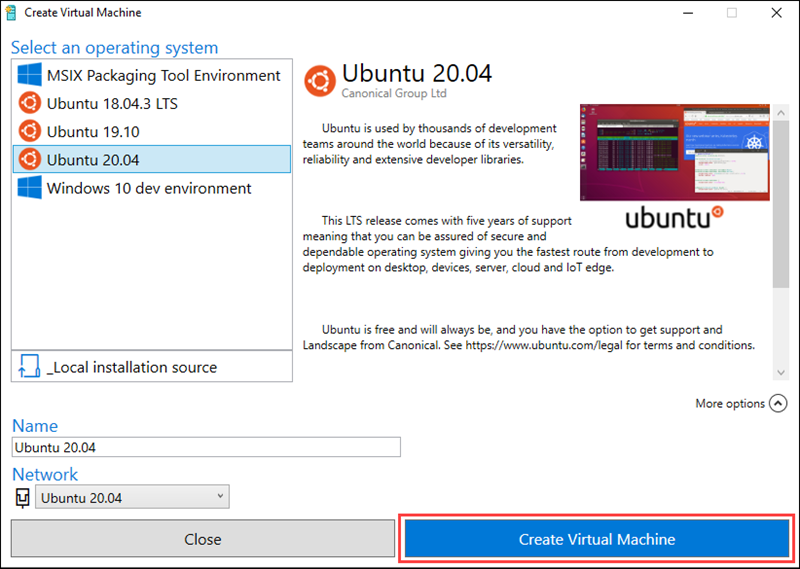
Quick Create
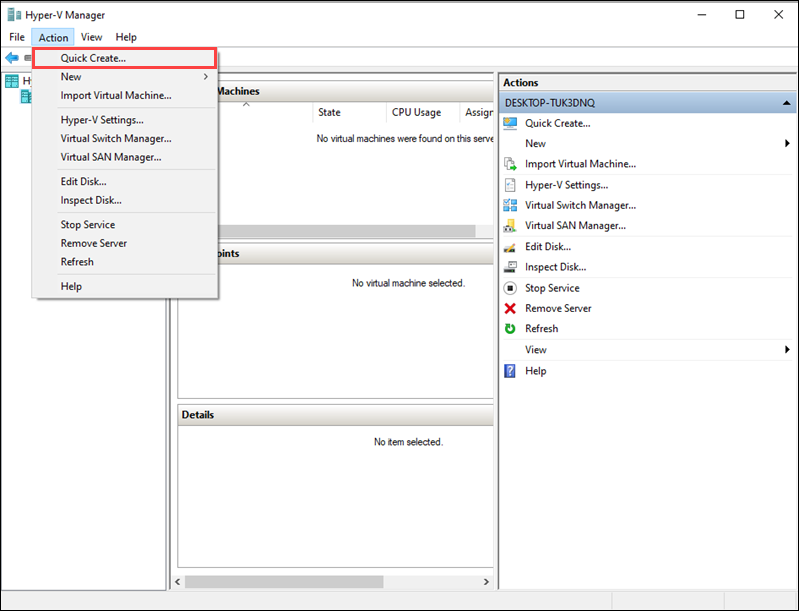
1. In the Action drop-down menu, click Quick Create to start the quick create wizard.
2. On the left-hand side, select Ubuntu 20.04 from the list of operating systems.
3. Click More options to set up a name for the new virtual machine and select the Ubuntu 20.04 virtual switch in the Network menu.
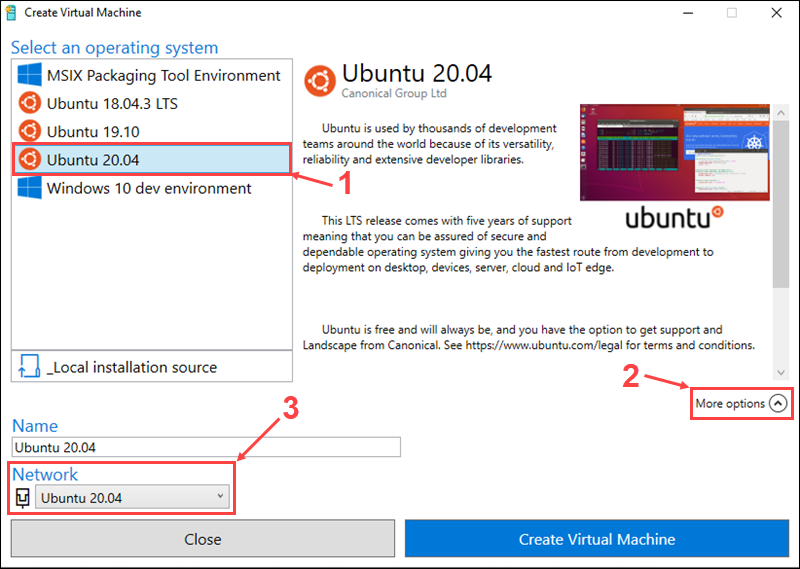
3. Click Create Virtual Machine to start the setup process. Hyper-V will automatically download and install Ubuntu.
4. Once the installation is done, use the Connect button to start up your virtual machine or the Edit settings… button to change settings.
Manually
1. Before you start setting up a new virtual machine, download the Ubuntu 20.04 installation image from the official Ubuntu website.
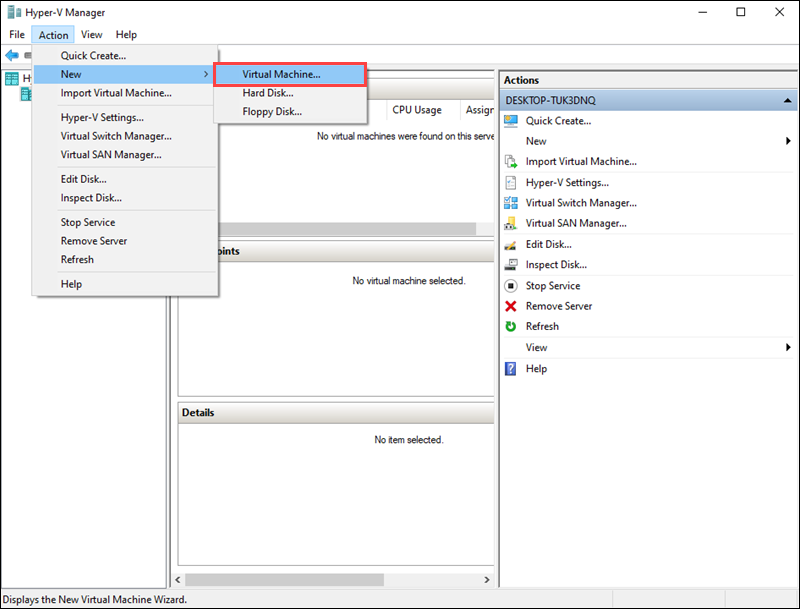
2. In the Action drop-down menu, select New and click Virtual Machine.
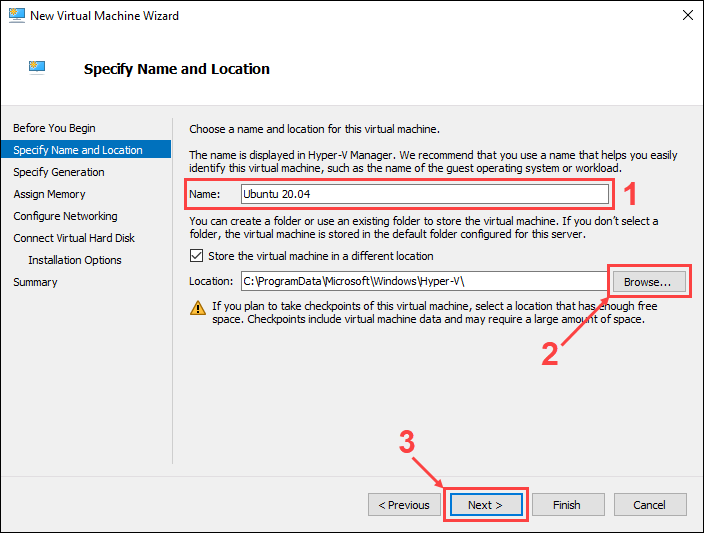
3. In the New Virtual Machine Wizard, click Next to start setting up the new virtual machine.
4. Choose a name and install location for the new virtual machine, then click Next to proceed.
5. Choose the generation for the new virtual machine, then click Next.
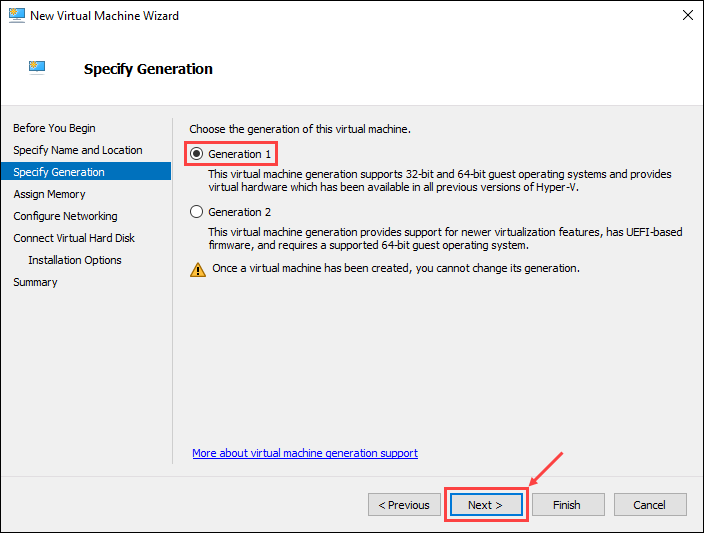
Note: Learn the difference between type 1 and type 2 hypervisors in our article What is a Hypervisor.
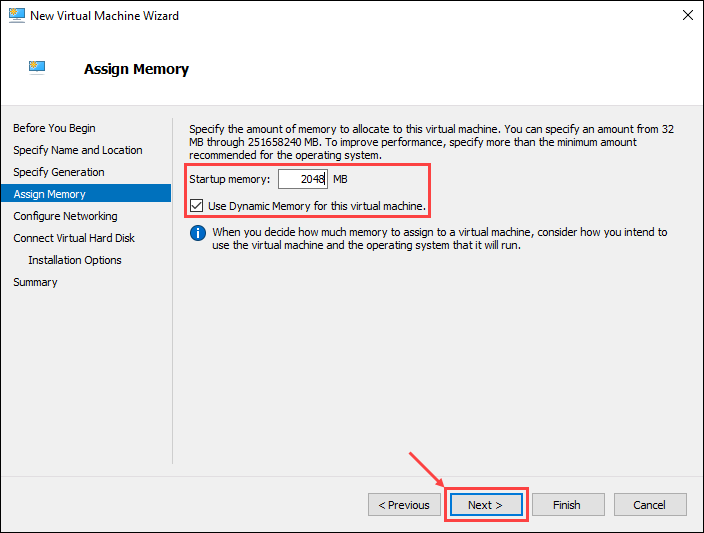
6. Assign the amount of memory to allocate to the virtual machine. Use at least 2 GB of memory and enable the use of dynamic memory. Click Next to continue.
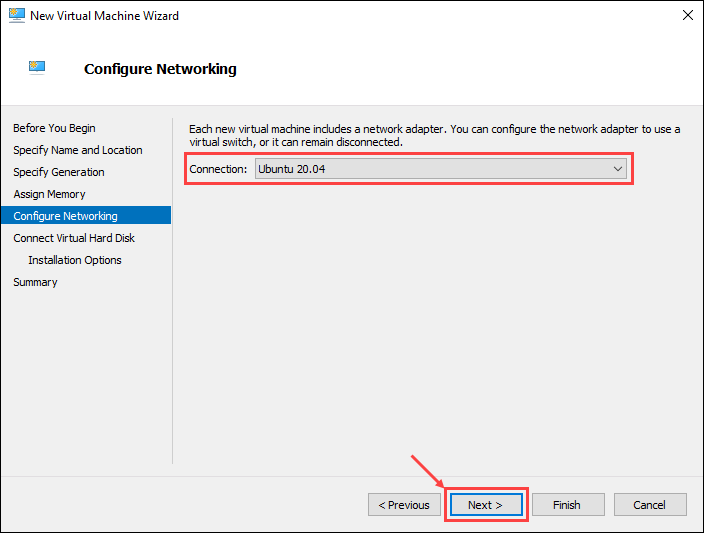
7. Choose Ubuntu 20.04 as the virtual network switch, then click Next.
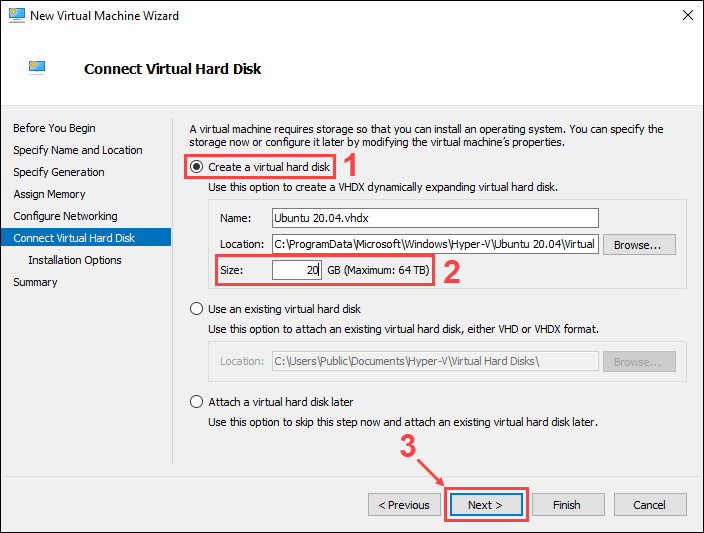
8. Use the Create a virtual hard disk option to create a new hard disk for the virtual machine. Assign at least 20 GB of hard disk space and click Next to continue.
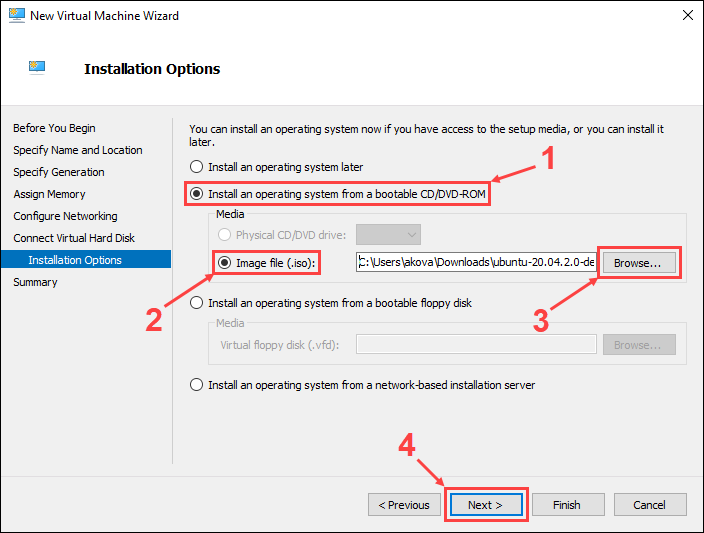
9. Under the Install an operating system from a bootable CD/DVD-ROM option, choose Image file (.iso) and select the Ubuntu image you downloaded previously. Click Next to continue.
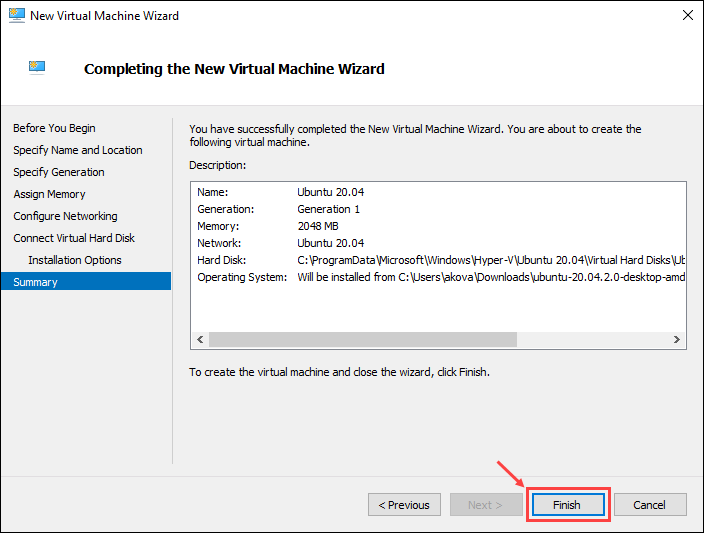
10. The final step offers a summary of the new virtual machine setup. Click Previous to make any changes or click Finish to create the virtual machine.
STEP 5: Start the Virtual Machine
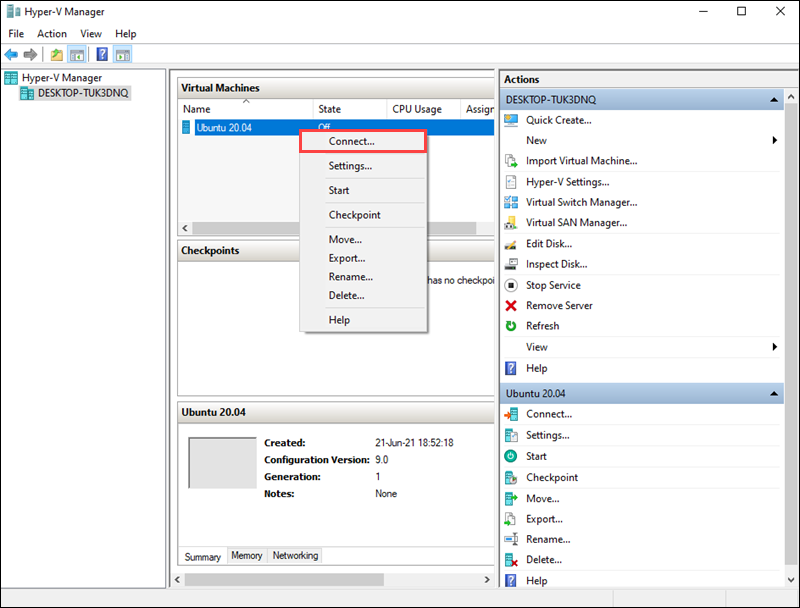
The new virtual machine appears in the Hyper-V Manager window. Right-click on the virtual machine name and click Connect to start it up.
Conclusion
After following this tutorial, you should have Hyper-V enabled, and a new virtual machine with Ubuntu 20.04 installed and ready to use.