1. Overview
Windows Subsystem for Linux (WSL) allows you to install a complete Ubuntu terminal environment in minutes on your Windows machine, allowing you to develop cross-platform applications without leaving Windows.
In this tutorial, we’ll show you how to get up and running with Ubuntu on WSL. These instructions will work on both Windows 10 or Windows 11.
Whilst WSL is a powerful tool for all users, some features, such as the ability to run graphical Linux applications, are only available on Windows 11. Please check out our Windows 11 tutorial for more information.
2. Install WSL
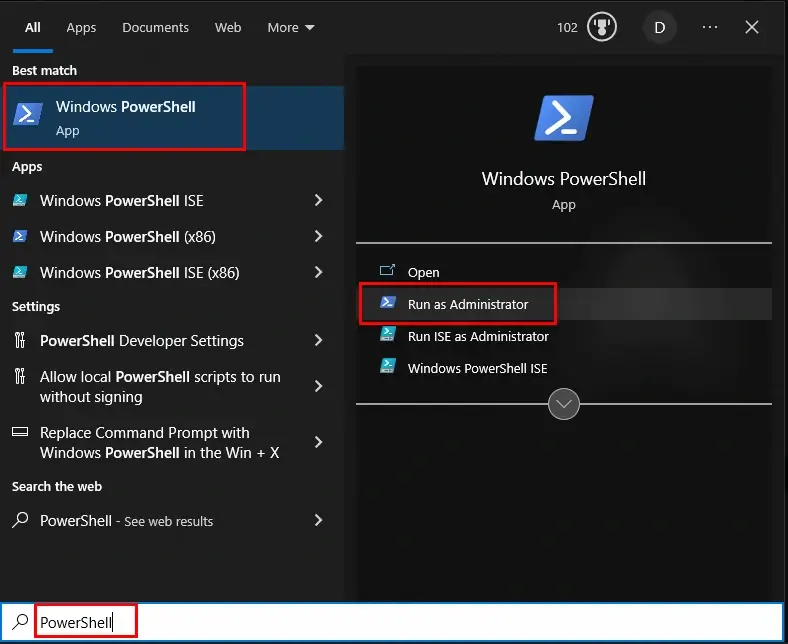
Installing WSL is now easier than ever. Search for Windows PowerShell in your Windows search bar, then select Run as administrator.

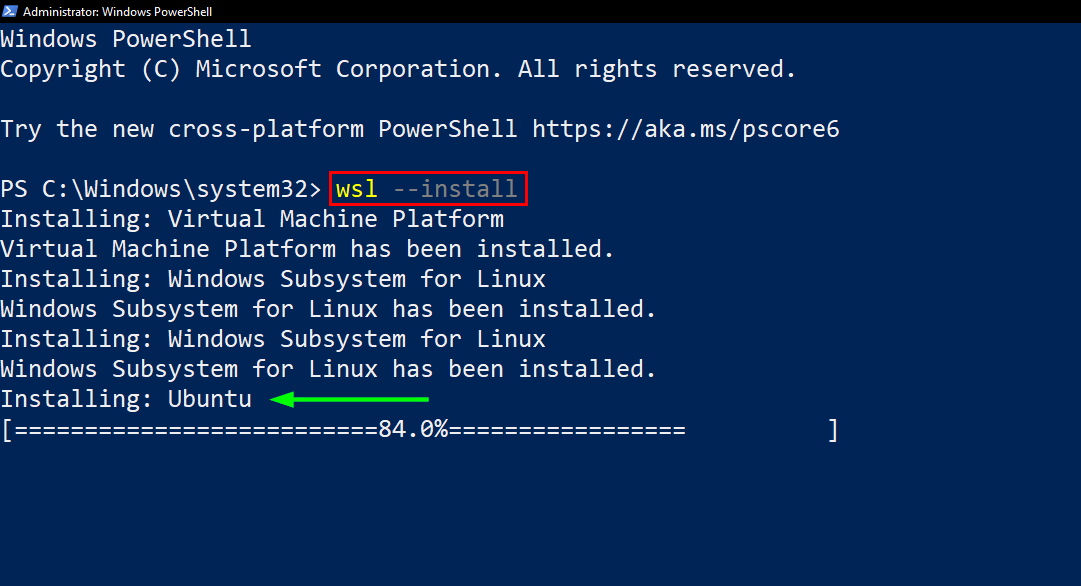
At the command prompt type:
wsl --install
And wait for the process to complete.
For WSL to be properly activated, you will now need to restart your computer.
3. Download Ubuntu
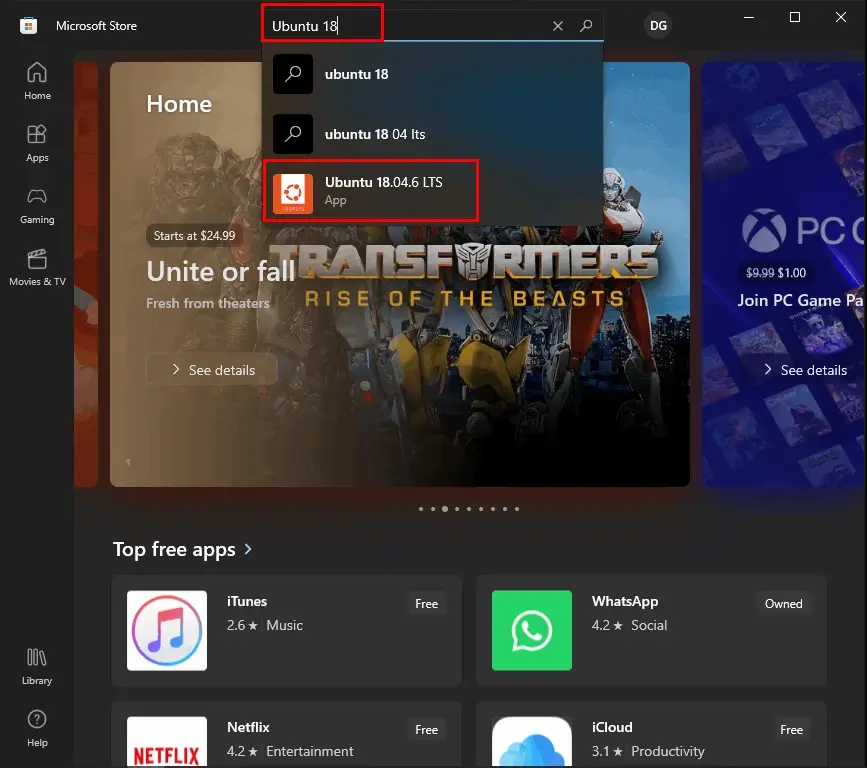
WSL supports a variety of Linux distributions, including the latest Ubuntu release, Ubuntu 20.04 LTS and Ubuntu 18.04 LTS. You can find them by opening the Microsoft store app and searching for Ubuntu.
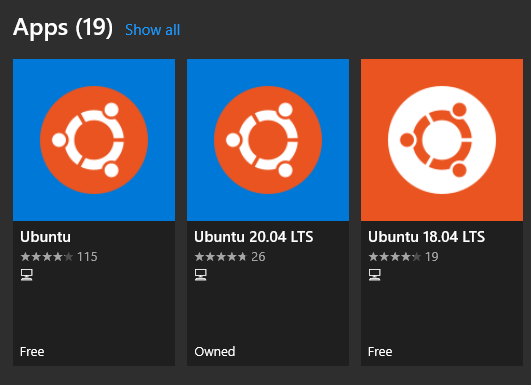
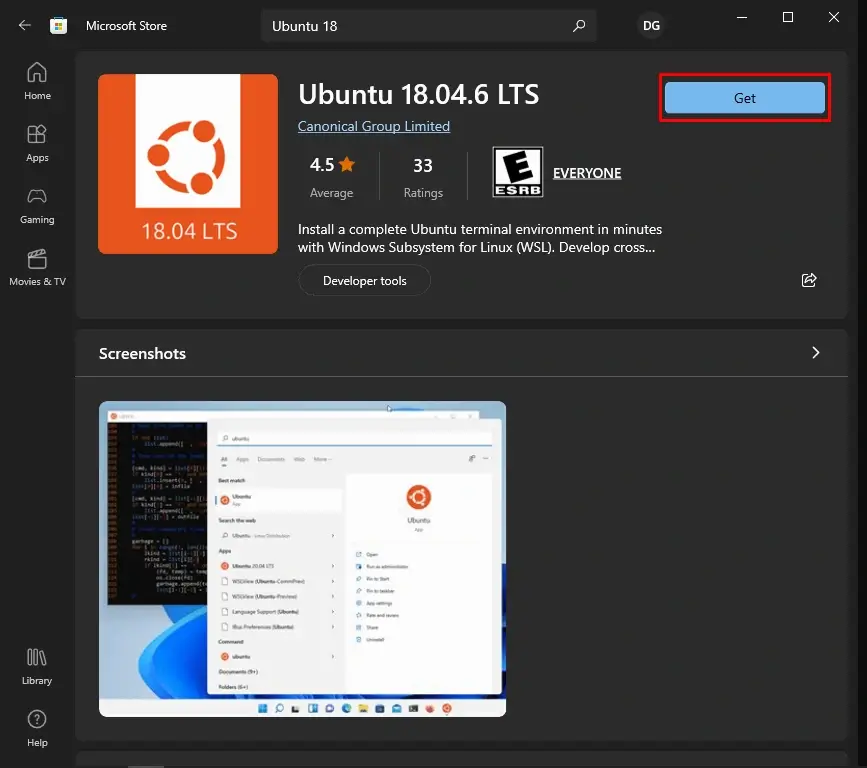
Choose the distribution you prefer and then click on Get as shown in the following screenshot:

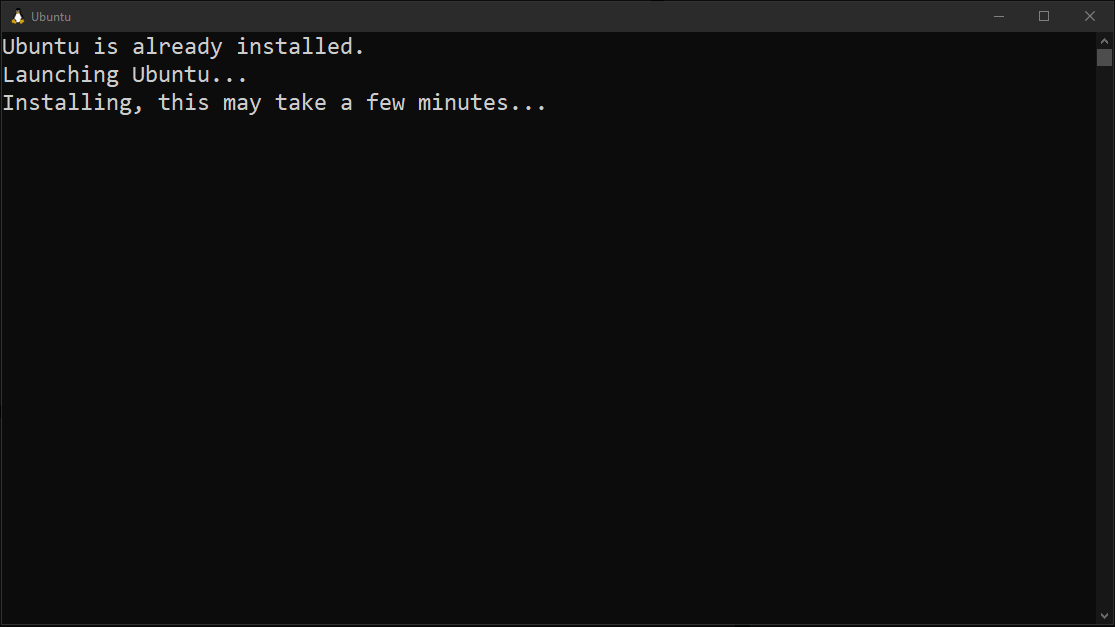
Ubuntu will then install on your machine.
The one line install!
There is a single command that will install both WSL and Ubuntu at the same time.
When opening PowerShell for the first time, simply modify the initial instruction to:
wsl --install -d ubuntu
This will install both WSL and Ubuntu! Don’t forget to restart your machine before continuing.
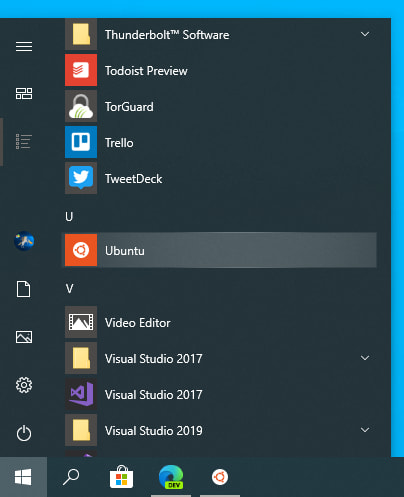
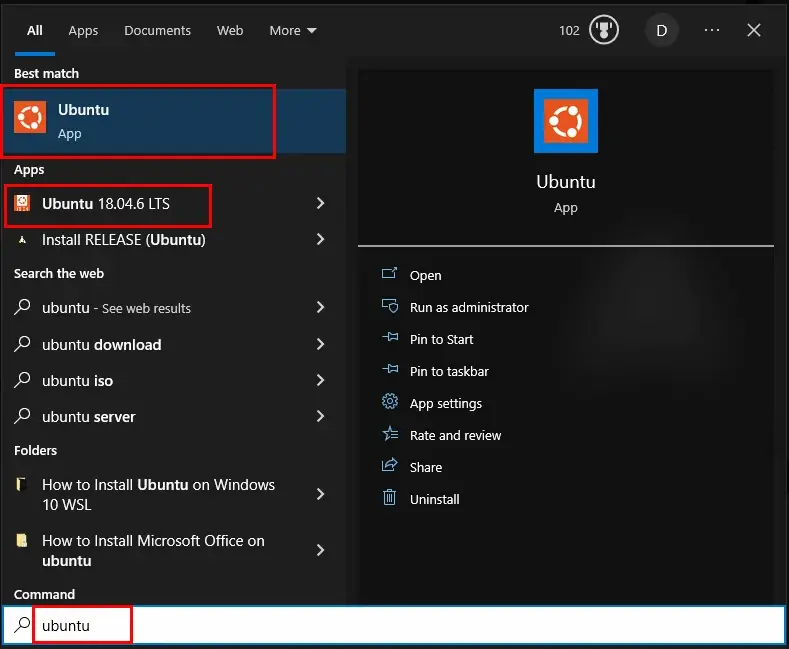
Once installed, you can either launch the application directly from the store or search for Ubuntu in your Windows search bar.
4. Configure Ubuntu
Congratulations, you now have an Ubuntu terminal running on your Windows machine!
If Ubuntu returns an error during this initial installation, then the most common issue is that virtualisation is disabled in your device’s BIOS menu. You will need to turn this on during your device’s boot sequence. The location of this option varies by manufacturer, so you will need to refer to their documentation to find it.
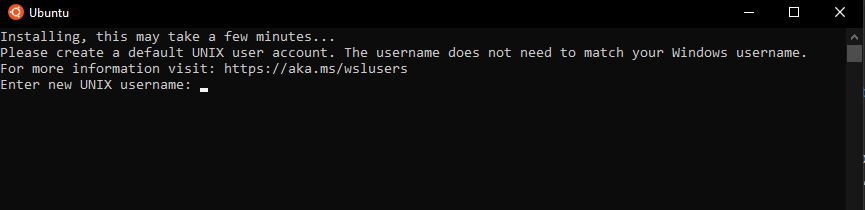
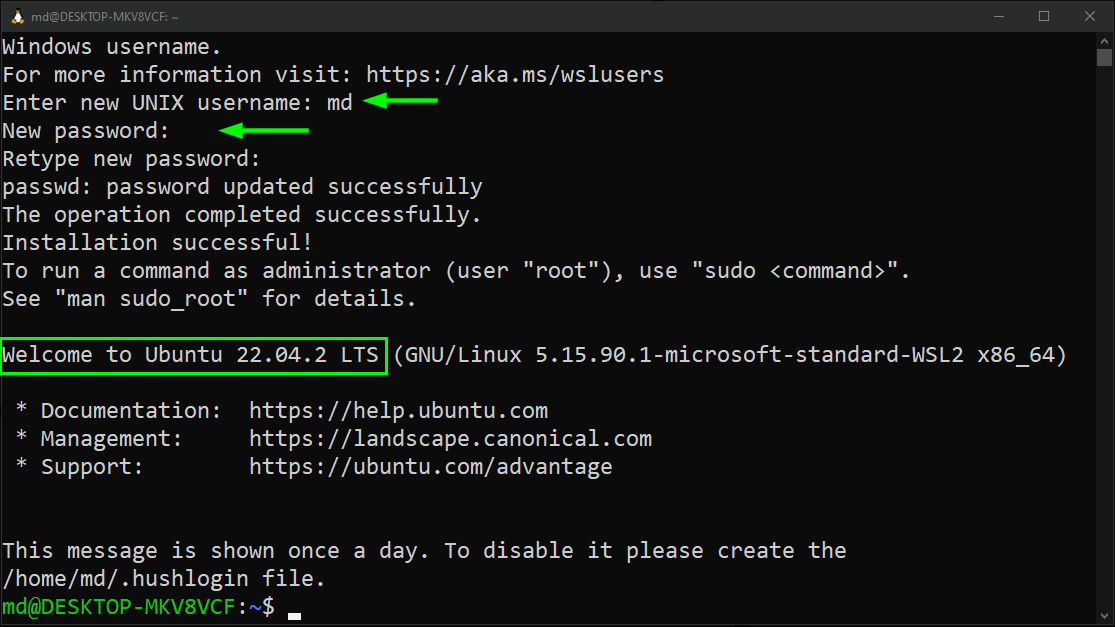
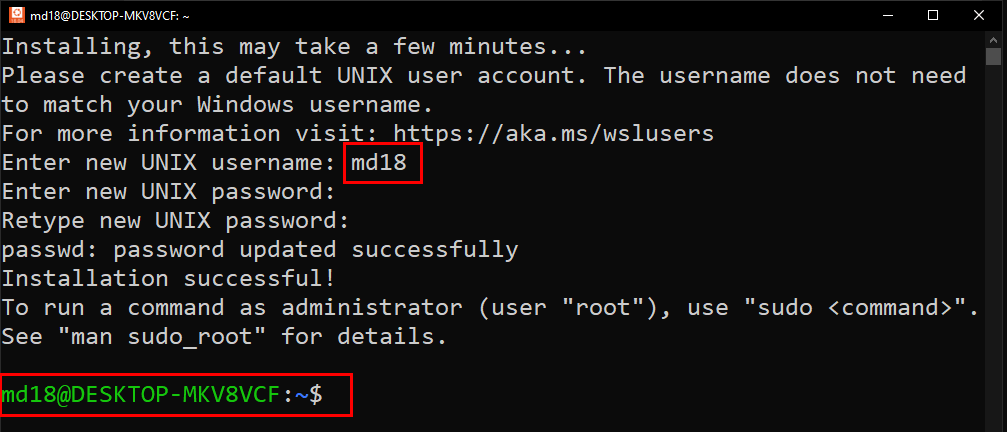
Once Ubuntu has finished its initial setup you will need to create a username and password (this does not need to match your Windows user credentials).
Finally, it’s always good practice to install the latest updates with the following commands, entering your password when prompted.
sudo apt update
Then
sudo apt upgrade
Press Y when prompted.
5. Install your first package
Installing packages on Ubuntu is as easy as using a single command. Below, you will see how to install bpython, a simple python interpreter for trying out ideas, featuring some nice usability features like expected parameters and autocompletion.
To check that you have the latest package lists, type:
sudo apt update
Then install bpython:
sudo apt install bpython
To run the application type:
bpython
And you’re ready to go!

6. Customising your Terminal with Windows Terminal Preview
Since you’re likely to be using your Ubuntu terminal a fair bit, it’s always nice to do some customisation. We recommend installing Windows Terminal Preview to get the most user-friendly setup. You can find it in the Microsoft Store.

Windows Terminal allows you to open multiple Terminal instances as tabs, so you can have PowerShell running alongside Ubuntu. It also includes a number of customisation options. In the below screenshot, we’ve changed the tab name and colour, and configured the terminal appearance to use the Tango Dark theme and the Ubuntu font!
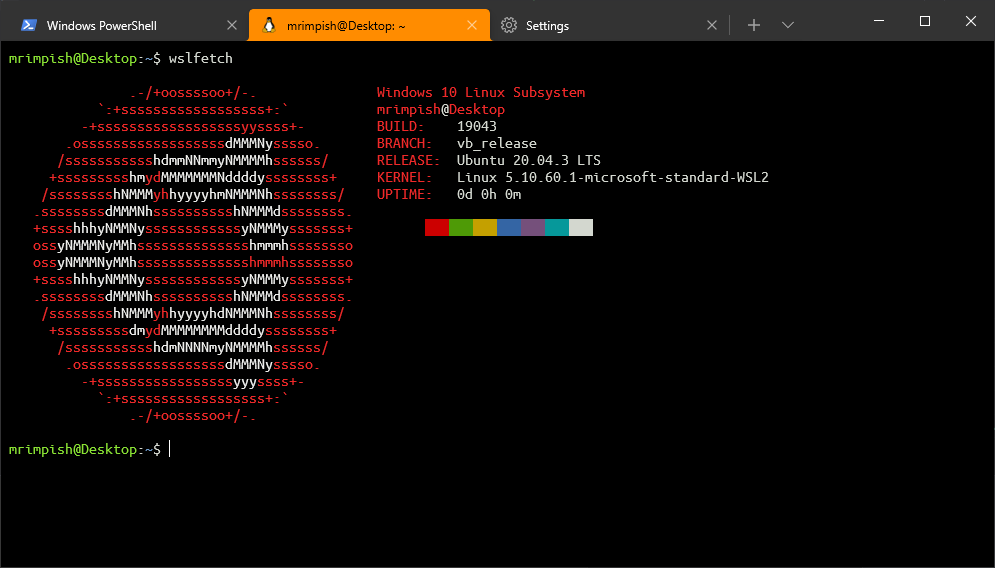
These customisations can be applied universally using the Appearance menu in Settings or to individual profiles which each have their own Appearance menu. Try it yourself to find something you feel comfortable with!

7. Enjoy Ubuntu on WSL!
That’s it! In this tutorial, you’ve seen how to install WSL and Ubuntu, set up your profile, and install your first package. You also got some tips on how to customise your experience.
We hope you enjoy working with Ubuntu inside WSL. Don’t forget to check out our blog for the latest news on all things Ubuntu.
Further Reading
- Install Ubuntu on WSL2 on Windows 11 with GUI Support
- Working with Visual Studio Code on Ubuntu on WSL2
- Enabling GPU acceleration on Ubuntu on WSL2 with the NVIDIA CUDA Platform
- Setting up WSL for Data Science
- WSL on Ubuntu Wiki
- Ask Ubuntu
Was this tutorial useful?
Thank you for your feedback.
This blog will offer an optimal solution for installing the latest as well as a specific version of Ubuntu in your Windows by using WSL.
What is WSL?
WSL (stands for “Windows Subsystem for Linux“) is a feature of Microsoft Windows that allows the user to run Linux distribution alongside Windows by utilizing a compatibility layer. It was released in 2016, however, the current version is WSL 2, which supports numerous Linux distributions including Ubuntu, Debian, and Fedora.
WSL is a beneficial feature for developers as it eliminates the need for extra hardware, virtualization, or dual-boot setups to manage Linux file systems or to access Linux command-line and tools.
With WSL, one can seamlessly switch between Windows and Linux workflows, enabling them to take advantage of Linux-specific tools while still enjoying the features of Windows as their primary operating system.
Let’s start the installation process of Ubuntu on Windows by using WSL 2.
Enable Windows Subsystem for Linux on Windows
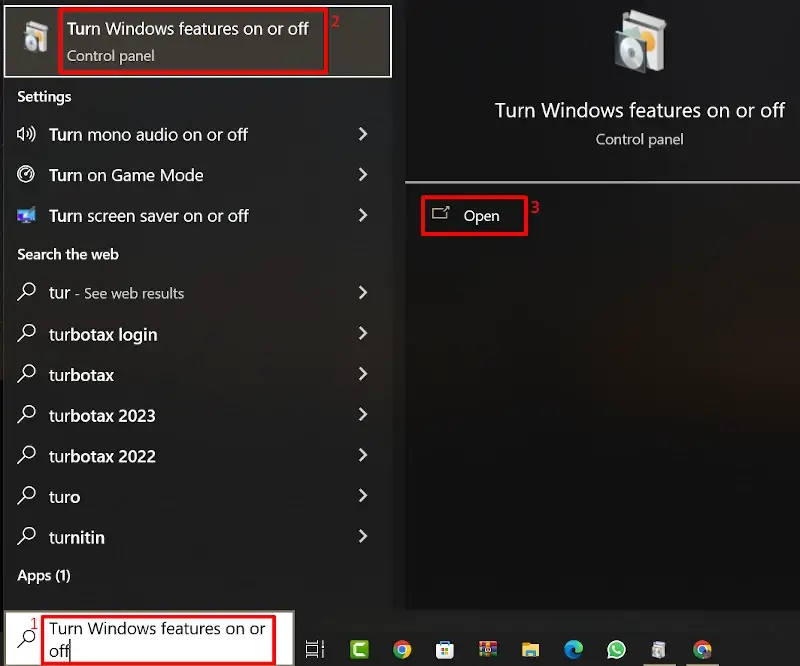
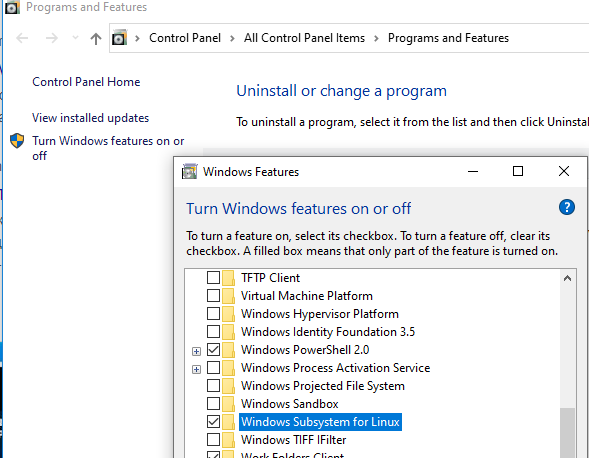
To enable WSL, press the “Windows Logo + S” keys and search “Turn Windows features on or off”, then, click on the “Open” option.
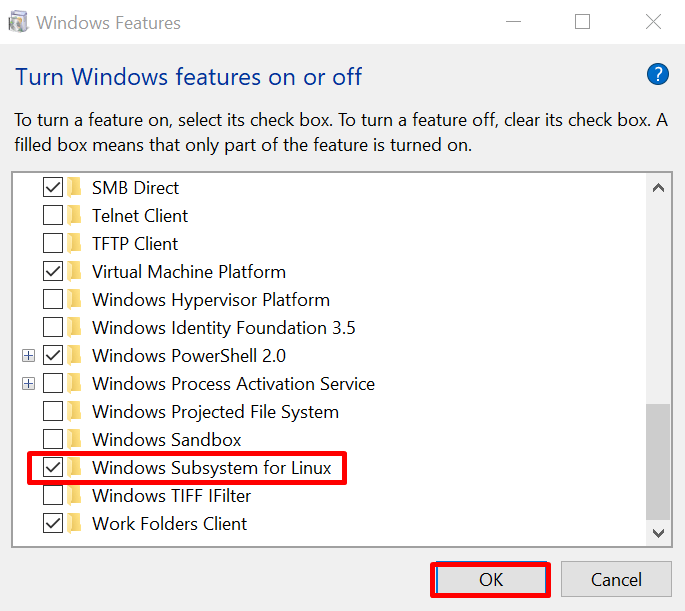
The Windows feature dialogue box will open. Here, locate the option “Windows Subsystem for Linux” and select the checkbox associated with it. Finally, click on the “OK” button:
Now restart your Windows to enable WSL.
The process of installing Ubuntu on Windows by using WSL is quite straightforward.
To install the latest version of Ubuntu by utilizing WSL, simply run “Windows PowerShell” as administrator:
Then, type the command listed below to automatically install and set up WSL along with the default version of Ubuntu:
$ wsl --install
This command takes care of everything including turning on the required features of Windows, installing the WSL Linux kernel update package, and setting up Ubuntu.
Once the installation process completes, reboot your Windows system to access Ubuntu. After the reboot, the further installation and launching process of Ubuntu will automatically start and will consume some time, so wait for its completion:
The next step is to provide the username for Ubuntu (22.04) and also set its password. After it, you will be able to execute Ubuntu commands:
Let’s try this by executing, the apt update command:
$ sudo apt update
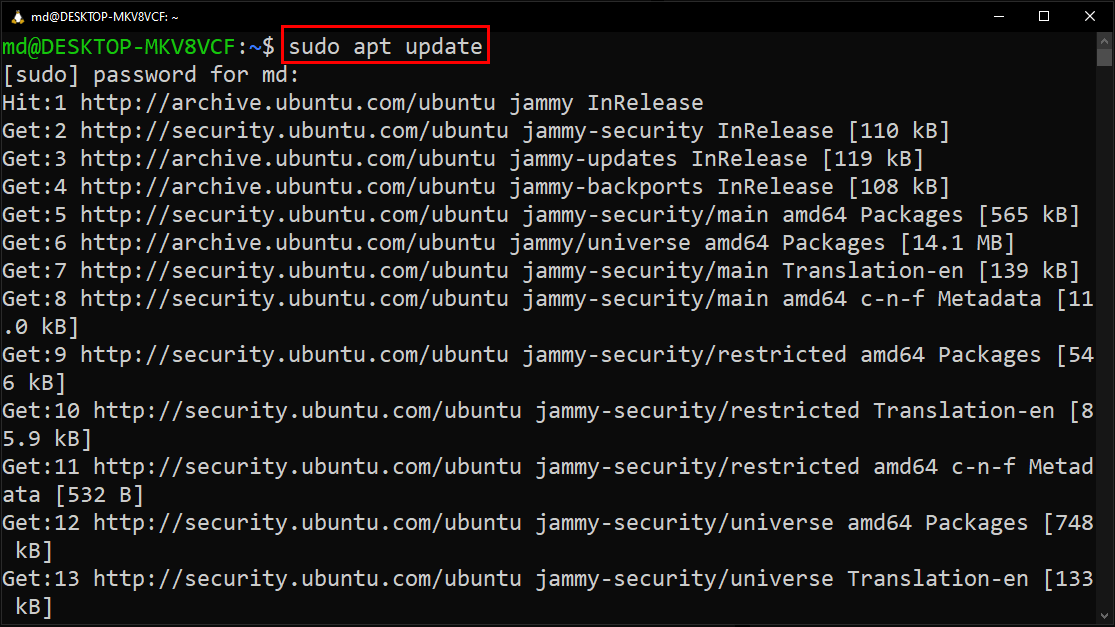
It is visible that your Ubuntu has started the process of updating the local repository cache.
Install Specific Ubuntu Version on Windows via WSL
However, if you want to install a specific previous version of Ubuntu on Windows. Then, head to Microsoft Store after following the previous steps or simply enables the Windows Subsystem for Linux as shown in the “Enable WSL” section of this blog:
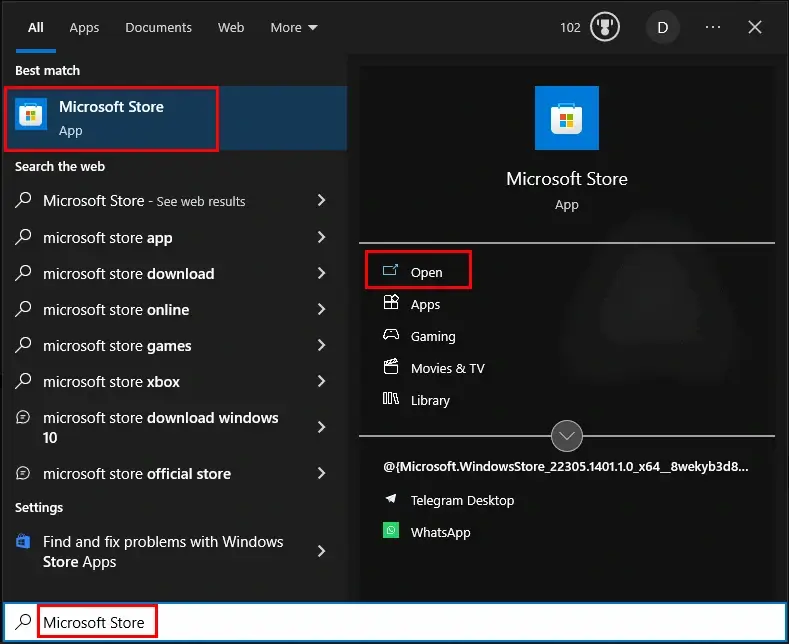
In the Microsoft store, search for the desired version of Ubuntu. For instance, let’s search “Ubuntu 18.04”:
Then, click on the “Get” button and wait for the completion of the installation process:
Once the Ubuntu is installed, click on the “Open” button:

The Ubuntu 18.04 will launch successfully, now set its username and password:
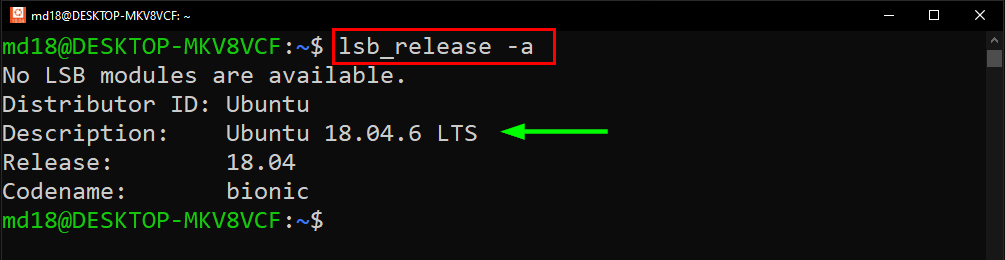
You can even check the version of installed Ubuntu by executing the command mentioned below:
$ lsb_release -a
Now close the terminal to shut down Ubuntu.
You can search Ubuntu to view and open your already installed Ubuntu from the Start Menu.
Conclusion
WSL (Windows Subsystem for Linux) is a feature offered by Microsoft that allows the user to run a Linux distribution alongside Windows 10. It supports many Linux distributions including Ubuntu, Fedora, and Debian.
This guide provided a solution for installing the latest/specific version of Ubuntu on Windows by using WSL.
Although Windows users could also wish to run Linux software, Linux users frequently desire to run Windows applications on Linux. You can use Linux applications without leaving Windows, whether you’re searching for an improved development environment or strong command-line tools. There are several alternatives to purchasing a new laptop to run the OS for running Linux applications on Windows. Since anybody can set up a virtual machine with a free Linux distribution without the requirement for software licenses, it is simpler than running Windows software on Linux.
There are two popular methods for running Linux software on Windows, they are
- WSL (Windows Subsystem for Linux)
- Virtual Machine
In this article, we’ll discuss how to implement both of these methods briefly.
Note: If you’re using Windows 11, the below steps can be omitted since Windows 11 can run Linux GUI apps out of the box.
Method 1: Windows Subsystem for Linux (WSL)
The WSL is a feature available in Windows that’ll enable one to run the Linux file system, along with Linux command-line tools and GUI applications, directly on Windows. And they can be completely integrated with Windows tools. But the only drawback of WSL is that they are mainly targeted for command-line tools and cannot be used for graphics-intensive programs.
Step 1: Enable the Windows Subsystem for Linux optional feature
Start PowerShell or Command-Prompt with administrator privileges and enter the following command to enable the WSL services on windows, this may be enabled by default in some systems.
Enable-WindowsOptionalFeature -Online -FeatureName -Microsoft-Windows-Subsystem-Linux

Alternatively, you can enable it using the ‘programs and features’ settings.

Step 2: Enable the Virtual Machine platform and Install WSL2
The virtual machine has to be enabled before installing WSL, this can be done using the following command.
dism.exe /online /enable-feature /featurename:Microsoft-Windows-Subsystem-Linux /all /norestart

Once it has been enabled, install WSL by entering the following command in PowerShell or Command-Prompt.
wsl --install
Set the default version of WSL to 2
wsl --set-default-version 2

Step 3: Download and Install a Linux distribution
You can download and install any distro of your choice, for the sake of convenience we’ll be installing ubuntu. Navigate to Microsoft Store and search for ‘ubuntu’ then install the application. Once downloaded open the app and follow through with the installation wizard. Once the installation process is complete you’ll be left with the following terminal. Linux Command-line tools can be executed using this terminal.

Step 4: Download and Install VcXsrv Windows X Server
The X server is a third-party display manager which is a provider of graphics resources and keyboard/mouse events. Download VcXsrv Windows X Server from the link provided – VcXsrv Windows X Server
Once the setup is complete, make sure to disable the access control option to avoid running into errors while running the GUI applications.

Step 5: Setting up the DISPLAY environment variable
Starting the bash terminal, we have to set the DISPLAY environment variable so it uses the windows host IP address since WSL2 and Windows host doesn’t share the network device. Use any of the following commands to set the DISPLAY variable.
export DISPLAY=$(ip route|awk ‘/^default/{print $3}’):0.0
export DISPLAY=”`grep nameserver /etc/resolv.conf | sed ‘s/nameserver //’`:0″

Run the below command to check whether the variable is properly set or not.
echo $DISPLAY

The variable is reset every time a session is restarted so as to avoid running the command each and every time we open the terminal. We can add the command at the end of the /etc/bash.bashrc file. Open the bashrc file using nano or vim and then add the command at the end.
sudo nano /etc/bash.bashrc

Step 6: Create a .xsession file in the user’s home directory
The following command can be used to create a .xsession file in the user’s home directory /home/<user>/.xsession with the content xfce4-session.
echo xfce4-session > ~/.xsession
Now Windows desktop can run Linux GUI apps.

Method 2: Using a Virtual Machine
Using a Virtual Machine is the most efficient and easy way to run Linux apps on Windows, we’ll briefly discuss the installation and setting up a virtual machine with a Linux OS.
Step 1: Download and Install a Virtual Machine
Download a virtual machine of your choice (Oracle or VMware), here we’ll be using a VMware workstation. Download the software from the below link and follow the installation process. Refer to this How to Install VirtualBox on Windows GeeksforGeeks article for setting up a virtual machine using oracle.
Download VMware Workstation.

Step 2: Download a Linux distribution of your choice
You can download any Linux distribution, below are some of the most popular choices along with their links.
- Ubuntu
- Pop! OS
- Linux Mint
- Fedora
Step 3: Installing the OS
Open VMware Workstation, and click on the ‘Create new Virtual Machine’. And then select the installer disc image option and choose the downloaded Linux operating system’s ISO file.

Specify the disk capacity and click on next.

Name the virtual machine and move on to the next step.

Start the virtual machine to boot up the OS and follow the installation steps. Once the installation is complete you can run any Linux GUI apps using the virtual machine.

Step 4: Starting and Running the applications
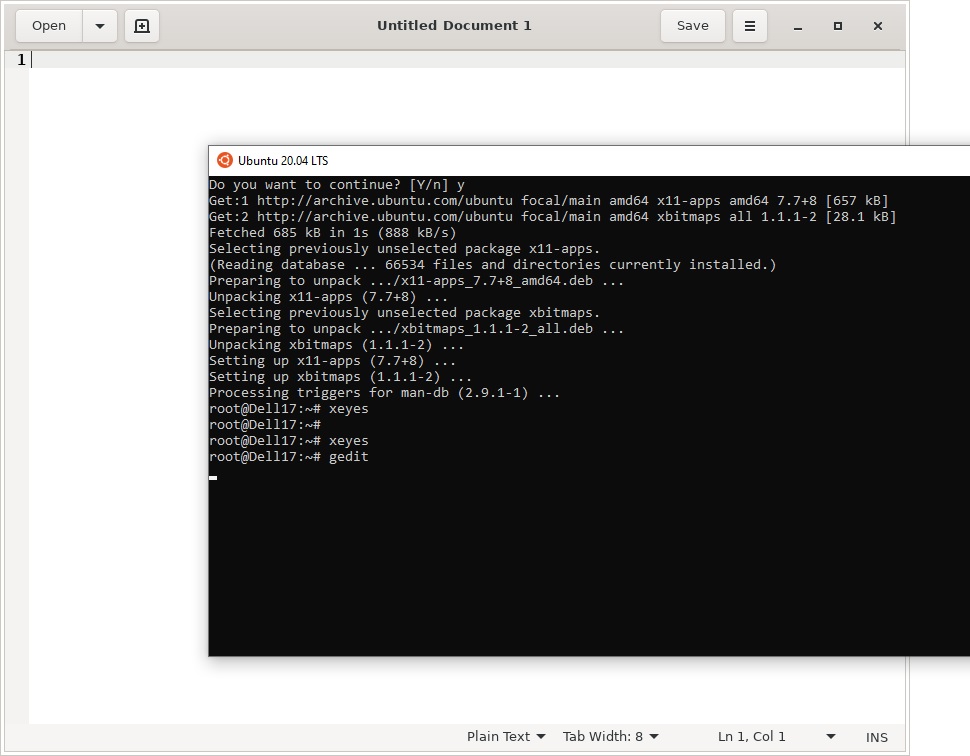
You can now run any Linux application while within the virtual machines environment, here are some examples.
$ gedit

$ sudo apt install x11-apps -y
$ xcalc

$ xclock

$ xeyes

Last Updated :
07 Nov, 2022
Like Article
Save Article
Windows Subsystem for Linux (WSL) — подсистема ОС Windows 10, позволяющая разработчикам, тестировщикам запускать нативные приложения Linux, писать скрипты, выполнять команды непосредственно из Windows. В обновлённой Windows 10 (2004) появилась 2я версия WSL, в которой используется полноценное ядро Linux с возможностью запуска приложений и контейнеров Docker, реализована высокая скорость загрузки, небольшой объем потребляемых ресурсов, управление в фоновом режиме, обновление ядра. Таким образом вы сможете запускать ELF64 программы, которые могут получать доступ к файловой системе Windows без использования сторонних порто (таких как Cygwin).
Образ ядра Linux (версия ядра 4.19) в Windows 10 представляет собой легкую виртуальную машину, для запуска которой не нужно ставить полноценную роль Hyper-V. Системные вызовы Linux транслируются на лету в вызовы Windows без использования эмулятора (в отличии от WSL1).
Изначально компонент WSL отключен. Чтобы его включить, вам необходимо зайти в Пуск -> Панель управления -> Программы и компоненты -> Включение и отключение компонентов Windows (Control Panel\All Control Panel Items\Programs and Features\Turn Windows features on or off), активировать галочку Подсистема Windows для Linux (Windows Subsystem for Linux), нажать кнопку ОК, и перезагрузить компьютер.
Вы можете включить компоненты WSL в Windows 10 с помощью dism:
dism.exe /online /enable-feature /featurename:VirtualMachinePlatform /all /norestart
dism.exe /online /enable-feature /featurename:Microsoft-Windows-Subsystem-Linux /all /norestart
или PowerShell
Enable-WindowsOptionalFeature -Online -FeatureName Microsoft-Windows-Subsystem-Linux
Enable-WindowsOptionalFeature -Online -FeatureName VirtualMachinePlatform
В Windows Server 2004 Semi-Annual Channel (SAC) для установки компонента WSL используется командлет Install-WindowsFeature:
Install-WindowsFeature -Name Microsoft-Windows-Subsystem-Linux
После этого также необходимо перезагрузить компьютер.
В настройка BIOS/UEFI компьютера должна быть включена поддержка аппаратной виртуализации: Intel VT (Intel Virtualization Technology) или AMD-V.
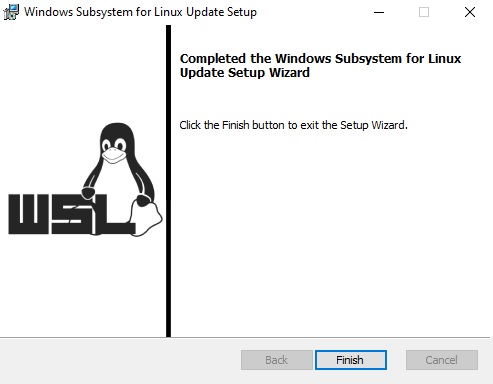
Теперь вам нужно выполнить обновление WSL до версии 2. Для этого требуется зайти на сайт https://docs.microsoft.com/ru-ru/windows/wsl/wsl2-kernel, скачать файл wsl_update_x64.msi, установить его. По завершении увидите картинку
Чтобы сделать WSL2 архитектурой по умолчанию для новых дистрибутивов, в PowerShell выполните команду:
wsl --set-default-version 2
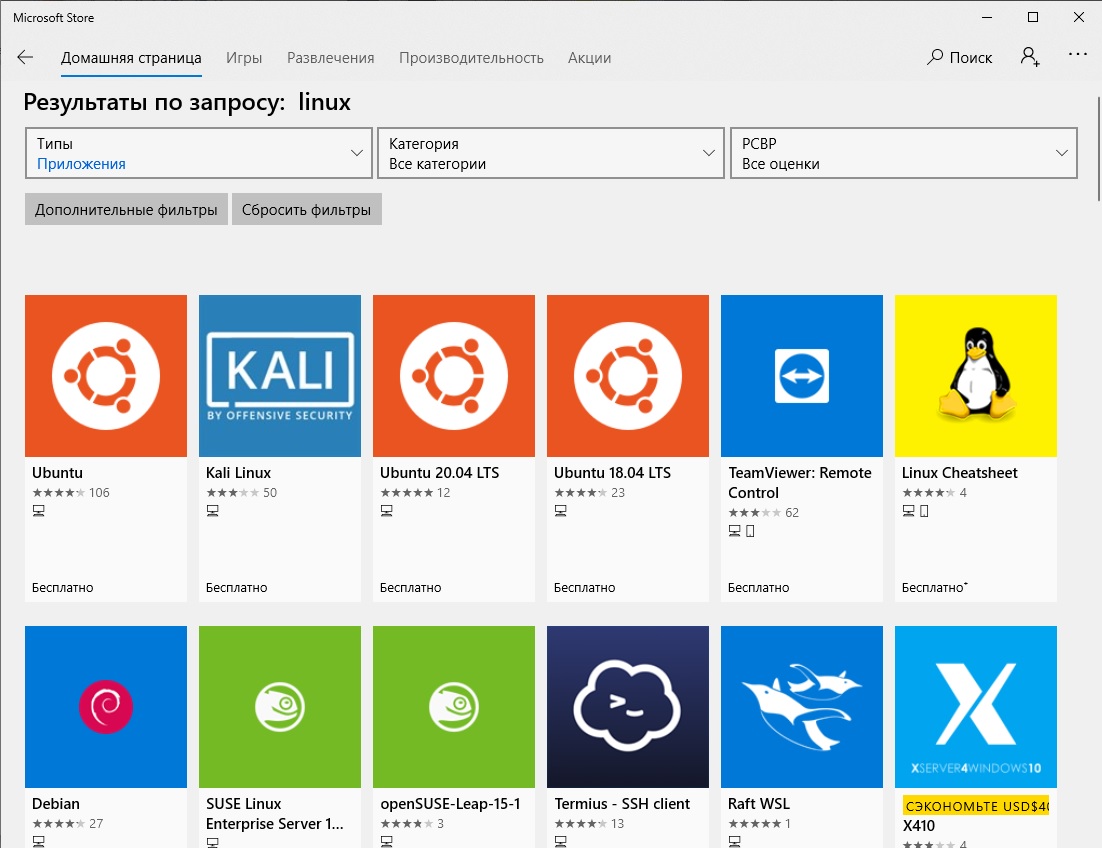
Далее вам необходимо открыть Microsoft Store, в поиске ввести слово “Linux”. В появившемся списке выберите нужный дистрибутив. Доступные Ubuntu, Debian, Kali Linux, Linux Cheatsheet, SUSE Linux Enterprise Server15, openSUSE Leap 15-1, Pengwin Enterprise, Fedora Remix for WSL или другие. В нашем примере мы будем использовать Ubuntu 20.04 LTS, нажмите кнопку Получить.
Если у вас отключен Windows Store или вы хотите установить дистрибутив WSL в Core редакции Windows Server, вы можете скачать дистрибутив Ubuntu с помощью PowerShell командлета Invoke-WebRequest:
Invoke-WebRequest https://aka.ms/wslubuntu2004 -OutFile ubuntu-2004.zip –UseBasicParsing
Распакуйте архив:
Expand-Archive -Path .\ubuntu-2004.zip
Запустите установку образа Linux с помощью файла Ubuntu.exe.
Также вы можете скачать образ в виде appx файла и установить его с помощью командлета Add-AppxPackage.
После установки можно проверить используемую версию WSL с помощью команды
wsl --list –-verbose
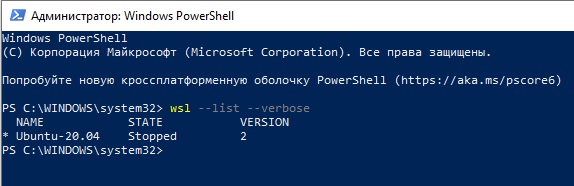
Если у вашей среды Linux указана версия 1, нужно изменить ее на WSL2 командой:
wsl --set-version Ubuntu-20.04 2
Файл жёсткого диска с образом виртуальной машины ОС Linux Ubuntu 20.04 будет располагаться в профиле пользователя: C:\Users\234\AppData\Local\Packages\CanonicalGroupLimited.Ubuntu20.04onWindows_79rhkp1fndgsc\LocalState.
После установки дистрибутива в стартовом меню появляется ярлык на него. Для запуска Ubuntu зайдите в меню Пуск, нажмите на соответствующем ярлыке и получите в отдельном окне полноценную командную оболочку Bash. Запускать WSL можно и с помощью команды wsl. При первом запуске образа в командной строке Bash вам будет предложено создать пользователя и пароль (которые не должны совпадать с учётной записью Windows). Чтобы выполнять команды с правами root, необходимо использовать дополнительный ключ (префикс) sudo. В WSL есть общие команды для Bash и CMD, и тут нужно не забывать, что система Linux чувствительна к регистру.
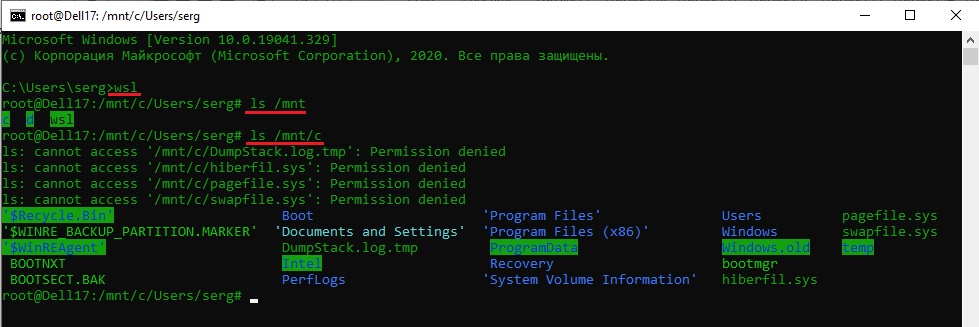
Вы можете выполнить Linux-команды из CMD. Для этого необходимо вначале указать “WSL”. Например, для просмотра списка файлов и папок в каталоге Windows, выполните:
wsl
ls /mnt
ls/mnt/c
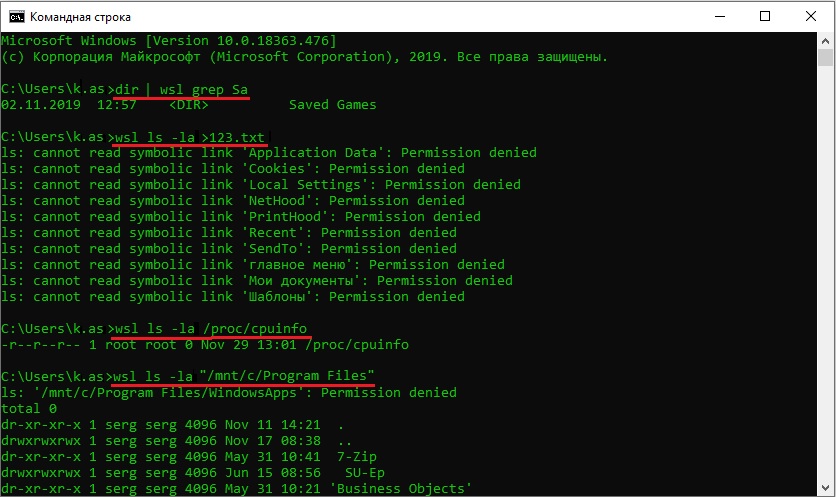
dir | wsl grep Sa
wsl ls ‑la > 123.txt
wsl ls ‑la /proc/cpuinfo
wsl ls ‑la “/mnt/c/Program Files”
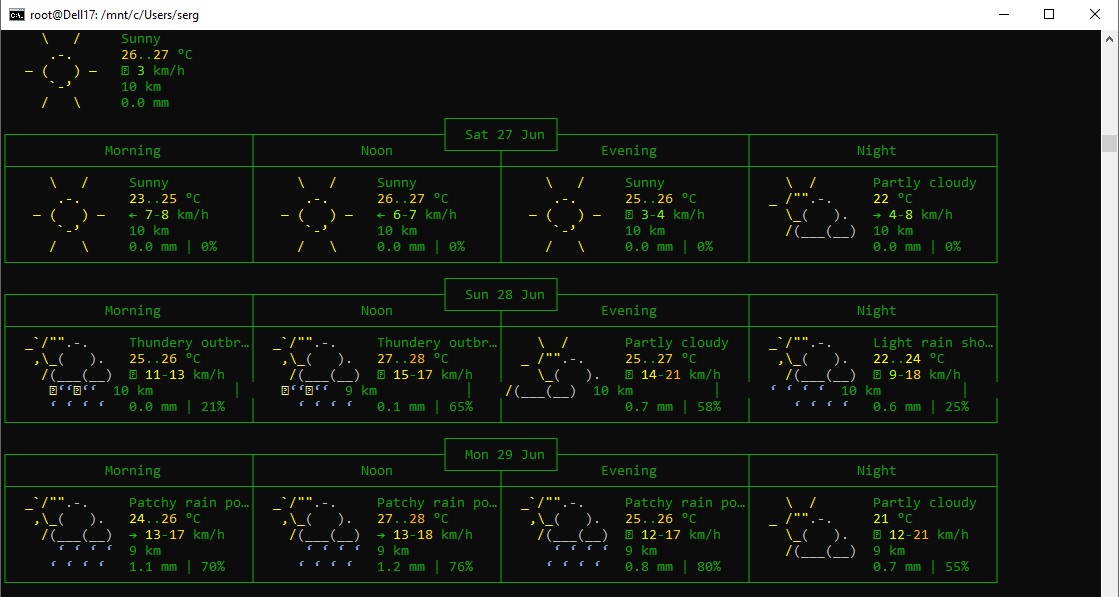
Также вы можете открыть проводник командой explorer.exe, калькулятор – calc.exe, блокнот – notepad.exe, paint – mspaint.exe, календарь – cal, погоду – curl wttr.in
Ещё один пример взаимосвязи 2х систем – вы можете открыть в Windows файл из WSL-дистрибутива по сетевому пути. Для этого в CMD наберите путь к файлу:
notepad \\wsl$\Ubuntu-20.04\home\1122.txt
Из окна консоли вы можете обновить список пакетов в Ubuntu с помощью команд:
sudo apt-get update
sudo apt-get upgrade
После обновления Ubuntu папка …/LocalState будет занимать 1.5 Гб.
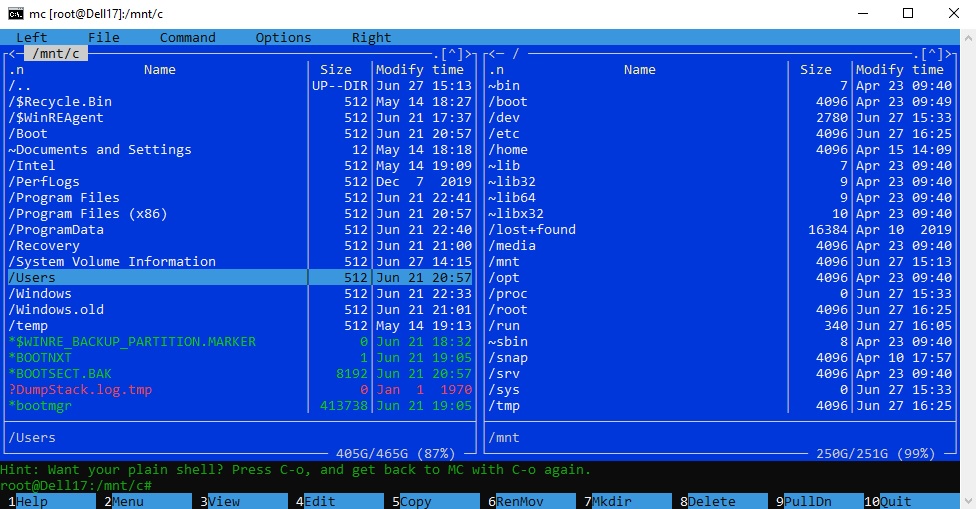
Из командной строки Linux можно не только просмотреть Windows-файлы и каталоги, но и получить к ним доступ. Чтобы удобнее копировать файлы, просматривать директории и их содержимое, установите файловый менеджер Midnight Commander с помощью команды
sudo apt-get install mc
Вы можете запустить Midnight Commander как в командной оболочке Bash, так и внутри CMD. На скриншоте ниже показано, что в двух панелях MC показывается список файлов с обеих ОС.
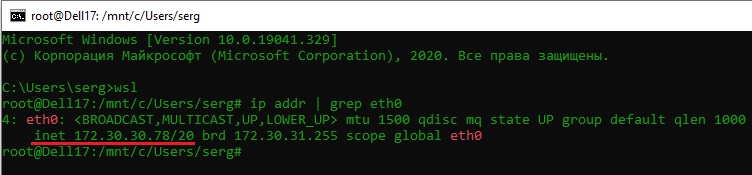
Можно отобрахить сетевые настройки (IP адрес) IP-адрес Linux-системы:
ip addr | grep eth0
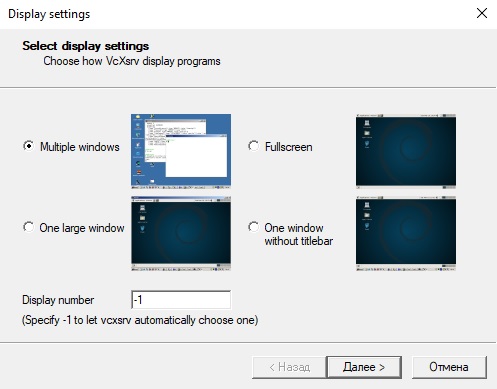
В WSL не предусмотрена работа приложений с графическим интерфейсом. Тем не менее вы можете попробовать их установить и использовать. Чтобы запускать графические приложения в Linux, нужно скачать и установить в Windows программу VcXsrv Windows X Server (https://sourceforge.net/projects/vcxsrv/).
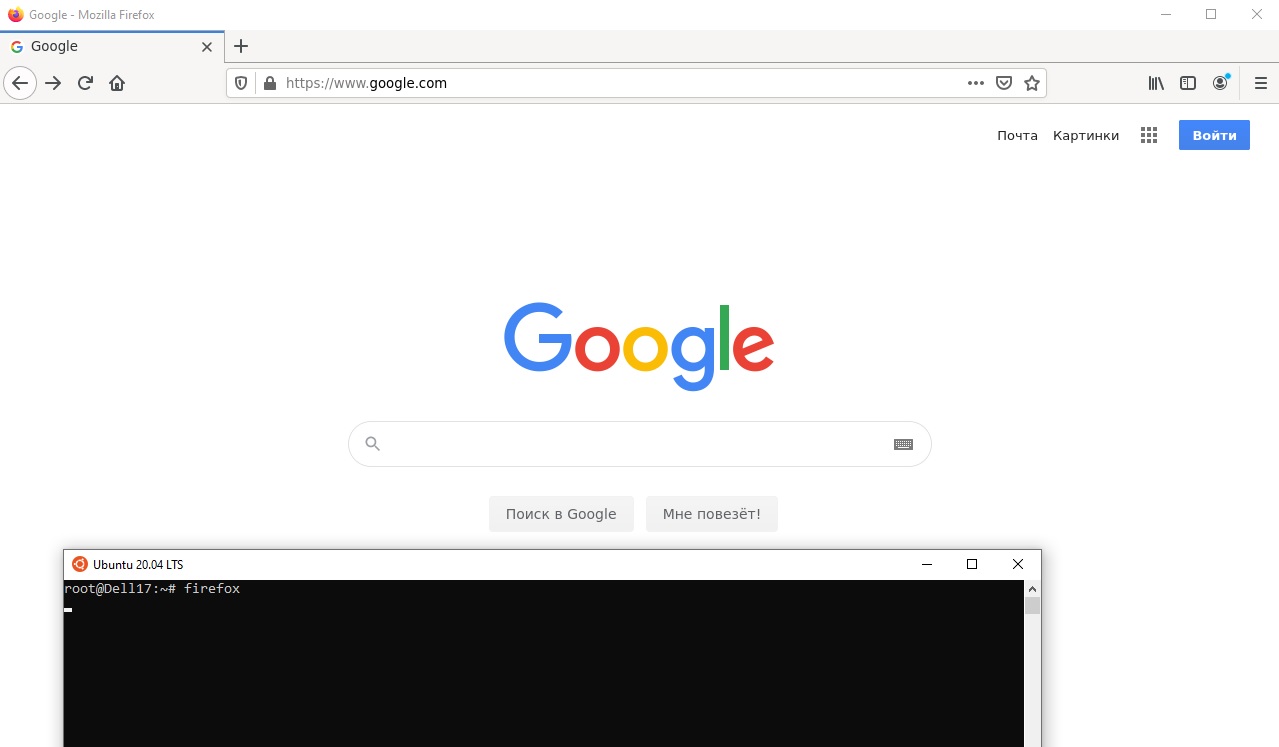
С помощью пакетного менеджера apt-get установим несколько графических программ: например, браузер, текстовый редактор или что-то ещё:
sudo apt-get install gedit
sudo apt-get install firefox
sudo apt-get install x11-app
Затем создайте файл в директории root:
cd /~
vim .bash_login
впишите строку
export DISPLAY=$(cat /etc/resolv.conf | grep nameserver | awk '{print $2}'):0
сохраните запись
Esc -> :wr -> :q
Теперь можете запустить графические программы Linux через WSL командами:
firefox
или
gedit
Вы можете установить в Windows 10 несколько дистрибутивов Linux и запускать одновременно в разных окнах WSL. Вывести весь перечень установленных дистрибутивов можете с помощью команды:
wsl --list –all
чтобы завершить работу всех запущенных дистрибутивов и ядра WSL 2, выполните команду:
wsl --shutdown
Время на прочтение
9 мин
Количество просмотров 241K
К написанию данной статьи меня побудил вопрос на Тостере, связанный с WSL. Я, после нескольких лет использования систем на ядре Linux, около полугода назад перешел к использованию Windows 10 на домашнем ПК. Зависимость от терминала и Linux окружения в моей работе практически сразу привели меня к вопросу: или ставить виртуалку или попробовать WSL. Я выбрал второе, и остался вполне доволен.
Под катом я расскажу как установить и настроить WSL, на какие я наткнулся проблемы и ограничения, как запускать Linux приложения из Windows и наоборот, а так же как интегрировать элементы окружения Xfce в окружение рабочего стола Windows.

Никогда не думал, что однажды вернусь на Windows, но повод попробовать мне дали стечения обстоятельств: жена, далекая от IT, дергала почти каждый раз, когда у нее возникала необходимость воспользоваться компом; проснулась ностальгия по одной игре, но она никак не хотела адекватно работать под wine; а тут еще мне подарили коробочную Windows 10 Pro. WSL я поставил чуть ли не сразу после установки системы, поигрался несколько вечеров, понял, что продукт для моих задач годный, но хочется более привычный терминал и вообще некоторых удобств.
Установка WSL и дистрибутива
Сразу оговорюсь, в интернете можно найти описание установки с помощью выполнения команды lxrun /install в командной строке или консоли PowerShell. Данный способ больше не работает (после выхода WSL в стабильный релиз). Насколько мне известно, сейчас WSL можно установить только из Microsoft Store вместе с предпочитаемым дистрибутивом.
Так же отмечу, что когда установку производил я, на выбор были доступны дистрибутивы OpenSUSE, SUSE Linux Enterprise и Ubuntu 16.04 — последний я и установил. Сейчас также доступны Ubuntu 18.04, Debian 9 и Kali Linux, возможно появятся и другие дистрибутивы. Действия по установке могут отличаться. Так же, часть проблем описанных в статье может быть уже исправлена.
Находим в магазине желаемый дистрибутив и устанавливаем. Установка пройдет быстро, так как скачает только эмулятор ядра Linux и утилиту для запуска подсистемы, которая окажется в системной папке в трех экземплярах: wsl.exe, bash.exe и ubuntu.exe (вместо ubuntu будет имя Вашего дистрибутива). Все они равнозначны и делают одно и то же — запускают собственный эмулятор терминала, в нем linux’овый bash работающий под эмулятором ядра. При первом же запуске нас попросят придумать логин и пароль для пользователя по умолчанию, а после произойдет непосредственно установка дистрибутива. В качестве пользователя по умолчанию указываем root без пароля — это потребуется для дальнейших шагов. Безопасность не пострадает, кроме того при подготовке материалов к статье, в англоязычном туториале, я наткнулся на информацию, что новые версии WSL теперь делают пользователем по умолчанию root без пароля без лишних вопросов.
Дожидаемся установки. Далее первым делом стоит обновить зеркала apt на ближайшие. Для этого понадобится CLI текстовый редактор. В комплекте только vi, я же больше предпочитаю nano, поэтому ставлю его:
apt install nanosudo вводить не требуется, так как мы уже под root’ом. Отредактируем файл /etc/apt/sources.list:
nano /etc/apt/sources.listУ меня лучше всего работают зеркала Яндекса, поэтому мой файл выглядит так:
deb http://mirror.yandex.ru/ubuntu/ xenial main universe restricted
deb-src http://mirror.yandex.ru/ubuntu/ xenial main universe  restricted

deb http://mirror.yandex.ru/ubuntu/ xenial-security main universe restricted
deb-src http://mirror.yandex.ru/ubuntu/ xenial-security main universe restricted

deb http://mirror.yandex.ru/ubuntu/ xenial-updates main universe restricted
deb-src http://mirror.yandex.ru/ubuntu/ xenial-updates main universe restricted
Нажимаем Ctrl+O для сохранения и Ctrl+X для выхода. Теперь можно обновить систему до актуального состояния:
apt update && apt upgradeПосле обновления можно создать нашего основного пользователя. В данной статье я назову его user1, Вы же можете задать привычное имя:
addgroup --gid 1000 user1
adduser --home /home/user1 --shell /bin/bash --uid 1000 -G user1,sudo user1
Далее переходим в папку юзера, зайдем под ним, установим пароль и отредактируем файл ~/.bashrc:
cd /home/user1
su user1
passwd
nano .bashrc
Мой базовый .bashrc выглядит так
# If not running interactively, don't do anything
case $- in
    *i*) ;;
      *) return;;
esac

# don't put duplicate lines or lines starting with space in the history.
# See bash(1) for more options
HISTCONTROL=ignoreboth

# append to the history file, don't overwrite it
shopt -s histappend

# for setting history length see HISTSIZE and HISTFILESIZE in bash(1)
HISTSIZE=1000
HISTFILESIZE=2000

# check the window size after each command and, if necessary,
# update the values of LINES and COLUMNS.
shopt -s checkwinsize

# If set, the pattern "**" used in a pathname expansion context will
# match all files and zero or more directories and subdirectories.
#shopt -s globstar

# make less more friendly for non-text input files, see lesspipe(1)
[ -x /usr/bin/lesspipe ] && eval "$(SHELL=/bin/sh lesspipe)"

# set variable identifying the chroot you work in (used in the prompt below)
if [ -z "${debian_chroot:-}" ] && [ -r /etc/debian_chroot ]; then
    debian_chroot=$(cat /etc/debian_chroot)
fi

# set a fancy prompt (non-color, unless we know we "want" color)
case "$TERM" in
    xterm|xterm-color|*-256color) color_prompt=yes;;
esac

# uncomment for a colored prompt, if the terminal has the capability; turned
# off by default to not distract the user: the focus in a terminal window
# should be on the output of commands, not on the prompt
#force_color_prompt=yes

if [ -n "$force_color_prompt" ]; then
    if [ -x /usr/bin/tput ] && tput setaf 1 >&/dev/null; then
    # We have color support; assume it's compliant with Ecma-48
    # (ISO/IEC-6429). (Lack of such support is extremely rare, and such
    # a case would tend to support setf rather than setaf.)
    color_prompt=yes
    else
    color_prompt=
    fi
fi

if [ "$color_prompt" = yes ]; then
    if [[ ${EUID} == 0 ]] ; then
        PS1='${debian_chroot:+($debian_chroot)}\[\033[01;31m\]\h\[\033[01;34m\] \W \$\[\033[00m\] '
    else
        PS1='${debian_chroot:+($debian_chroot)}\[\033[01;32m\]\u@\h\[\033[00m\] \[\033[01;34m\]\w \$\[\033[00m\] '
    fi
else
    PS1='${debian_chroot:+($debian_chroot)}\u@\h \w \$ '
fi
unset color_prompt force_color_prompt

# If this is an xterm set the title to user@host:dir
case "$TERM" in
xterm*|rxvt*)
    PS1="\[\e]0;${debian_chroot:+($debian_chroot)}\u@\h \w\a\]$PS1"
    ;;
*)
    ;;
esac

# enable color support of ls and also add handy aliases
if [ -x /usr/bin/dircolors ]; then
    test -r ~/.dircolors && eval "$(dircolors -b ~/.dircolors)" || eval "$(dircolors -b)"
    alias ls='ls --color=auto'
    #alias dir='dir --color=auto'
    #alias vdir='vdir --color=auto'

    alias grep='grep --color=auto'
    alias fgrep='fgrep --color=auto'
    alias egrep='egrep --color=auto'
fi

# colored GCC warnings and errors
#export GCC_COLORS='error=01;31:warning=01;35:note=01;36:caret=01;32:locus=01:quote=01'

# some more ls aliases
alias ll='ls -alF'
alias la='ls -A'
alias l='ls -CF'

# Add an "alert" alias for long running commands.  Use like so:
#   sleep 10; alert
alias alert='notify-send --urgency=low -i "$([ $? = 0 ] && echo terminal || echo error)" "$(history|tail -n1|sed -e '\''s/^\s*[0-9]\+\s*//;s/[;&|]\s*alert$//'\'')"'

# Alias definitions.
# You may want to put all your additions into a separate file like
# ~/.bash_aliases, instead of adding them here directly.
# See /usr/share/doc/bash-doc/examples in the bash-doc package.

if [ -f ~/.bash_aliases ]; then
    . ~/.bash_aliases
fi

# enable programmable completion features (you don't need to enable
# this, if it's already enabled in /etc/bash.bashrc and /etc/profile
# sources /etc/bash.bashrc).
if ! shopt -oq posix; then
  if [ -f /usr/share/bash-completion/bash_completion ]; then
    . /usr/share/bash-completion/bash_completion
  elif [ -f /etc/bash_completion ]; then
    . /etc/bash_completion
  fi
fi
Все, подсистема готова к использованию… почти…
Установка X-сервера, Xfce и прочих GUI’шных приложений
Первая же проблема, на которую я натолкнулся — bash-completion в предлагаемом эмуляторе терминала работал, мягко говоря, некорректно. Кроме того, данный эмулятор не умеет вкладки, а каждый его экземпляр запускает все в новом пространстве процессов, с отдельным init’ом (который кстати не заменить). Мне захотелось нормальный эмулятор терминала, некоторых других GUI приложений, а так же панельку, чтоб это все быстро запускать.
Когда я гуглил этот вопрос, я наткнулся на множество проблем, вроде необходимости перевода dbus на tcp протокол. На данный момент всех этих проблем нет. В подсистеме нормально работают unix-domain-socket’ы и все спокойно общается через них.
Первым делом нам понадобится X-сервер, притом установленный в основную систему (в Windows). Лично я использую для этих целей VcXsrv — порт X11 на Windows. Официальный сайт указанный в about самой утилиты его сейчас не предоставляет, поэтому гуглим установщик и устанавливаем все по умолчанию.
Пока идет установка возвращаемся в терминал WSL, командой exit выходим обратно в root’а. Первым делом настроим русские локали:
locale-gen ru_RU
locale-gen ru_RU.UTF-8
update-locale
Далее установим некоторые компоненты Xfce. Можно конечно установить его целиком из мета-пакета, но большинство компонентов нам не понадобится, а модульная архитектура Xfce позволяет нам поставить только необходимое:
apt install -y xfce4-session xfce4-notifyd xfce4-appfinder xfce4-panel xfce4-quicklauncher-plugin xfce4-whiskermenu-plugin xfce4-xkb-plugin xfce4-settings xfce4-terminal xfce4-taskmanager mousepadЗапускать каждый раз окружение руками не очень удобно, поэтому я автоматизировал данный процесс. Для этого в основной системе создадим в удобном для нас месте папку, а в ней 3 файла для запуска:
- config.xlaunch — файл настроек для VcXsrv
<?xml version="1.0" encoding="UTF-8"?> <XLaunch WindowMode="MultiWindow" ClientMode="NoClient" LocalClient="False" Display="0" LocalProgram="xcalc" RemoteProgram="xterm" RemotePassword="" PrivateKey="" RemoteHost="" RemoteUser="" XDMCPHost="" XDMCPBroadcast="False" XDMCPIndirect="False" Clipboard="True" ClipboardPrimary="True" ExtraParams="" Wgl="True" DisableAC="False" XDMCPTerminate="False" /> -
x-run.vbs — WSL всегда запускается со своим эмулятором терминала, если его закрыть — завершатся все его дочерние процессы. Чтоб данное окно не мозолило глаза, неплохо его запускать скрытым. К счастью в Windows встроен интерпретатор VBScript, который позволяет это сделать в одну строчку:
WScript.CreateObject("Shell.Application").ShellExecute "wsl", "cd /home/user1; DISPLAY=:0 LANG=ru_RU.UTF-8 su user1 -c xfce4-session", "", "open", 0Поясню, что здесь происходит. Мы говорим VBscript выполнить приложение wsl с параметром
cd /home/user1; DISPLAY=:0 LANG=ru_RU.UTF-8 su user1 -c xfce4-session, папка запуска нам не важна, поэтому пустая строка, действие open — запуск, 0 — скрытый режим. Самому wsl мы отдаем команду на выполнение: переход в папку пользователя, затем с установкой переменных окружения DISPLAY (дисплей X-сервера) и LANG (используемая локаль) мы запускаем xfce4-session от имени нашего пользователя user1 (благодаря команде su) - start.bat — batch файл для запуска, по желанию его можно засунуть в автозагрузку
start config.xlaunch
wscript x-run.vbs
Далее можем запустить наш start.bat и настроить панель Xfce под себя. Замечу, что здесь я наткнулся на еще одну проблему — панель прекрасно отображается поверх всех окон, но вот выделить себе место, как панель на рабочем столе Windows она не может. Если кто знает решение данной проблемы, поделитесь в комментариях.
Ну и под конец данной части, скриншот моего рабочего стола:

Взаимодействие окружения Windows и окружения подсистемы Linux
Запускать Linux приложения напрямую из Windows можно через те же 3 команды — bash, wsl или ubuntu. Не забываем, что по умолчанию запуск идет от root, поэтому стоит понижать привилегии через su, так же нужно не забывать передавать переменную окружения DISPLAY=:0 если приложению требуется X-сервер. Так же нужно менять папку, из которой должно работать приложение, через cd внутри WSL. Пример, посчитаем md5 для file.txt на диске D средствами Linux’овой md5sum:
wsl md5sum < d:\file.txtДоступ к файловой системе Linux так же имеется, лежит она в %localappdata%\Packages\CanonicalGroupLimited.UbuntuonWindows_79rhkp1fndgsc\LocalState\rootfs. Читать таким образом файлы можно, а вот писать — не желательно, можно поломать файловую систему. Думаю проблема в том, что Windows не умеет работать с правами и владельцами файловой системы Linux.
Из Linux так же можно запускать Windows приложения. Просто запускаем exe-шник и он выполнится в основной системе.
Диски Windows монтируются в /mnt в соответствии со своими буквами в нижнем регистре. Например диск D будет смонтирован в /mnt/d. Из Linux можно свободно читать и писать файлы Windows. Можно делать на них симлинки. Права у таких файлов всегда будут 0777, а владельцем будет root.
Сетевой стек у подсистемы общий с Windows. Сервер поднятый в Linux будет доступен на localhost в Windows и наоборот. Однако unix-domain-socket для Windows будет просто пустым файлом, работать с этим можно только внутри Linux. Выход во внешнюю сеть у Linux так же есть, в том числе можно слушать порты, если этого не запрещает фаервол.
ifconfig в Linux и ipconfig в Windows выдают одинаковую информацию о сетевых интерфейсах.
Из диспетчера задач Windows можно спокойно прибить процесс внутри подсистемы Linux. Однако Linux увидит только свои процессы.
Особенности, ограничения и подводные камни
Ядро Linux в WSL не настоящее. Это всего лишь прослойка-эмулятор, которая часть Linux-специфичных задач выполняет сама, а часть проксирует напрямую в ядро winNT. Большая часть api в нем реализована, но не все. Свое ядро собрать не получится, как и не получится подключить модули ядра (.ko, Kernel Object).
Init процесс у WSL тоже свой и заменить его, например, на system.d не выйдет. У меня давно есть желание написать менеджер демонов на go, который бы работал с файлами юнитов system.d и предоставлял бы схожий интерфейс, да все руки не доходят.
Нет поддержки openFUSE, соответственно примонтировать виртуальную или удаленную файловую систему не получится. Так же нельзя сделать mount из файла, mount вообще ничего кроме bind здесь, похоже, не умеет.
Так же нет никакой возможности разбить файловую систему Linux на несколько разделов/дисков.
Прямой доступ к железу практически отсутствует. Все таки мы находимся в песочнице Windows, а не в полноценном Linux. /dev и /sys заметно пустуют, в них лишь проц да виртуальные устройства. Доступ к GPU — только через X-сервер, напрямую — никак, так что нейросети обучать придется в Windows.
В JS разработке столкнулся с тем, что electron.js отказался запускаться в WSL, пришлось дублировать окружение node.js в Windows.
Итоги
Статья получилась довольно длинной, надеюсь, что она окажется еще и полезной.
WSL для меня лично оказался инструментом вполне юзабельным, решающим мои задачи fullstack backend разработчика. Виртуалка с Linux за полгода так и не понадобилась. По общим ощущениям Windows+WSL намного функциональнее, чем Linux+Wine.
Пока писал статью, обнаружил, что в Microsoft Store появилась сборка WSL с Debian 9.3, данный дистрибутив мне более симпатичен, чем Ubuntu, поэтому буду пробовать ставить.