IIS, short for Internet Information Services, is a Microsoft version of a web server.
To operate any kind of server like FTP, ASP.NET or local and remote management on your Windows 10, you need to keep the IIS feature enabled on your OS.
Do you want to know how to do that? Then, tag along. Here I will explain three different methods to enable Internet Information Services in Windows 10. Let’s begin.
The interesting fact about IIS is that it’s pre-installed with Windows and is deactivated by default. That’s why it is available for free with Windows Server. Since it’s a user-friendly GUI, many prefer IIS over Apache or NGINX and take full advantage of Microsoft Stack.
The process of turning IIS on is very simple and straightforward. These methods work not only on Windows 10 but also on other operating systems like Windows 8, Windows 8.1, and Windows 11. Let’s see how it’s done.
Follow our guide to fix cFosSpeed driver preventing Windows 11 installation.
Here are the steps to turn on IIS in Windows 10:
From Windows Feature
From Command Prompt
The installation will be finished once the PC reboot. See our most recent article if you want to change the command prompt’s color and font.
From Windows PowerShell
After the restart, you can use Internet Information Services(IIS) Manager without any trouble.
Read more on should you re-install Windows with a new CPU?
FAQs
How do I know if IIS is installed?
To know whether IIS is installed or not, go to the search icon and type Internet Information Services(IIS) Manager there. If the application shows there, it means the IIS has successfully been installed on your PC.
Where is IIS in Windows 10?
To locate IIS in Windows 10, type Administrative Tools on the Windows search bar. There you will see the Internet Information Services(IIS) Manager application.
Is IIS included with Windows 10?
Yes, the latest version of IIS 10.0 is included with Windows 10. It is also added in the Windows Server 2016.
Conclusion
Using the IIS, you can effortlessly make your own website. But before you start using Internet Information Services, ensure it runs properly. If you face any trouble, uninstall the IIS completely and reinstall the application by following any of the three methods.
Hope you have installed IIS on your Windows 10 and are using it without any complications. Don’t hesitate to ask any questions in the comment section. I will gladly answer them.
Peace!
Steven Arends
Steven Arends is a computer science graduate and tech enthusiast with over 10 years of experience in the field. He has a vast collection of computer hardware and loves exploring the latest advancements. As a contributing author to 10Scopes, Steven shares his expertise to make the world of technology more accessible and easier to understand for all readers.
Although IIS is included in every installation of Windows 10, it’s not turned on by default. Here’s a way to install IIS on Windows 10.
-
Right-click on the Windows button on the bottom-left corner and select Run

-
In the Run dialog box, type appwiz.cpl and press ENTER.

-
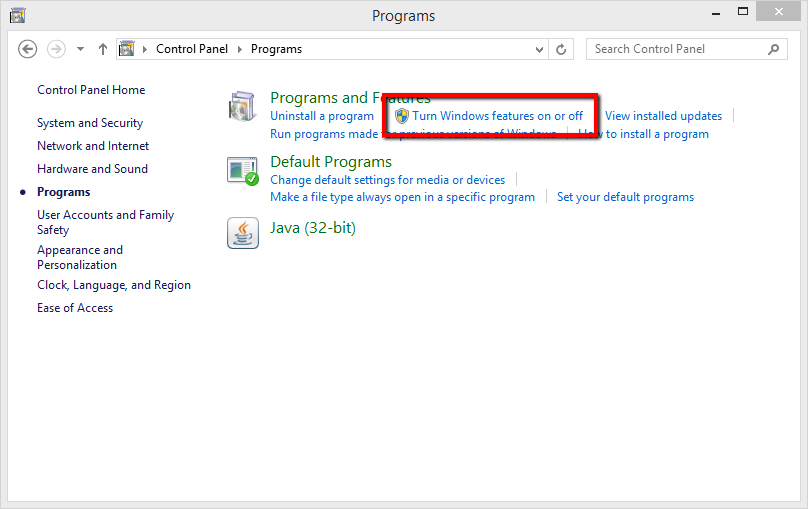
As soon as a new window called Programs and Features is opened, click on the link Turn Windows features on or off.

-
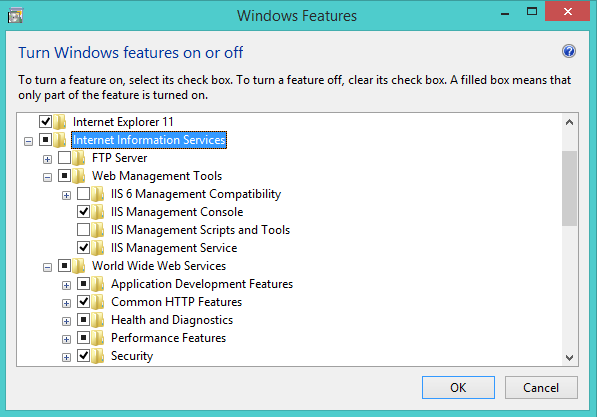
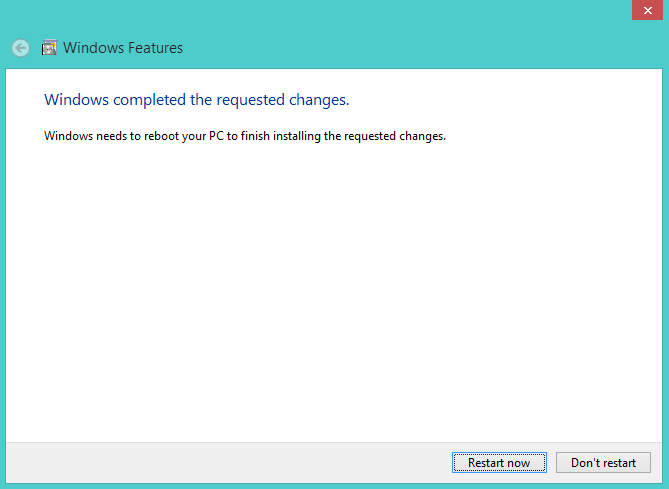
Click on the Internet Information Services checkbox. By default it will install all you need to host a website. However you might want to check some other components that you might need as well. Once done, click OK and Close when it says “Windows completed the requested changes.”

-
Now open your browser and type in localhost and press ENTER. You should see a default web page is rendered in your browser.


That’s all there is to it and the default website directory will be in C:\Inetpub\wwwroot folder.
Further Reading
How to Manage IIS Remotely
How to Manage IIS Servers Remotely with WMSVC
How to Backup IIS Manager Connections List on Windows
How to Install IIS Management Console on Windows
How to Migrate IIS Websites to a Different Server
New Features Introduced in IIS 10.0
How to Setup HTTP Strict Transport Security (HSTS) on IIS
How to Activate Built-in Web Server
Служба IIS (Internet Information Services) необходима для работы ASP.NET серверной части СпрутМонитор.
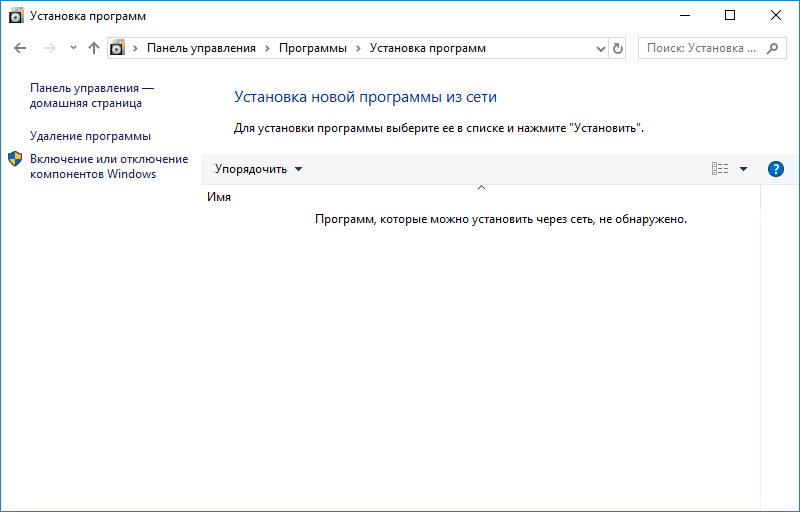
1. Перейдите в Панель Управления -> Программы -> Установка программ. Щелкните на пункт меню (слева) Включение и отключение компонентов Windows.
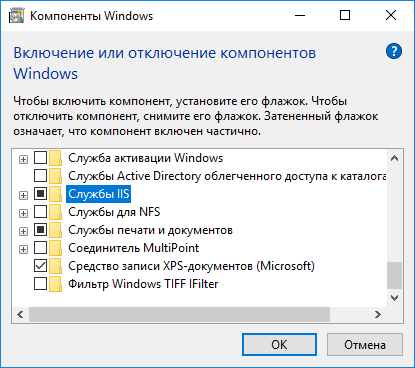
2. Отметьте пункт Службы IIS, и нажмите кнопку ОК:
3. Дождитесь окончания установки всех необходимых компонентов:
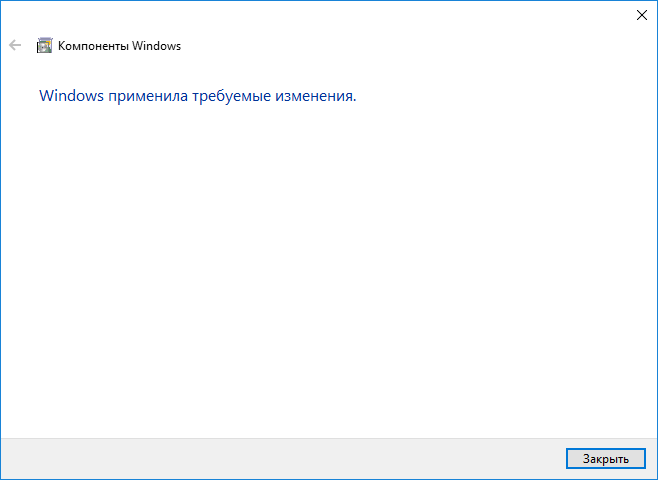
4. После завершения установки, рекомендуется перезагрузить компьютер.
5. Запустите браузер и перейдите по адресу http://localhost/. Если открылась тестовая страница IIS, значит установка произведена успешно.
См. также: Установка серверной версии СпрутМонитор.
In this article, I will explain how to install an IIS web server on a computer with Windows 10.
IIS is a Web server developed by Microsoft that is also available on servers.
The version installed on the client is called IIS Express, it is perfect for testing locally.
Installation IIS on Windows 10
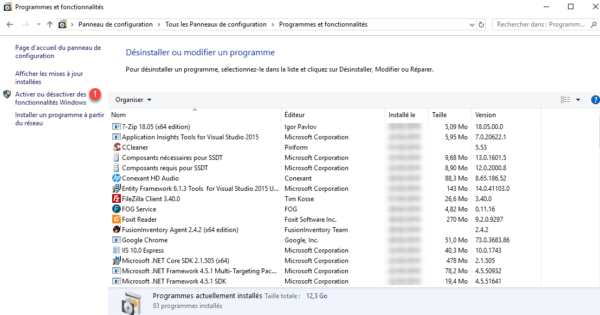
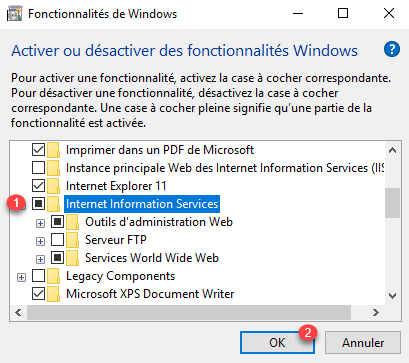
1. Open the Control Panel and go to Programs and Features and then click Enable or Disable Windows Features 1 .
2. Search Internet Information Services and check the box 1 and click OK 2 .
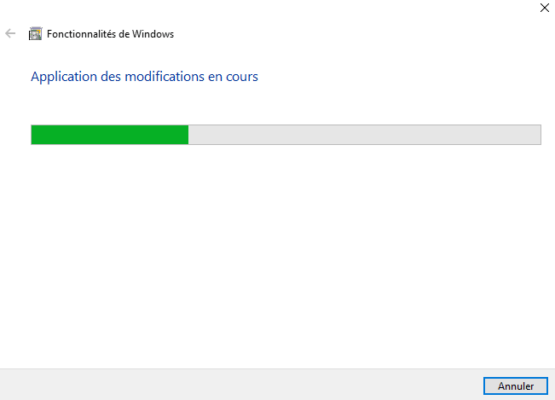
3. Wait during the installation …
4. When the installation is complete, close the window.
Manage IIS
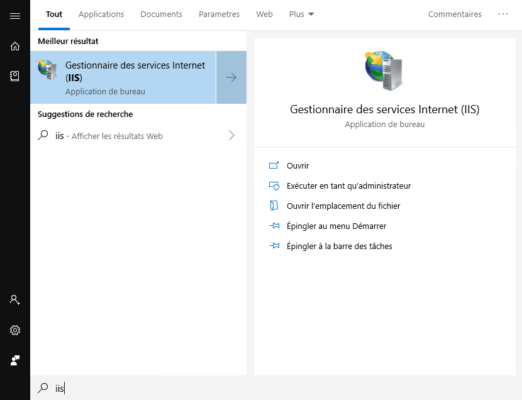
1. To access the Administration Console, look for IIS in the Start menu and click Internet Services Management.
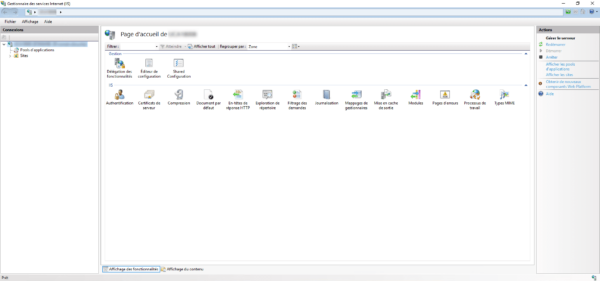
2. The console is the same as for the Windows Server version.
For administration, release articles can be applied to IIS with Windows 10.
Use IIS
Copy your pages in the folder C: \ inetpub \ wwwroot
Launch a browser and enter the address http://127.0.0.1 to display your site.
IIS is formerly known as Internet Information Server. It is created by Microsoft for Windows operating systems. IIS supports HTTP, HTTPS, FTP, FTPS, SMTP and NNTP protocols. Microsoft also provides a graphical user interface for IIS called IIS Manager. It is useful for managing websites and other applications on Internet Information Server.
Useful tutorials:
- How to Setup Let’s Encrypt SSL in IIS
- How to Redirect HTTP to HTTPS in IIS
- How to Setup Reverse Proxy in IIS
Use the following step-by-step tutorial to install IIS on Windows 8 & Windows 10 operating systems.
Step 1- First of all open control panel on your system. To open the control panel either use the start menu or you’re can also type “control” on the run window.
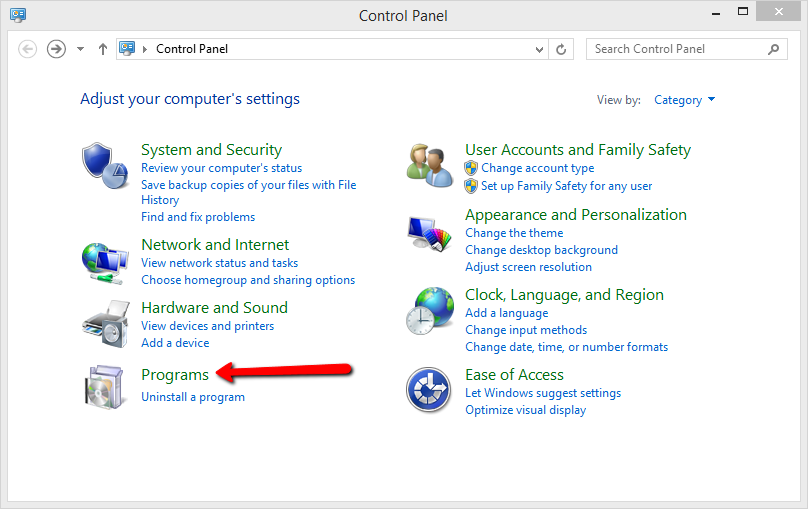
Step 2- Turn windows features on or off under the Programs and Features section.
Step 3- You will get a list of Windows features. Expand the “Internet Information Service” option. Select all required features to add to your IIS server. Now click OK.
The installation process begins now. It will take few minutes to complete. After completing the installation process reboot your system by clicking on Restart now button.
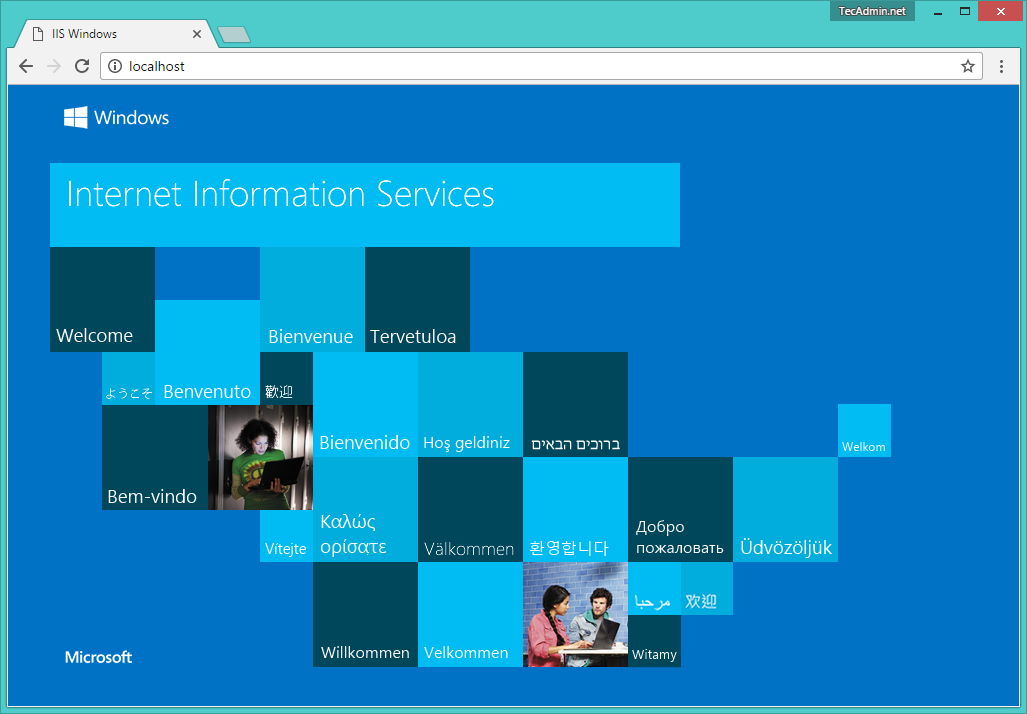
Step 4-As a result, you have successfully completed the installation process. Visit localhost on a web browser. You will see the default IIS page on your screen as below, maybe the screen looks to change in your case as per the version of IIS. You can change the default page under directory C:\inetpub\wwwroot\.
Now access to Internet Information Services(IIS) Manager by typing “inetmgr” in the run window or search in the start menu to open IIS manager on your system and start added new sites.